Limewashed brick is another technique to add color to natural brick walls and fireplaces, hedges, ovens, and other brick house features in the field of home interior and exterior design. This limewashing falls under the renovation umbrella. If you’re thinking about changing the color of your brick walls, limewashing is an excellent choice to investigate.
Here are 12 of the most fundamental but vital facts regarding limewash brick and, of course, the brick-lime washing pro-tips. There’s also limewashed brick care to be done.
Know More: Limewash
As limewash is a form of paint that has been around for a long time, it does not include any hard procedures. Limewash gets its name from the fact that limestone is the main element. Limewash may also refer to a verb or action that involves applying limewash paint to brick or another surface.
To make limewash paint, first, make lime putty out of limestone. Crushing, burning, and eventually slaking the limestone with water to turn it into lime putty is how it’s done. The procedure doesn’t finish there.
You can’t use the putty as limewash paint right after making it. It still has to mature, which might take anywhere from a few days to months. When the putty has developed enough, it will be thinned with water, resulting in limewash as the final product.
The color is unquestionably the essential quality for limewash’s qualities. Limewash is often white due to the principal component. Although colored lime wash brick is also available right now, you may select any color other than white. Another distinguishing feature is the slightly chalky, matt look. This look is the consequence of the crystalline matrix-forming after the paint has been applied to a surface.
Is There a Specific Limewash Paint to Use on Brick?
The second most important thing you should know about limewash brick house is that they come in various colors. This argument is inextricably linked to many people’s queries: is there a specific limewash paint to use on brick?
There is only one sort of limewash paint, and it works best on porous surfaces where it may sink because it is water-based. Brick, lime plaster (traditional), lime render, and stone are among them. On the other hand, it won’t function on non-porous surfaces. Hard gypsum plaster and cement renders are two examples. To improve the bonding of limewash on certain characters, you must add a unique ingredient to the paint.
Because brick has the best porous surface, the paint will never have difficulty sinking into it. One of the most pleasing aspects of limewash is the interaction between the paint and carbon dioxide in the air, which hardens the paint and gives it a profound matte effect.
Although there is no special limewashed brick paint, it is one of the most excellent surfaces for this sort of paint to be applied on, so there is no need to mistrust the outcome. Furthermore, when moisture appears inadvertently on some portions of the brick surface, the paint will seem more appealing.
12 Limewash Brick House:
1. Stone and Brick Limewash House
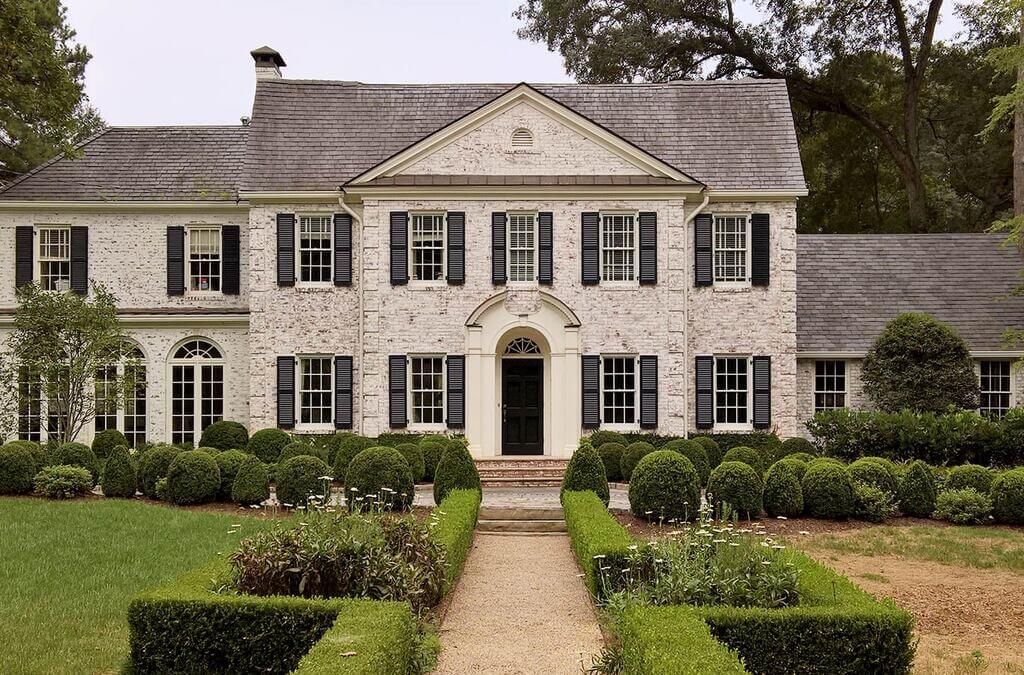
It was not easy to establish a focal point in the original Tudor home with a deeper color palette and various surface kinds. The house is brought together by limewashed brick and stone the same color and painting the stucco the same color.
2. Traditional Siding and Brick
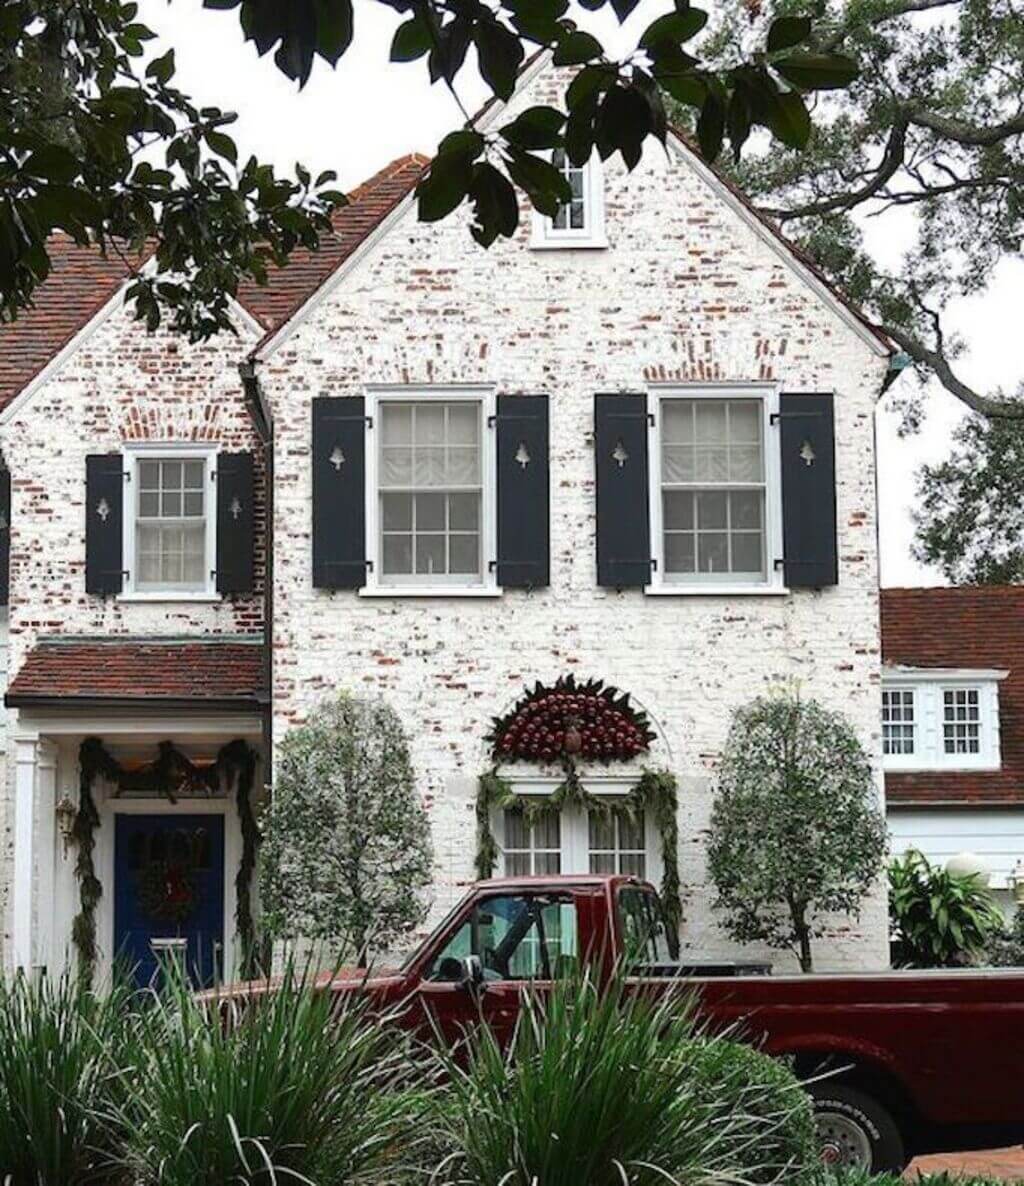
In the 1960s and 1970s, many transitional homes featured a two-tone design, with brick and color siding. Limewashed brick gives it fresh vitality and makes the shutters stand out while being easier to maintain than painting the brick and siding all the same color or retaining the two-tone aesthetic.
3. Large Brick Colonial with a Stately Feel
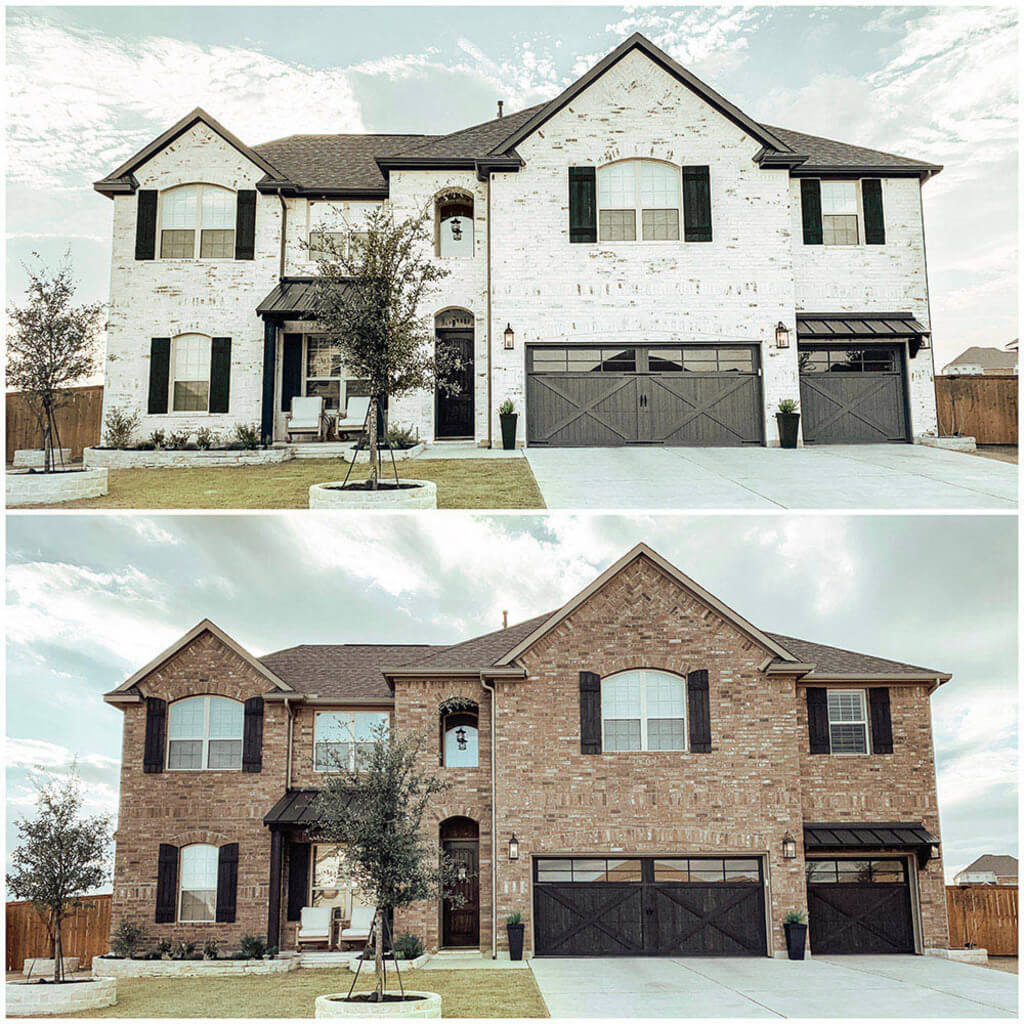
Limewash brick gave this lovely three-story brick colonial a big makeover. The top balcony and cottage shutters light up the entire house and give it a more French Country feel. Depending on the condition and color of your brick, you may alter the amount of limewash application to achieve the desired look. You can also see the change in before and after limewash brick houses.
4. Modern Stone Limewash Brick House
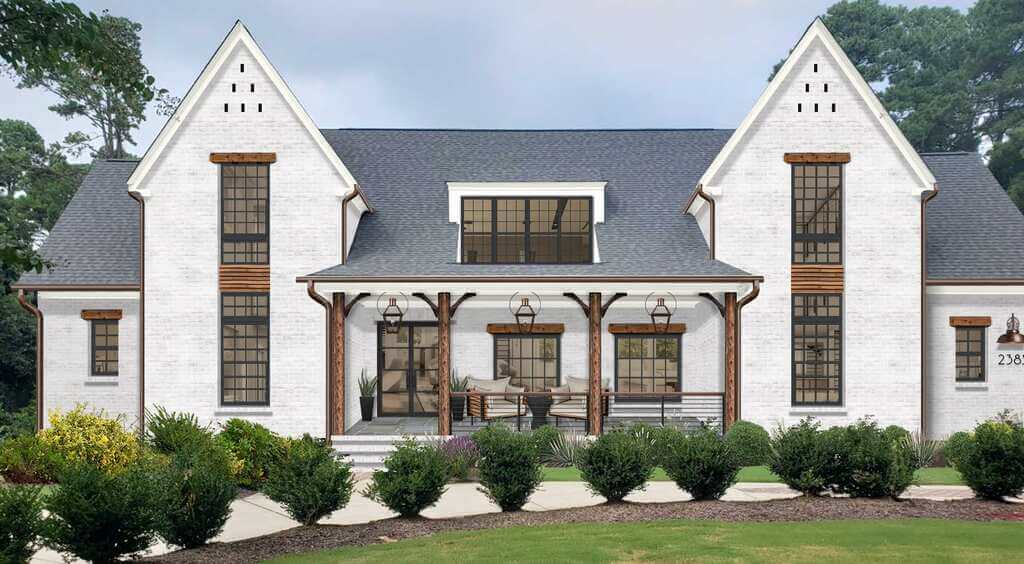
The contemporary mountain estate’s brick and stone facade blended in, concealing some of the home’s distinctive characteristics. The Benjamin Moore Kendall Charcoal James Hardie siding contrasts nicely with the limewash stone. Consider limewashing as a technique to make a unique construction material into a focal point rather than a cover-up.
5. The Contrast in Black and White
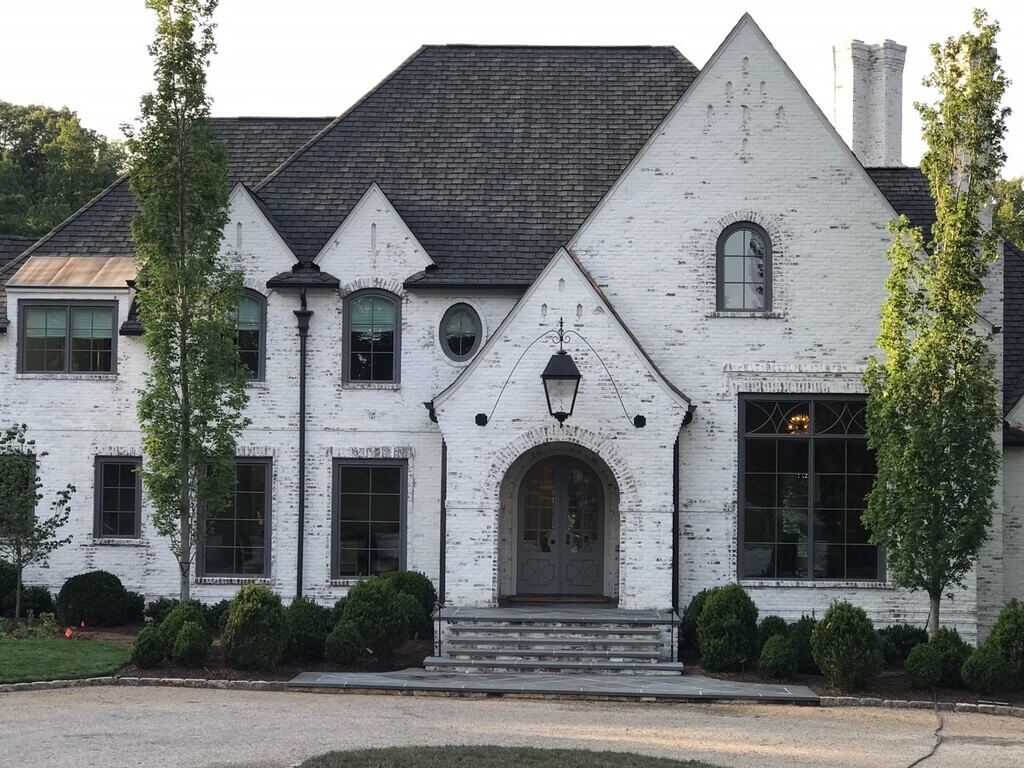
Contrast can highlight your home’s distinctive qualities and personal flair when used effectively. The brick’s weight overpowered beautiful black grill windows in this house. The home’s most outstanding characteristics are contrasted and visually attractive with classic limewash brick and black window trim.
6. Focal Chimney
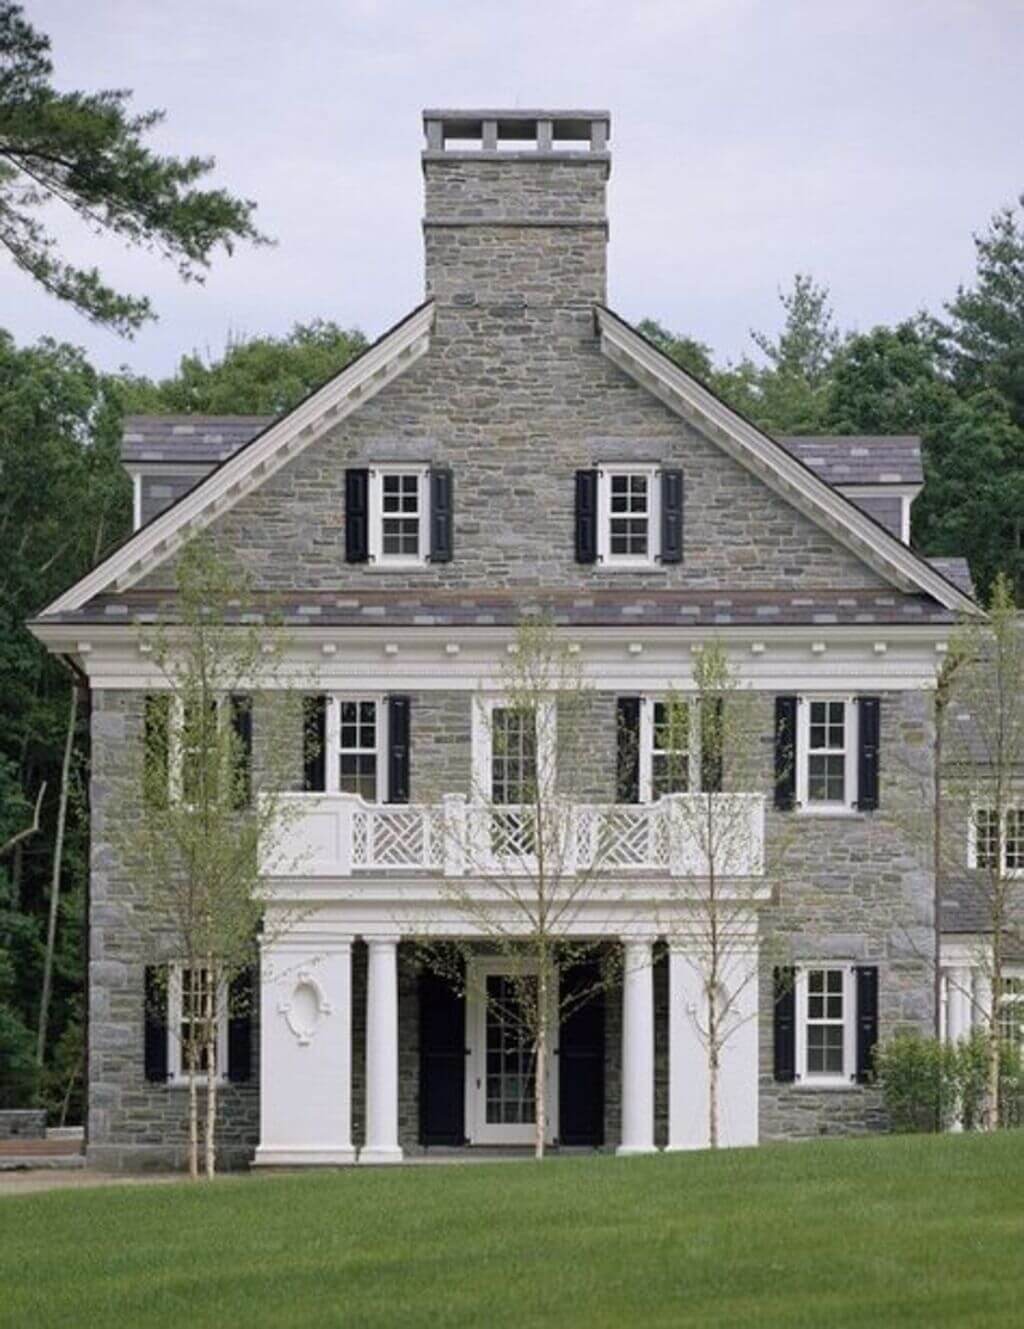
The limewashed brick you may not do your brick to hide flaws but draw attention to them. This lovely ranch homeowner has a beautiful ornamental chimney that he wanted to show off. The chimney became the main point of the residence once the rest of the building was limewashed.
7. Paint vs. Limewash Brick
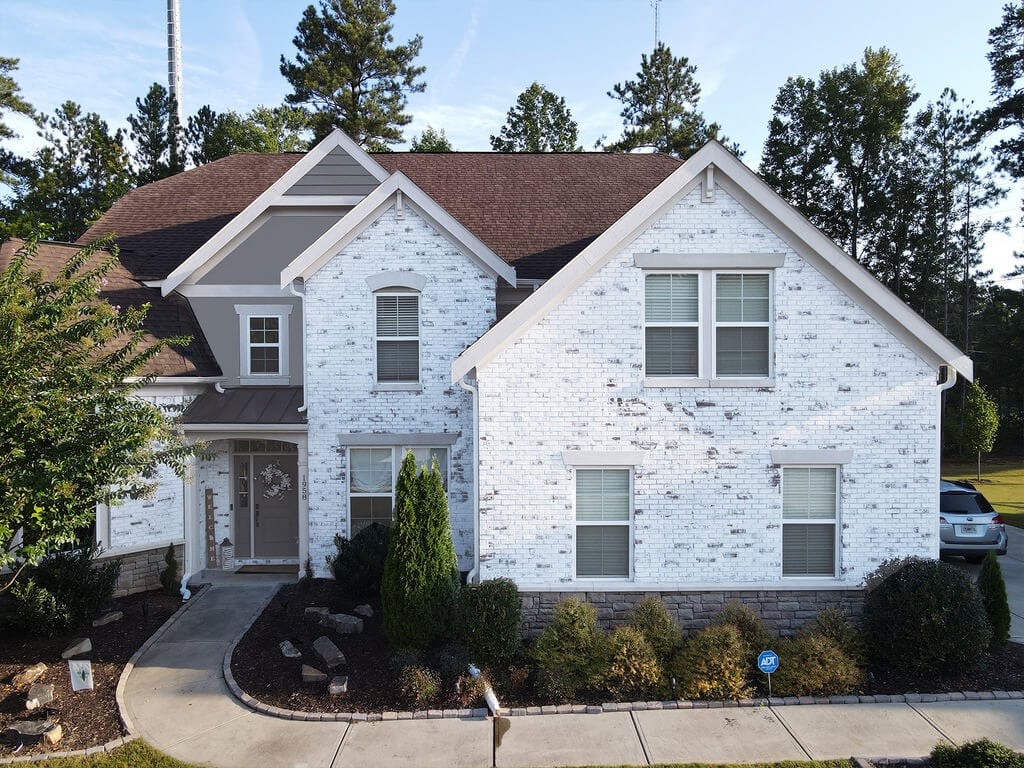
If you’re not sure whether to go with limewash brick or paint, then you should try the limewash brick procedure. Because color can crack, peel, or discolor over time, it requires additional upkeep. Limewash absorbs into the brick, preventing it from chipping. It aged well as well. Paint, on the other hand, offers extra coverage and color possibilities.
8. Updated Windows with Limewash Brick
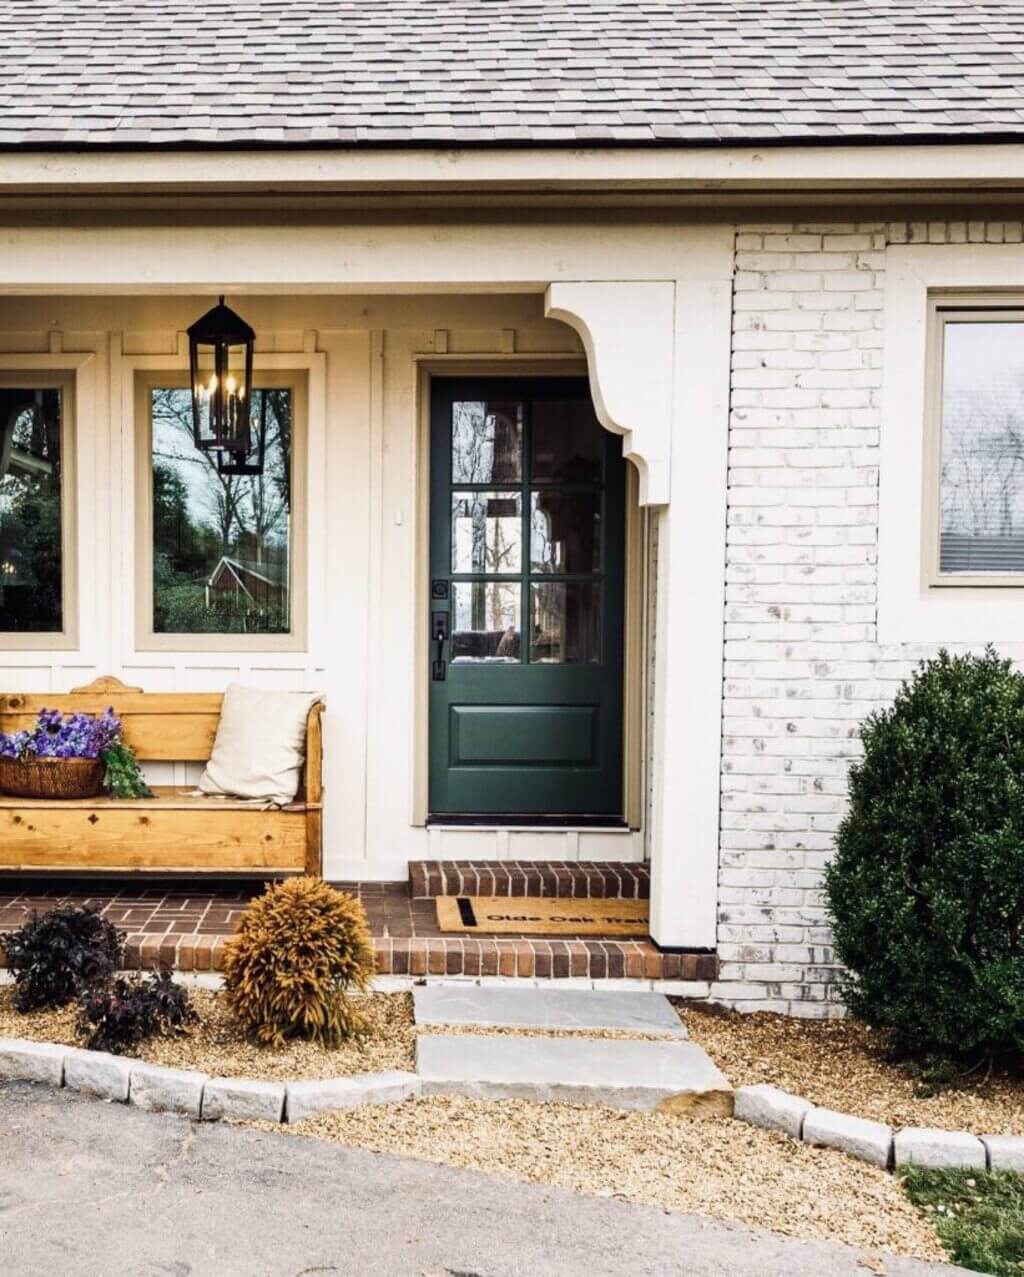
Limewashing is an excellent alternative if you don’t like the color of your brick but don’t want to paint it. It may enhance the color of your property and hide brickwork flaws, as shown in this example. The addition of wood to the windows and front door warms up the brick and makes the house feel more welcoming.
9. The Porch on a U-Shaped Ranch
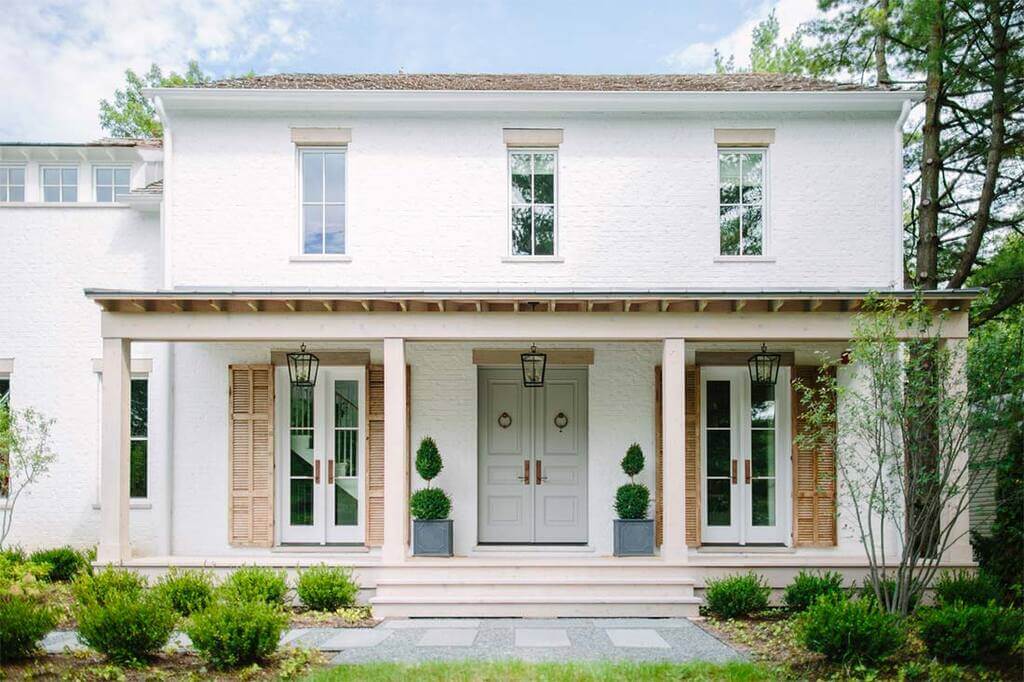
The charming front porch is a fantastic feature of this home’s façade. The black brick made the porch appear gloomy since it was inset. Limewash bricks brighten the room and make it feel more open. The addition of furniture and wood accents creates a warm and inviting atmosphere.
10. Ranch in Monochrome

On a two-story home, a brick foundation might help it feel more solid, but on a ranch, it can make it feel squat and shrunken. Limewashed brick and painting it in the same hue can make your little ranch feel more raised and spacious.
11. Stone Farmhouse in the Modern Era

As the stone and brick (along with many other design components) were battling for attention, the architectural aspects of this home were lost. The porch and foyer and the stone arches leading to the side door are limewashed in Avorio White to capture the attention.
12. Two-Story Columns on a Brick Traditional
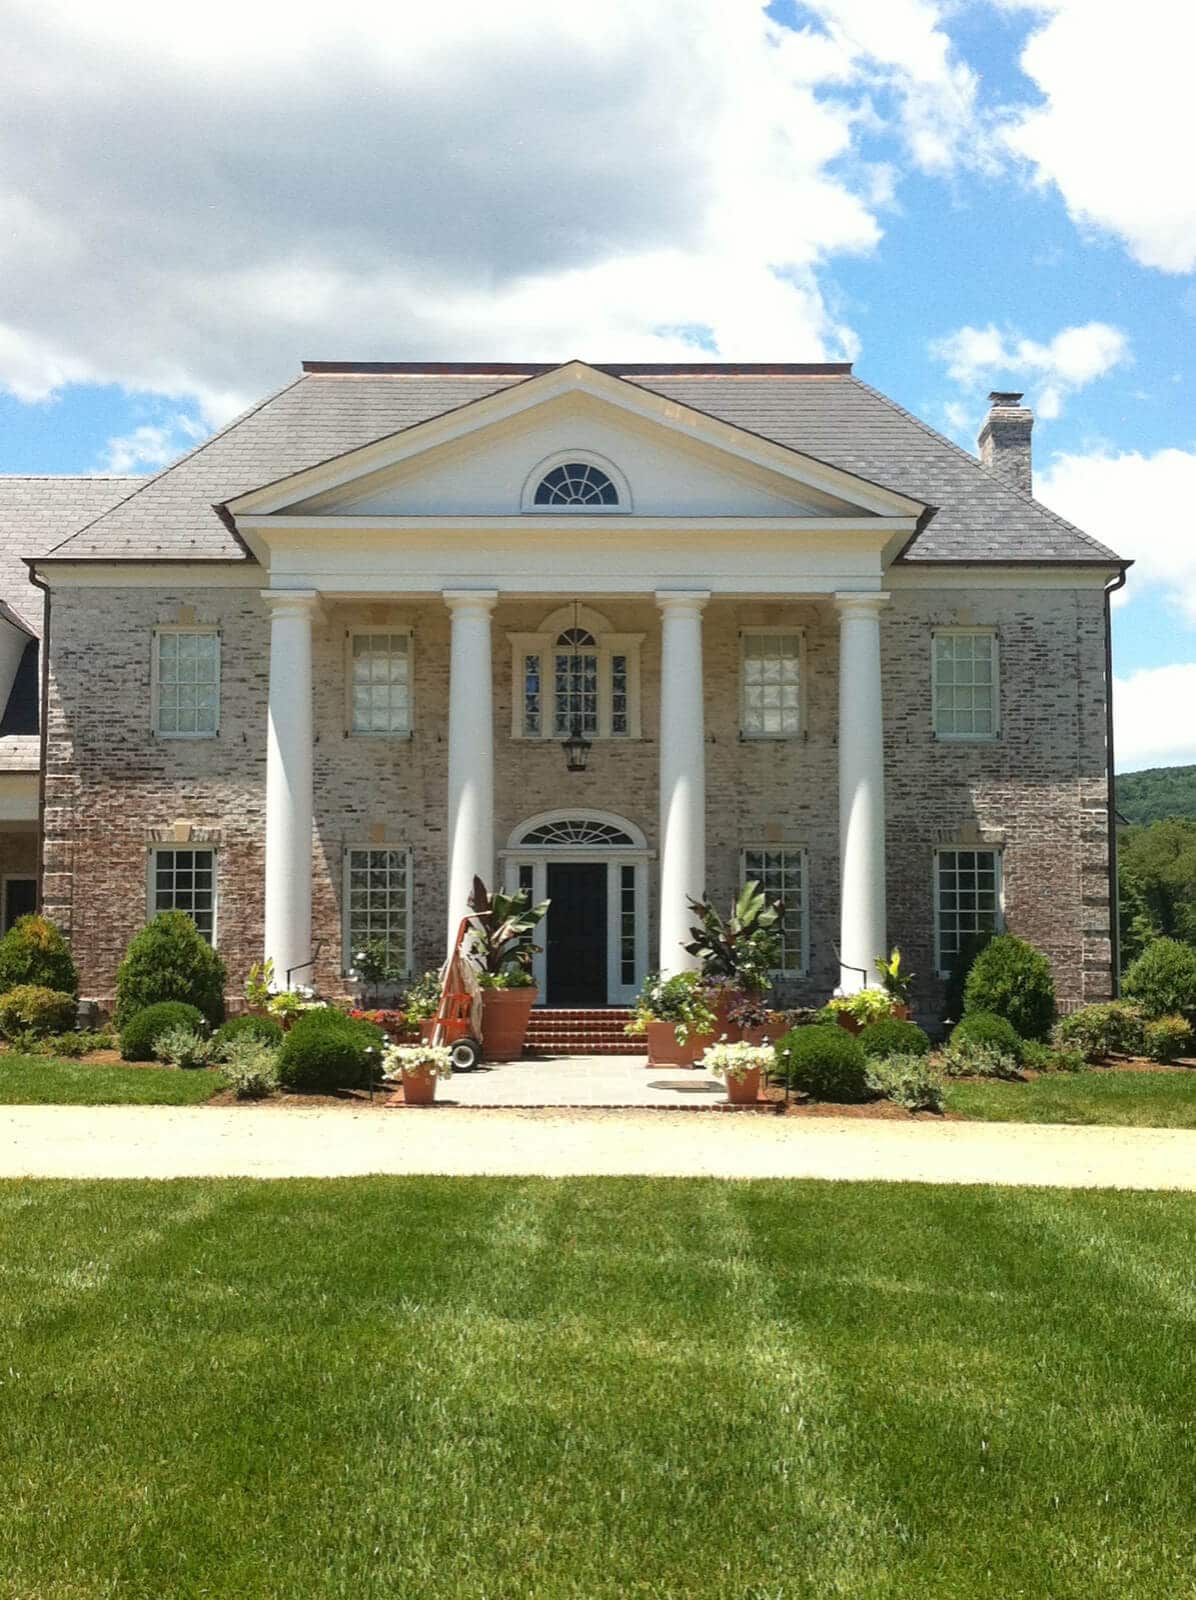
Limewashing this historic brick home with Cristallo White makes it more accessible while maintaining a crisp, contemporary air. We adore the neutral shutters and wood door to tie it all together.
ProTips for your Limewash Brick House
After you have seen the best before and after limewash brick house examples, it is completely necessary to know some of the pro tips to limewash brick house in a proper manner.
- You’ll need to get specific tools ready. Water mister or spray bottle, huge rough-textured brush or drywall sponge, and rubber gloves are among them.
- When applying limewash paint to a brick surface, an essential thing to remember is that the character must be moist. It does mean that if the surface is dry, you must first dampen it.
- The ideal method to accomplish this is to use a water mister since it speeds up the process, but if you don’t have one, you may use anything else, such as a spray bottle, as long as the result is a moist surface.
- Following the dampening of the surface, apply the paint with the rough-textured brush or drywall sponge.
- It’s critical to keep your rubber gloves on throughout this phase, considering the paint’s caustic nature
- It’s tough to acquire the appearance you desire after putting a coat of paint on the brick surface since a single layer of paint leaves the original look of the brick exposed.
- To get the desired effect, you’ll need at least three or four coats.
- When it comes to limewash brick, many individuals mistake applying a second coat shortly after they complete the first. It is something you must not do since it will just ruin everything.
- You must ensure that the previous layer is dry enough before applying another. After it has dried, you must dampen it again by spraying it with water before reapplying the paint.
- Remember that You should only use limewash paint on a moist surface.
- After you’ve completed three or four coats, the next step is to let the surface cure for at least three days. In the meanwhile, avoid touching or hanging anything on the surface.
- Another thing to avoid is speeding up the drying process by using a fan or even a heater. Allow the paint to dry freely and carefully if you want a beautiful end effect.
- Simultaneously, if necessary, control the temperature in the area from becoming overly humid or hot.
How to Take Proper Care of a Limewashed Brick
Another advantage of limewash brick is how low-maintenance it is. It’s astonishing to learn that when you pick limewash brick, you won’t have to do any maintenance at all.
The only maintenance required is a fresh coat when the color appears to have faded. A new layer like this is usually required every five years, so after applying limewash to a brick wall, you may expect to be worry-free for at least five years.
As a result, you won’t need to set aside any further funds for wall redecorating in the interim. It also means that limewashing is a cost-effective interior and exterior refurbishment option.
At the End: Limewashed Brick
Although brick is attractive and ageless, it is not to everyone’s taste in its natural condition. Limewash brick allows homeowners to hide unsightly colors or emphasize specific parts of their property without worrying about painting.
Limewashed Brick is eco-friendly and matures wonderfully over time, giving your house an appearance that’s all your own.
Discover More

