We all know a plunge router is a versatile tool having a different mechanism system. The lots of knobs and dials inside the router can make you confused. So thinking of adjusting the depth of a router can make you feel insane. Worry not, it is not as hard as everyone thinks. In this article, I will discuss how to set the depth on a plunge router.
I always adjust the depth using a single and easy way. But when I thought of sharing this article with you I learned another way and performed the task a few times.
Finally, I am ready and here to discuss this article with you. So keep reading and find the easiest way to adjust the depth on a plunge router.
Why Setting Up the Depth of a Plunge Router Is Necessary?
The depth adjustment is essential to work properly using the best plunge router. You need to place the depth of the router into a precise position for getting the perfect cutting. A slight mistake in the depth setup can mess up the whole project.
So, maintaining depth, position, and right direction movement is essential to use a plunge router perfectly.
How to Set the Depth on a Plunge Router?
There are several ways to set the depth of a plunge router. It is neither perplexing nor too easy. You have to keep your concentration up to do this task. However, let’s learn 2 different ways to do it.
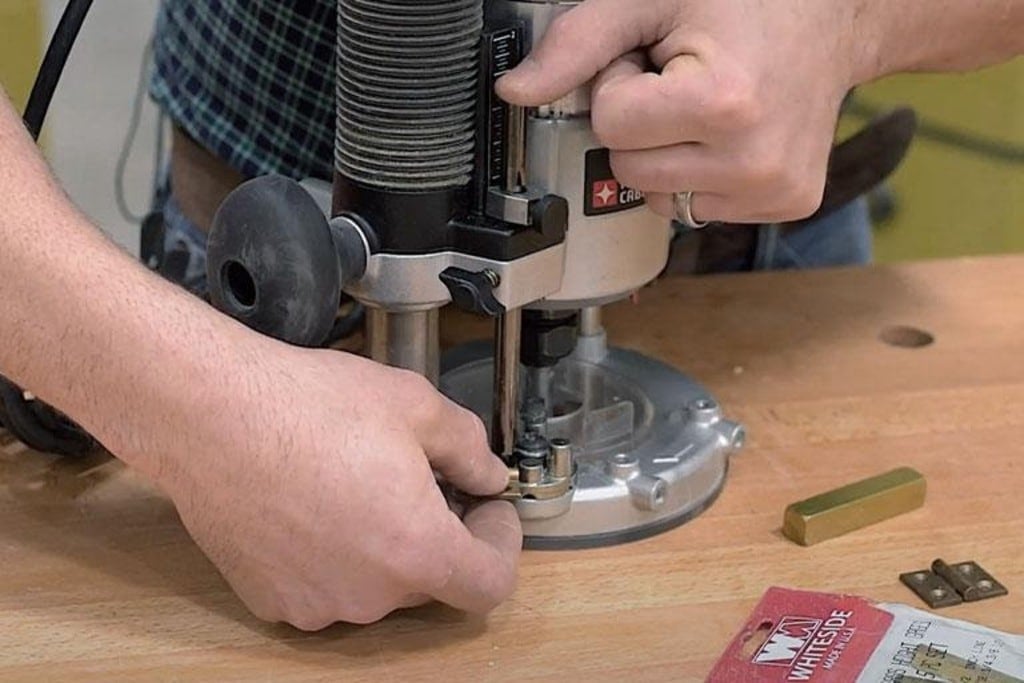
1. Use the Basic Plunge Feature

The basic plunge features come into use for different types of operations. Depth adjustment is one of them. So let’s learn how you can adjust the depth using the plunge features.
Step 1: Safety is the first priority. So unplug the router.
Step 2: Now keep the template on a circle wooden surface in a position directly to your face.
Step 3: Now it’s time to lose the depth stop clamping the lever. You need to do it because it is a must to make it free for going up and down.
Step 4: Now lock the clamping lever of the router after lowering the router to the certain depth desired.
Step 5: Now find the fine adjustment dial and fine-tune to the desired depth by turning the dial. Still, confused? Let me discuss them in-depth.
There you will see some numbers like 5,6,7,8 etc.
Do You Want to Increase the Depth?
Turn the adjustment dial to the higher number. It means the depth is increasing.
Need to Decrease the Depth?
Do the opposite task. Turn the adjustment dial to the lower number and the depth will decrease.
Example: Considering the ideal depth at 5. When you turn the dial to 6/7/8 that means the depth is increasing. Turning the dial to 3/4 means the depth is decreasing.
You may be worried about the rating per number Increase or decrease. Well, I am clearing up your confusion.
Every index number under the dial represents 0.004 inches / 0.1 mm of depth. The overall turn represents .04 inch / 1 mm of depth. (The rating may vary from model to model)
2. Use a Depth Gauge
This is another method of adjusting the depth of a plunge router. Here you need a depth gauge and follow the steps I will describe now.
Step 1: First of all, unplug the router and ensure your safety.
Step 2: Place it in a favorable position.
Step 3: Now make a 1/4 turn to the lock knob to loosen it and lower the router. As soon as the router touches the basepoint stop lowering it.
Step 4: For ease of working re-tighten the lock knob.
Step 5: Now you have to set the base point. To do it first lower the depth stop. When it touches any post of the turret, stop lowering it. Unlock the depth stop lever and slide the index pointer to the zero setting.
Step 6: It’s time to set the depth. Raise the depth stop and notice the index pointer. When the pointer points to a certain depth on the depth gauge, stop raising it.
Step 7: Now lock the lever again and release the plunge lock.
Bottom Line
We are a very long way from the beginning and now you have successfully learned how to set the depth on a plunge router. I have discussed 2 ways. Frankly saying, I always use the first way. It is hassle-free and quick. However, you must read both parts and try to understand which one you feel is easy. Hopefully, now you have no confusion on the topic.
Continue reading:-