Whether it’s a modern house or an old abode, hardwood floor refinishing is an amazing way to revive the floor’s look. Wood floor refinishing, also known as resurfacing, can add a makeover to your dull and scratchy floor. It is easily manageable and saves a lot of time and money as well.
The result of sanding hardwood floors is a fresh and shiny surface to work on. Prefer spring and a temperature of 18.3°C–23.8°C for refinishing your floor.
Read along to get more information about it.
The Project Overview
| Working Time | 6 to 8 hours per day |
| Time Required | 3 to 4 days |
| Yield | 10’ x 10’ room |
| Skill Efficiency | Intermediate |
| Estimated Cost | $(200 – 300) |
Follow 7 Tips Before You Begin
1. Clean your Floor
Dust and dirt make the floor dull, so before you start, make sure the floor is clean.
2. Deep Cleaning
- Clean the floor with a soft bristle broom.
- Vacuum and clean the floor.
- Use a concentrated cleaner and micro cloth to mop the floor.
- After the three steps of deep cleaning, surface clean with a micro cloth and vacuum three times a week.
- Use concentrated wood floor cleaner to clean the floor every month.
- Do professional deep cleaning every year.
3. DIY Without Sanding
You can use the following products to regain the shine of the floor without sanding –
- Wood Floor Transformations
- Hardwood Floor Reviver
- Wood Floor Restorer
4. Refinishing as the Best Option
If the hardwood floor is beyond DIY fixes, then follow these steps –
- Sanding
- Patching
- Staining
5. Fixing the Gaps
Wood expands during the summer and contracts during the winter. So, do trowel filling and post-sanding to fix the darn gaps during the right time of the year.
6. Dark Floor Stains
Stain colors such as dark oak or mahogany are popular these days but know that dust particles are more visible in darker colors. So choose stains wisely.
7. Glossy Floor or Satin Floor?
Consider the purpose of the floor before deciding between glossy or satin. Because glossy floors are shiny and smooth, while satin is rough and thus hard to slip on.
Bonus Facts!
- For oak, maple, or any other floor, refinishing or aggressive sanding is the best.
- If the floor is 3/4th inch thick, then 3-4 sandings can be done.
- Gluing hardwood veneer planks with plywood results in a type of wood called engineered wood.
- Engineered wood needs only one refinishing.
- Sanding is not suitable for laminated floors.
What are the best tools for Refinishing Hardwood Floors?
- Pry bar.
- Protection for eyes, ears, nose, and mouth.
- Hammer.
- Edge sander.
- Upright drum or belt sander.
- Paint scraper.
- Soft bristle broom.
- Brad Nailer.
- Paintbrush with a roller.
- Needle-nosed pliers.
- Under radiator sender.
- Spackle knife.
- Sanding pool.
- Vacuum.
- Fine steel wood pads.
What are the best Materials for Refinishing Hardwood Floors?
- Plastic sheet.
- Painter’s tape.
- Wood putty.
- Clean cloth.
- 40, 60, 80, or 120-grit sanding bets for upright and edge sanders.
- Fine-grit sandpaper.
- Tack cloth.
- Sealer, varnish, or polyurethane topcoat finish.
- Wood stain.
- 120-grit sanding screen.
- Denatured alcohol.
- Oil-based stain.
- Smooth foam roller.
- Rags.
5 Safety and Security Tips For Refinishing Floors
- Use an upright drum sander for sanding hardwood floors. But this instrument is quite challenging to handle so, read the instructions properly before using it.
- Wear a protective mask, hearing protector, and eye protector, while using the upright drum sander.
- Keep the space ventilated as much as possible, using windows and fans during the sanding process.
- Take time while sanding, because if the upright floor sander is misused, it can create deep dips in the floor.
- Don’t rock or tilt the sander; it can gouge the floor.
Step-By-Step Guide to Do Hardwood Floor Refinishing
Step 01: Make Your Mind
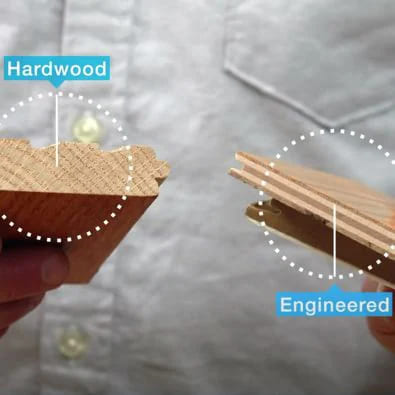
Before you start, determine which type of refinishing you want: engineered wood or hardwood.
Step 02: Prepare The Floor For Refinish
Start by cleaning the room and the floor. Clear the shoe and door molds as well. Remove the staples from the carpet on the floor.
Step 03: Removal of Trim Moldings
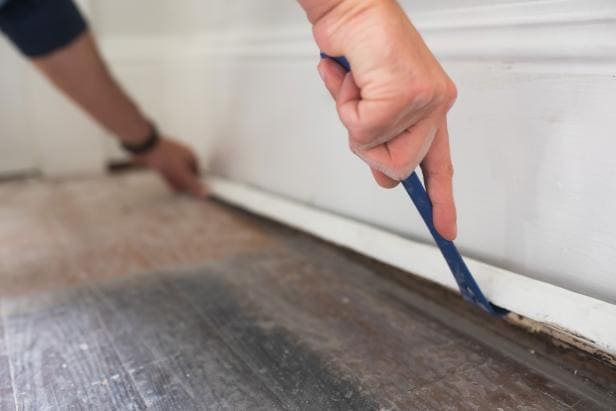
For quality work, remove the baseboards before you begin. Be careful while you pry the molding, as it tends to crack.
Step 04: Cover All Doors and Ducts
Cover doors and vent ducts with plastic and painter’s tape so that the sanding dust doesn’t travel all around your home.
Step 05: Cleanse Floor
Do a deep cleaning of the floor to remove all sorts of dust and debris.
Step 06: Do Required Repair Work

Closely examine the floor for any protruded nails and carefully fix them because they can be nuanced in the sanding process. Also, check for damaged or missing floorboards and fix them as well.
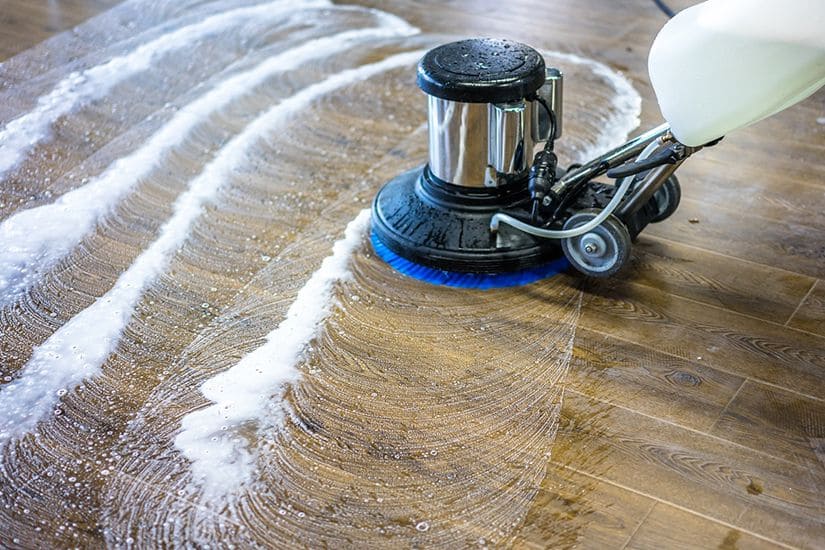
Step 07: Hardwood Floor Refinishing
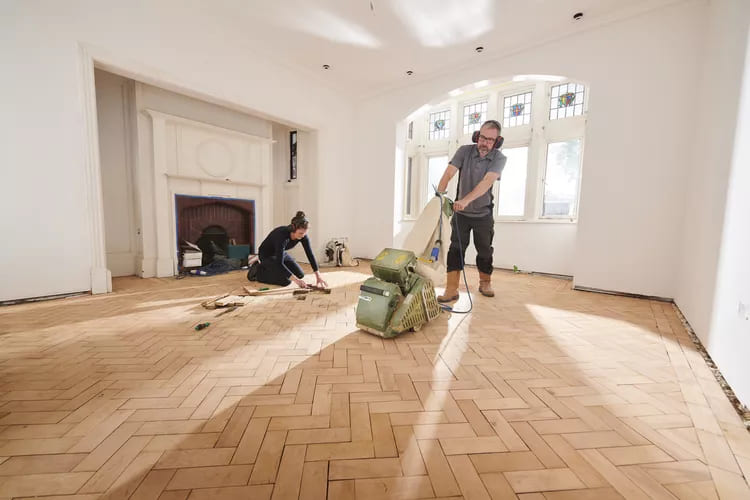
- Install upright drum sander with 40-, 60-, 80- or 120-grit sanding belt, depending on the need.
- Put on protective gear.
- Start sanding entire floor.
- Move sander parallel to boards and not across them.
- Do sanding close to wall.
- Don’t touch sander with the baseboard.
Step 08: Corner and Edge Sanding
Refinish the room’s edges and corners up to the baseboards using a hand sander that includes 40- or 60-grit sandpaper. You might need to apply a paint scraper to the corners to get rid of the last traces of finish.
Step 09: Floor Examination

Use medium-grade sanding for any leftover space. Post the refinishing, examine the floor for a smoother finish. Use wall putty to cover any gauges, then sand them again with fine-grit sandpaper and wipe them with a tack cloth.
Step 10: Post-Sanding Cleaning
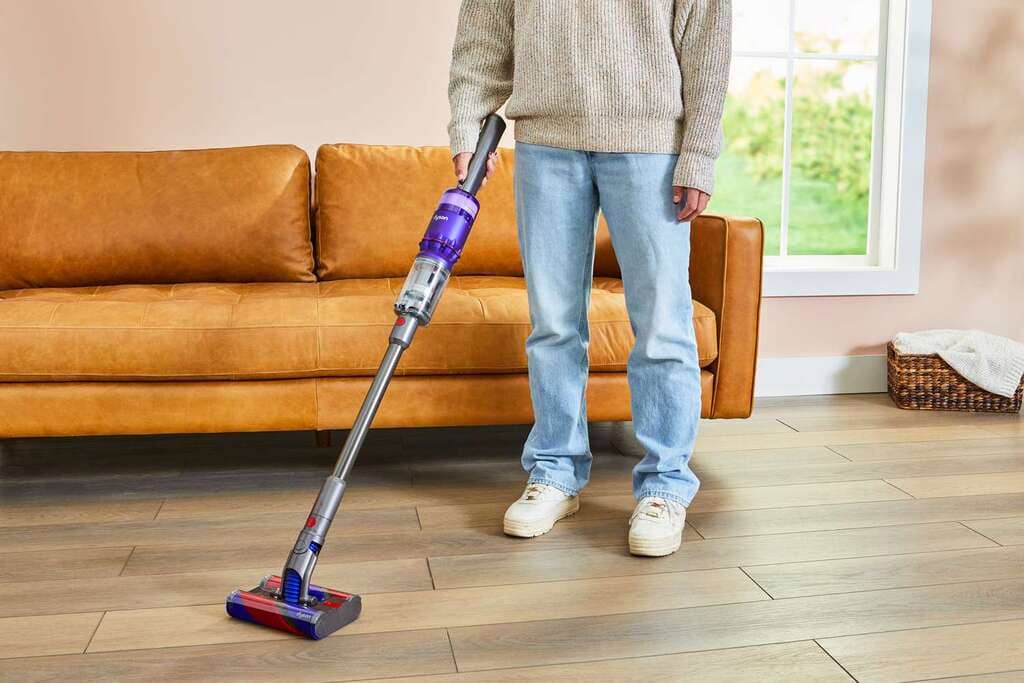
Do vacuum cleaning to remove the post-refinishing dust, and then mop.
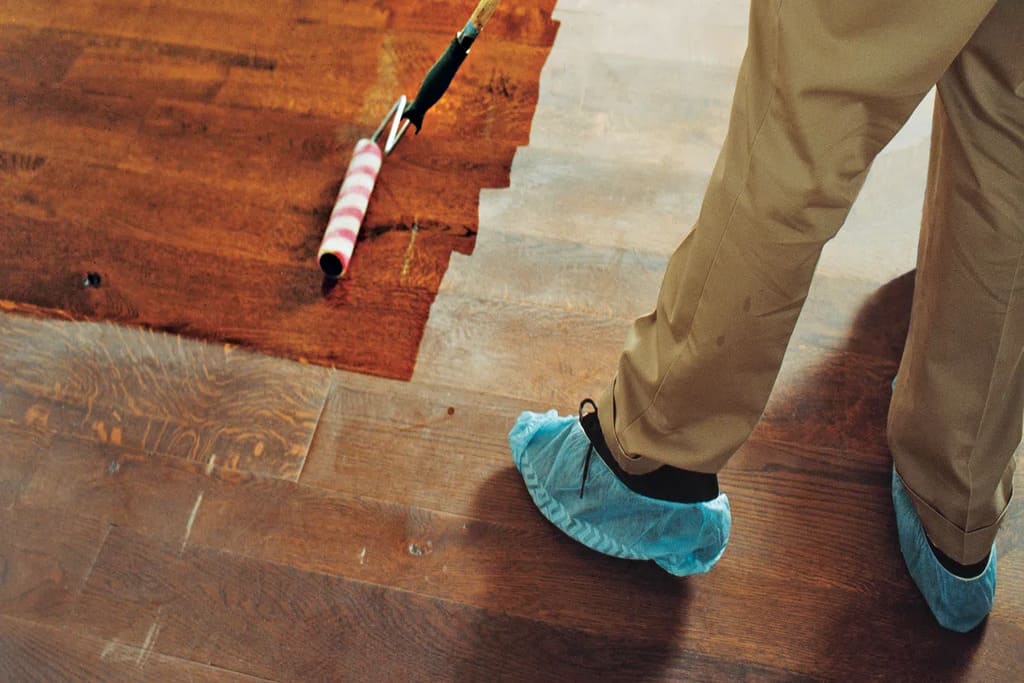
Step 11: Staining
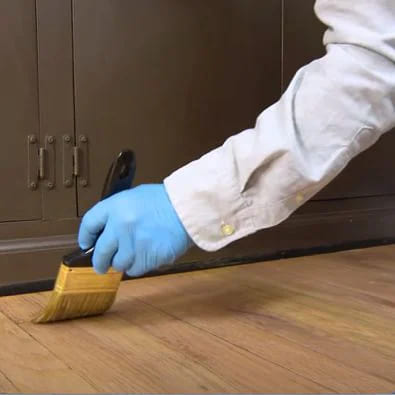
Staining is optional, but you can choose any color to stain your floor. One of the easiest methods to apply stain is to rub in the stain with clean rags.
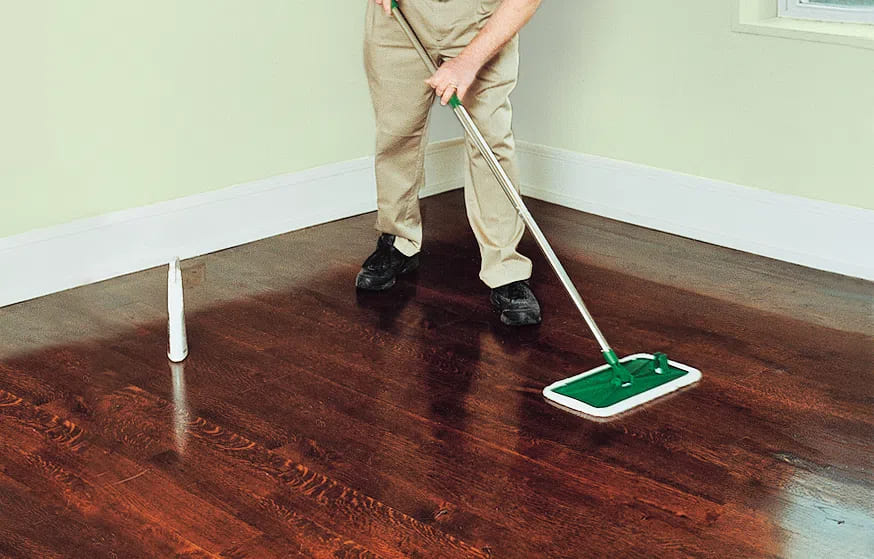
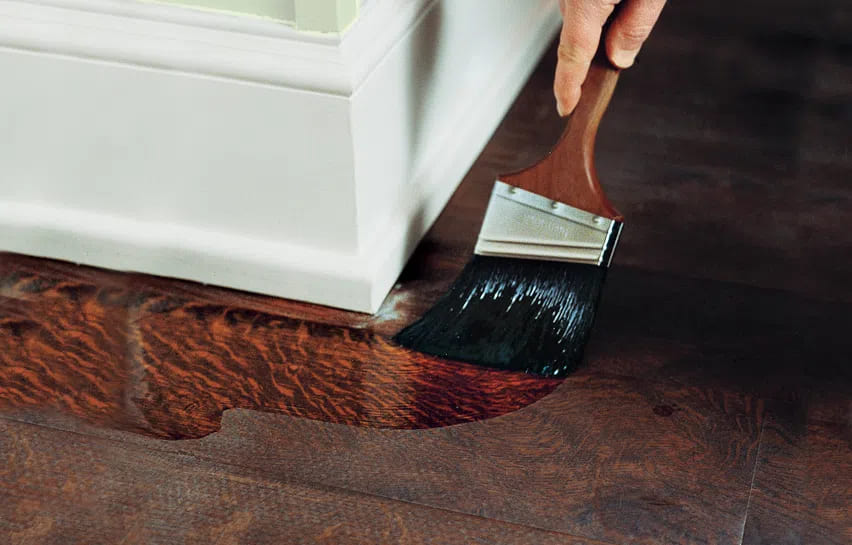
Step 12: Floor Sealing and Topcoat
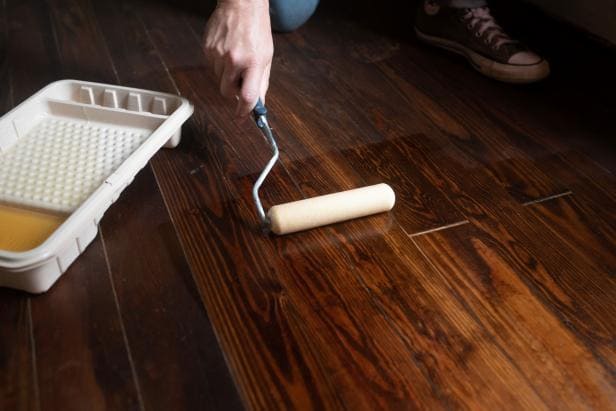
After the wood floor refinishing has dried completely, apply the topcoat or varnish. Sealing will help protect the floor from dings, water damage, and scratches for at least 6-12 months and also add shine to the floor.
Sealants For Hardwood Floor Refinishing
1. Polyurethane
It is a clear, plastic-like substance. You can apply them on the floor using a normal paintbrush. From glossy to matte, they are available in all types of finishes. They add a protective sheet on the floor to resist scratches and stains.
2. Traditional Varnish
Similar to polyurethane, they are famous for their dramatic effect on the floor. As they are very thin, they can repair even the smallest spots while darkening the floor.
3. Natural Oil Finishes
You can use Tung oil, which is eco-friendly and cheap. But they are not so good in terms of protection and adding shine to the floor. They need to be applied at regular intervals of time as well.
4. Wax
Wax is famous for its natural and matte finish. But they lack durability, are labor intensive, and need reapplication.
Step 13: Molding Replacement
The last step involves installing the molding and edge covering. Use a brad nailer to place the moldings.
5 Easy Tips for Hardwood Floor Refinishing
- Protect your baseboards using masking tape.
- The floor can be refinished without requiring you to leave your room.
- Use a vacuum cleaner to remove debris and dust between refinishing with various grit grades.
- Felt pads are necessary while moving on the refinishing floor to protect them from scratch.
- You are not required to use dark stainers always.
Reasons Why You Should Hire Professional for Hardwood Refinishing Floor
What Happens When You Do DIY Refinishing?
- Rent a solid-wood sanding machine.
- Refinishing tools and preparation can cost around $200 per day.
- Mistakes are unavoidable.
- High efficiency and skills are required to perform the task.
Benefits to get Professionals for Hardwood Refinishing Floor
- Depending upon the scale of work, the professional charge is as low as $3-8 per sq. ft. for hardwood floor refinishing.
- Sanding and 2-3 layers of surface finishing are involved in the professional process.
- Professionals require less time for refinishing and cleaning 3-5 days.
Are You Ready To Incorporate Hardwood Floor Refinishing?
Hardwood floor refinishing can add value to your space and create a warm look as well. Asking for professional help will ease your way, but if not, you can do the refinishing yourself as well. This article must have given you enough knowledge about it, so now it’s your turn to shine up your floors.
Subscribe to our page for more such behoove pieces.
FAQs:-
If maintained well, it can last up to 10 years; otherwise, it needs a refinish every 7 years.
Go for hardwood floor refinishing near me.
Get minute scratches fixed.
Do hardwood flooring.
Mop it well.
Alternatively, rent a machine for floor polishing.
Yes, because it helps extend your floor’s life, it is cheaper, safer than replacement, and long-lasting as well.
Considering the budget, refinishing is cheaper than replacement. But if the damage is severe, then go for a replacement.
The average cost to refinish hardwood floors is $1000–$2400. However, DIY refinishing cost a little less, around $500 per 275 sq. ft.
Conclusion:-
Overall, hardwood floor refinishing is a great way to improve the look and value of your home. If you are considering this option, be sure to do your research and choose a reputable contractor.
Read More:-