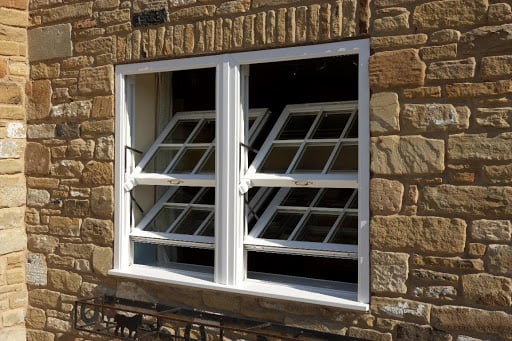
Sash windows are a timeless addition to any home, available in many designs to suit all manner of home. This style of window has been around for over 300 years and are an integral part of the home. However, over time windows may need refurbishing as well as regular maintenance work. If they are looked after to a high standard, they can last for a lifetime, however, there comes a time where windows may need updating, so it is important to follow these steps to ensure a high-quality finish.
Unscrew and Take Out the Sash
Carefully unscrew security fittings and lower the sash. Remove the staff bead and take off chords and chains. Remove the sash hardware and place safely aside. Then, free the glass, safely remove and label this so you remember which windowpane goes in which frame. Give the joints, panes and frame a clean so that they are fresh once put back together.

Apply Epoxy and Prime
To rebuild the cleaned-out joints, brush on Epoxy High Build and let it sit for 20 minutes. Then, mix the two parts of the epoxy filler into a mixture. Force it into the joint and spread the mix over the sides to restore the joints original shape. Leave for four hours, then trim any excess.
After 24 hours, the epoxy will have fully cured. Hand-sand the sash with sandpaper and seal the wood with a thin coat of primer.
Bed the Glass
To re-bed, the glass lay the sash exterior side up, then use multi-purpose putty along with the glazing rebate and press the pane into the putty and secure it with grips. Apply further fronting putty by applying where the glass meets the glazing rebate and fronting it to create a triangular-shaped fillet, finishing about 2mm below the sightline. Neaten up removing any excess.
Rehang the Sash
Both sashes should be working properly when it comes to hanging the windows. The top sash should be able to drop down to the windowsill with ease – if it does not, the weights will hit the sash pulleys and can break. A lot of the time the sash windows have been painted shut at the top which causes issues opening and closing. Once the sashes are smoothly running, clean and reattach the sash. Ensure that your sash windows are draughtproofed as this will protect the sash and prevent movement and rattling within the frame while making the pane more secure.
Address Pulleys and Ropes
The pulleys on sash windows need a regular application of spray lubricant to keep them running smoothly. A pulley should be greased with pulley oil when it begins to squeak. Then, reattach the cords or chains to the upper sash or replace them with new ones. Re-attach the top sash, then replace the parting bead.

Tips to help maintain sash windows
Regularly clean your windows – Use a glass cleaner and a microfiber cloth to clean the windows once a week to get a streak-free and shiny finish.
Check your windows for rot – Sliding sash windows can develop rot over time and weaken the structural integrity of the wood. The area should be cleaned thoroughly should rot develop, followed by the application of wood hardener.
Maintain your insulation – Gaps around the window allows air to come in meaning warm air from inside escapes, leading to higher energy loss. Sash windows from Quickslide are built to last through all weather conditions with the addition of an innovative weather bar in addition to multi-chambered frames and sashes to stop warmth escaping from the home.
Stop your windows from sticking – This can be a common problem sash window owners encounter. The window should slide smoothly up and down and are often sticking due to paint being applied too thick and can seal the window in place making it ridged. The paint should be removed and repainted if the paint job is messy and stripped from hardware with warm soapy water.
Conclusion
When refurbishing sash windows, ensure to treat each component with care while using the proper equipment for restoring each section. When renewed, the windows will last decades if properly maintained, keeping your home looking timeless and stylish.
Keep reading:

