If a painting project has been swirling around your mind for a long time now and if you have come to the conclusion that it is time to finally get it over with, then I have a question for you. Have you thought about the methods or the tools that you would be using in the process and have you found a way to make the whole project easier and a lot less messy than it usually is? If you haven’t, then you really should, because making things easier will definitely be to your liking.
Am I right in assuming that you already know which tool I am talking about? Oh, okay, okay, I shouldn’t be assuming anything. Instead, I should be making things clear and that’s exactly what I intend to do. So, I am talking about a paint sprayer. That’s not all, though.
I’m actually talking about an airless paint sprayer tool reviews guy, which is known for being better than any traditional painting options. That basically means that you will be able to complete the whole project in a much shorter time frame than you might have expected it. Plus, it works amazingly on any surface you can imagine, which is definitely a huge advantage, since you won’t need to worry about poorly done painting jobs on uneven surfaces.
This sounds like the perfect tool for you, doesn’t it? Well, that’s probably because it is, but there’s one thing that you certainly need to think about before you grab the sprayer and start the painting project. Let me put it this way. Do you even know the first thing about actually using this tool the right way? If not, then you ought to learn.
I’m sorry if I have offended your ego or something, but this is simply the question that needs to be posed. After all, you wouldn’t like to start using something without knowing how to do it properly and then end up with a poorly painted home, or any other property. Trust me, that question is for your own good. Of course, we won’t stop at simply posing the question. We will also provide you with an answer.
No, I’m not going to try and guess whether you know how to use anyone from those airless paint sprayers listed here or found anywhere else. Instead, I’m going to assume that you are here because you do need some tips on how to use those the right way and I’ll immediately jump to giving you those tips. So, without further ado, let us cut to the chase and show you how airless paint sprayers are used.
1. Preparation Comes First
It goes without saying that this specific tool needs to be properly prepared before you start using it. And yet, you might not know what the preparation part actually entails. Don’t worry, everyone’s been there at some point because nobody is born ready to use a sprayer. This is something that needs to be learned and, luckily, it’s not a difficult learning process.
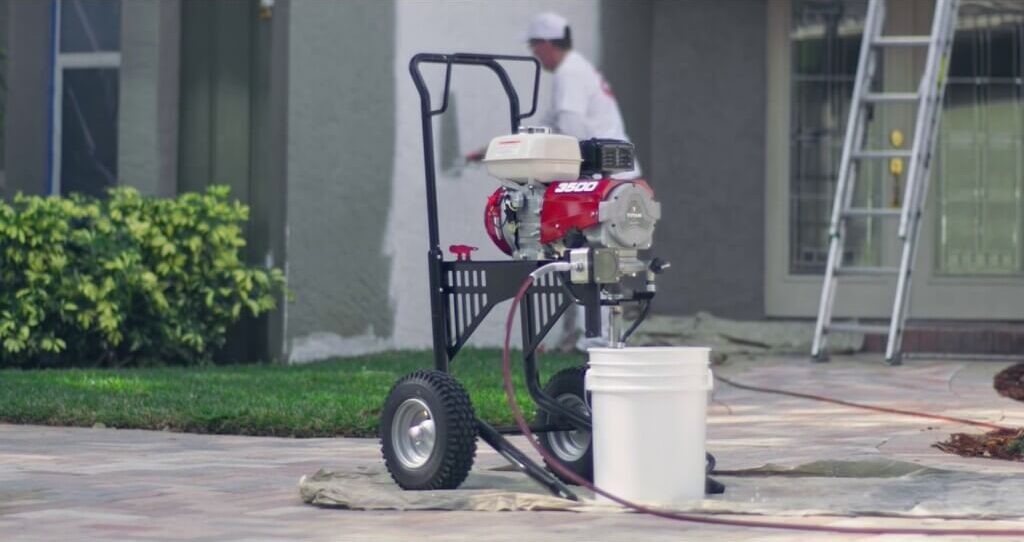
The preparation process consists of getting the right tip, thinning and straying the paint, setting up the hose, and priming the pump. Choosing the right tip is tremendously important. Narrower ones are perfect for work that requires extreme precision, while larger tips can cover much more ground effectively and in much less time. The larger ones, however, usually require more pressure.
After picking the tip, you will need to thin your paint, so that it can flow through the nozzle more easily. Usually, you should add a ¼ cup of either water or a chemical thinner to every single gallon of paint that you are using. Even when you do your best to mix the pain evenly, there might be some clumps left, which is why you need to use a strainer and a bucket to catch and discard the solid bits. This will prevent the nozzle from clogging.
As you already know, an airless sprayer actually draws the paint from a hose, which you need to attach to the back and place the other end into your paint bucket. When you do that, all that’s left is to prime the pump, which is usually done by pressing a button on your device. That is your last preparation step, at least when it comes to the sprayer.
2. Prepping The Surface Also Matters
I suppose that you have already learned a few basics about paint sprayers and that you now know how to prepare them for use. Yet, you should also learn how to prepare the surface, unless you want to make a mess out of things. This includes covering all the surfaces that you don’t wish to have painted and laying something on the ground so as to prevent any drips from getting on your floor. This is a pretty straightforward process that doesn’t require further explanation.
3. Hold The Trigger
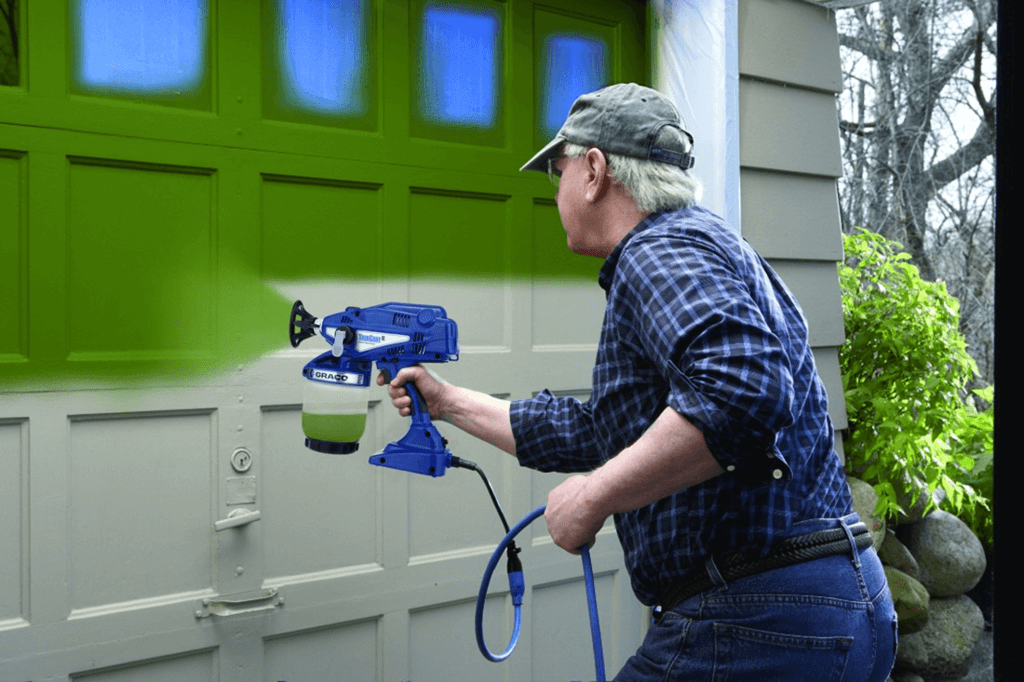
It’s time to start painting. Now, if this is your first time using this tool, you might want to start by practicing on a throwaway surface first. This is just for a minute or two until you have gotten the hang of it and learned how to start and stop spraying whenever you want. If you feel more comfortable, you can do your test spraying with water. The whole procedure is not that difficult, so you will get the hang of it rather quickly.
4. Adjust The Pressure
Once you learn how to start and stop spraying, you will need to think about the pressure that is being applied and adjust it accordingly. Basically, if the paint isn’t being sprayed evenly or thickly, then you should increase the pressure. There will be a dial on your sprayer that will allow you to measure this. Don’t forget that you shouldn’t keep the pressure too high unnecessarily.
5. Keep Your Distance
One of the most important things to remember is that you should maintain a steady distance while doing the spraying, in order to get an evenly and amazingly done painting job. Generally, the tool should be around 10 or 12 inches away from the surface you are painting. That way, the paint will be applied effectively, while the range will be perfect for covering a wider surface. So, don’t forget to maintain a steady distance during the whole project.
6. Keep Moving Your Hand
The worst thing you can do during this project is to hold the aim at one place for far too long because that might result in a poorly done job. Instead, do your best to keep your hand and your aim moving and keep the speed steady and consistent. In case it seems that the paint isn’t being applied evenly, you should think about slowing down your movements.
7. Release To Stop
I suppose you already know these, but it is still worth mentioning. When you want to take a break or when your whole job is done, all you have to do is release the trigger and your tool will stop spraying. It’s as simple as that. I hope these tips were enough to turn you into a pro when it comes to using airless sprayers.
Discover More