Tired of your boring white ceiling? However, they do not want to put fancy POP false ceilings or classical mouldings. Then shiplap ceiling ideas are your best bet.
A shiplap ceiling has parallel, regularly spaced lines that are generally made of wood planks. Evenly spaced wood planks provide a calm, tidy, and stylish atmosphere.
What’s more?
Shiplap on ceiling is extremely DIY friendly and the materials are also readily available.
We have compiled a list of 15 Sophisticated shiplap ceiling ideas to inspire your next DIY project. We have also curated a detailed section on how to install shiplap on the ceiling so that it’s a hassle free process for you.
What Is Shiplap and Why Is It Called So?
Shiplap had a functional purpose rather than an aesthetic one. It is a sort of wood paneling with a rabbet or groove carved at the top and bottom of each board so that they overlap to make a tight seal. It was originally used to waterproof ships and hence this name. Shiplap was later utilized as siding on houses when it was proven to be resilient to weather conditions.
Only recently this ingenious technique is making its way into the interior design scene. Its waterproofing quality is proving effective for fragile yet important areas like ceilings. Shiplap ceilings are a trending decor aesthetic due to their simple installation process and chic aesthetic.
How Does Shiplap Work?
The square edge of shiplap boards is referred to as a butt joint. When many boards are pressed together, they readily overlap, resulting in a small gap between each one.
15 Sophisticated Shiplap Ceiling Ideas to Glam Up Your Roof
1. Warm Woody Shiplap Ceiling Design
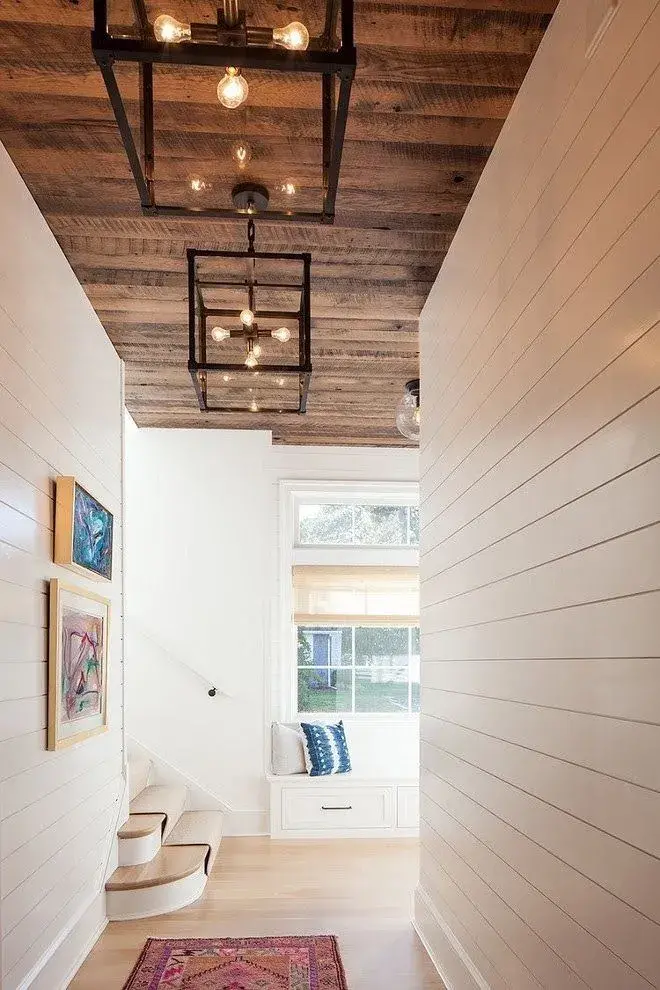
Shiplap patterns are typically painted white. Opt for natural wood shiplap ceilings instead of conventional ones. The warm brown colour and discernible natural grains offer warmth and a touch of nature, creating a cheerful and coy space.
This is one of those shiplap ceiling ideas that have a country-cottage feel to it. Rustic wooden shiplap ceilings are ideal for kitchens.
2. Horizontal X Vertical
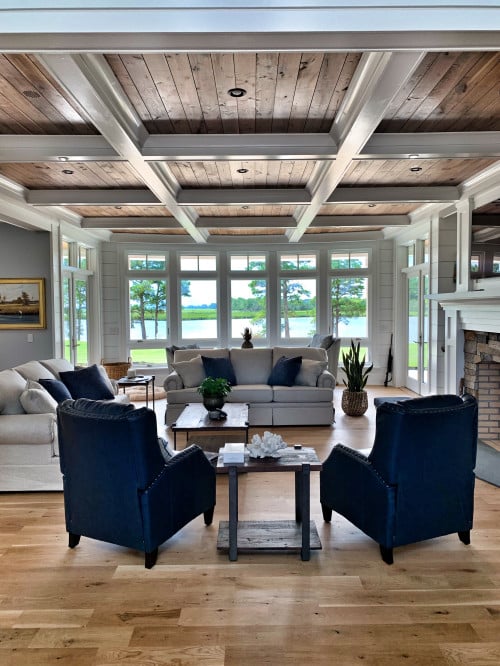
Shiplap patterns are not limited to the ceilings. You can create a sense of dynamism and continuity by installing vertical birds on the walls. Inject some variety in the shiplap ceiling ideas by using complementary colours in the vertical shiplap for the walls with horizontal shiplap for the ceiling, yielding an unexpected yet harmonious aesthetic.
3. Uniquely Uneven
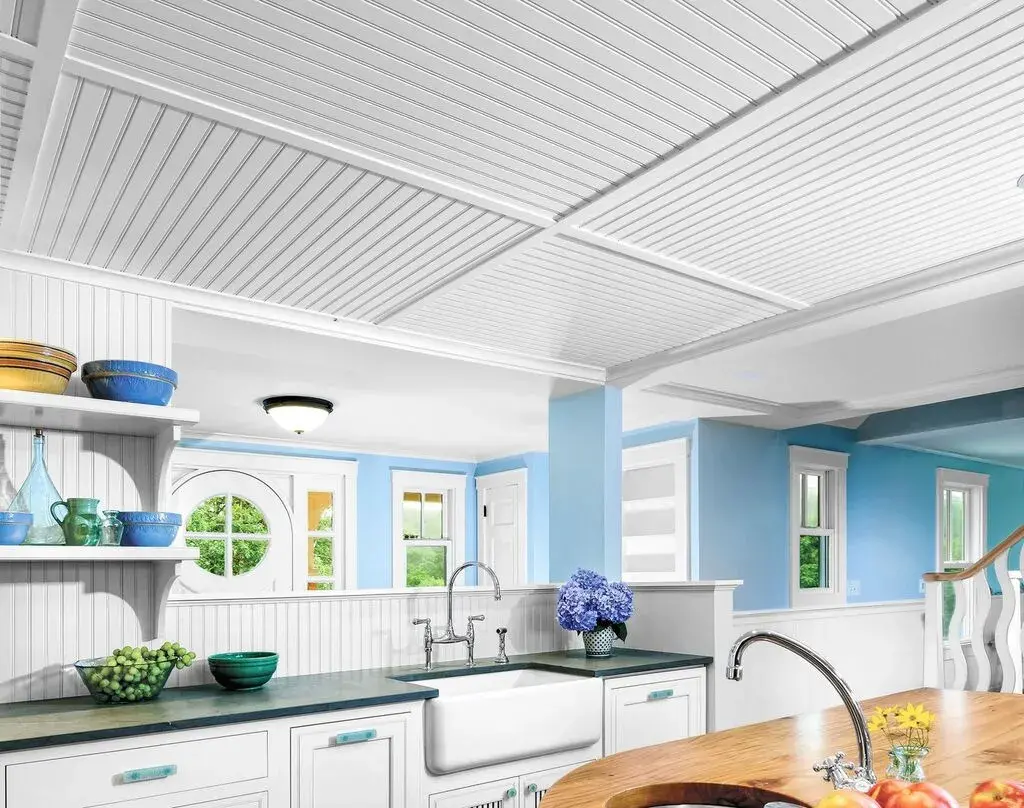
Who says your shiplap ceiling design has to be evenly spaced? Shiplap may be tailored to fit your specific needs, from broad to narrow and anything in between. This will bring just the proper amount of edginess to an otherwise sleek and minimalist aesthetic. You may arrange the boards to create a gradient effect by alternating between thinner and broader planks.
4. Classic White
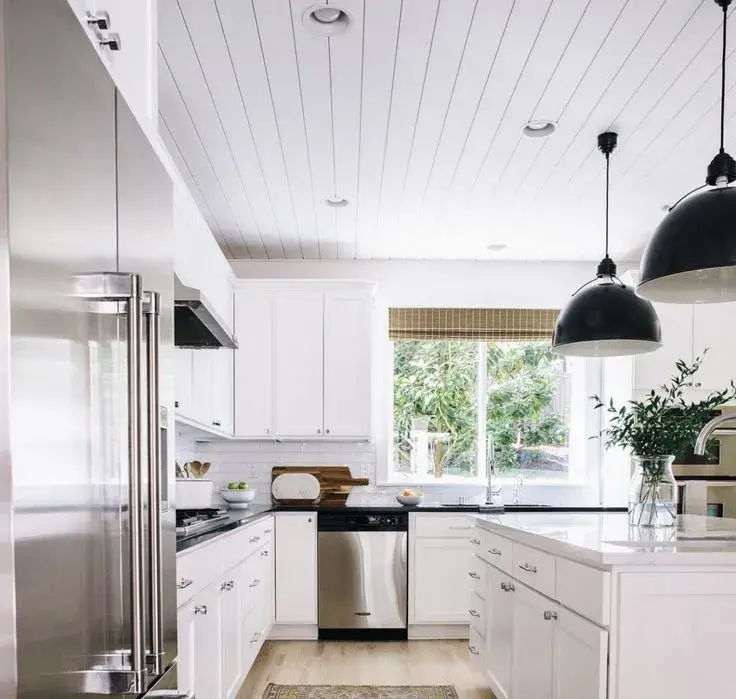
Let’s stay with the traditional navy white shiplap ceiling design. The white of a shiplap ceiling will undoubtedly complement the natural light streaming in through your window. A white ceiling maintains the space looking light, open, and clean. Coating the walls in the same bright colour gives the room a unified appearance.
5. Break It With Beams
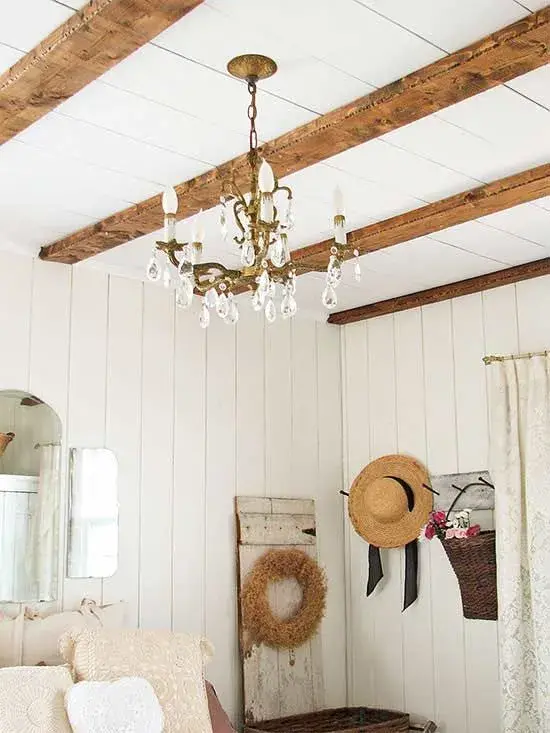
Are you concerned that the beams running through your roof will spoil your shiplap ceiling ideas?
You can genuinely benefit from their designs. Cover them with dark boards to simulate wooden beams. Their rich stain stands out against the white shiplap ceilings. The vintage aesthetic of wooden beams negates the necessity for art or decor.
6. Experiment With Dark Shades
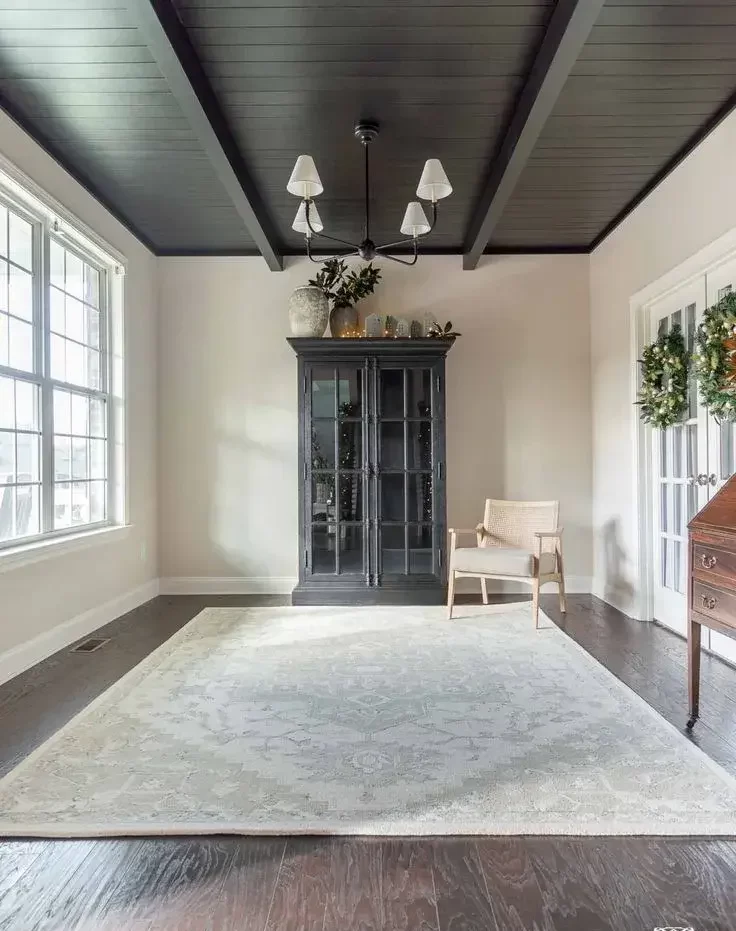
Despite being the most common option, white shiplap isn’t the only one available. Darker shiplap ceiling coverings tend to produce a warm and intimate ambience. For a ship deck feel, choose nautical colours like navy blue. A dark shiplap wall may serve as a focal point in a space and an anchor for the rest of the décor.
7. Create an Illusion
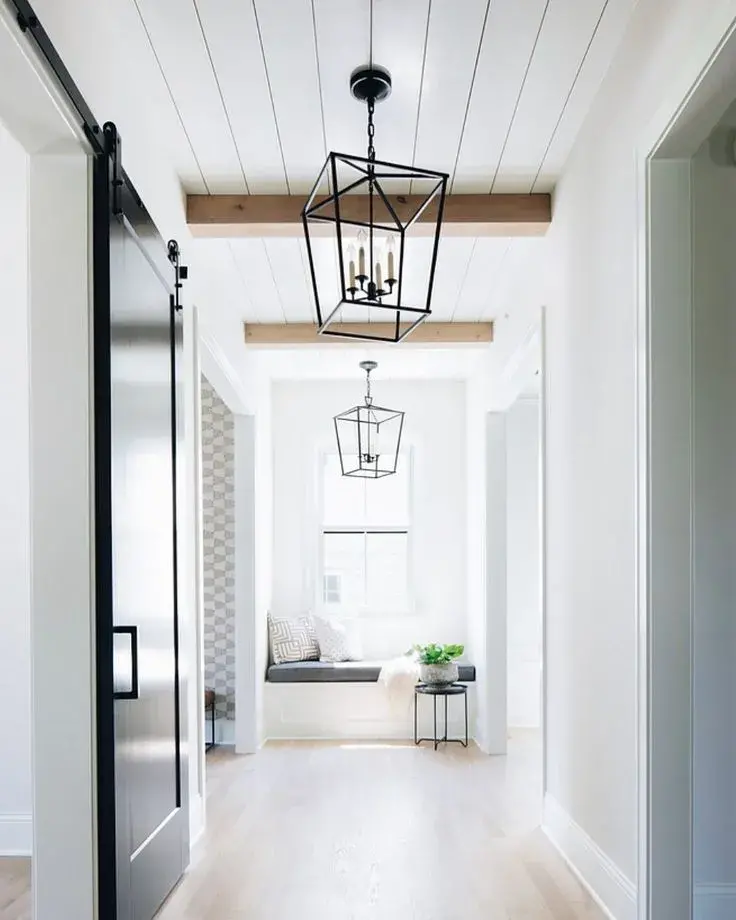
A parallel line longitudinally produces the sense of larger space, whereas a parallel line horizontally makes it feel tight. So you may lay your planks as you like. Vertical lines assist in drawing the eye forward and making a room appear taller. Let’s see wall decor tips to make home amazing.
Use a shiplap ceiling, for example, to make a tight corridor appear broader and roomier. A continuous shiplap pattern on the walls gives the appearance of a larger area as well.
8. Frame It With A Trim
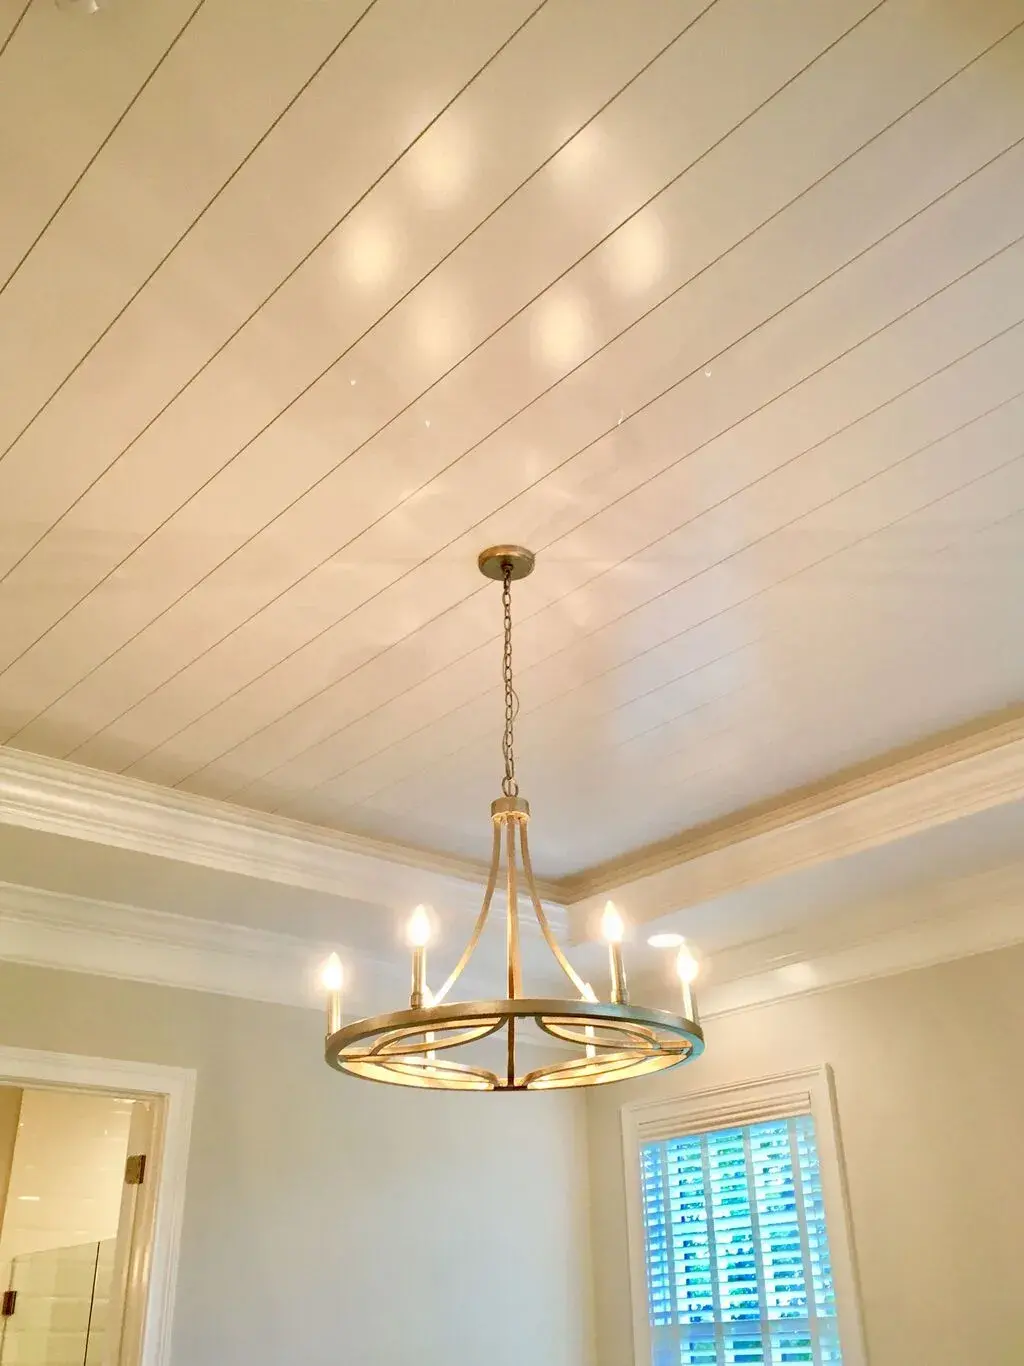
If you think your single-pattern shiplap ceiling ideas are too repetitive, mix it up with different architectural elements. A framed shiplap ceiling contains both the dynamism of lines and the classic touch of trims.
It provides complexity and a degree of aesthetic fascination to any room, raising its level of sophistication. After all, texture and size are fundamental to interior design.
9. Diagonal Shiplap Ceiling Ideas
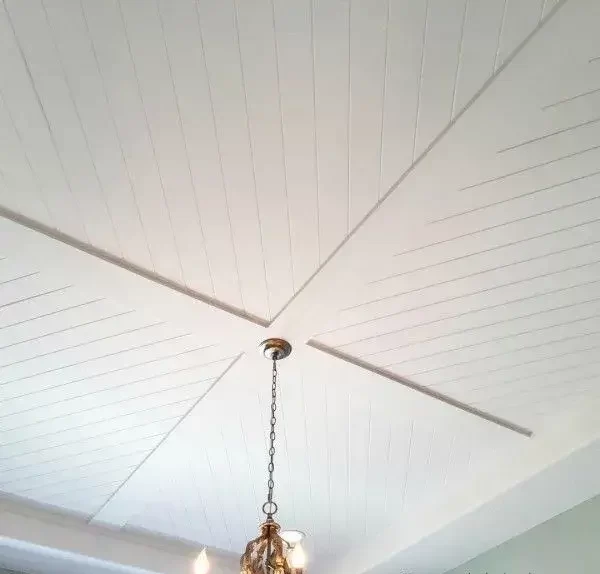
Who says you can only orient the shiplap planks at 90 degrees?
The shiplap pattern is truly transformed with diagonal shiplap ceiling ideas. It’s a great way to add visual interest to any area, but it’s especially effective in living rooms, bedrooms, and sunrooms.
This is the shiplap ceiling style to go for if you want something out of the ordinary.
10. Multiple Shiplap Elements
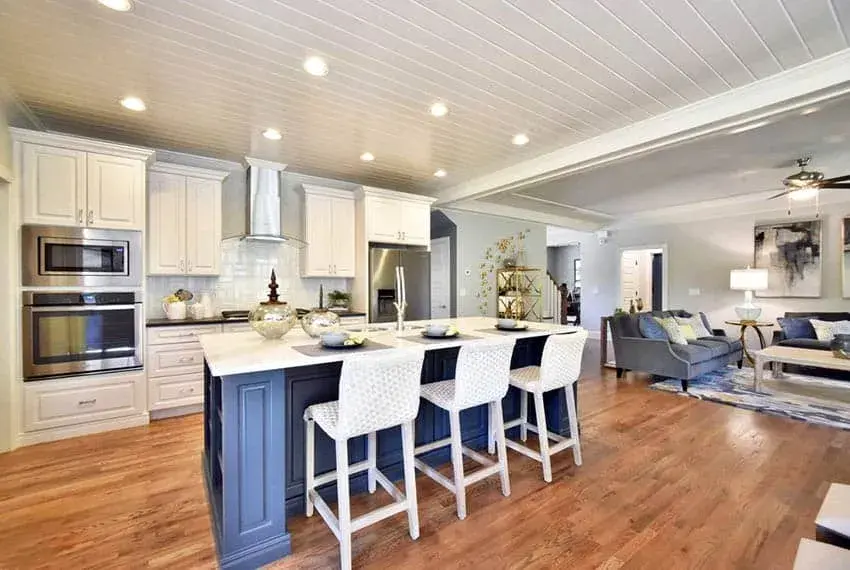
Two are always better than one! Shiplap ceiling ideas should have complementary elements. For instance, deck flooring or feature walls. You may also include a shiplap-detailed barn door. It’s a simple DIY that adds a lot of charm to the room. You may simply reuse the leftover boards from your ceiling project in other sections.
11. Groovy Narrow Paneled Shiplap Ceiling
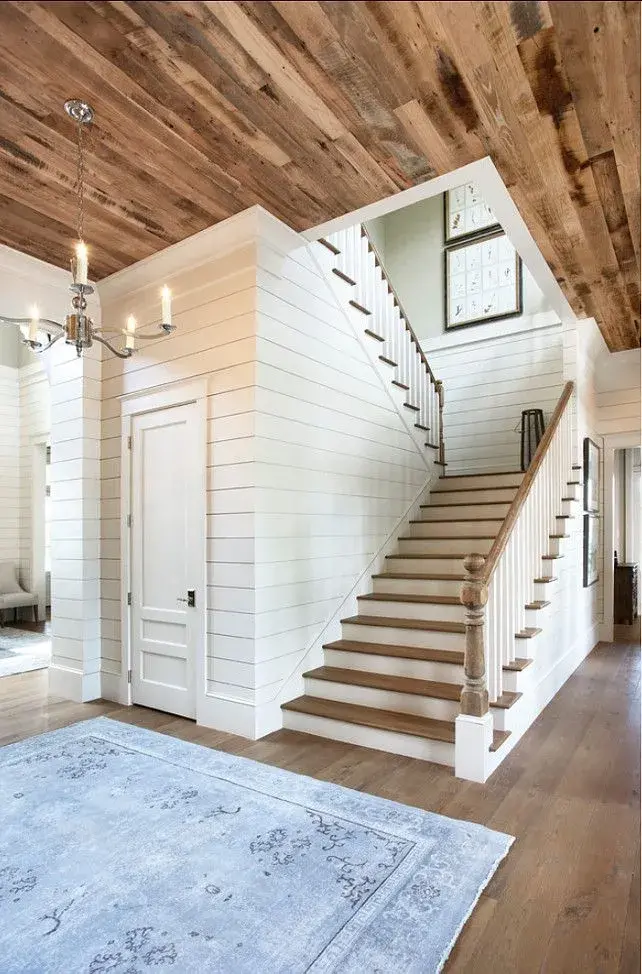
If you don’t want your shiplap ceiling to have a nautical feel, adjust the size of the planks. Although broad shiplap panels are what most people are accustomed to, there are other options. Thin shiplap is the ideal blend of contemporary and antique. It complements several common design sensibilities when applied to the ceiling.
12. Shiplap Ceiling Ideas for Vaulted Ceilings
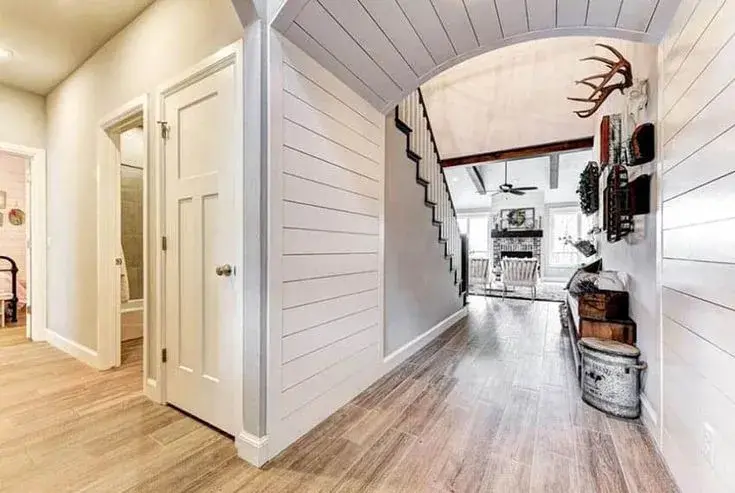
White ceilings may make a space feel bigger by making the walls look higher. It’s a kind of optical illusion produced by parallel lines. White shiplap ceiling on vaulted roofs is a great way to make large spaces feel even larger! Your home will feel magnificent if you apply white shiplap on vaulted ceilings, which are already higher than regular ceilings.
13. Mix and Match Of Colours
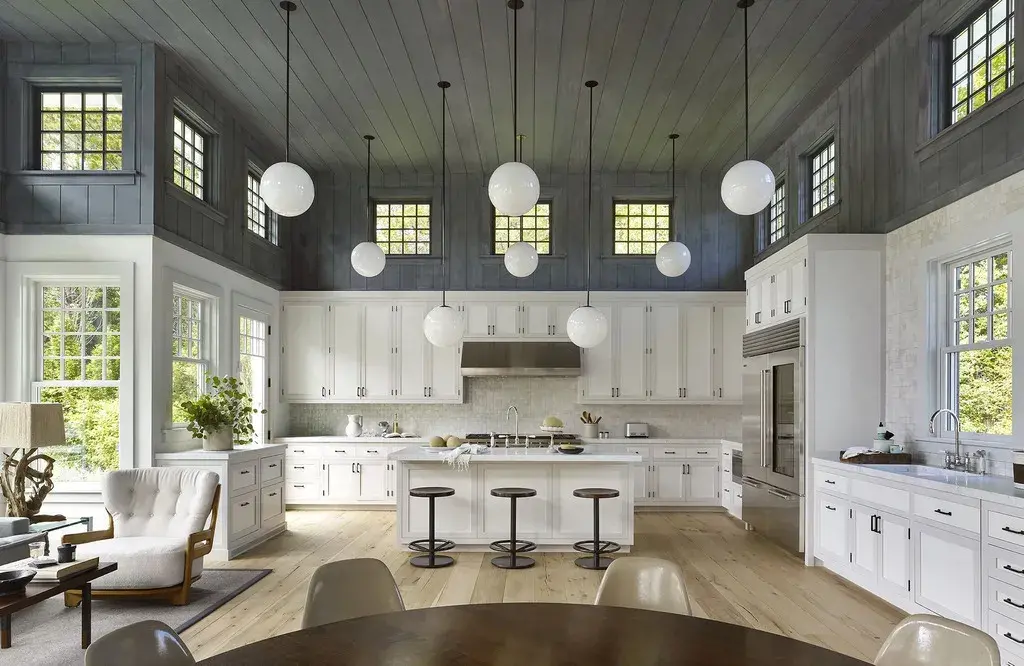
Your shiplap ceiling ideas should not be limited to a single colour. Consider mixing and matching colours, especially if you have a wide surface area. By altering the colour of the shiplap, you may divide distinct rooms.
Consider utilising two distinct shades of shiplap to add interest to your ceiling. Shiplap ceilings with varying colours are more visually appealing than one-dimensional tones. You may accomplish this appearance using shiplap panels in different wooden tones. You can also see coffered ceiling ideas.
14. Shiplap Ceiling with a Feature Wall

The continuation of the shiplap pattern on the walls is an easy approach to instill a dynamic personality. But what if you don’t want vertical lines on all of your walls?
Instead, you make a feature wall that complements your shiplap ceiling ideas. It draws the eye forward and creates a focal point in your living space. You can also simplify the look in areas like the bedroom by just adding a shiplap pattern headboard.
15. The Shiplap Attic
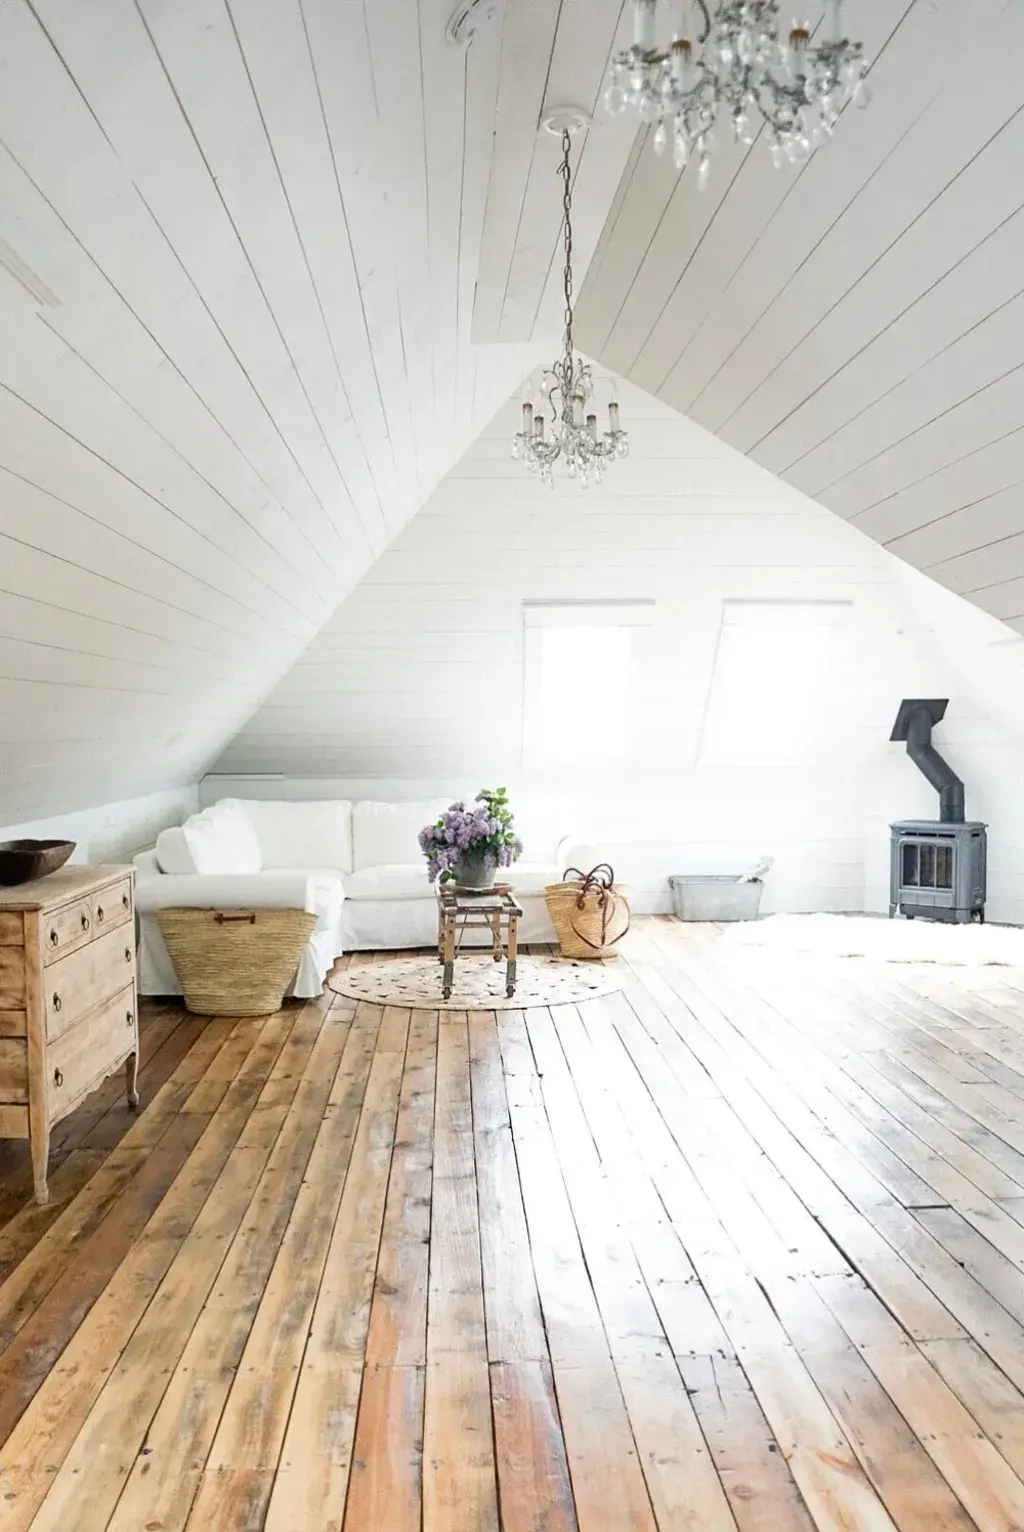
Do you want to convert your attic into a living space?
The use of shiplap on a curving, low-hanging ceiling instantly makes the area feel calm and inviting rather than cramped and confined. Use vertical boards for the walls and then carry the look up to the ceiling for a charming cozy zone.
How to Install Shiplap on Ceiling?
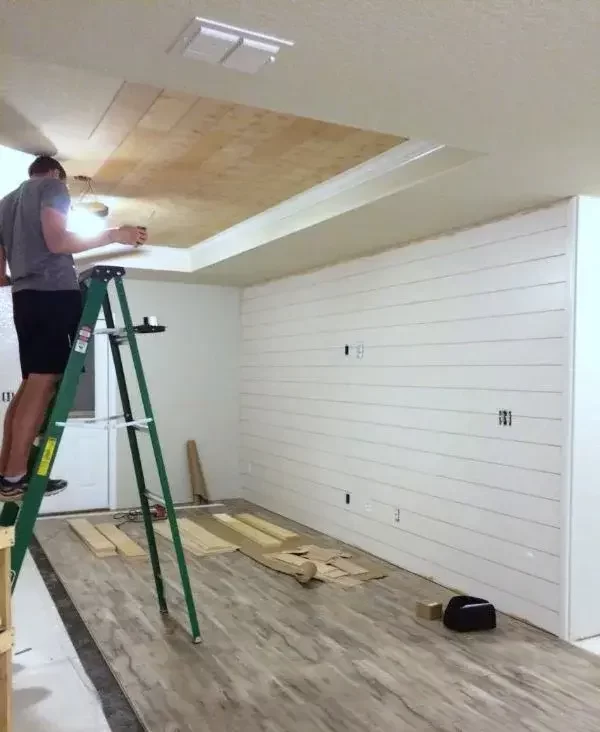
After researching some of the most popular shiplap ceiling designs, you must plan to install them. As long as the ceiling is clean and level, shiplap may be put up right on the drywall.
Minor surface flaws can be hidden with a shiplap ceiling, but the real problems must be fixed first. If not repaired, leaks from above will merely move onto the shiplap degrading its quality.
1. Declutter the Ceiling Surface Area
Start by removing everything that protrudes from the ceiling, such as ceiling lights, vents, hooks, and even mouldings.
2. Assess the Location of Ceiling Joists
At one end of the ceiling, use the step ladder to approach the ceiling. Move the stud finder from one side of the ceiling to the other and mark the centre of each joist with a pencil.
3. Place Furring Boards:
In case you have an uneven ceiling, use furring boards to provide a seamless surface for your shiplap ceiling panels. Cut the furring strips to length and attach them to the studs at 16-inch intervals.
4. Measure your Shiplap Panels
Determine the length of each board. Consider any obstructions, such as beams or light fixtures, that will be positioned on your board.
5. Cut the Starter Board
With all of the measurements in hand, it was time to use a mitre saw to cut each board to length. Consider adding an extra 1/8 inch on each side, for a total of 1/4 inch, to allow for growth.
6. Attach the Boards to the Ceiling
Nail the starting board to the ceiling with a 1/8-inch space on both sides. Nail into the joists or furring strips rather than the hollow drywalls. Hammer through the rabbet and again midpoint through the face of the board on the remaining boards.
7. Last Shiplap Board Measurement and Cutting
The final board will almost certainly not be the precise width. So, using a table saw, cut the board down to the required width.
Embrace the Chic Quality Of Shiplap Ceiling in Your Home Decor!
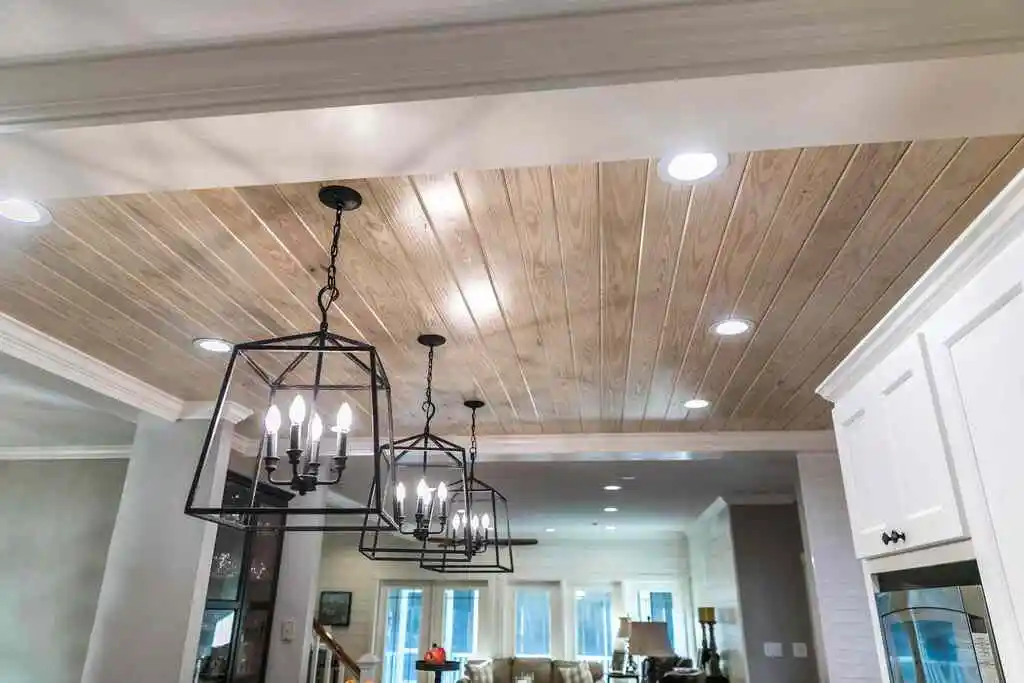
Shiplap ceiling ideas are the most Pinterest-worthy look in modern interior design. You’ve probably seen it as part of the decor of one of your favorite Instagram influencers’ home. It is a must-have for your home decor because of its utilitarian and aesthetic properties. And guess what?
You now understand how simple it is to install shiplap. Prepare your equipment and give your roof a makeover.
FAQs
Shiplap is most likely named from a kind of beadboard that was historically used to build ships. It uses the same overlapping junction to keep the real shiplap tight and waterproof.
Plywood is the most popular and cost-effective material to use for recreating the shiplap look.
The nickel gap is the space between shiplap boards, so named because you could fit a nickel into each of the gaps.
In case you missed it!

