Does the table in your room look boring? Are you thinking of getting a new one that would look more fashionable and fancy? If your answer is a yes, you have come just to the right place. What if we told you that you could build a table similar to the one shown above, all by yourself? From this article, you can create your epoxy resin wood table. This tutorial is a step-by-step process by which you can easily design a table and build a stunning piece all by yourself.
The Right Kind of Resin
First thing first, not all resins can make a perfect table. You should be choosing one that is less viscous so that it is easy to pour and can fill up hard-to-reach areas easily.
If you are making a table for your kitchen or dining, ensure that the resin is non-toxic and food safe so that it does not affect your health in any way.
It is also a good idea to use resins that are UV and HALS stabilized. These sorts don’t go yellow or change color over time. You want your table to always look shiny and vibrant.
The Right Wood
Using the right kind of wood is the key to a perfect, long-lasting table. After going the extra mile to create a table yourself, you want it to last years. For that, you should never rely on cheap, low-quality wood.
Woods usually come in two types: hardwoods and softwoods. Hardwoods are always preferred over softwoods for their durability and strength. These include oak, mahogany, maple, etc. A good idea is to pick a wood that is at least 4 cm thick.
If you are confused about where to get your wood from, you can easily get it from a nearby carpenter shop or even online!
Check out the most trendy and creative table ideas for small spaces.
Things You Will Need
You will need a handful of things to make your table. So it’s wise to keep the following list and ensure that you have everything in front of you before you start.
- Large mixing cups or bucket
- Duct tape
- F-clamps
- Sandpaper
- Measuring tape or folding ruler
- Screws
- Level
- Caulking Gun
- 100% silicone caulking
- MDF board
- Color pigments (blue or any color of your preference)
- Clear transparent pigment
- Polishing paste
- Wood oil
- Silicone spray
- Wood chisel and soft mallet
- Drill
- Heat gun
- Orbital sander
- Jigsaw
- Nitrile gloves
- Plunge router
- Eye protection
- Mask
Resin-based DIY presents are ideal for every occasion. You may express your love by coming up with perfect DIY gift ideas utilizing resin, whether it’s for Christmas, Thanksgiving, or even Valentine’s Day.
The Making Process
Now that you have everything you need ready, let’s start making.
Step 1: Prepare Your Wood
- Before you start, make sure the wood that you’re using is dry.
- Remove any bark if you are using wood directly from a tree trunk.
- Then use an orbital sander to sand the wood all over. This will remove any sharp or uneven edges. This will also ensure the proper binding of the wood with resin.
- Cut the wood in the middle with a circular saw. This is where your resin river will flow through.
- Make sure the length of the two pieces is equal.
- Use a milling machine to ensure that the wood is plain and flat and has the same thickness throughout.
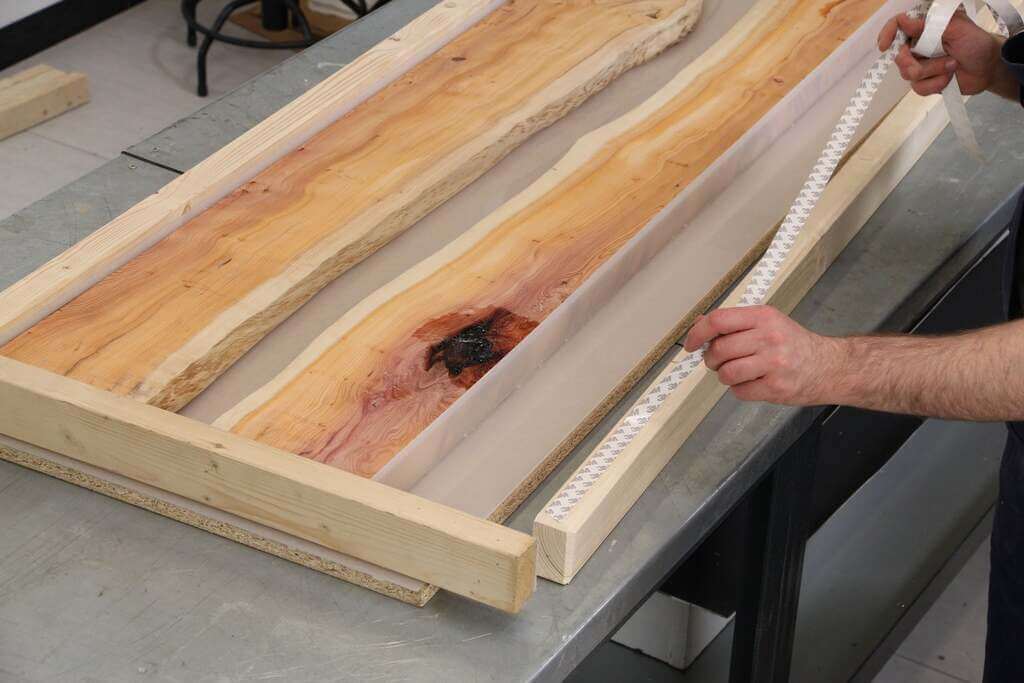
Step 2: Build Mold
- After you have shaped your wood into the desired shape, it’s time to build a mold.
- For this, take 4 pieces of flat wood (MDF board) and make a rectangle with them.
- You should have a hollow rectangle now with the woods creating its parameter. Make sure that this is at least 10mm higher than your desired tabletop.
- Attach the boards using a hot glue gun or silicone. This will seal the boards together so that when you pour resin, it will not leak out.
- Now spray a few layers of release agent on the inside of the mold. This will make the separation of your tabletop easier after you are done.
Step 3: Fitting Wood into Mold
- Now that you have your mold ready, place the prepared wood inside the mold.
- You should have a gap in between the two wood pieces in which you would pour the resin later.
- Remember, this fit will be exactly how your tabletop turns out. So place it the way you want the final results to look like.
- It is a good idea to coat the wood edges with a sanitary silicone barrier so that the resin can be poured more smoothly.
Step 4: Seal Wood

- If you have cracks in your wood, the finishing of your tabletop will be uneven. The resin can also leak out. Hence it is important to seal any crack in the wood before starting.
- Take your resin and brush it on the edges of the wood and fill up any crack.
- Use a clear resin for this purpose.
- After sealing your wood, cover the entire wood surface with more clear resin.
- Make sure the resin is completely dry.
- Now sand your tabletop.
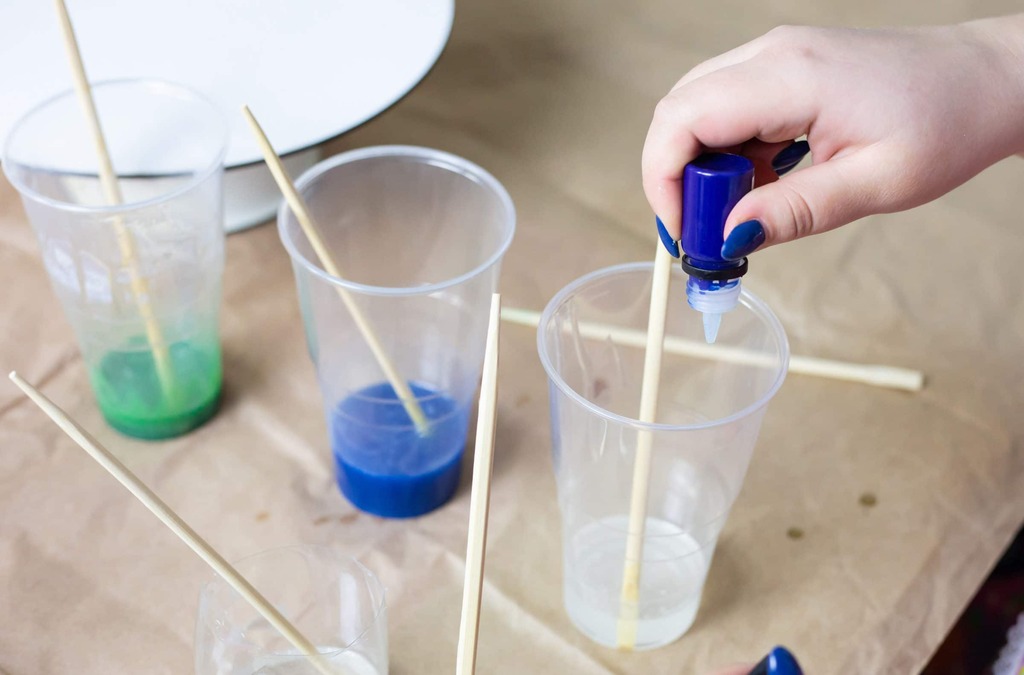
Step 5: Mix Resin
- Mixing resin is a critical part and the proportions should be accurate to get the right consistency.
- Don’t forget your nitrile gloves before you mix.
- Get your bucket and weighing machine ready.
- You can easily find resin calculators online and mix the given proportions.
- The ratio of resin to hardener should be 3:1.
- Mix well using a mixer or a spatula.
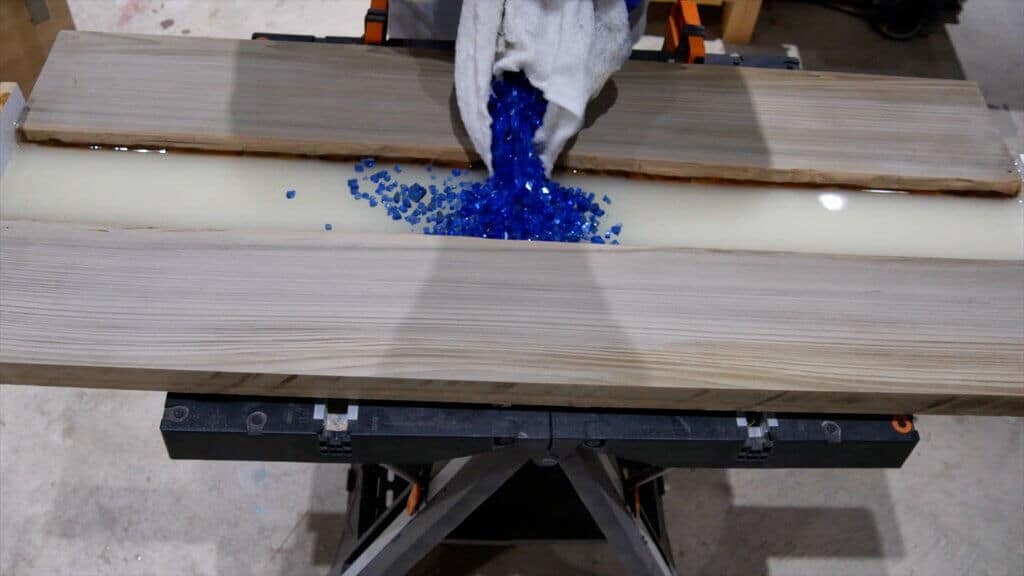
Step 6: Color Resin and Pour
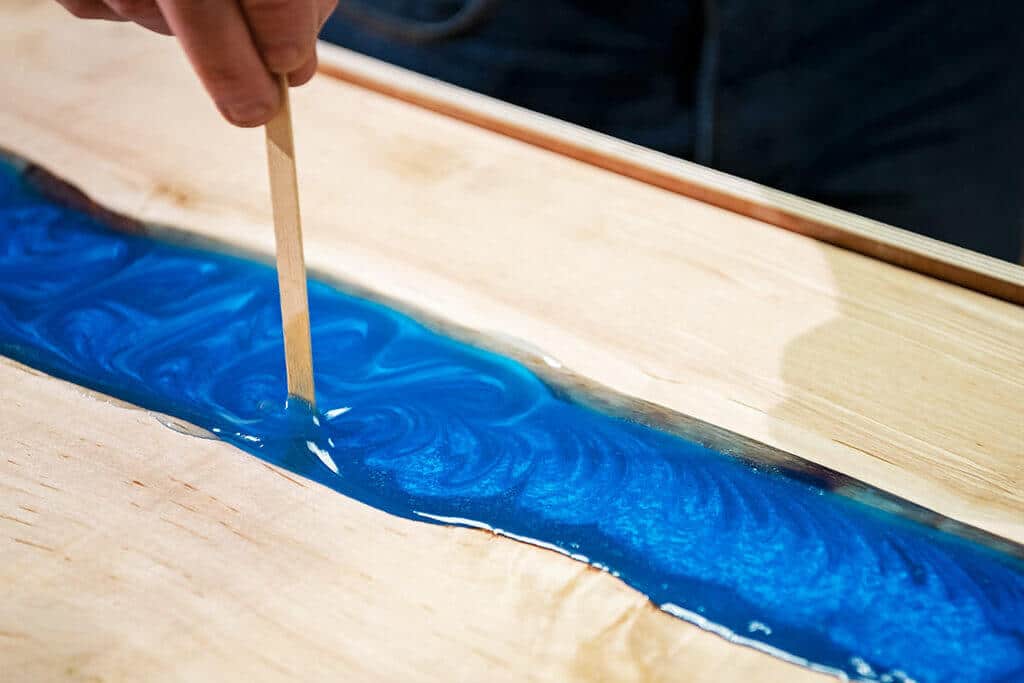
- After you have prepared your resin mix, it’s time to add some color.
- Add a metallic blue or any color that you would like your river to be.
- You can choose from different glow-in-the-dark colors too.
- Add the pigment slowly and see how much you need. Add up to your desired shade.
- Mix well.
- Pour the mixture into the hollow between the two wood pieces in the mold.
- Do not pour too fast as the resin is thick and increases in level fast. Take your time to see how much you are pouring.
- You may need to pour the resin into layers. Sometimes you may see the resin boiling at a certain thickness. This makes the resin cloudy and unusable.
- So it’s better to cast it in several layers, giving it time for each layer to cool and dry.
- If you see any air bubbles, use the torch to heat them gently to remove them. However, too much heat in one place can damage the resin. So be careful while doing this.
Step 7: Add Clear Resin and Add Accessories
- Once you have your colored resin cast, you can seal it off with some clear resin mix.
- If you want you can add some accessories like shells or stones.
- Do not add the accessories before this stage, as they will sink to the bottom. Add them now and then cast the clear resin on top.
Step 8: Demold
- Now it’s time to wait.
- You need to let the resin completely dry and set.
- Once it does, remove any screws or clamps.
- You can use a chisel and hammer to remove the mold from the tabletop as this will be quite hard to remove fully by hand.
- Be careful not to break or damage the tabletop.
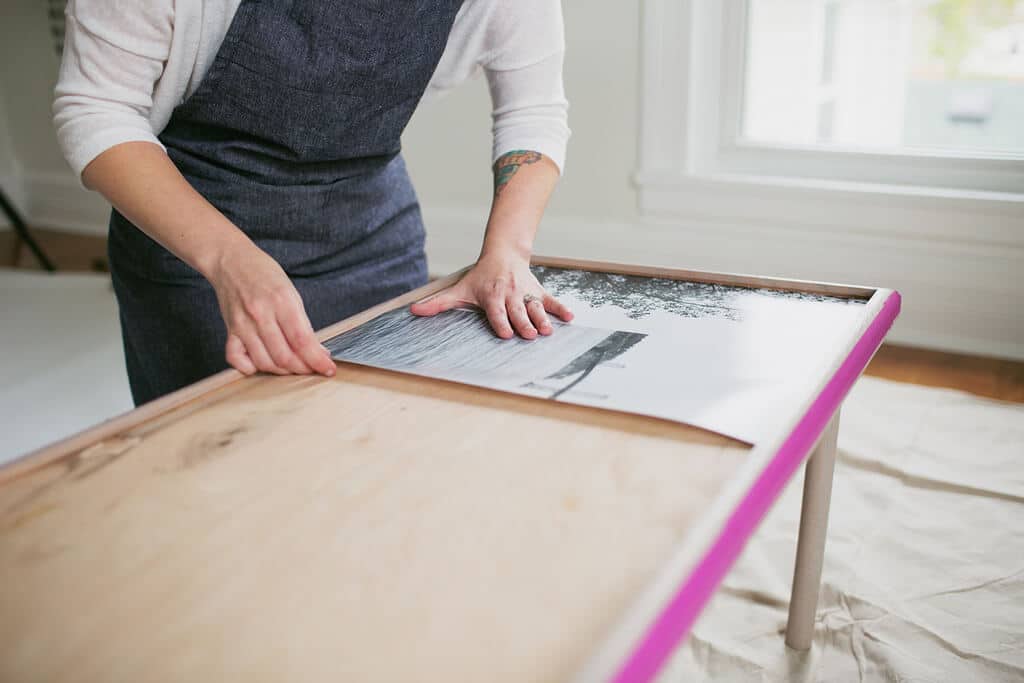
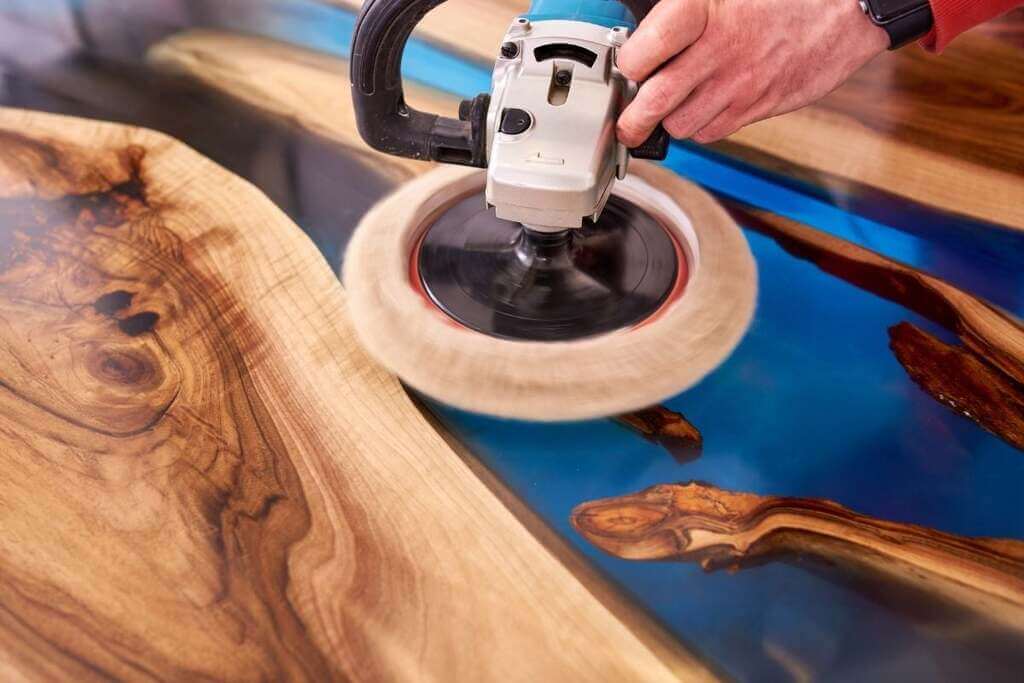
Step 9: Sand, Polish, and Oil
- Once you have demolded your top, it’s time to finish the look.
- Sand the tabletop completely using 80 to 400 grit sandpapers.
- You can also use a miller to shave off the surfaces for a smoother finish.
- After this, polish the top using a buffing machine to get rid of any scratches or unevenness.
- Now for that natural look, oil the tabletop using wood oil.
- Take some oil into a soft cloth and rub it all over the top.
- Now your tabletop is ready!
If you want an extra shine, you can cover the tabletop with clear resin. You can use a spatula to spread the resin evenly all over the table surface. For a more glossy finish, you can opt for a polyurethane coating. However, this requires a professional and can be expensive.
Step 10: Add Table Legs
- A table is not complete without its legs!
- After you have your tabletop ready, add some wooden or metal legs.
- For this, you will need to cut the wood or metal into your desired height and shape and simply attach them using a drill and screws.
- Viola! Your table is ready to serve.
A Table with Life, For Life
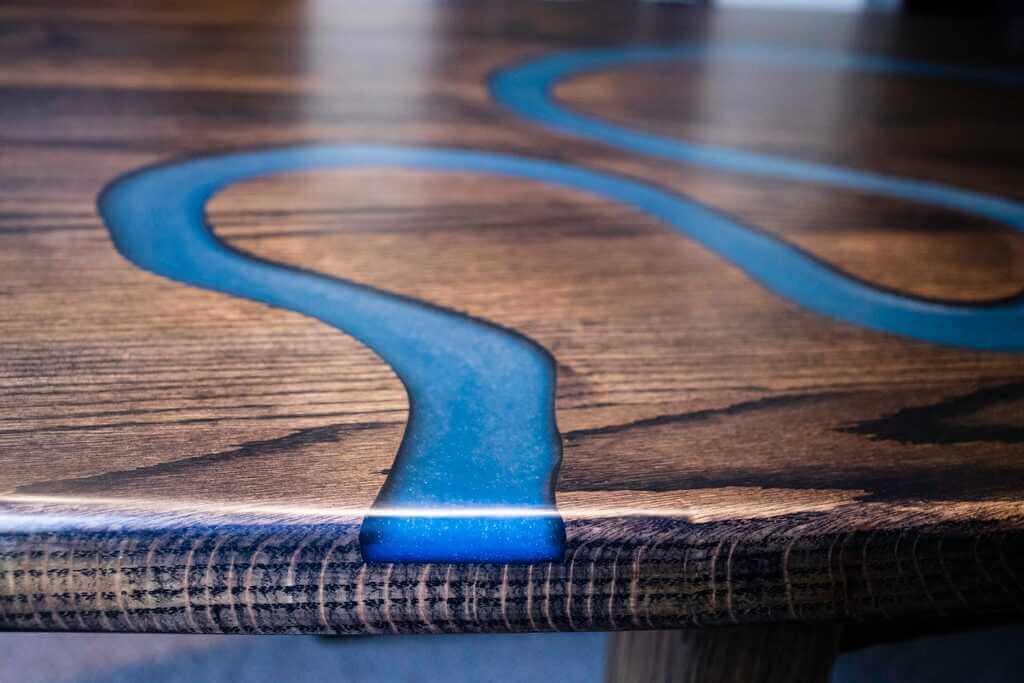
It’s time to get rid of your old, ordinary table and get this epoxy resin river table in your room. If you have a creative side, you can easily pull off the task alone with the steps given above. If you are wondering about the cost, it can vary from $1000 to $10,000 depending on the table size, but a regular-sized table can easily be covered within $2500.
So what are you waiting for? Put on your gloves and mask, and get ready to make a creation to treasure!
Continue reading: