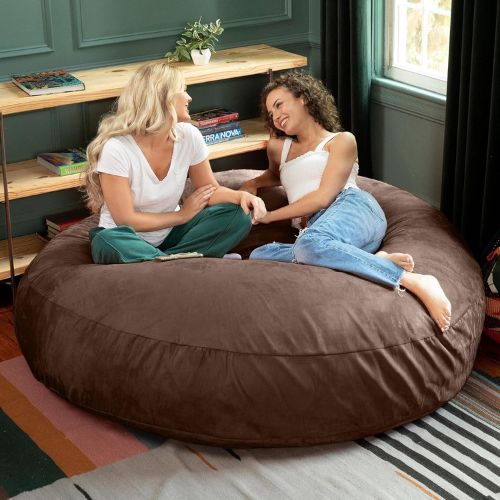
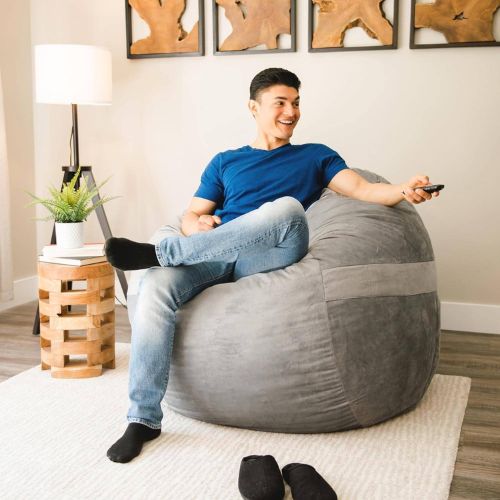
Bean bag chairs are comfy and fun seating options that can fit well in different spaces, like play areas and dorm rooms. But don’t underestimate their versatility—they’re just as suitable for a laid-back living room or home office. You can easily move them around and stash them in a closet when you need extra room.
When you’re out shopping for one, remember to think about both its style and function. Consider what you’ll mainly use it for, then pick the right material, size, and maintenance level to match. Also, think about how stable it needs to be and what decor style suits your space best.
Even if you have a more formal room, you can still make a bean bag chair work. Try adding some extra touches like decorative pillows, tables, throws, or even a rug to make it blend in seamlessly.
Bean bag chairs come in all sorts of styles and shapes, from super cozy ones to more structured ones that look like regular chairs. We’ve put in over 500 hours of testing to find the best ones out there, considering everything from durability to comfort. So whether you’re looking for a stylish addition to your living room or something fun for the kids, our list has got you covered.
What to Know Before You Buy Bean Bag Chairs
There are two primary ways to fill bean bag chairs; each has advantages and disadvantages of its own.
Bead Filling
The expanded polystyrene (EPS) used to make bead filling gives it a styrofoam-like texture. Bead-filled chairs are less expensive and heavier than those filled with foam. They provide the same welcoming, sink-in feeling as conventional bean bag seats. Although they are pliable and adapt to your body, the filling may eventually become less shaped.
Foam Filling
Foam filler is made of many components, such as recycled materials or polyurethane. As a result, you get a really comfortable chair that is durable and strong enough to survive for years. You may need to shake the shredded foam occasionally as it might sometimes clump together. Foam-filled bean bags, however, are the better option if you want a chair that holds its form without causing any hassle.
Material
A bean bag’s composition greatly influences its performance and feel. Some have a more textured feel, like the Big Joe Wild Things line, while others, like Yogibo’s, are composed of a soft and elastic cotton and spandex combination.
For support and comfort, the interior materials are also important. Polystyrene beads are comfortable and lightweight, while shredded foam often provides more support.
When purchasing bean bags for children, seek fabrics that are simple to clean, long-lasting, and resistant to water and stains. For increased convenience, we advise giving family-friendly textiles and washable coverings top priority.
Dimensions & Size
Take into account the size of your room as well as the intended user of the bean bag. Though they provide you with more space to stretch out, oversized alternatives may not be the best fit in tiny areas. Larger chairs with greater weight capacities are better for adults while growing children want something sturdy.
Consider the form and style that best fits your personality. While some bean bags are built like big pillows, others have the appearance and feel of classic chairs thanks to the armrests and seat backs.
Weight
A bean bag’s weight varies according to its materials and form. While foam provides more comfort but is heavy, polystyrene bean filler is lightweight. If the chair is for a youngster, in particular, think about how portable it has to be and if grips might be useful.
Certificates
For peace of mind, check for product certificates pertaining to the materials used in the outer cover and fill. Oeko-Tex, CertiPUR-US, and the Global Recycled Standard certifications show that the products are safe and environmentally sustainable.
Cost
Depending on elements like fill, cover material, and size, bean bag chairs fluctuate widely in price. Although they can initially cost more, better solutions are often more resilient and less prone to flatten with time. Less expensive choices can eventually need replacement sooner, incurring more expenditures.
Our Top Picks
Let’s take a look at our top 15 picks for the best bean bag chairs.
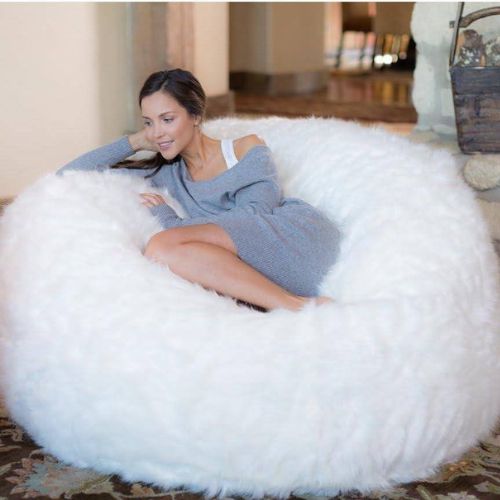
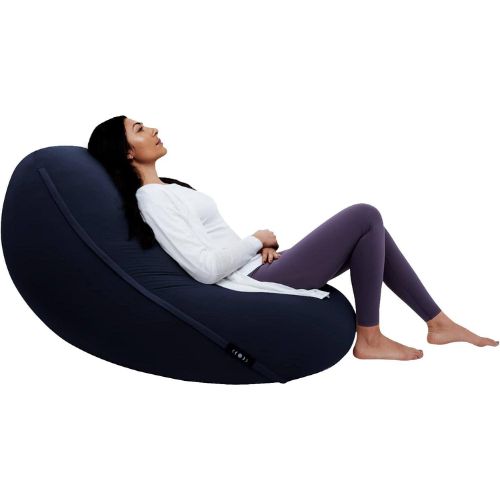
1. Yogibo Max Bean Bag Chair
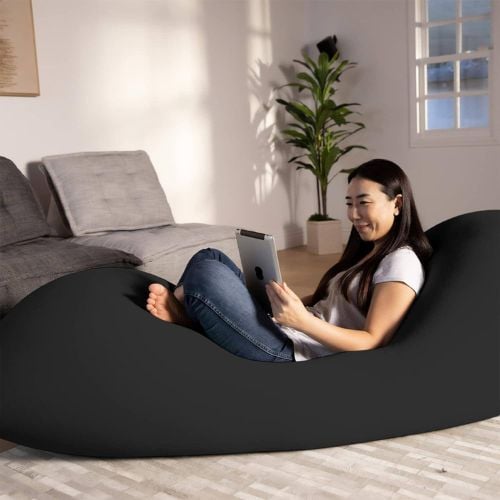
Unlike other bean bag chairs, the Yogibo Max is remarkably large, measuring 72 inches in length and 24 inches in height—the same dimensions as several futons and couches! This makes it the bean bag chairs for adults since you can use it as a chair, recliner, bed, or even a sofa. That’s one of the reasons it was our first choice. It encircles your body to provide you with comfortable reading, TV watching, or gaming.
Its cover is a comfortable cotton-spandex blend that is simple to wash, and it comes in a wide range of colors. We adored its generous dimensions, which easily seated four persons. In addition, it has EPS beads within that, regardless of how you sit, gently embrace your body.
Despite being one of the largest bean bags we tested, the Yogibo Max is still rather portable. It is easily manageable by one person. We chose it as the best overall because of its greater comfort and adaptability, even though it didn’t quite match the Sofa Sack Ultra Soft Bean Bag Chair in our testing. It is ideal for busy homes with plenty of people who like to comfortably sit together.
However, keep in mind that the Yogibo Max may not fit well in tiny places because of its large size. However, the company also has other smaller bean bag chairs if that’s a worry.
- What we like: It is quite adaptable. It takes on the form of your body. Cleaning the cover in the washing machine is simple. There are several color options.
- What could be better: The limited return window is something to be aware of.
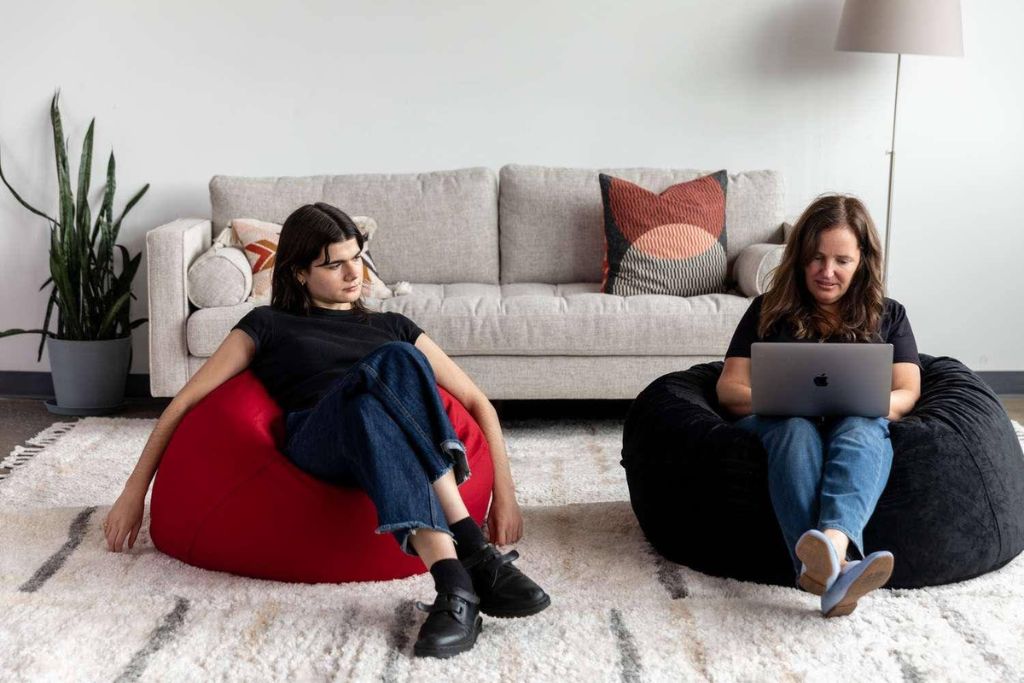
2. Sofa Sack Bean Bag Chair
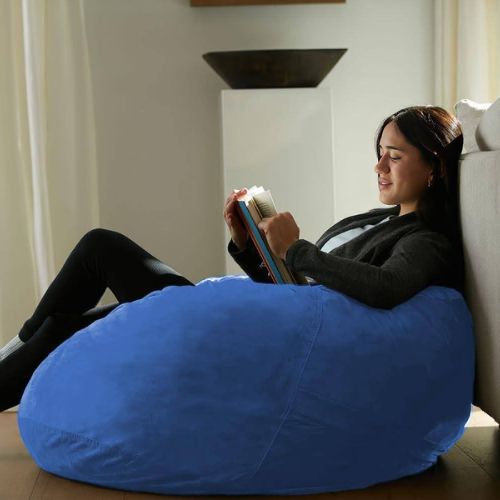
Although the Sofa Sack Bean Bag Chair seems to be a regular bean bag, it is really packed with memory foam, which makes it quite comfortable to sink into. Furthermore, foam beads won’t fly everywhere if it breaks. Compared to EPS beads, memory foam provides a stronger cushion and greater support.
Its clean appearance, ideal for a bedroom, playroom, or den, really appealed to us. It comes with a micro suede cover that is available in many colors, and you may choose between two and three-foot sizes. The 2-foot size is ideal for children and teenagers, but the 3-foot one fits one adult perfectly, in our experience. However, there’s also a large 6-foot version that can accommodate several people if you need extra space.
Although its size and comfort pleased us, we did think the cover material might have been a little bit higher quality. It seemed easier than some of the others we attempted. If you have dogs, keep this in mind since it requires many attempts to remove hair and Cheerios from the bean bag using a portable vacuum.
- What we like: It’s quite comfortable and toasty. Looks chic and comes in an abundance of colors.
- Want could be better: The materials may not be as strong as we would want.
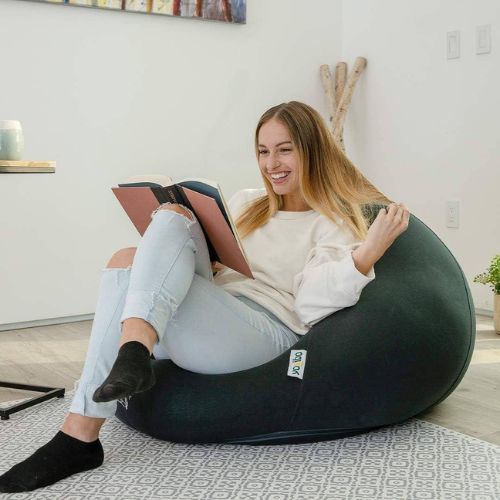
3. Big Joe Milano
The Big Joe Milano is a great option if you want a traditional bean bag chair but are on a small budget. Its chair-like shape makes it comfortable to lounge in, and its thick polyester fabric is simple to vacuum and long-lasting. It is also simpler to enter and exit than conventional bean bags because of its elevated position.
It is suitable for adults and children alike, with a weight restriction of 200 pounds—just maybe not at the same moment. If the filling begins to droop, you may even purchase refill bags to top it out; however, we advise doing this outside to prevent a mess. As is, it’s incredibly comfortable, but having the ability to change the stuffing if necessary is a good touch.
With over two dozen hues to select from, it’s simple to choose one that goes with your decor. When we tested the navy hue, it seemed just as it did online. This reasonably priced solution is ideal for homes with children and dogs since it is long-lasting and simple to maintain.
- What we like: It’s not heavy. Extremely durable and comfortable. If necessary, you may fill it up again.
- What could be better: Just a heads up, refilling might become a little bit of a problem.
4. Ultimate Sack 3000 Bean Bag Chair
The Ultimate Sack 3000, their most compact model, is three feet wide and is the bean bag chairs for kids. You may have it in a rainbow of colors made of suede or fake fur. During our testing, we were particularly impressed by the suede’s velvety smoothness.
The fact that the Ultimate Sack is so simple to clean is a major selling point for this product. We didn’t notice any static while vacuuming, and the cover is machine washable. These bean bags aren’t packed with beans but rather shredded polyurethane foam, which is soft and fluffy but could be uneven in some places. We love the 10-year guarantee it comes with—much longer than most brands—but you’ll have to fluff it up after each use to retain its form.
- What we like: Available in a rainbow of colors. A really pleasant and comfortable fabric. Simple to clean. It has a guarantee of ten years.
- What could be better: It doesn’t provide much support.
5. Comfy Sacks Bean Bag Chair
With its multiple fashionable color options, the Comfy Sacks Bean Bag Chair is sure to be a hit with teenagers. It was one of the most comfortable alternatives we tried, and its 60-inch size makes it ideal for relaxing. It was the epitome of style and material excellence, with its microfiber covering (we tested the white one). Although the fabric is really comfortable, it may get too heated on days with high temperatures.
Having said that, we did find a few problems with longevity when testing. Once hair and crumbs were trapped in the synthetic fur, vacuuming them away became a bit of a challenge. On top of that, lighter tones, like white and gray, may show stains more readily than darker ones. Cleaning up large messes would be a real pain since the cover isn’t machine washable.
It isn’t easy to move this bean bag, either. Buried under the synthetic fur makes the handle on top almost invisible. In spite of these issues, we still believe it’s the bean bag chairs for teens who want to spruce up their bedroom or dorm room.
- What we like: It looks fantastic. Memory foam blend filling. For adolescents, the bigger size is really comfortable.
- What could be better: It’s not the most resilient choice available.
6. Jaxx Cocoon Bean Bag
The Jaxx Cocoon Bean Bag is an enormous six feet wide bean bag chair that is ideal for lounging on by anybody looking for the large bean bag chairs. Due to its premium foam composition, it is more difficult to assemble than other bean bags and may need two persons; nonetheless, once assembled, it feels just like a mattress pad. The filling is luxurious and silky, but it’s not as flexible as some of the other alternatives we tested.
The polyester suede cover that comes with the Jaxx Cocoon is machine washable and comes in a variety of colors. But to thoroughly remove hair and crumbs, you may need to vacuum the area many times. Additionally, you would need two people to remove the cover so you could wash it.
Given its size, moving this bean bag around is a little difficult. Similar to large furniture items, you’ll want to choose a location for it and keep it there—for example, a floor pillow—rather than moving it about all the time. It’s also harder to move about since it lacks a handle.
- What we like: There’s plenty of room due to the large design. There’s considerable support from the foam filling. Cleaning the cover in the washing machine is simple.
- What could be better: Returns need prior clearance. It is difficult to move about and is heavy.
7. Homguava Bean Bag Chair Sofa

A bean bag chair that provides excellent support is a must-have for gamers who love to spend hours upon hours glued to their consoles. With its unique triangular form and arched backrest, the Homguava bean bag chair is ideal for supporting the head and neck. Even during long gaming marathons, you’ll be comfortable and bolstered due to its ergonomic design, big size, and solid structure.
The linen cloth outside cover is detachable and machine washable, so you can clean it anytime you want. The combination of cotton and memory foam gives it a fluffy, velvety texture that will make you feel even more comfortable. The addition of a carry handle on the rear makes it even more practical. Remember that this item is vacuum-sealed, so when you unbox it, let the bean bags chairs at least a day or two to expand to its full size.
- What we like: You won’t feel any strain because of the sturdy back. The cover is made of washable linen material. Comfortable cotton and memory foam make it an ideal filling.
- What could be better: Keep in mind that it needs at least a day or two after unpacking to grow completely.
8. Big Joe Fuf Foam Beanbag Chair
A favorite among our product testers, this bean bag chair with memory foam comes in two fabric options, a rainbow of colors, and three enormous sizes. All of our testers gave it the best possible rating, and the unanimous verdict was that the foam filling provided great pressure relief, making it an ideal bed for reading or napping. Despite its somewhat more difficult setup procedure, thicker foam fill compared to standard bean-filled choices, and compressed arrival (like a mattress in a box), the ultimate effect is well worth it. The manufacturer suggests waiting at least 48 hours for the shredded foam to expand before using it.
After several uses, our testers still raved about how simple it was to fluff up the bean bag chair and how long the foam lasted. In comparison to the usual bean bag chair, we thought it had a more solid and furniture-like aspect thanks to the high foam filling. One tester who was 6 feet 2 inches tall said the big size was just right.
- What we like: Shredded memory foam is great for relieving pressure. Cleaning is quick and easy with the detachable cover. Ideal for unwinding and kicking back.
- What could be better: It was a little tough for a few of the testers to stand up.
9. Chill Sack Bean Bag Chair
Ideal for adults of all ages, this 5-foot bean bag chair is very popular. With an amazing 18000+ ratings, it is a popular seller on Amazon and provides quick, simple shipping. It is packed, like many others, with shredded memory foam to ensure that it conforms to your body for optimal comfort and support.
It may need some fluffing after extended usage, and it may take several days for it to completely expand out of the package. Our testers enjoy that this particular chair is available in 30 various shades, ranging from neutrals to vivid colors, to complement the style of any area; some are even planning on getting one.
Remember that some reviewers have had problems with the foam fill. Thus, we advise you to be patient when allowing it to expand while setting everything up. You can manually break apart any big foam bits that are creating lumpiness.
- What we like: The foam filling offers excellent support. It is available in thirty shades to complement any decor. It’s a suitable size for one or two individuals.
- What could be better: It might take some time to set up, according to some reviews.
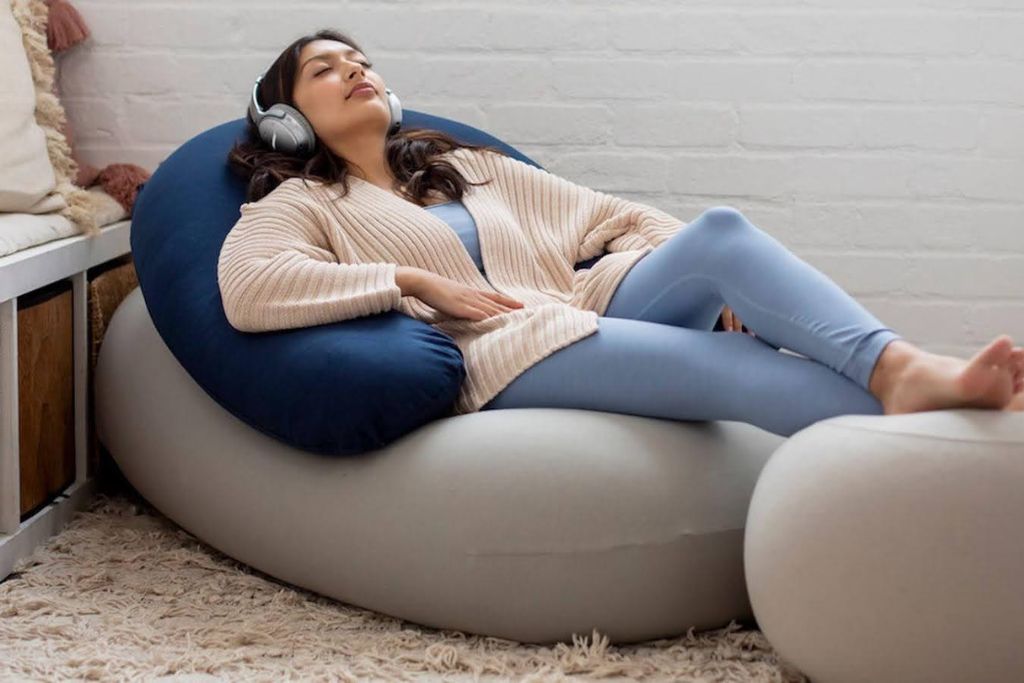
10. Moon Pod Bean Bag Chair
The Moon Pod is a weightless lounging product that has raised over 1.2 million dollars on Kickstarter. It is ideal for any area since it is lightweight and provides stability and flexibility thanks to its high-density bead fill.
Our testers like its distinctive teardrop form and construction, which provide enough body support while sitting, relaxing, or lying down. Testers praised its full-body pressure-relieving effect, even going so far as to proclaim it life-changing.
This multipurpose, comfortable bean bag chair is perfect for lounging with a book or playing video games with friends. In addition, the firm provides bigger sizes for sharing as well as add-ons like the lunar lift footrest and crescent backrest, which testers said further improved the Moon Pod’s already unmatched comfort.
- What could be better: It gives off a weightless, zero-gravity sense. Suitable for laying down, sitting, and relaxing. Provides sufficient back, hip, and neck support.
- What could be better: Due to its amorphous form, it could not go well with other house decor.
11. Yogibo Pod X
With 16 color options, the Yogibo Pod X personal size costs around $219. Yogibo states that its dimensions are a little over 2.5 feet in width, depth, and height, making it appropriate for people of various weights. Made of a cotton and spandex combination, the outer cover is resistant to paws and claws from dogs.
With a sewn-in handle, the 11.5-pound luxury bean bag chairs for adults are lightweight and portable between rooms. Yogibo estimates that it occupies 4 square feet of space.
The Yogibo Pod X’s inside is full of EPS beans, which relieve pressure points while you unwind. For $79, you may purchase extra Pod X covers if you’d like a different color.
Yogibo notes that based on use, the inner fill may eventually compress. It shouldn’t wear down too rapidly by sitting on it, but families with energetic children who play and bounce on their Yogibo a lot may need to replace the beads every year or two. Yogibo charges $35 for a 3-pound bag of refill beads and $59 for a 7-pound bag.
- What we like: It fits neatly and comfortably in small spaces. You can use the machine to wash the cover. Available in sixteen distinct shades.
- What could be better: For more comfort, you may need to add additional fill over time.
12. Big Joe Dorm

The Big Joe Dorm bean bag chair is double-stitched for added durability and weighs only a little over 5 pounds. With armrests on both sides and a 27-inch-tall back, it has a structural appearance. There’s a built-in drink holder and storage pocket in one arm. In addition, the rear has a handy carrying grip.
The Big Joe Dorm is available in 10 color variants, including dual-tone patterns and plain colors, for a price of $70. Big Joe says it’s best for children, teenagers, and little adults.
Despite the fact that the cover is non-removable, Big Joe’s SmartMax material, which is waterproof and stain-resistant, can be hand-washed with a gentle bristle brush.
Big Joe provides single or double refill packets to revive the chair, acknowledging that all bean bag chairs eventually lose part of their form. Additionally, they provide free delivery on bean bag chairs inside the continental United States.
- What we like: It has a side pocket and a built-in drink holder. Comes at a cost that is affordable. Provides a selection of ten different colors. Portable and light in weight.
- What could be better: Over time, you may need to refill it. You cannot take off the cover to wash it.
13. Yogibo Double
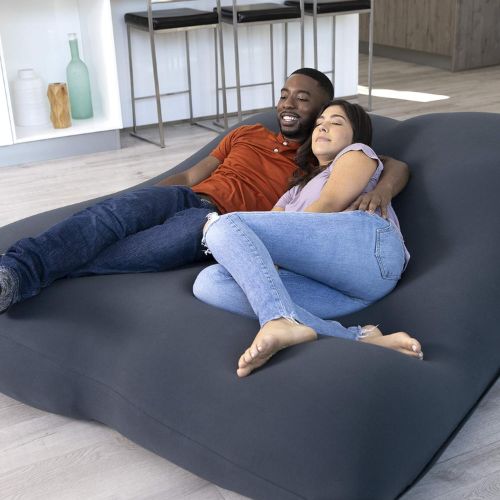
The Yogibo Double is true to its name—it has two Yogibo Max-sized bean bags packed under a single cover. With this configuration, you may have two different seats by separating the inserts and using them as a single, giant bean bag chair. Please be aware that the covers for the two Yogibo Maxes inside are not included, so you will need to buy them separately.
Due to its large size, Yogibo recommends utilizing the Double as an additional bed or as a lounge space for up to four people. Moving the chair may take more than one person since it weighs forty pounds and lacks handles.
Although the Yogibo Double can be used as a bed, a flat bean bag chair, or even a sofa when pushed up, its 6-foot length may not be sufficient for some people to sleep comfortably. Yogibo asserts, however, that the bag’s support has no weight restriction.
The detachable outer cover is safe to machine wash and is composed of cotton and spandex.
- What we like: Suitable for both sleeping and sitting. It’s the most extensive option Yogibo provides. You can take off the cover and give the machine a wash.
- What could be better: It costs more than $500. It lacks carrying handles and is heavy.
14. Jaxx Juniper Outdoor Bean Bag Chair
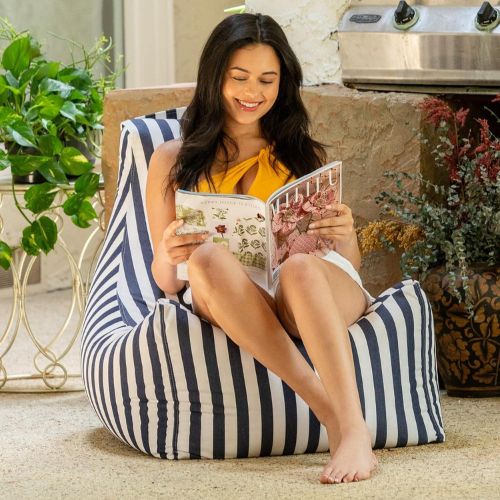
We advise searching for textiles that are resistant to UV rays and moisture if you’re in the market for a bean bag chair for your outside space. This is met by the Juniper Outdoor Bean Bag Chair, which has a cover made of woven acrylic fabric that is waterproof and weatherproof, meaning it won’t fade in the sun or develop mold or mildew. In addition, the cover is readily machine-washable and detachable.
The Juniper bean bag chairs are filled with polystyrene beans and have a structured seat design. The elevated backrest is a little over two feet tall, and the seat height is fifteen inches. The 15-pound Juniper chair has a reinforced upper back handle that makes it simple to move to your outside area. Pool decks and other slick outdoor surfaces are no match for the chair’s ballistic ripstop nylon fabric, which is made to last. More than 20 color variations, including solids, stripes, floral patterns, and dual tones, are available in the Jaxx Juniper Outdoor Bean Bag Chair line.
- What we like: Due to its UV and water resistance, the fabric won’t fade or catch mold. Double-stitched to provide strength. Offers more than 20 options for color and design.
- What could be better: Depending on the color and design you choose, the cost may change. Should you need to return it, the cost of shipping will be on your own.
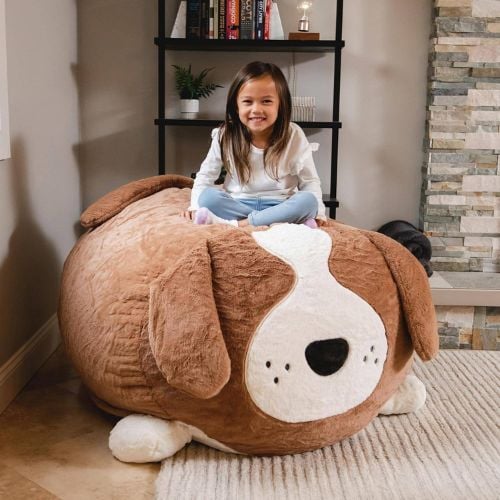
15. Big Joe Wild Things
We advise choosing bigger bean bag seats for children. If you want to make your child’s bedroom seem comfortable and relaxing, think about adding two bean bags and a tiny, low-side table.
Big Joe’s Wild Things collection bean bags, with their huge dimensions of over 3 feet broad, almost 4 feet long, and just over 2 feet tall, could be exactly what you need. These bean bags are available in fun animal-themed patterns such as Francesca Feline, Rocky Racoon, and Kenny Canine.
Parents will find it more convenient because the polyester knit cover is machine-washable and detachable. Big Joe compares the cover material’s consistent, silky feel to that of a fleece jacket. Repurposed, shredded polyurethane foam—which, according to Big Joe, never flattens—makes up the fill.
The 34 pounds of weight per chair may be too much for smaller children to handle alone. However, larger children and adults will find it simpler to manage the chair because of the sewn-in grips on the top.
- What we like: Soft fleece-like animal patterns. Has handles sewed in for ease of mobility. You can wash the cover in the machine.
- What could be better: It can be too heavy for some children to handle on their own. The selection of styles is restricted.
Final Verdict
Our top pick for a flexible, well-made, and really comfortable bean bag chair is the Yogibo Max. It passed all of our testing and is by far our top choice. This large chair conforms to your body to provide comfort regardless of your seating position, and it’s so adaptable that you can use it as a sofa, floor cushion, chair, and more.
Take into account the Big Joe Milano Standard Bean Bag Chair if you’re on a tight budget. It provides durability and adaptability, making it our cheap bean bag chairs. It’s a great option since it’s also quite supportive.
Explore More: