If you’ve ever browsed the laundry aisle, you’ve likely noticed the wide array of the best laundry detergents available. From liquids to pods, powders, and sheets, these products are designed to clean your clothes and leave them smelling fresh.
When it comes to choosing a detergent, our advice is to opt for one that meets your needs and preferences. Look for a detergent that not only cleans effectively but also aligns with your preferences in terms of ingredients, price, environmental impact, scent, and type.
To help you find the best option, we dedicated hours to researching and testing various laundry detergents, including popular brands like All, Ecos, Gain, and Arm & Hammer. We put these detergents to the test in our homes, laundering stained items such as napkins, cotton tees, and bath towels. Whether it was spaghetti sauce, chocolate, or a splash of wine, we observed how these detergents performed in tackling tough stains.
By assessing their effectiveness, comparing them to each other, and rating them across different categories, we were able to identify the top-performing laundry detergents.
Our Top Picks
| Category | Product |
| Best Overall | Gain Original Liquid Laundry Detergent |
| Best Scented Pods | Tide Pods Laundry Detergent |
| Best Liquid | Tide Laundry Detergent |
| Best Scent | HEX Performance Laundry Detergent |
| Best Pods | Gain Flings |
| Best Natural | Molly’s Suds Laundry Detergent Powder |
| Best for Sensitive Skin | All Free Clear Liquid 2x Concentrated Laundry Detergent |
| Best Eco-Friendly | Earth Breeze Laundry Detergent Sheets |
1. Gain Original Liquid Laundry Detergent
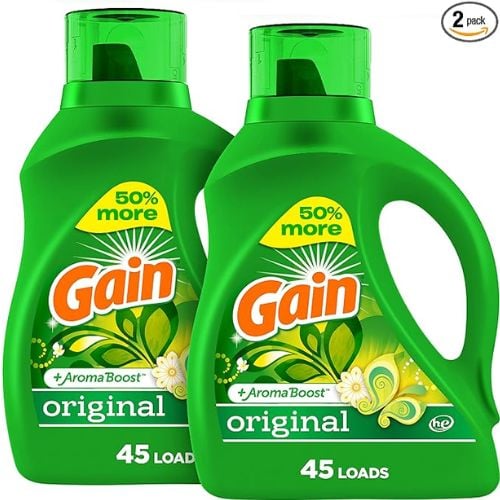
Go no further than Gain if you’re looking for a trustworthy laundry detergent free of unnecessary bells and whistles. With every wash, their Original Liquid Laundry Detergent left our clothing feeling and looking clean and had an inviting scent that we loved. It also amazed us with how well it removed stains.
We were astounded at how well this detergent removed stubborn stains like wine and chocolate, even surpassing other detergents in the process. It was also quite effective in eliminating foundation stains, which are notoriously difficult to remove without the need for additional stain removers.
This detergent’s ability to wash our clothing without leaving any residue is one of its greatest features. Every article of clothing we had felt immaculate, and our towels were fluffy and soft.
Interestingly, Gain’s Original Liquid Laundry Detergent costs less than the average of all the detergents we tested, even with its outstanding performance. We strongly advise trying Gain if you like liquid detergents.
What we like: We love how fresh-smelling this detergent leaves our clothing, and it works wonders for removing stains.
What could be better: If an unscented option were offered, that would be fantastic.
2. Gain Flings
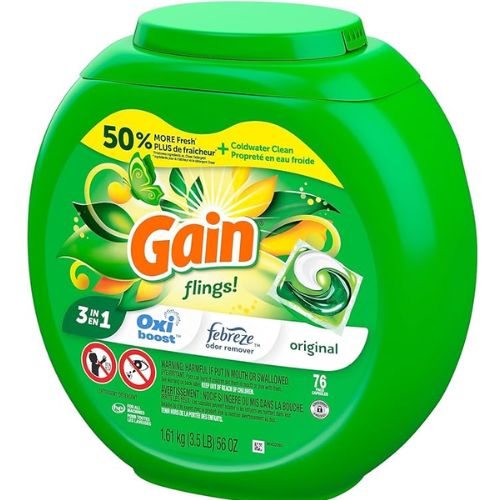
As the package includes the ideal quantity, laundry detergent pods are a practical substitute for powder or liquid detergents, eliminating the need for guesswork in measurement. Plus, they leave no mess behind, which is particularly useful if you have kids or pets in the house. Gain’s Fling Pods were the best-performing detergent pod among the ones we tested. They removed stains well and left our garments’ texture intact after washing.
Even though these pods’ stain-fighting capacity wasn’t as potent as Gain Liquid’s—some spots didn’t entirely go away—we still suggest them because of how well they cleaned overall in comparison to other brands. Furthermore, unlike with other laundry solutions, our garments didn’t smell like detergent after washing.
What we like: These useful pods keep garments smelling fresh and are ideal for washing in cold water.
What could be better: When it comes to removing stubborn stains, they fall short of liquid detergent.
3. Molly’s Suds Laundry Detergent Powder

One notable feature of this powdered laundry detergent is that it is devoid of harsh ingredients like parabens, phosphates, and artificial perfumes that are often included in other detergents. Actually, there are only four basic constituents in it: sea salt, magnesium sulfate, sodium carbonate, and sodium bicarbonate. Due to this, it has an A rating from the Environmental Working Group (EWG) and is a great option for those who like to use green cleaning solutions.
This detergent worked exactly as well as other non-natural detergents we tried despite being a natural choice. Chocolate and wine are two stubborn stains that it successfully removed, even totally eradicated, while lightening stains like jojoba oil.
The fact that this detergent eliminates stain stink from clothing without adding any additional fragrance is one of the things we love about it. There are perfumed detergent alternatives available, however, if that’s your preference. We also liked how simple it was to scoop the detergent and how clean our clothing felt after washing.
What we like: Free of harsh ingredients like parabens and artificial perfumes, this detergent performs well.
What could be better: Its ability to remove greasy stains is not the best.
4. Bryt Laundry Detergent Sheets

Compared to liquid or powder detergents, the best laundry detergent sheets are a more recent choice that is lightweight and less untidy. Because they don’t include plastic, they’re also environmentally friendly and take up less room in your laundry room.
Bryt Laundry Detergent sheets were our favorite among the laundry detergent sheets we tested. They have a lovely “fresh linen” scent and clean just as well as liquid detergents without leaving any residue on clothing.
The fact that these sheets don’t remove stains as well is a drawback. Only the chocolate stain came out fully, and we discovered that they were only able to remove around 50% of the stains that we examined. For optimal results, if you want to use these sheets, we advise spot cleaning with a laundry stain remover before washing.
What we like: These sheets don’t leave any residue behind and smell great on clothing. They are also environmentally friendly.
What could be better: They have trouble removing stubborn stains.
5. Dropps Sensitive Skin & Baby Detergent
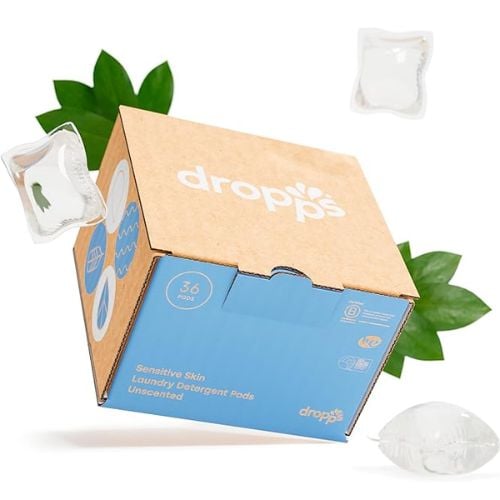
For those with sensitive skin, the Dropps Sensitive Skin & Baby Detergent Pods are ideal. Fragrances, dyes, phthalates, parabens, phosphates, and optical brighteners are all absent from this vegan detergent. It has an A grade from the EWG because it is so delicate that it is safe to use on both newborns and dogs.
This detergent removed wine and chocolate stains from our T-shirts rather well. However, it didn’t perform as well as other natural choices we tried when it came to difficult stains. Other stains, meanwhile, were only slightly lighter. In spite of this, unlike other detergents we tested, our garments didn’t feel filmy after washing, and several T-shirts even kept their wrinkles. The peace of mind that comes from using such a delicate mix makes it worth the price, even if it is more expensive than other alternatives.
What we like: These pods don’t have any irritants like enzymes and are devoid of scent and color.
What could be better: They have trouble removing stubborn stains.
6. HEX Performance Laundry Detergent
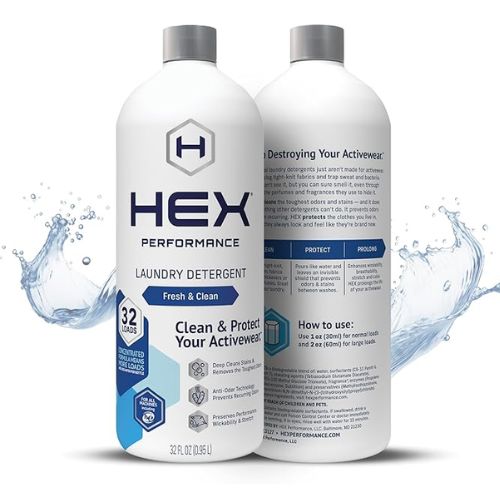
Laundry detergents are your best bet when it comes to stain removal. Hex Performance Laundry Detergent is a product you may want to try if you deal with spills and messes often. When compared to other detergents we tested, this concentrated detergent performed better than average and proved to be fairly efficient against stains. It considerably reduced an oil stain and totally eliminated chocolate, wine, and even stubborn foundation stains.
Hex Performance Laundry Detergent not only removed stains from our clothing but also left them fluffy and free of stiffness. One drawback, however, is that after washing our garments, we detected a little, hardly perceptible chemical odor. We still suggest this product in spite of this little problem, particularly given its potent stain-fighting capabilities.
What we like: This detergent removes makeup, wine, and chocolate stains with ease.
What could be better: The garments had a faint chemical odor after using them.
7. Love Home and Planet Ultra Concentrated Laundry Detergent
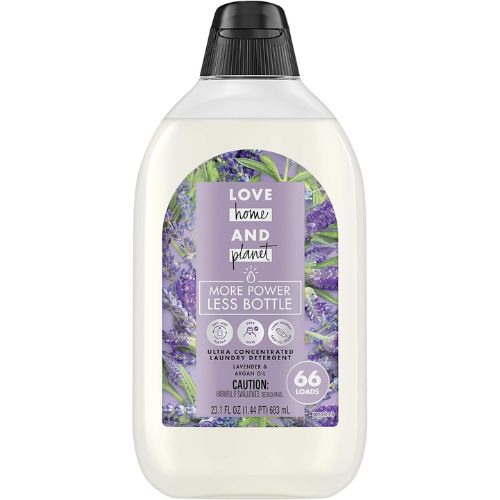
For several individuals, the fragrance of their laundry detergent has equal significance to its cleaning efficacy. After washing, clothing smells amazing thanks to Love Home and Planet Laundry Detergent’s lovely combination of lavender and Moroccan argan oil. If you don’t like lavender, you may also get it in Rose Petal & Murumuru. In addition, this best smelling laundry detergent is devoid of alcohol, phosphates, dyes, parabens, and other harsh ingredients.
The performance results were inconsistent. After washing, our garments felt softer and were free of residue. With the exception of the chocolate stain, which showed considerable improvement, we discovered that it didn’t successfully remove all of our stains. Therefore, you may need to use more stain removers in addition to this detergent. It costs more than the typical detergent as well. That being said, this is a decent option if you’re searching for something fragrant.
What we like: This detergent smells deliciously of lavender and argan oil and leaves clothing feeling softer.
What could be better: You’ll need to use a different stain remover since it doesn’t work well on stubborn stains.
8. Tide Pods Laundry Detergent
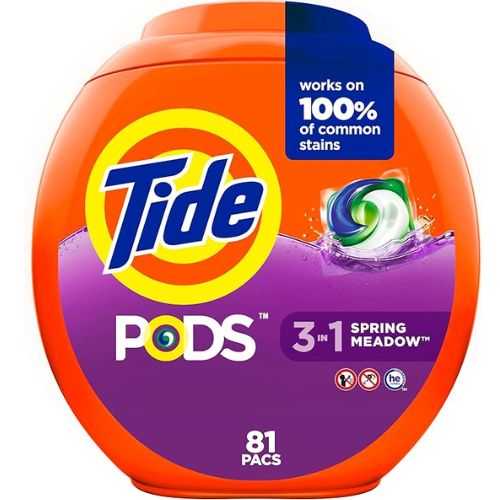
If you detest doing laundry, you’ll be grateful for items that make the chore easier. Tide Pods simplify washing by removing the necessity for measuring detergent; just add a pod and begin the cycle. These pods are an excellent option in terms of convenience.
For those who want a clean-smelling laundry without too much fragrance, we found the perfume of spring meadow to be invigorating without being overpowering. Our garments were softer and had no residue after washing; however, one towel felt a little rigid.
Although this product is easy to use and generally successful, our laundry still had some stains after using it. All of the products had noticeable stains after washing. Before washing, we advise pretreating any spills if you decide to use this detergent.
What we like: Clothes smell nice after washing thanks to these handy capsules.
What could be better: After washing, the towels felt a little stiff.
9. All Free Clear Liquid 2x Concentrated Laundry Detergent
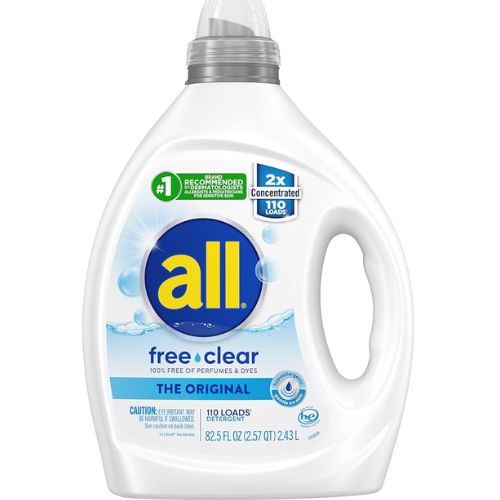
All Free Clear Laundry Detergent is a fantastic choice if you want unscented laundry detergent. This detergent has no colors or fragrances, and it leaves a soft “clean” smell behind.
All Free Clear’s highly concentrated solution works very well at eliminating stains. We discovered that it almost totally removed an oil stain and removed dirt, wine, and chocolate stains off our T-shirt with ease.
Our clothing was smooth and flexible after washing. However, one T-shirt seemed a little stiff. Our towels were fluffy. In spite of this, we heartily endorse this detergent because of its superior stain-fighting capabilities and reasonable cost.
What we like: This detergent works well to remove stains and has no colors or scents.
What could be better: After washing, one T-shirt felt a little stiff.
10. Ecos Plastic-Free Laundry Detergent Sheets
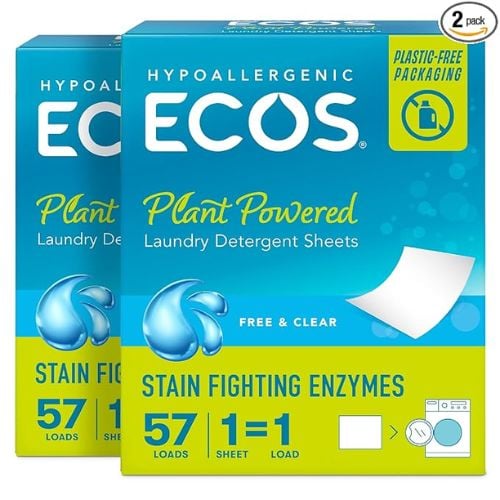
You can be sure that Ecos washing sheets are ecologically friendly since they are our top choice for the Best Eco Friendly laundry detergent. They’re devoid of formaldehyde, phthalates, and dyes, and they come in recyclable cardboard packaging. Moreover, they are really simple to use—just add one sheet to every washing cycle. These sheets are the answer you’ve been seeking if you have a tiny laundry room or want to conserve space.
You may need to use a specific stain remover in addition to the sheets for really stubborn stains. But after being cleaned using these sheets, the majority of the things smelled wonderful and felt softer. When the sheets were in the package, there was a faint chemical smell, but after washing, it vanished, and the garments smelled clean.
They’re less expensive than the median, at around $0.25 per load, which makes them an economical, environmentally responsible, and practical option all around.
What we like: The packaging of the best organic laundry detergent is biodegradable and recyclable. There are just plant-based substances. Their usage is simple.
What could be better: Products can get damaged if the box becomes damp.
11. Arm & Hammer Laundry Detergent

We value Arm & Hammer’s Sensitive Skin Free & Clear Liquid Laundry Detergent as our Best Value option since it’s not just reasonably priced (a big bottle can handle up to 107 loads!) but also has a hypoallergenic, mild formula that is devoid of fragrances, colors, and preservatives. It makes use of the strength of Arm & Hammer baking soda, a reliable household name.
When we tested the best laundry detergent for sensitive skin, we detected a little chemical odor, but after washing, it went away, and everything smelled clean. The bottle’s design makes pouring and portioning simple with its measured markings on the top and handy handle.
Targeted stain removal was the one area in which this option failed, a problem that many of the products we evaluated had trouble with. If spills and stains often happen in your home (particularly if there are small children around), you may want to have an additional stain remover on hand or think about going with one of our better options. However, this one is something to think about if you’re searching for a reasonably priced solution with mild cleaning capabilities.
What we like: It has no colors or fragrances and is hypoallergenic, especially made with delicate skin in mind. It has no fragrance.
What could be better: Stain removal effectiveness is lacking.
12. Grove Co. Laundry Detergent Sheets
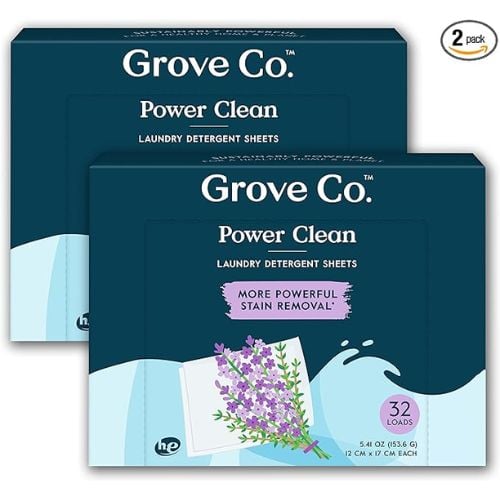
Though they may be the newest thing in laundry products, the best natural laundry detergent sheets are still something to think about. Unlike conventional detergents, they are usually devoid of plastic, dyes, perfumes, and optical brighteners. They are also lightweight and small. Moreover, their ease of storage makes them perfect for little laundry facilities. Grove Co. sheets work well for maintaining the quality of your clothing as well. Items cleaned with Grove sheets were softer and less rigid after washing and drying, particularly the towels. Laundry smells clean since the detergent contains only natural essential oils and plant extracts, which give it a lovely lavender and blossom scent.
It’s crucial to remember that these sheets could not be appropriate for removing stubborn stains, just like many of our selections. They worked best, according to our tests, on light to medium-sized loads without a lot of stains. Furthermore, their pricing is higher than the norm, coming in at $0.40 per load as opposed to the $0.25 median. Nevertheless, we still think they are deserving of the title of best non toxic laundry detergent given their general ease and environmentally beneficial design.
What we like: Storing them is convenient. They use plant-based, eco-friendly products. It has a pleasant, delicate smell. They leave everything fluffy and velvety.
What could be better: Their effectiveness isn’t as high as that of some other detergents.
13. Tide Laundry Detergent
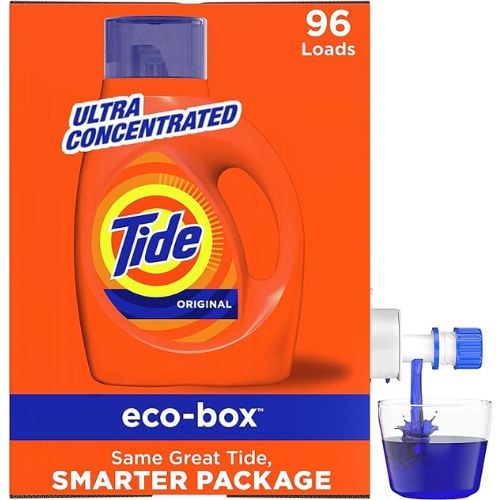
This product, like many detergents, offers many positive aspects as well as some places for improvement. It is excellent at cleaning materials, first and foremost; while some stains remained, it was able to remove most of the wine and sauce stains, oil, and chocolate without the need for any pre-treatment.
Positives also include the fragrance, which is delicate, somewhat sweet, and flowery without being overbearing or perfume-like. The fragrance fades after the things dry, leaving them smelling fresh. Furthermore, the dried materials have no stiffness or residue, and the towel becomes substantially fluffier than it did after washing with regular detergents.
There is a problem with the box itself, however. Refills are available separately, which makes them sustainable and reusable. However, the spout might be difficult to use. Despite the obvious directions and markings on the cap, several testers had trouble finding the perforated twist nozzle and dispensing the correct quantity of liquid. However, as one tester noted, you can certainly manage the Tide in a box as well if you can pour a glass of wine from a box.
What we like: The contents of the best liquid laundry detergent have a nice scent and are rather clean, plus the box may be filled with other items.
What could be better: Remember that there is a learning curve when it comes to utilizing the spout and box.
14. Earth Breeze Laundry Detergent Sheets

A lot of us are trying to be more environmentally conscious, and selecting a laundry detergent that minimizes waste is one simple way to do this. This detergent comes in handy sheet form, which makes storage easier and more effective, as opposed to powders, pods, or liquids.
These sheets are ideal whether you’re traveling and not sure whether your lodging will have detergent, camping, or living in a small apartment. Simply put a few in your luggage. Because the cardboard container is biodegradable and recyclable, you can instantly reduce your carbon footprint without having to do any additional work.
To avoid misunderstanding or the typical error of applying too much detergent, the container clearly indicates how many sheets to use according to the size of the load. It eliminates the need for speculation!
Nevertheless, in terms of stain removal without pre-treatment, these laundry detergent sheets are not very effective. All stains were still visible, with the exception of the chocolate stain, which was substantially eliminated. Still, every item was delightfully soft and residue-free.
Two of the articles had not wrinkled after drying; however, the linen napkin and the white tee both had several apparent creases. Unusually, the delightful citrusy, flowery scent of the detergent persisted on all cleaned objects. When you weigh the benefits and drawbacks, 27 cents for each load seems like a fair price for such a useful tool.
What we like: It is ideal for travel and has an luxe scent.
What could be better: Remember that you will need a different preparation for stains.
15. Babyganics 3X Fragrance-Free Baby Laundry Detergent
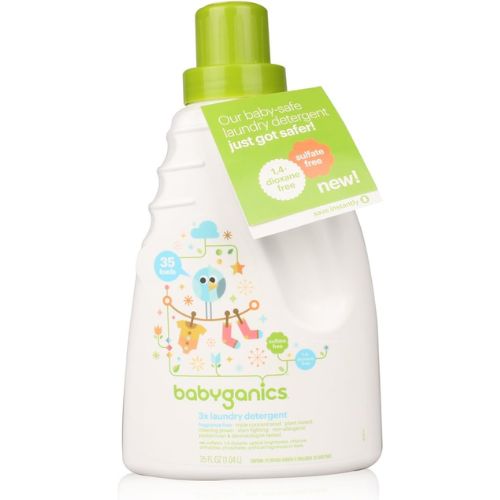
Although it’s a liquid detergent, this one is more concentrated, so you’ll need less of it for each load. Additionally, as it doesn’t include any smell, it is safe for sensitive skin, particularly that of newborns and young children who often have sensitive skin.
Particularly when pretreated directly on stains, this best baby laundry detergent blend of plant-derived cleaning ingredients, such as coconut oil and palm kernel oil, efficiently eliminates microscopic dirt stains. Harder stains, like as blood or oil, would, however, need more care. However, it’s important to remember that many ordinary detergents have trouble removing these kinds of stains on their own without the need for a stain remover.
What we like: It is devoid of scents and colors. The best clean laundry detergent makes use of cleaning chemicals made from plants.
What could be better: Not for usage when traveling.
Final Verdict
All things considered, we suggest the Gain Original Liquid Laundry Detergent because of its pleasant scent, effective cleaning and stain-removing capabilities, and reasonable cost. After washing, we were pleased with the way our clothes felt and smelled, and we discovered that measuring and using this detergent was simple.
Our Testing Process
We put 30 different laundry detergents to the test and assessed them on a number of factors, including smell, usability, and efficacy. We stained four different pieces of clothing—a cotton T-shirt, an athletic polyester T-shirt, a terry cloth towel, and a linen napkin—in order to evaluate their stain-fighting skills.
Jojoba oil, chocolate, wine, dirt, spaghetti sauce, foundation (on the cotton T-shirt), and chlorophyll (on the polyester T-shirt) were among the materials that discolored each item of clothing. Next, we used the manufacturer’s suggested detergent dosage to clean these products.
We looked at the texture and stain condition of the clothing after washing. We observed whether they were stiff or felt fluffy and soft. Furthermore, we observed if the detergent’s fragrance persisted on the clothing and assessed the detergent’s overall fragrance.
We determined which laundry detergents were the finest by taking all of these aspects into account.
How to Buy Laundry Detergents
1. Types
Laundry detergents come in a variety of forms, the most often used being liquids, powders, and pods.
Pods: Pre-portioned packets of pods make things convenient by removing the need for measurement. Although they often cost more and need more plastic packaging, they are excellent for families.
Powders: Detergents in powder form are economical and efficient in eliminating stains. Depending on the size of the load, you may change the quantity used, but in order to avoid residue, they must completely dissolve in water.
Liquids: Pre-dissolved liquid detergents lessen the possibility of leaving residue on clothes. Although they are adaptable for pretreating stains, they may be messy to measure.
2. Formula
Natural laundry detergents are an excellent choice for those who are allergic to strong cleaning agents. Seek for gentle components free of abrasive substances like bleach. Surfactants and enzymes are essential components of efficient cleaning. Sensitive skin responds well to eco-friendly solutions like Dropps Sensitive Skin Laundry Detergent Pods, the best nontoxic laundry detergents.
3. Scent
A range of fragrances sourced from plants, such as flowers and herbs, are available in certain detergents. On the other hand, use unscented products like All Free Clear Laundry Detergent if you’re sensitive to fragrance.
In Case You Missed It!