One out of 10 American homeowners has used drywall to decorate their interior. These are easy to install, repair and very flexible when you want to renovate your home. Sanding drywall is an integral part of the drywall installation and today, we are going to share with you the most efficient way to sand drywall.
Drywall Sanding is easy when you know how to do it. But for performing an effective drywall sanding job, you need to be patient, have some essential tools in hand, know how to do it and finally, execute!
So, collect these tools for sanding your drywall efficiently-
Drywall Sander
Sandpaper
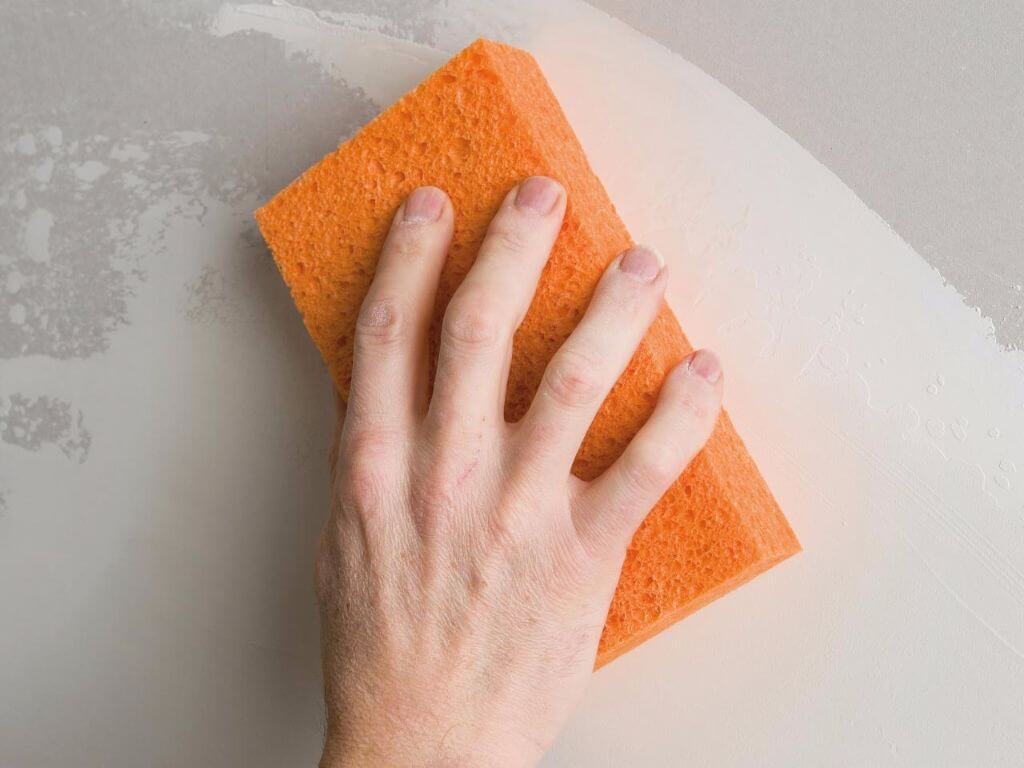
Sanding Sponge
Marker (a pencil will do the work)
Dust collecting tray
Safety equipment
As you have the necessary tools, follow these easy steps to complete your job-
1. Take Proper Safety Precaution
Before you start sanding, take proper protective measures for preventing any subsequent illness due to the contact of the drywall dust.
A protective cloth, eyeglass, gloves, and a respiratory mask will save you from harmful drywall dust. Inhaling dust can cause severe respiratory problems and exposure of eyes to the dust can have a negative impact on eye health as well.
Despite using a dustless drywall sander, The Tooly says that around 5% dust remains uncollected and can harm your health.
2. Block all Entrances to the Jobsite
For making your house safe from those 5% uncollected dust, you should seal off all the openings of the room. Doing this will keep the dust on the job site and it will be easier for you to collect them later.
If you sand drywall with an open window or a door, get ready to see all of your house dirty with the drywall dust.
3. Mark the Wall
As you are now ready to go with the sander, you should start marking the wall for smooth sanding. Mark the places where you need to sand more for their raised surfaces, or where you need less as the surface is inadequately primed.
Apart from marking, you should divide the wall into different sections so that you can work efficiently. Those sections will reduce your risk of leaving any surface unsanded.
4. Start with Corners and Edges
When you start sanding, make sure to sand the corners and edges first. Since corners are the hardest to sand places, you will need the help of sandpaper and sanding sponges for a perfect finish.
Another important thing is that you must sand maintaining a line. Maintaining a line will help you to do the task faster as you will not sand a place unnecessarily in this way.
5. Collect Dust in a Dust Tray
When you sand manually with a sanding sponge or sandpaper, ensure that you pick a dust collecting tray to collect the dust at the source. Doing so will minimize dust exposure and keep the room relatively clean for you.
6. Look for Blemishes
After the sanding is done, you now need to look for any surface that remained unsanded or surfaces that need more sanding.
You’ll find this type of surfaces around the corners and electric outlet openings. These surfaces are hard to sand with an electric sander, and thus most of the time remain unsanded or sanded less than necessary.
Final Words
As you know how to sand drywall, you should be able to effectively sand your own home or help your friend finding the perfect rhythm to sand his house.
Ensure that you clean everything perfectly from the room after the sanding work is done as leaving the dust in the room will harm your respiratory health.
We all rely on energy in both our working and private lives – so when there is a power outage, many people go into panic mode. However, while we certainly need access to electricity in our day to day lives, we risk causing continued damage to the environment as well as to our own pockets because of the way it is burdening the environment.
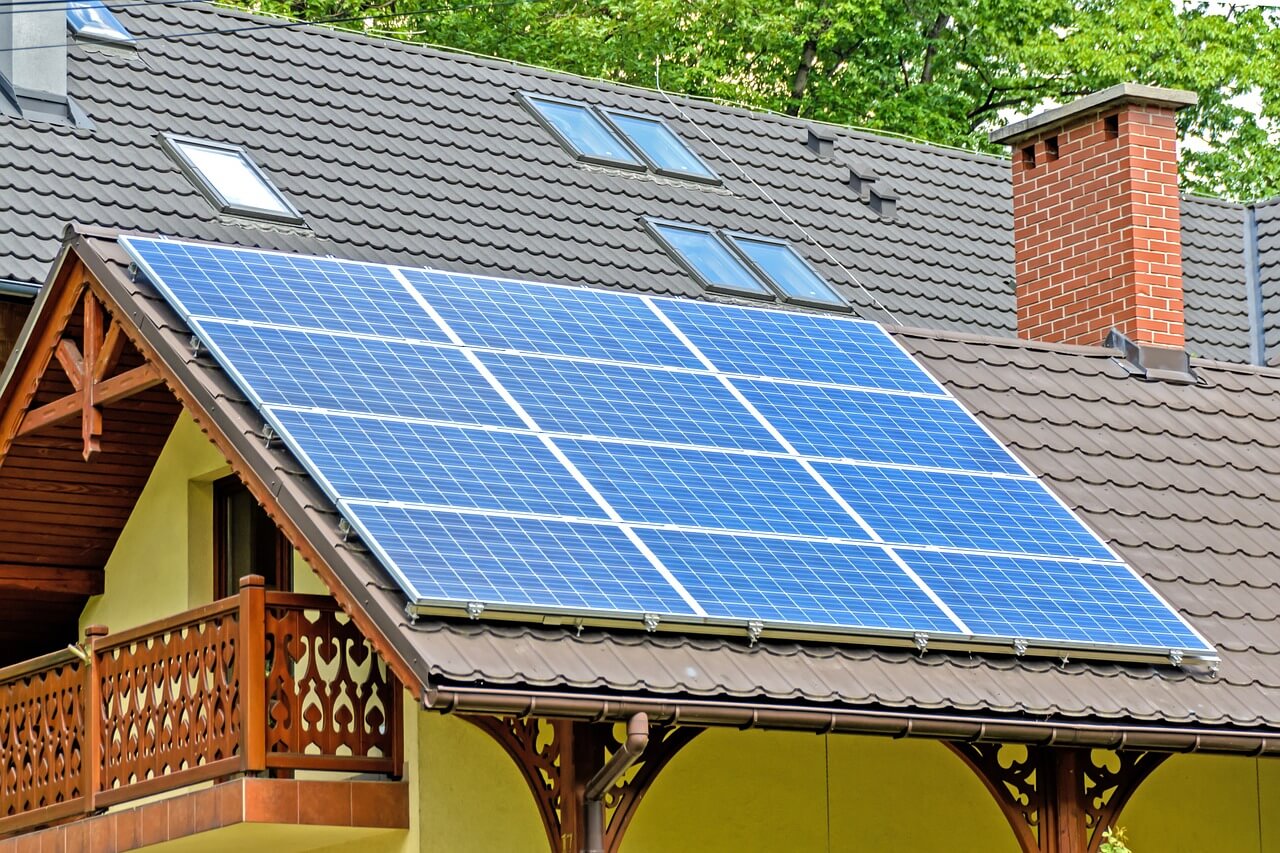
The good news is that in today’s modern world, there are other alternatives you can turn to for your energy, such as solar power. More and more people have decided to utilize solar power over recent years, and this is because it offers a range of benefits. In this article we will look at some of the benefits you can look forward to when you use solar energy:
What Are the Benefits of Going Solar?
There are many benefits that come with using solar energy for your home, your business, and even when you are out and about. Some of the main benefits include:
Easy Access
A lot of people have taken an interest in solar power in recent years, and this has resulted in increased demand as well as increased supply. It means that you can now enjoy easy access to solar power, including power for your home from a green energy company Houston and portable power via one of the many portable solar power generators available. Yes, you can make use of solar power no matter where you are.
Environmentally Friendly
Many people today are eager to find solutions to the burden of our lifestyle places on the environment. The damage to the planet and environment has been highlighted over recent years, and everyone has to do their part in order to help.Solar energy is green, sustainable energy, which means that you can get the power you need while also protecting the environment.
Generally, using solar energy can benefit the environment in the following ways:
It helps conserve water: The regular production of electricity makes huge a large volume of water. For example, water is used to refine fuel, move fuel in pipes, and even cool off generators after use. But with solar energy production, you can avoid the risk of running short of water.
It does not produce pollution: When producing electricity, certain gases are emitted into the environment, causing the air people breathe to be harmful. On the other hand, with solar energy production, you can ensure that no pollution from your supply will hurt the environment and endanger people’s health.
It reduces the use of fossil fuels: With solar energy, you don’t need to use regular electricity to power up your home. As a result, you’re able to minimize the use of fossil fuels, thereby cutting down the dangers they produce, such as toxic gas emissions.
Saving Money
Most people wish they had a little extra cash in their pockets at the end of the month, but often most of the budget is taken up by housing costs andhousehold bills. The cost of energy has skyrocketed over the years, with many facing huge bills every month or quarter for their energy usage. Since solar energy takes its power from the sun, you won’t have to worry about dealing with sky-high energy bills any longer, making this a great way to save money.
Furthermore, if you want to get the most out of your energy savings with solar panels, you may consider purchasing a solar buyback electricity plan. Generally, consumers with solar panels can sell back power to the grid through their utility. This is called Net metering. For instance, in Texas where electricity is deregulated, you can consider Net metering in Texas by shopping for a solar buyback electricity plan from a retail electricity provider. This way, you can get more savings from your electricity bills in the run.
Perfect for Properties and Adventurers
Another great thing about solar energy these days is that there are so many options. You can get solar power for your home or business premises, which can make a huge difference in terms of costs and the environment. However, you can also turn to portable solar power when you are enjoying the great outdoors such as on a camping trip, on a road trip in your caravan, or spending the day hiking.
A Great Option in the Modern Age
Solar power provides us with a great option in today’s modern world. We can still continue to get the power we need to run our homes, use our devices, and more, but we can also help save some money and the environment.
On Friday, March 27, 2020, Michael McKinnell, a British-born American architect, passed away at the age of 84, from COVID-19-induced pneumonia. He is known for his work in Boston City hall. He also won the international open contest to design this building, along with his professor Gerhard Kallmann.
The City hall is designed in an architectural style known as “Brutalist.” The construction was started in 1963, and it was opened for the public in 1968. This year this remarkable building completed 52 years!!
McKinnell explained the architecture & the genesis of the design in an interview in the book Heroic: Concrete Architecture and the New Boston (2015), “We believed that concrete was the appropriate material to use because it symbolized longevity, it symbolized permanence. It also symbolized faith in the future—that the building was going to last. And that was an act of resistance against the expendable commercial architecture of the time.” he further added, “If we could have, we would have used concrete to make the light switches.”
Boston City Hall was a significant success. Michael McKinnell was a student at Columbia University when he entered this competition. Right after winning the competition in 1962, he also established his firm known as Kallmann McKinnell & Knowles (now known as Kallmann McKinnell & Wood) in Boston.
McKinnell was born on December 25, 1935, in Salford, England. He attended Salford Grammar School and later graduated from the University of Manchester in 1958. In 1960, he completed his master’s in architecture from Columbia University.
Did you know that his firm Kallmann, McKinnell & Wood has received 8 honor awards, including the 1984 Firm of the Year award from the American Institute of Architects?
They completed not only local projects like Cambridge’s American Academy of Arts and Sciences building, Back Bay MBTA station, and Hynes Convention Center but also international projects like Washington University’s School of Business and Public Administration, Becton, Dickinson and Company headquarters in Franklin Lakes, New Jersey. He was also appointed as a professor in the U.S. Commission of Fine Arts in 2005 (2005-2011). He also lectured and taught at many other universities all across the globe, such as Harvard’s Graduate School of Design and Massachusetts Institute of Technology.
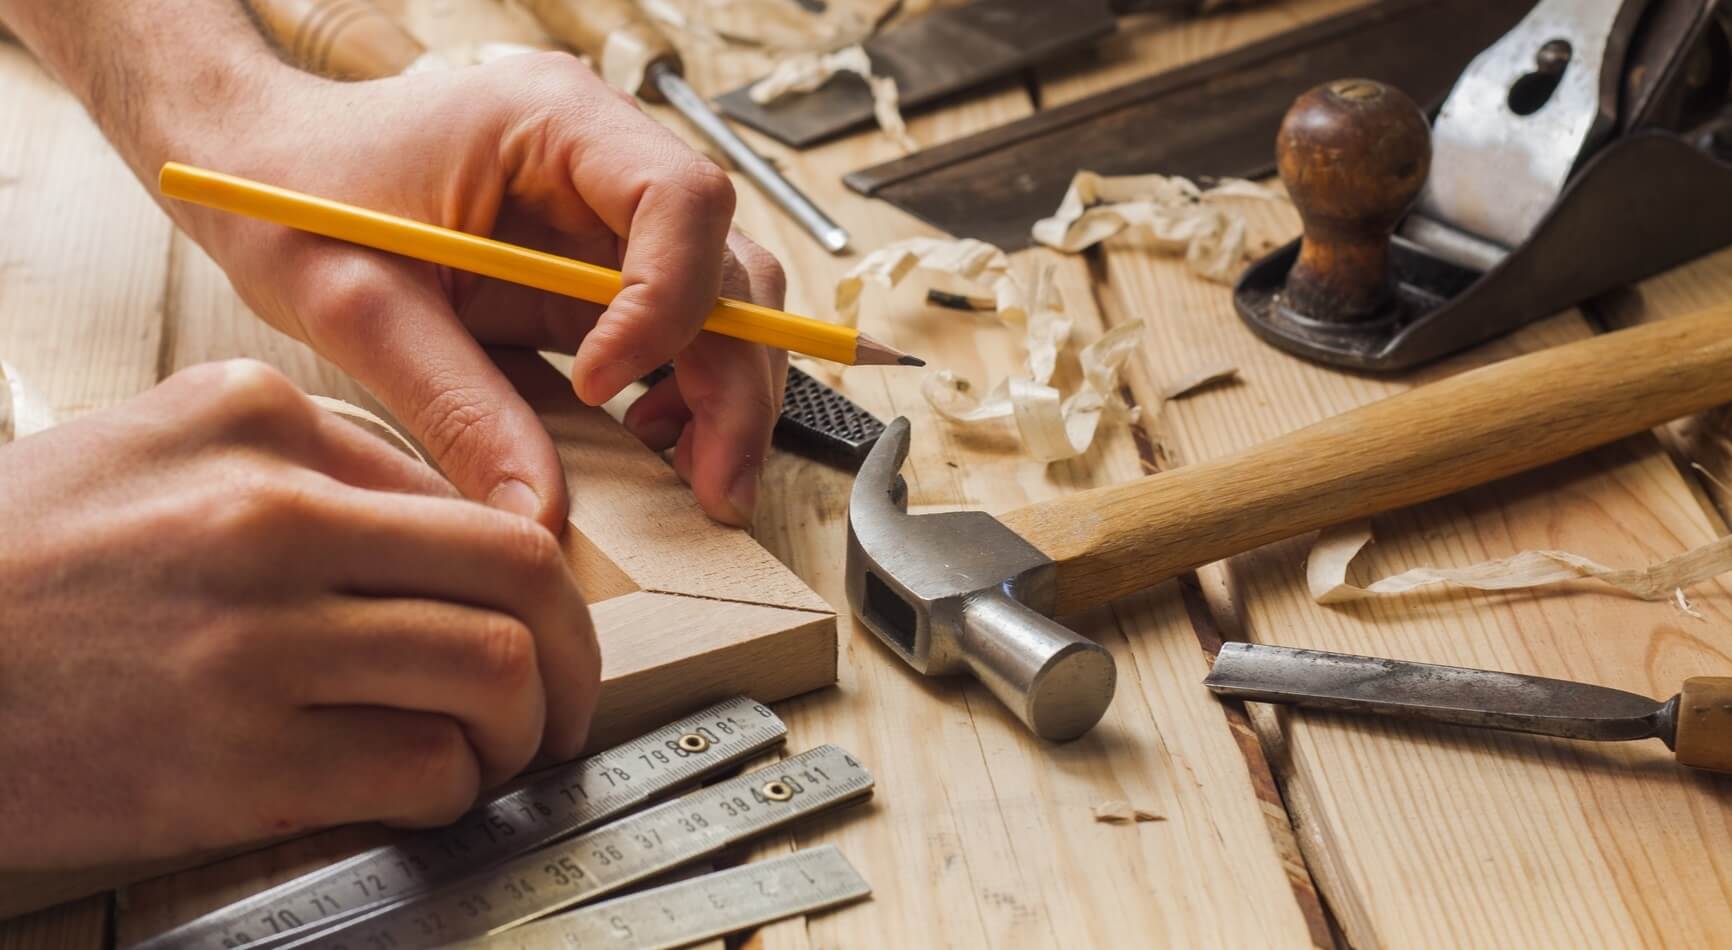
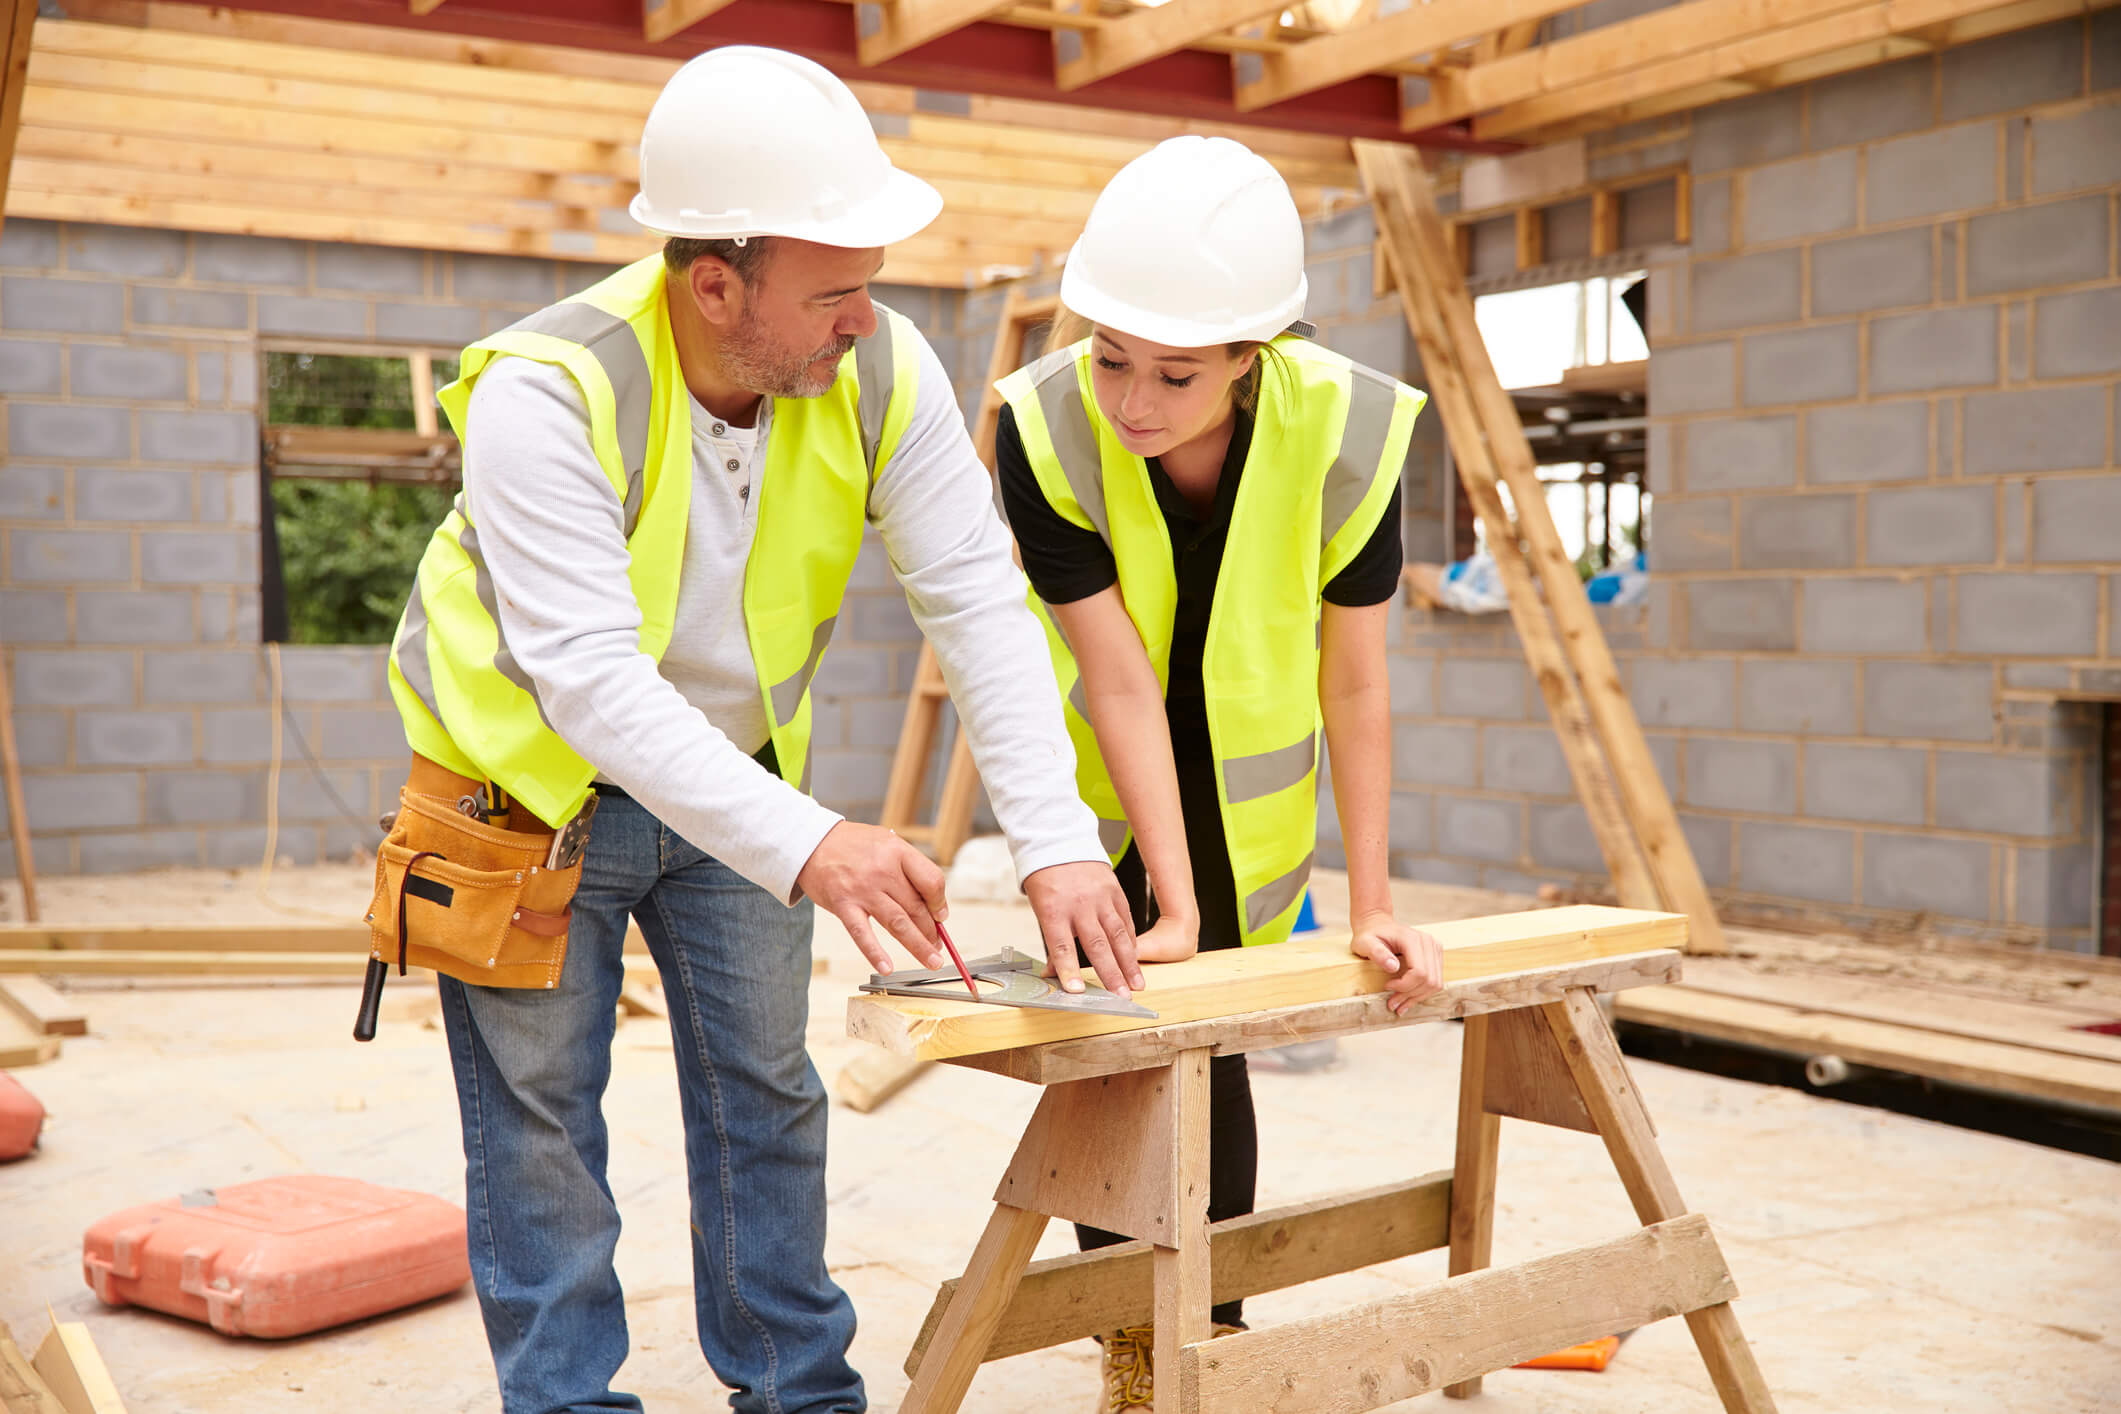
The construction business is an important asset to society as many of its functions depend on the work of the construction industry. Usually, when we hear the title of a carpenter our basic perception of the word is a blue color worker who can merely fix our cabinets and doors. However, a carpenter’s profession is much more than just fixing a few cabinets and doors, they are responsible for constructing buildings, ships, and many other forms of the framework. In the older days, carpentry usually involved working with naturally existing wood, and carpenters did the basic work of building frames and such, now their job description involves much more.
Although carpenters are now available in almost every neighborhood, when you have a specific job such as constructing the frame of your house it can be challenging to select the best tool bags for carpenters for you. However, if you live in Umea, the choice is easy as Byggföretaget Umeå AB offers the best Snickare Umeå has to offer.
In the times before the printing press was invented, the skill of carpentry was learned from person to person with the seniors passing on all their skills and knowledge to their students and teaching them the tricks of the trade. However, after the introduction of the printing press, experts in the field started publishing books on the topic and making their knowledge widely available. In times today, there are numerous places you can go to gain information about the trade. As for the earlier works of carpentry and architecture using wood, not many buildings still exist to date. However, the few that exist include Nanchan Temple and Greensted Church in China and the stave churches which are constructed in the 13th century in Norway.
The trade entered the European region at the beginning of the 16th century, since then the industry has made its space in the community and has claimed a vast part of the basics of any construction job under their name. Whether it is a commercial project you are working on or a residential one, carpenters will be a major part of that job from setting the framework to building the kitchen, bathroom, and doorways, doing the floors, paneling, or molding as well as building the roofs and ceilings of your house or office. Carpenters can handle almost anything from building a new house, building an extension, or even refurbishing your property. Some of the main skills a carpenter has are:
Remodel or rework: changing the structure of the property according to your desires.
Install Stairs: be it a straight, curved, or spiral staircase you desire, carpenters will install the best choice for you making sure it is safe to use.
Create Banisters: installing banisters is an important part of installing staircases as it makes them safer.
Create and install kitchens: kitchens are one of the most important rooms in a building. Having a kitchen that is poorly shaped can affect a household negatively.
Create a framework: if the framework of a building is not constructed properly, the building might not be safe for residential or commercial use. Skilled carpenters make sure the work they do is of top quality.
Install doorways: having a solid framework for a doorway is important as with the seasons changing from warm to cold doors can expand or reduce in size. However. if the framework and installation are done properly problems will not arise when the doors are in use.
Lay floors: laying the floors of a building is a tricky job and construction workers have to be careful about it being straight and level. They also have to account for the weight that is going to be on that floor.
Apply wall covering: having walls in a house or workspace that you dislike or ones that have gotten rough or old is not an ideal situation for any individual. Carpenters can be a blessing in cases like these where old walls can be replaced with new ones.
Install beams: beams add support to structures as well as have various uses from being a decorative element in a space to being a support to a swing you want to hang in your living room.
Apart from the skills mentioned above carpenters can also work on any interior or exterior work of your property as well as make doors, window frames, built-in cupboards, and construct furniture. Therefore, a carpenter is an irreplaceable resource in society as their skills cover a vast area of basic needs of society.
A carpenter needs to master skills other than working with wood and construction. They need to be able to understand and follow designs whether they are made for an individual home or a bigger-scale architectural project. It is a requirement for them to be able to read and understand these instructions to avoid any miscommunication. It is also crucial that a carpenter can communicate effectively with the individuals or company they are working for to avoid any confusion. Confusion between the carpenter and the client will create problems for the client as well as a waste time of for both parties.
Therefore, an individual needs to choose a company they trust for constructing their desired project as well as provide them with clear designs and instructions to be followed to avoid any confusion and miscommunication. This saves time for both parties and saves from a lot of raw materials resources being wasted. This also saves the owners of the project a lot of money and hassle. Whether it is a construction of a house or business the faster it is completed the sooner the owners can start to put their property to use.
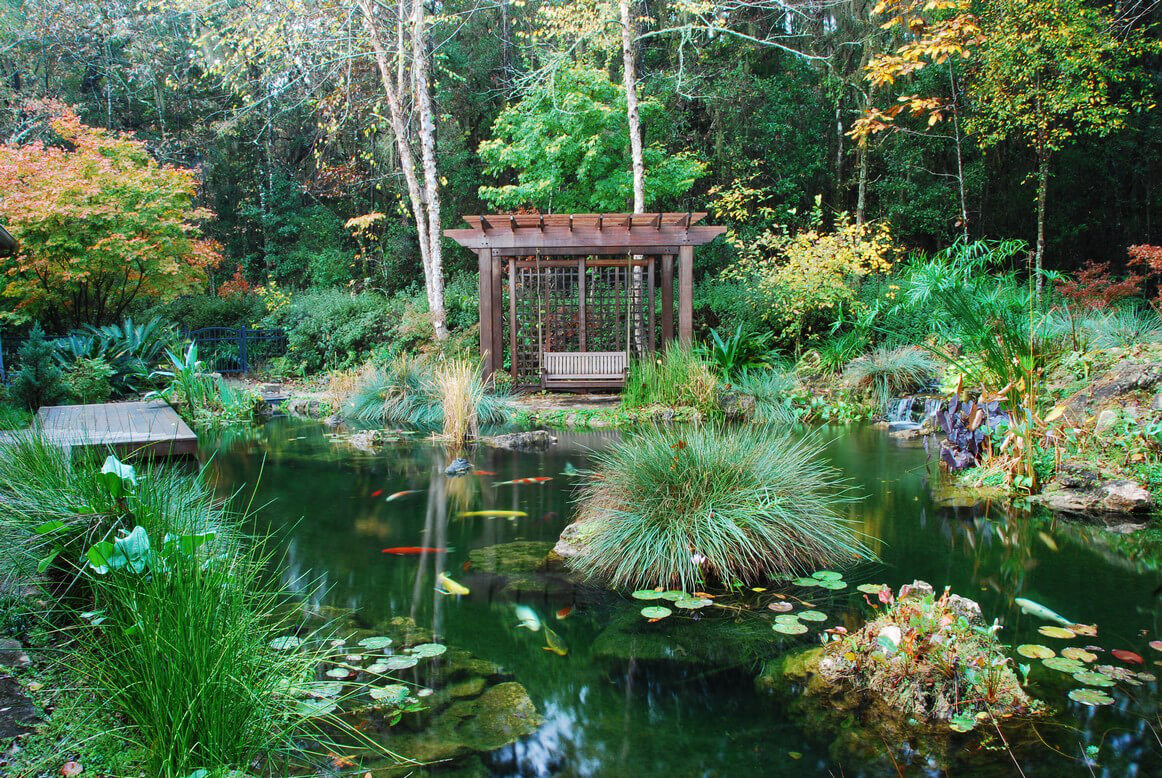
It is every homeowner’s dream to own a pond with beautiful fish, plants and possibly a miniature waterfall. Having a pond is an affordable luxury attainable for homeowners which they can then enjoy whenever they please, a personal vacation spot, so to say. However, few homeowners are aware of the maintenance that goes into keeping a pond clean and the water fresh and suitable for fish to survive. To run a low-maintenance pond effectively needs a good filtration system to keep the water clean and fresh. However, with a huge variety out there, it can be difficult to decide the best pond filter for your pond.
There are three main types of pond filters available in the market, a biological system, a mechanical system, and a sterilizer system. These three filtration systems usually work together to create the perfect living conditions for your fish and aquatic plants.
Mechanical System
Mechanical filters clean the pond water by trapping and removing debris and sediments from the water before it settles to the bottom. The mechanical systems are built in such a way that they can hide all the plumbing and the pump from view making it easier to enjoy the pond without having to look at pipes and pumps all the time. The two kinds of pond skimmers available in the market are box skimmers or floating skimmers. The function, however, is the same for both the filtration systems. The water enters the skimmers and the large debris is caught in the basket of the skimmer.
Biological System
These types of filters break down the pond water by using bacteria, turning harmful components into beneficial ones which can then be used to fertilize and improve the growth of aquatic plants. Water comes into the biological filtrations system after it has already been skimmed by a mechanical system. The water is then cleaned further from smaller particles of debris using a long pipe containing filtration media. Biological filters are also designed to create a small waterfall with the filtered water providing you with the beautiful sound of falling water.
Sterilizer System
This kind of filter works by using a UV light to kill the harmful bacteria in the water. However, if you have an adequate biological and mechanical system working in your pond the need for sterilizing the water of the plant reduces.
Aquatic Plants
Many individuals add aquatic plants to their ponds mainly for the beauty they bring to it. However, what a lot of people fail to realize is their filtration properties, numerous water plants keep the water fresh by absorbing the toxic components present in the water. if these toxins are left in the water they can result in algae development as they are the food for algae.
By using a combination of the biological and mechanical filtration systems homeowners can make sure their ponds require very low maintenance while always having fresh water and a nice environment for the fish to survive. Moreover, by adding the aquatic plants, aeration rocks, and fish to the pond you create a healthy eco-system that you can enjoy anytime you desire.
Conclusion
Pond paradise? Filtration’s the hidden hero! Combine biological and mechanical wonders, sprinkle in plant power, and voila – a low-maintenance oasis awaits. So ditch the algae blues, embrace filtration’s friendly hand, and let your backyard symphony begin!
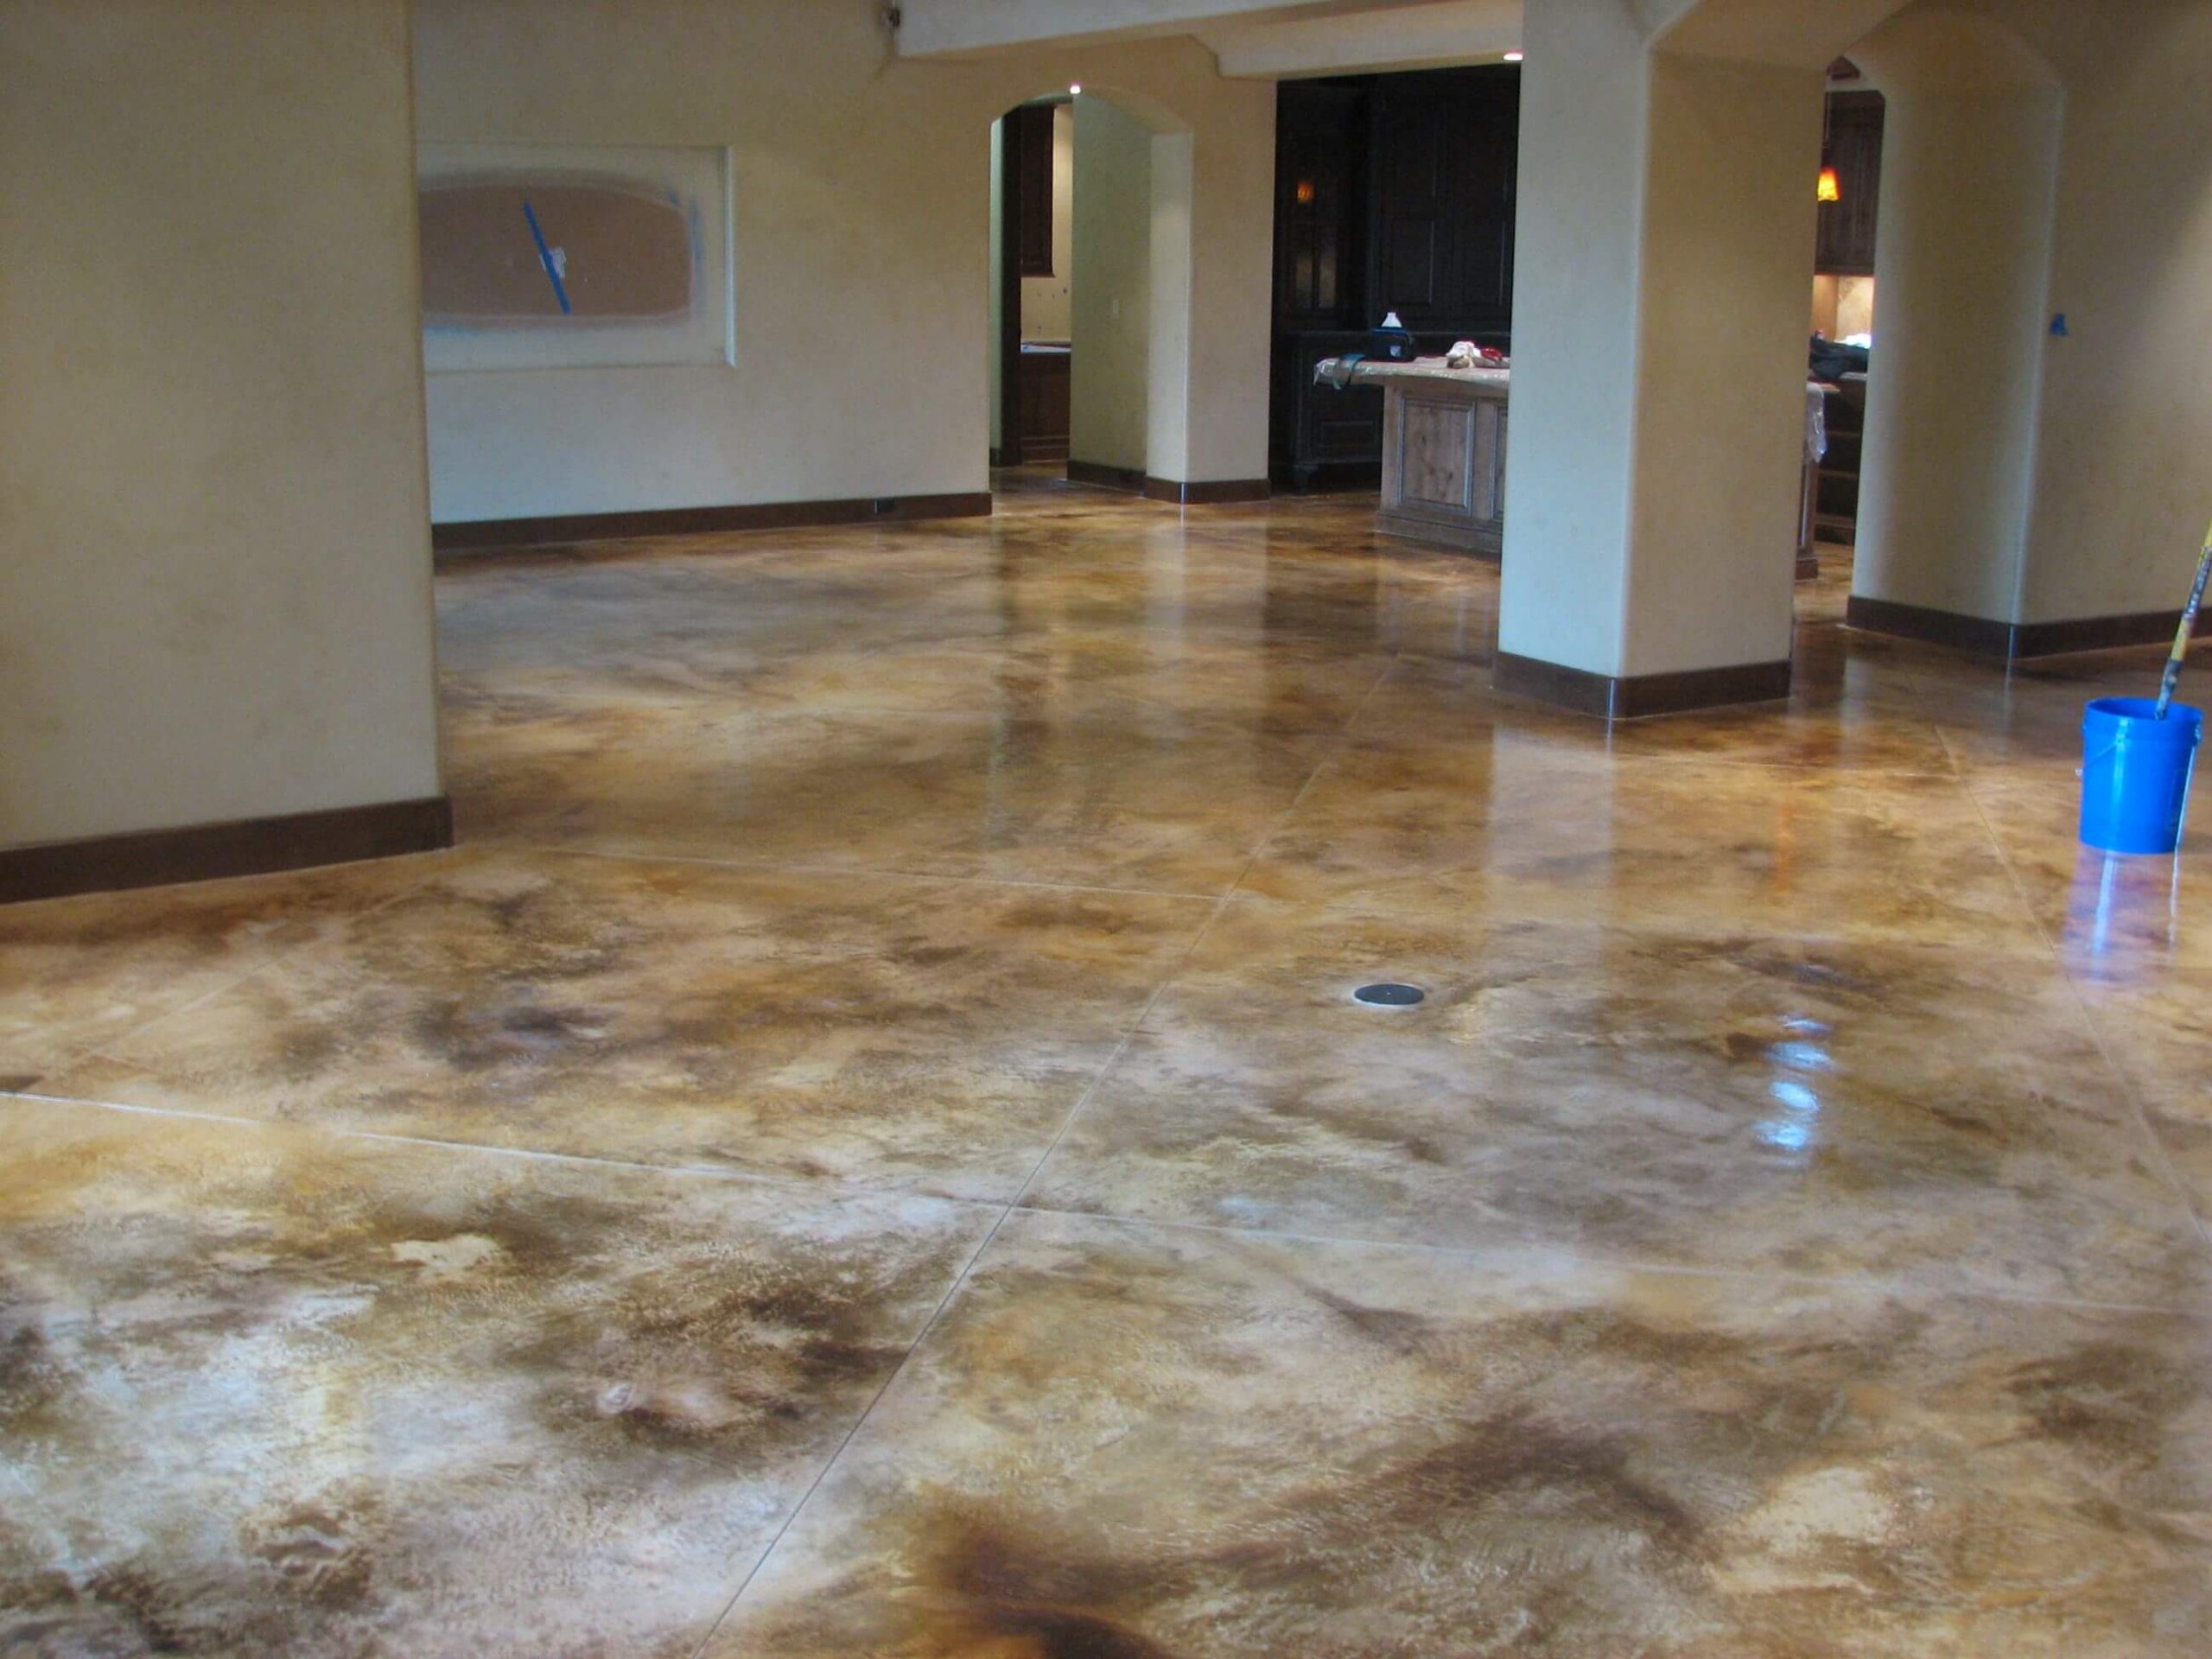
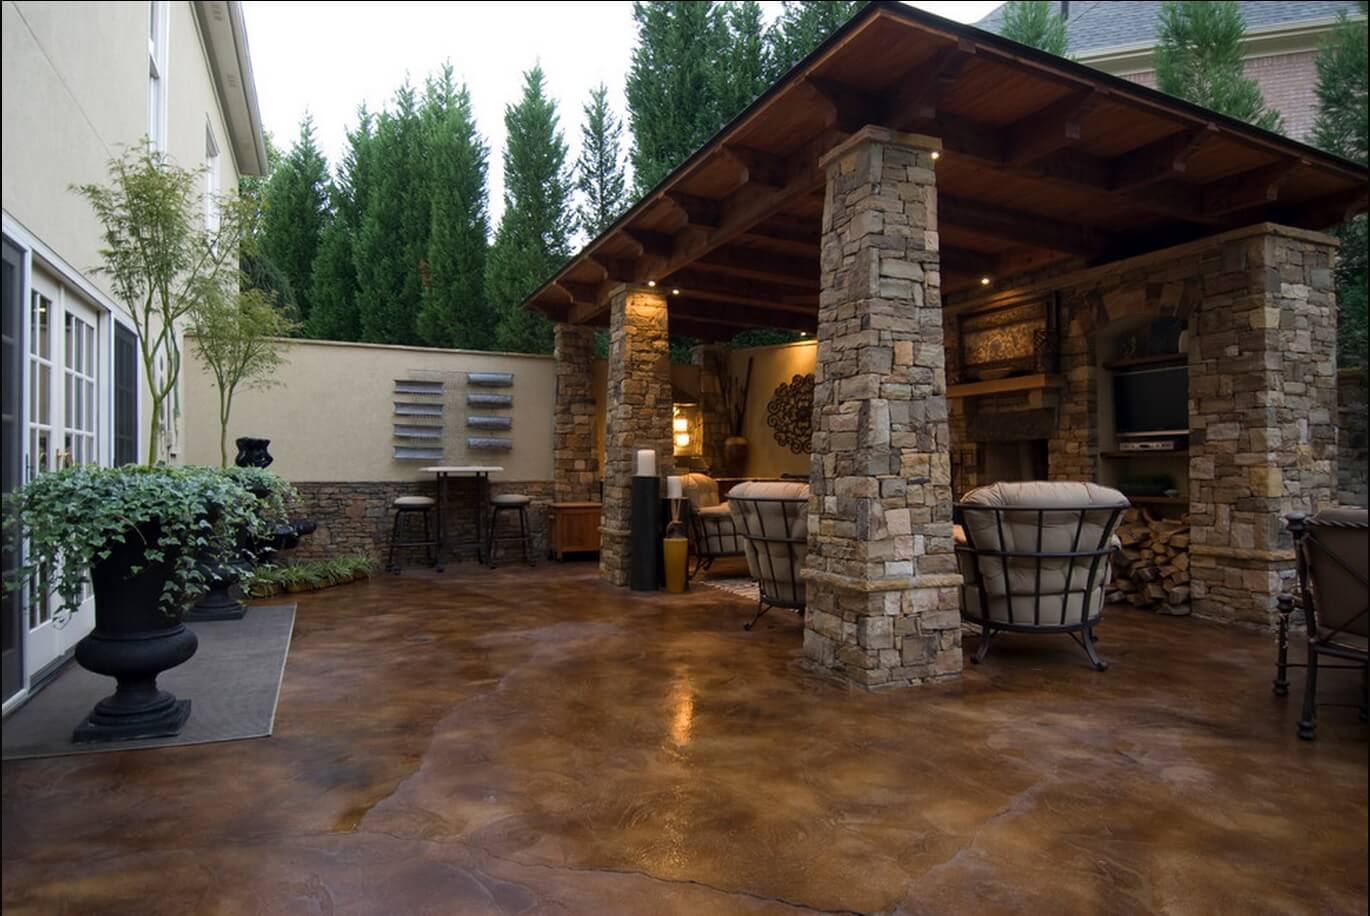
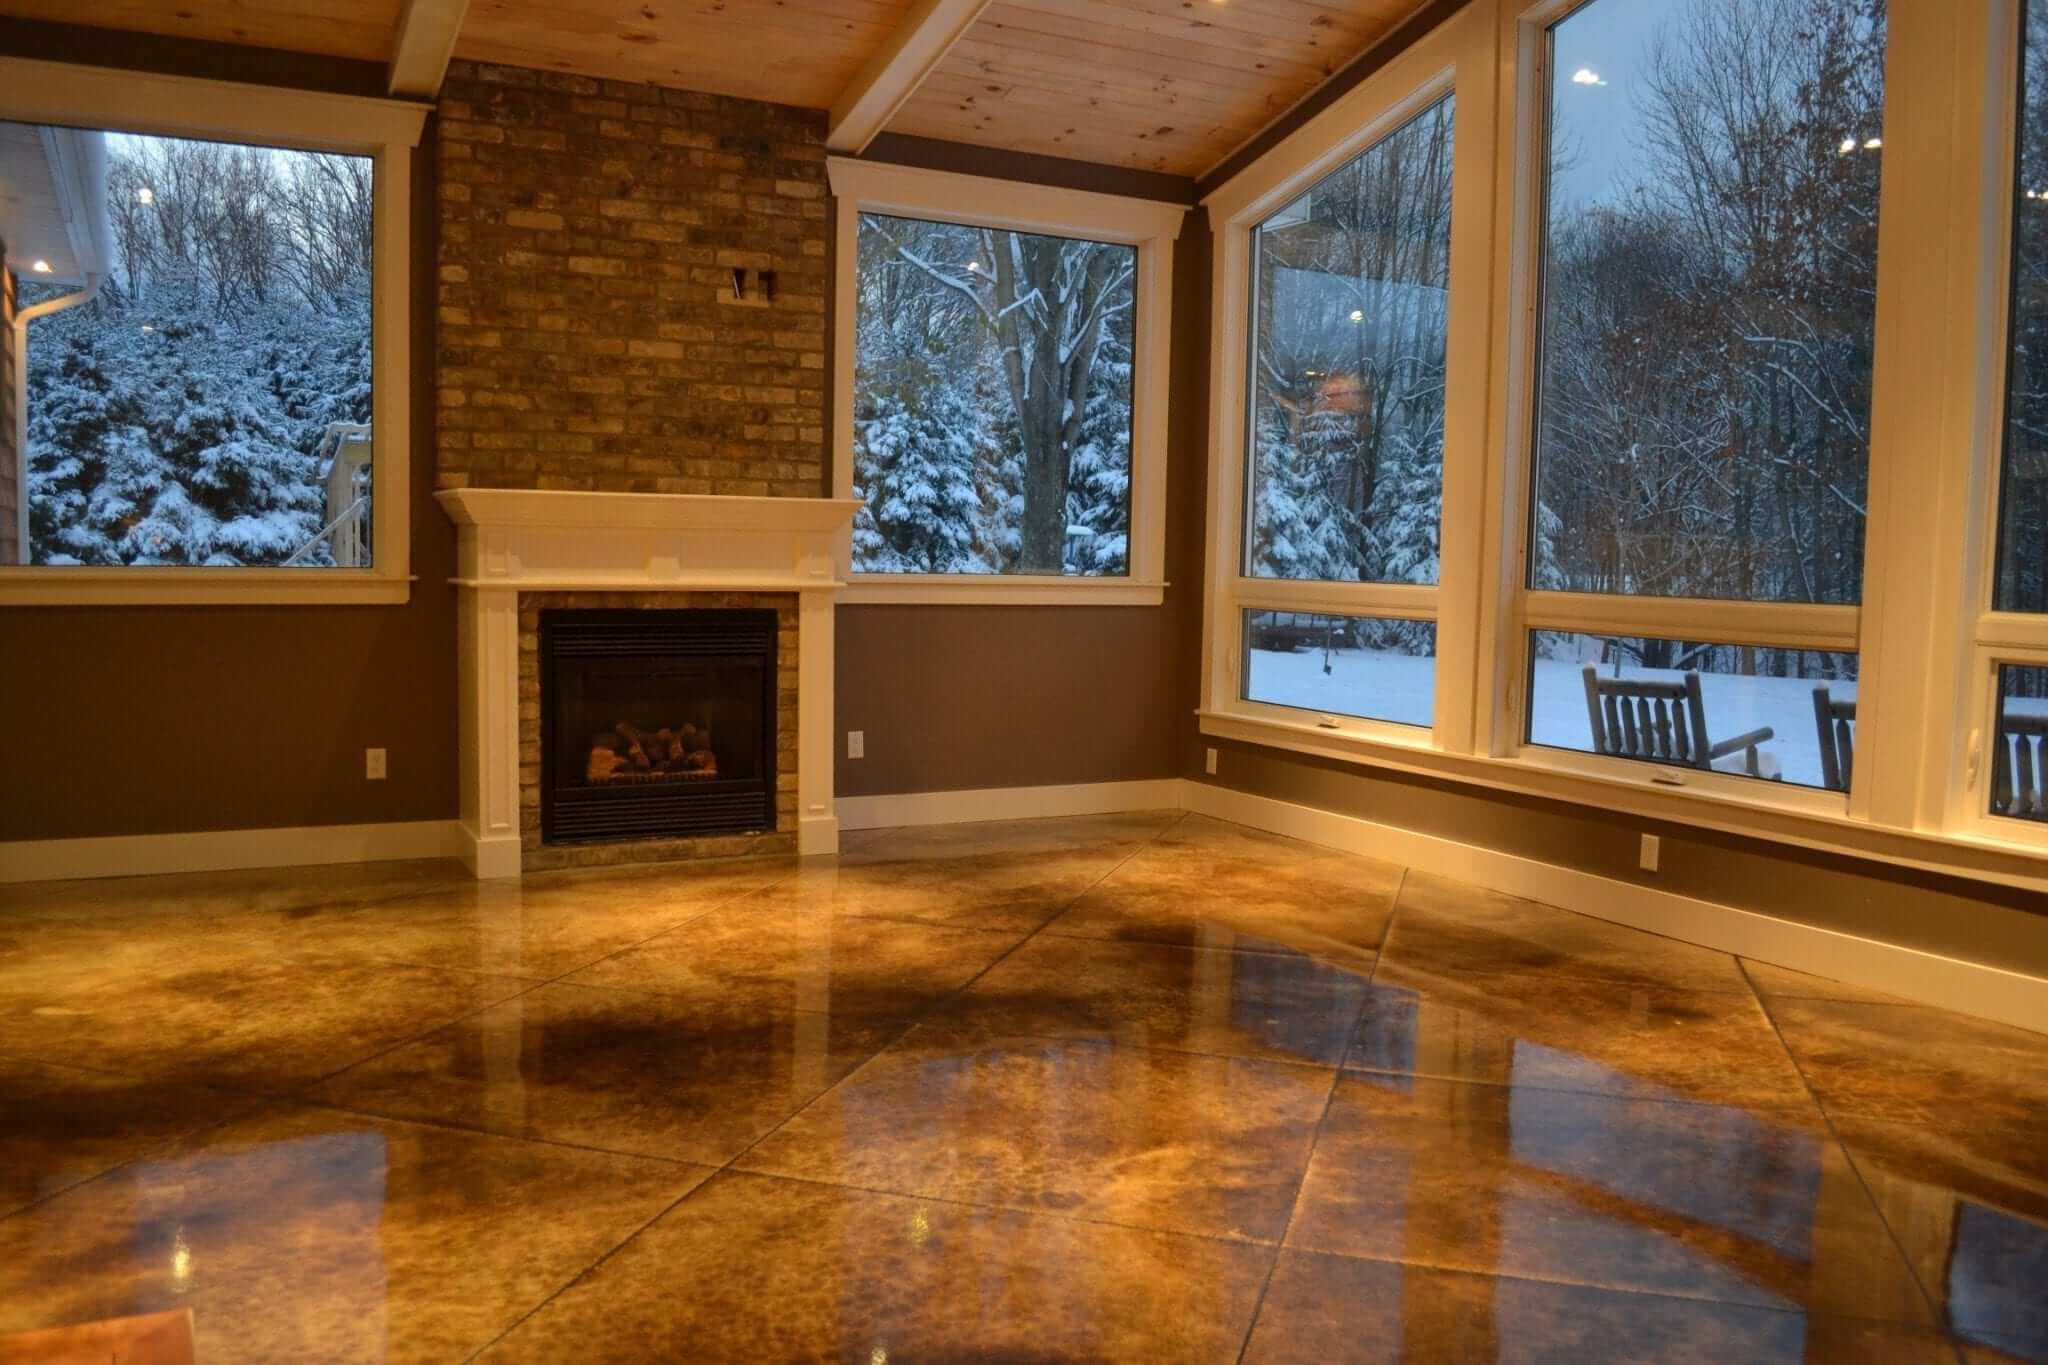
Are you looking forward to staining concrete floors? Then you must be wondering about the cost associated with it. In fact, you must be wondering whether you will have to spend too much money to stain the concrete floors that you have at home.
The cost associated with stained concrete floors will cost you around $2 to $5 per square foot. However, you will have to spend more money on complex projects. It is also important to keep in mind that some of the concrete floor staining projects are intricate. As a result, you will need to go ahead with the faux finishing. If you are going ahead with that, you will have to spend more money out of your pocket. When you are going forward with such a project, you will have to spend around $15 per square foot. However, you will be able to end up with high-end flooring, and you will fall in love with what you receive.
There are certain factors, which can create an impact on the cost that you will have to bear at the time of staining concrete floors. Here are some of the most prominent factors out of them. You can take a look at these factors and make a decision on whether you are going to move forward with the project or not.
State of Concrete
The state of concrete that you have on the floor can determine the overall expense you will have to bear during the staining process. This is where you need to check and see if the existing concrete floor you have has cracks. Then you will have to fill in those cracks, which will cost money. That’s because you cannot stain a floor that has cracks. An epoxy patching will have to be used to seal all the cracks that you can find in the concrete floor. You will have to spend around $50 to $150 to get that done.
If you are not in a position to get the sealing job done on your own, you will have to contact an expert for it. This will also make you spend extra money on labor. Therefore, you need to take a look at the state of concrete that you have on the floor and make the decision to move forward.’
Sanding the Concrete Floor
Some of the concrete floors need to be sanded before you can stain them. Once you sand the floor, you will be able to make sure that the stain will adhere to it. In addition to that, you will also be able to make sure that the stain is penetrating through the surface perfectly well as well.
However, it is important to keep in mind that some of the concrete floors don’t need to be sanded. In case you can see visible stains on your concrete floor, you can think about cleaning the surface with water, cleaning soap, and scrubbing that has stiff bristles. Then you will be able to remove the stains. But if your concrete floor has been polished to deliver a smooth appearance, you will have to think about sanding it. Then only you should apply the stain. That’s because the concrete surface has to be porous and rough for the paint to penetrate. If the concrete floor is smooth, you will not be able to end up securing the best results.
Size and Location of the Concrete Floor
People who are planning to go ahead with staining the concrete floors will need to think about taking a look at the size and location of the floor as well. Then you will be able to get a better understanding of the overall cost that you will have to bear.
Corridors and bathrooms at your home are linked with sharp corners. On the other hand, the area that you can find in them is too small as well. Hence, you will not be able to get the staining job done with ease. Due to the same reason, people who are working on the job will have to spend more hours. This will increase the cost that you will have to bear on the work as well.
Keep these facts in mind and determine the amount of money that you will have to bear for staining your concrete floor. In general, the process of staining concrete floors at home is not expensive, and you can receive worthy returns.
In California contact Extreme Industrial Coatings for all your commercial concrete flooring needs.
As an architect, you might be knowing how vital a cladding is! Cladding saves an architecture from rainwater, harsh winds, and sometimes provide sound and thermal insulation too.
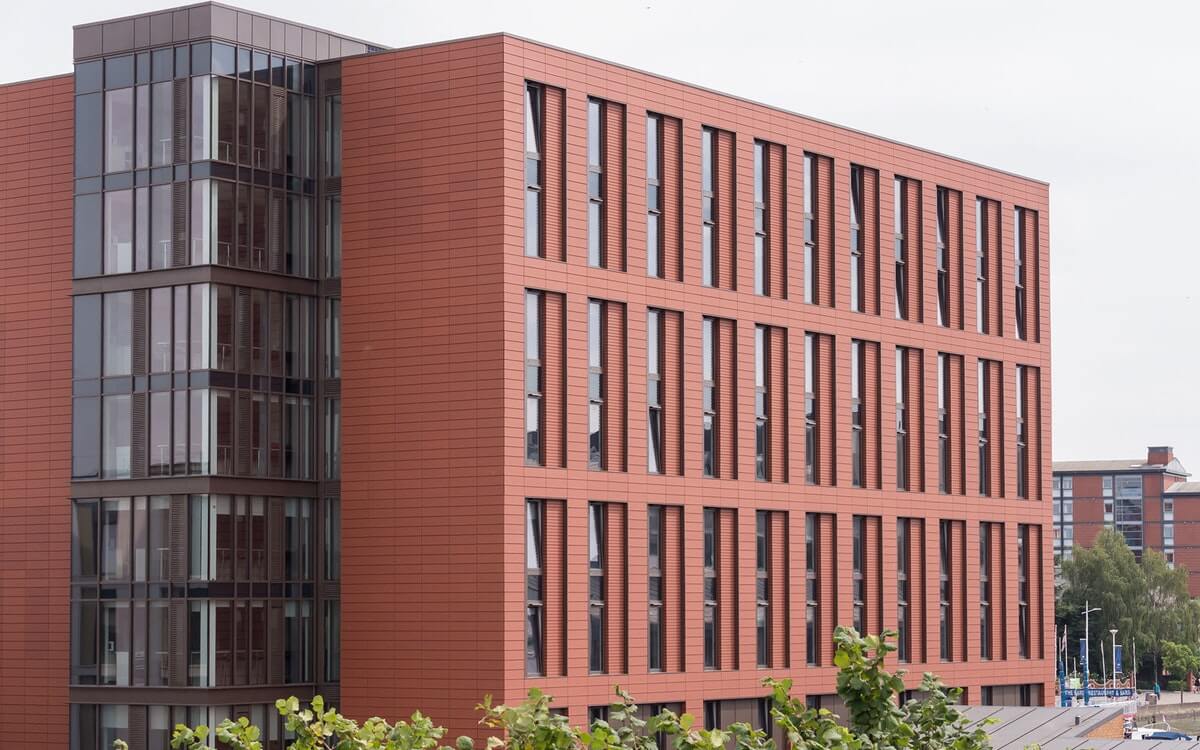
And we all know the increasing demand for terracotta cladding in the architecture industry. It is praised by architects and is used in most of the contemporary architectures. The first use of terracotta cladding was done in the 1960s by NBK Terracotta.
And from the past few years, it has gained immense popularity in the industry of buildings. So let’s consider this a perfect time to give terracotta limelight for your own good. (And to get the spotlight too!)
What is Terracotta Cladding?
According to LOPO, “ Terracotta Cladding is manufactured with natural and aged raw clay without any other chemicals and fired at high temperatures. It is an architectural cladding material that provides a certain degree of thermal insulation and weather resistance while creating an aesthetically pleasing facade.”
What are The benefits of Terracotta Cladding?
1. Durable and Longlasting
As terracotta is made from natural and raw clay, the strength is natural. Plus, it is formed after passing through the high temperatures, which makes it reliable and durable. Proper design and installation can do wonders and make its life span longer. It is possible to have a terracotta cladding that lasts up to 100 years without spending much on maintenance.
2. Thermal Insulation
Due to the ventilated system of the terracotta, it gives better performance on thermal insulation than any other conventional insulation. The Rainscreen principle has a better performance than the precast cladding. But if the precast cladding is done with the sandwich wall concept, then it can also give reliable thermal insulation with weather resistance.
3. Pocket-Friendly Maintenance
You might get surprised with this benefit, but as we said above (in point 1), its lifespan is long without spending much on maintenance. We weren’t just saying, it’s true. The surface of the terracotta cladding won’t get dusty, and even it gets, one power wash and clean it off. Every 5 to 10 years, a power wash will work, and if you have glazed terracotta installed, then you can be worry-free for 10 to 20 years.
4. Environment Friendly
The terracotta is 100% nature friendly. It is fireproof and is a very safe cladding material. It is obtained from natural clay, and no one is harmed during its making, not even the environment. It is recyclable and reusable too.
5. Multiple Aesthetics (to choose from!)
Don’t let the myth rule your mind! After hearing terracotta, there are only two-three colors that come to mind mostly on the brownish shade. There are a number of options available in the terracotta cladding. Be it textures, or colors. Terracotta also has natural fired as well as the glazed surface.
Types of Terracotta Cladding
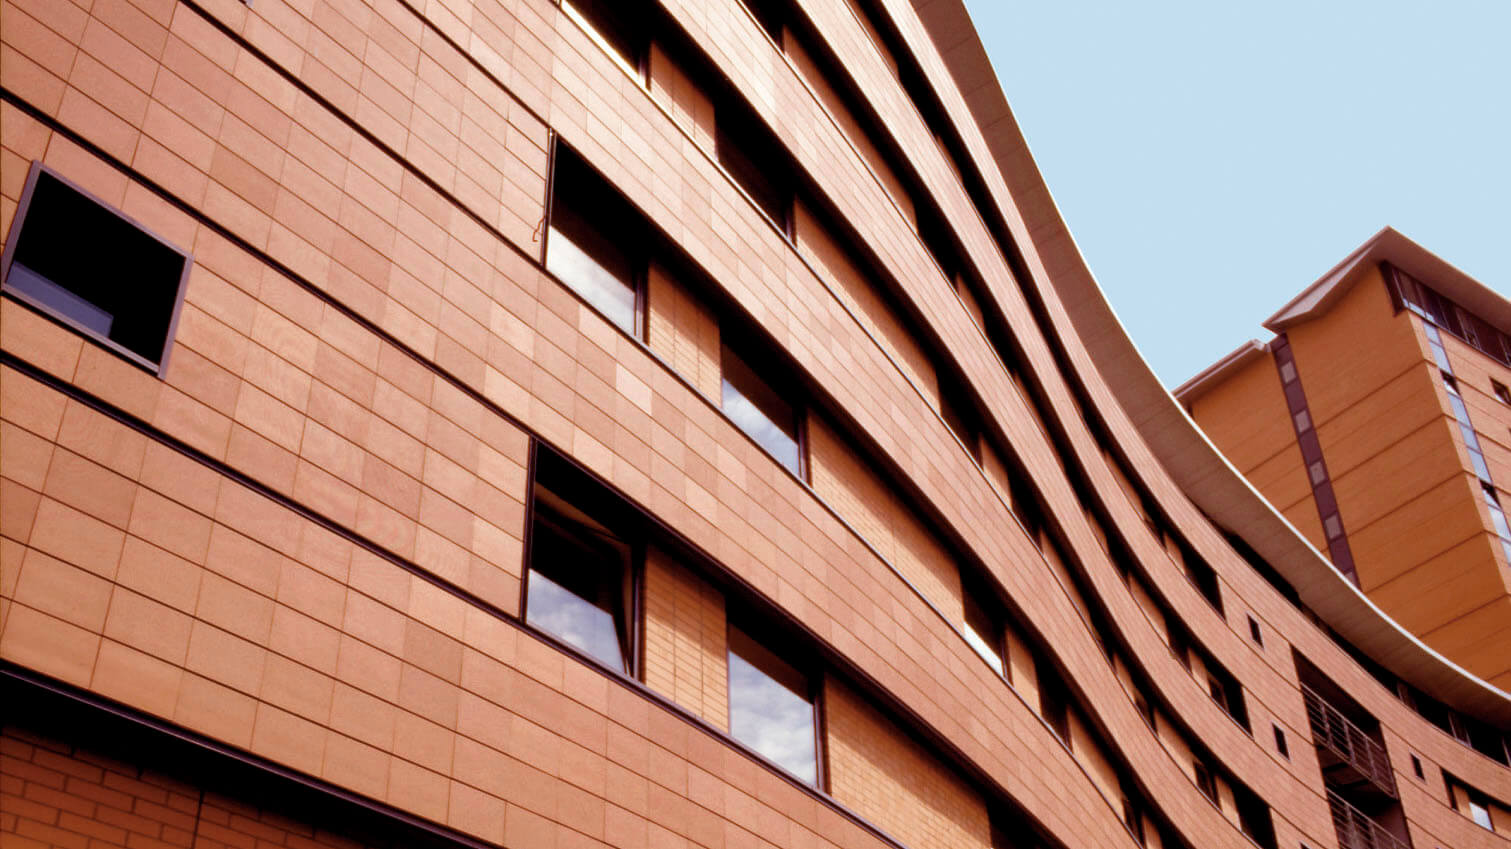
1. Terracotta Rainscreen Cladding
With the concept of rain screen, terracotta rain-screen cladding is composed of terracotta panels, supporting track systems, vapor barriers, and a ventilated cavity. The plus point of this type of cladding is it doesn’t use grout sealants like silicone, so there are fewer joints in the wall. This also makes it easy to maintain and can be installed easily in any weather condition. This method is used in making of building’s core for a longer lifespan.
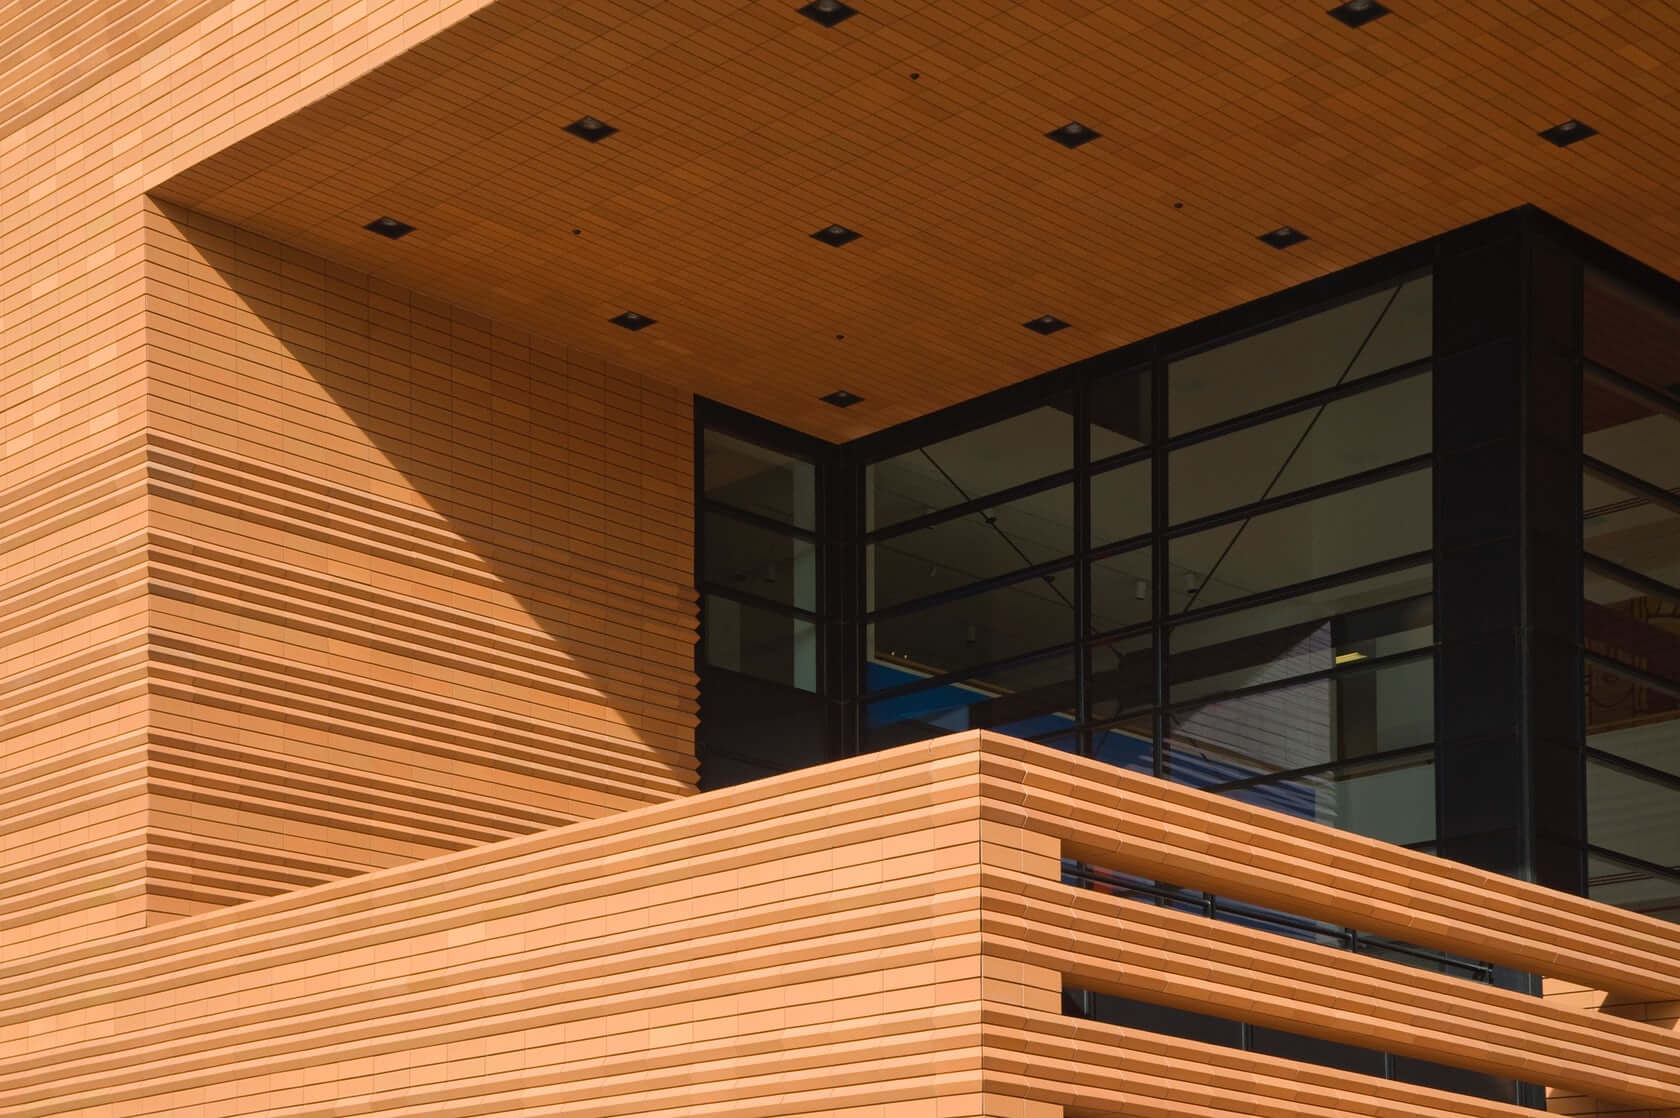
2. Terracotta Precast Concrete Panels
Here in this type of cladding, terracotta concrete panels are embedded into large concrete units. This idea of coating is suitable for designers who are looking for strength with flexible designs, finishes, and profiles. From inside, this cladding looks like a solid concrete wall and from outside, it is a perfect terracotta building.
If we look at the costing, it is lesser than rain-screen cladding, but the maintenance cost will arise as it has joints.
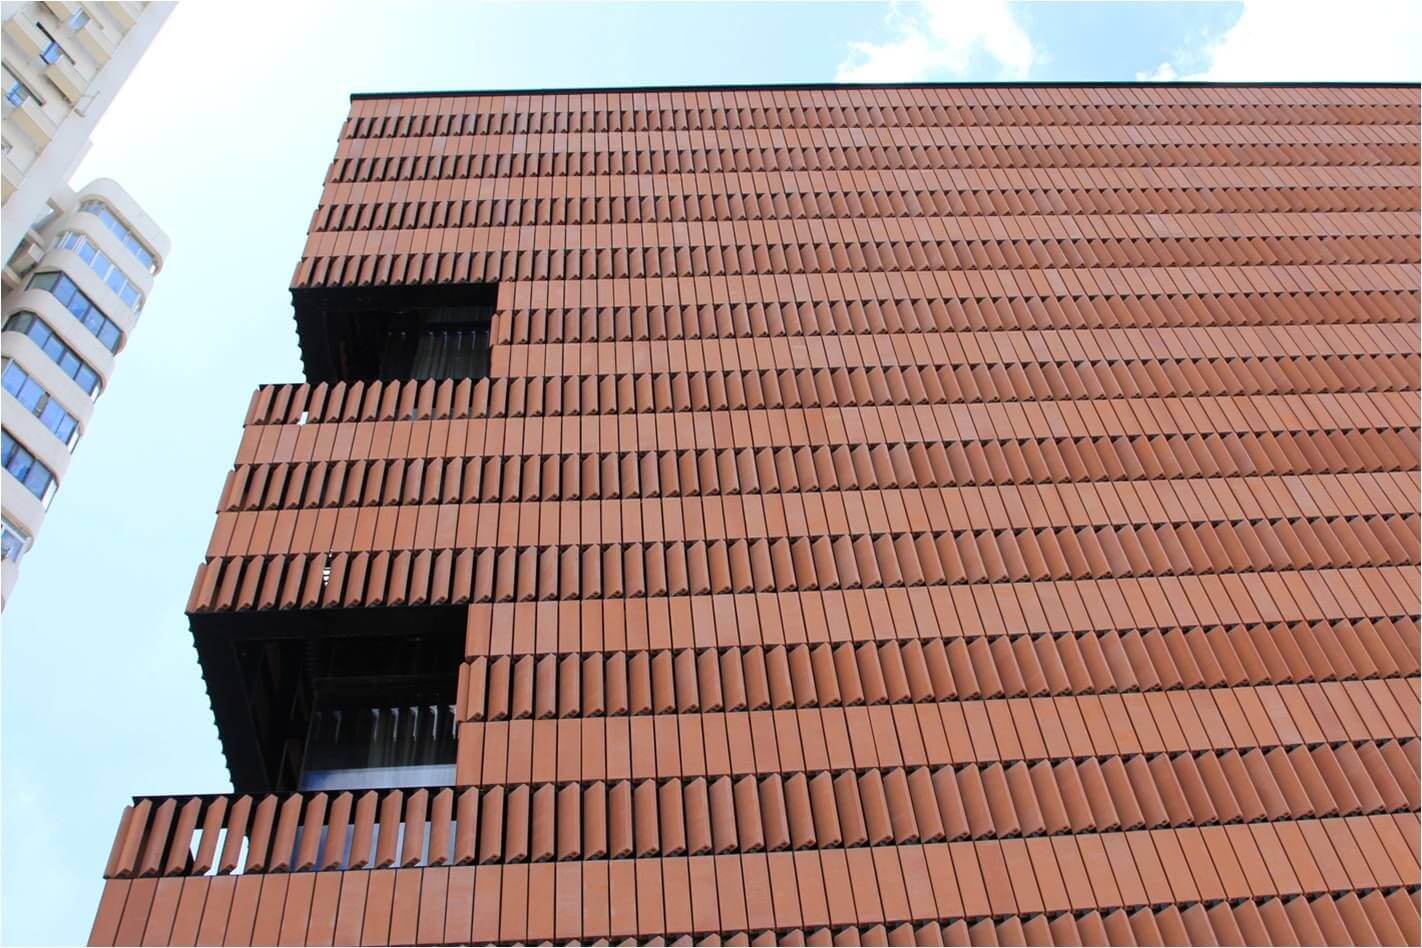
3. Terracotta Sunshade
Terracotta sunshade or sunscreen is a product of terracotta wall cladding. Use it with the rain-screen principle cladding for a harmonium and unique facade. It can also be used as a separate element for the modern and peculiar appearance of the building. The multi-purpose terracotta sunshade has many textures for cladding while it provides the shading to the construction. The textures vary from a square, circular to oblong cross-sections, divided into terracotta louvers and baguettes.
Wrapping Up
You will find terracotta cladding in many modern building’s facades and envelopes from skyscrapers to residential buildings. It gives the modern, elegant, and contemporary look to the design and overall outlook of the construction. Along with that, it also provides thermal insulation and is weather resistance too. The best quality that attracts many architects is its low maintenance cost. So what are you still thinking about? Make the terracotta cladding an essential product for the construction.
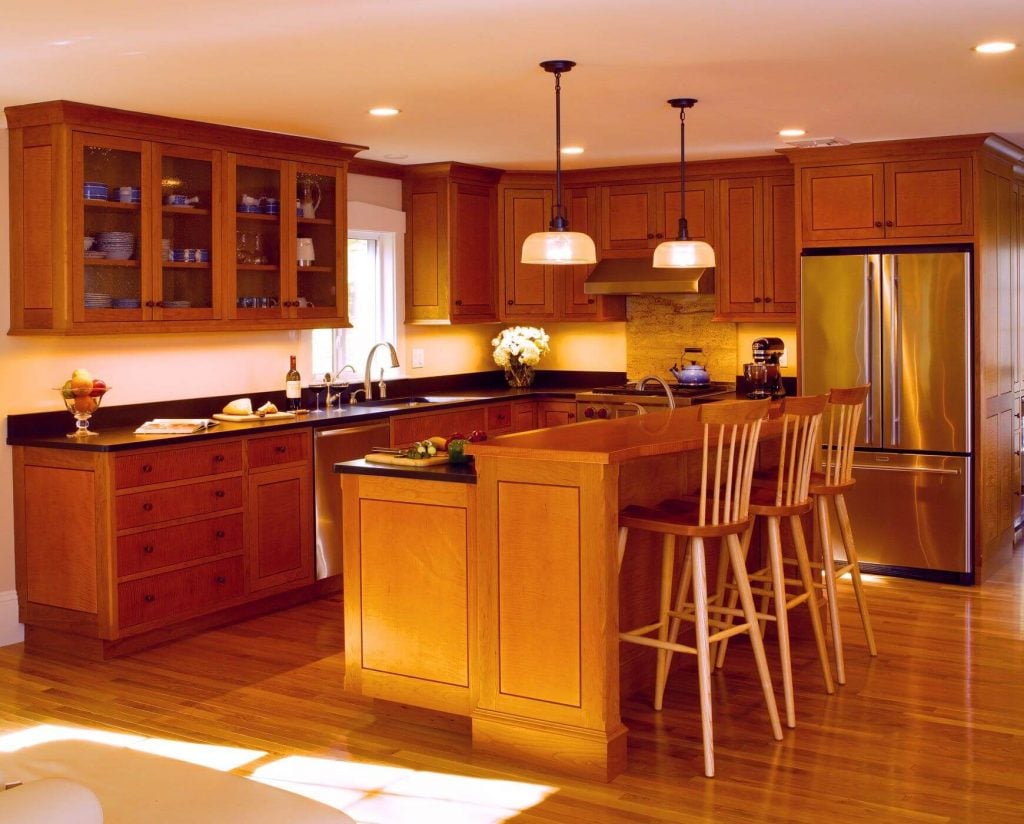
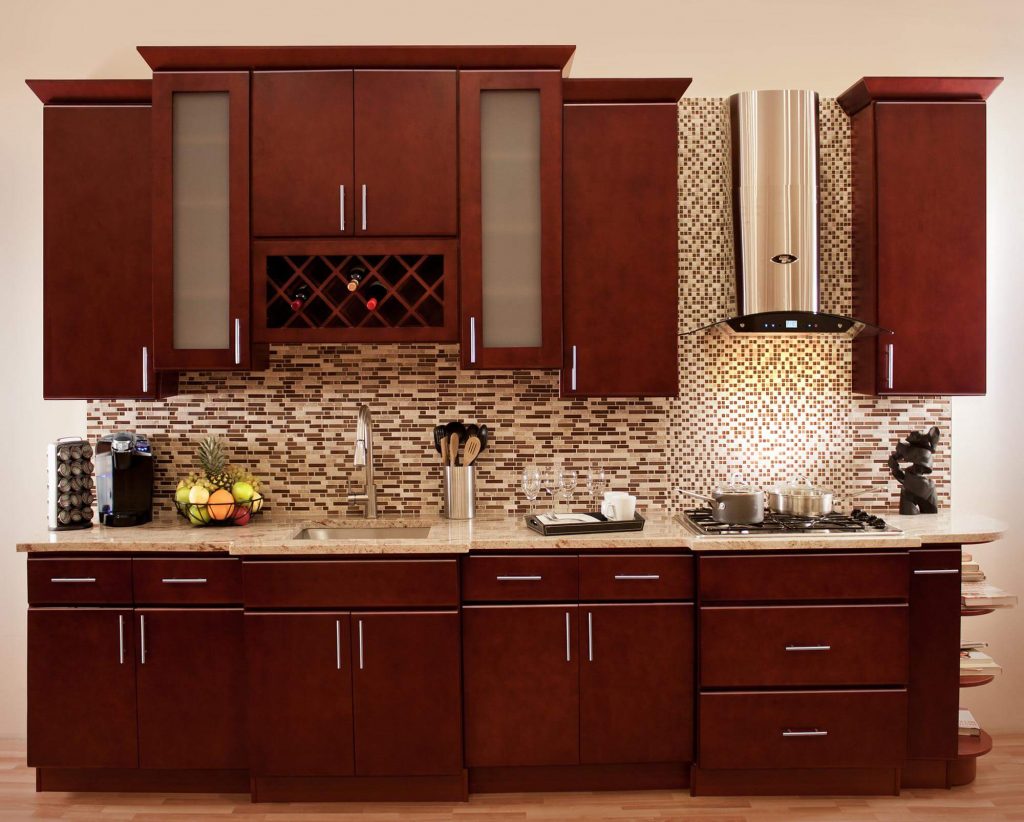
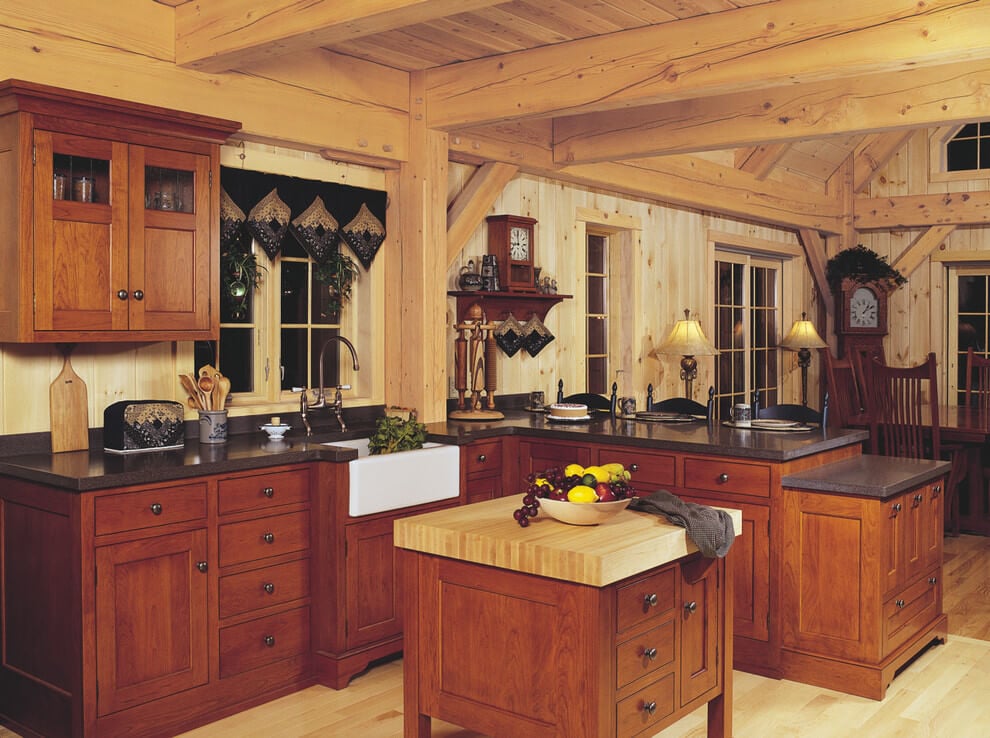
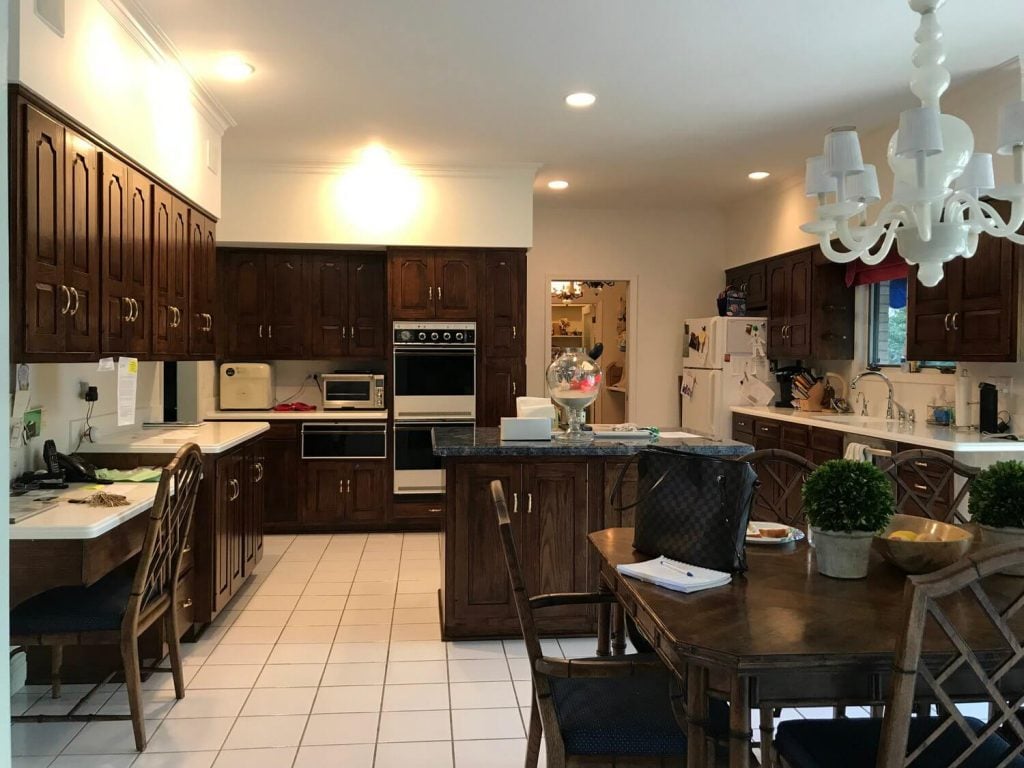
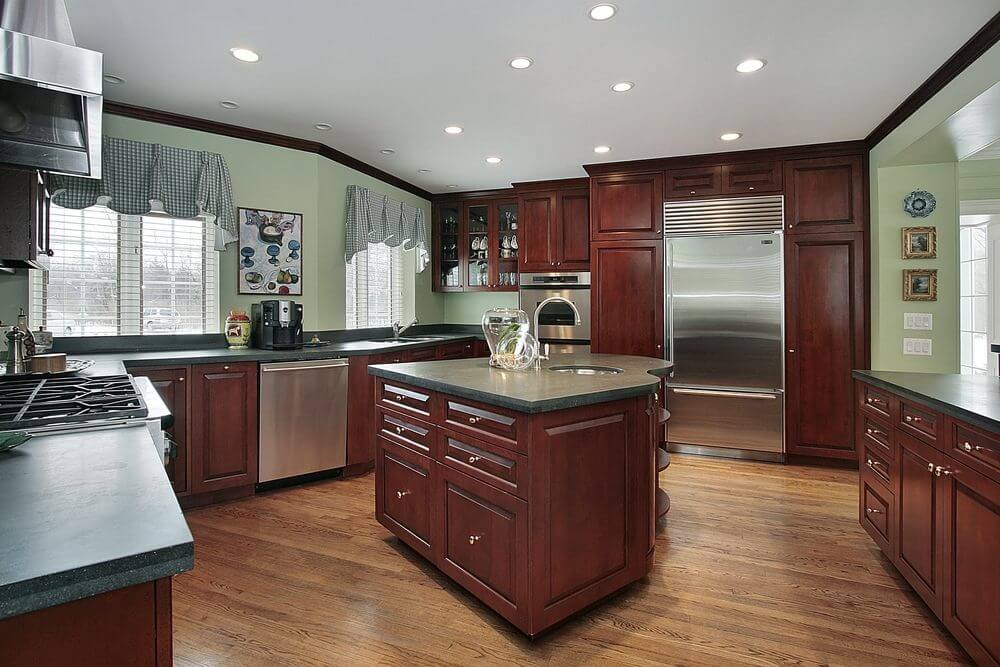
Wood is the most preferred material when it comes to furniture. From living room furniture to the kitchen cabinets, wood fits everywhere perfectly, isn’t it? It looks Not only absolutely stunning but also environment friendly. So, if you’re also planning to renovate your old kitchen and looking for furnishing ideas, you’re on the right page. Today we are going to tell you all about the kitchen wood cabinets and the wood that is not like any other type but an exceptional one. Yes, in this blog, we have provided all the related information about the Cherry wood cabinets!!
You might have already heard about cherry wood floorings and furnishings, but have you ever think about placing cherry cabinets in your kitchen? If not, then it time to do this. They’re very versatile looking yet they add drama to your kitchen. But will they go with your desired theme or design of the house? Aren’t they expensive? How to maintain them?
Solutions to all your questions and doubts lie in here, and we’re pretty sure after reading this whole blog, all your doubts will go away, and you’re mesmerized with the beauty of cherry wood. So, let’s start with the characteristics of it.
Characteristics of Cherry Wood
The cherry wood is not a new type of wood, but it has been used for ages. It is a traditional wood that carpenters and woodworkers have used for years. Reason? Because of its quality and color. Cherry is a reddish-brown, smooth-grained hardwood that comes from the American Black cherry fruit tree. That’s why it is the most prized wood in America.
Did you know that Cherry wood changes its color? Yes, the wood changes its color over time, initially it’s in light golden/pink tone and gradually transforms into the dark color. The darkening or “Riping” process takes around six months to several years before reaching the beautiful reddish-brown hue!!
Why Choose Cherry Wood Cabinets?
There is absolutely no doubt that the cherry wood is the new name of luxury!! Apart from providing a fantastic visual appeal with elegance, cherry wood is also an archetype of practical functionality. Isn’t it great?
There are not one or two, but many reasons why people love to have cherry kitchen cabinets. Really? Yes, let’s start with its durability. Apart from the visuals, the first priority is always durability, right? We all want a material that is durable and can work for years. Cherry wood is not as resilient as oak wood, but it is known for its strength and can be used for years.
Now, you might be thinking that cherry wood will be expensive? No, that not true at all, the wood is somewhat mid-price range. (which is neither costly nor cheap!). If you compare with the other dark woods, it is more affordable than the ebony and mahogany. No doubt, they are good investments, returning practical advantages in the long run.
Another advantage is that they’re available everywhere in the market. You can easily purchase it from exclusive wood suppliers, cabinet manufactures, and even from online shops!!
Reason
Now, the primary reason why we select any type of wood is the aesthetic appeals, right? The main reason why homeowners love to have cherry cabinets is the looks and beautiful color of this wood. It comes in an elegant deep rich undertone that brings luxurious in the whole kitchen.
In addition, they never go out of style!! From traditional styles to ultra-modern ones, they work well with various types of concepts & designs. How? Keep on reading as below we’re listed some of the fresh styles and themes that will work great with cherry wood.
But before that its time to tell you some little drawbacks of it. Afterall nothing is perfect!! Just like the other woods, it is also prone to termites. However, this can be overcome by taking preventing measures like termite proofing. Also, they’re not scratch & water-resistant, so keep water away from it and immediately wipe any spills so that it does not produce any stain.
PROS
Luxurious Looking Finish
Unstained
Durable & Strong
Can be easily Shaped
CONS
Expensive
Color changes with time
Not scratch & water resistance
Cheery Wood Kitchen Cabinet Style Ideas
Now, let’s see how cherry wood complements every style & theme:
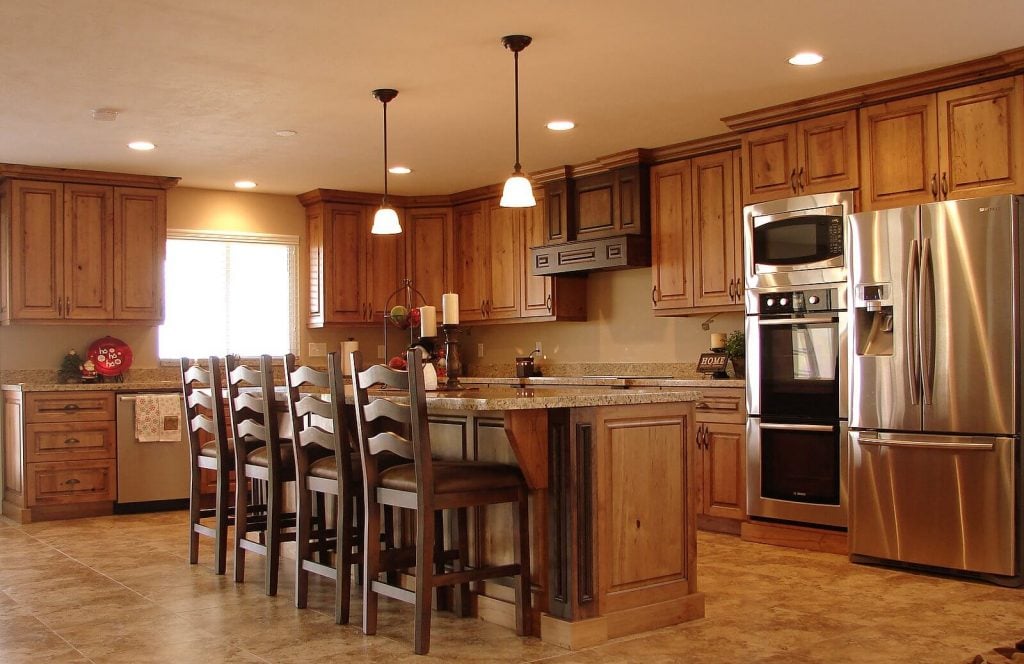
1. Rustic Style
This a kitchen in a cool rustic theme, isn’t it look perfect? With the tile flooring & white ceilings, the cherry wood cabinets look best for this place. The golden honey color of the cherry wood is perfectly going with the countertops and the under shelves.
2. Modern Style
Looking for modern furnishings? This kitchen has more space and simple looking cabinet profile that will give a cleaner and more uniformed finish. And all of this is achieved by cherry wood laminates. Pair with the cream color countertops and patterned backsplash tiles, the overall look is well balanced, yet elegant.
3. Farmhouse Style
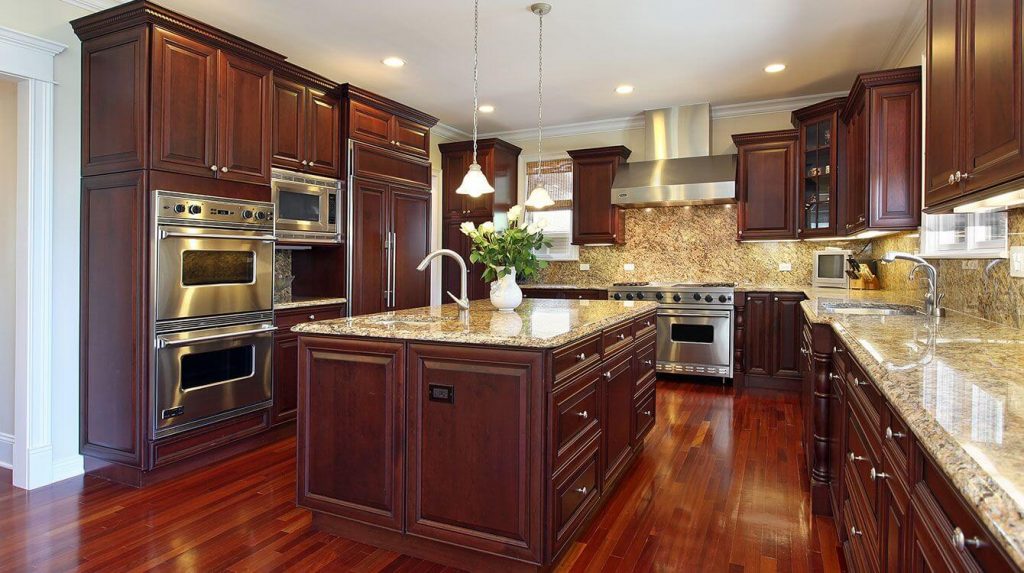
If you’re looking for a vintage-ish kind of kitchen style, then go for a farmhouse style. Just look at this wonderful farmhouse-inspired kitchen. It has the shiny merlot color cherry kitchen cabinets with dark granite countertops. The walls and ceilings are also built from the solid wood to give you the classic farmhouse vibes.
4. Transitional Style
If you’re an open concept lover, then try to match other furniture pieces in the same color as the cherry wood cabinets. It all creates a spectacular transitional concept between various spaces like dining space to the workspace. Like the above kitchen, it has all the elements in the same color, and the results are breath-taking.
5. Countryside Style
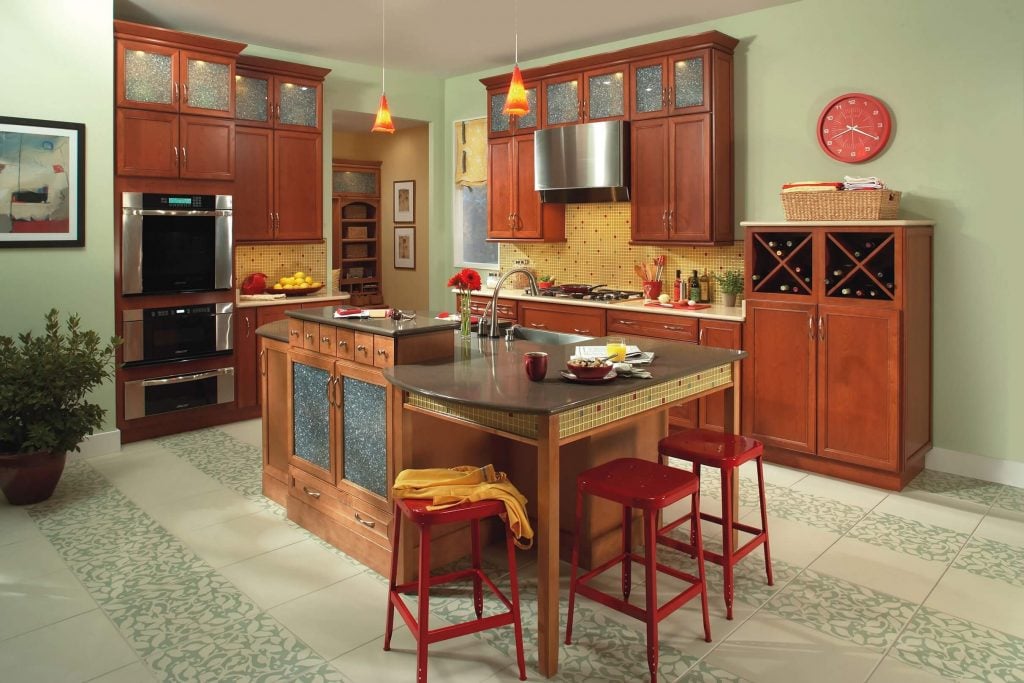
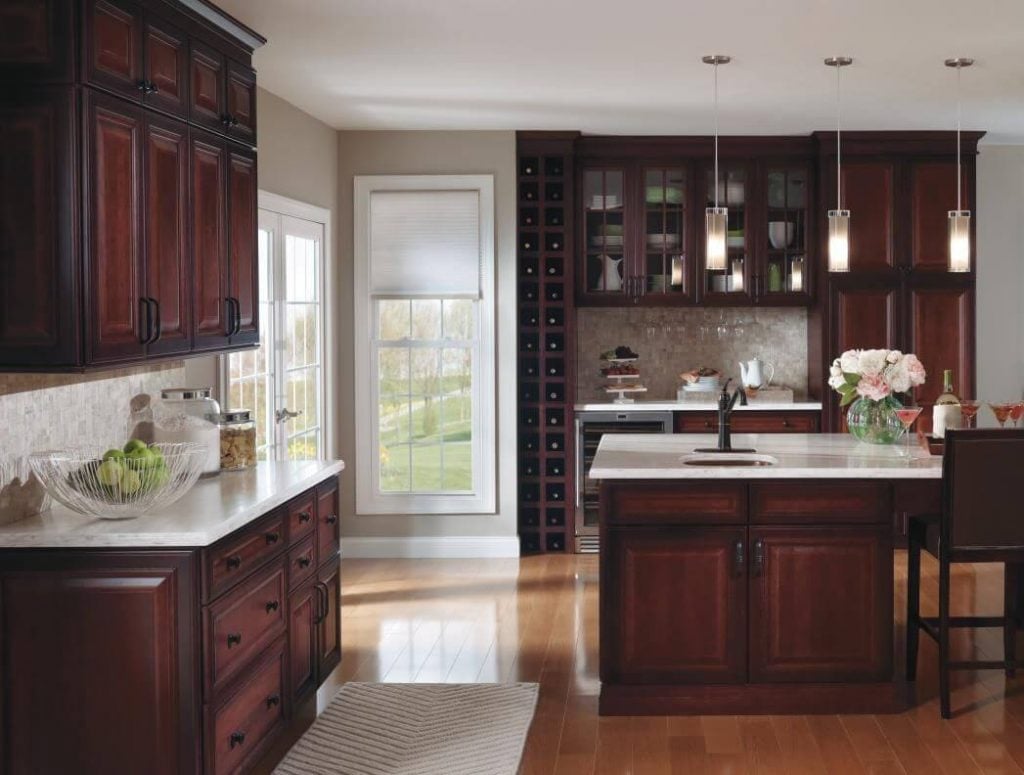
Welcome to the country style kitchen!! The elegant paneled cherry cabinets give a classic yet modern appeal. In the middle is a kitchen island, which also doubles as a dining and additional storage space. But you noticed what is adding more texture and pop of color to the cooking place? The light yellow mosaic tiles!!
6.Traditional Style
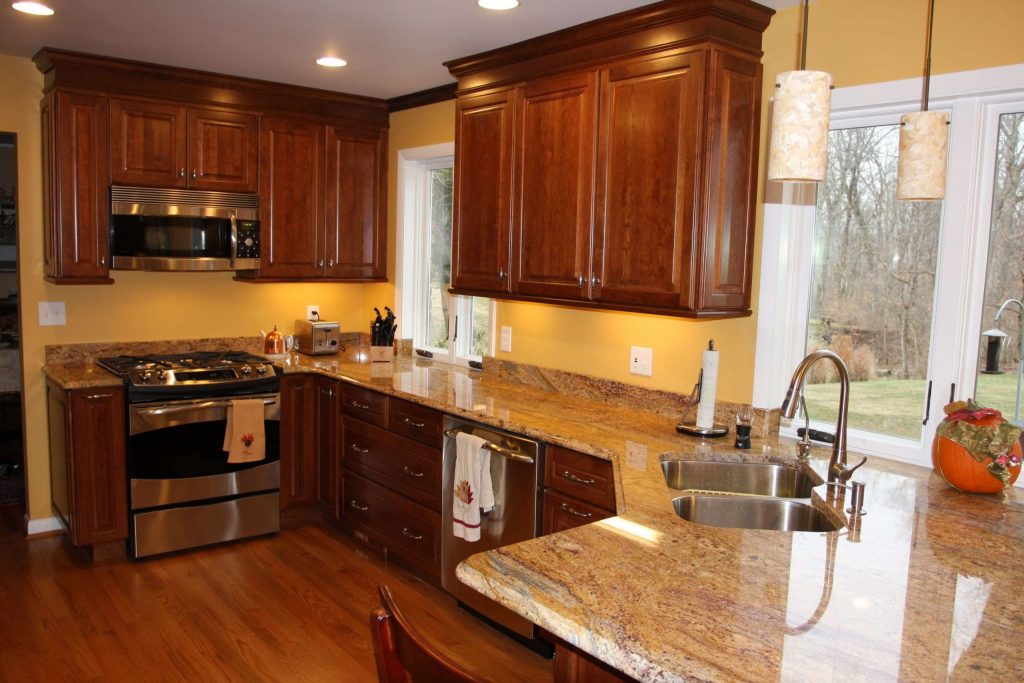
This a traditional style kitchen with all the detailings, and to make it more elegant & classy light-colored countertops are used. Which, by the way, looks absolutely stunning with the dark merlot cherry wood cabinets. Despite the old looks, it also has some modern touches like under cabinets lights, high pendant ceiling lights to help illuminate the working space.
7. Architectural Touch
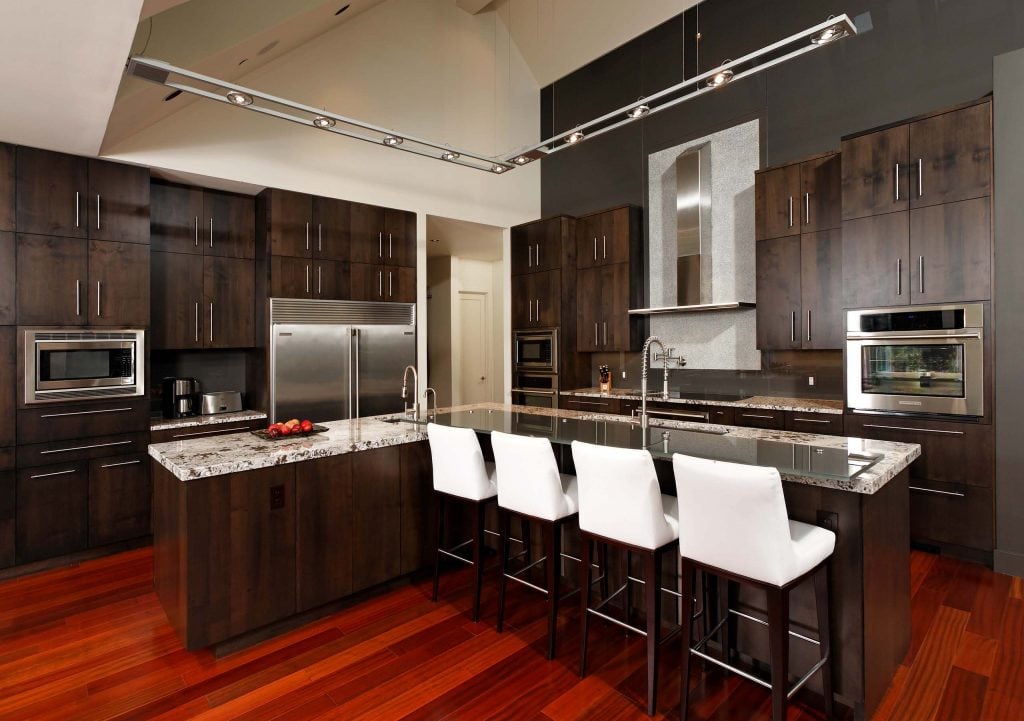
Are you drawn to the architectural design of this kitchen? Sometimes this style is known as industrial style. From the roof to the flooring, it has rough vibes to it, that’s why it is still in demand. Not only the cabinets but also the flooring is done by cherry wood. Yes, the shiny floors and chairs are also polished in solid cherry wood. Dark cabinets with silver handles make them modern and classy.
8. Contemporary
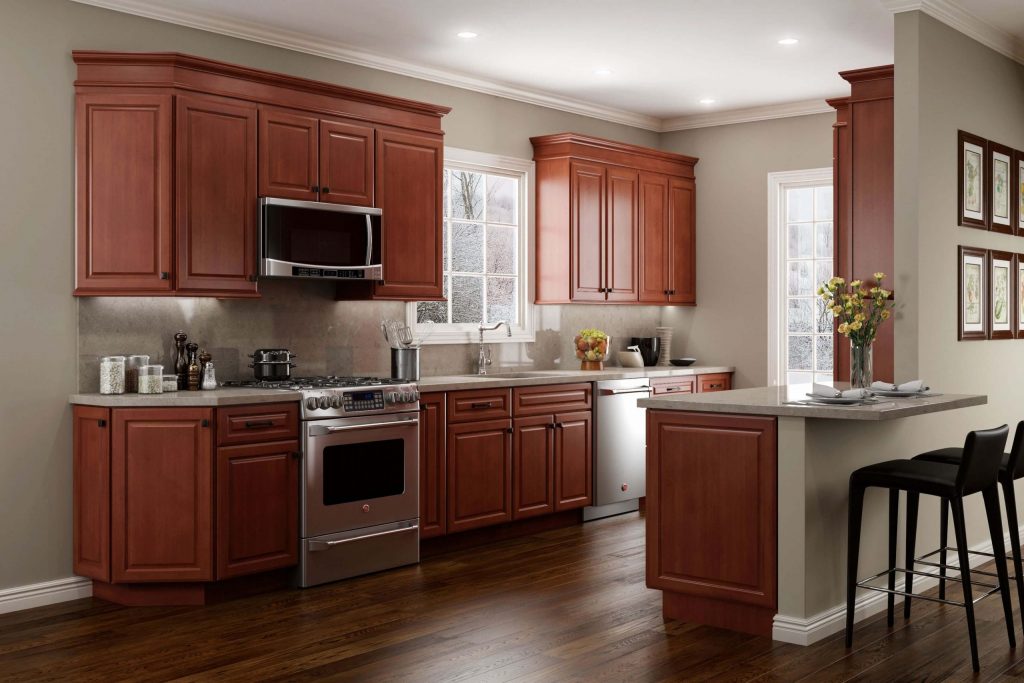
Want a kitchen that has light-colored cabinets and open space? Take inspiration from this kitchen, it has the cherry wood cabinets in natural clear stain undertones. This contemporary style is best for small spaces because the light-colored shelves and the spotted white marble top will automatically make the area more open and airy. It also features the full height length pantry storage & built-in refrigerator and center island to do more kitchen chores.
Kitchen Paint Ideas with Cherry Wood Cabinets
We all know about how beautiful is the natural deep color of the cheery wood, right? Thanks to it’s red & brown undertones, there are a lot of possibilities in terms of styling and designs. They can go with any color scheme and spread luxuriousness all over the place.
So if you think which color combinations look best with the cherry cabinets? Don’t worry because when it comes to wall colors, there is plenty of margins, as almost every color looks good with them.
From a classic white color to pastel shades, there are several wall paint ideas that can be explored to match the cabinets. The right color will completely transform the space. You can always select the shade according to the style & aesthetic attribute you’re going for like if you want a modern-looking kitchen use neutral colors similarly for traditional vibes you can paint the walls in deep vibrant colors.
When you select the right paint color with the right undertones of cherry cabinets, the ambiance of the whole kitchen area will uplift. Still, confused with the color selection? No worries, just scroll down and check out some ultimate color combinations. These color palettes choices will surely help you in deciding the right shade for your kitchen that matches well with the cherry wood cabinets.
1. White + Cherry wood Cabinets
Most Americans prefer the white as wall color of their entire house. After all, white color is the most versatile & timeless color in the whole color palette. No matter what your decor is, white walls never go out of style. Don’t you agree with this? White walls create the perfect contrast between them & the dark cherry cabinets.
2. Gray Cherry wood Cabinets
Don’t want to paint your walls in white color? Then just don’t, instead, use gray color. Nowadays, gray is the perfect alternative for whites. It creates a dramatic effect that is subdued but not overwhelming! If you think beige or white is too boring, then go for this color. Include various shades of gray and create an aesthetically appealing environment in your kitchen.
3. Neutrals Cherry wood Cabinets
Love the Monochromatic theme? Black, gray, and beige or nude and sometimes yellow comes under the monochromatic color scheme. They are not only very popular in interior designs but also used everywhere else. Mixing and matching will be the work of a kid if you go with neutral colors (means super easy!).
4. Brown Cherry wood Cabinets
San, tan, and light mocha- these are various shades of brown which very well compliments the cherry cabinets. They help in making the place more “ homey & inviting.” the thing with this color is if you’re going to place light-colored cherry cabinets, then select a darker brown color or vice- versa, to match everything perfectly.
5. Pastels Cherry wood Cabinets
Light colors are the best choice if you want to add a bit of color, but that is also not too dark. An interesting thing about pastels colors is that they carry both warm & cool undertones such as cool gray, light green, and light yellow. Cool undertones make the wood appear brighter, select according to your taste.
In short,
White = Makes cherry cabinets appear cleaner and brighter
Neutrals (browns) = Blending, enhances warmness
Complementary Colors (green) = Contrast, drama, makes cherry color pop
Pastels or Light Colors = Tones down the color of cherry wood
Bonus tips for you!
After you decided which colored cherry wood cabinets you want, it’s time to select the best countertops. Yes, you can also match them according to the cabinets. Below are some trendy and stylish looking countertops ideas which can perfectly go with any type of cherry cabinets:
Light-colored Granite
Gold Antique
Ivory Brown
Dark-colored granite
“Avoid placing red countertops with red cherry cabinets as it is a clashing combination. The red color overpowers the natural beauty of the wood.“
Always considered the additional elements such as lighting, flooring, appliances, and backsplash. All these things matter equally when it comes to transforming the whole space. If the elements are appropriately chosen, then they produce a cohesive and also represent a well-balanced kitchen design. If your budget doesn’t allow you to go with cherry wood cabinets, then one thing you can do is paint your old cabinets in cherry wood. And if you don’t know How to paint kitchen cabinets, then read our blog on this.
You’ve dreamed about it for years and now it’s time to begin designing your dream home. Where do you start, though? Which rooms are the most critical? What should you do about maximizing natural light while reducing your heating and cooling bills? How do you prevent heat or cold from migrating into the home from the garage? What’s the ideal kitchen layout? These are just some of the questions answered in this guide from Truoba House Plans. Learn more about nine of the most critical elements when designing a custom home for you and your family!
Building your dream home can be enticing. That’s because it enables you to be in total control. What’s more, being your own builder can make it easier to stay well within your budget. Skipping hiring builders with years of industry experience, however, can do more harm than good. This is especially true if you have no prior experience with building a house from the ground up, and you are not particularly good at dealing with the stress, challenges, and unwanted surprises that come with a home building project.
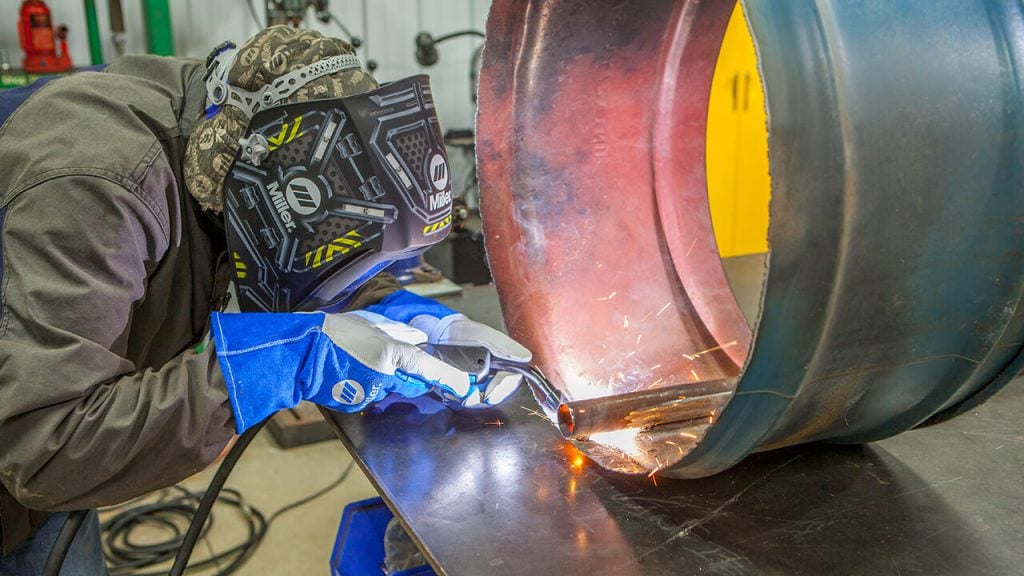
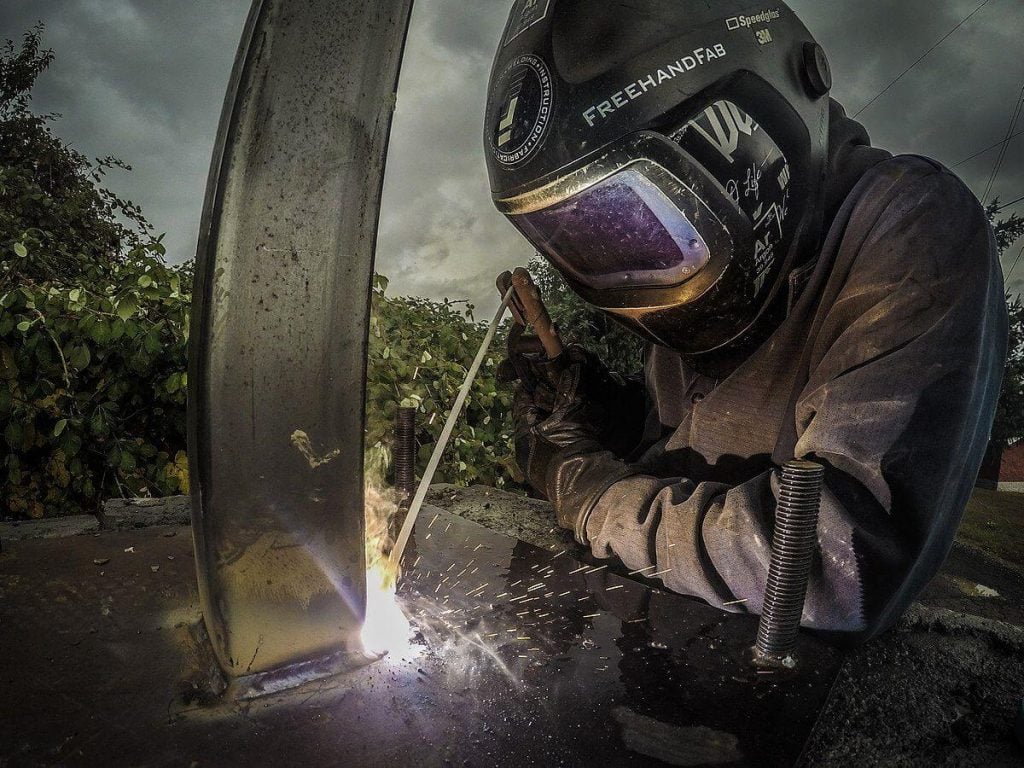
If we want to make a comparison between MIG and Arc welding, it’s a tough task. The welder who does their work most in MIG can think that arc welding is better than theirs. But at the same time, the Arc welder may also think the same. So, it is always a common tendency that what others have is better than mine. The best multi-process welder will let you perform at least two types of welding processes on the same machine.
To make a comparison we have to know the basics of the two types of welding. Let’s have a look at some of the basic differences between MIG and Arc welding.
First, MIG welding means Metal Inert Gas while Arc welding is simply described as stick welding which is commonly known as SMAW. So, it is clear that their working materials are different.
Second,Arc welders work on passing the necessary electricity to go through a rod. When it arcs it creates a temperature of almost 7,000 degrees F. In this high temperature, the welding rods melt and joints create. In contrast, the MIG welding works with the trigger of the welding gun of the MIG welding machine. It usually takes control of the feed of the electrode.
Third,Arc welding is actually a manual process and it is tough in comparison with MIG welding. It takes lots of time for a person to become an expert. But MIG is the easiest way of welding and very much popular with the beginner as it is a semi-automatic process which is half done by the machine.
Fourth,In MIG welding the use of metals is limited. As metals can’t be very thick or very thin, MIG’s working area is limited. But in the case of arc welding, you can weld any type of metal conveniently. If the metal is rusty or dirty, you can’t use MIG welding there. But nothing matters in the case of arc welding. Everything will be just fine with arc welding.
Fifth,if you want sophisticated and clean welding work MIG is the best option. On the other hand, arc welding is left over with lots of debris and sparks. The ending of arc welding is not as clean as MIG welding.
Sixth, Arc welding is a relatively affordable and cheap option than MIG welding. The necessary materials for arc welding are relatively cheaper than MIG welding.
Seventh, In the MIG welding process external gas is to be needed to prevent damages in the welding pool. But in the case of arc welding, it is not needed as the flux core itself does the job.
Eighth,MIG welding is very much suitable for indoor work as wind outside can cause the problem to make the weld. But for arc welding, nothing matters in its working process. Whether indoor or outdoor in windy situations, it works perfectly.
Ninth, you are about to begin welding, and MIG will be your ultimate choice. You just buy a welding machine and start. But to be an arc welder you have to work hard and learn it carefully.
Though there are many differences between the two types of welding, both are useful for work. Both types have their own utilities. Considering all the issues, you should fix your perfect shot.
Conclusion
Both MIG and arc welding offer unique strengths, making a decisive winner a close call. MIG shines with its ease of use, clean welds, and indoor practicality, while arc welding boasts affordability, metal versatility, and all-weather resilience. Ultimately, your champion depends on your priorities. Consider complexity, budget, material choices, and environment. For quick, beautiful welds, MIG’s your ally. But for rugged, adaptable work, arc welding reigns supreme. Know your needs, wield your choice wisely, and conquer any metal beast.