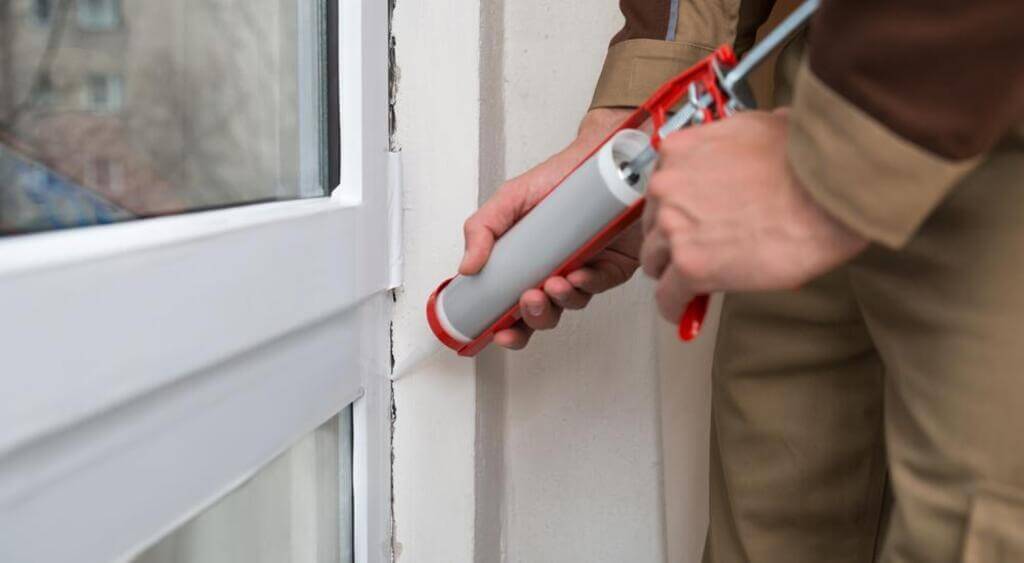
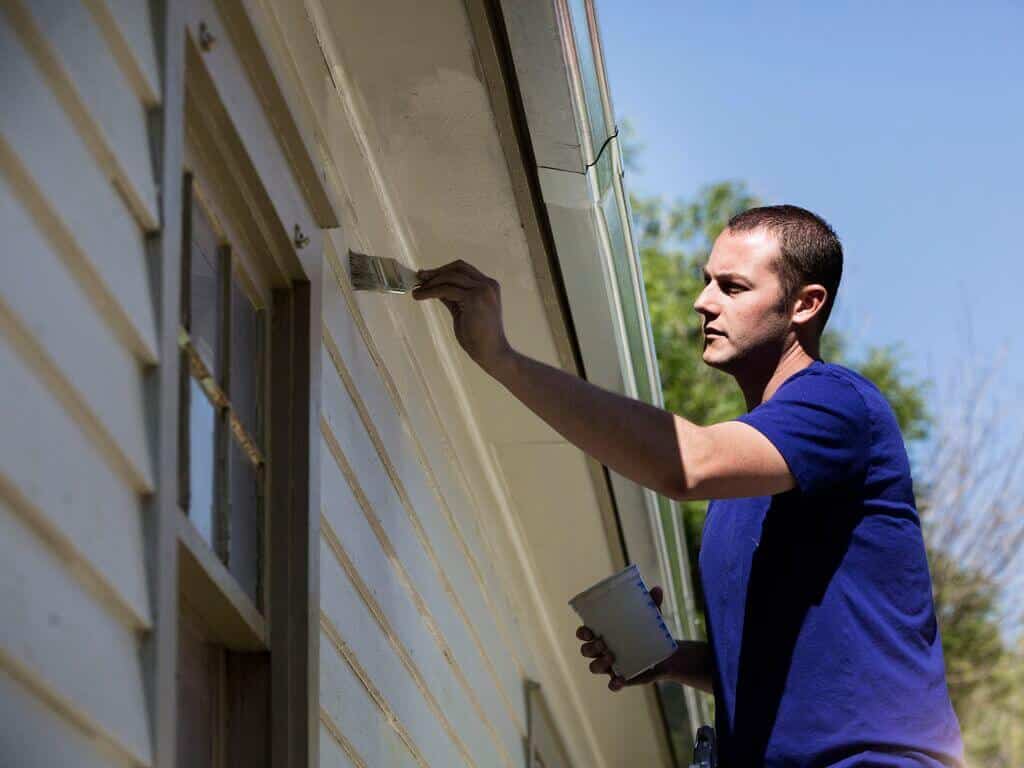
When moving into a new home or renovating your current one, air sealing is one of the smartest upgrades you can make. Air sealing involves closing gaps, cracks, and leaks around your house to keep conditioned air inside and unwanted outdoor air out. This simple step can dramatically improve your indoor air quality, lower your energy bills, and make your living space more comfortable year-round. In this article, we’ll explore the top benefits of air sealing your home and show you how to identify and address common air leaks for a healthier, more efficient house.
5 Benefits of Air Sealing Your New Home – Breath Healthy, Stay Happy
Essentially, air sealing means keeping your indoor air, which is either warmed or cooled by your HVAC system, inside the house. And not allowing the outside air to enter your house.
1. Maintains the Air Quality in Your Home – Germ-Free and Dirt Free
When we talk about indoor air, it is not just about temperature. Undoubtedly, air sealing helps in maintaining indoor temperature. But there are various other aspects that you need to consider such as the humidity level, the concentration of pollutants, and the dust-carrying particles.
These are part of the wind that blows outside and will enter your house if you allow the external air to make its way inside.
Seal it to stop it!
By sealing the cracks and openings in your windows and doors, you can prevent these undesirable components of the air from getting in. This way you breathe in clean and safe air.
Also, it keeps your house free of pests, tiny worms, or other insects that can sneak through these small openings. Your house stays clean and warm/cool enough for you to love staying indoors.
2. Comfort Comes First
Sealing the joints and holes is particularly beneficial during winter. If your house is not airtight, you will surely experience drafts, and the inside environment will get uncomfortably cold. In summer, you will never get a cool enough house because the warm air will keep entering.
Also, your HVAC system will have to do extra work. The additional load on the thermostat will eventually increase the maintenance cost of the furnace and other parts of the system.
The smart move!
When you go for air sealing, you put a stop to air coming in as well as going out. This ensures that your house stays at a constant desirable temperature, which is comfortable for you – neither too hot nor too cold.
3. Reduced Utility Expense – Save Your Hard-Earned Money
With those gaps and holes around your house, all the warm wind that you are paying to heat up is escaping. Similarly, the cool air coming from your air conditioner in summer is leaving the house too.
Thus, it is not just wind blowing out of those cracks.
It is your cash seeping out too!
Lower utility cost is a major benefit of air sealing. If the warm air stays inside in winter, and none of the cold winds enter the house, you can turn the heating system off after the indoor temperature reaches a certain point. As a result, the temperature will stay constant for a longer duration and you will spend less on paying energy bills.
4. Build It Right, Keep It Strong
When there are gaps and holes in walls, doors, and even floors, warm air rushes out. Thereafter, when it gets in contact with cooler surfaces such as pipes it condenses and water droplets stay in the form of moisture.
Moisture kills!
It is not good for your house. It can cause mold growth. In addition to this, moisture has an adverse impact on concrete which has been used in the structural construction of your house.
Thus, the extra moisture will make your house less durable in the long run. It will weaken the basic elements, and you will have to spend a huge sum on maintenance in the long run.
By locking and sealing all such gaps and blocking the movement of air across these, you are making your house stay strong for many years to come.
5. Keep the Hustle Bustle Away
When you are trying to stop outside air from entering your home, you get the added benefit of keeping the noise outside too. A noisy neighbor’s car or kids playing in the backyard will not disturb you anymore.
Take care of your house the way it takes care of you!
And, surely, air sealing is a part of keeping your house safe and comfortable. Before you start air sealing you should be aware of the places that need the most attention.
Check it out!
Identify the leakage points by closely examining all the gaps, holes, and cracks that you previously never paid attention to.
The most popular areas of air leakage are:
Attic
Holes for plumbing and wiring
Vents around lights
Gaps around chimneys
Doors and windows
Flooring
There are various tests conducted by professionals to check your house for potential air leaks. The most widely used is the door blower test. It is advisable to get it done before moving to a new place.
You can also self-check by thoroughly checking all the joints where two surfaces are getting connected. Do not forget the spaces behind electrical switches too.
Another important step is to see if the existing caulking material is intact or has worn off with time. You should also check if your doors and windows are shutting down properly or not.
How Do You Seal These Gaps and Leaks?
The most popular way is air sealing with caulk. Weatherstripping is another technique used for the same purpose. But these methods differ in the places where they can be used. Caulking is more useful for corners and gaps which are immovable whereas weatherstripping is used for movable parts such as doors.
Conclusion
Thus, to reap the benefits of air sealing your new home, start right away, and inspect the potential leakage spots – either by yourself or by hiring a professional.
Your house is your comfort zone!
So, keep it warm/cool, free of pollutants, and save on energy bills. Most importantly, conserve energy and keep the environment safe.
A collapsed sewer line is a serious issue that can disrupt daily life, cause costly property damage, and pose significant health risks. Recognizing the early warning signs and understanding the main causes of sewer line collapse can help you act quickly and avoid more extensive repairs. In this guide, you’ll learn how to spot the signs of a collapsed sewer line, what causes these problems, the potential effects on your property and health, and the best steps for repair and prevention.
Indicators of a Collapsed Sewer Line
Identifying a collapsed sewer line early on can prevent further damage and minimize repair expenses. Common signs include:
Recurring Drain Clogs
Persistent drain clogs, especially in various areas of your property, could indicate a collapsed sewer line.
Slow Draining Water
Slow drainage in sinks, showers, and bathtubs might suggest a sewer line blockagedue to collapse.
Foul Odours
Unpleasant smells from drains or outdoors can signal a damaged sewer line and sewage leakage.
Sewage Backup
Sewage backing up into your property is a strong sign of a collapsed sewer line.
Sinking or Damp Yard Patches
Collapsed sewer lines can cause soil to sink or create damp patches in the yard as sewage leaks into surrounding areas.
Factors Contributing to Sewer Line Collapse
Several factors can lead to sewer line collapse:
Aging Infrastructure
Older sewer lines, especially clay or cast iron, are more prone to deterioration and collapse.
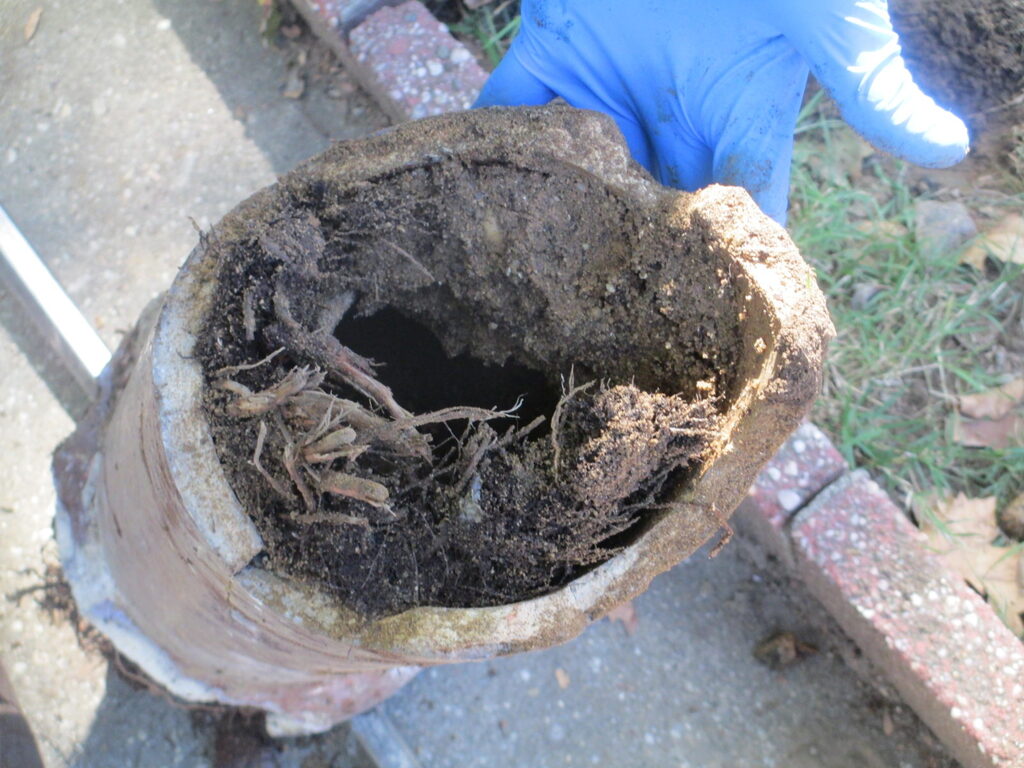
Tree Root Intrusion
Tree roots can infiltrate sewer lines seeking moisture and nutrients, resulting in blockages and eventual collapse.
Ground Movement
Soil shifting or settling, often due to construction or natural geological processes, can strain sewer lines and cause them to break or collapse.
Corrosion
Metal pipes may corrode over time, weakening their structural integrity and increasing the likelihood of collapse.
Poor Installation
Improperly installed sewer lines can be more susceptible to collapse, lacking necessary support or being more prone to external damage.
Effects of a Collapsed Sewer Line
Collapsed sewer lines can negatively impact your property and health:
Property Damage
Sewage leaks from collapsed sewer lines can damage your property’s foundation, landscaping, and interior structures.
Health Hazards
Sewage leaks can expose inhabitants to harmful bacteria, parasites, and viruses, posing health risks.
Environmental Damage
Sewage leaks can contaminate soil and groundwater, resulting in environmental harm and possible fines for property owners.
Daily Disruptions
Repairing a collapsed sewer line can be time-consuming and disruptive, potentially necessitating excavation and temporary relocation.
Addressing and Preventing Sewer Line Collapses
To prevent sewer line collapses and tackle existing issues, consider these steps:
Regular Inspections and Maintenance
Schedule routine inspections and maintenance of sewer lines to identify and resolve potential problems before they worsen.
Tree Root Management
Trim tree roots near sewer lines regularly or install root barriers to prevent intrusion.
Replacing Old Pipes
If you have an older property with clay or cast iron sewer lines, consider upgrading to more durable materials like PVC or HDPE.
Proper Installation
Ensure new sewer line installations are done correctly by hiring reputable, experienced professionals.
Timely Repairs
If you notice any signs of a collapsed sewer line, immediately contact a professional plumber to assess the situation and carry out the required repairs.
Repair Options for Collapsed Sewer Lines
When a sewer line collapses, prompt repair is essential to avoid further damage and health risks. Depending on the collapse’s extent and the sewer line’s location, several repair methods are available:
Trenchless Pipe Repair
Techniques like pipe bursting or cured-in-place pipe (CIPP) lining can fix collapsed sewer lines with minimal excavation. These methods are less invasive, faster, and often more cost-effective than traditional excavation methods.
Excavation and Replacement
In situations where trenchless repair methods are unsuitable, excavation may be required to access and replace the collapsed sewer line. While this method can be more time-consuming and disruptive, it may be the only option in some cases. Core drilling in Sydney areas may be your best option here.
Pipe Relining
In some instances, relining the collapsed pipe with a durable liner may be possible, creating a new pipe within the old one. This method can be less invasive and quicker than excavation, but may not be appropriate for all situations.
Always consult a professional plumberor sewer repair specialist to determine the best repair method for your specific situation.
The Value of Hiring Professionals
When addressing a collapsed sewer line, it’s crucial to hire experienced professionals who specialize in sewer repair services. Professionals possess the necessary skills, knowledge, and equipment to accurately diagnose the issue, recommend the most appropriate repair method, and execute the repairs efficiently and safely. Attempting to repair a collapsed sewer line without professional help can result in further damage, increased repair costs, and potential health risks.
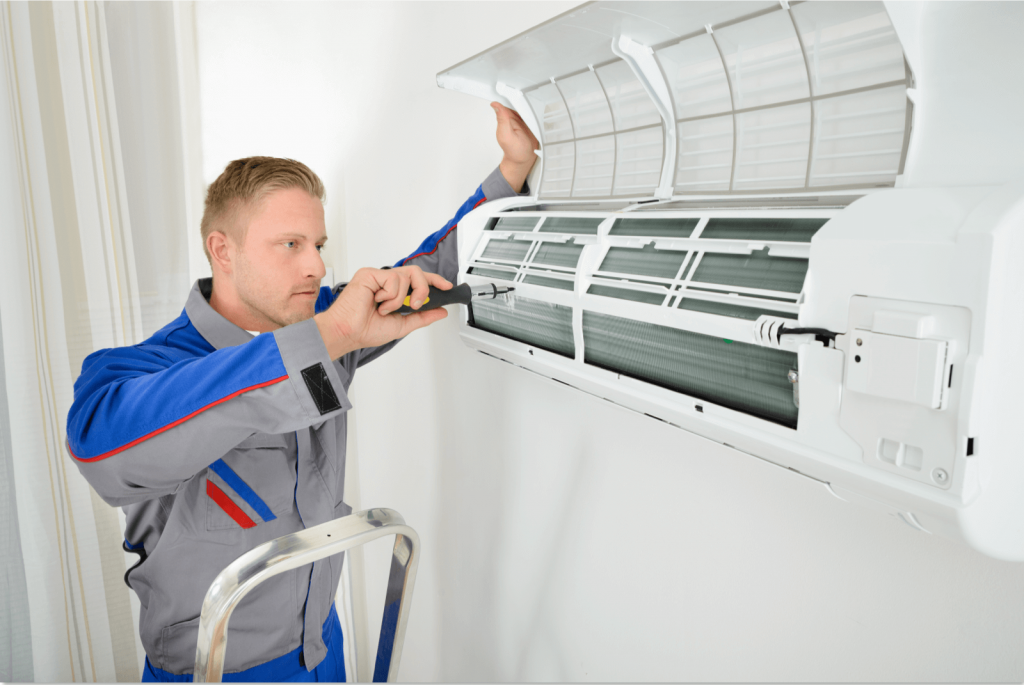
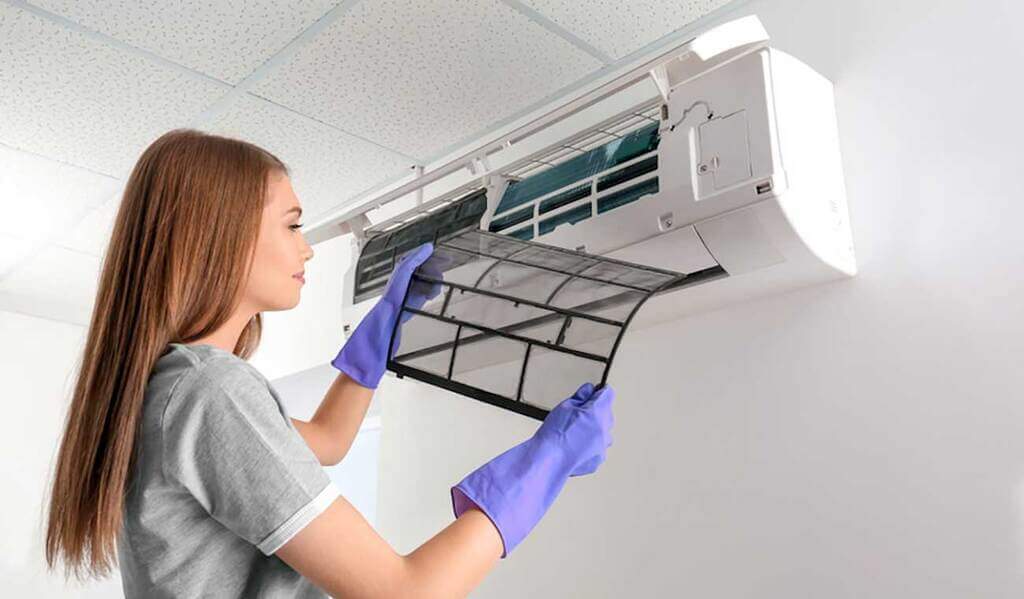
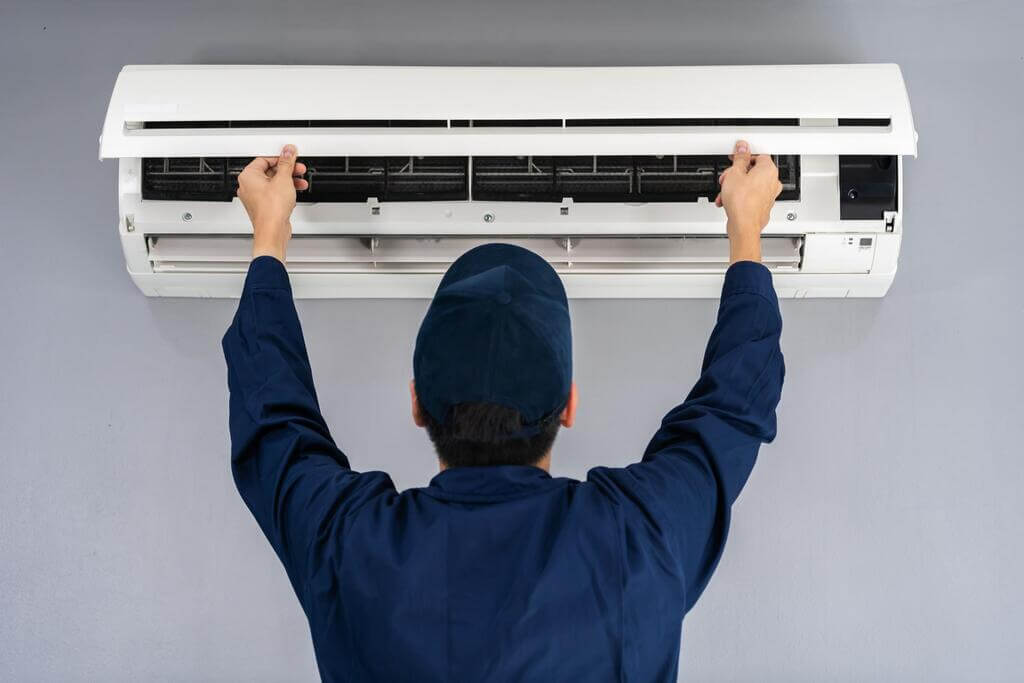
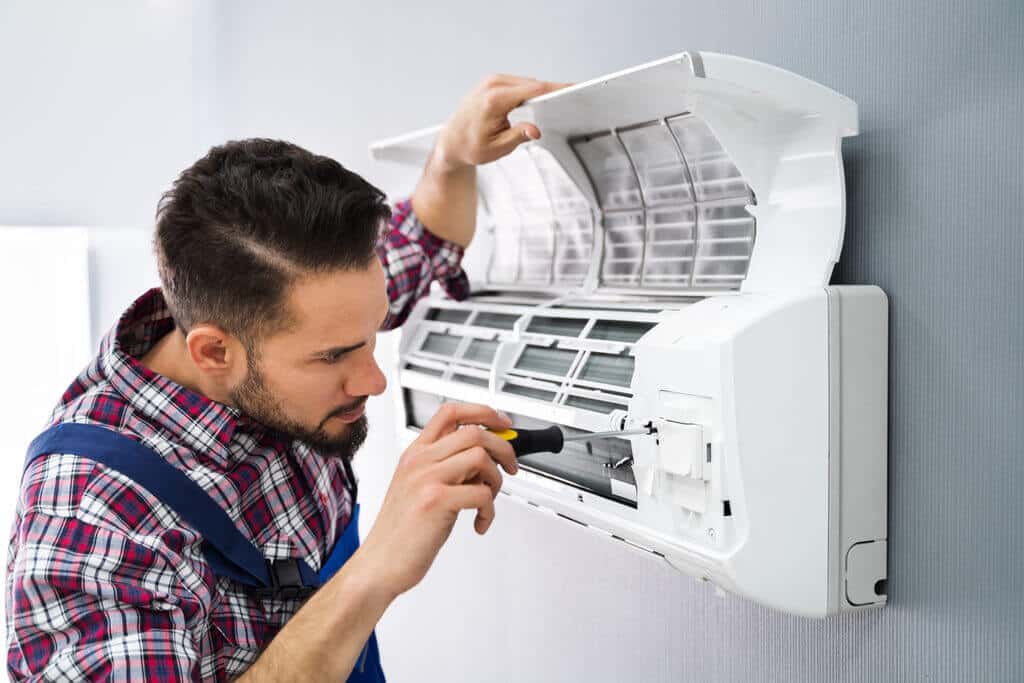
When your air conditioner starts acting up, it can quickly turn your comfortable home into an uncomfortable space. Recognizing the early signs that your AC needs repair can save you from costly breakdowns and ensure your home stays cool when you need it most. From warm air blowing through the vents to unusual noises or weak airflow, these warning signals indicate it’s time to call in a professional.
Understanding these key signs helps you address issues promptly, maintain energy efficiency, and avoid inconvenient system failures during the hottest days of the year. Here are four clear signs that your air conditioner needs repair before the problem worsens.
1. Poor Airflow
If you turn on your unit and think that it is functioning perfectly, but the room temperature doesn’t seem to change at all, then it definitely isn’t functioning perfectly. Usually, this is a case of poor airflow. There are a couple of ways to measure the airflow and you can find some of those on this page.
You will often be able to determine this by simply putting your hand in front of the vent. If the air coming out is not powerful enough, then you definitely have an issue on your hands. This might be a sign of clogged filters, blocked air ducts, or other issues. In any case, it needs to get checked out and fixed.
2. Hot Air
Here’s another important sign that you need to call in professionals to fix your AC unit. It’s blowing hot air when during hot summer months. You’ll definitely notice this one because it is rather unpleasant when you cannot get the temperature right.
Before you contact anyone, though, you should give it some time. It might need a while before it switches to cold air. If it doesn’t then it might be an issue with the refrigerant, or a disconnected return duct and similar. A professional technician will know what to do.
In the meantime, here are some tips on cooling down without air conditioner, before help arrives: https://www.wikihow.com/Cool-Yourself-Without-Air-Conditioning
3. Unusual Noises
At some point, you might notice that your air conditioning system is making very unusual noises. It might sound like it was struggling to work. If you ignore this, it will probably stop struggling and stop working altogether after a while.
Of course, it must make some noise while working, but you will be able to differentiate between normal and unusual ones if you just pay attention. If it sounds like something is scraping or grinding inside, it’s definitely a bad sign. Make sure to pay attention to any changes in noise and contact experts the moment you notice it is becoming unusual.
In some instances, these noises can mean that there is a loose part inside the unit. If you simply let it be, then the problem will get worse over time. In other instances, it can be a sign that some parts need some lubricant. Whatever the case, don’t ignore the issue since the repair might cost you more later.
4. Weird Smell
Another significant sign that your AC unit needs to be repaired is when it starts emitting weird and unpleasant smells. Trust me, the smell won’t disappear unless you do something about it. Doing something about it, of course, means contacting an expert.
The smell might not be an indicator of a very serious issue. It could happen that duct cleaning is all you need in order for the odor to disappear. On the other hand, it might be a sign of wire issues. Whatever the case, ignoring the smell is the last thing you want to do.
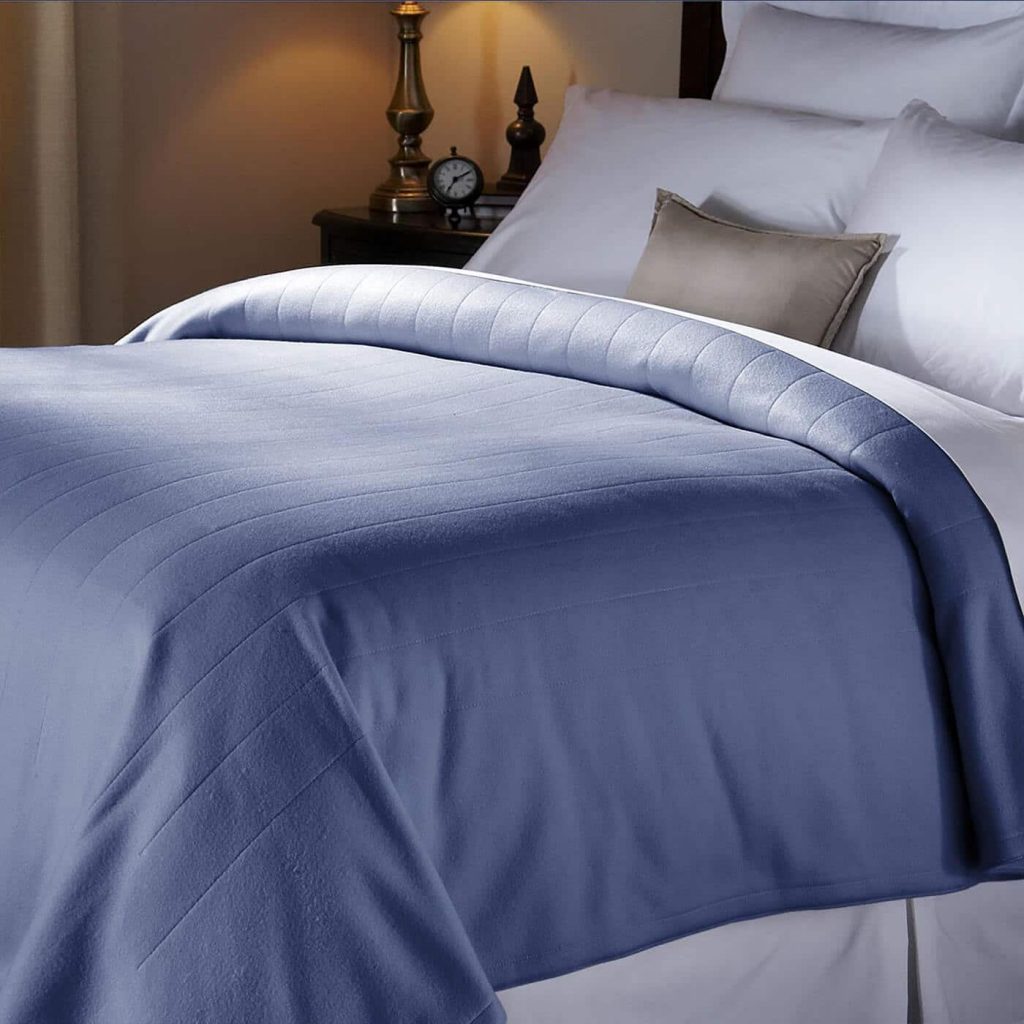
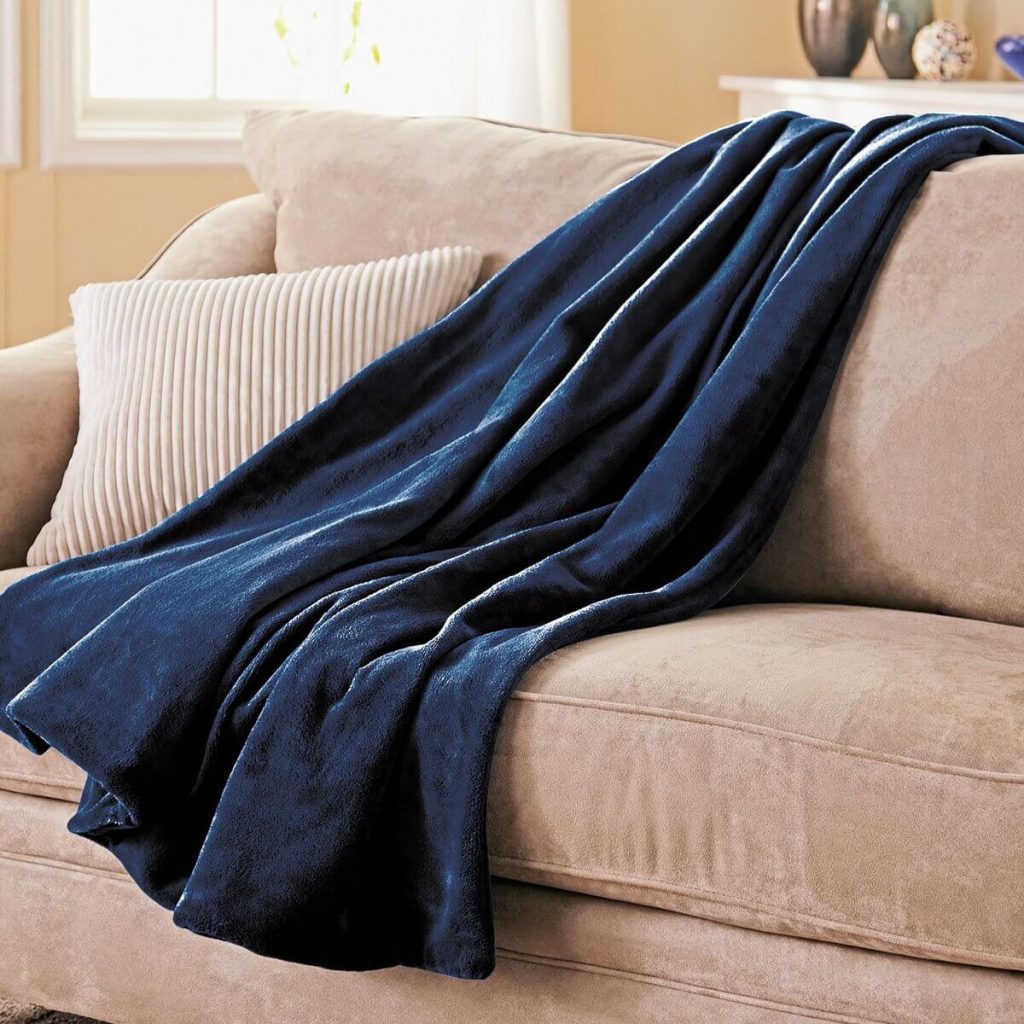
Winter’s chill is fast approaching, and for those living in especially cold climates, traditional blankets and comforters often fall short of providing the warmth needed for a restful night’s sleep. Instead of piling on layers or relying solely on woolen sheets, electric blankets offer an efficient, customizable solution to keep you comfortably warm through the coldest nights.
Modern electric blankets feature advanced heating technologies, adjustable temperature controls, and soft, machine-washable materials, making them a practical and energy-efficient way to stay cozy all winter long. Whether you’re relaxing on the couch or settling into bed, these blankets deliver consistent warmth and convenience, eliminating the need for multiple heavy layers.
What to Look for in an Electric Blanket?
Before we dig into the blanket list, let’s know what the major things are that you should always look for in an electric blanket before you buy one:
Material
If you feel scratchy in a blanket, then there is no use in it, right? But fortunately, heated blankets are made with soft microfiber that is very soft to touch. The polyester microfiber blankets are machine washable for easy care and dryer safe.
Size
Before you order, first decide whether you want a blanket for your couch or bed, as both will be available in different sizes. Electric blankets come in sizes from twin to king.
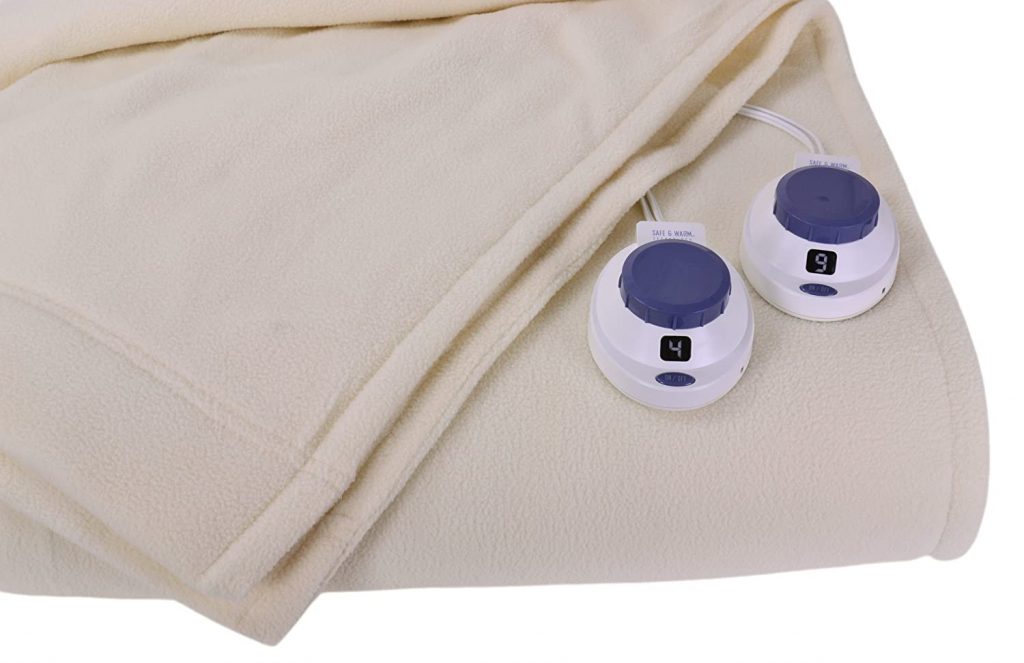
Dual Temperature Control
Always buy a dual temperature control heated blanket if you know that you’ll be sharing the blanket with someone else. In dual control, you can set two different temperatures at the same time.
7 Top Electric Blankets
Below is the list of best-heated blankets to help you stay warm on chilly nights:
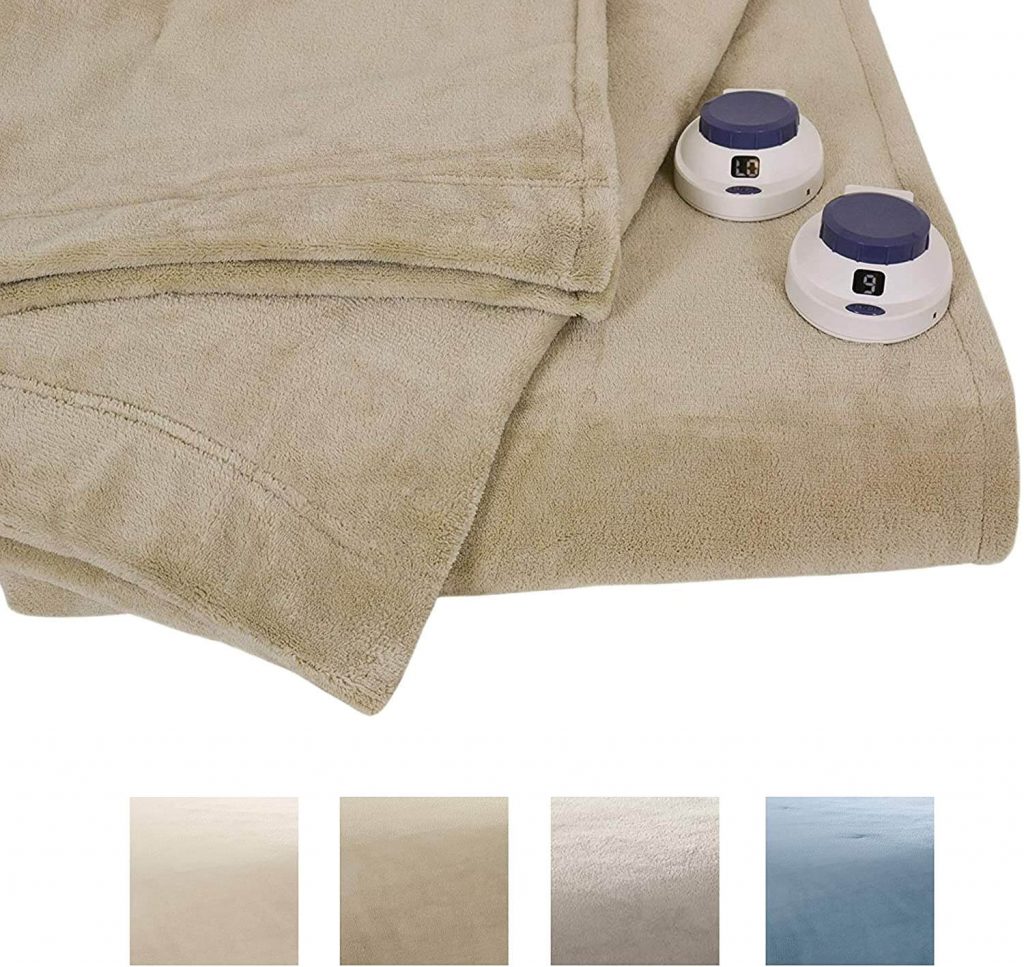
1. Sunbeam Quilted Fleece Heated Blanket
When it comes to electric blankets, Sunbeam is a well-known brand, and our first pick is also from this brand. Their Quilted Fleece Blanket is not only budget-friendly but also is designed with ThermoFine technology so that it will provide you with evenly distributed heat all night long.
And the best part is that it has ten temperature settings with many other features such as automatic shut-off capabilities with a 10-hour timer, and dual adjustment options for couples in the Queen and King sizes. Made from ultra-plush polyester fleece, this blanket holds heat quite well and provides night-long thermoregulation. It also comes in various colors and sizes, like twin, full, queen, and king, so you can choose your favorite one.
Key Features
10 temperature settings
Machine Washable
5-year warranty
Dryer Safe
Polyester fleece
Soft and Durable
Automatic shut-off function
Dual controls for larger sizes
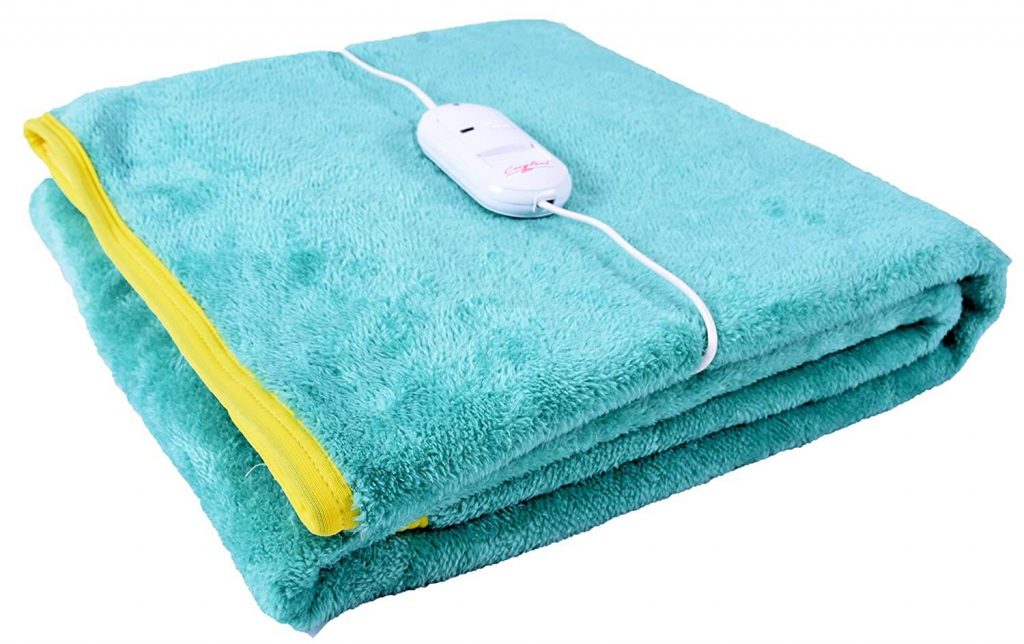
2. Warmland Single Bed Electric Bed Warmer
Living in cold regions of the planet? Then this electric blanket will work perfectly for you. Whether you are watching TV or sleeping, the Warmland single electric blanket will give you the utmost comfort.
Comes with three controllable speed options- low, medium, and high; it is perfect for old age people and people who are suffering from arthritis & backache. The blanket will get warm as soon as you switch it on.
Key Features
100% Shockproof and 100% waterproof
Autocut for overheating,
5-Year Replacement warranty
Flexible
3-speed setting options
Auto shut off
Machine washable
Low power consumption
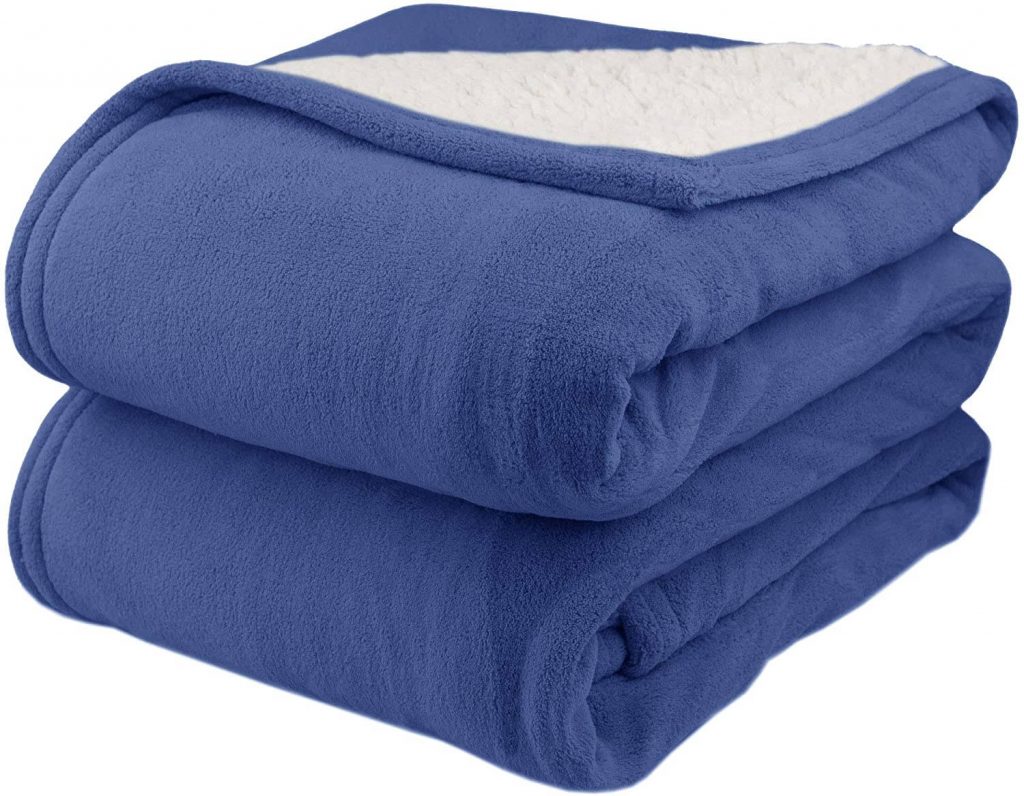
3. Biddeford Microplush with Sherpa Electric Blanket
Sometimes you and your partner don’t agree on the same heat level, right? So here is the solution for you: the Biddeford Microplush Electric Blanket. Yes, it is a dual-control blanket that comes at an affordable price. It comes in both queen and king sizes and with two controllers for dual heat zones. Isn’t it amazing?
This blanket has a soft micro plush fabric on one side and a cozy sherpa on the other, which means it is comfy on both sides. Also, it has ten heat settings and a ten-hour shut-off for safety. It is super easy to wash and dry.
Key Features
100% Polyester
Soft and Comfortable
Adjustable heat settings
Auto shut-off timer
Machine Washable
5-year warranty
4. Sunbeam Heated Throw Blanket, Microplush
Don’t want to spend a lot on your first electric blanket? Try this one. The Sunbeam Heated Throw Blanket is super affordable and ultra-soft. Although it is on the smaller side, it is still worth giving it a try.
Made from polyester, it uses ThermoFine technology to deliver even heat. It also has three settings to choose from. Don’t worry if you forget to turn off the things, because this blanket will automatically turn off after three hours. Another great thing about it is that you can easily clean it in the washing machine and dryer.
Key Features
100% Polyester
3-hour auto-off
Controller with 3 settings
Ultra-soft microplush
ThermoFine technology
Easy to use
Machine-washable and dryer-safe
5. SoftHeat Luxury Micro-Fleece Electric Heated Blanket
Want a super comfortable and a better performance blanket? Particularly, the SoftHeat by Perfect Fit is on the expensive side, but it has many awesome features such as Low-Voltage Heated, safe for pets, and many more.
This blanket uses a low-voltage technology, which is very safe even if it gets wet. Available in twin, full, queen, and king sizes and plenty of cute colors, you can select any blanket. You will not even feel the wires, and yet it delivers cozy and consistent heat. Know which is best between microfiber and cotton sheets.
Key Features
Patented Safe & Warm
Safe in the presence of moisture
Automatically shuts off after 10 hours
Machine washable
Comes in various colors
Safe & Warm Low Voltage Technology
6. Serta Soft Heat Luxe Plush Low-Voltage Heated Blanket
One thing that people hate about electric blankets is that they can feel the wires when they’re using them. But not with this one! The Luxe Plush Fleece Electric Throw from Serta has super-thin wires that are nearly undetectable during use for a more convenient experience. It uses low-voltage wires that are safe in the presence of moisture and for pets to sleep on.
Like many other electric blankets, this model also offers 10 heat settings ranging from light to very warm. Additionally, the blanket will automatically turn off after 10 hours. You can buy this blanket in four beautiful color options.
Key Features
10 temperature settings
5-year warranty
Lightweight
Polyester microfibers
Automatic shut-off function
Dual controls for larger sizes
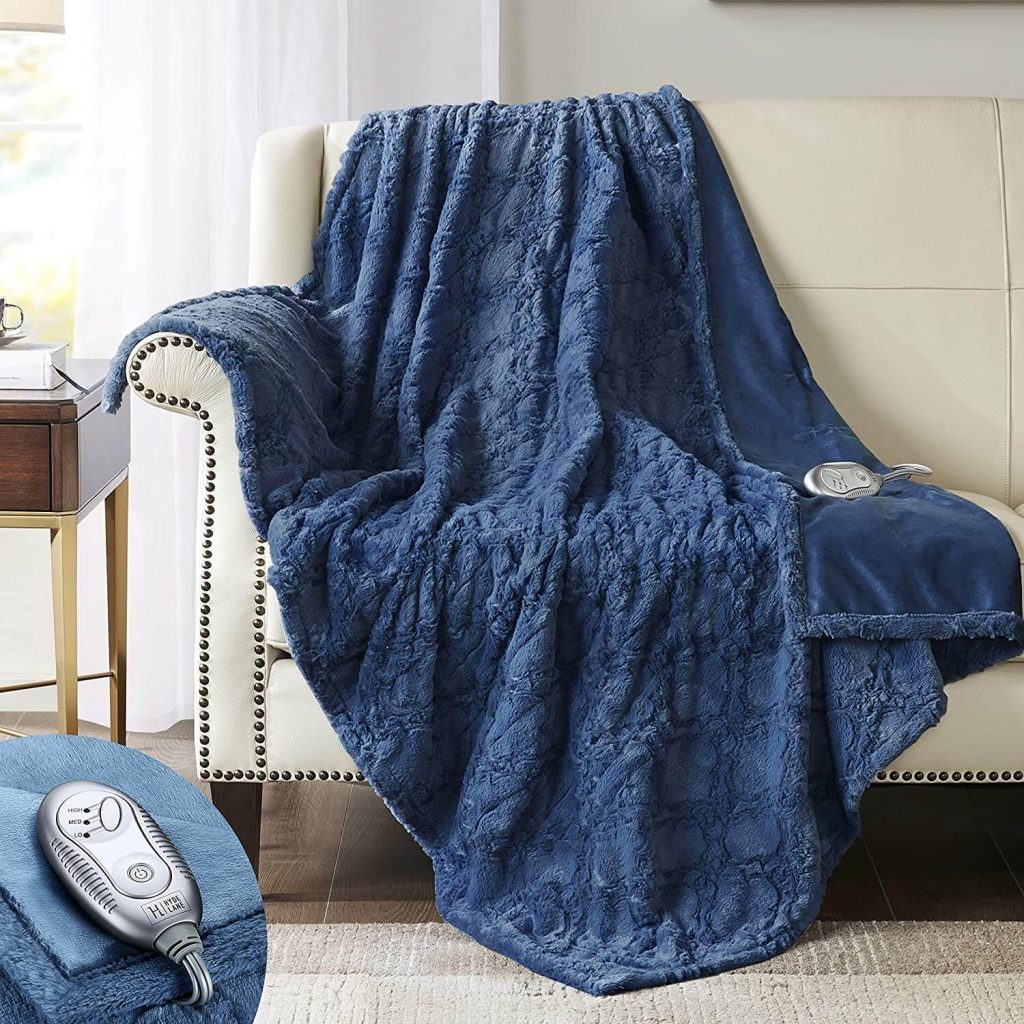
7. Hyde Lane Premium Heated Faux Fur Throw Blanket
Above all, six blankets are more on the comfier side, but if you’re looking for a decorative blanket that you can put on your sofa, then try this one. The Hyde Lane’s Heated Faux Fur Throw Blanket has super soft faux fur, which not only looks good but also feels good. The wavy texture of the fur will give you the feeling of the real fur. Besides this, the low-voltage wires aren’t visible, which is great if you’re going to display this blanket.
It also has a tiny remote, and all this comes in an attractive box, which simply means you can give this as a gift to others. Comes with advanced three heat settings, this will heat quickly and give you a comfortable sleep. Select any one from the six different pretty shades, including wild fox and snow leopard.
Key Features
Silky Soft
Low energy consumption
Affordable
Soft and Lightweight
Multiple heat settings
The Bottom Line
Say goodbye to the old ways to keep you warm; the new advanced approach is the electric blankets. Just wrap yourself up in pure comfort and luxury. That’s all for our best picks of heated blankets. I hope this guide helped ease your buying decision. If you have found your favorite one, don’t forget to order it by clicking on the link.
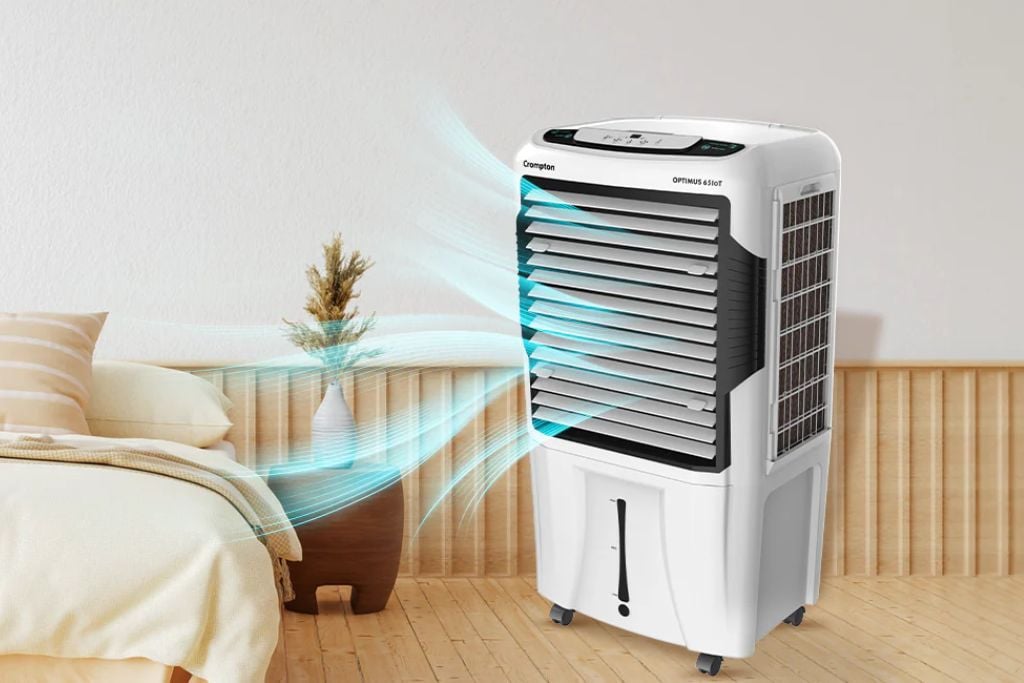
Looking for a cost-effective way to beat the heat without relying on an air conditioner? A tower air cooler is a smart alternative that combines cooling performance with energy savings. Whether you’re cooling a small apartment or just want a portable option for different rooms, tower coolers offer practical benefits that suit a wide range of living spaces. Here’s a closer look at why a tower cooler might be the right choice for your home this summer.
1. Energy Efficiency
One of the most compelling reasons to choose a 1 over a traditional air conditioner is its energy efficiency. Tower coolers consume significantly less energy, making them an environmentally friendly option. They use natural water evaporation to cool the air, requiring only a fraction of AC units’ electricity.
This leads to low utility bills and reduces environmental impact, making it eco-friendly for cooling your space. By reducing your energy consumption, you’re saving money and contributing to a more sustainable future.
2. Portability
Unlike fixed air conditioning units, tower coolers are designed to be portable. They are lightweight and equipped with caster wheels, allowing you to move them quickly between rooms as needed. Whether you work in your home office, relax in the living room, or sleep in the bedroom, you can enjoy cool, refreshing air.
Their compact design makes them perfect for small spaces or apartments where traditional AC units may not be feasible. This flexibility ensures you can maintain a comfortable environment throughout your home without needing multiple cooling systems.
3. Improved Air Quality
Tower coolers not only cool the air but also help improve indoor air quality. Many models come with built-in air purifiers and filters that capture dust, pollen, and other allergens, ensuring you breathe clean and fresh air.
This is particularly important for individuals with respiratory issues or allergies, as the cooler can help eliminate symptoms during the hot summer. By continuously circulating and filtering the air, tower coolers create a healthier living environment, making them a dual-purpose appliance that enhances comfort and well-being.
4. Affordability
Regarding cooling solutions, affordability is a crucial consideration for many consumers. A tower air cooler offers a budget-friendly alternative to air conditioners, making them accessible to the audience abroad. The relatively low upfront air cooler price, energy savings, and reduced maintenance expenses make it a cost-effective cooling solution for your space.
Tower coolers offer the same level of comfort and cooling efficiency as an air conditioner without breaking the bank. This makes them an excellent choice for those looking to stay cool on a budget.
5. Quiet Operation
One common complaint about traditional air conditioners is their noise, which can be disruptive, especially when trying to work, relax, or sleep. On the other hand, tower coolers operate quietly, allowing you to enjoy a serene space without the constant hum of an AC unit.
Their innovative design minimises noise levels, making them an excellent choice for offices, bedrooms, or any other space where quietness is preferred. This ensures you can maintain a soothing atmosphere while benefiting from effective cooling.
6. Low Maintenance
Maintaining an air conditioner is a hassle, often requiring professional servicing and frequent repairs. In contrast, tower coolers are known for their low maintenance requirements. With simple cleaning and occasional filter replacements, you can keep your cooler running efficiently throughout the summer.
This saves you time and effort and minimises the risk of costly repairs or breakdowns. The ease of maintenance makes tower coolers convenient and reliable for anyone looking to simplify their home cooling routine.
7. Versatility
A tower air cooler offers versatile cooling options to suit your preferences. Many models come with adjustable fan speeds, oscillation settings, and remote controls, allowing you to customise the cooling experience according to your needs. If you prefer a gentle breeze or even a powerful gust of air, you can adjust the settings to create the perfect indoor climate.
Some advanced models even include additional features such as timers, humidity control, and air ionisers, providing enhanced comfort and convenience. This versatility ensures that you can customise the cooling performance of your tower cooler to match your specific requirements.
8. Environmentally Friendly
Tower coolers are energy-efficient and environmentally friendly. Unlike air conditioners, which use harmful refrigerants, they cool the air through natural evaporation.
This means they don’t emit greenhouse gases or contribute to ozone depletion, making them a greener choice for the environment. By choosing a tower cooler, you’re prioritising your comfort and taking a step towards reducing your carbon footprint and protecting the planet.
9. Space-Saving Design
Another advantage of a tower air cooler is its space-saving design. Their tall, slim profile allows them to fit seamlessly into any room without taking up too much floor space. This is mainly beneficial for smaller homes or compact apartments where space is at a premium.
The sleek design of tower coolers also adds a modern touch to your interior decor, effortlessly blending in with your existing home decor and furnishings. Thus, you can enjoy the benefits of effective cooling without compromising on style or space.
Conclusion
Investing in a tower cooler for your space this summer offers several benefits, including energy efficiency, portability, improved air quality, affordability, quiet operation, low maintenance, versatility, and environmental friendliness. With their innovative design and advanced features, tower coolers provide a refreshing and comfortable indoor environment during the year’s hottest months. So, embrace the immense advantages of this cost-effective and eco-friendly cooling solution and enjoy a relaxed and comfortable summer.
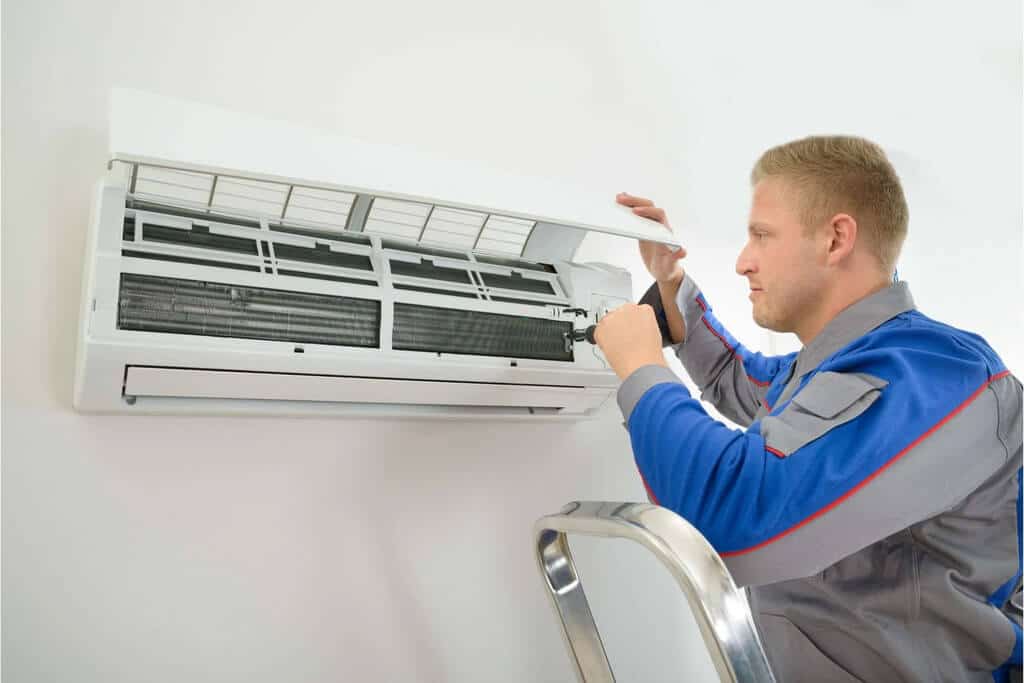
Modern central air conditioning systems are designed to operate quietly, so any loud or unusual noise from your AC is a clear sign that something may be wrong. Ignoring these sounds can lead to bigger problems and costly repairs down the line. Whether it’s banging, screeching, buzzing, or hissing, each type of noise points to a specific issue that needs attention. In this guide, we’ll help you identify common AC noises, what they mean, and when it’s time to call an HVAC professional to keep your system running safely and efficiently.
If Your AC Is Making Banging Noises
The compressor in your HVAC system is designed to distribute refrigerant to various components of your unit in order to remove excess heat from your home. If you are hearing a banging noise, it can be a sign that the compressor is experiencing a problem. It is not unusual for parts of the compressor to become loose, especially if you have an older system.
The sound you are hearing is caused by parts that have become loose or detached and are hitting the compressor’s housing. In most cases, compressors aren’t easily disassembled, making them irreparable.
Contact a qualified technician at an HVAC company to evaluate the situation and make repairs. In some instances, this may not be possible and you will require a new system.
If Your AC Is Screeching
The usual culprit associated with screeching noises coming from your HVAC unit is the fan motor located in the exterior condenser unit. This fan is responsible for removing heat from the refrigerant.
If you are hearing a high-pitched screeching or shrieking noise, the cause can usually be traced back to this fan. In some cases, it may be caused by a damaged motor in the condenser system’s compressor.
Another cause may be that the blower fan motor located inside your home has become damaged. This fan collects warm air from the interior of your home and sends it through the return ducts to be cooled by your air conditioning system for redistribution. The blower fan performs this function, as well, by circulating warm and cool air back and forth through the unit to cool your home.
You might also find that the screeching is caused by damaged bearings or fan belts in your fan motor. This is usually the case when the screeching sound is emanating from the HVAC components inside your house.
Any of these require a service call. It is best to turn off your HVAC system and contact a professional to address the problem before turning it back on.
Constant Humming
If your contactor relay switch has become defective it can create the humming sound you may find yourself hearing from your HVAC system. This part is responsible for starting the exterior condenser unit as signaled by your thermostat. This electrical problem is something that must be addressed immediately.
Turn off your system and contact an HVAC technician to investigate the situation. Failure to do so can result in severe damage to your system and expensive repair, if not irreversible damage.
Loud Buzzing Sound
You should never allow buzzing noises coming from your HVAC system to go unchecked. Buzzing is a warning that a fan blade has loosened or gotten off the balance in your condenser unit. This buzzing sound can also be created by faulty outdoor fan motors, condenser coils that have gotten dirty, and loose parts.
If an obstruction is located near the copper lines of your system, it can also make this sound while in operation. The direst of causes is a refrigerant leak. Refrigerants can be very dangerous and must be dealt with immediately.
The best solution is to ensure that you keep up with maintenance to prevent any of these issues from occurring, but if you do hear a buzzing noise, contact a professional immediately to correct the problem and prevent additional damage.
Regular Rattling
There can be a very simple reason for rattling. Loose sticks, dirt, or leaves can sometimes become lodged in your exterior condenser unit and cause this problem. It can be remedied by turning off the system and removing the offending items.
In some cases, rattling may be a sign that there is a damaged electrical contractor present in your system. If you were unable to locate any visible items hindering the operation of your condenser unit, then this may be the problem. This issue can be quite significant.
Contact an HVAC expert to have this corrected in order to avoid suffering more severe harm to the central air conditioner’s compressor.
Intermittent Clicking
A clicking noise can sometimes be heard when your HVAC unit comes on or off. This is entirely normal and nothing to worry about. If you are hearing more continuous clicking, that is an issue. One potential cause is a malfunctioning thermostat. An experienced technician should be able to diagnose and replace or repair your thermostat with relative ease.
Constant Hissing
Hissing is usually the result of an air leak. If the leak is severe enough that you are hearing the hiss, then you should have it checked immediately. Air leaks of this magnitude can be costly as they directly affect the energy efficiency of your system and interfere with heating and cooling operations.
Hissing might also be the result of a faulty expansion valve or an incompatible air filter. It is best to call a qualified HVAC technician to inspect your system and make any necessary repairs.
Conclusion
There are several types of sounds your air conditioning system might be making, and they might point to a variety of potential issues. The scale and complexity of the fix will vary depending on the issue and the unique circumstances around your home, so even with these tips, you may not be able to fix the issue.
In situations like this, it’s best to contact a local HVAC professional to get assistance with your loud AC, as they’re trained and experienced enough to solve the issue quickly and efficiently.
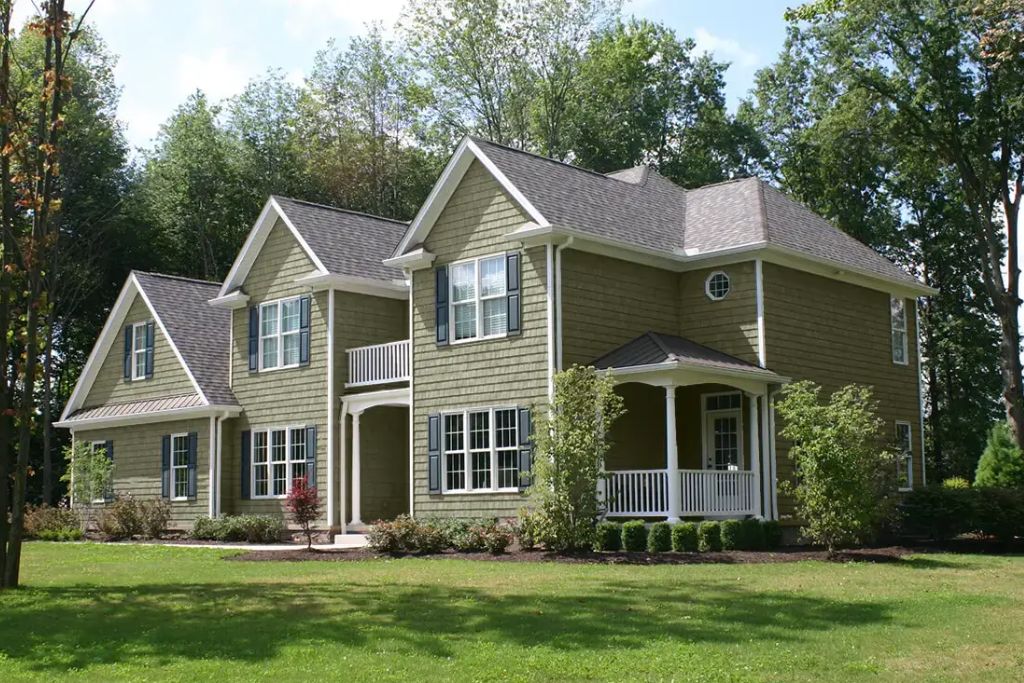
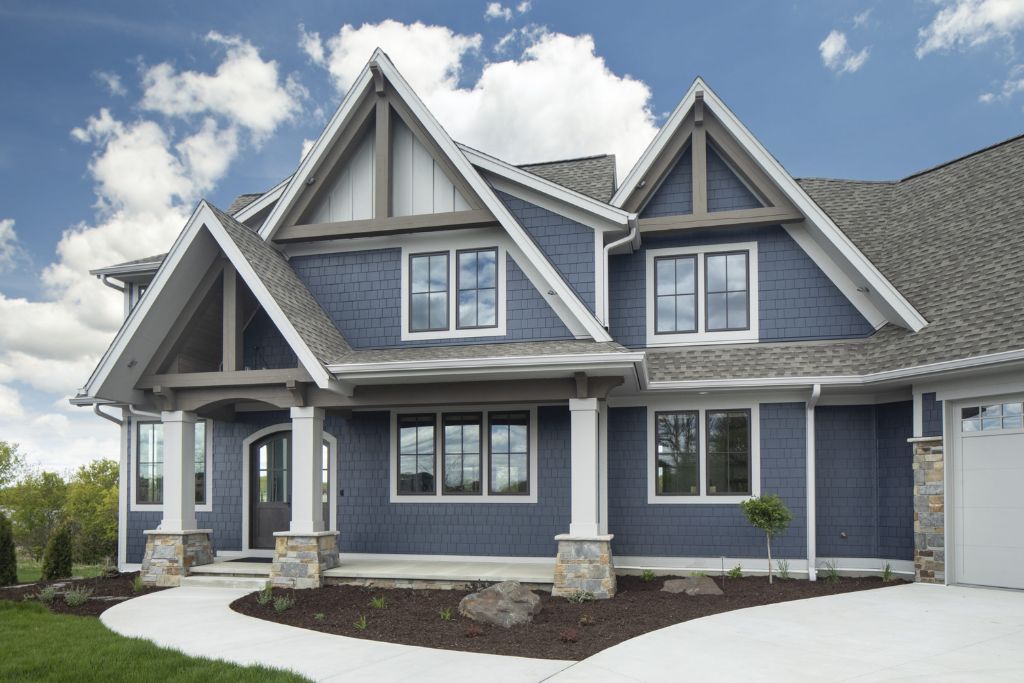
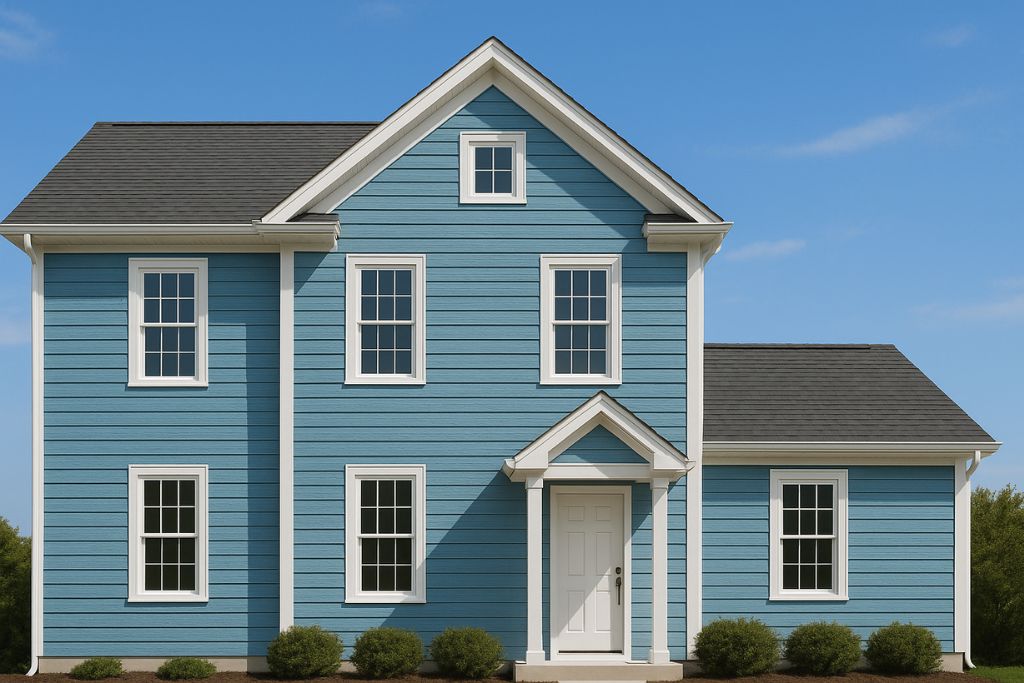
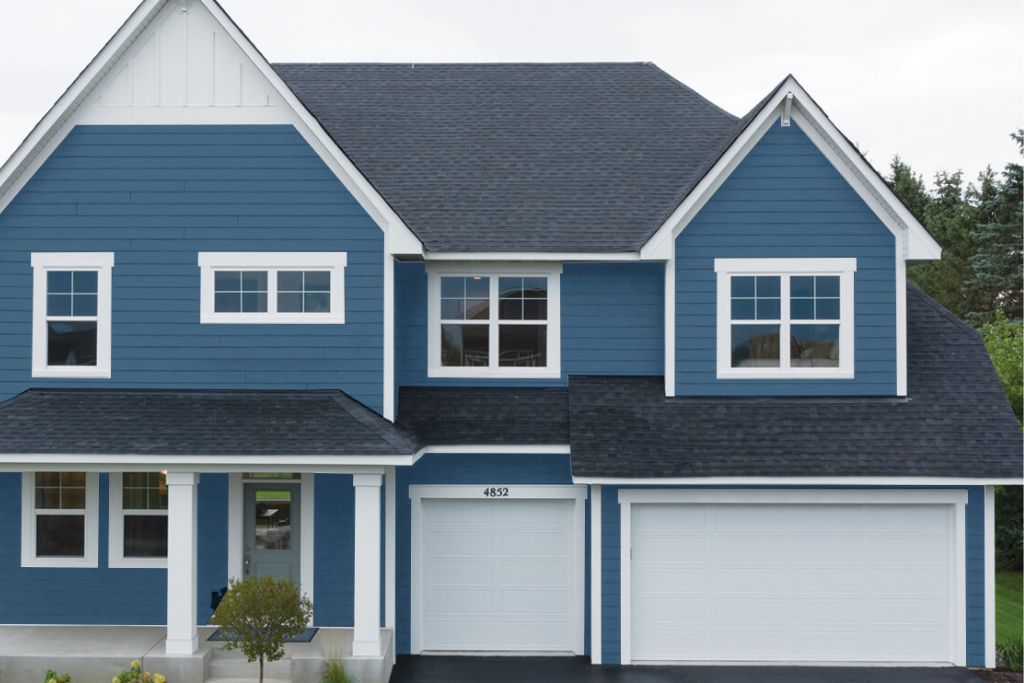
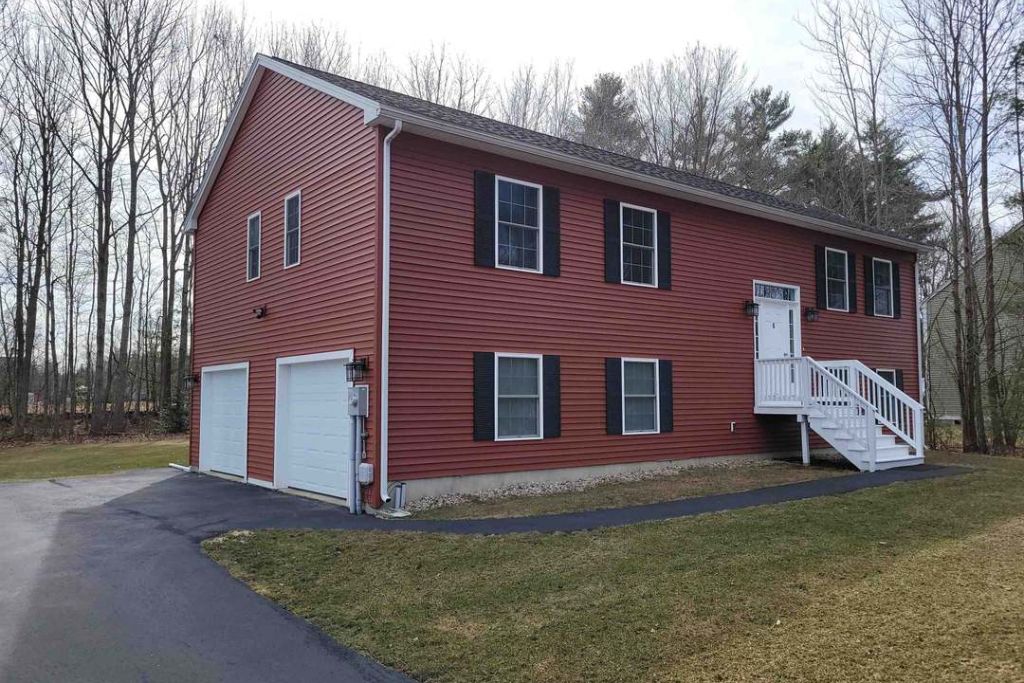
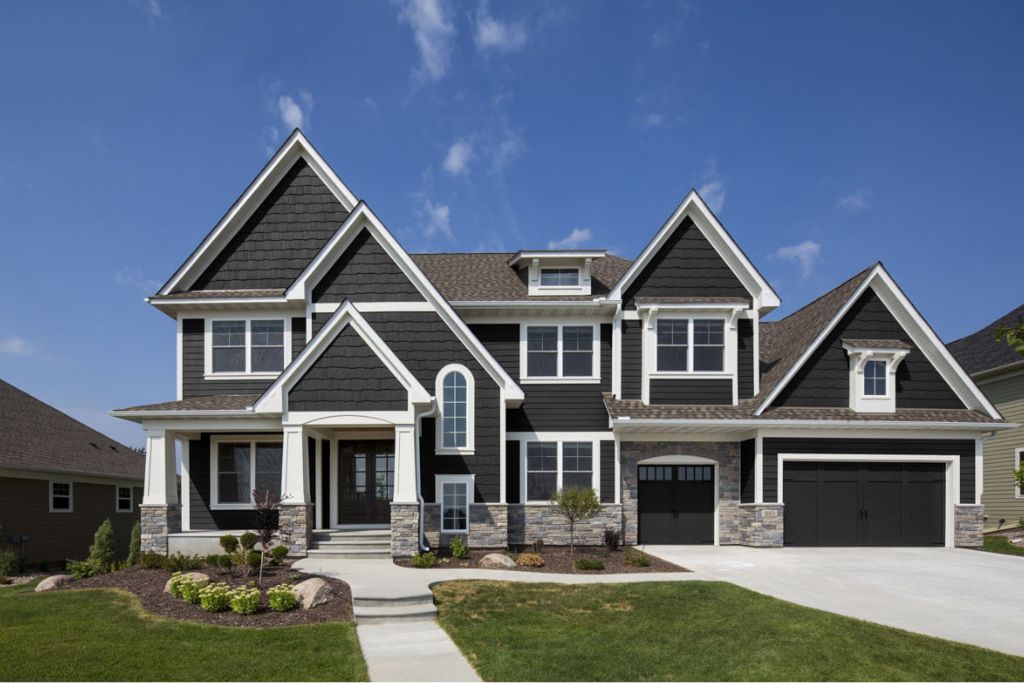
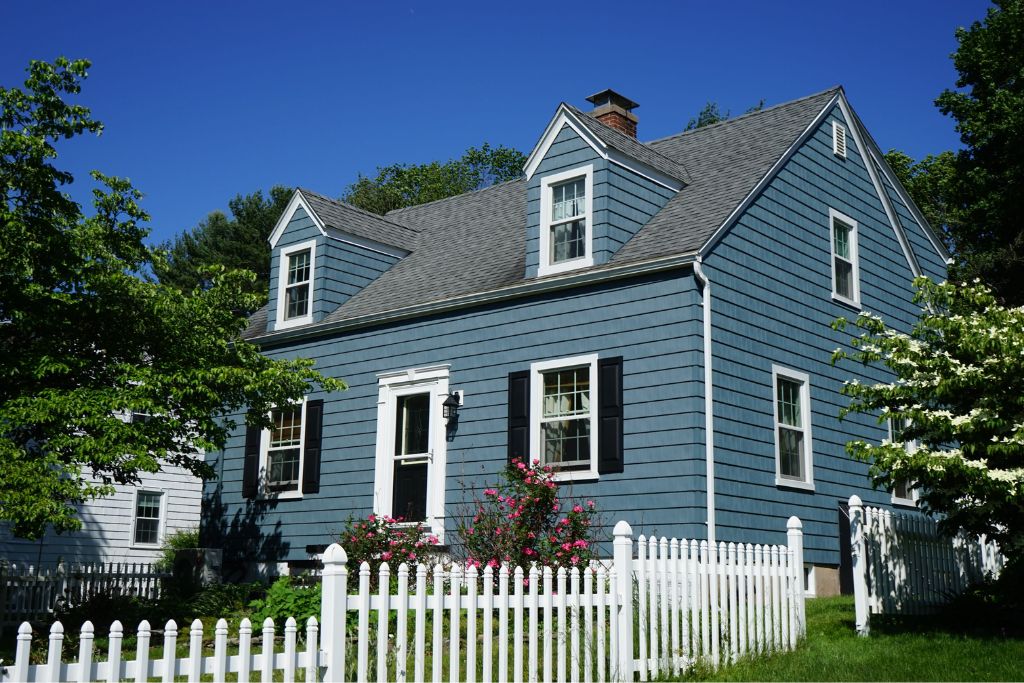
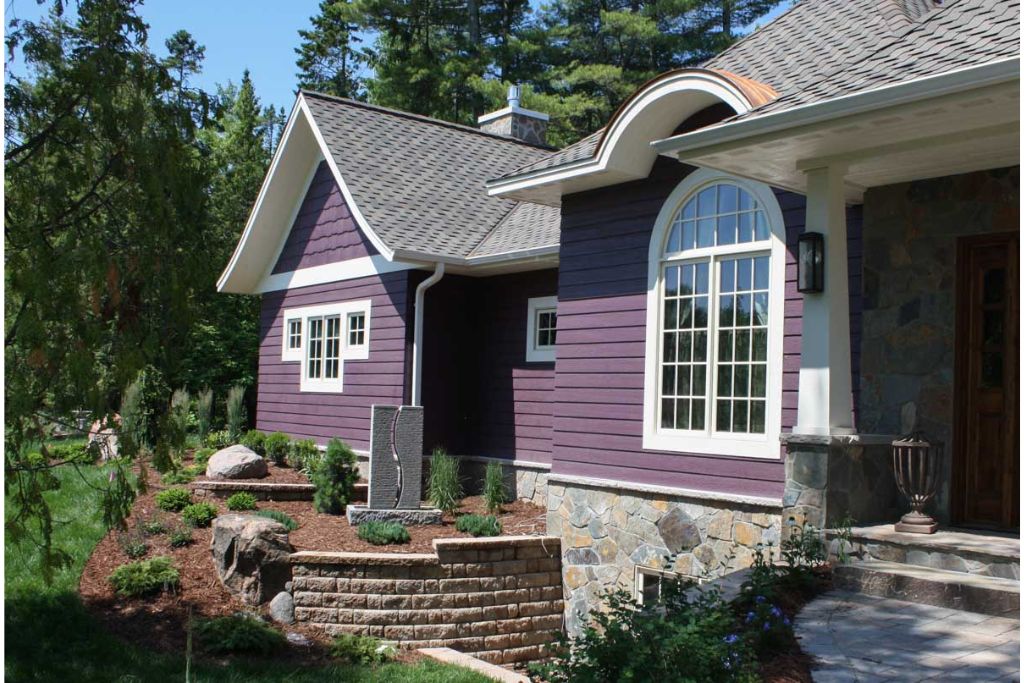
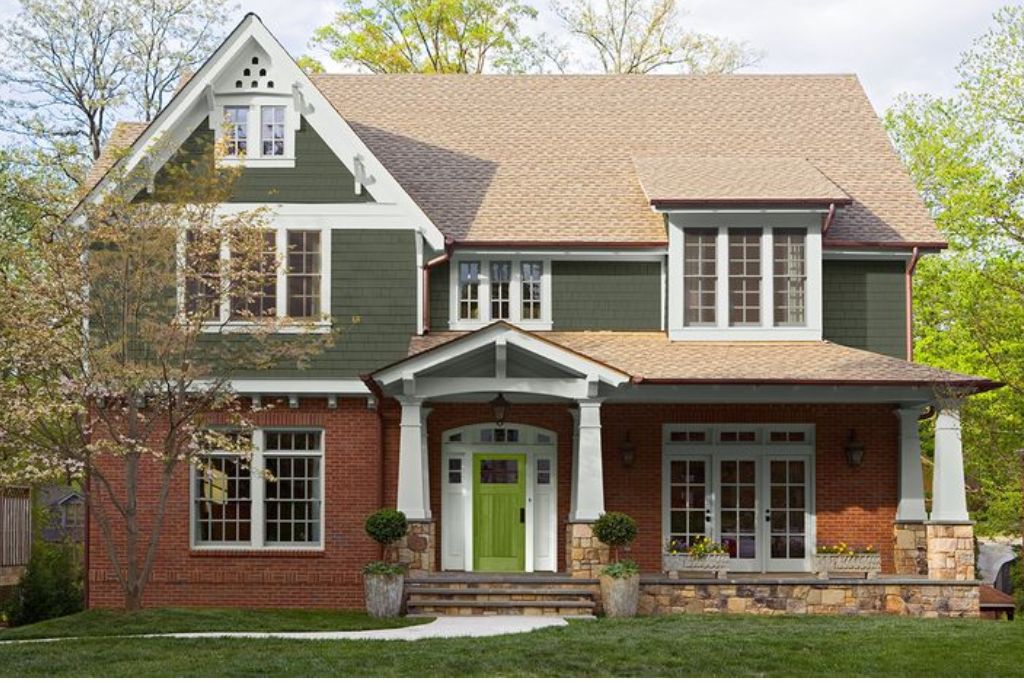
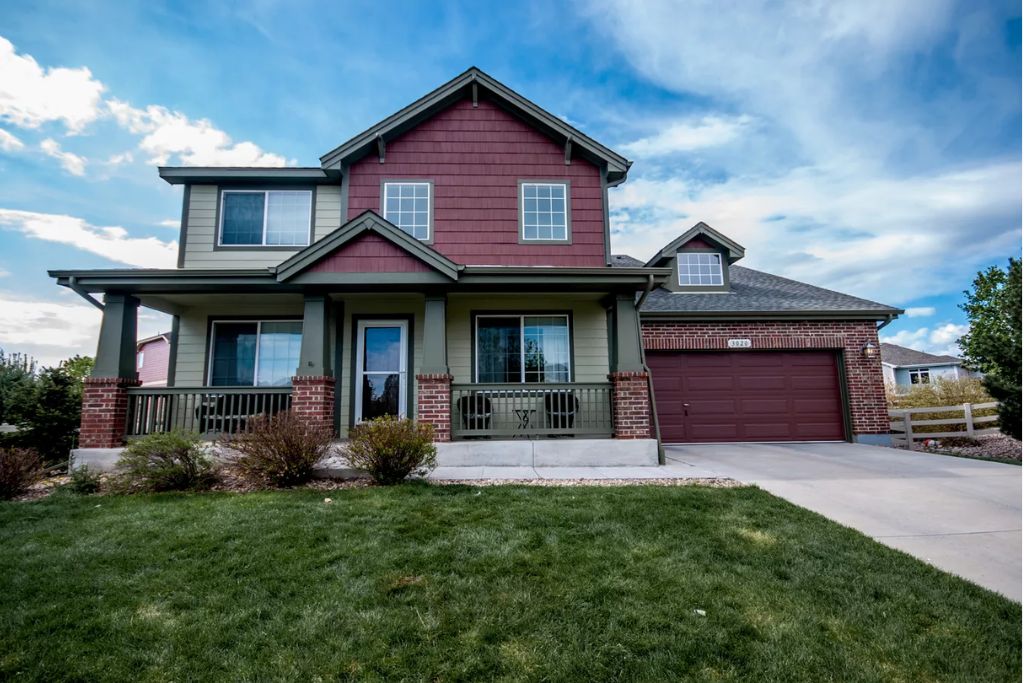
Vinyl siding isn’t just about protection; it’s a big part of your home’s personality. The Vinyl Siding colors you choose can shape how your house is perceived from the street and how it fits in with its surroundings. A good match can make your home feel more welcoming and up-to-date, and even increase its value if you’re considering selling down the road.
Curb appeal is one of the first things buyers notice, and siding color plays a major role. A well-chosen color can highlight architectural details, make small homes seem bigger, and give older homes a fresh look. On the flip side, the wrong color might clash with your roof, landscaping, or the overall character of the neighborhood.
Modern vinyl siding comes in a wide range of shades, from clean neutrals to bold, deep tones. Whether you’re into the crisp look of white or a dramatic navy, there’s likely a shade that matches your taste and your home’s style.
How to Choose a Vinyl Siding Color
Choosing the right vinyl siding paint colors isn’t just about picking something you like on a color card. There are a few practical points to keep in mind:
1. Home Style
Different home designs tend to work better with certain colors. For example:
Colonial homes look great in traditional whites, deep reds, or dark blues.
Modern styles may lean toward cool grays, black, or minimalist tones.
Farmhouse and cottage homes usually suit soft pastels or earthy neutrals.
2. Regional Climate and Natural Surroundings
Colors can look different depending on the light and environment. In sunny or desert areas, lighter tones might help reflect heat. In wooded or coastal areas, natural greens, grays, and blues can blend nicely with the landscape.
3. Roof and Trim Color Coordination
The colors of vinyl siding should complement, not compete with, your roof and trim. If your roof has a strong color or pattern, you might want to keep the siding more neutral. If the roof is muted, you’ve got more flexibility.
4. Resale Value and Neighborhood Trends
A bold or unique color might reflect your style, but it’s worth checking what’s common in your neighborhood. Going too far off the usual palette might make resale harder down the line.
5. Color Longevity and Fade Resistance
Exposure to sun, wind, and weather affects colors vinyl siding year-round, with noticeable fading often seen in the brighter and darker shades. Many manufacturers now offer UV-resistant finishes, but it’s still something to ask about before deciding.
Top 40 Vinyl Siding Colors (Organized by Category)
Neutrals: Timeless and Versatile
Neutral vinyl siding colors are always in demand because of their flexibility and long-lasting appeal. Whether you’re building new or updating your home’s exterior, neutrals offer a safe and stylish choice. They blend well with various roofing, trim, and landscaping styles and tend to age well over time.
1. Classic White
Classic white siding gives a home a clean, bright look that never feels outdated. It works across many architectural styles from colonial to modern farmhouse and gives a crisp backdrop for contrasting accents like black shutters, bold-colored doors, or natural wood tones. It’s also a smart pick in warm climates, since it reflects sunlight, helping to keep interiors cooler. White is an easy way to make a home look fresh and well-kept, which can help with curb appeal and resale.
2. Soft Beige
Soft beige brings warmth and comfort to your home’s exterior without being too bold. It blends easily with natural surroundings, making it a good option for homes near trees, fields, or stonework. This color works well with brown or red-toned roofing and adds a calm, welcoming feel to the structure. It’s also easier to maintain than brighter shades, as it hides dirt and weather stains better, which is a bonus for busy homeowners.
3. Warm Taupe
Warm taupe is a great option for those who want something richer than beige but not as cool as gray. It sits nicely in between, offering both warmth and depth. Taupe is especially popular on transitional and craftsman-style homes and looks polished when paired with white or cream trim. It also complements natural materials like brick and stone, making it a versatile choice that feels cozy without looking too dark.
4. Light Gray
Light gray has a sleek, modern feel that suits both new construction and renovations. It’s neutral enough to fit in anywhere, but has enough character to give a home a stylish edge. This shade works beautifully with both black and white trim, making it easy to coordinate exterior details. Light gray also reflects just enough sunlight to keep it looking fresh in both sunny and cloudy weather.
5. Charcoal
Charcoal brings a bolder, more dramatic look while still staying in the neutral category. It’s a deep gray that adds sophistication and strength to a home’s appearance. This color of vinyl siding works well on modern homes or any structure where you want a clean, confident exterior. Charcoal looks especially sharp when paired with white trim and warm wood accents. It’s also effective at hiding dust or discoloration over time, which adds to its practical appeal.
6. Driftwood
Driftwood gives a relaxed, lived-in look that feels right at home in natural settings. With its weathered, wood-inspired tone, it brings rustic charm without going too dark or heavy. This color is ideal for homes with stone features or natural landscaping. Driftwood can soften the appearance of a boxy structure and make it feel more connected to the outdoors. It’s a favorite for cottages, lake houses, and craftsman-style homes.
7. Sandstone
Sandstone has a soft, earthy feel that adds a bit of warmth and charm to any home. It’s especially well-suited for homes in dry, sunny areas and pairs nicely with bronze or brown trim. This Vinyl Siding tone gives your home a natural, desert-like warmth that blends well with light-colored stone or clay roofing. It also does a good job of disguising dust and fading, making it a practical pick in areas with a lot of sun and wind.
8. Clay
Clay is a deeper neutral that mixes beige with a touch of gray, giving it a grounded and versatile appearance. It’s commonly seen in newer suburban builds because it works well with asphalt shingles and various trim colors. Clay strikes a nice balance Also, it’s dark enough to stand out, but still soft enough to look traditional and calm. It’s a smart choice if you want a color that won’t feel trendy or risky over time.
9. Pewter
Pewter brings a cool, slightly bluish-gray tone that’s perfect for more contemporary styles. It has a smooth, refined look that gives your home a modern edge without being too cold. Pewter works beautifully with darker roofing materials and minimalistic trim, especially in black or steel tones. It’s a good fit for homes in overcast regions, too, since the color has just enough brightness to keep things from feeling dull.
10. Almond
Almond is a soft, creamy shade that gives homes a light, sunny appearance without being as stark as white. It adds subtle warmth and looks inviting without drawing too much attention. This Vinyl siding shade is well-suited for traditional homes, especially those with green or navy accents. Almond is great for anyone looking for a cheerful but subtle color that plays well with brick, stone, or wood details.
Earth Tones: Natural and Grounded
Earth tones draw inspiration from nature, think soil, stone, tree bark, and greenery. These Vinyl siding colors tend to feel calm, warm, and balanced. They work especially well in neighborhoods surrounded by trees or homes with natural features like wood trim, stone foundations, or landscaping. Earth tones can help your home blend into its surroundings while still standing out subtly.
11. Olive Green
Olive green siding gives a home an organic, grounded look. It brings a hint of color without feeling too bright or trendy. This shade fits beautifully into wooded areas or homes with lots of landscaping, and it pairs nicely with brown or tan roofing. Olive also works well with cream or off-white trim and gives a mature, earthy presence that feels steady and calm.
12. Sage
Sage is soft, slightly dusty, and very easy on the eyes. It’s a lighter green that feels fresh and natural, making it a favorite for craftsman-style and cottage-style homes. Sage complements stonework, weathered wood, and even brick, and it’s a great option if you want a green that doesn’t overpower. It works well with dark brown or charcoal trim and is ideal for homes that lean into a natural or vintage aesthetic.
13. Brownstone
Brownstone is a deep, rich brown that adds a sense of structure and warmth. It looks strong and grounded, especially when used on larger homes or homes with symmetrical designs. Brownstone is a natural match for stone chimneys, dark roofing, and wood or bronze accents. If you’re looking for something traditional with a bit of boldness, this color fits the bill without being flashy.
14. Rustic Red
Rustic red brings a barn-inspired charm to homes, especially in rural or country settings. It’s bold but earthy, making it more welcoming than a bright cherry red. Rustic red pairs well with white or black trim and often complements older homes or farm-style properties. It adds personality without feeling too aggressive and gives a classic look that doesn’t go out of style.
15. Chestnut
Chestnut is a deep, warm brown with reddish tones that make it feel rich and inviting. It works well on log cabins, craftsman homes, and any structure with wood elements. Chestnut is especially striking in the fall and winter months when the natural surroundings become more muted. It pairs beautifully with tan or cream trim and stone accents, and it gives off a cozy, high-end feel.
16. Cypress
Cypress has a light, muted green tone that’s soft, relaxed, and easy to work with. It sits somewhere between gray and green, making it a gentle choice for those who want color without going bold. Cypress blends in well with plants and trees and adds a fresh look to homes without being flashy. It works with both warm and cool tones, so it’s flexible when choosing trim and roof colors.
17. Autumn Gold
Autumn gold has a warm, golden tone with hints of orange and brown. It brings a cozy, sun-washed feel to a home, especially in wooded or rustic settings. This color is great for making a house feel cheerful and welcoming, and it works well with darker trims like deep green or black. Autumn gold adds character and feels especially fitting in areas with strong seasonal color shifts.
18. Mocha
Mocha is a soft, chocolatey brown that offers warmth and comfort without being too dark. It pairs well with off-white or beige trim and looks great with stone features or brick chimneys. Mocha suits ranch-style and colonial homes, giving a lived-in, classic feel that doesn’t try too hard. It’s a safe, tasteful pick for anyone who wants a deeper tone that still feels homey.
19. Terracotta
Terracotta is earthy, sun-baked, and full of character. Inspired by clay and desert tones, it works especially well in warm climates or Southwestern-style homes. Terracotta pairs naturally with lighter roofing and neutral trim, giving the exterior a warm, grounded look. It’s a great choice for homeowners who want a splash of color that still feels grounded in nature.
20. Espresso
Espresso is one of the darkest earth tones, with a rich coffee-like color that feels elegant and modern. It brings a lot of depth to a home and can make the architecture stand out more sharply, especially when paired with lighter trim. Espresso works best on contemporary or upscale traditional homes and creates a dramatic yet natural-looking finish that doesn’t feel too trendy or harsh.
Cool Tones: Crisp and Modern
Cool tones lean into shades of blue, green, and gray with cooler undertones. These colors are known for their calming, clean vibe and tend to feel more modern or coastal. They work well in homes that aim for a fresh, airy look and are especially popular in neighborhoods near water or in newer residential developments. These shades are also a favorite for homes with white trim, as the contrast feels sharp but not harsh.
21. Slate Blue
Slate blue is one of those blue vinyl siding colors that strikes a nice balance, and it’s a medium shade with a soft gray undertone, giving it a classic look that feels confident without being too bold or dark. It’s a strong color that feels classic and confident without going too dark. This shade gives homes a dignified look and works well with both white and darker trims. Slate blue is especially popular for colonial-style or craftsman homes and looks great year-round, especially in areas with changing seasonal light. It adds just the right amount of color without feeling loud.
22. Storm Gray
Storm gray brings a cooler, stormy feel to a home’s exterior. It’s a sleek, mid-to-dark gray with blue undertones that give it depth. This shade is a solid pick for modern homes or urban areas where a more refined and minimalist exterior fits in. Storm gray also does well in mixed-material homes, pairing easily with stone, wood, or metal. It’s a clean, balanced choice for anyone wanting something modern but trendy.
23. Pacific Blue
Pacific blue adds a vibrant but grounded tone to any home. It’s a deeper, ocean-inspired blue that still feels natural. This color is perfect for beach houses, lakeside cabins, or homes that want to lean into a nautical or coastal style. It pairs nicely with white trim and natural wood, giving a bold but breezy feel. Pacific blue also works well for homeowners who want to stand out a bit while keeping things tasteful.
24. Steel Blue
Steel blue is a cooler, slightly grayer take on traditional navy. It gives homes a modern, sophisticated look that works especially well with clean lines and minimal design. This shade looks strong but not overpowering, and it does a good job of hiding dust and weather wear. Steel blue also complements metallic accents and light stone, so it’s a great fit for contemporary or industrial-style exteriors.
25. Icy Gray
Icy gray is a very light, almost silver-gray tone that feels crisp and clean. It’s a good option for smaller homes or those with darker roofs, as it helps open up the exterior visually. Icy gray pairs beautifully with cool white trim and adds brightness without feeling too stark. It works especially well in modern neighborhoods or newer builds that lean toward a cooler color palette.
26. Arctic Blue
Arctic blue is a pale, soft blue that brings a gentle, calming vibe to a home’s exterior. It’s perfect for those looking for something subtle that still offers a pop of color. This shade of vinyl siding is especially appealing in coastal areas or for cottage-style homes, where a lighter touch helps create a relaxed, peaceful setting. Arctic blue works well with white or ivory trim and looks best in natural light.
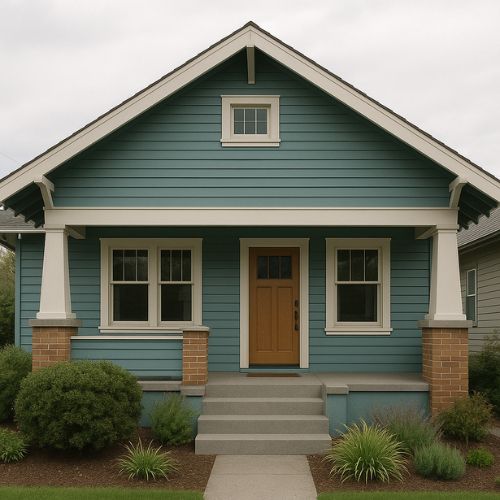
27. Coastal Green
Coastal green mixes hints of seafoam and gray to create a color that feels both beachy and elegant. It’s not a loud green; it’s muted and calming, which makes it ideal for homes looking for a soft, breezy aesthetic. Coastal green pairs easily with sandy-colored roofing and white or pale trim, and it looks especially fresh on homes near water or with plenty of natural light.
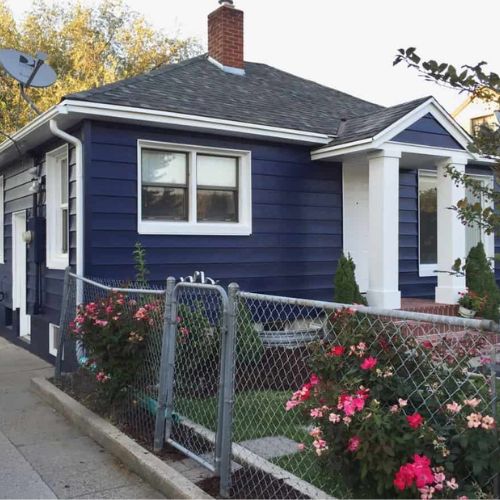
28. Navy Blue
Navy blue is a bold classic that never really goes out of style. It’s deep, strong, and sophisticated, giving homes a crisp, clean appearance. Navy works well with white, tan, or even wood-toned trim, and it suits a variety of home styles, from traditional to coastal to contemporary. It adds drama and richness without feeling trendy, and it holds its color well over time, making it a durable choice too.
29. Dusty Teal
Dusty teal brings a unique mix of green and blue with a softened, vintage finish. It feels creative and a little unexpected, which makes it a fun choice for someone who wants color but still wants to stay grounded. Dusty teal pairs well with both light and dark trim and works especially well with homes that use natural materials like wood or stone. It’s a great pick for craftsman or bungalow-style homes looking for something a little different.
30. Frosted Mint
Frosted mint is light, airy, and refreshing. It gives a home a cheerful look without being too sweet or bright. This color has a subtle presence and works nicely with white or cream accents. It’s an especially good match for cottages or homes in sunnier climates where a lighter, more playful exterior fits the setting. Frosted mint helps make a home feel cool, open, and inviting.
Bold and Statement Colors: Make It Stand Out
Some homes are built to blend in. Others are meant to stand out. Bold siding colors are for those who want their exterior to reflect personality and character. These colors create strong visual contrast, highlight unique architectural features, and leave a lasting impression. While they’re not for every home or neighborhood, when chosen thoughtfully, these shades can completely transform curb appeal.
31. Deep Burgundy
Deep burgundy adds richness and depth to a home’s exterior. It feels dramatic but also refined, especially when paired with off-white or dark bronze trim. This color works well on historic homes or homes with strong design features that can carry a deeper shade. Burgundy gives a warm, welcoming tone without feeling overly bright, making it a smart pick for homeowners looking for a bit of edge without going too far.
32. Black
Black siding has become a standout trend, especially in modern and minimalist architecture. It brings a sleek, bold look that emphasizes clean lines and strong contrast. Black works well with wood accents, glass, and metal, making it a good match for contemporary designs. It also provides a striking contrast with light-colored trim or natural stone. This color isn’t just eye-catching, it’s powerful and confident, giving a house a strong sense of presence.
33. Dark Emerald
Dark emerald green brings luxury and depth, offering a nod to nature while still feeling polished. This color is a great way to make your home feel distinctive but grounded. It pairs well with soft golds, creams, or wood accents and fits beautifully in wooded areas or upscale neighborhoods. Dark emerald adds a timeless quality that blends richness and restraint.
34. Royal Blue
Royal blue makes a strong statement. It’s vivid, saturated, and hard to miss, but still carries a sense of tradition. This color works well for homeowners who love color and want their house to reflect energy and brightness. Royal blue can be paired with white for a clean nautical feel or softened with gray or beige for something more balanced. It’s a cheerful option that instantly boosts visual interest.
35. Crimson
Crimson is rich, energetic, and full of character. It brings warmth and personality to homes, especially when matched with neutral trim or stone features. Crimson is bold without being overwhelming, and it suits both traditional and farmhouse-style homes. It’s a good fit for homeowners who want something classic but still want to make a statement.
36. Graphite
Graphite is a dark gray with depth, slightly softer than black but just as impactful. It gives homes a clean, structured look and is easy to pair with natural materials like wood, stone, or brick. Graphite is especially popular in modern and industrial-style homes, but it also works well in traditional settings with the right trim. It’s bold but versatile, offering a strong presence without dominating the entire look.
37. Cobalt
Cobalt is bright, bold, and full of personality. It’s not for everyone, but it’s perfect for those who want their home to feel energetic and expressive. This color works especially well with white trim and black or dark gray roofing. Cobalt is a good pick for beach towns, artsy neighborhoods, or any area where creativity is embraced. It sends a clear message: this home has style.
38. Plum
Plum brings a sense of richness and elegance with a touch of whimsy. It’s deep enough to feel grounded but has just enough color to feel unique. Plum siding pairs well with light grays, creams, or even darker purples for a layered look. This color is ideal for homeowners who want something moody and unexpected without going into very dark or bright territory.
39. Forest Green
Forest green is bold but still earthy, giving homes a strong, grounded look. It feels especially fitting in rural or wooded settings, where it blends with nature while standing out from typical neutrals. Forest green works well with wood tones and stone and adds a sense of richness to the home’s exterior. It’s a confident choice that feels both fresh and classic.
40. Maroon
Maroon is deep, dramatic, and refined. It’s less common than brick red but still feels timeless. This color of vinyl siding looks especially sharp with white trim or neutral stone features. Maroon works well on colonial homes or homes with a lot of architectural detail, where the deep tone can help highlight those features. It’s a good middle ground for someone who wants boldness without going overly bright.
Conclusion:
Choosing Vinyl Siding Colors isn’t just about style, it’s a way to shape how your home feels to you and others. Whether you’re drawn to clean neutrals, grounded earth tones, cool modern shades, or bold standouts, your chosen color will set the tone for everything that follows. It affects how your home fits with the neighborhood, how it photographs, and even how you feel coming home every day.
Vinyl siding now comes in such a wide range of shades that it’s easier than ever to find something that matches your style and adds value to your space. The right Vinyl Siding color can help your home look newer, more cared for, and more aligned with your taste. Whether you play it safe or go bold, what matters most is that the color feels right to you.
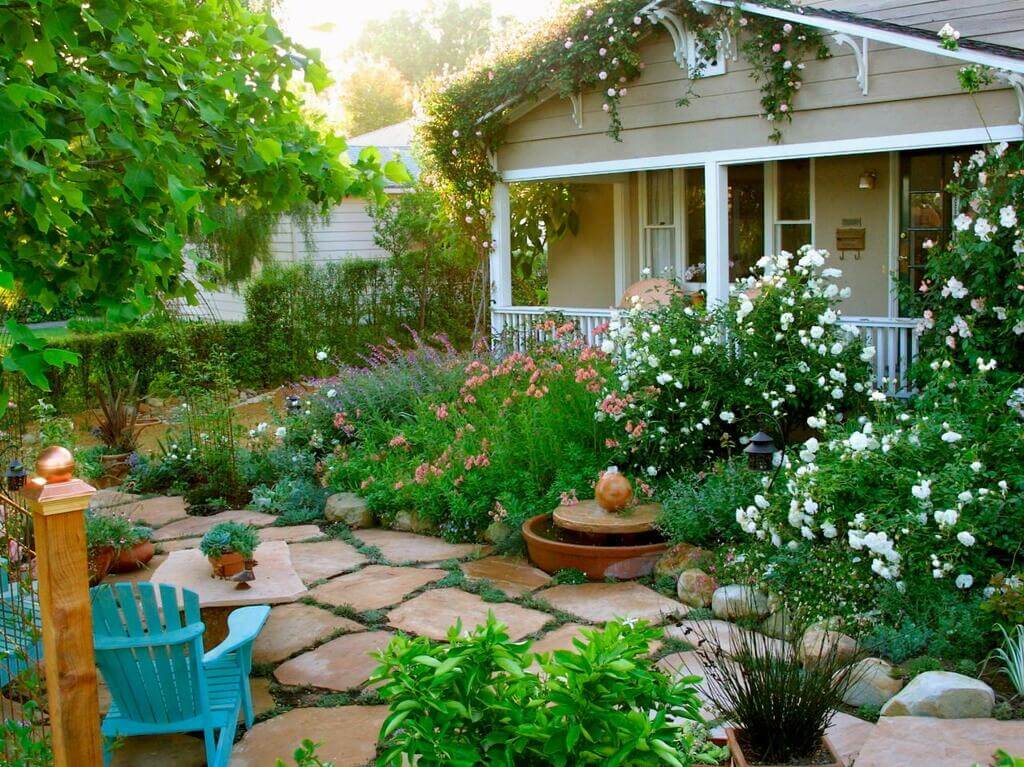
Whether you’re buying or selling a house, first impressions matter-and your outdoor space plays a crucial role. Landscaping and garden design not only enhance your home’s curb appeal but can also significantly increase its market value.
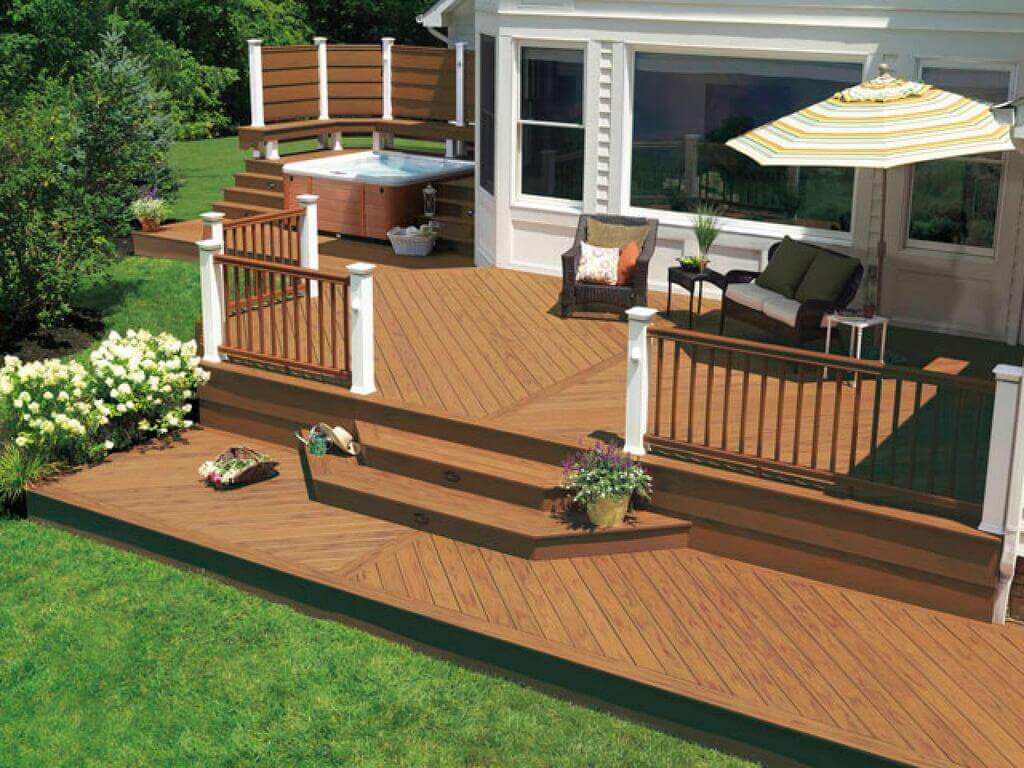
Studies show that well-maintained gardens and thoughtfully designed outdoor areas can boost property values by up to 20%, making landscaping one of the most cost-effective home improvements. If you’re planning to sell your house, investing in outdoor upgrades like decking, garden rooms, or water features can attract buyers and maximize your return. Here are the top garden ideas to increase your home’s value and appeal.
1. Add a Deck
You should expect a value increase of 10%. With the current housing prices in the UK, this is about £24,000 of an increase, quite a substantial amount for any homeowner.
However, building a deck is expensive, but that is also the reason many potential buyers are in demand for homes with a deck already installed. Therefore, you can’t go wrong with this option.
2. Add Some New Paint
You should expect a value increase of 5%, translating to £12,000, by simply repainting your home. It may seem like a huge job at first, but it is definitely worth the cost in the long run.
Just refresh the garden furniture if you don’t want to paint your entire property. From paint and stain to fabric coverings, there are many ways to spruce up your outdoor furniture.
3. Weatherproofing
You should expect a value increase of 3.6%, about £8,000, if you choose to weatherproof your home. The initial cost of weatherproofing your home may be quite expensive at first, but the increase in the value of your home is definitely worth it.
4. Add a Garden Room
With an expected value increase of 5 to 15%, you don’t need to worry about the initial expenses on this project. Even better, you can transform the garden roominto a man cave, home office, or gym. It will solve any space issues you may have experienced, especially during the COVID era.
5. Add Bifolding Doors
You should expect add value to your home by at least 10% by simply adding Bifolfding doors. If there is a section of your home that is blocked off from the outdoors, this is the best place to add Bi-folding doors. This way, you can bring the outdoors in and enjoy the best of both. It’s a great benefit besides boosting the value of your property.
6. Hot Tub Installation
Did you know adding a hot tub to your house can increase your home’s value by at least 27%? Note that this is about £65k, when looking at the current prices of houses in the UK. Of course, don’t assume the same benefits will be accrued by freestanding, portable hot tubs that you’ll carry when you move. To enjoy these benefits, you need permanent built-in fixtures.
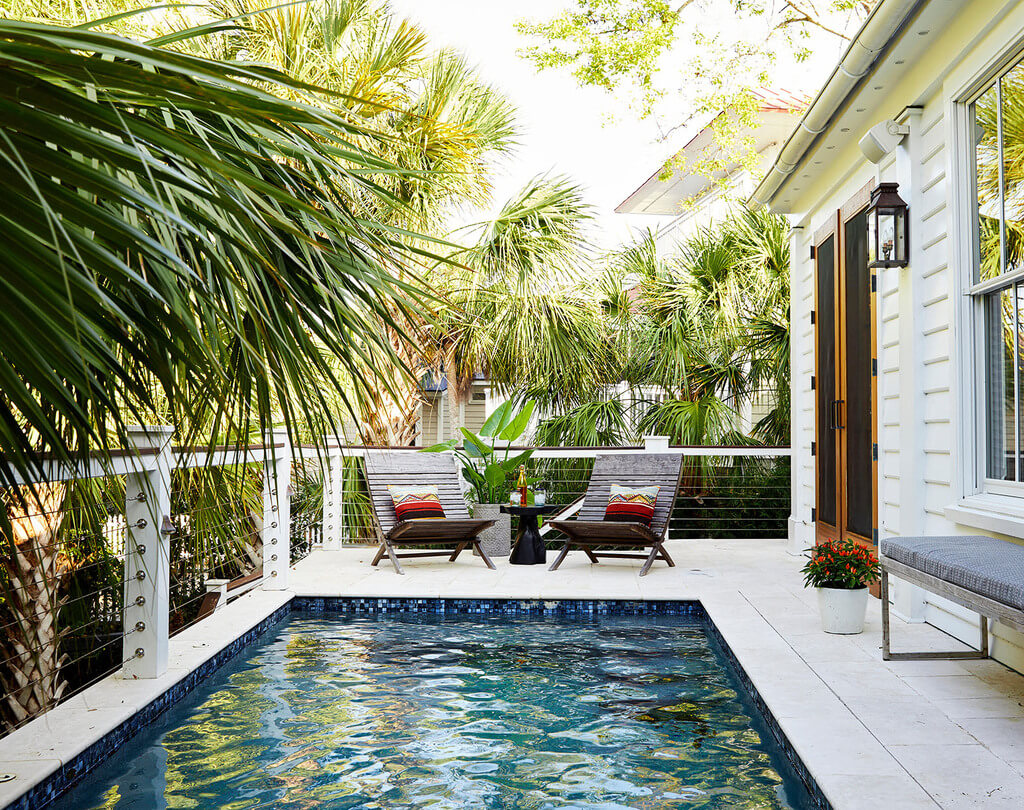
7. Swimming Pool
Yes, the weather in the UK can be quite unpredictable. That’s why it’s hard to acknowledge that swimming pools will boost the value of your home. In fact, adding a swimming pool to your home is a great way to increase the value of your home by at least 22%.
So try to add at least one water feature like a small waterfall or pond or fountain, in your outdoor space. This will not only create a serene and calming atmosphere but also boost the overall value of your home.
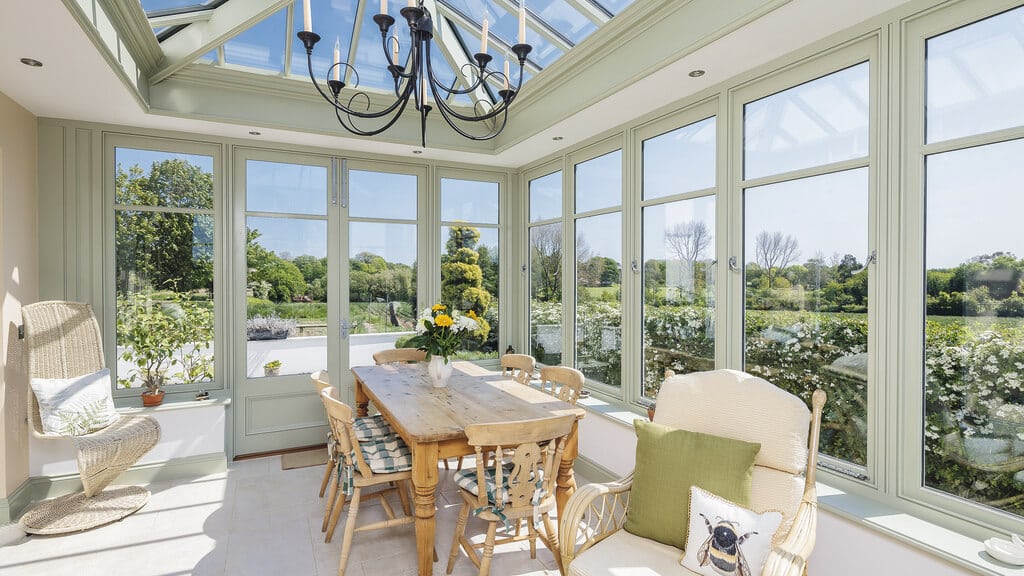
8. Conservatory
Adding a conservatory will increase the value of your home by at least 10%. Considering that the weather is unpredictable, it’s one of the best investments you can make in your home. Even better, if you’re working from home it’s a good investment to consider because of the extra office space.
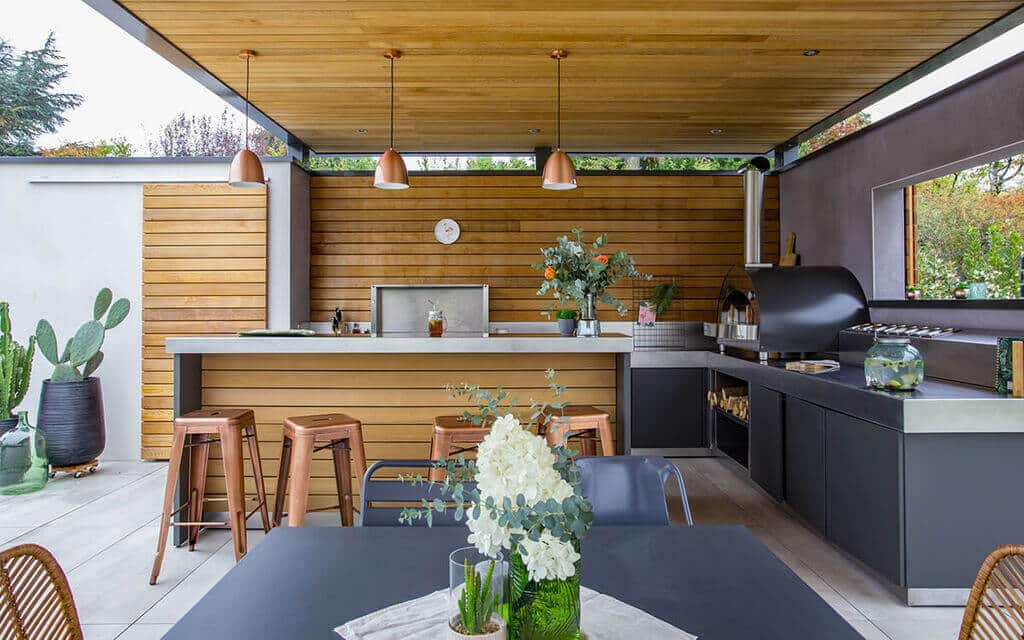
9. Outdoor Kitchen
An outdoor kitchen can make all the difference when it comes to adding value to your home. Outdoor kitchens and dining areas are really becoming a popular worldwide trend.
With summers getting hotter in the UK, an outdoor kitchen can really be a fantastic luxury and allows you the chance to entertain outside with ease.
Final Words
In summary, adding small renovations to your home is a great way to increase the value of your property if you’re planning to sell in the future. Try these garden ideas and investments for the best results.
As the real estate landscape evolves, buyers in Knoxville, Tennessee, are exploring new ways to invest in property, balancing affordability, lifestyle preferences, and long-term returns. Two prominent choices stand out: tiny homes and traditional homes. While tiny homes offer a minimalist, budget-friendly lifestyle, traditional homes bring space, equity growth, and stability.
But which one truly offers the better investment? This guide explores both options in-depth, helping Knoxville investors determine which suits their financial goals and plans best.
1. Affordability and Upfront Costs
Tiny homes are known for their significantly lower price tags, ranging between $20,000 and $80,000. This makes them appealing to first-time buyers, retirees, and those avoiding high mortgage debt. In contrast, according to recent market data, traditional homes in Knoxville have a median price of approximately $314,250. Despite rising interest rates (~7%), many buyers still lean toward conventional housing due to better long-term financing options and property appreciation.
In Knoxville, where the cost of living is below the national average, tiny homes can offer an accessible entry point into real estate—especially in areas with flexible zoning like South Knoxville or Powell. However, hidden costs such as purchasing land, hooking up to utilities, or navigating local zoning laws can erode these initial savings.
2. Long-Term Value and Appreciation
Traditional homes generally offer more substantial long-term value. With consistent appreciation rates—Knoxville’s real estate market is projected to grow another 7% in 2025—traditional properties build equity. They are easier to finance through conventional mortgages.
Tiny homes, on the other hand, typically depreciate like vehicles or RVs. While owning land beneath the structure may add value, the homes rarely appreciate it. This makes traditional homes safer for investors focused on building wealth over time.
If you aim to upgrade your home portfolio, consider your options to1—especially in a market with limited inventory and increasing buyer activity.
3. Maintenance and Sustainability
Maintenance is where tiny homes shine. With smaller square footage and simplified systems, upkeep and energy costs are minimal—perfect for Knoxville’s temperate climate and eco-conscious residents. Many tiny homes also utilize solar panels and composting toilets, promoting a sustainable lifestyle.
Traditional homes require more upkeep—on average, 1–4% of the home’s value annually.
However, they benefit from readily available materials and labor, making repairs less complicated than tiny houses’ specialized features.
4. Lifestyle and Comfort
Tiny homes promote a minimalist lifestyle that can be liberating for remote workers, digital nomads, or retirees. In neighborhoods like Old City or Fourth & Gill in Knoxville, tiny home communities offer a close-knit vibe with shared amenities. However, these homes can feel cramped—typically 200–400 square feet—and aren’t ideal for families or long-term hosting.
Traditional homes offer more comfort, privacy, and adaptability, making them better suited for growing families or those seeking permanent roots. They’re often located in established communities like West Hills or Fountain City, providing access to schools, parks, and social networks.
5. Market Demand and Resale Potential
While the demand for tiny homes has surged, especially among younger, eco-conscious buyers, the resale potential remains unpredictable. Financing is limited—tiny homes often require personal loans with higher interest rates—and zoning restrictions can limit buyer interest.
Traditional homes, however, continue to dominate Knoxville’s housing demand. With stable appreciation, broader financing options, and strong buyer interest, they provide greater liquidity and resale reliability.
Suppose you’re unsure which option will yield better returns. Getting a property value lookup from a local real estate professional or appraisal service may be helpful.
6. Legal and Zoning Considerations
Knoxville’s zoning regulations are more accommodating to traditional homes, making it easier to secure permits and comply with local building codes. Tiny houses, particularly mobile units, may face zoning challenges, such as parking limitations or foundation requirements.
Before investing in a tiny home, research Knoxville’s zoning maps or consult with city planning offices to ensure legal obstacles won’t hinder your investment.
This is where working with a real estate agent in Knoxville becomes essential—especially if you’re considering new construction. Agents familiar with the city’s regulations can help you navigate zoning codes, locate flexible neighborhoods, and guide you through the building or buying process.
Final Verdict: Which Should You Choose?
The best investment depends on your goals:
Choose a tiny home for affordability, sustainability, and mobility. It’s ideal for solo living, short-term stays, or supplementing income with a rental property—provided zoning allows it.
Choose a traditional home if you prioritize space, long-term equity, and resale value. These homes suit families, multi-generational living, and anyone aiming for long-term financial growth.
For many Knoxville buyers, the decision also hinges on how they plan to live. Do you want to travel freely, live, or lay down roots and build wealth? Whatever your decision, don’t go it alone. A trusted local expert can help you weigh your options. And suppose you’re ready to make the switch. In that case, we buy houses in Knoxville, offering fast and flexible solutions for sellers looking to transition quickly.
Conclusion
Tiny and traditional homes offer unique advantages in Knoxville’s evolving housing market. Tiny homes support a minimalist, cost-effective lifestyle, while conventional homes provide long-term investment security and room to grow. Carefully evaluating your financial goals, lifestyle needs, and local zoning regulations will help you determine which home type is the best investment.
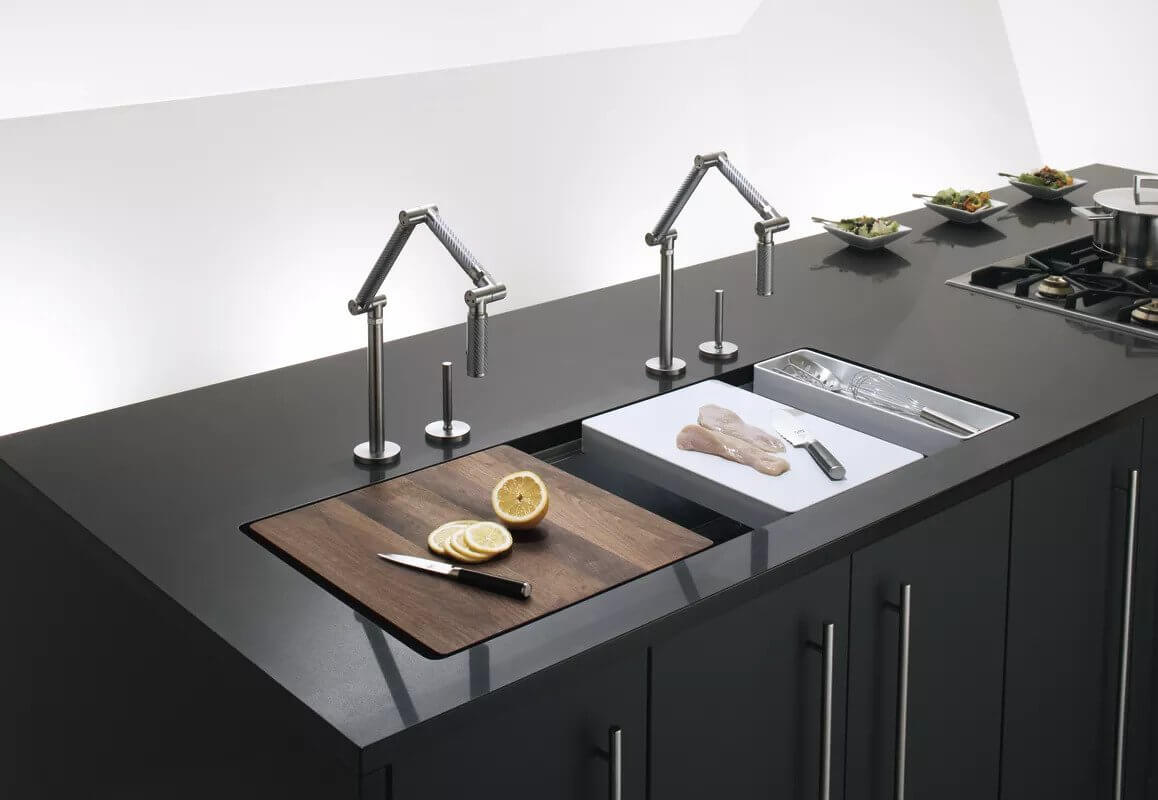
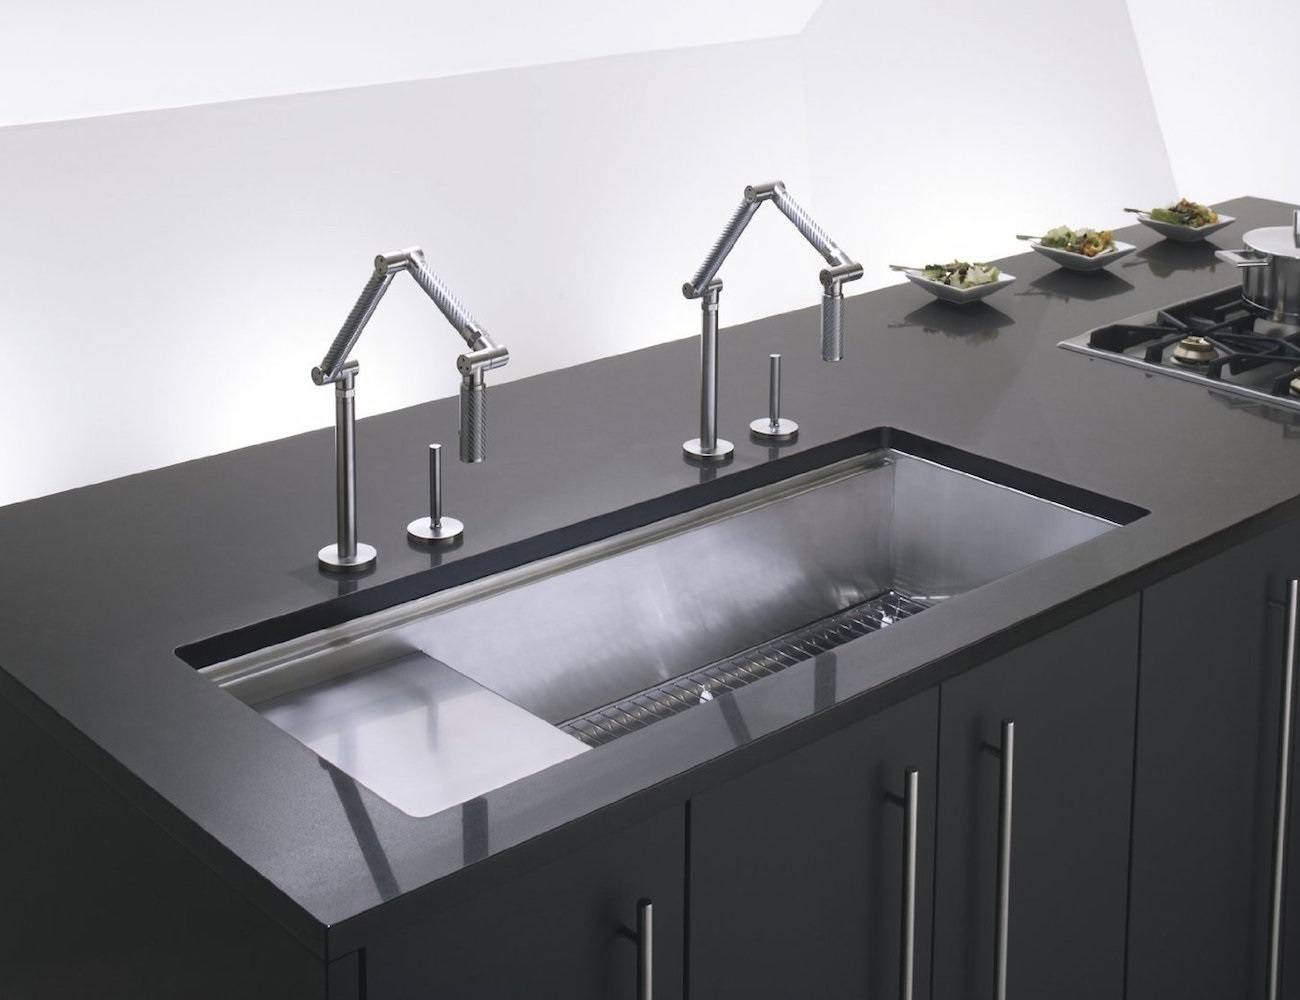
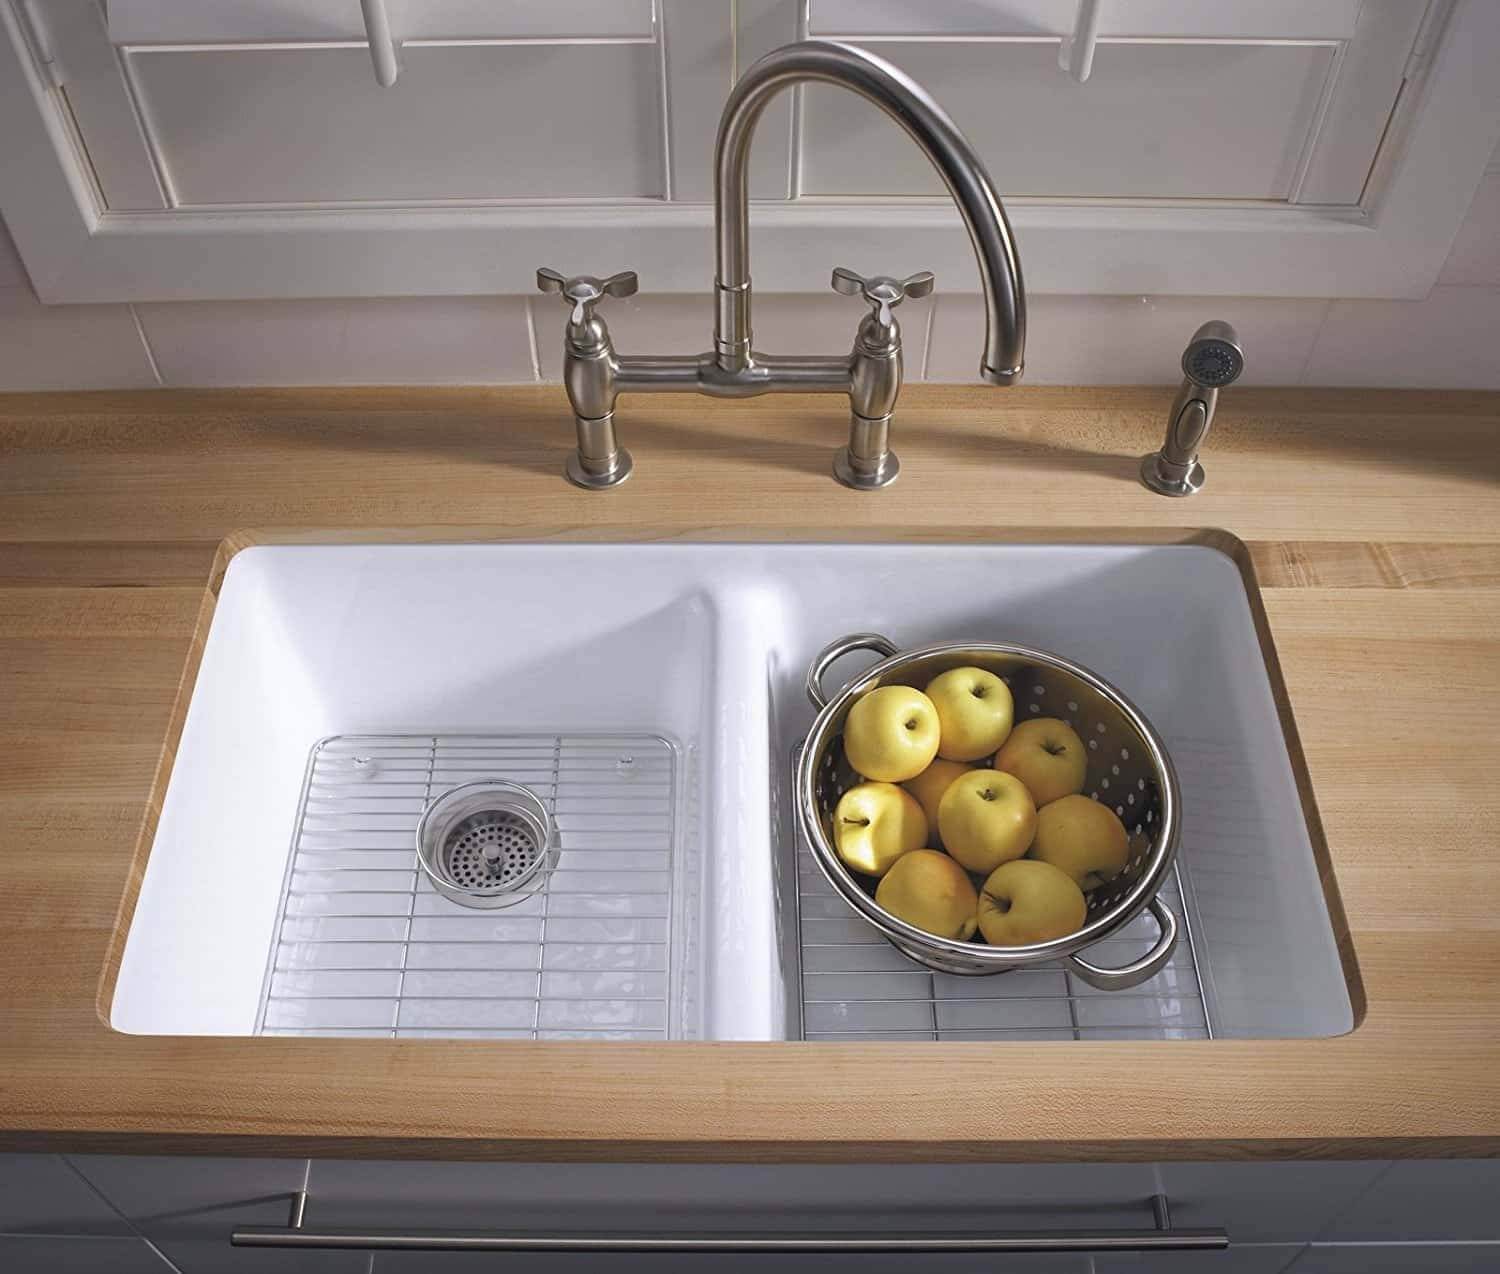
Choosing the right kitchen sink mounting style is essential for both functionality and aesthetics. Top-mount kitchen sinks, also known as drop-in sinks, are installed by dropping the sink into a pre-cut hole in the countertop, with the rim resting visibly on the surface. This installation method offers several advantages, including easier and more affordable installation, compatibility with a wide range of countertop materials, and simpler replacement or upgrades. Additionally, top-mount sinks provide sturdy support and are easier to clean since all edges are visible and accessible. Whether you’re remodeling or installing a sink for the first time, understanding the benefits of top-mount kitchen sinks can help you make an informed decision that suits your kitchen’s needs and style.
Why do we still love top-mount sinks?
There was once a time when all you could find were top-mount sinks. From delicate porcelain designs to sturdy and bold cast iron, every sink was top-mount only. However, undermount sinks soon took over the market since this style of installation is almost seamless. The rim of the sink sits under the countertop, making the edges invisible, and it adds panache to the kitchen counter.
That might make you wonder how the self-rimming sinks have survived this long. 27-inch undermount sinks are clearly better-looking and more appealing to the sophisticated customer, so what makes drop-in sinks the highest-selling among all kitchen sinks?
Here are some advantages of the top mount kitchen sink that no user or remodeler can deny –
Cost
The cost of installing a top mount sink is considerably lower than undermounting one. The sinks cost almost 50% less than undermount sinks. You can purchase top-mount sinks from online stores as well as land-based stores. They have a wider variety at affordable prices.
Installation
Installation and replacement of top mount sinks are easier than undermount sinks. Drop-in sinks require minimal tools and skills. You will find thousands of DIY guides for the mounting of large, small, double bowl and workstation top-mount sinks online. The plumbing work for top mount sinks is considerably easier than undermount sinks as well. They require no additional support since they already rest their edges on the countertop.
Compatibility
Top-mount sinks are ideal for granite, composite granite, marble, tiled, and even plain cemented countertops. You can also make laminate countertops work perfectly with top-mount sink designs. On the other hand, undermount sinks work well with solid materials, including composite or solid wood! Several homeowners forego undermount sink choices to curtail the cost of replacing or upgrading their countertop.
Hygiene
Top-mount sinks are more sanitary than undermount designs. Since you can see the edge of the sink, you can check for food particles, dirt, and debris that get stuck on the caulk and between the rim and the counter. You can use a soft cloth or a super-soft brush every day to clean out the buildup. Unlike undermount sinks, these sinks don’t have unseen crevices that can serve as a haven for bacteria, algae, and mold.
Sturdy
The sink can withstand more pots and pans thanks to the self-rimming method of installation. It offers better support to the sink, and the chances of the sink cracking or yielding from the joint are next to nil, even when you pile on your heaviest pots and pans after a family meal. You can fill it to the brim with warm water and soap confidently to give your dirty dishes a good scrub. You can even upgrade your standard single bowl sink to a workstation kitchen sink thanks to the self-supporting mechanism of top-mount sinks.
What are the lesser-known benefits of going for top-mount kitchen sinks?
A benefit that people rarely consider is that a top-mount sink completely hides the countertop cutout from view. This makes the installation process much easier, especially for novices. You can use a rotary cutter to create the opening for the sink without worrying about minor slips or uneven edges, as these imperfections will be concealed by the sink’s rim. There’s no need to finish the edge of the cutout, since it will remain hidden. This not only reduces the workload for the installer but also speeds up the installation process. The appearance of the cutout has no impact on the sink’s performance, thanks to the caulk or putty used to seal the gap between the sink and the countertop.
Top-mounting maximizes the design flexibility for all homeowners. You can mount the sink on the counter in a conventional style, you can think about corner mounting your sink, or installing a new sink on the kitchen island to maximize available workspace. Most importantly, you can play around with design ideas and sink types since you can readily remove a top-mount sink without disturbing the countertop and the surrounding cabinetry. You don’t have to worry about under-sink storage space or fixing a new support harness for the sink underneath. Top-mount sinks offer the maximum gratification by minimizing the workload.
What’s easier, replacement, or first-time installation?
When replacing an old sink, you need to consider the dimensions of the cutout before you pick your sink. It is quite easy to replace an undermount sink with a top-mount variant. You will have to consider the changes in the water inlet and faucet levels before the installation. Additionally, you will need to add around half an inch to the existing dimensions of the cutout to find a top-mount sink that will fit perfectly into that hole. While shopping, measure the rim of self-rimming sinks to see what size will fit the countertop.
Installing a sink for the first time is much easier than replacing a sink. You can purchase a sink of a desirable size, bring it home, and then mark the countertop for cutting out the portion that will hold the sink. Replacement is a whole different ballgame. To know more about replacing your undermount sink with a more affordable and durable self-rimming sink, seek professional assistance before heading out for sink-shopping.