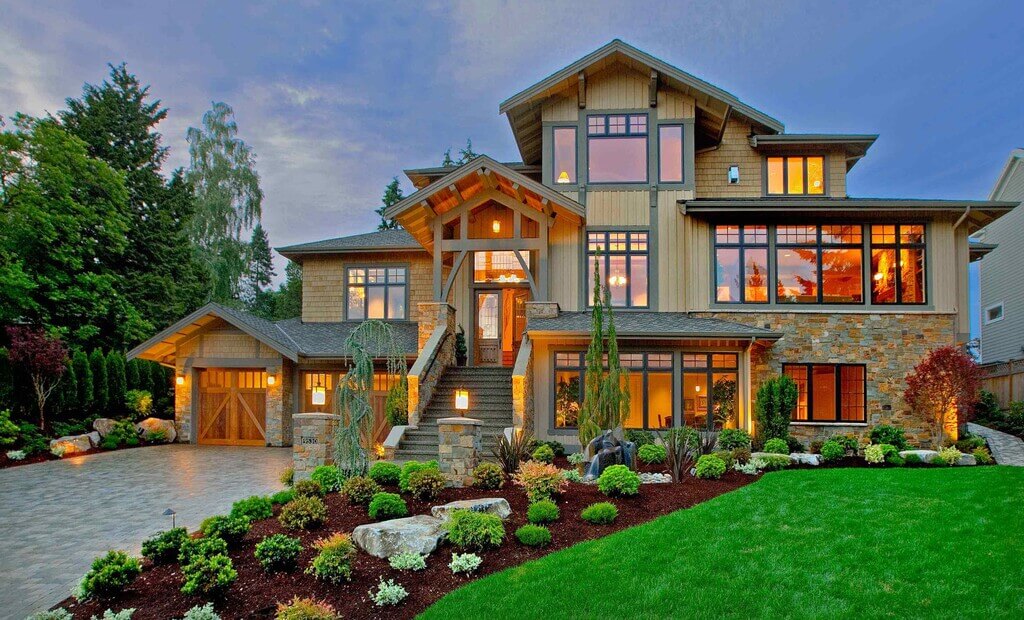
Choosing the right moving company can be a daunting task, especially with so many providers promising top-notch service. While it’s important to select a reputable mover, your own actions as a customer play a crucial role in ensuring a smooth and successful move. To make your moving experience as stress-free as possible, it’s essential to understand not only what you should do, but also what you should avoid when working with professional movers. In this article, we’ll share common mistakes to steer clear of, helping you protect your belongings and build a positive relationship with your moving team.
Rushing Them
You have to give them enough time to wrap all your belongings carefully, load them in their truck, drive them to your new home and unload them carefully. Rushing will not give them time to strategize as well as do their work right. If you want to make sure that all your belongings are carefully wrapped and moved safely to your new home, stop rushing them.
Sure, they will do all their best to deliver your stuff to your new home, but rushing them or giving them an impossible timeline is something you need to avoid if you want to receive your items as it is.
The more you rush them, the more chance that they may not do what they are supposed to do properly. Yes, of course, they are the experts but do not expect them to rush their jobs.
Forcing All Your Belongings to a Small Truck
They are not magicians, hence do not force them to use a smaller truck to move all your belongings just because it is the cheaper option. Choose the right size of truck to move all your belongings.
You may want to ask the moving company of the right size of truck for your items to be moved successfully. Do not decide on your own nor decide for something that is impossible. Do not put your belongings at risk of damages just because you want to save money from hiring a moving company.
Leaving Them Alone
Even how trustworthy the moving company is, you must not leave them on their own. You still have to be there while they are loading your belongings to the truck, more so when they unload it. You have to check all your items before you let them go.
Once they are out of the vicinity, they are not liable anymore if damages were seen. Sure, there is no one who can say whose fault was the damage. Just to be on the safer side, let them unload and unwrap all the items they moved in front of you. Inspect and check on it one by one.
Micromanaging Their Work
They know what they need to do, hence stop micromanaging them. You do not need to be there every step of the way teaching them how to properly wrap your items. They know what they need to do, sure, you can give them instructions but you do not need to be there watching them and waiting for them to do anything wrong.
Give them space, they definitely need that to perform their job right and peacefully.
Not Treating Them Professionally
If you want to be treated professionally, make sure to treat them the same way. Do not shout at them or use words that are inhumane against them, do not disrespect them. They are professionals; hence they should be treated like that.
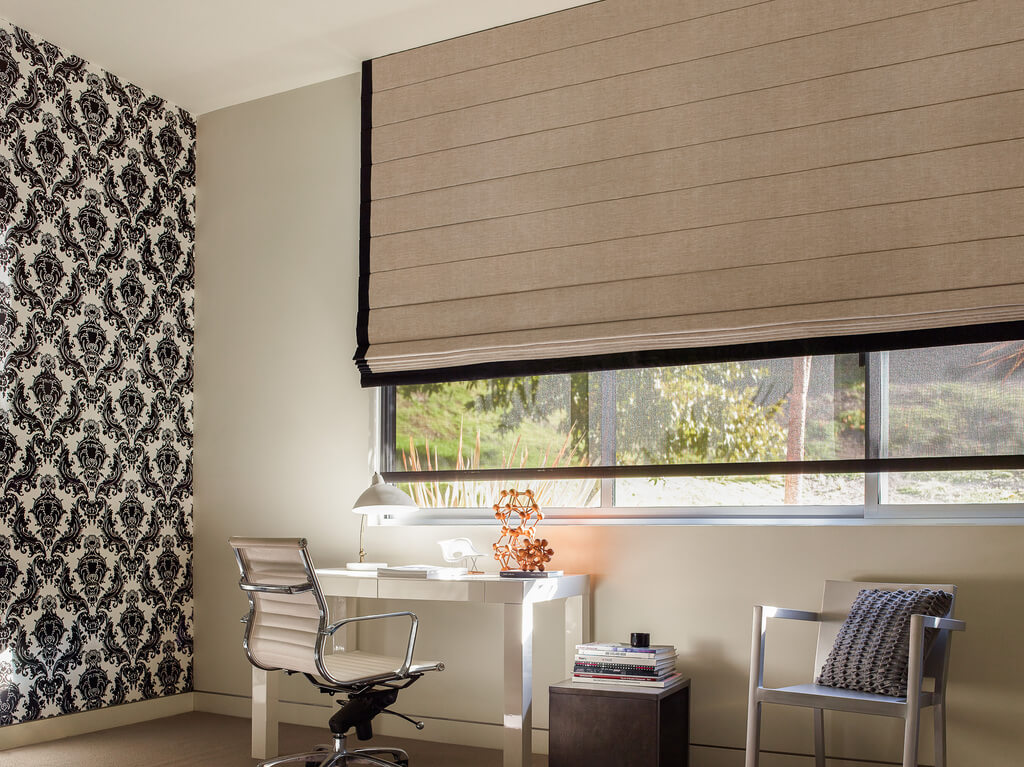
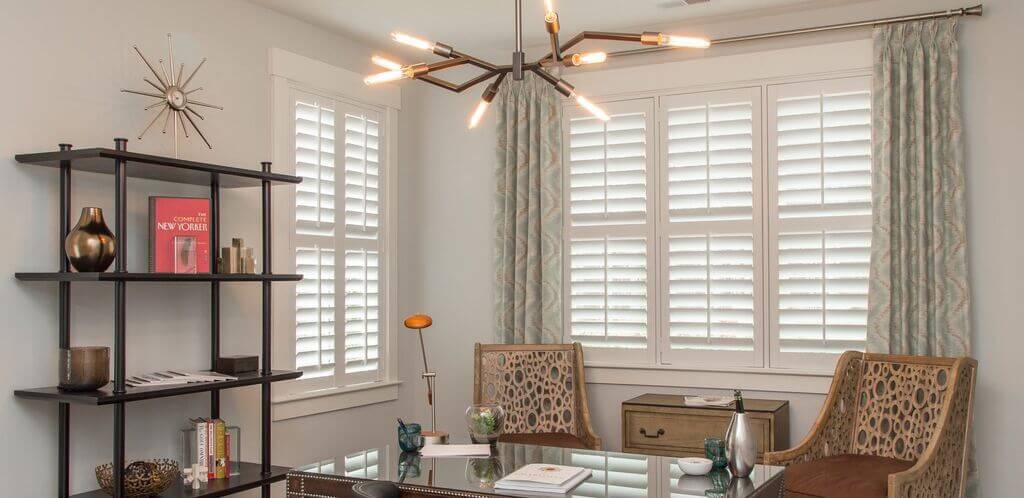
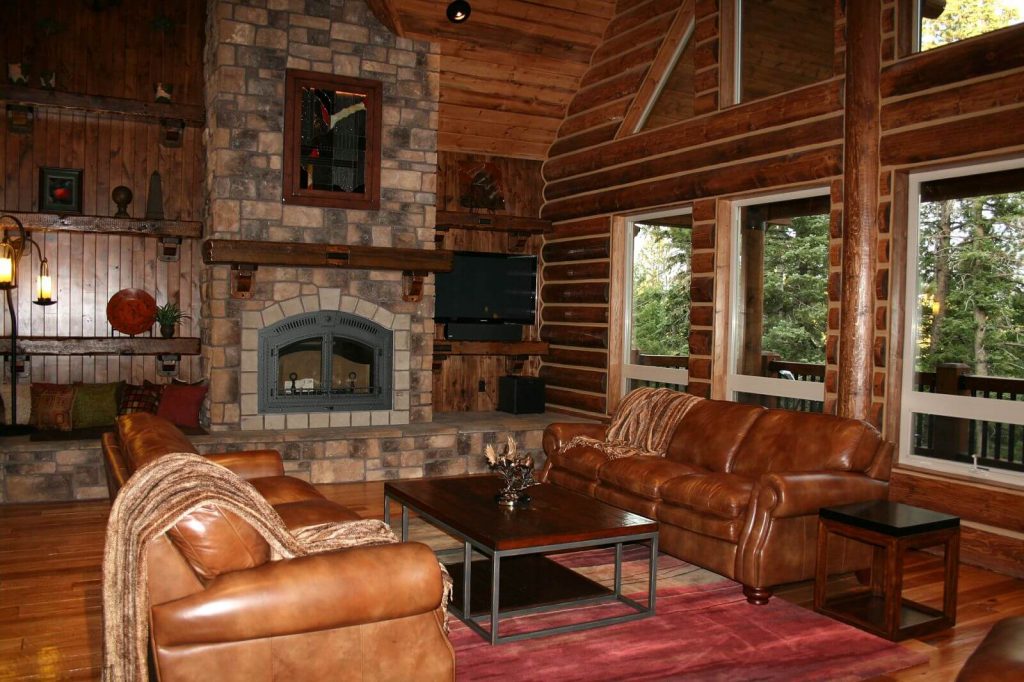
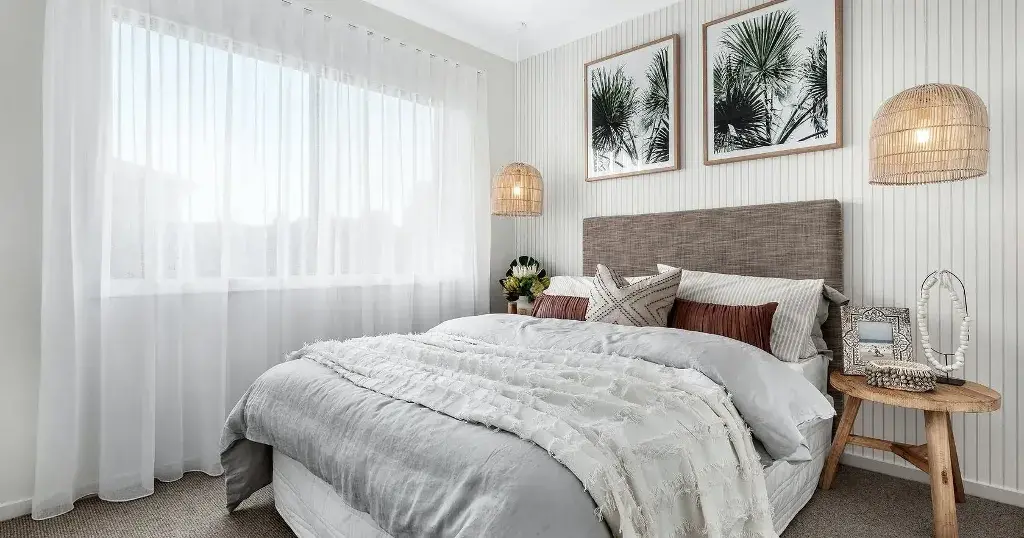
Selecting the perfect custom window coverings for your home is more than just a finishing touch; it’s a key design decision that shapes the look, feel, and functionality of your space. Whether you’re updating your current decor or settling into a new home, window treatments should be thoughtfully integrated into your overall interior design plan. The right choice not only enhances your home’s style and creates a cohesive atmosphere but also delivers practical benefits like privacy, light control, and energy efficiency.
With a wide range of options available, from elegant drapes to modern shades and blinds, taking the time to consider your needs and preferences will ensure your windows become a true focal point that complements your lifestyle and budget.
Why Use Window Coverings
Window coverings like shades, curtains, or blinds change the aesthetics of any space. They are able to soften the harsh lines in a room, they can draw the eye, and emphasize the details of the architectural structures surrounding a window, they can create shapes and create focal points in your room. They can change how a room is visually perceived. With planning and consideration, they can be used to give the illusion of high ceilings and wide windows.
They are a tool where you will be able to add color to your room, add a texture or pattern and work with your soft furnishings to create a feeling within your room, such as warmth or intimacy. They have the ability to make a room seem formal, casual, or finished. Also, they are practical as well as decorative.
Of course, in addition to the visual benefits, they also have the capability to generate practical benefits as well. They are a tool that can be used to keep light out, enable privacy, insulate a room, and prevent heat from leaving, they can keep the sun off furniture and ensure that they remain protected and carpets from fading as well as canceling out noise.
Decide on Their Purpose
To begin with, you’ll need to decide on the purpose of the shades you want to get installed. So, when you think of custom window coverings such as shades or blinds of any type, think about why you want to get them installed.
Start with the where: how will you use the space once the coverings have been hung? Then think about the factors that go into this function – do you need privacy, do you need plenty of natural light, etc. For example, somewhere like the living room will need to take both of these elements into account, but bedrooms can freely favor privacy.
Placing Your Window Coverings
Then it’s time to consider where you’re going to place your window coverings. How often will you use the room? And how much space do you have to work with, both width, length and dropwise? It’s going to be hard to place an overbearingly colored cellular blind in the bathroom, for example!
Similarly, are you choosing to place blinds or shades underneath a set of curtains? That may also affect how much placement you have to work with. And if there are children or pets in the house, could the coverings you choose to be easily tampered with?
Choosing Your Style
Now it’s all about the style you’re interested in. Most window’s shades coverings can be customized to your taste, but there are a lot of separate styles to choose from. If you’re a fan of minimalism, for example, a set of Sheer Shades would work wonderfully in your space. But if you’re more of a cozy and cluttered fan, hanging up Natural Shades may be more suitable.
Conclusion
However, this is a big question to answer on its own without visual examples! And here at the Guyer Shutter Company, we have a lot of custom window coverings on show in our online showroom. No matter if you’re a fan of Blinds or Roman Shades, or you’d actually prefer a set of Layered Shades to decorate the living room, check them out here on our website to get a taste of the window covering types you’d love to hang in your home.
When building a custom home, you should expect to make decisions. Lots and lots of decisions. However, if you partner with the right custom builder, those decisions become easier to make.
Quality custom home builders understand the current trends, market conditions, and local regulations. They can help you overcome obstacles and realize your dream home. Each housing market has its unique challenges and building requirements. Your builder can tell you what they are and how you can still have the design you want at a reasonable price.
To get you started, here is an overview of the process of building a custom home, from idea to move-in.
Start the Decision-Making Process with “Home” Work
You may already have an architectural style in mind for your custom home. If you don’t, you can start by looking online and in magazines to identify which style and architectural features appeal to you.
Drive through the neighborhoods you are considering, as well as new construction throughout the city. What are some home designs that stand out to you? What makes you say, “wow, I want to live there”?
Keep in mind that many communities have homeowner associations that may have restrictions on various aspects of the homes built there, from the architectural style to the color. You will want to select a home design that complements the aesthetic of existing homes in the neighborhood.
More ideas are available online and in print publications. There are magazines and websites that feature home design ideas, both interior, and exterior. Keep a folder of your favorites to show your design-and-build team when you are ready to create plans.
Also, when selecting the builder to make this home a reality, speak with family and friends about their experiences with builders in the area. Sit down for an initial interview with the builder, and follow up on references. You are undertaking a complex project for a substantial investment, so you want everything to be just right.
Make firm decisions before the design-build process begins. If you start making changes after the final plans are drawn, your budget will swell. If you change your mind after construction begins, your budget and schedule can go out the window.
An Overview of the Home Building Process
As early as possible, you want to select your “dream team”: the builder, architect, and interior designer that will bring your ideas alive. Custom homebuilders often partner with architects and interior designers they have worked within the past. A smooth working relationship between the members of your design and build team goes a long way towards creating a successful project. Here’s an overview of each team role:
Your architect, who may be called a building designer, looks at your ideas and preferences to develop custom drawings for the builder and interior designer to use. You, your architect, and your builder need to mesh well because you will be spending a lot of time together discussing your lifestyle, vision, family needs, and desires for a home.
Your builder provides a preliminary estimate for each version of the design. The builder is also an expert in local material and labor availability and pricing and can suggest value-engineering options to keep you on budget. After finalizing the design, the builder develops a comprehensive budget and schedule.
Your interior designer works with the details inside your home. The interior designer develops lighting schemes, space planning, material selections, and other design work. Not to be confused with an interior decorator, the presence of an interior designer early in the home building process allows the architect and builder to plan for specifics of wiring, plumbing, and other utilities.
Including these three roles as early in the process as possible to ensure accurate budgeting and scheduling, allows plenty of lead-time for ordering materials and gives the builder time to lock in subcontractors.
The Phases of the Building Process
Custom home building is done in phases, allowing the project to be broken into smaller, more manageable steps:
The architectural design phase is where you and your dream team create your preliminary home design. You develop an estimate, final plans, engineering, specifications, and a detailed budget and schedule.
The preconstruction phase consists of obtaining all approvals for financing, as well as from the homeowners association and municipal regulators. Key subcontractors are signed for the major home systems.
The construction phase is where you break ground, and the project really starts to move. The builder prepares the site, engineers build the foundation, and the shell of your home takes shape. After that, your house receives its exterior and interior work from flooring to insulation.
The final inspection phase involves walking through your completed home to ensure everything is the way you want it.
The warranty phase is where unexpected issues are taken care of. Builders do the best they can to ensure perfection before move-in. Still, a quality builder isn’t finished until you are completely satisfied.
Just knowing there are definite steps to your project can make it less overwhelming. Each of these phases has its own timeline, but you can rest assured that the completion of each step moves you along to living your dream.
A Few Words About Permitting
There is no construction without permits. Before beginning site work, the builder obtains HOA approvals and city building permits. One of the benefits of using a quality custom builder that is familiar with your city is that intimate knowledge of the local process smooths the way.
Permitting is the regulatory technique used for monitoring construction standards for quality and safety within a municipality and neighborhood. Most permits require a fee paid to the city, and the granting of a permit hinges on situations such as easements and property setbacks.
Homeowners associations are typically volunteer organizations within the neighborhood, perhaps along with a professional management company. HOAs set and enforce the CC&R (covenants, conditions, and restrictions) for the neighborhood while managing common areas and community property. The HOA exists to maintain the neighborhood’s quality and lifestyle. Homeowners pay annual dues toward maintenance and administration of the HOA.
Permits and HOA enrollment are requirements, not options. For the builder to proceed to construct your home legally, you must pay for permits. If the neighborhood has an HOA, it is unlikely you can opt-out.
Plan Firmly but Remain Flexible
Homebuilding is a definitive case for “hope for the best and prepares for the worst.” Early design decisions and selections help keep the project on track, but there are variables that nobody has control over, such as the weather, local labor, and material availability.
There is no way to ensure sunny weather at the construction site, nor to remove all delays for shipping and transportation. However, your custom builder should be familiar with the local weather and the challenges of ordering supplies. The schedule is made accordingly.
Feel free to visit the construction site periodically to see how things are going. Stay positive and expect the unexpected.
Common Issues
Several issues are typical of custom home building. When you put together your dream team at the outset and make firm decisions, you mitigate the worst of these:
Permitting delays – a builder with experience in the area usually knows the ins and outs of the permitting process and prevents most delays.
Material selection delays and lead times – when you make firm decisions as early as possible in the project, you have plenty of lead time to account for shortages or transportation problems.
Design budget misalignment – again, put your team together early, pay attention to any concerns, and make firm decisions ahead of the final budgeting process. Experienced architects, builders, and interior designers have a handle on the typical cost of materials and labor and should be able to guide you accordingly.
Changes in design – another reason to make firm decisions early. Change orders are some of the most expensive processes in construction.
Unexpected costs and delays – here is where you put on your positivity hat and let your dream teamwork through the problem.
Conclusion
As you can see, most of the issues above can be eliminated through early planning and decisiveness.
Building a custom home is a huge project for most homeowners. When you work with a quality home builder, the project can be a joyous one. Choose your dream team wisely, stay flexible and positive, and you can be living in your new custom home before you know it.
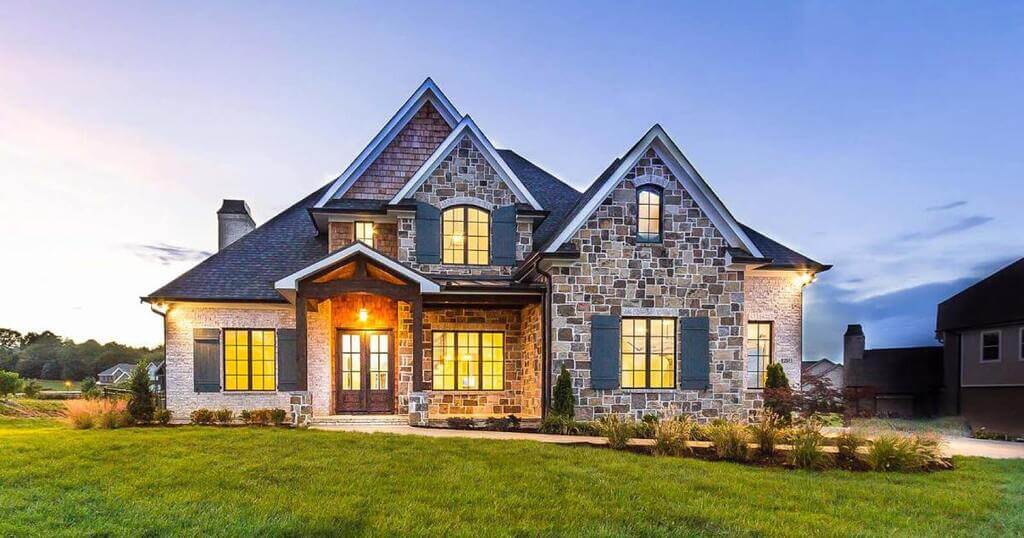
Choosing the right custom home builder is one of the most important steps in turning your dream home into a reality. The right builder will guide you through the process, ensure quality craftsmanship, and help you avoid costly mistakes that could delay your project or affect the final result. If you’re planning to build a custom home, here are key factors to consider when choosing your builder and common mistakes to avoid for a smooth, rewarding building experience.
Experience
Experience is not just in the number of years but also in the number of projects properly executed. You want to ensure that your choice of custom builder has deep knowledge of custom-building and is familiar with building standards and practices, giving you the best home there is.
Reputation
This shows how much you can trust your dream home in your contractor’s hand. It is helpful to read reviews about your builder before entrusting your home into his hands. You can search for their reviews on Google and Angie’s list. It can also be a bonus if your builder comes highly recommended by friends and colleagues.
Another factor to consider is how committed to timely delivery your contractors are.Have there been cases of customer complaints about missed deadlines? It could also help to ask if they offer an on-time guarantee.
Portfolio
Asking to see your contractor’s portfolio of custom home builds gives you an idea of what your future home could look like. It also allows you to see a real-life example of your contractor’s workmanship.
When building your dream home, it’s crucial to choose the right custom home builder. Perth builders particularly understand the unique aspects of building in the Western Australian climate and can ensure your new home meets all local regulations.
Quality of Work
In choosing a builder, meticulousness is an important factor. You want to make sure your contractor does quality work, which you can check out by examining their completed projects.
Customer Service
You want to make sure the contractor you’re choosing has a customer-centric approach to business. This is vital in building custom homes as you are translating your dream into being. You would therefore need someone who listens to, understands your vision, and would be able to deliver.
Budget
When choosing a contractor, the budget can be a huge indication of the quality of work you’ll be getting. A ridiculously cheap budget might indicate that the contractor uses substandard materials, while a budget set too high when compared to others might mean the contractor is trying to rip you off.
We recommend you examine the builder’s past projects and the equipment to make an informed decision.
How To Avoid Common Mistakes When Building A House
Mistakes abound in all human endeavours, and custom home building is no exception. However, certain mistakes which will cost you time and money are highlighted below.
Not Getting the Builder’s Input Before Designing Your Home
While this might seem contradictory since the builder is meant to translate your dream into a physical home, getting your builder’s input before designing will make it easier to dream up a liveable home.
In the same vein, your builder will be able to work with your budget in giving you the home you envision at a price suited to your pocket.
If done the other way round, however, and you design your home before meeting your custom-home builder, there may be significant changes to your design to suit the costs, complexity, and features of your chosen design.
Not Understanding the Home Building Process Properly
It is best to arm yourself against unpleasant surprises by knowing what the home building process entails. Features in your home like the choice of flooring material, the colour of plumbing fixtures like the toilet bowls and sinks are examples of some aspects of the process you should know.
It is also crucial to know what the costing of your home building entails. Knowing if the price stated includes the site work and other technical expenses. Being surprised with an unexpected bill after the building might be a tough pill to swallow.
Not Making Design Decisions Upfront
When the decisions are made “on the go,” it is easier for the design to end up being haphazard or even, in worst cases, become stuck at a point and need a complete do-over or major adjustments that significantly differ from your broader vision.
Conclusion
Given that your custom home builder will be involved in the details of your home from the earliest planning to the post-construction cleanup, choosing someone you can work with and be comfortable with is important, as is steering clear of mistakes that can potentially cost you a lot of time and money. We believe these tips above will help make choosing your custom home builder easier.
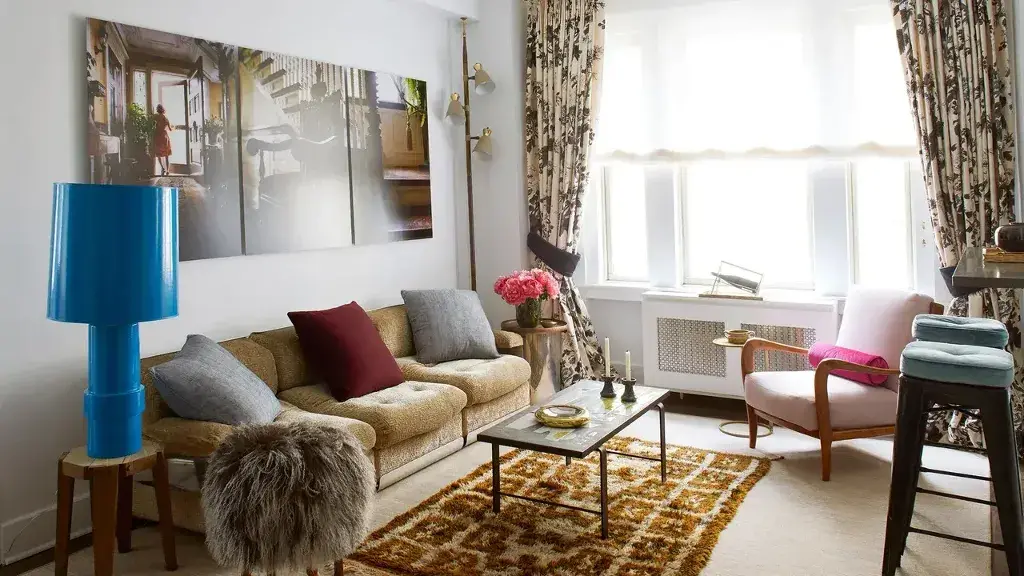
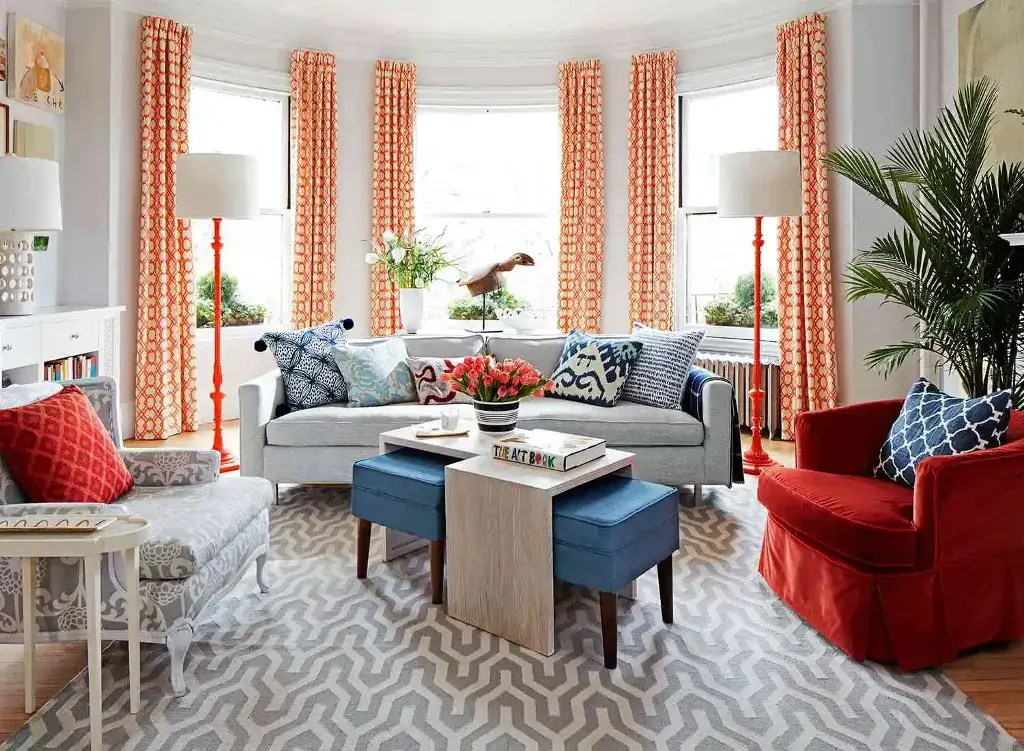
Curtains are a simple yet powerful way to add style, warmth, and privacy to your home. Whether you want to refresh your living room, bedroom, or kitchen, the right curtains can transform your space instantly while letting you control light and comfort. From sheer panels that add a soft glow to blackout curtains that provide privacy, there’s a style to match every room and taste. Explore these curtain ideas to find the perfect option that elevates your home’s look with ease.
Explore the Importance of Curtains!
Curtains are a necessary element in any room design, and however, they may also serve as a statement item that immediately injects your area with instant flare and personality. Finding the appropriate curtains for a space can make a difference in tying everything together and adding the ideal finishing touch.
There are a few considerations to consider while choosing curtains for a room. First and foremost, you need to consider the space’s purpose. If you want to maintain your privacy, select a heavier fabric that will prevent light from penetrating it. Choose fabrics with a lower thread count and a lighter weight if you want more natural light to enter the room.
Next, consider the atmosphere that you wish to evoke in the audience. Do you desire for there to be a sense of warmth and closeness in the room? Or light and airy in nature? Your choice of curtain material and hue will significantly impact the space’s overall atmosphere.
Finally, keep in mind the importance of practicability. Check that your curtains can be easily opened and closed and that they are the appropriate size for your windows. Because there are so many different types of curtain styles available, it is simple to find an alternative that complements the design of your room while also being functional.
Types of Curtains to Consider
There are a variety of curtains to consider when trying to add style to your space. Some common types of curtains include:
1. Sheer Curtains:
Sheer curtains are a great way to add a touch of elegance to any room. They let in natural light and can be hung alone or paired with another type of curtain.
2. Blackout Curtains:
Blackout curtains are ideal for bedrooms and any other space where light must be blocked. They may help you obtain a good night’s sleep by creating a dark, comforting environment.
3. Patterned Curtains:
These are excellent ways to bring character to a room. There are patterned curtains for every style, ranging from floral to geometric designs.
4. Linen Curtains:
Linen drapes are ideal for creating a casual, natural home appearance. They come in a variety of colors and textures and drape beautifully.
5. Velvet Curtains:
These are luxurious and exquisite, perfect for adding a touch of sophistication to any home.
6. Grommet-Top Curtains:
However, grommet-top curtains come in various hues and may be hung alone or with sheer curtains.
Your Window Size Matters the Most!
Windows come in all shapes and sizes, and so do curtains! There are several considerations to bear in mind while selecting curtains for your windows. Initially, consider the size of your window. Curtains that are too tiny can seem out of place, but curtains that are too huge might be overpowering.
Consider the style of your place next. Classic panels may be the best choice if your interior design is more conventional. However, top curtains might be better for a more contemporary aesthetic.
Finally, remember functionality. If you need privacy or light control, then blackout curtains or room-darkening shades might be what you’re looking for.
The Color Choice: What Colors Should You Pick?
Color choice is an important aspect of design, whether designing a website, a brochure, or even just choosing a color scheme for your office. Colors may express various meanings and provoke different emotions, so it is essential to choose them carefully.
There are a few things to remember when choosing colors for your design:
Consider the message you want to convey. Different colors can create different moods, so choose a color that matches the feeling you’re trying to create.
Think about the audience you’re targeting. Different colors appeal to different people, so make sure you’re choosing a color that will resonate with your target audience.
Consider color’s cultural implications. Know color’s cultural meanings if you’re targeting a worldwide audience.
Tips for Creating a Style That Works with Your Curtain Design:
If you’re looking for tips on creating a style that works with your curtain design, you’ve come to the right place.
\First, consider the formality of your space. When decorating a formal living room, you’ll want to choose elegant and sophisticated curtains. For a more casual space, like a den or family room, you can get away with choosing a more relaxed style of curtain.
Consider your space’s purpose. Choose blackout curtains for sleeping or watching movies. Sheer curtains provide privacy and light.
How to Hang Curtains on a Rod or Track
If you’re wondering how to hang curtains on a rod or track, there are a few things you’ll need to keep in mind. First, you’ll need to ensure that the rod or track is properly installed. Once that’s taken care of, you can hang your curtains.
There are many methods for hanging curtains, and the ideal option for you will depend on the sort of rod or track you use. If you’re using a rod, you can either use clip rings or sew-on tabs. If you’re using a track, you can either use hooks or rings.
Once you’ve decided how to hang your curtains, you can then proceed to hang them. For a rod, you’ll need to first put up the rod and then hang the curtains.
What Are Your Options If You Want to Hang Curtains but Don’t Want to Drill Holes in the Wall?
There are a few solutions if you want to hang curtains without putting holes in the wall. Temporary adhesive hooks, found at most hardware stores, are one way to hang curtains without drilling holes. You can also use tension rods, which can be adjusted to fit the width of your window. If you’re looking for a more permanent solution, you can install screw eyes into the molding around your window or the wall itself. With a little creativity, you can find a way to hang curtains without drilling holes in your wall.
Conclusion
We hope you found these curtain ideas helpful in adding instant style to your space. If you have any questions or comments, please get in touch!
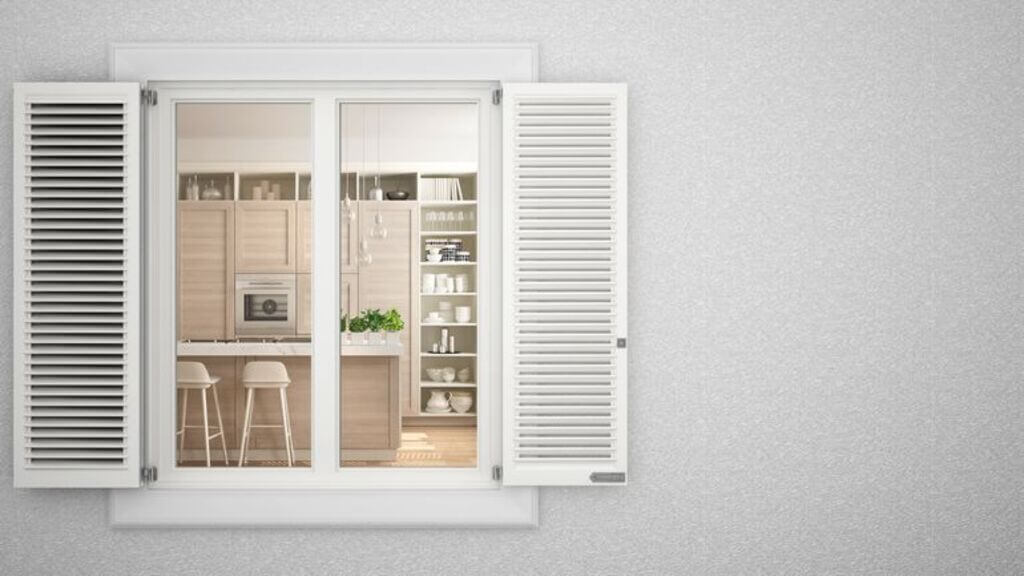
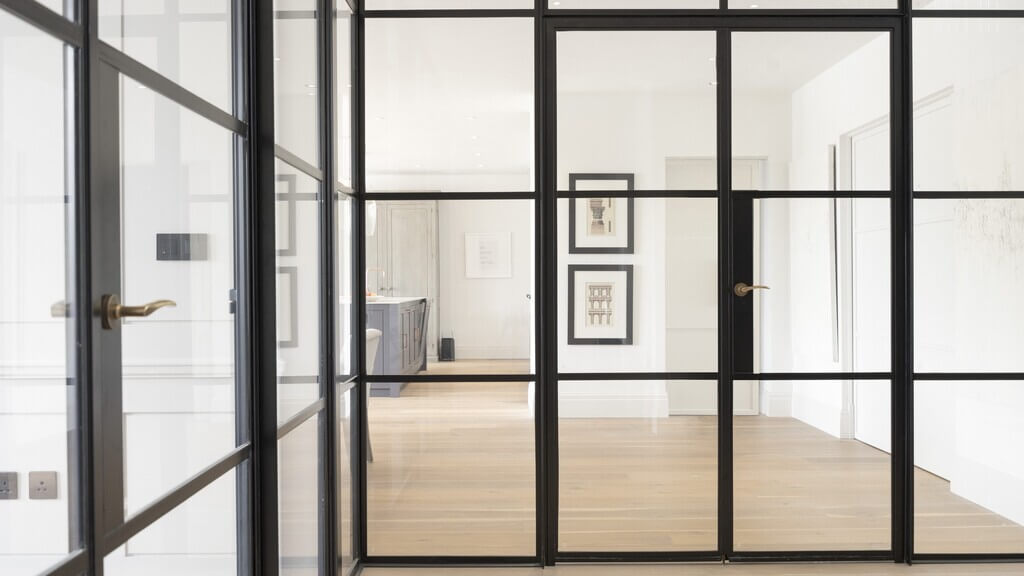
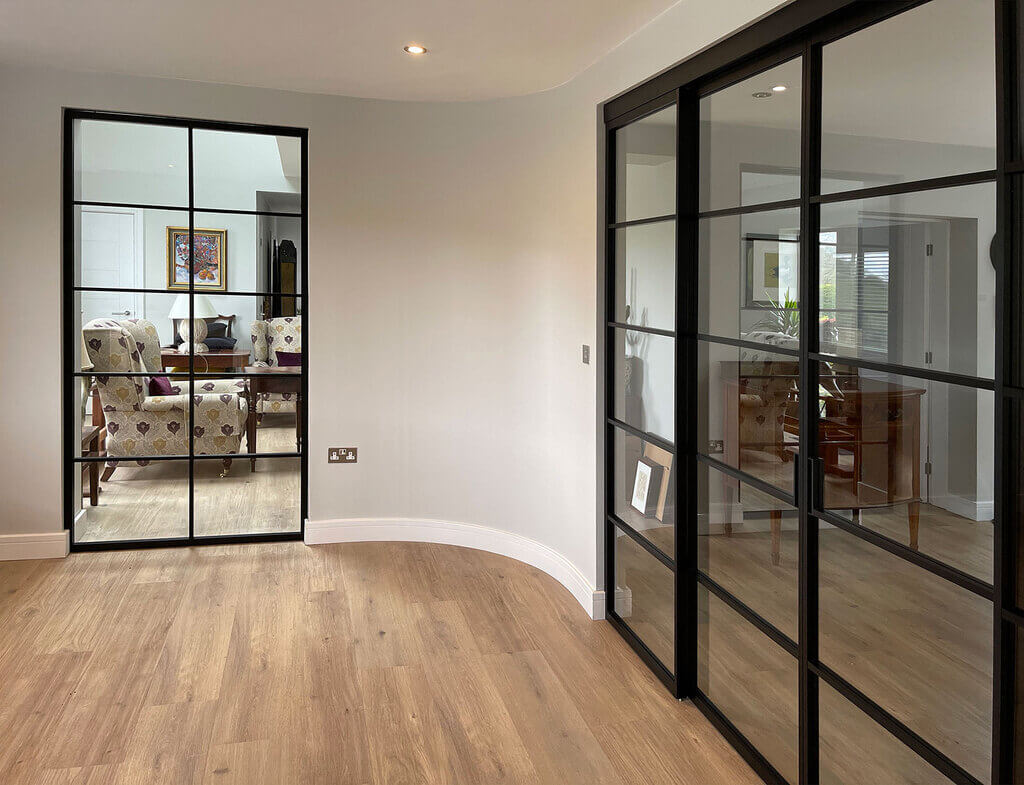
You may not know this, but Crittall windows and doors got their start in the 1880s. Back then, they were exclusively used for warehouses, factories, and other industrial spaces. In the decades since, though, these steel-framed grids of metal and glass have evolved to suit a huge range of styles, tastes, and functions. Sure, they’re still immensely popular as windows and internal doors, but they’re also used for everything from room dividers to shower screens.
Crittall windows and doors can be quite expensive, though, which is why many consumers decide to look for a Crittall alternative. There are plenty of manufacturers who make Crittall-style windows, interior doors, and everything else you could imagine. These alternatives are usually cheaper, especially since many of them use aluminum frames rather than the usual steel frames. This makes it possible to get the same look and functionality but with a smaller price tag and a shorter wait time.
Why Are Crittall-Style Windows and Doors So Popular?
There are several advantages to having this type of window or door in your home. For one thing, a Crittall-style interior door opens up spaces and allows natural sunlight to reach a much wider area. For another, the metal-grid pattern provides enhanced security for windows and exterior doors.
For many people, the main draw of this style is…the style! The black metal frames contrast with the clarity of the glass; depending on how it’s personalized, it can match with Victorian houses, industrial-themed homes, or minimalist lofts with very little effort.
If there’s one secret to the continued popularity of Crittall-style windows and 1, it’s probably their versatility. They can enhance one space, or become the defining feature of another. For some examples of how they can fit into a variety of spaces, just keep reading!
Crittall-Style Picture Windows Paired with Natural Materials
Let’s say the main theme for a house is raw natural materials – unfinished oak floors, plaster walls, and neutral-toned linen on the furniture. With an interior like this, you’d almost expect hearty wooden doors and stocky window frames; this would make sense, but it would also make the space feel a bit weighed down with all the wood. If you put in a Crittall-style picture window, however, this would add yet another natural element to the space – sunlight! It would also make the interior feel more modern and open, without clashing with all the natural materials. Interior doors or room dividers could also be used to extend the motif.
Arched Crittall-Style Windows and Interior Doors Flow with the Design of the House
There are some houses that just deserve more than the usual right-angled windows and doors. For example, a townhouse with lofty ceilings and a sophisticated look would really stand out with custom-made arched windows, plus arched interior or exterior doors – all with Crittall-style metal frames. The black metal of the frames would make the space feel more structured, even as the curves of the arching shapes would bring a certain lightness to the look.
Crittall-Style Room Dividers to Open Up a Loft
When laying out the interior of a loft, every inch counts – as does every bit of light! If there are a limited number of windows, putting up a room divider could doom part of the space to nothing but artificial light. Unless, of course, you use a Crittall-style room divider. In a loft, there’s only so much room for stylistic flourishes; this is why the room divider would become one of the statement pieces of the loft’s interior. It would add an industrial vibe to the living space and set the tone for the rest of the place.
Crittall-Style Touches to Transform Open Living Spaces
What should you do when you like the feel of an open living space, but still want to delineate specific areas? Use Crittall-style room dividers or doors to guide the flow of the house. This allows you to break up larger spaces into smaller ones, without making the house’s interior feel any less open or airy. Each area becomes more manageable, but nothing is sacrificed for those who prefer the open living space.
Build a Translucent Wall with a Crittall-Style Window
Thanks to the grid-like construction of Crittall-style windows, they’re the perfect candidate for constructing an entire wall out of clear glass and robust metal frames. An ordinary picture window can let in plenty of light, but it’s still a window. A Crittall-style window, on the other hand, can be expanded to take up the entire wall without concerns about safety or security. Not only does this maximize the amount of light that the room will get, but it also serves as a remarkable statement piece that will define the entire house. This concept is especially perfect to showcase a spectacular view; rather than looking out the window to catch a glimpse, you’d almost feel like you were standing right in the middle of it.
Crittall-Style Interior Doors with Ribbed Glass
Crittall-style doors aren’t generally used for spaces that require privacy, but they can be with the use of ribbed glass. Many bathroom windows use textured glass to provide light without compromising privacy, but this is much less common with bathroom doors. However, by using ribbed glass in a Crittall-style door, even the bathroom can benefit from the lightness of these doors without sacrificing privacy.
Construct a Minimalist Feel with Crittall-Style Windows and Interior Doors
Minimalism as an aesthetic isn’t simply the absence of details; it’s characterized by clean lines and colors that bring a sleek feel to any space. This is perfectly embodied by Crittall-style windows and doors, especially if they’re made with slim frames. They allow efficient use of sunlight instead of artificial lighting, and they strengthen the look of a simple interior without adding complexity.
The Takeaway
Crittall-style windows, doors, and other products are iconic and striking, yet incredibly versatile at the same time. From heritage sites to modern lofts, they can elevate the look and feel of pretty much any space.
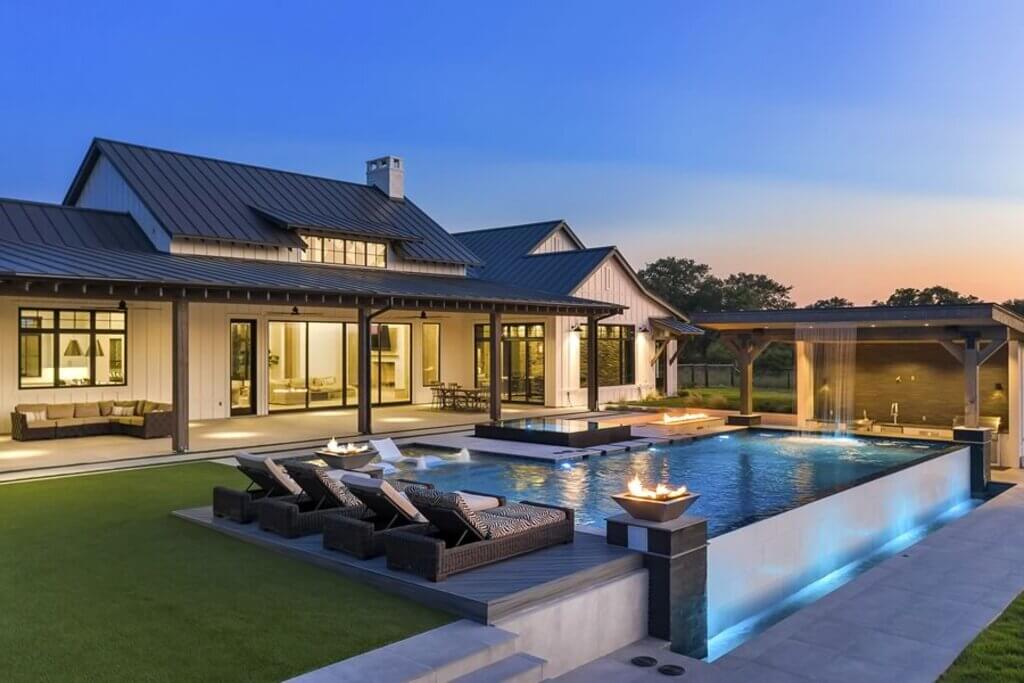
Building your “forever home” means creating a space where you can live comfortably now and in the years to come. If you’re environmentally conscious, adding energy-efficient customizations is one of the best ways to ensure your home remains comfortable, cost-effective, and sustainable as you age in place. From smart layouts to energy-saving fixtures, these upgrades will help lower your bills and support your lifestyle without worrying about future resale value.
Customizations to Create Your Energy-Efficient “Forever Home”
Build a Compact Layout Home
If you plan on building your home from the ground up, be sure to keep in mind the option of a compact layout. A lot of people think that because they’re building their homes that they have to build a big home, but that’s not the case at all.
Big homes that “spread out” tend to lose more heat and aren’t as efficient. Even tall homes or homes with high ceilings tend to be more efficient than wide, one-story homes. Simply put, homes with compact layouts have smaller surface areas, making it easier to retain more heat in the winter and stay cooler in the summer.
Have Energy-Efficient Lighting Installed
According to the US Energy Information Administrations, the usage of lights in your home account for a whopping 14% of most household budget expenses. Making energy-efficient changes to your homes now will prove to be very beneficial, especially since most people and children are working from home now. Many households are seeing significant spikes in their energy bills due to being home more.
The key here would be LED lighting. So whether you want to have chandeliers, recessed lighting, or dimmer lights installed, you can do that all with energy-efficient lighting. This particular customization is one that doesn’t negatively impact the aesthetics of your home at all.
Install Skylights
Skylights are an absolutely beautiful house feature when considering the aesthetics of a home but can also prove to be a wonderful way to reduce your energy usage at home, from a lighting and heating perspective.
All homes have windows but not too many have skylights. Skylights prove to be beneficial for illuminating a room, making the need for electricity reduced. They also provide homes with natural light and heat from the sun, reducing the need to use the thermostat, especially during the winter months.
Conclusion
Whether you’re building your home from the ground-up or if you’re just renovating your current home into the home of your dreams, energy efficiency is key. The above customizations are ones that may not matter to home buyers, and that’s okay because they’re meant just for you.
The whole point of these customizations is to reduce your energy consumption. When you have these customizations done, you can lower your electric rates even further by changing providers.
Conclusion
This is going to prove to be helpful in lowering your energy bill considerably, and this is going to be even more helpful in your forever home when you get older, retire, and have to live off a limited income. The customizations you’ll have done in your younger years will be even more financially beneficial to you in your older years.
Thousands of families don’t have access to decent homes in this era because of the rising costs of housing. Although different platforms are emerging to make affordable homes a reality for many, each family has a role to play when it’s time to build their dream home.
These tips will come in handy as you create an affordable home for your family.
Good location
The location of your home will influence your everyday living and property value later on. You need to confirm that there are good schools around if you have kids. Amenities such as banks, parks, and grocery stores must be easily accessible too.
Choosing a location with a robust transportation network will make your commute hassle-free. Your lifestyle will determine the other amenities that you need. Above all, a location that has a high crime rate should be avoided even if it offers all the amenities that matter to you.
Open plan layouts
Open plan layouts and kitchen diner help to eliminate the confined feeling in a family home. This type of layout is also a smart way to maximize space.
Without mincing words, corner sofa beds are the latest trends that will give your home the modern vibe. You need versatile furniture pieces if you have a growing family or often have guests over. Your best bet is to get a sofa bed instead of buying an extra bed.
You can buy some affordable and stylish corner sofa beds from FURCO which give you the best of both worlds, a sofa that converts into a bed saving space and easily accommodating extra sleeping space.
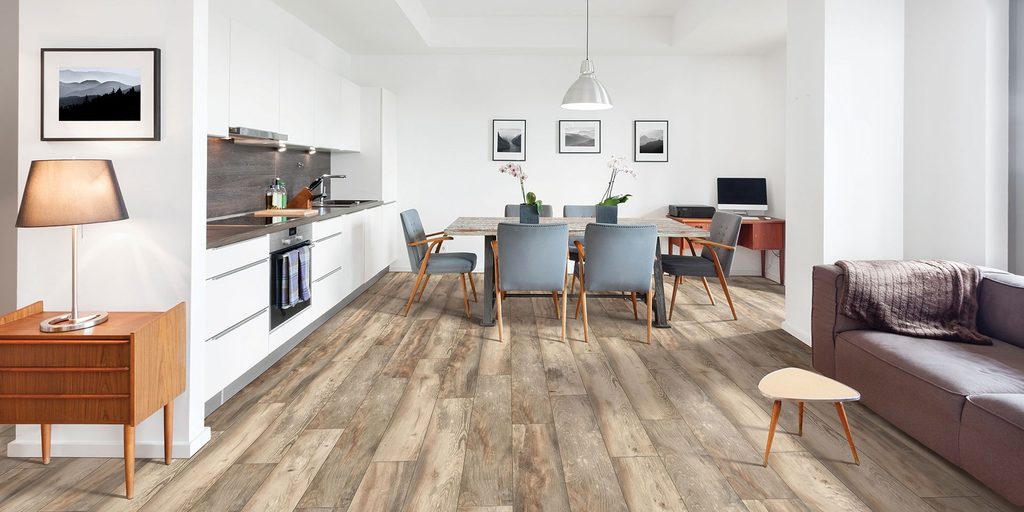
Right flooring
Homeowners have tons of flooring options to choose from. A lot of people tend to make the mistake of sacrificing needs over aesthetics. Even so, it’s imperative to consider your family’s needs and lifestyle so that it will be easier to arrive at the best decision.
Try to understand the pros and cons of each flooring option. Laminate flooring has become widespread and it’s among the top options, especially if you have pets and young children. You can get affordable and durable laminate flooring at Floors Direct and you can save even more money by installing the floor yourself by choosing a “click” variation which makes it easier to lay the floor.
Family bathroom suite
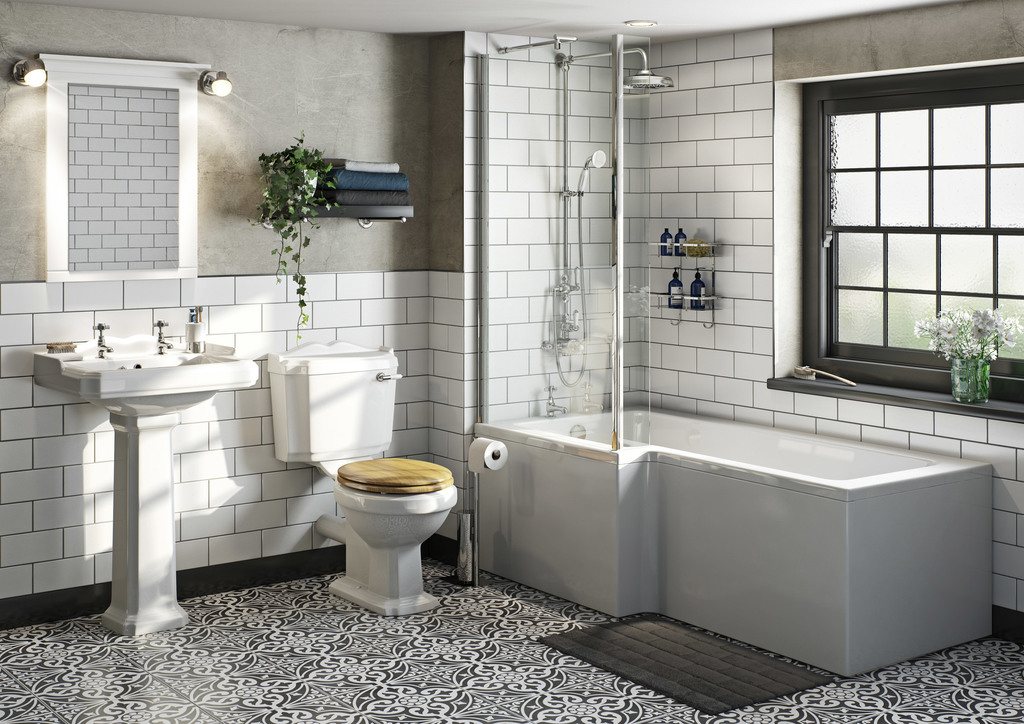
Family bathroom suites can help you get more out of your bathroom and enjoy some privacy regardless of their size. For instance, two people can use a dual sink for brushing their teeth at the same time. Have a clear picture of the layout and purpose of the bathroom suite.
Even though your family need is a top priority, you can still create a space when you can have a relaxing bath. Ensure that the flooring is non-slip with round edges.
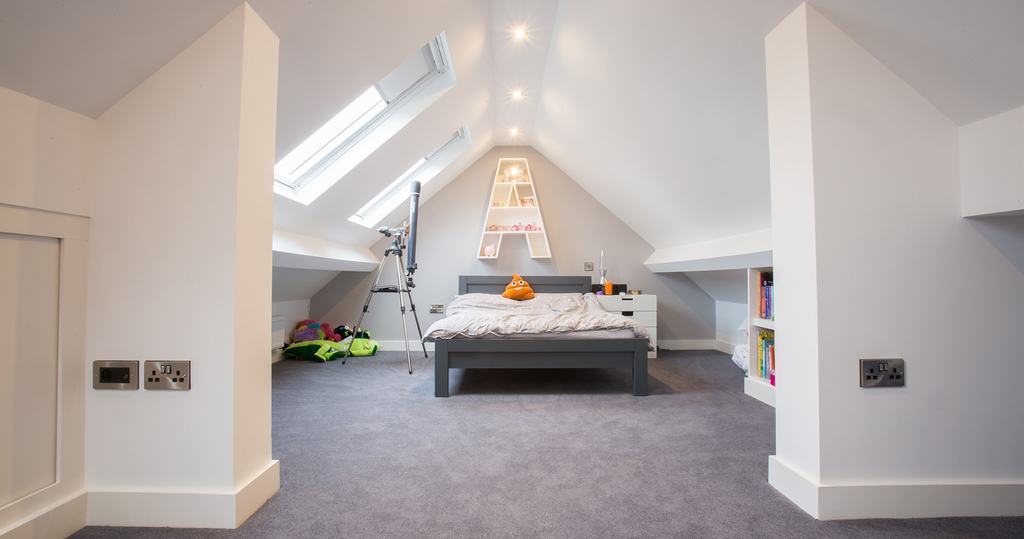
Loft conversions
When searching for houses, opt for the one with enough cavity space in the roof. This will make it easier to transform it into a home office, play area, lounge, or guest bedroom.
Some of the factors you should consider include your budget, energy efficiency, and the configuration of the loft. Endeavor to incorporate the furniture layout as you come up with design ideas.
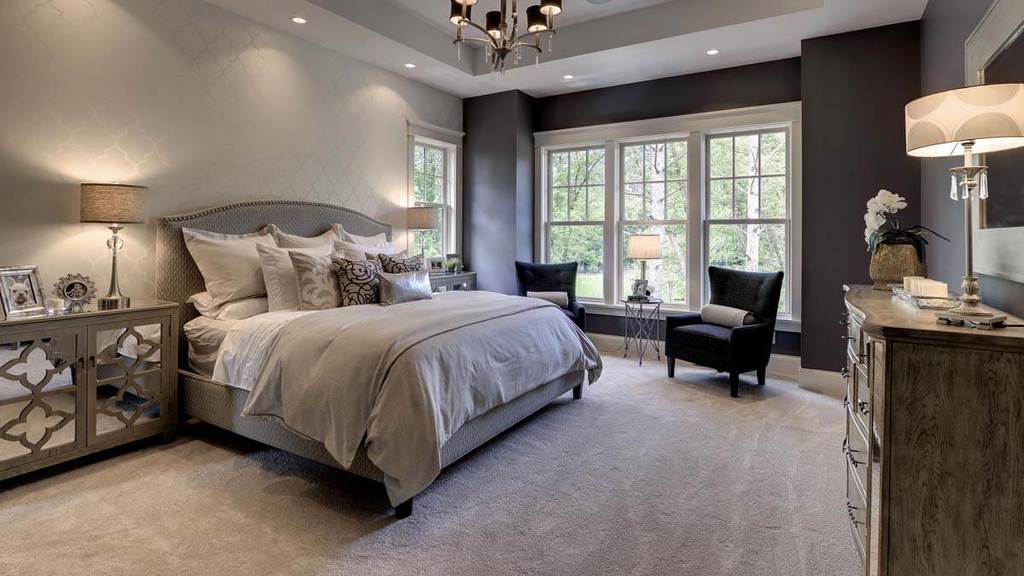
Master bedroom
Although the bedroom will be concealed from the public glare, this doesn’t mean you can’t convert it into a haven. Chances are you spend more time in it than in any other room. Given this, invest in quality fabrics for your beddings and budget-friendly products for a luxurious bedroom.
Conclusion
Another thing is that your bedding should be comfortable and offer optimum support. Building a walk-in closet and en-suite can go a long way to reduce clutter and promote convenience. Taking these steps will also boost the value of your family home.
When summer temperatures soar, a malfunctioning air conditioner can turn your home into an uncomfortable sauna. If your AC isn’t keeping you cool, understanding the most common air conditioner problems and the parts that cause them can help you troubleshoot quickly and restore comfort.
From insufficient cooling and strange noises to leaks and rising energy bills, knowing what to look for means you can address minor issues yourself or call a professional before a small problem becomes a costly repair. In this guide, we’ll cover the Common issues with Air Conditioning units, their likely causes, and how to keep your system running efficiently all season long.
1. Insufficient Cooling
If your air conditioner is running, but the air isn’t as cool as it should be, the problem could be caused by a few different factors. One possibility is that the refrigerant level is low. This usually means there is a leak, which needs to be located and repaired by a professional.
Another common reason for inadequate cooling is a dirty or clogged air filter. This restricts airflow to the air conditioning unit, causing it to work harder than necessary and often resulting in decreased cooling capacity. Changing the air filter every few months is generally a good practice to prevent this issue.
2. Unit Not Turning On
When your air conditioner doesn’t turn on at all, it could be due to several issues. One common cause is a problem with the thermostat. Ensure that it’s set correctly and has power. If it’s a battery-operated model, check to see if the batteries need replacing.
Another reason could be that the circuit breaker has tripped. If so, resetting it might solve the problem. However, if the breaker continues to trip, it’s best to call in a professional as it could indicate a more serious issue.
3. Noisy Air Conditioner
While air conditioners are not silent machines, unusual noises like rattling, buzzing, or squealing can signal a problem. Loose air conditioner parts, such as screws, bolts, or panels, can cause a rattling noise. Tightening these can help eliminate the issue.
Buzzing noises often indicate an electrical issue, such as problems with the circuit breakers, condenser coil, or loose wiring. On the other hand, squealing noises might be due to a malfunctioning fan motor or blower wheel. As these issues are complex, it’s best to have a professional diagnose and fix them.
4. Water Leaks
If you notice water leaking from your air conditioner, don’t ignore it. While a small amount of condensation is normal, excessive leaking indicates a problem. It could be due to a clogged condensate drain pipe, a rusted drain pan, or issues with the condensate pump (if you have one). It’s best to have these issues addressed by a professional to prevent water damage to your home.
5. Frequent Cycling
If your air conditioner is turning on and off more frequently than usual, it’s often a sign of an overworked unit. This could be due to an improperly sized unit (too large or too small for the area it is cooling), or an issue with the thermostat. Dirty coils or a clogged filter can also make your unit work harder, causing frequent cycling.
6. Rising Energy Bills
An often-overlooked sign of an air conditioner problem is a sudden spike in your energy bills. While it’s normal for these bills to rise somewhat during the summer months due to increased AC usage, a significant and unexplained increase could signal a problem. This could be due to anything from a refrigerant leak to a malfunctioning compressor. Both of these issues force your air conditioner to work harder to cool your home, using more energy in the process. If you notice your energy bills skyrocketing, it’s worth having your air conditioner inspected by a professional to rule out any potential issues.
7. Dealing with Old Units
Air conditioners, like all appliances, have a finite lifespan. Typically, an air conditioner can last anywhere from 10 to 15 years with proper maintenance. As your unit gets older, you might start to encounter more frequent issues, and some air conditioner parts might require replacement. It’s important to weigh the cost of constant repairs versus the investment in a new, more efficient unit.
Modern air conditioners tend to be more energy-efficient and reliable, and while the upfront cost might seem steep, the long-term savings on energy bills and repair costs often make this a worthwhile investment.
Conclusion
Your air conditioner is composed of many parts working together to create a cool and comfortable environment. When one or more of these air conditioner parts is not functioning correctly, it can result in a variety of issues, from insufficient cooling to excessive noise.
While some problems can be easily addressed, such as changing a dirty filter or tightening loose screws, others require professional assistance. Regular maintenance can prevent many issues, but when problems arise, don’t hesitate to call a professional. Not only will this ensure that the problem is correctly diagnosed and fixed, but it also safeguards your unit’s warranty, if applicable.
Remember, the sooner an issue is addressed, the less likely it will cause more severe damage to your unit, saving you time, money, and discomfort in the long run.
Are you feeling creative or searching for a rewarding new hobby? Wood crafting is the perfect way to channel your energy, offering endless possibilities for both beginners and seasoned DIYers. With wood’s incredible versatility, you can cut, carve, paint, or build to your heart’s content, producing beautiful, functional pieces for your home, garden, or as thoughtful gifts. In this article, discover five inspiring wood crafting projects that are fun, practical, and sure to spark your imagination.
1. Indoor Flower Basket
Inject some green appeal into your humble abode by crafting a wooden basket for your indoor flowers. This task need not be arduous to undertake. All you need is an old magazine rack, a tin of paint, a plywood sheet, and some hessian. The rack will be painted in your favourite colour and will ultimately form the body of the basket.
The small piece of plywood will be attached to the basket and act as a sign, and the hessian will sit in the basket in order to keep your flowers safe and compact. This item makes a unique gift for someone special, whether it’s their birthday or an anniversary.
2. Memory Board
If you’re looking for a unique, quirky way to display your family’s memories, you should consider crafting a wooden memory board. So long as you have a robust wood engraving machine at hand, you will have the capacity to engrave special names, dates, and recollections on a piece of wood that can then be hung up in your home to create a beautiful addition to any room.
3. Kitchen Caddy
Are you fed up with never being able to find jars, recipe books, utensils, and other pieces of cooking paraphernalia in your kitchen? If so, you should eliminate this plight from your life right away by crafting your very own wooden kitchen caddy. Should you decide to take on this crafting challenge, be sure to heed the advice and guidance laid out in this helpful article.
4. Stacked Side Table
Do you feel ready to take your wood crafting capabilities to the next level? If so, you should take on the challenge of designing a DIY stacked side table. Made from a plethora of small pieces of plywood, this is a layering task that will be sure to push your skills as a crafter to their limit.
To succeed with this difficult yet rewarding endeavour, you must:
Have the right tools, materials, and solutions at hand (carving machine or laser cutter, design software, 1/8” straight bit, hammer, plywood, circular saw or laser cutter, wood glue)
Find a design file for a stacked side table
Tweak your cut settings to ensure that you have a feed rate of 60”, a plunge rate of 15”, and a depth per pass rate of 0.08”
Stick to five pieces of plywood per layer, and retain equal spacing when laying out your pieces
Use your carving machine to cut out a wooden tabletop that meets the circular diameter of your stacked base
5. Garden Planters
If you enjoy spending time in your garden and are wondering where to grow and display your favourite flowers or herbs, look no further than your planter. This is a fun and creative idea that you can make as small or as big as you need, depending on how much space you have.
Conclusion
You can easily create a planter in a day by using treated timber. It is vital to use treated timber as the wood will become wet during watering or bad weather. By using treated timber, you can ensure your planter stands the test of time. You will need first to work out how big your planter needs to be before cutting your wood to size and beginning construction.
The next time you find yourself with an abundance of spare time, why not resolve to take on the five wood-crafting challenges listed above?