Home Blog Page 24

11+ Innovative And Festive Christmas Decorating Ideas Without A Tree

0
Christmas decorations without a trees

HO, HO, HO…lidays are here!! That means…Shopping, partying and so many things. So, are you ready to celebrate Christmas? It’s only 20 days away!! Bring out the festive spirits from inside of you and enjoy every second of this festive season.

If you are living in a small apartment or house and face difficulty in decorating your place? It is a widespread problem because sometimes it is quite hard to decorate small spaces. But with the right strategy and proper decor items, you can do this. 

We know a lot of people believe that no Christmas is complete without a Christmas tree. It is kinda true, but what if you have little space? That doesn’t mean that you can’t celebrate Christmas. Of course, you can!! And now if you ask how to do Christmas decorations without a tree? We are already ready with the answer. Today we bring the list of alternatives for the Christmas tree, which you can implement in any place.

But before you start reading, you need to know what is the key point to decorating any small space.

The key point is to keep things simple and NOT over-clutter!!

This is the major mistake people make in their homes, so we are telling you this in the first place so that you’ll not repeat this thing. 

So let’s start, by looking at these super awesome 12 Christmas decorating ideas without a tree:

1. Christmas Tree Tapestry

Christmas Tree Tapestry

Tapestries are the best ways to bring Christmas tree vibes. You’ll find various tapestries with a Christmas tree printed on them. Just hang them above your bed frame or anywhere on the wall. Another thing you can do is that just take a picture of an already decorated tree and turn it into a large scale print, just hang this into your apartment… And you’re ready for Christmas.

Fast, Easy, and practical!!

2. A Mini Christmas Tree

A Mini Christmas Tree

But if you want a real Christmas tree, even if you have a really small apartment, then there is only one to way to achieve it, and that is the tiny versions of the tree. You can find these cute and adorable miniatures trees in the departmental stores or online (easiest way!!), or you can cut some branches of the live Fraser fir tree.

“Place them on the side tables or near windows and feel the real and authentic tree in a small form.”

3. Gold Pineapple

Gold Pineapple

For a unique and artistic looking Christmas tree, try a pineapple one. Yes… it may sound funny, but it looks so awesome. Pick a pineapple and spray paint it in a glittery gold or sparkly silver color and place it on the table as a centerpiece. 

4. Draw The Tree

 Draw The Tree

But if you want a  tree in an exact shape of a Christmas tree, then another creative idea is to draw them. If you have a wall with chalkboard paint, then it is fantastic, draw a tree with colorful chalks on it, or you can also paint them on one of the walls of your house. 

“A Christmas tree wall painting is a big commitment, so make one if you’re ready to see this for a longer period.”

5. Crepe Paper Tree

Crepe Paper Tree

A fun DIY project for kids is making a tree with crepe paper. Select a green color crepe paper and fold and paste them horizontally on the walls and later decorate it. 

“To get the real effects of a tree, trim the bottom of each strip infringe.”

6. Fabric Christmas Tree

Fabric Christmas Tree

Cut out some green felt or cloth in the shape of a Christmas tree and glue it on the wall. Or another option is to buy a fluffy fabric tree and place it in any corner and decorate it with some fairy lights.  

“Fabric tree is a great idea if you have a baby who is always crawling and breaks stuff. (which is, in fact, a great exercise for babies!!)”

7. Green Garland Tree

Green Garland Tree

Another wall tree option is a garland Christmas tree. It is the easiest and quickest way to create one. Just place a green garland in the tree form and top it with a red ribbon bow, and your cheap but very attractive looking Christmas tree is ready!!

8. Tree Branch 

Tree Branch  Christmas decorations without a tree

Grab some tree branches from the garden (if you don’t have a garden, then pick it from neighbors). Cut the sharp edges and points and resize them in the pyramid shape. Place them in the decreasing size from top to bottom and tie all of them with a rope. And ta da…your hanging Christmas tree decoration is ready.

9. Washi Tape

Washi Tape Christmas decorations without a tree

Another last-minute decor idea is to make one with washi tape. Sounds kiddish? But what to do if you have no time but you want a Christmas tree and believe us it will not look that bad so try it out!

“You can experiment with different designs, prints, and colors. Add ornaments and lights to get the full Christmas vibes.”

10. Paper Triangle Tree

 Paper Triangle Tree Christmas decorations without a tree

Another eye-pleasing decor is a colorful paper tree. For this project, involve your kids, and tell them to cut out some triangles from the colorful sheets of paper, and place them randomly on the wall (but in a tree shape, of course).

11. A Tree From Ornaments

A Tree From Ornaments Christmas decorations without a tree

Want to do a fun and interesting DIY? Grab some (by some, we mean a lot) ornaments in various sizes. The next step is to create a conical tower with them. Keep bigger sized ornaments on the bottom and tiniest ones on the top. 

“Keep going on placing the balls on each other until you reach the desired height.”

12. Stickers

Stickers Christmas decorations without a tree

If it is the day of Christmas and you still not be able to find an alternative solution for a live Christmas tree, then only this DIY can save your Christmas. 

You’ll find Christmas stickers everywhere, from malls to the dollar stores there are plenty of varieties of stickers. So pick a Christmas tree sticker and put it on your walls or glass windows. 

Christmas Decorating Ideas Without A Tree

You are not allowed to either paint or glue anything on the walls, that doesn’t stop you from decorating your place. There are other methods by which you can decorate your place without a Christmas tree. 

1. Decorate Your Tv Unit 

Decorate Your Tv Unit

Imagine a fireplace in your TV unit and decorate it in the same way, like you will decorate a fireplace. Put stockings, ornaments, and garlands to spice up the place. 

2. Twinkling Lights

 Twinkling Lights for chirstmas

Another mind-blowing decor you can do is with lights!! After all, the holiday season is all about happiness and joy, and the best way to represent them is by lights. Cover your entire apartment with different types of colorful lights. But not extensively, otherwise you will trip into these.

3. Cozy Table Decors 

Cozy Table Decors  Christmas decorations without a tree

Embellish your table with charming and festive decorations, and you don’t need much space for this. Check this amazing Christmas table decoration ideas.

4. Wine Glass As A Candle Holder

Wine Glass As A Candle Holder Christmas decorations without a tree

How beautiful are these candle holders!!

Actually, these are made from wine glasses. For this specific project, you might need some craft skills, but we are pretty sure that anyone can do it.

5. Festive Wreaths

 Festive Wreaths Christmas decorations without a tree

Another easy and space sufficient decor idea is that adorn your place by wreaths. They are the true definition of festivals.

Christmas decorations without a tree

After reading the whole blog, you are thinking about why these ideas have not come to your mind? Right? The thing is we are not able to think out of the box and stuck with the common decorations which we are doing it through the years. But it’s time to change and update yourself with us. I hope you’ll find these Christmas decorating ideas without a tree helpful.

Continue Reading:-

55 Best Office Christmas Decorations Ideas: From Desk to Door

0
office christmas decorations

As the holidays near, it’s clear that sprucing up office spaces with Christmas decorations can make a big difference. By adding some carefully chosen decorations, your workplace can feel livelier and more festive, a nice break from the usual routine. If you’re looking for great ways to decorate your workspace tastefully, our office Christmas decorations ideas can really help.

We’ve put together office Christmas decorations for offices that not only save money but also bring the cozy holiday spirit into your workspace. These ideas are a chance to show off your creativity and bring your coworkers together for the holiday fun. When you try these ideas, your office will become a happier, more cheerful place, embracing the holiday vibe without overspending.

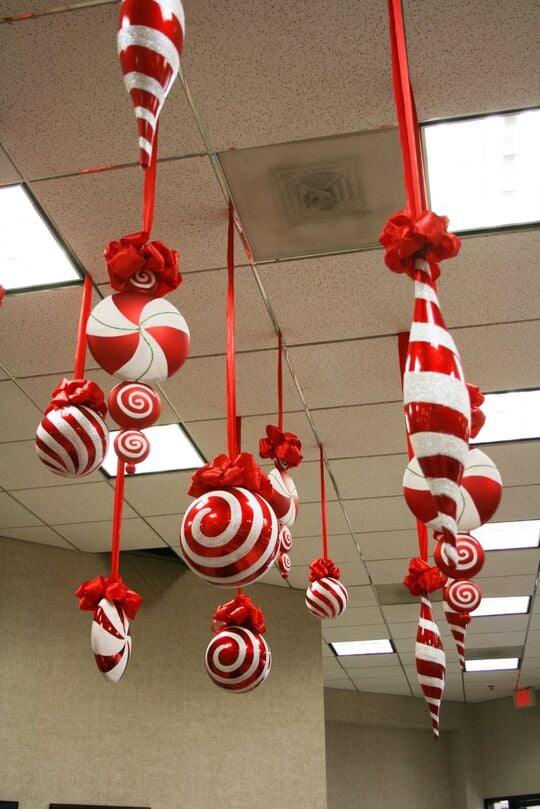
1. Use Candy Canes For Ceilings

Use Candy Canes For Ceilings

Hanging colorful candy canes is a simple and elegant Christmas decor for office. When strung from the ceiling, they provide a joyful touch and have a way of getting everyone in the workplace in the party mood.

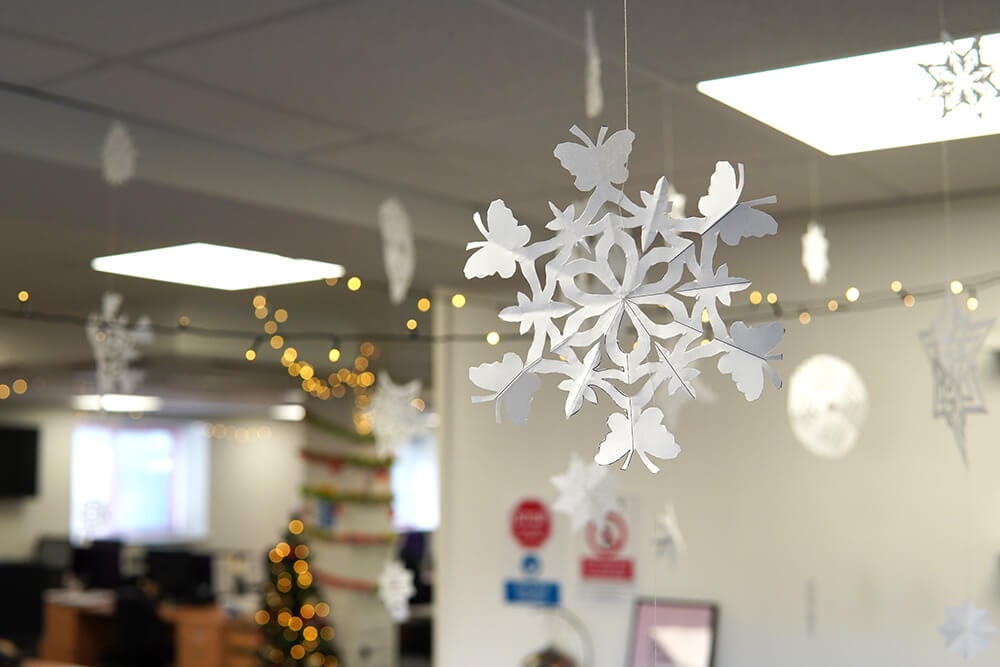
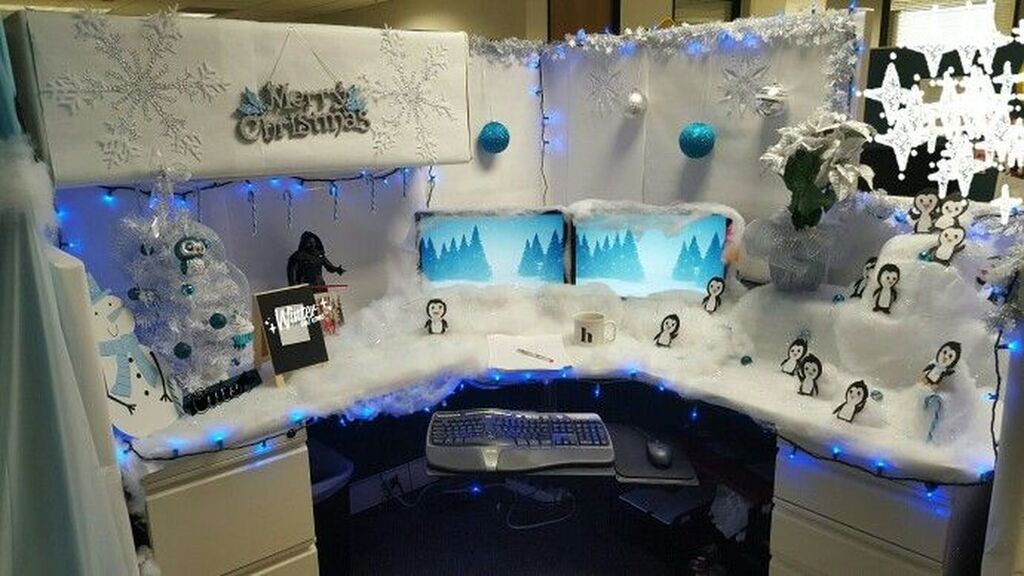
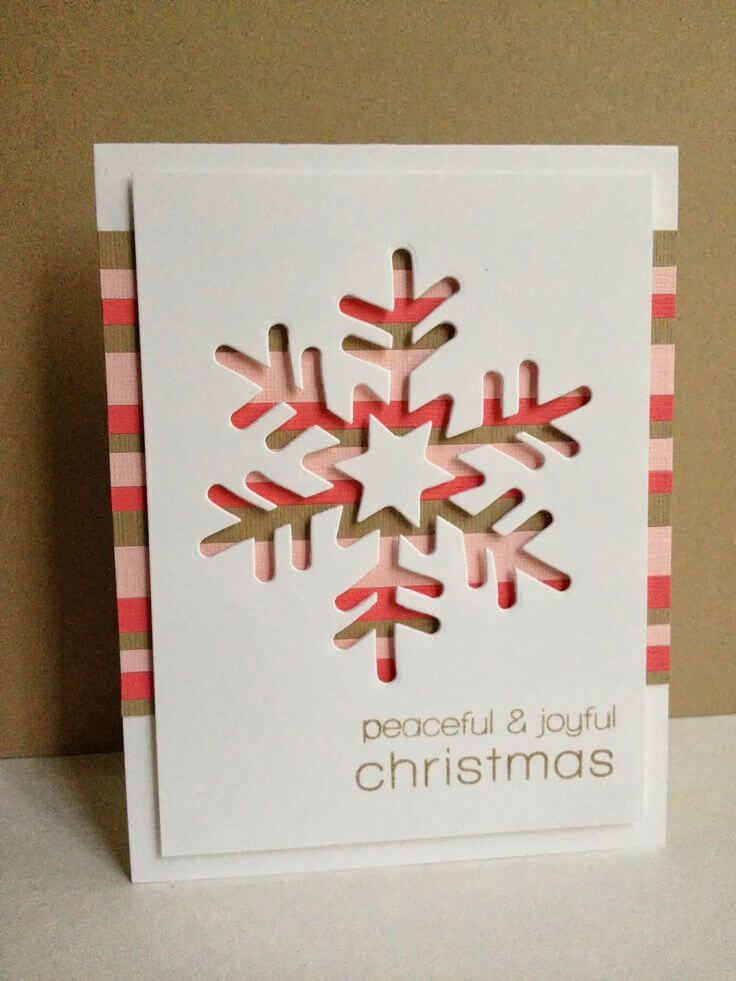
2. Decorate your Office with Snowflakes

Decorate your office with Snowflakes

To create the atmosphere of a winter wonderland, cover the desks with paper snowflakes. To add some more finesse, you can also lay white carpeting down in the workplace halls. It is sure to put everyone in the Christmas spirit!

3. Beautify the Lobby with Decorative Objects

Beautify the Lobby with Decorative Objects

Decorate the foyer with brightly colored items, like Christmas decorations, bells, and baubles. Thanks to this brilliant concept, the office lobby will seem much more elegant and festive!

4. Turn Your Desks to Gingerbread House

Turn Your Desks to Gingerbread House

You can transform those workplace cubicles into adorable gingerbread homes with some cotton, cardboard, and red/brown paper wrapping. Adding Christmas lights can make it seem even cozier and more festive!

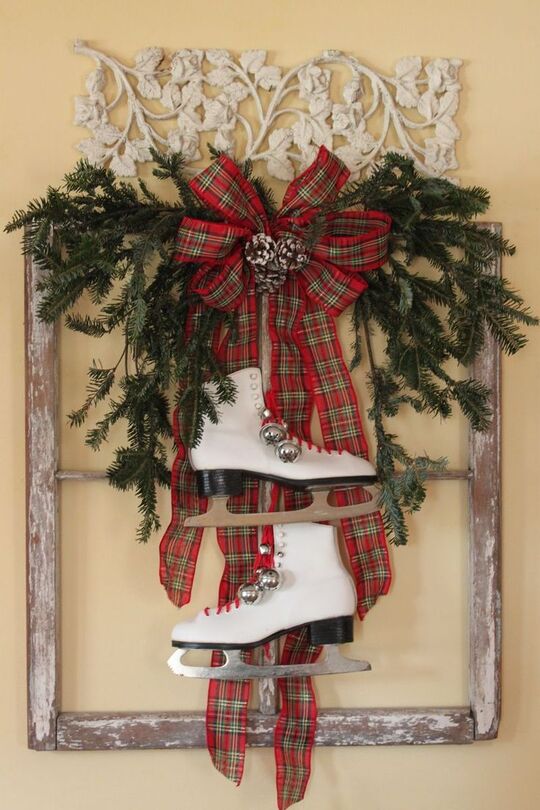
5. Use Christmas Boots Wall Decor Rather Than Stockings on the Walls

Use Christmas Boots Wall Decor Rather Than Stockings on the Walls

Do you plan to do any Christmas decorating for the office? Add a little magic with some toy skis or winter boots strung up on the office wall. Make them more festive by embellishing them with ribbons or paper cutouts in Christmas colors.
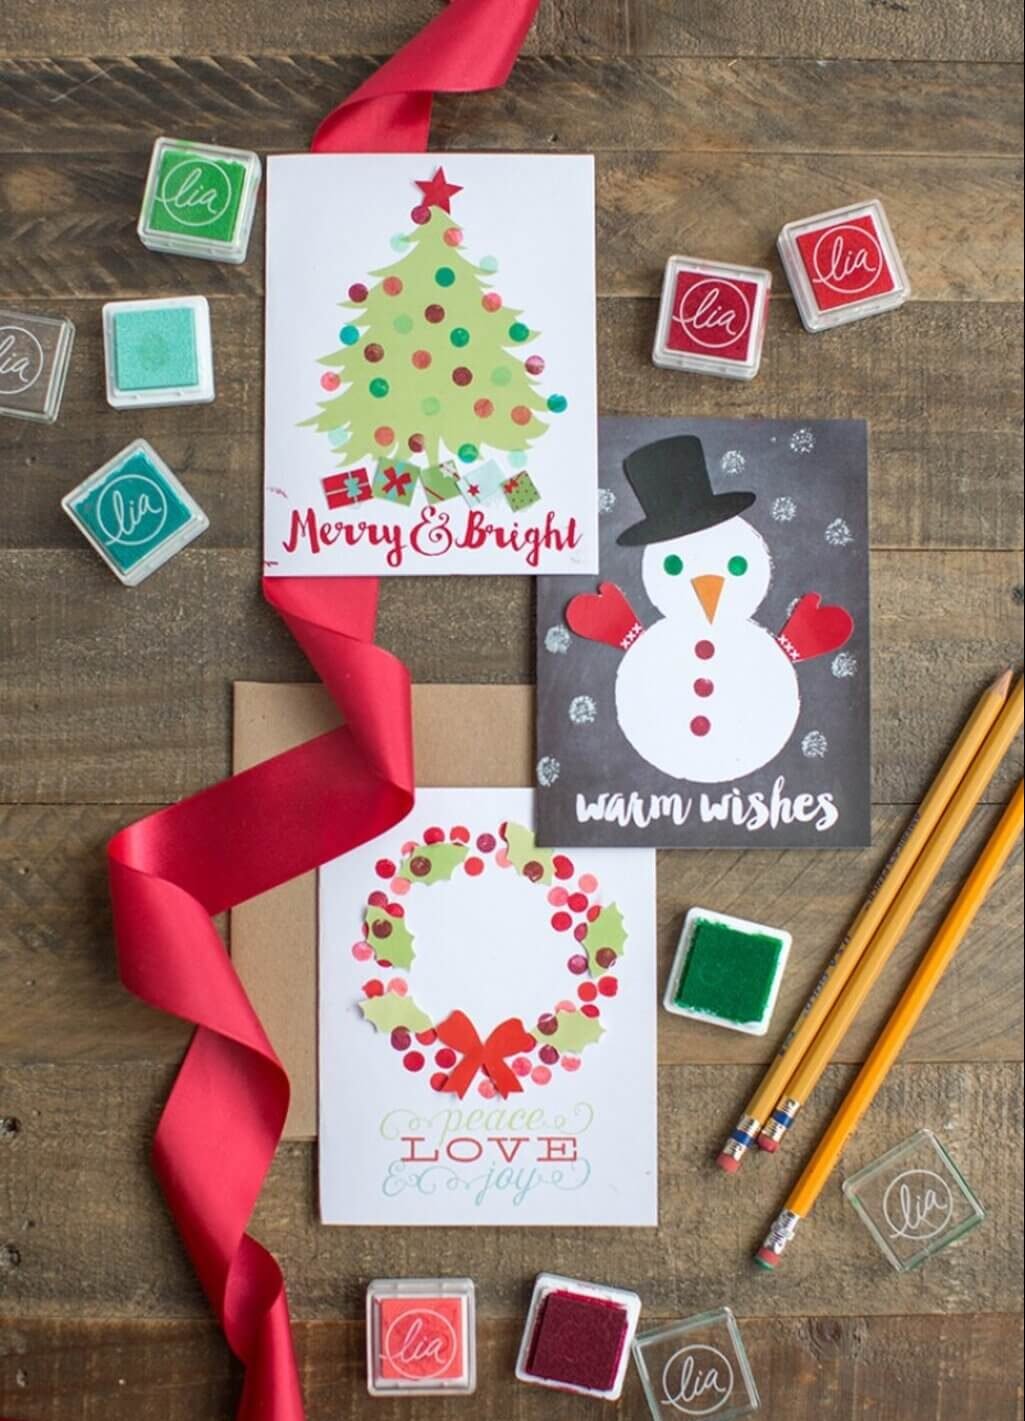
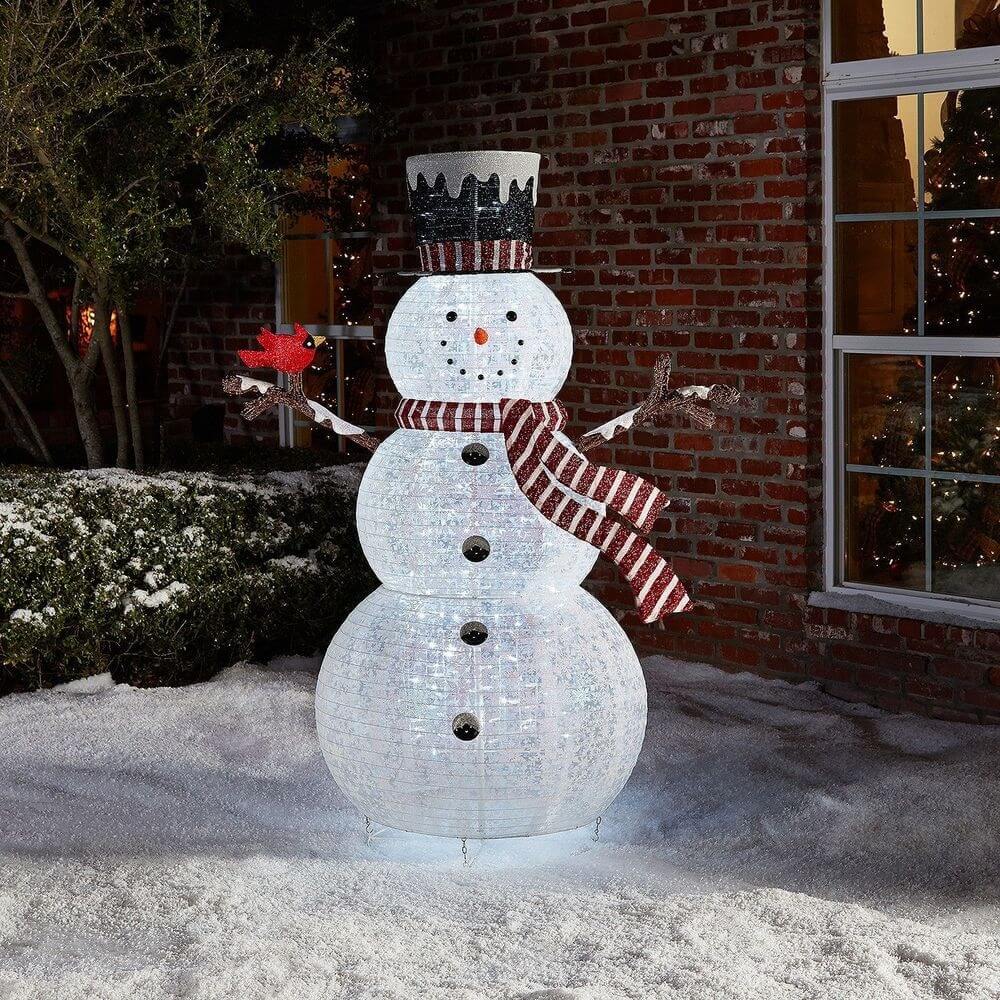
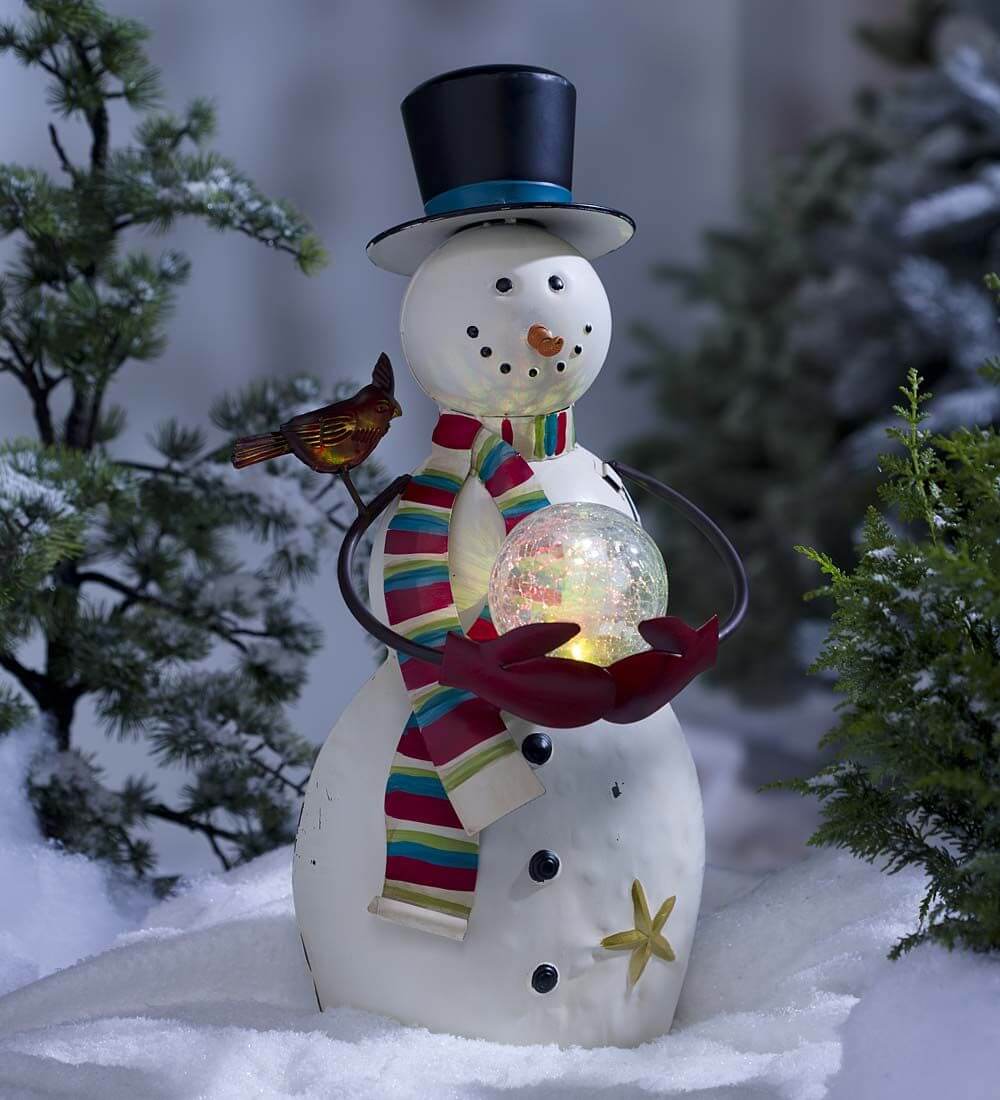
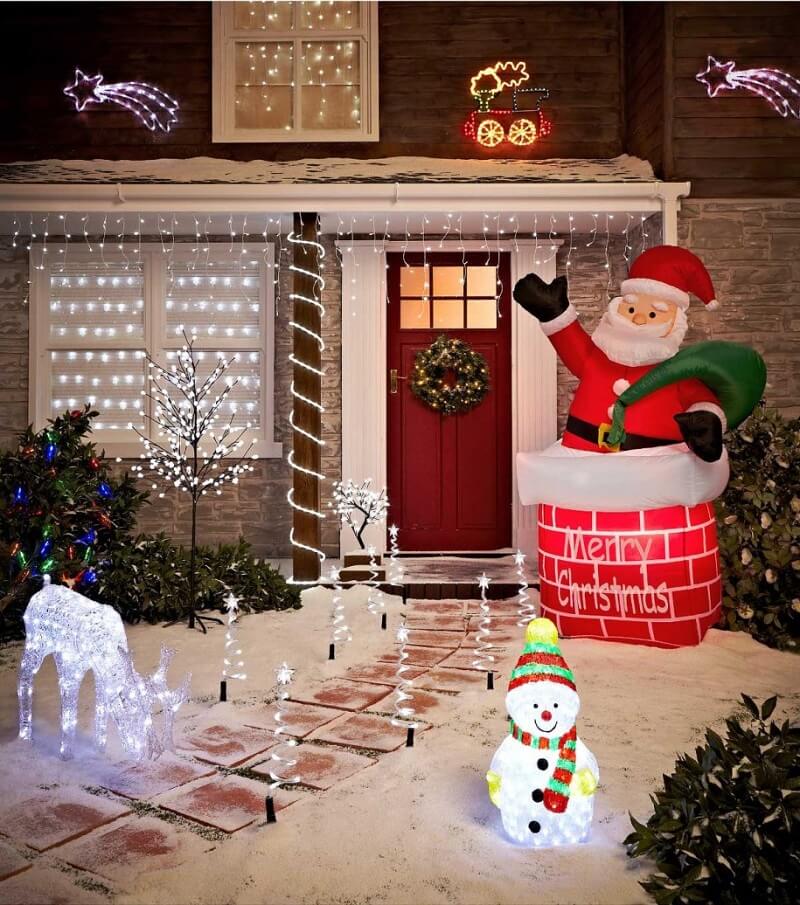
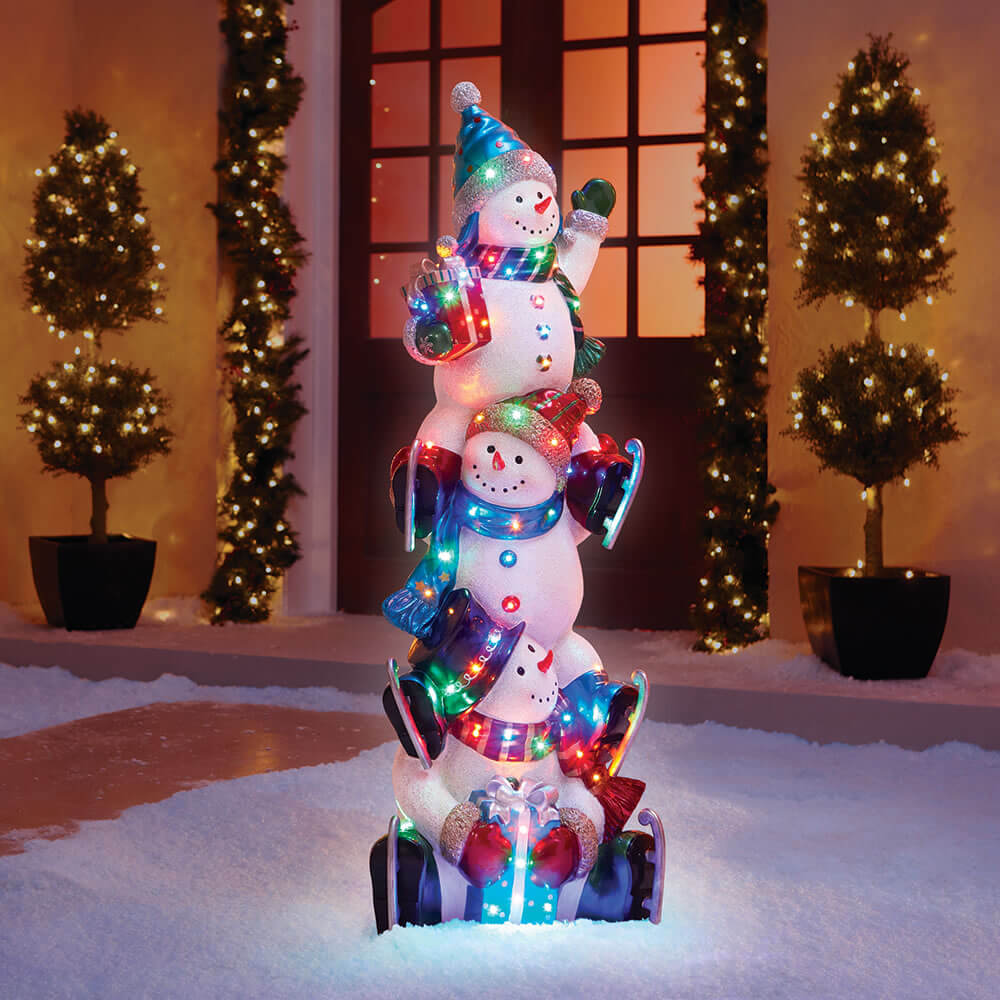
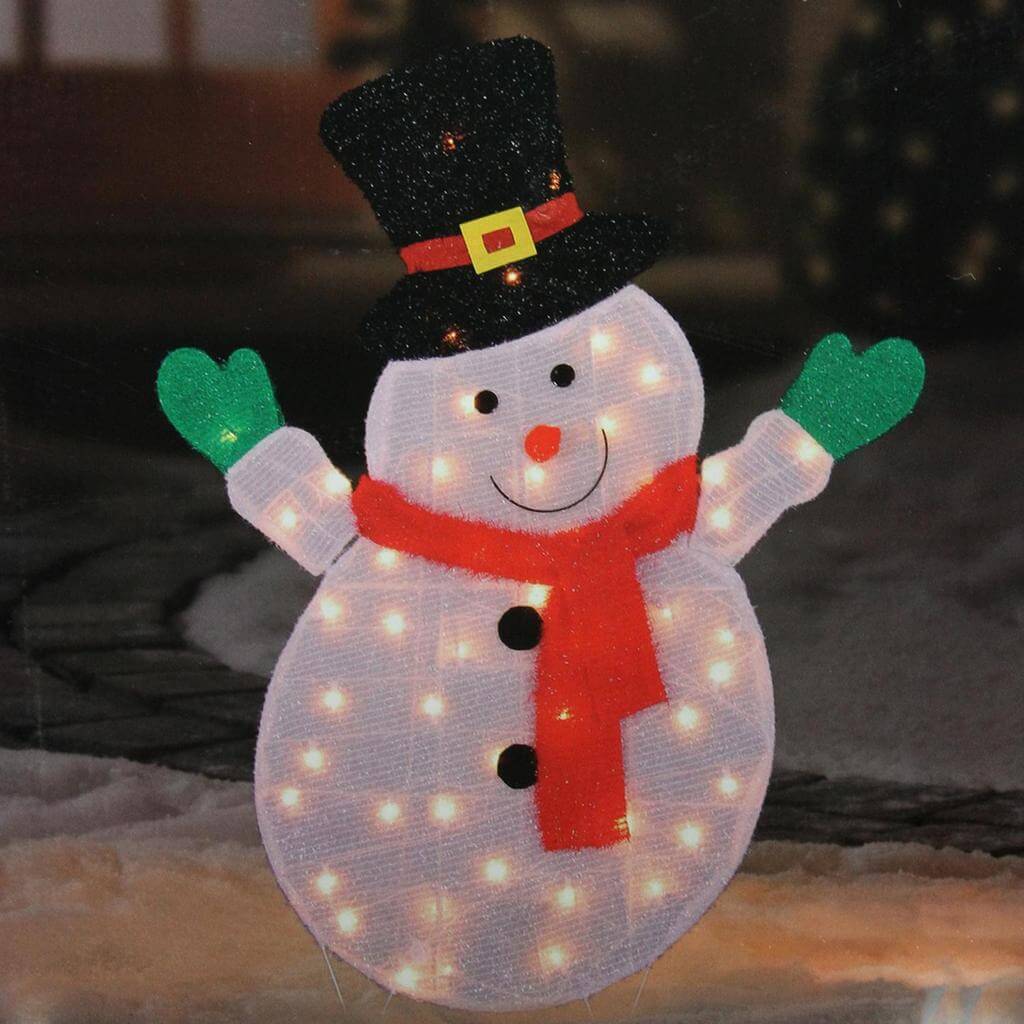
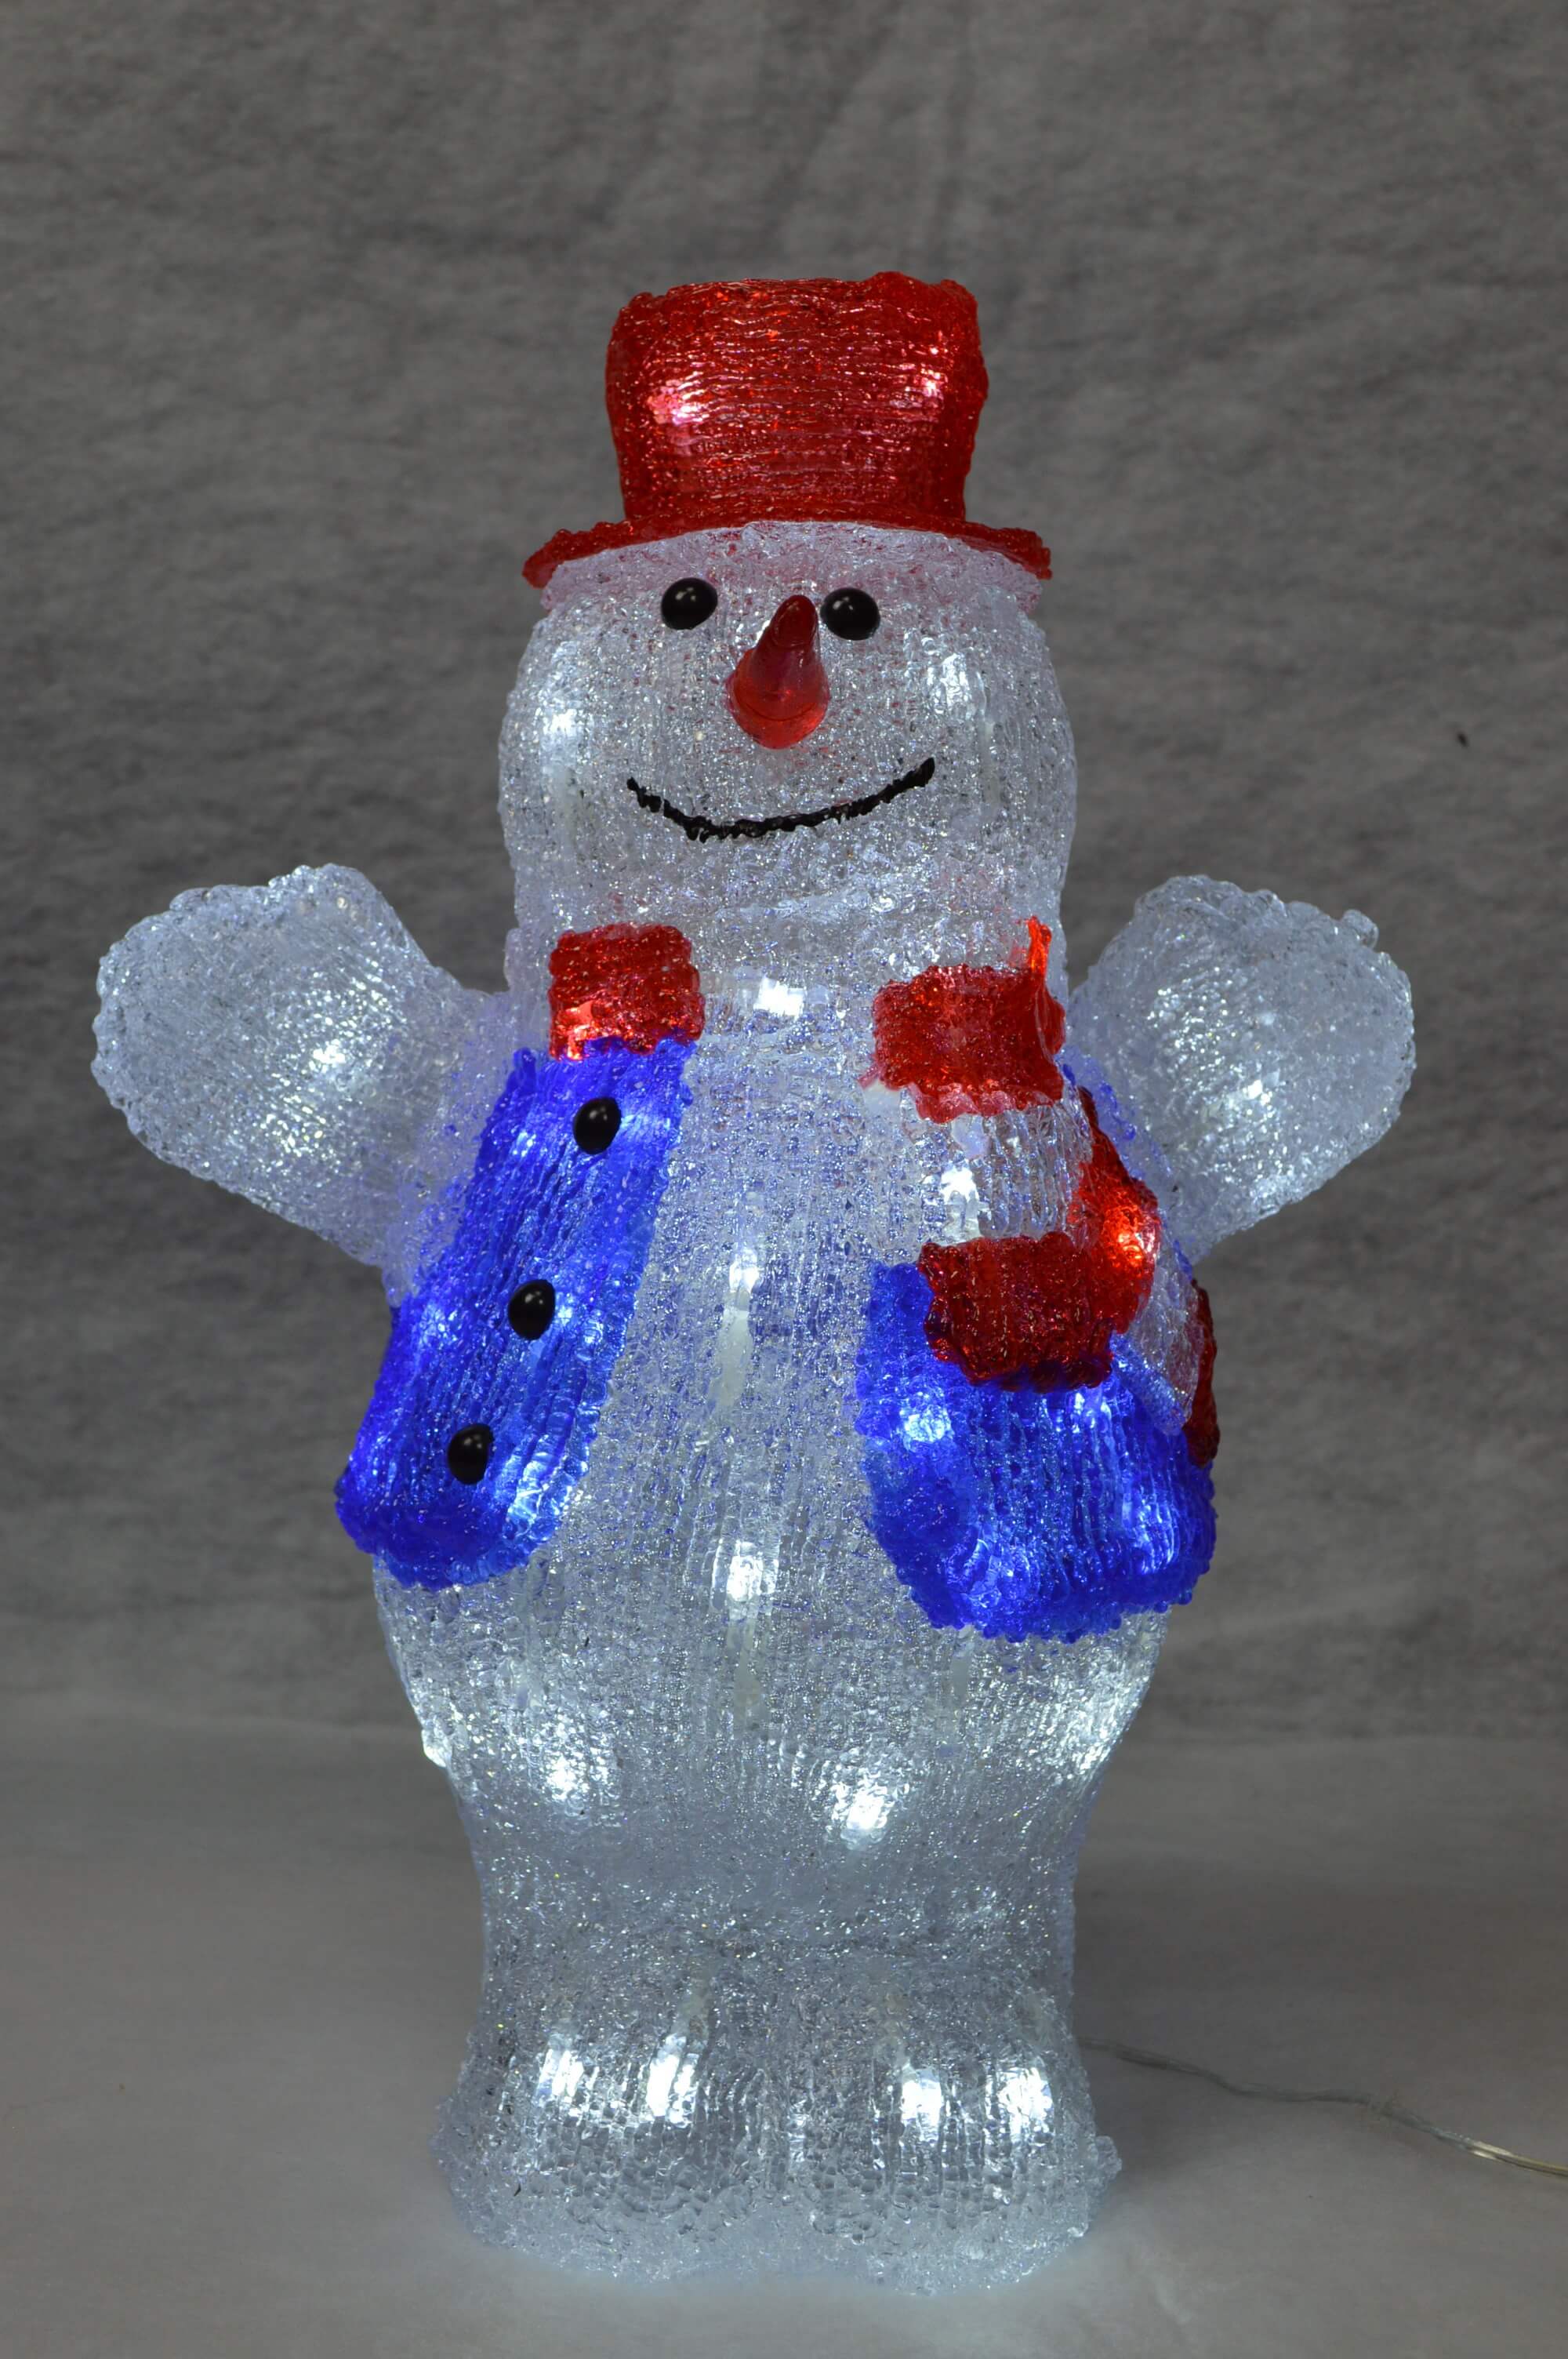
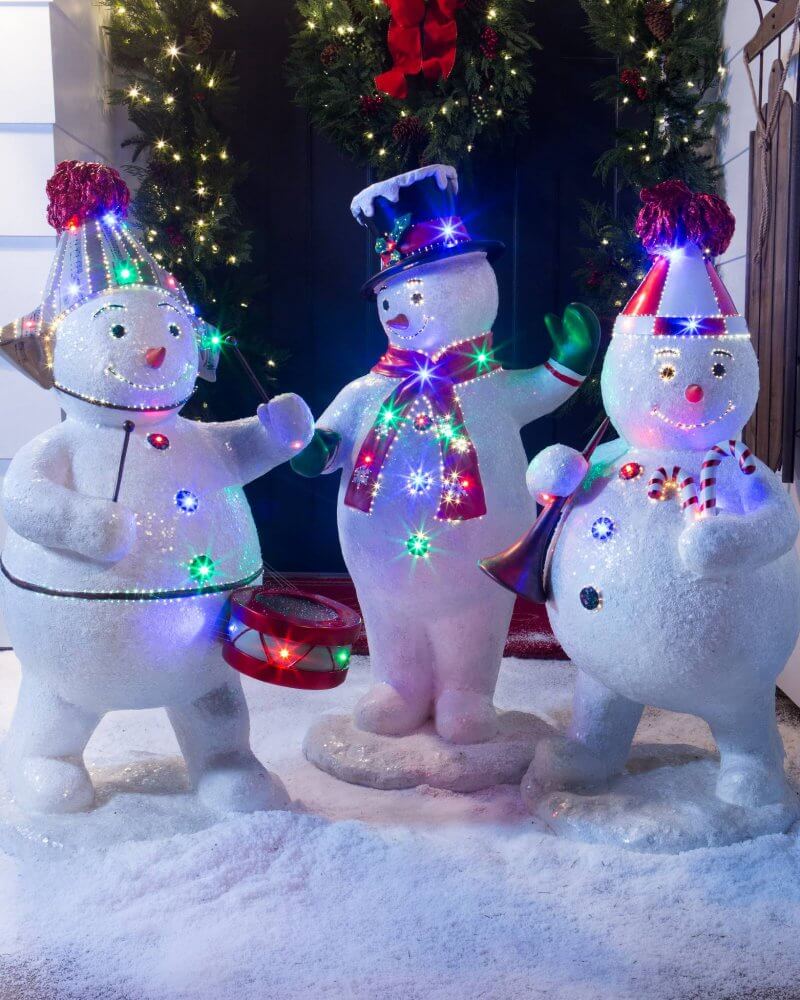
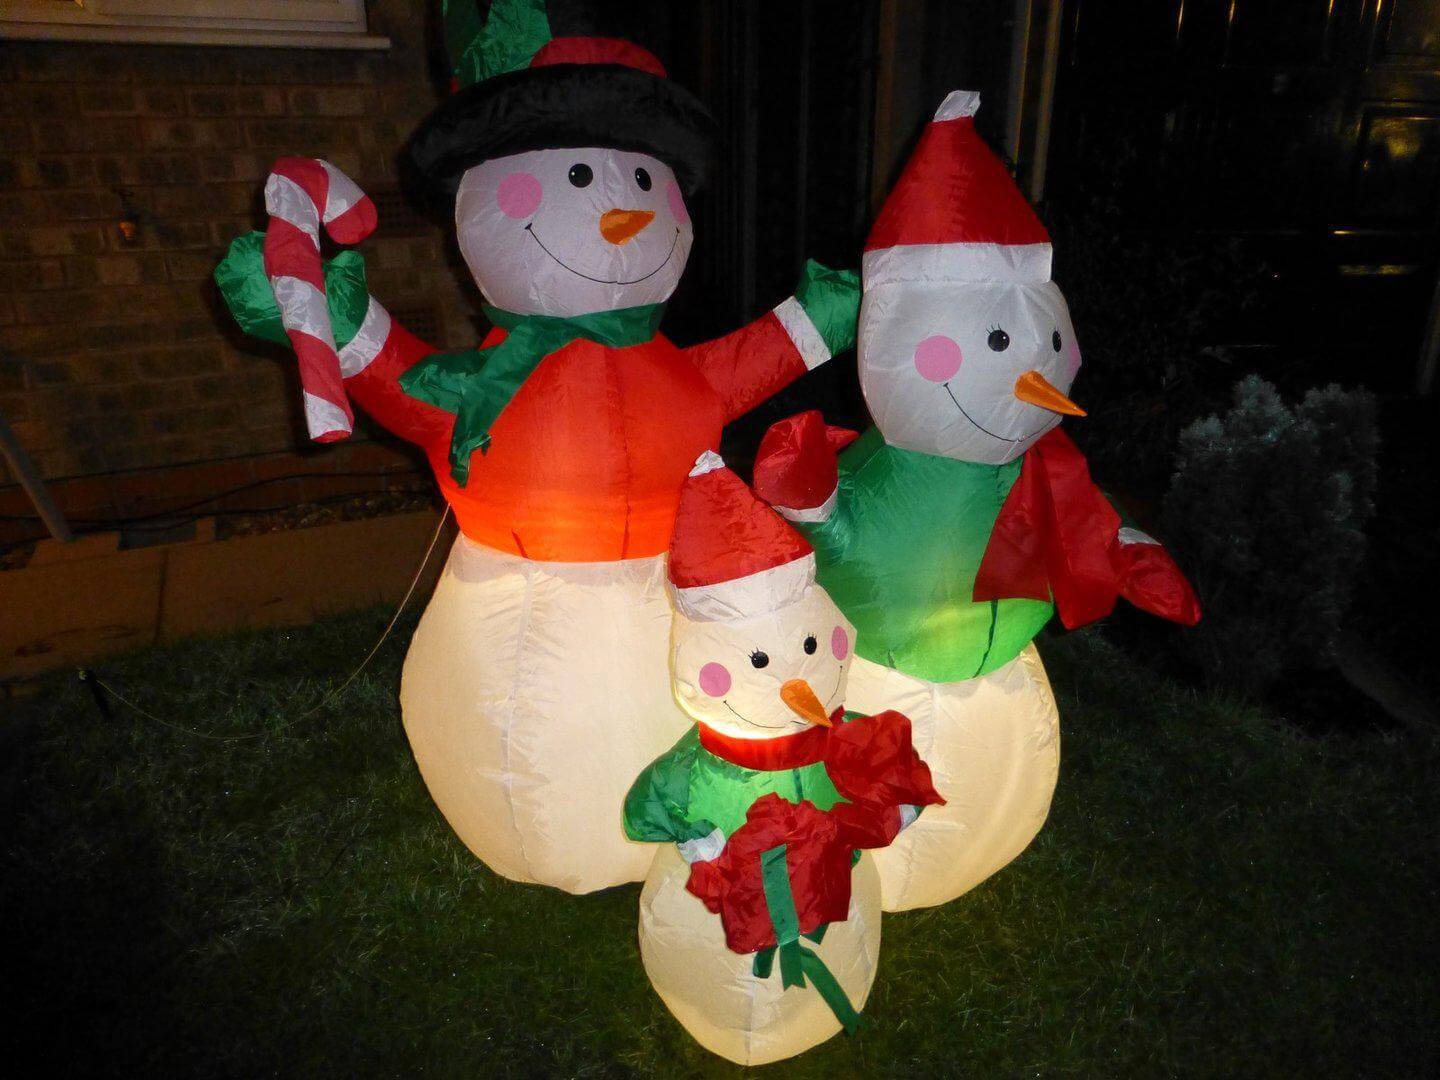
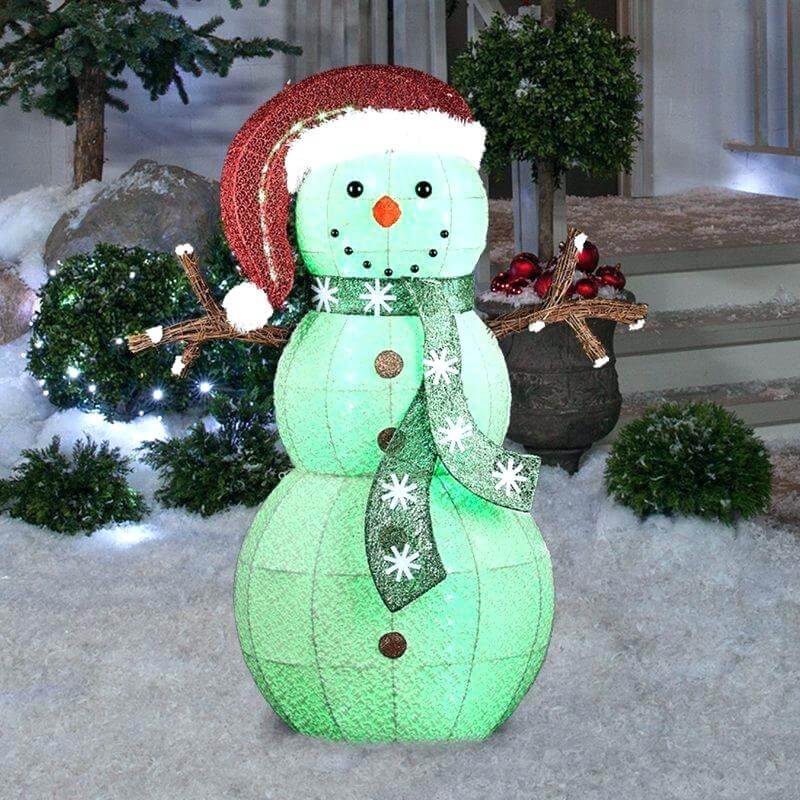
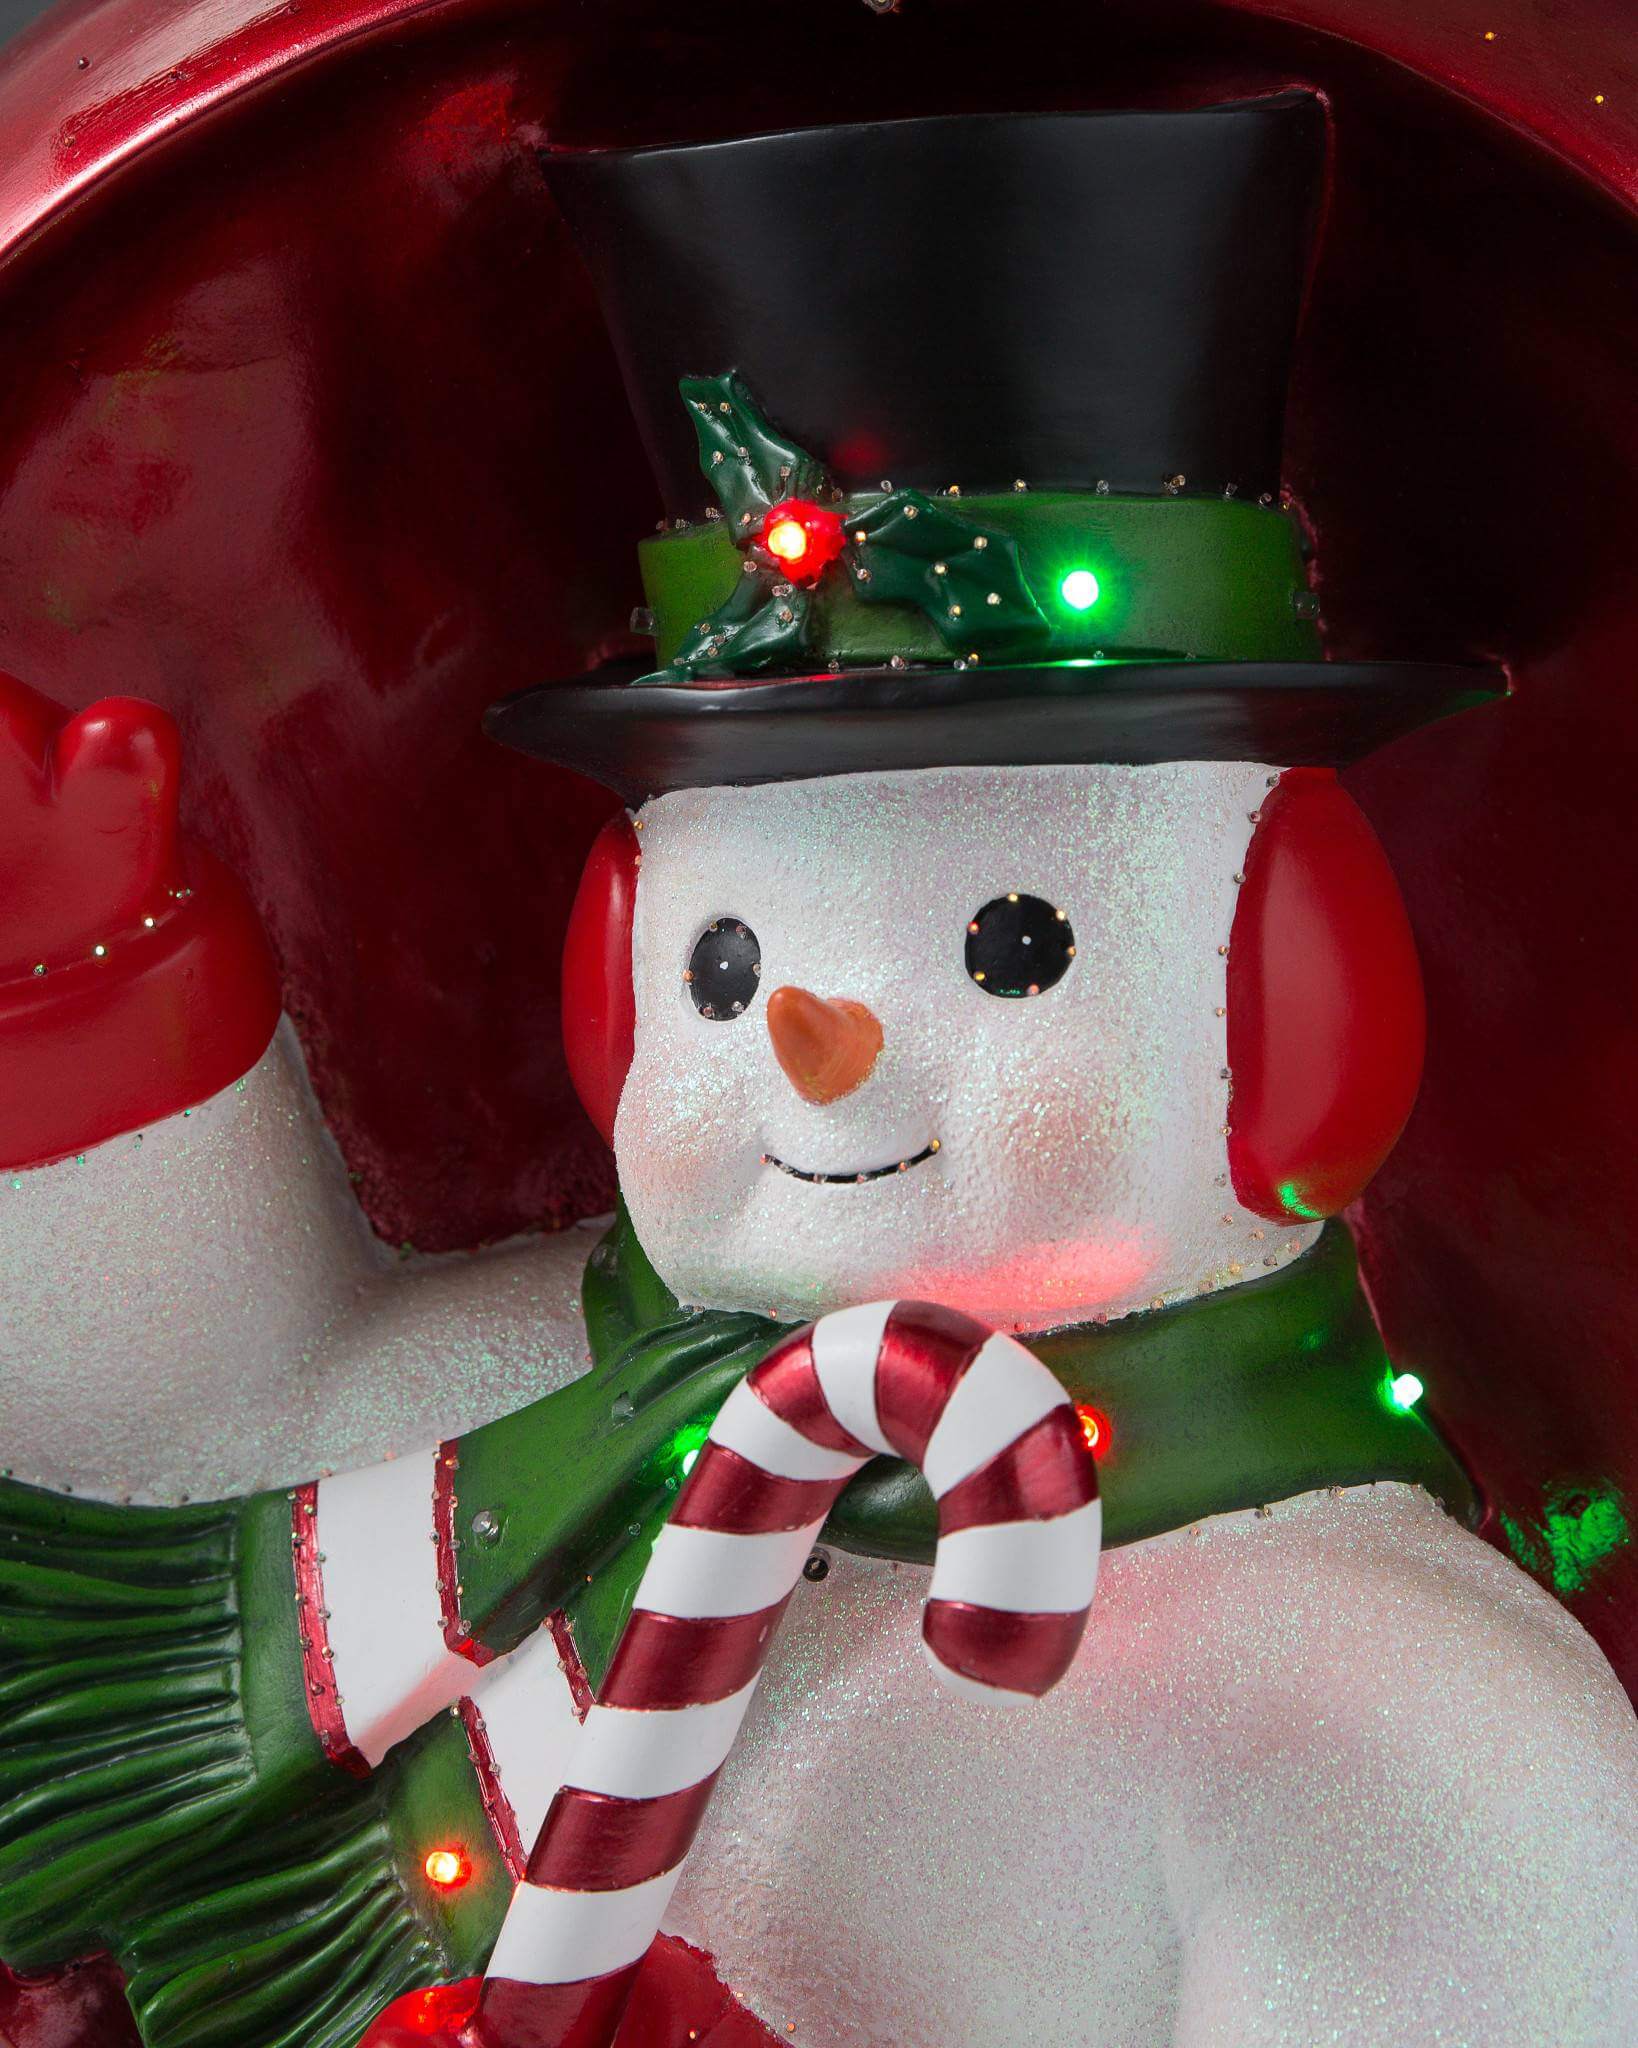
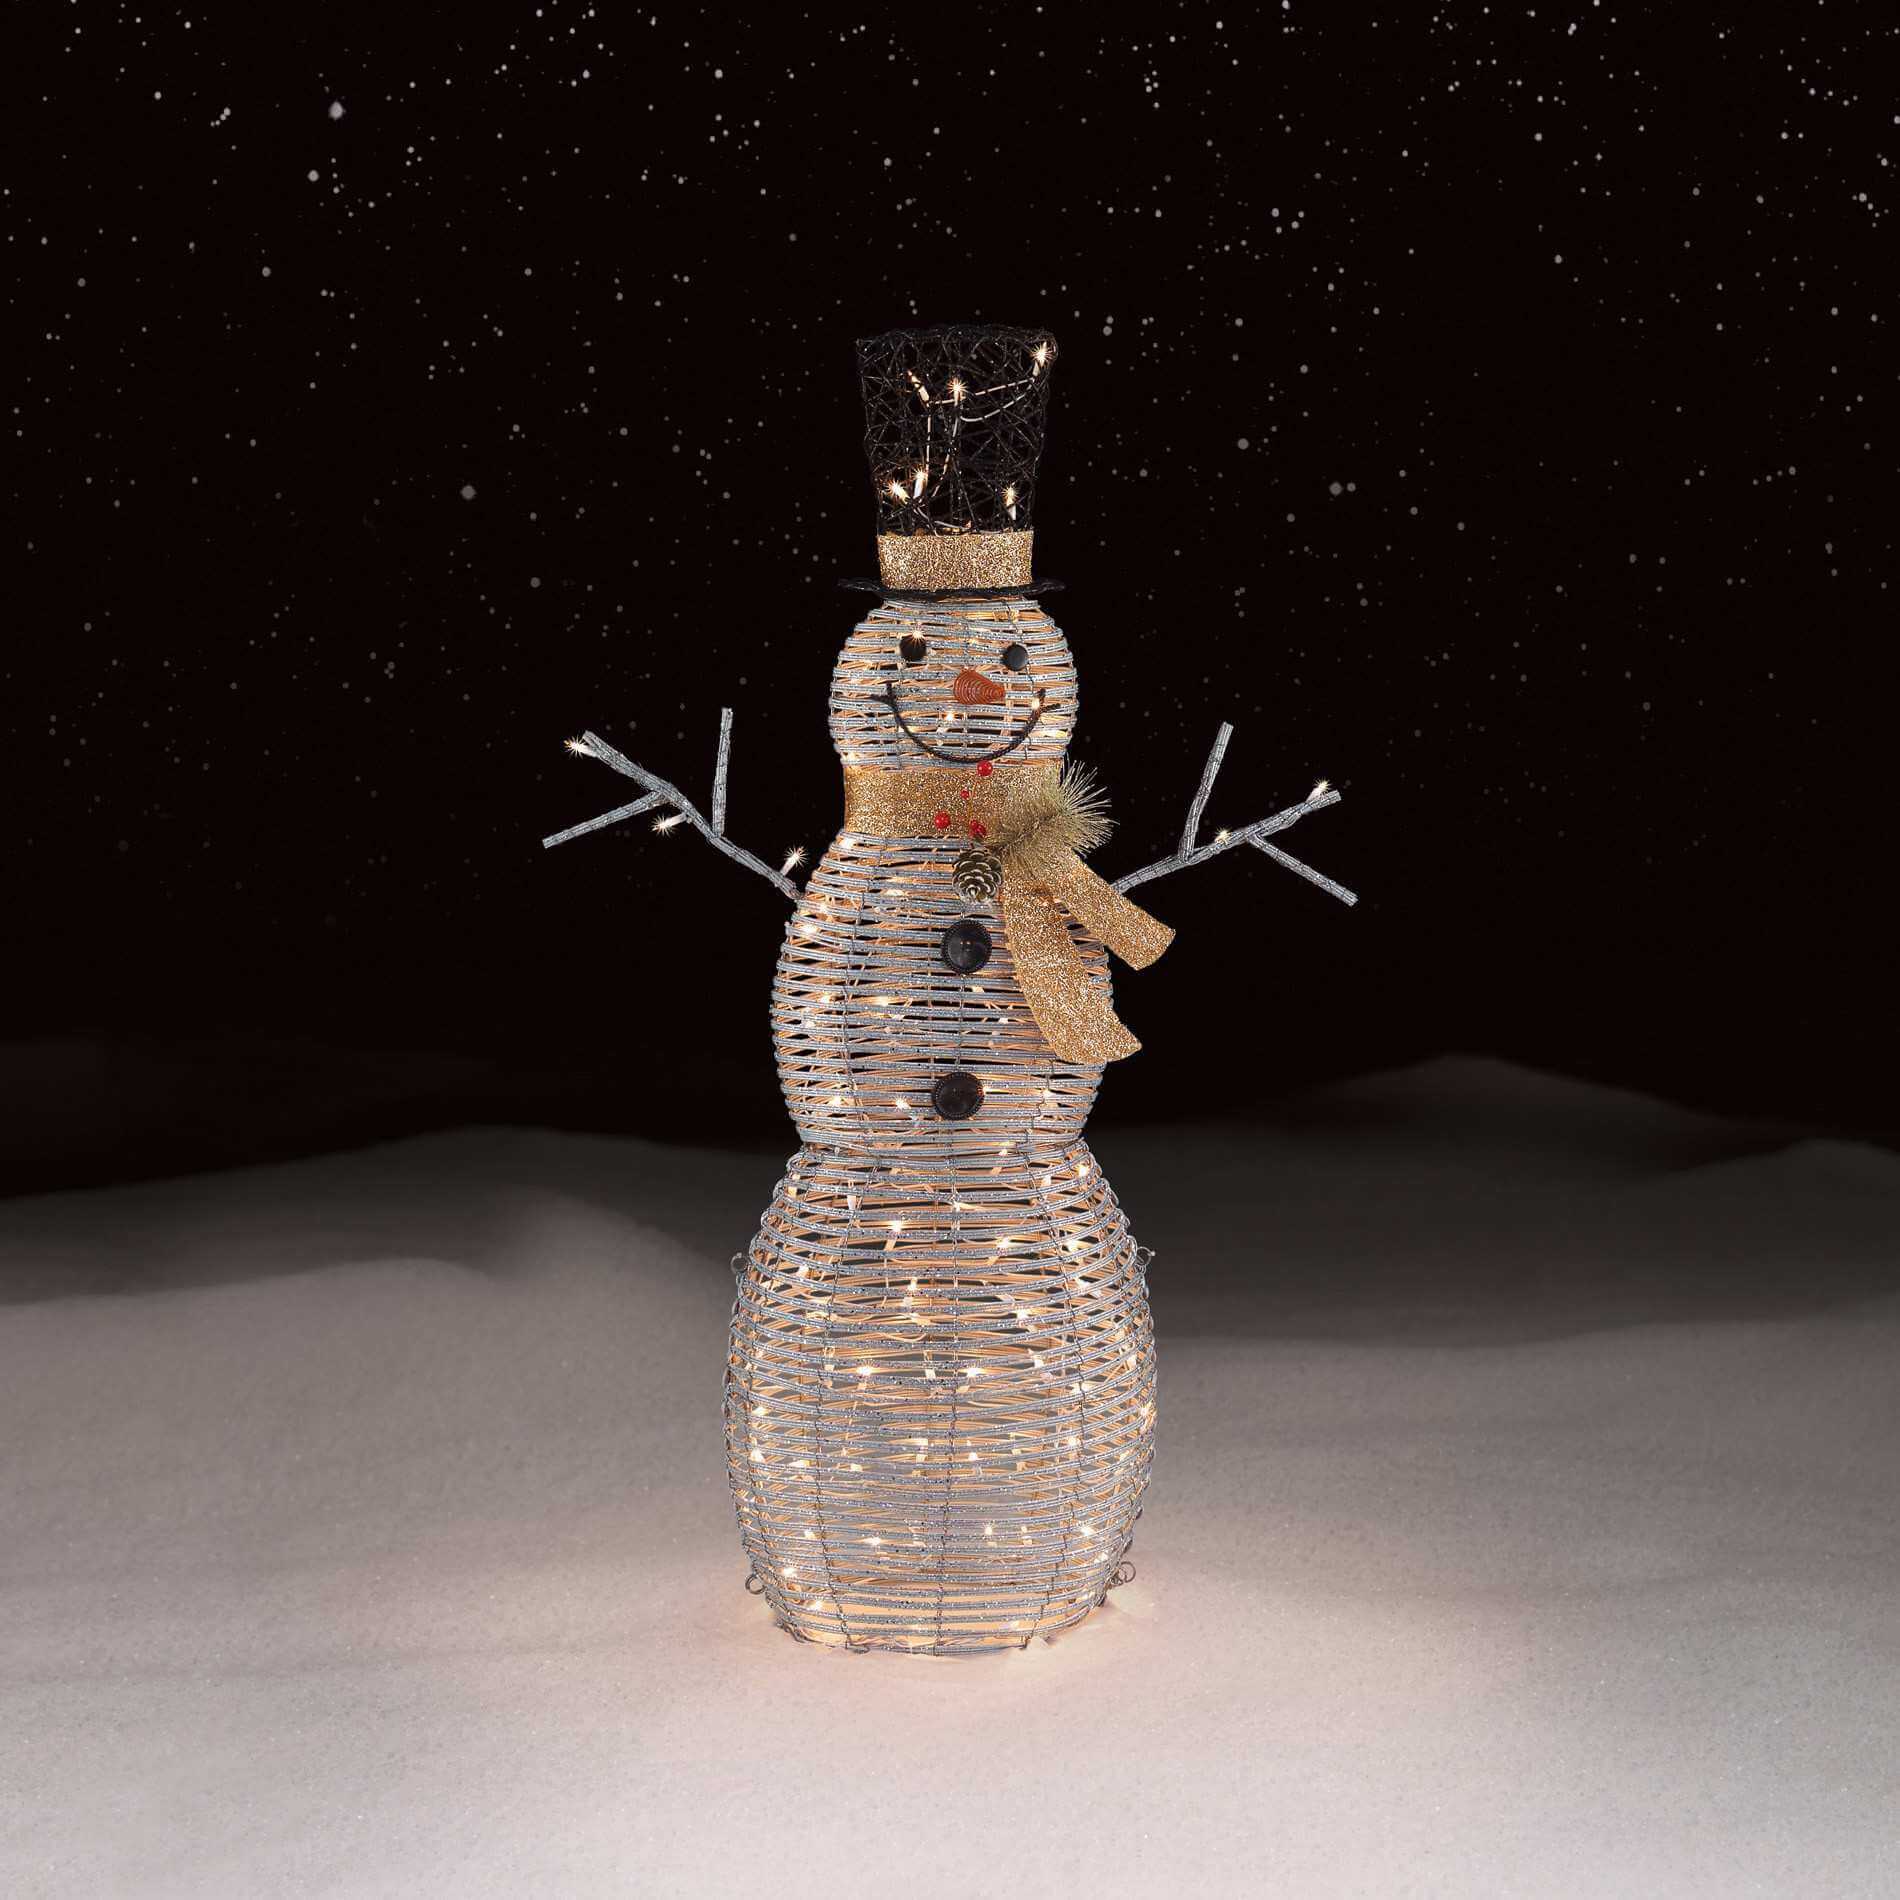
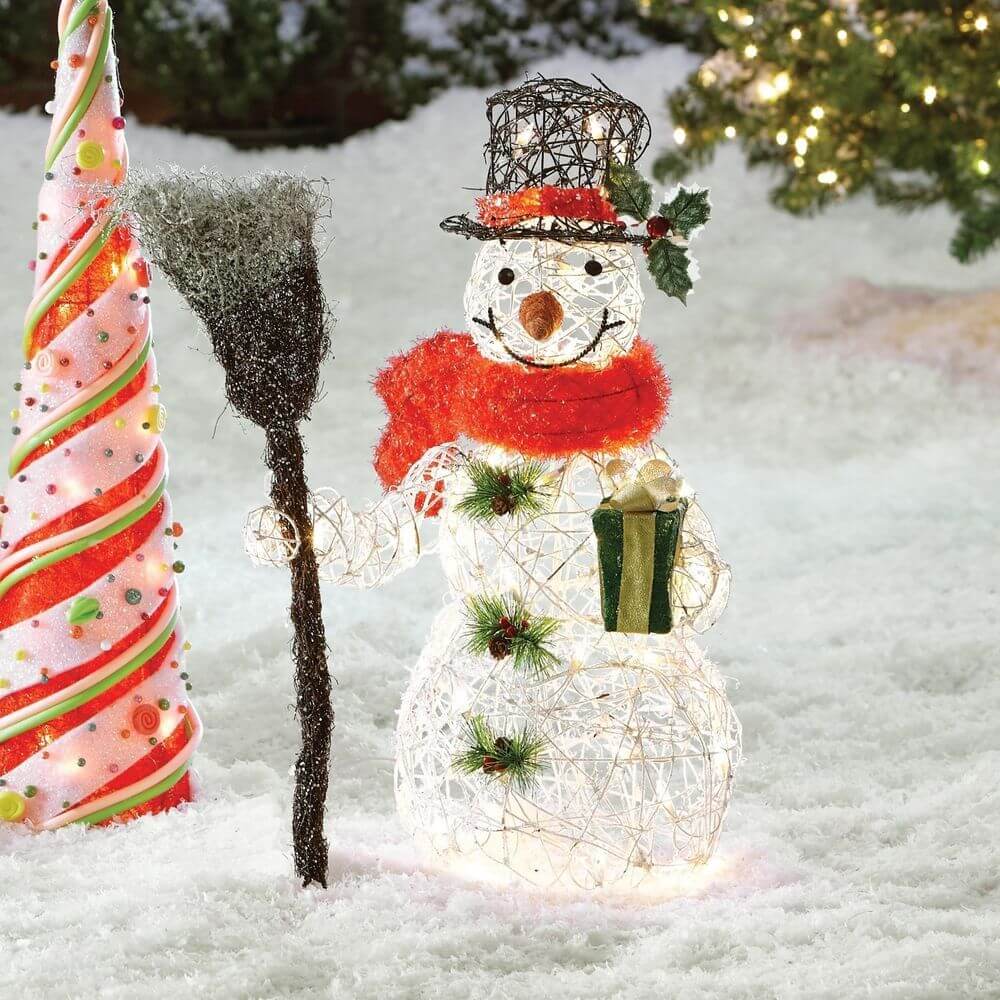
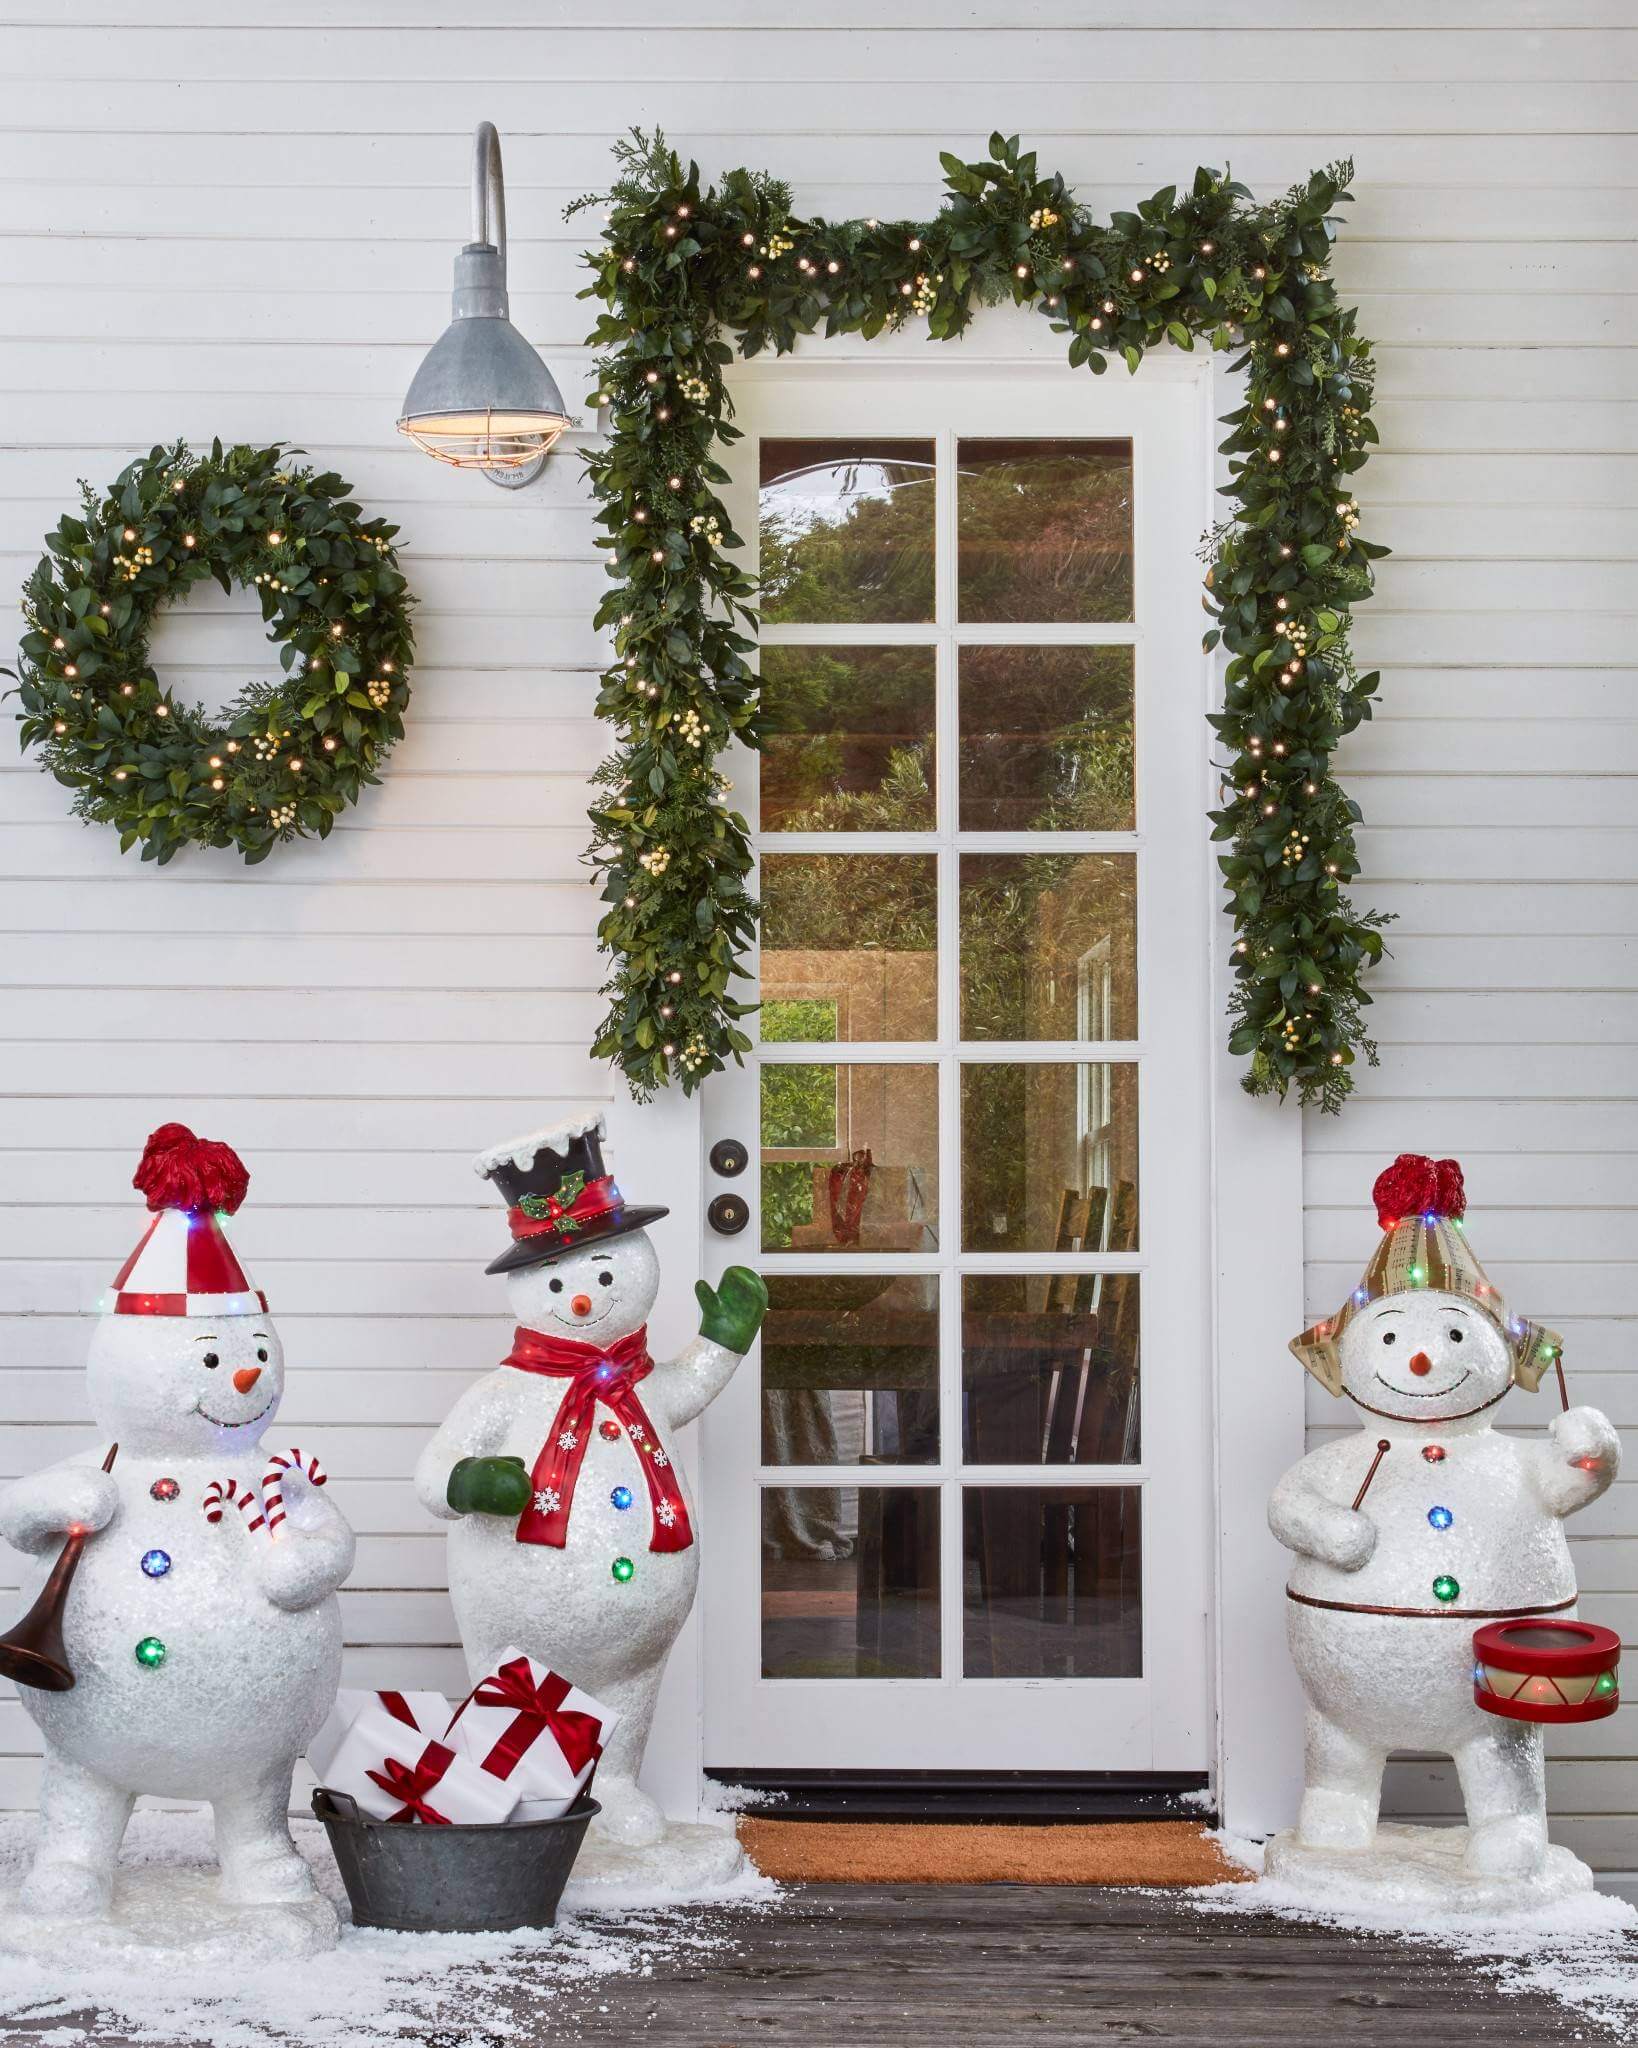
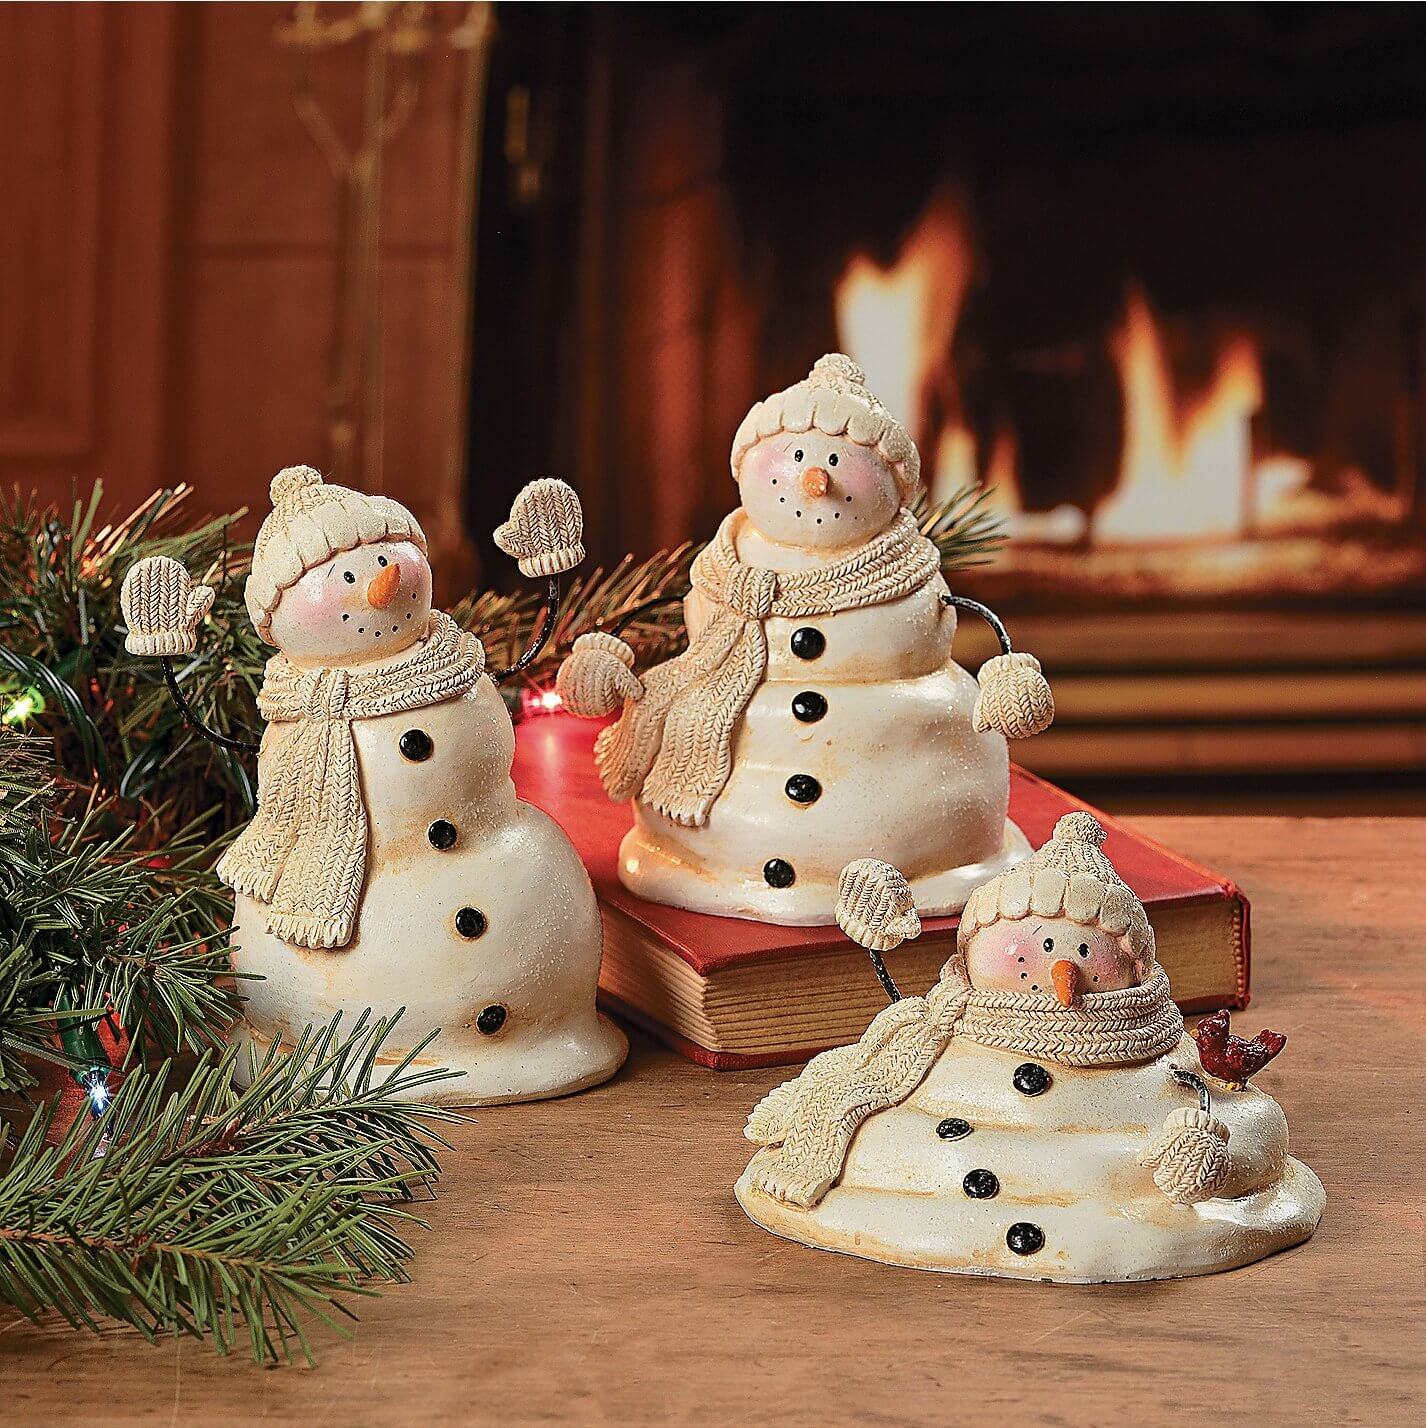
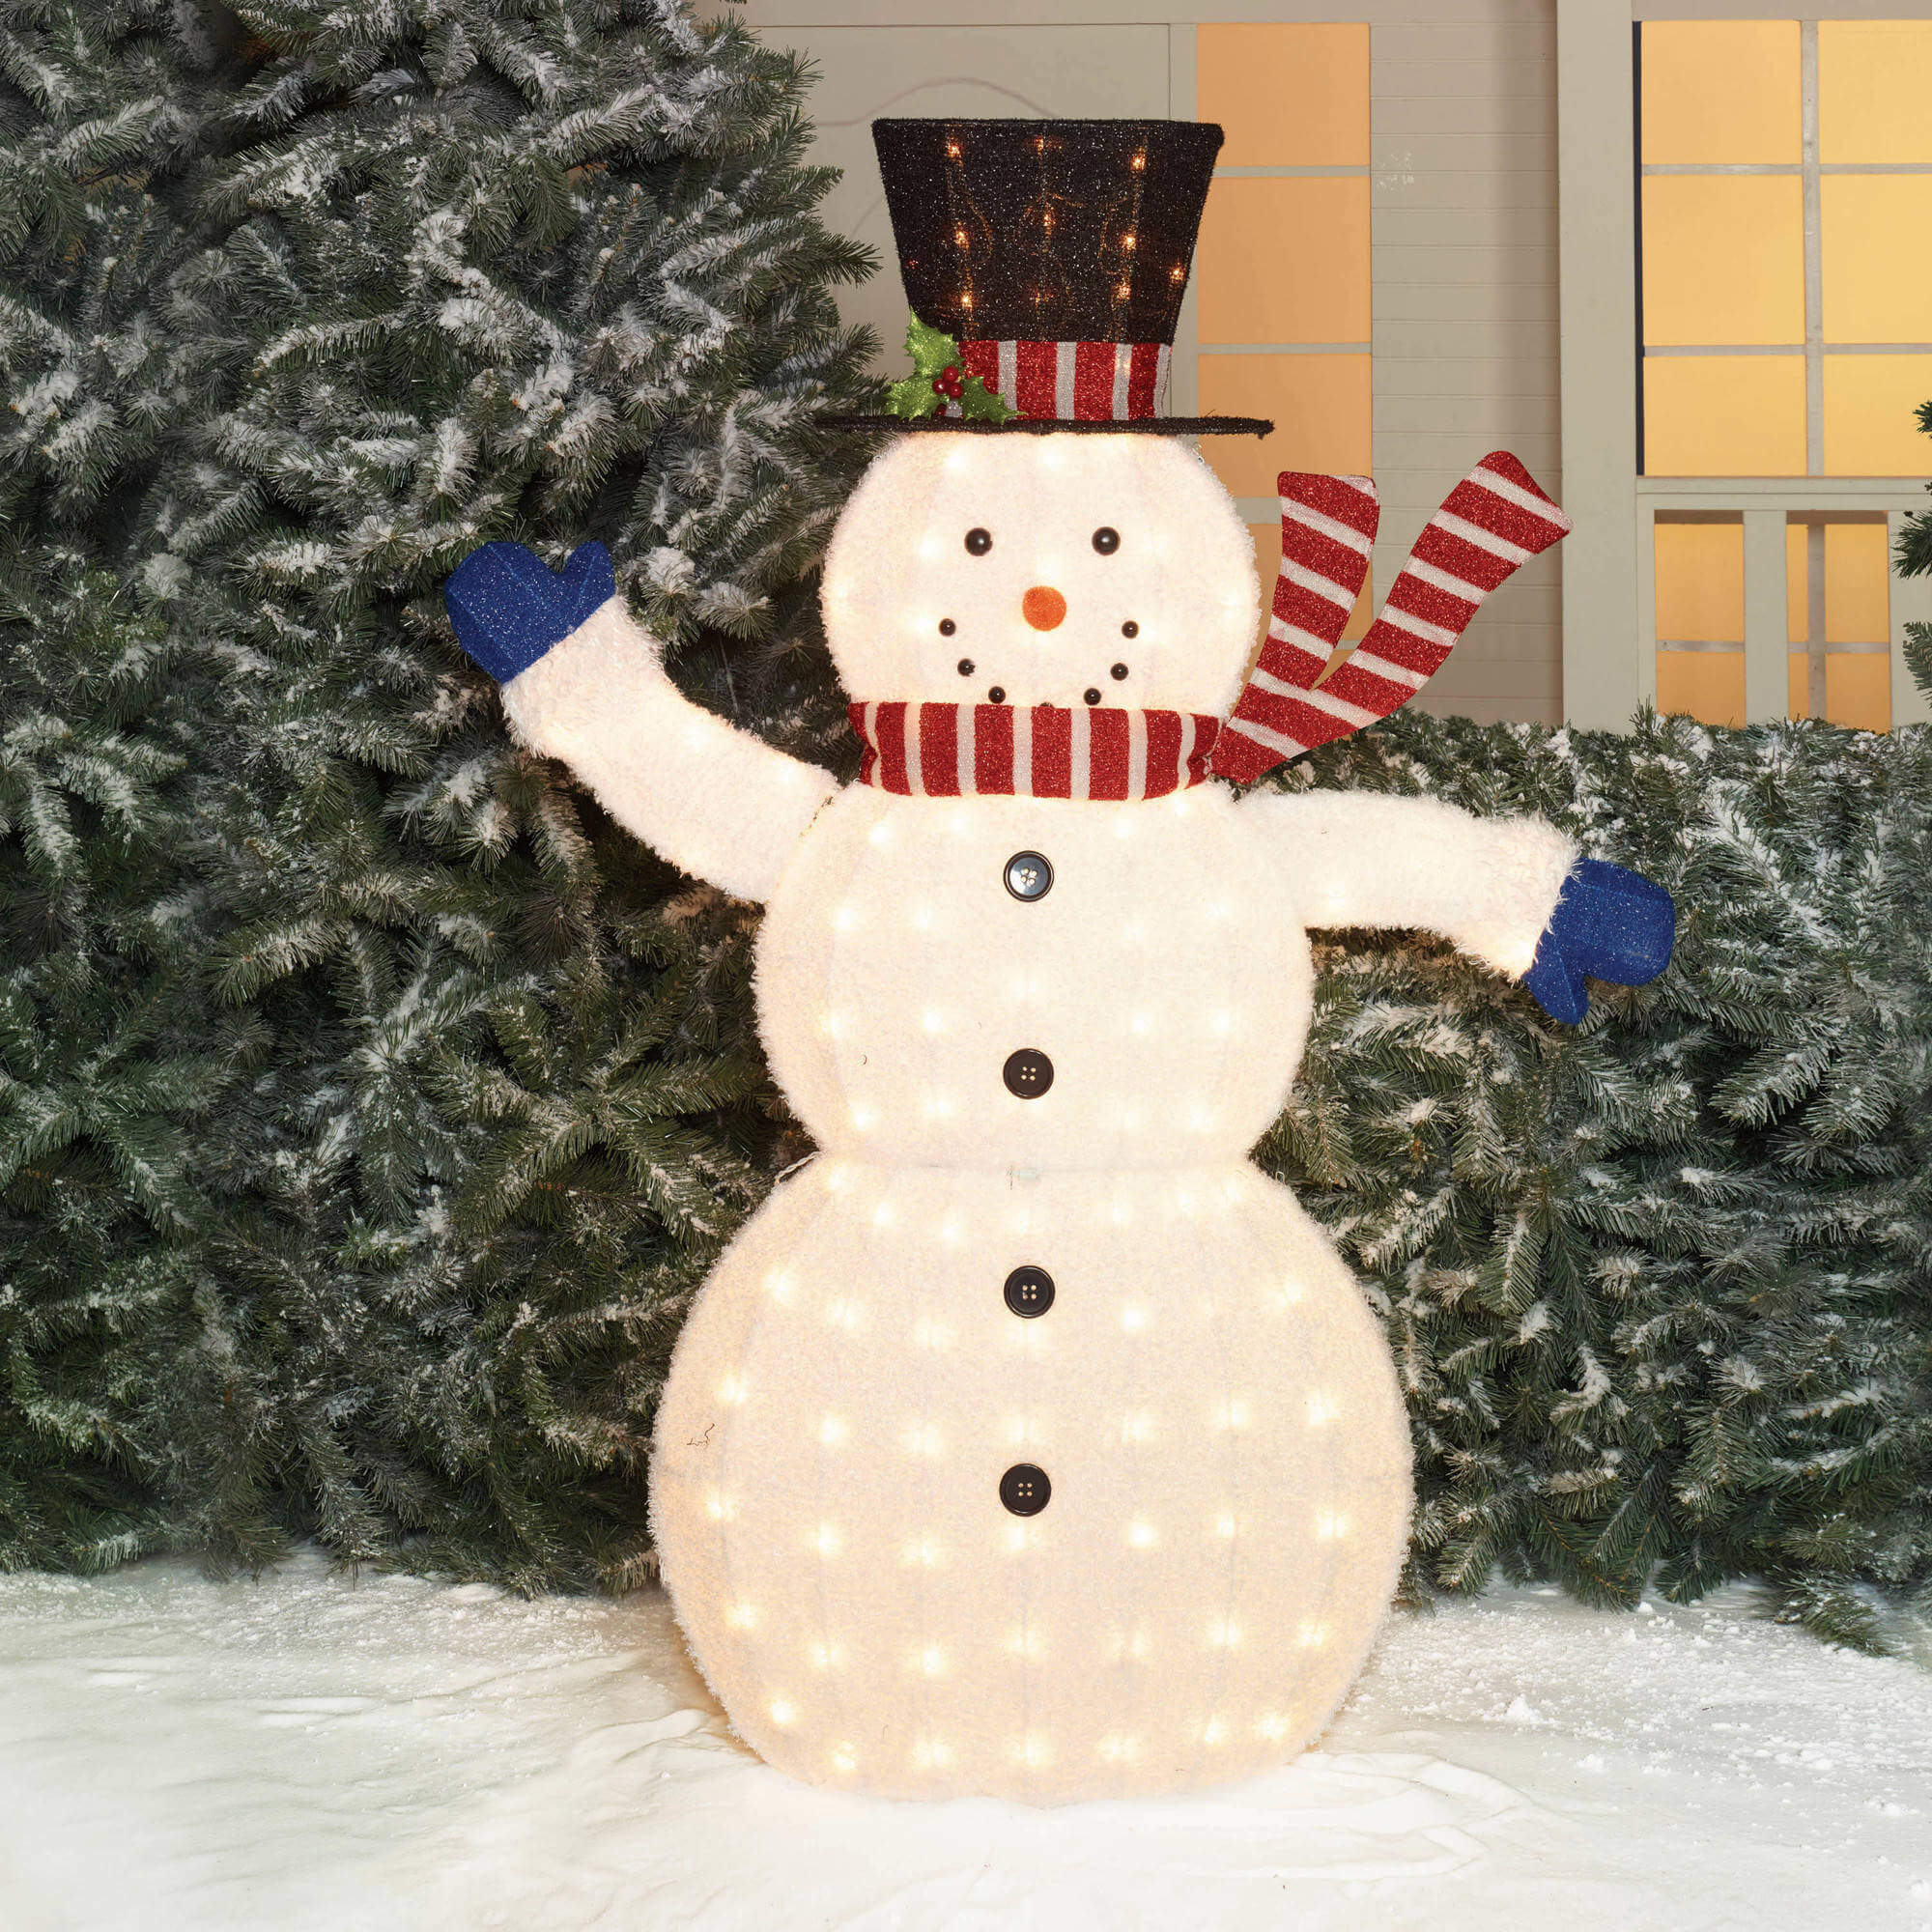
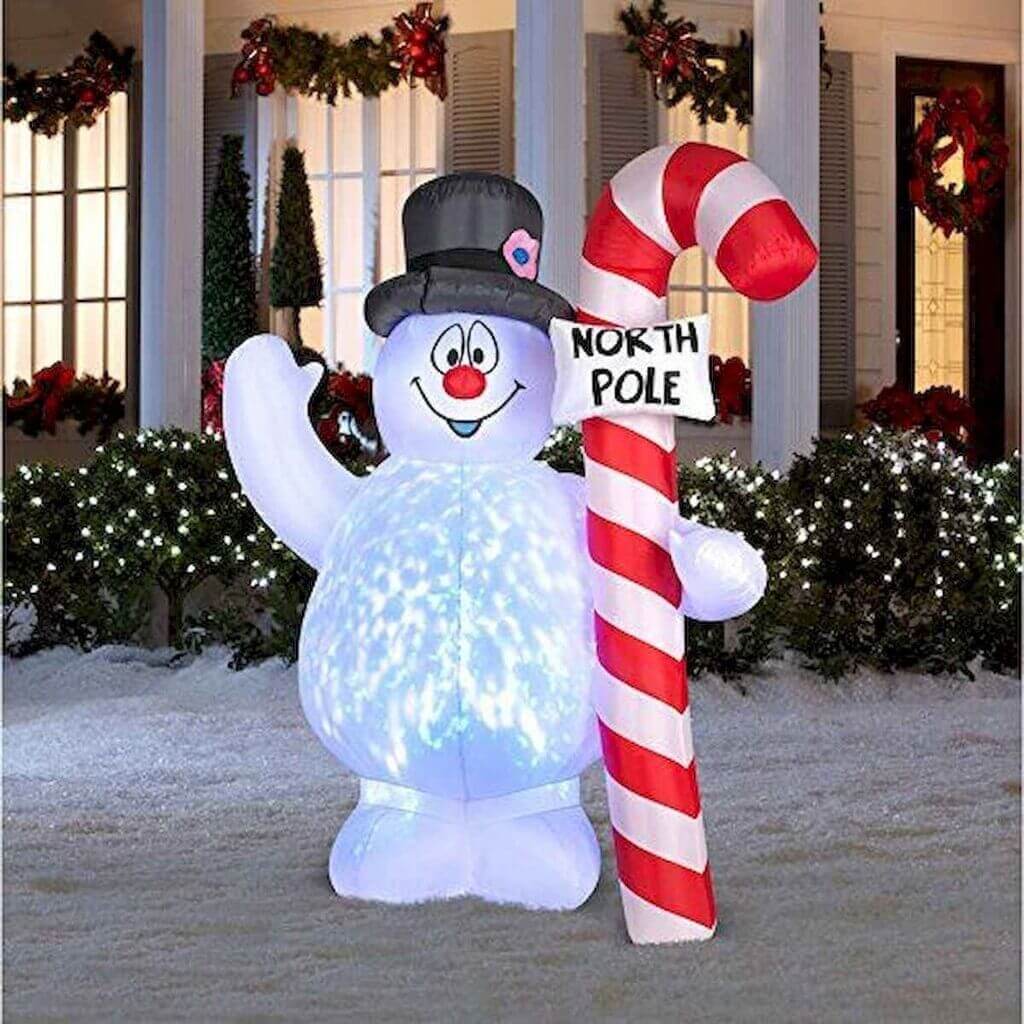
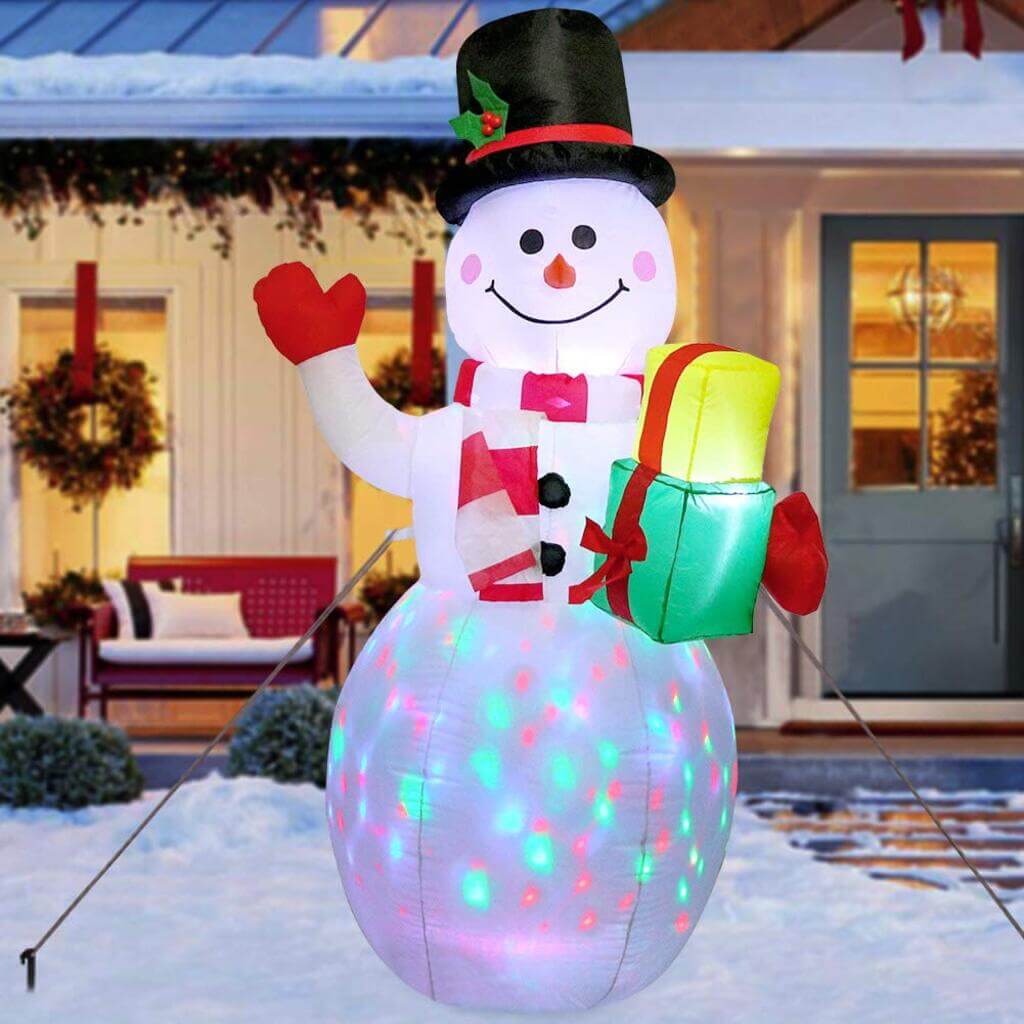
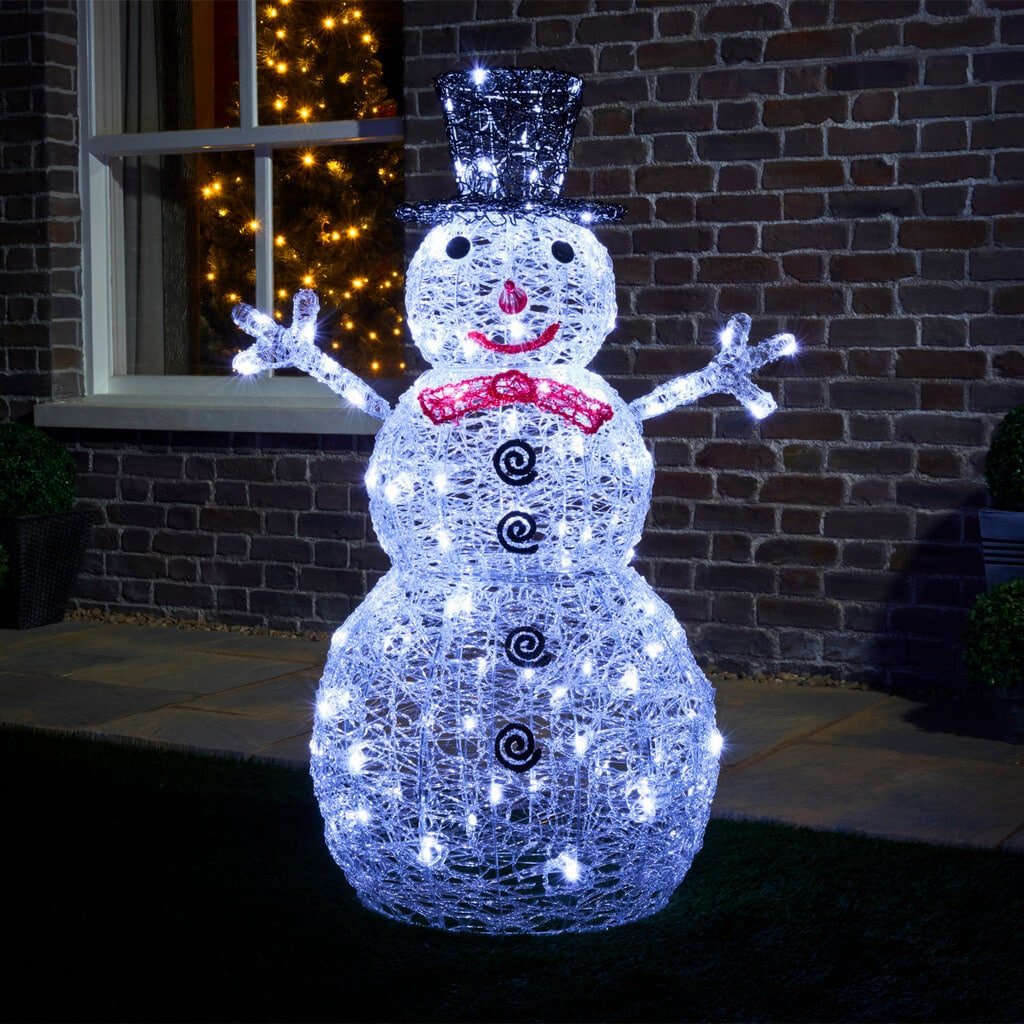
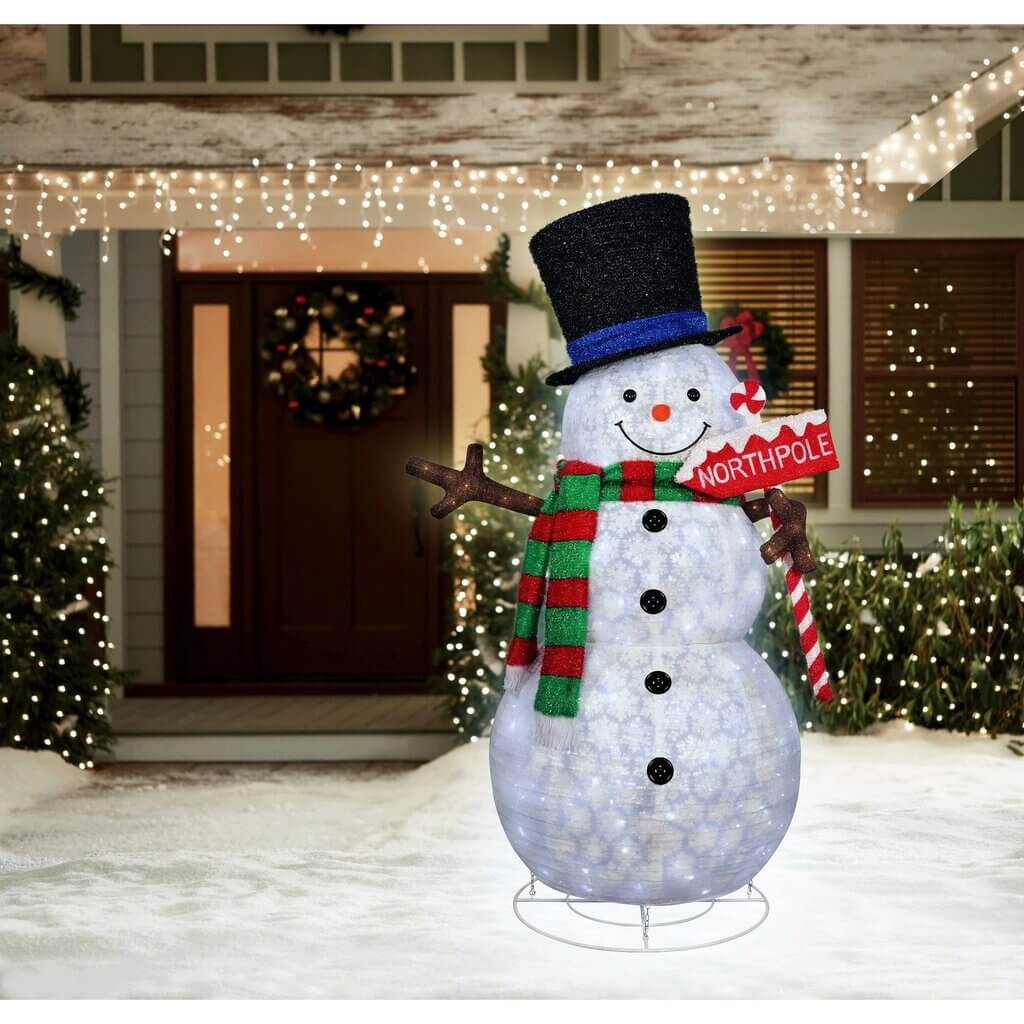
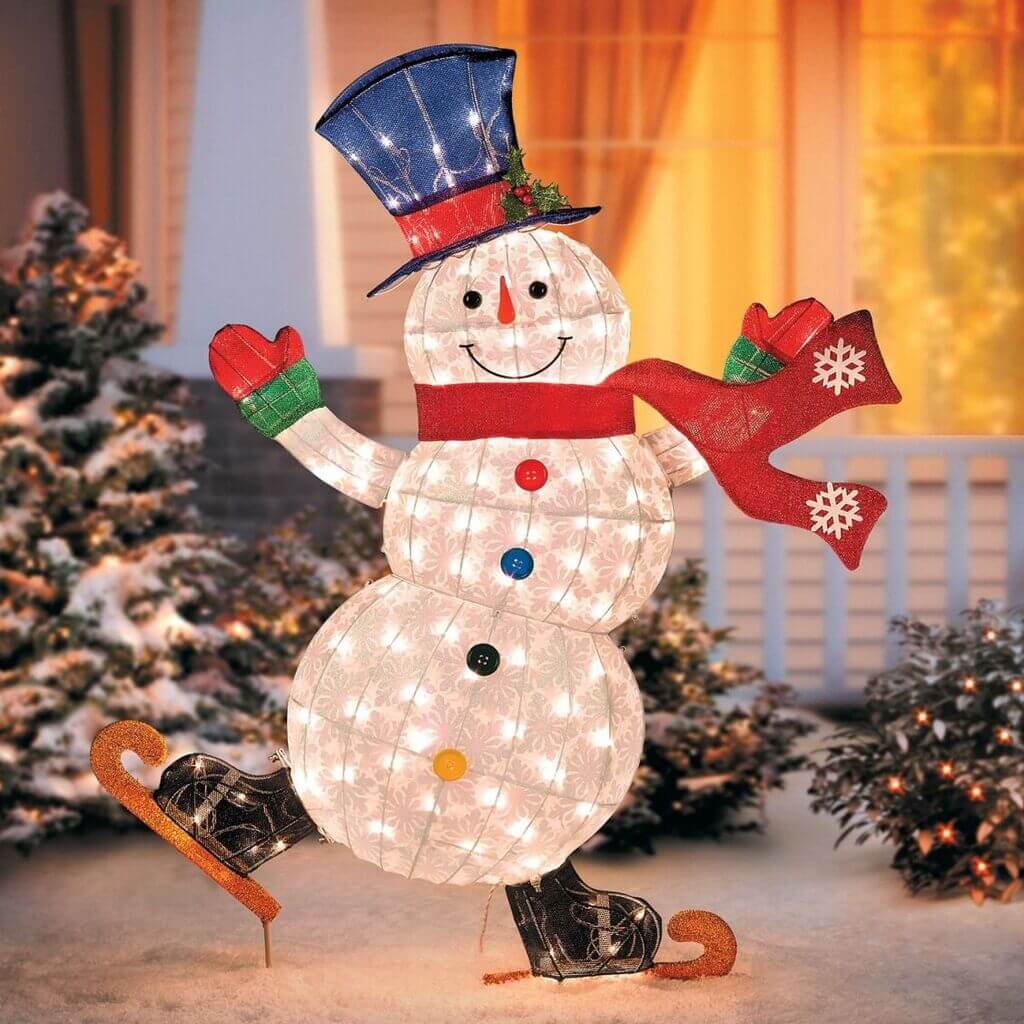
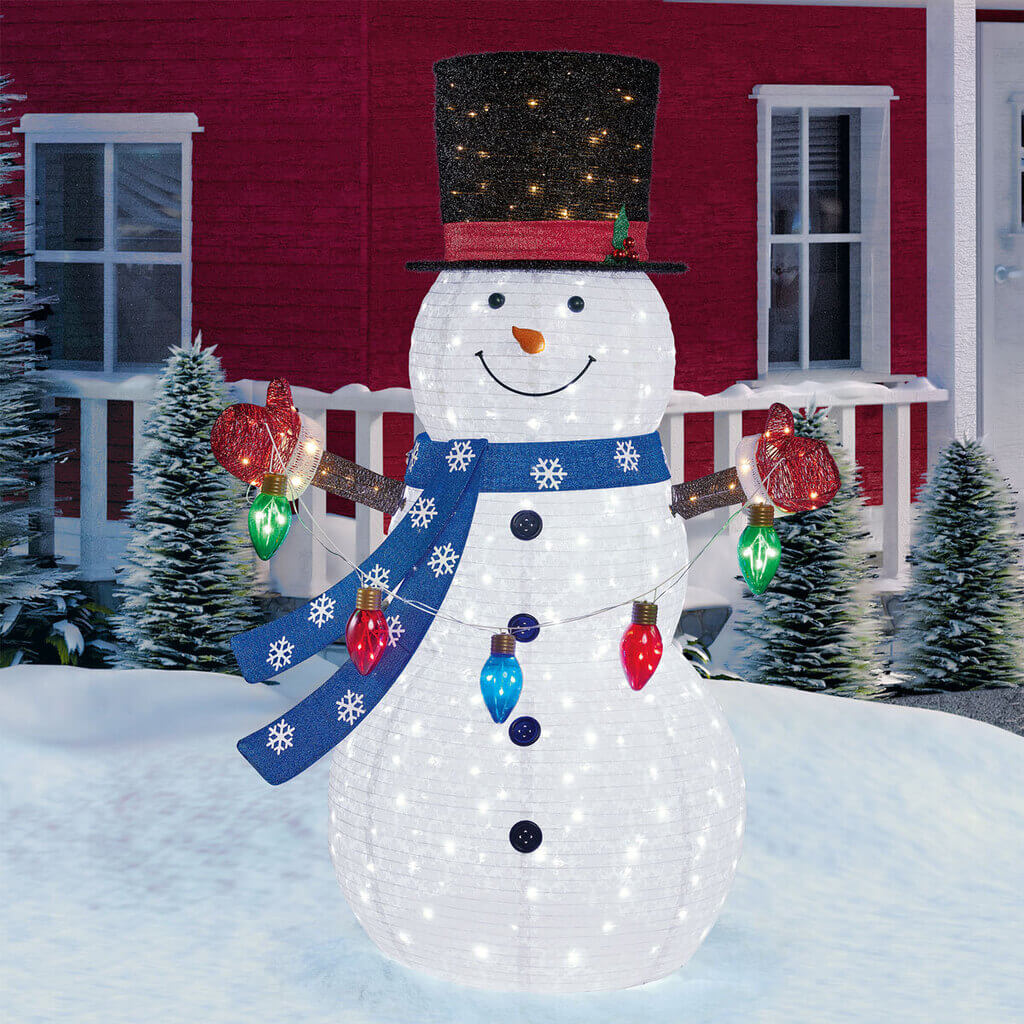
6. Get a Snowman

Get a Snowman

You don’t require real snow for this one! Use shiny paper and white cotton to make a snowman with eyes and a nose. Once it’s done, place it by the entrance of your office. It’ll definitely catch everyone’s eye!

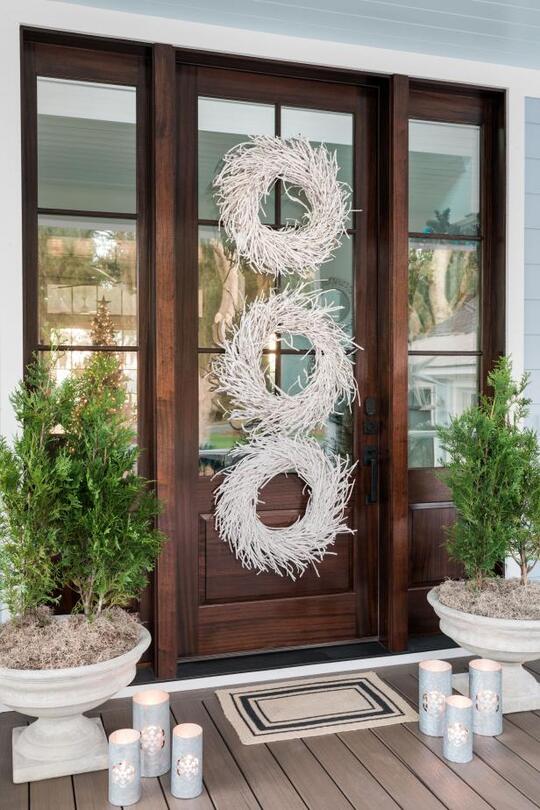
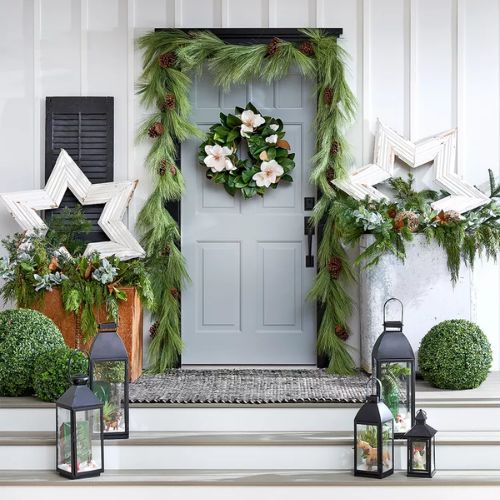
7. Decorate your Office Door with a Christmassy Wreath

Decorate your Office Door with a Christmassy Wreath

Wreaths aren’t just for houses; they’re great for your reception or entrance door area, too! Wrap the office door Christmas decorations with fairy lights to add a cheerful glow to your workplace this Christmas.

8. Add Stars to the Office Ceiling

Add Stars to the Office Ceiling

Stars are a beautiful way to adorn your Christmas party. A great way to liven up your office space is to hang them from the ceiling. It’s a cheap way to make your workplace seem more presentable.

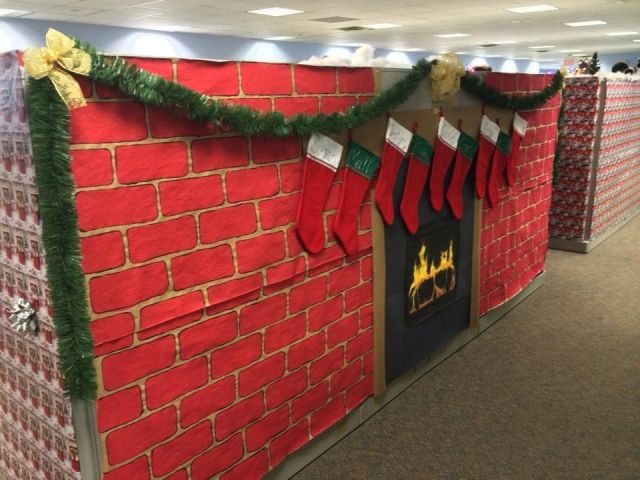
9. Go for a Brick Look

Go for a Brick Look

Give each cubicle a brick appearance to make it seem more like a warm chimney. Afterward, add some festive stockings and a few ornaments. The whole workplace will be cheering for this brilliant plan!

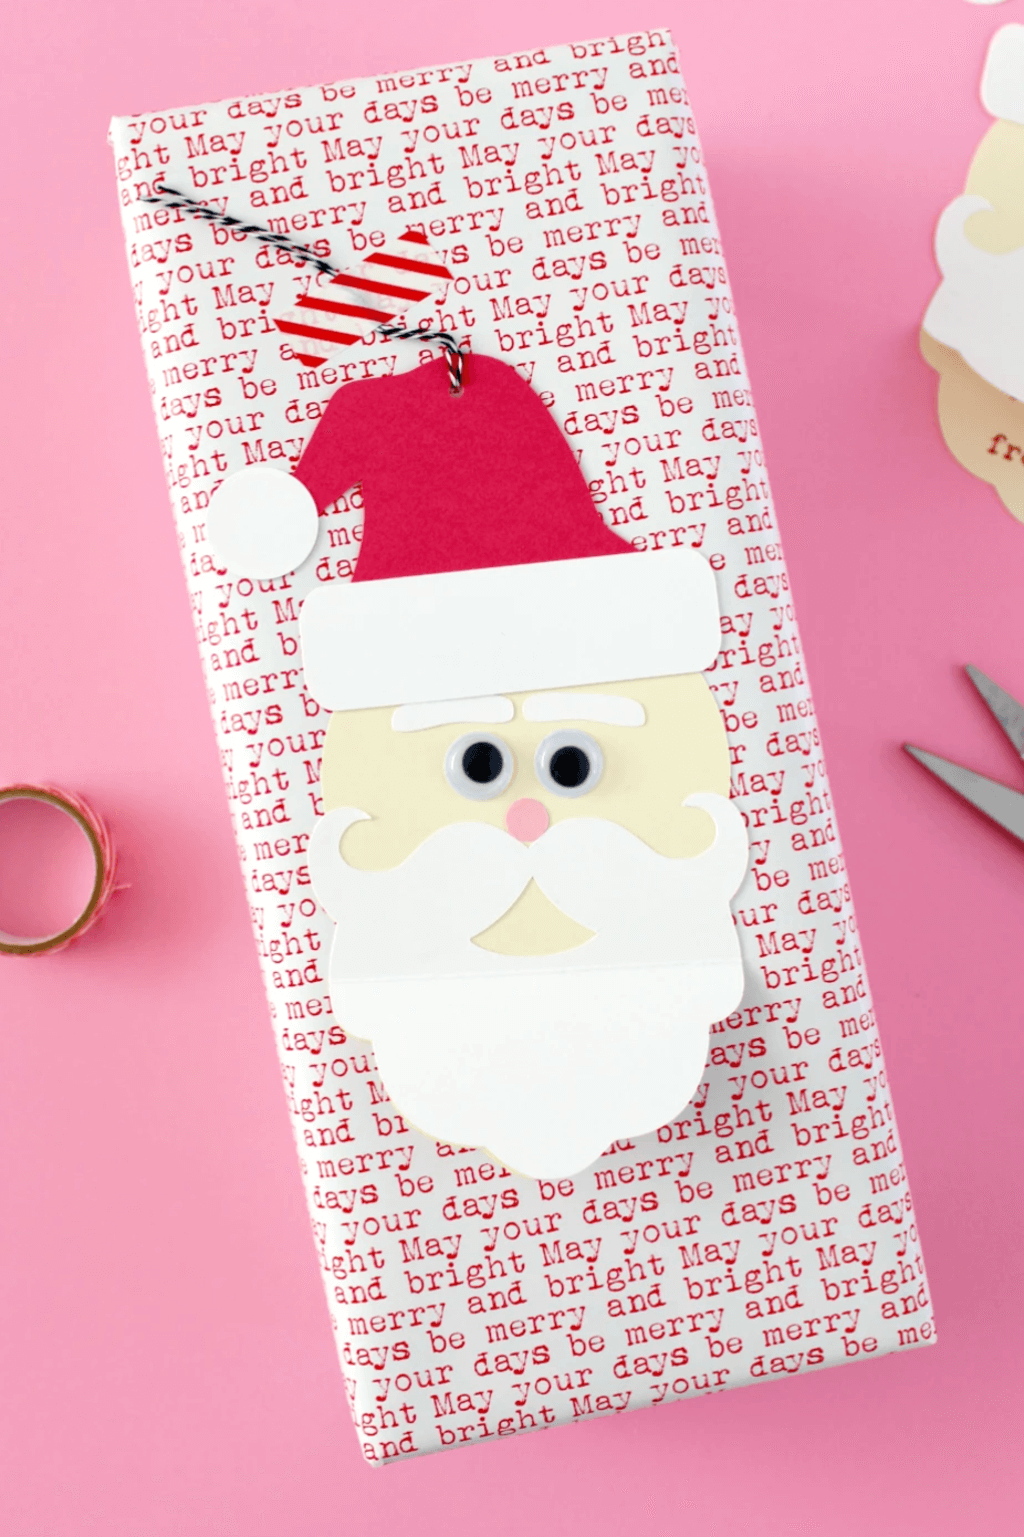
10. Make Santas out of Paper

Make Santas out of Paper

Create a variety of tiny paper Santas. When placed on each workstation, they will look so cute and bring forth the holiday spirit!

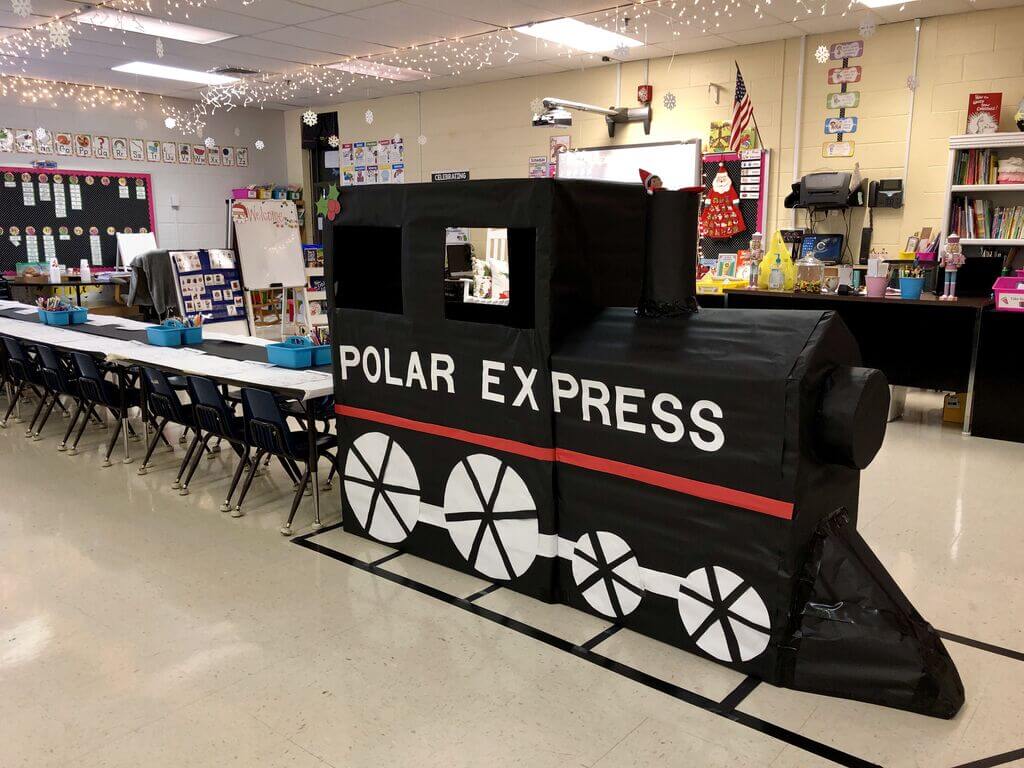
11. Journey towards the North Pole

Journey towards the North Pole

Turn your desk into Santa’s train station! As part of your office decorating for Christmas, you can make a train cut-out out of colorful paper and cardboard boxes. The office will be in utter shock when they see this decorating concept!

12. Use Balloons for Fun

Use Balloons for Fun

Office Christmas decoration ideas with balloons are not only for birthdays! Hanging balloons in various places, such as cubicles, the reception desk, and the entryway, may generate a cheerful Christmas atmosphere at work. For a traditional look, go with red and white; for something more creative, try combining colors! 

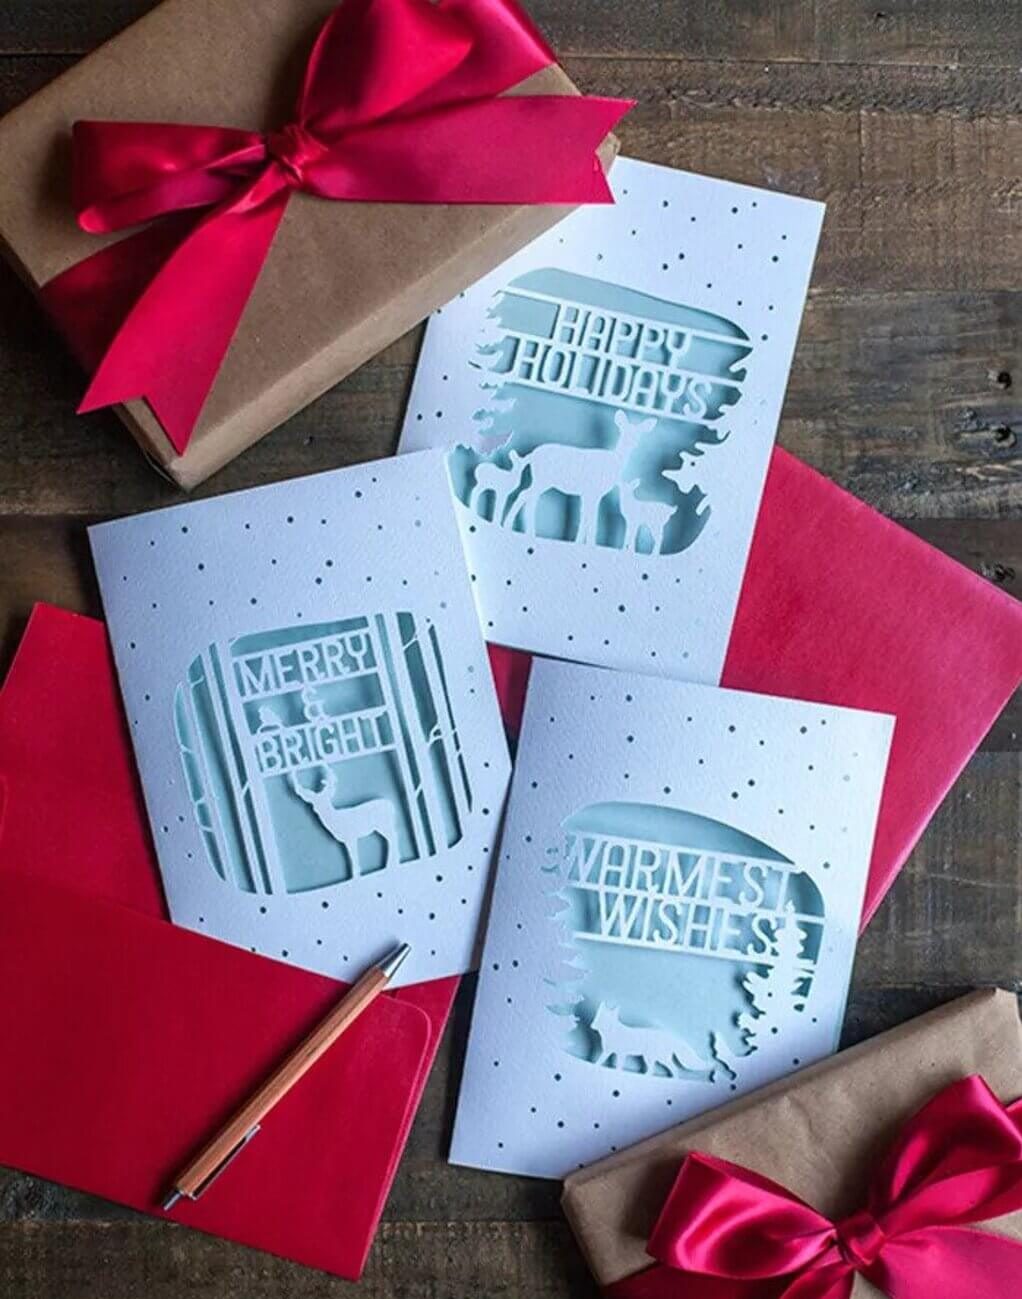
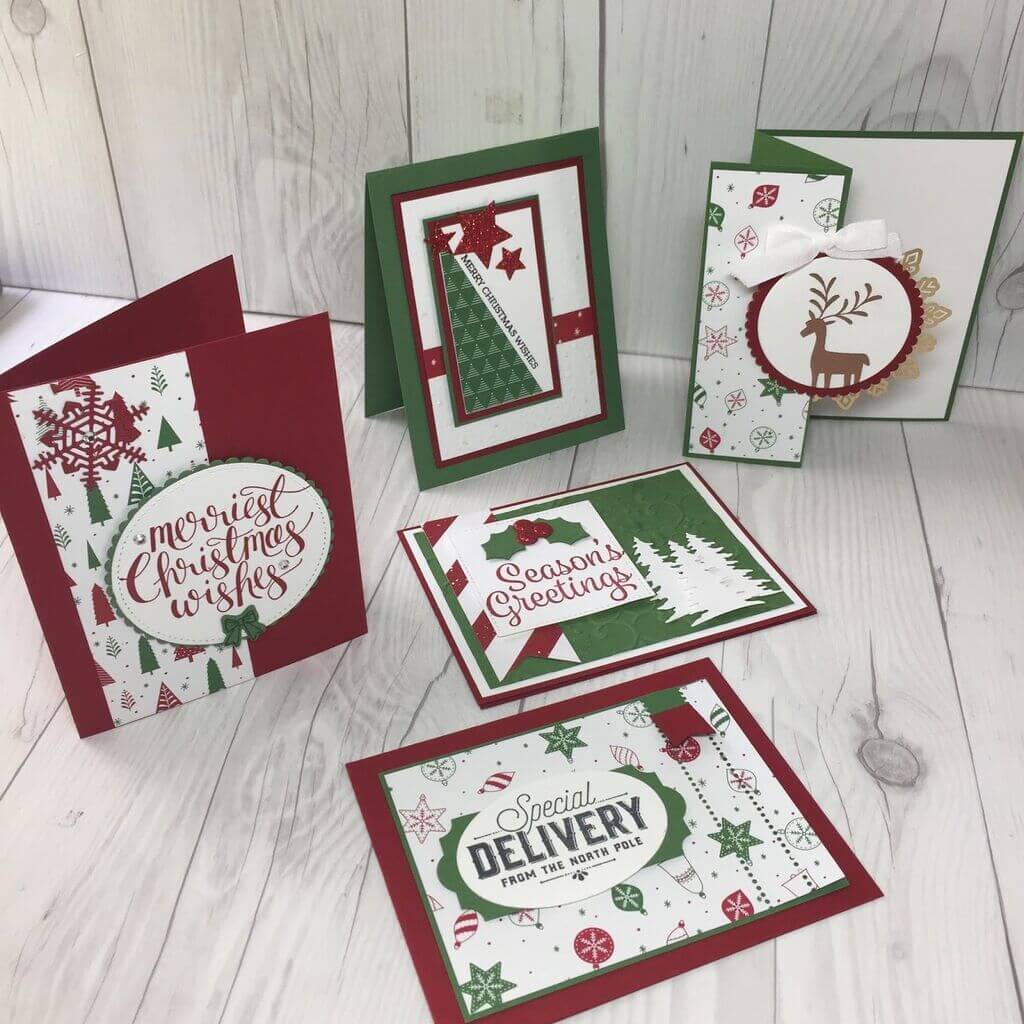
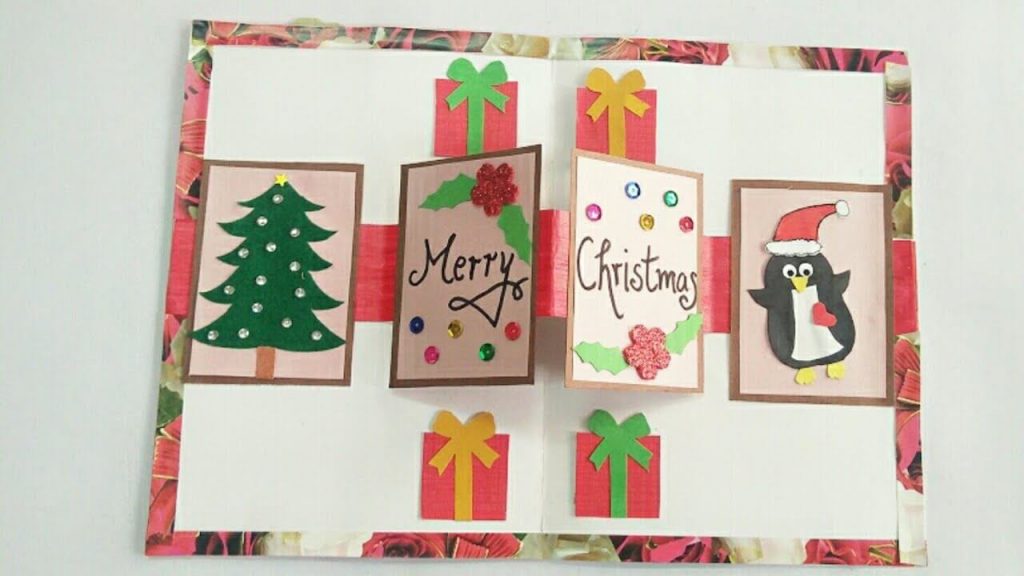
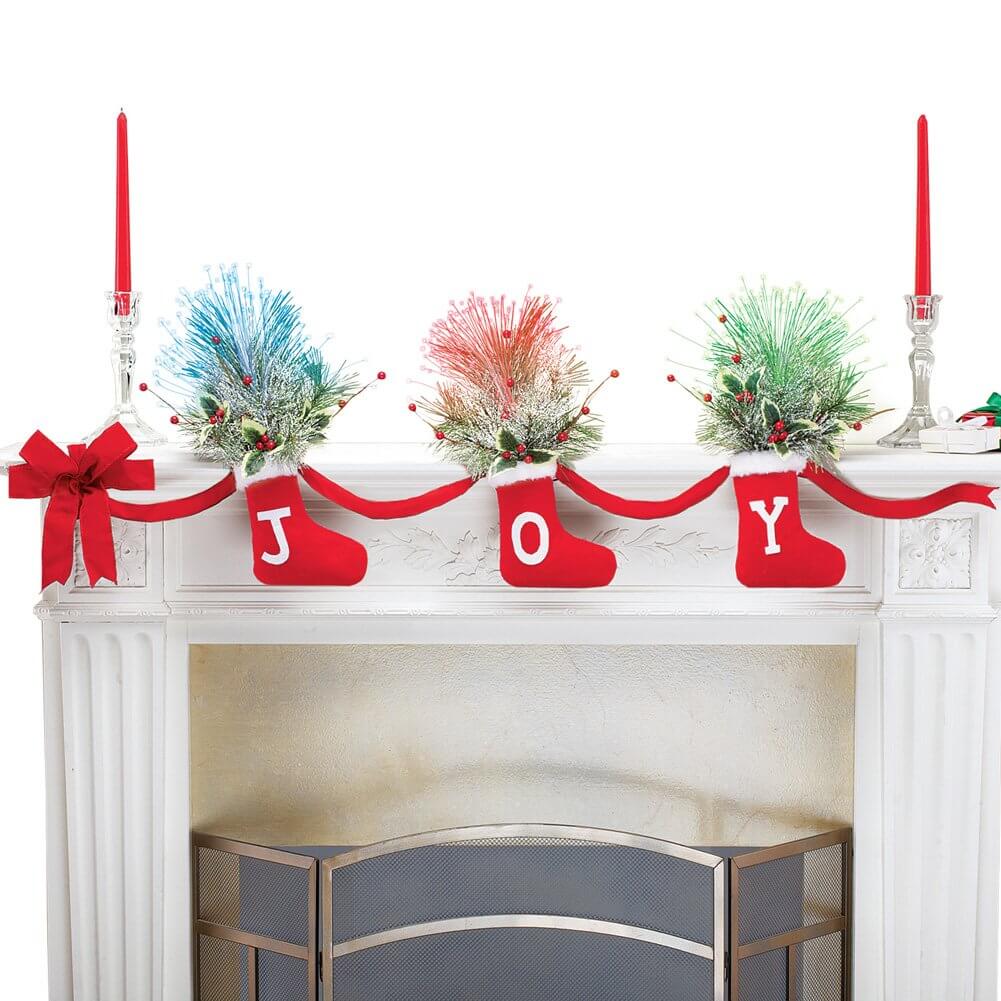
13. Use a Festive Display Christmas Banner

Use a Festive Display Christmas Banner

Put up a “Merry Christmas” banner at your workplace to let people know about the holiday festivities. It will bring joy to everybody and cast a spell!

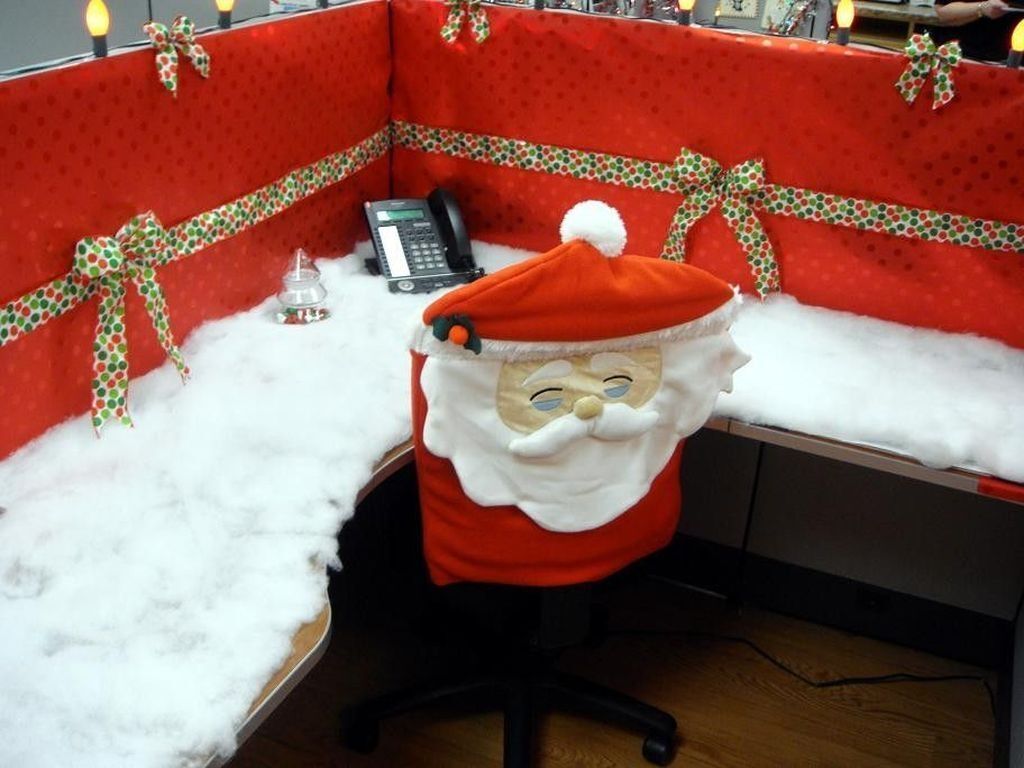
14. Convert your Office to a Snow-capped Mountain

Convert your Office to a Snow-capped Mountain

For these Christmas decoration ideas for office, stock up on cotton. To create the illusion of snow, sprinkle it over the floor or desks in the workplace. As an additional wintery touch, you may even adhere paper snowflakes to walls or tables!

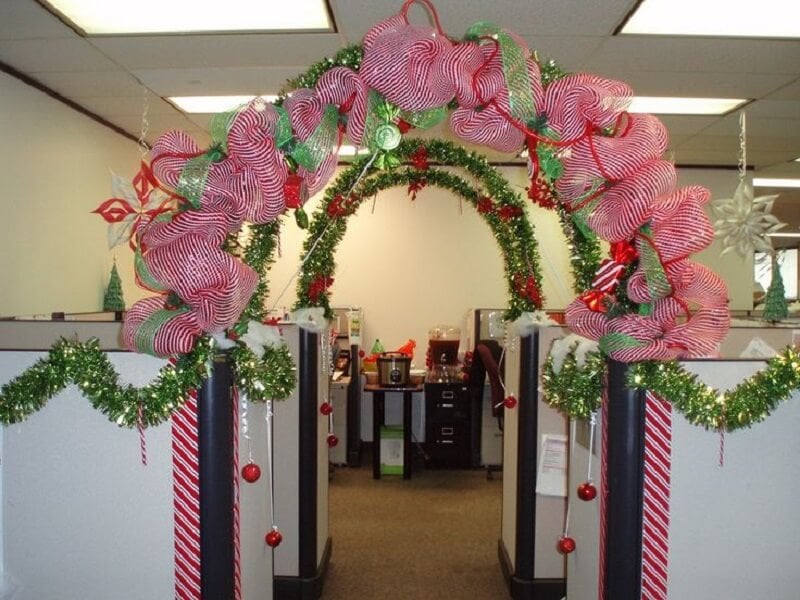
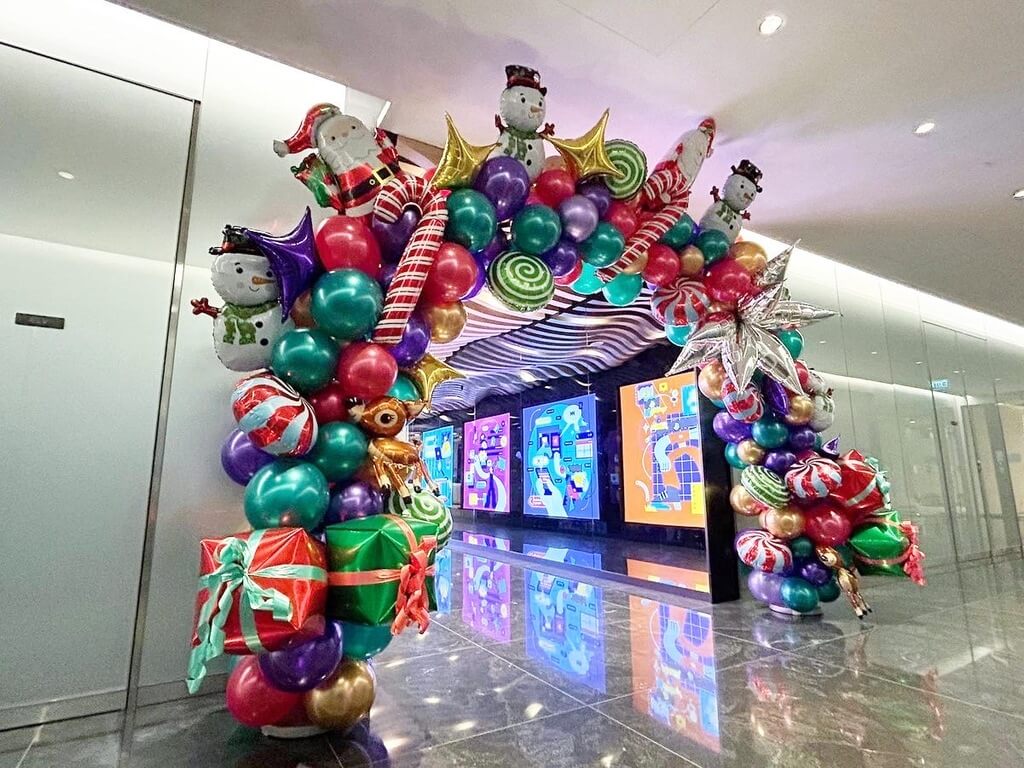
15. Build a Beautiful Archway

Build a Beautiful Archway

Make a pink or green or any color of your choice archway for a stunning entrance with this incredibly creative office Christmas decorations idea. Add some Christmas balls, ribbons, and sweets to make it stand out. For a more entertaining option, think about using an inflatable archway. 

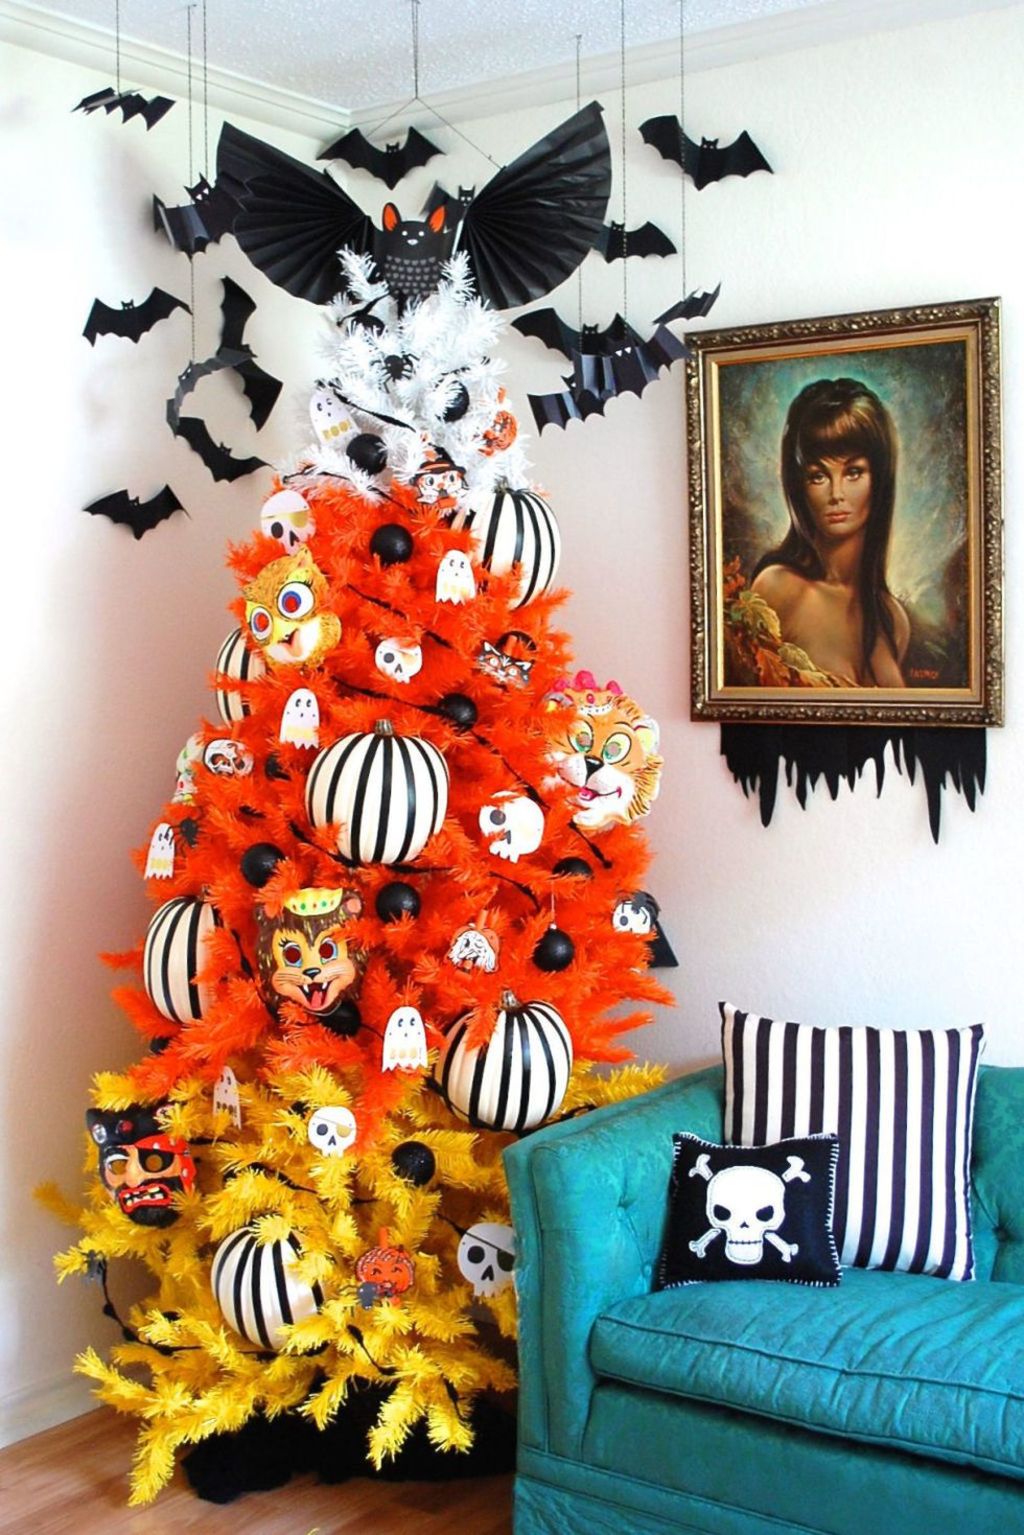
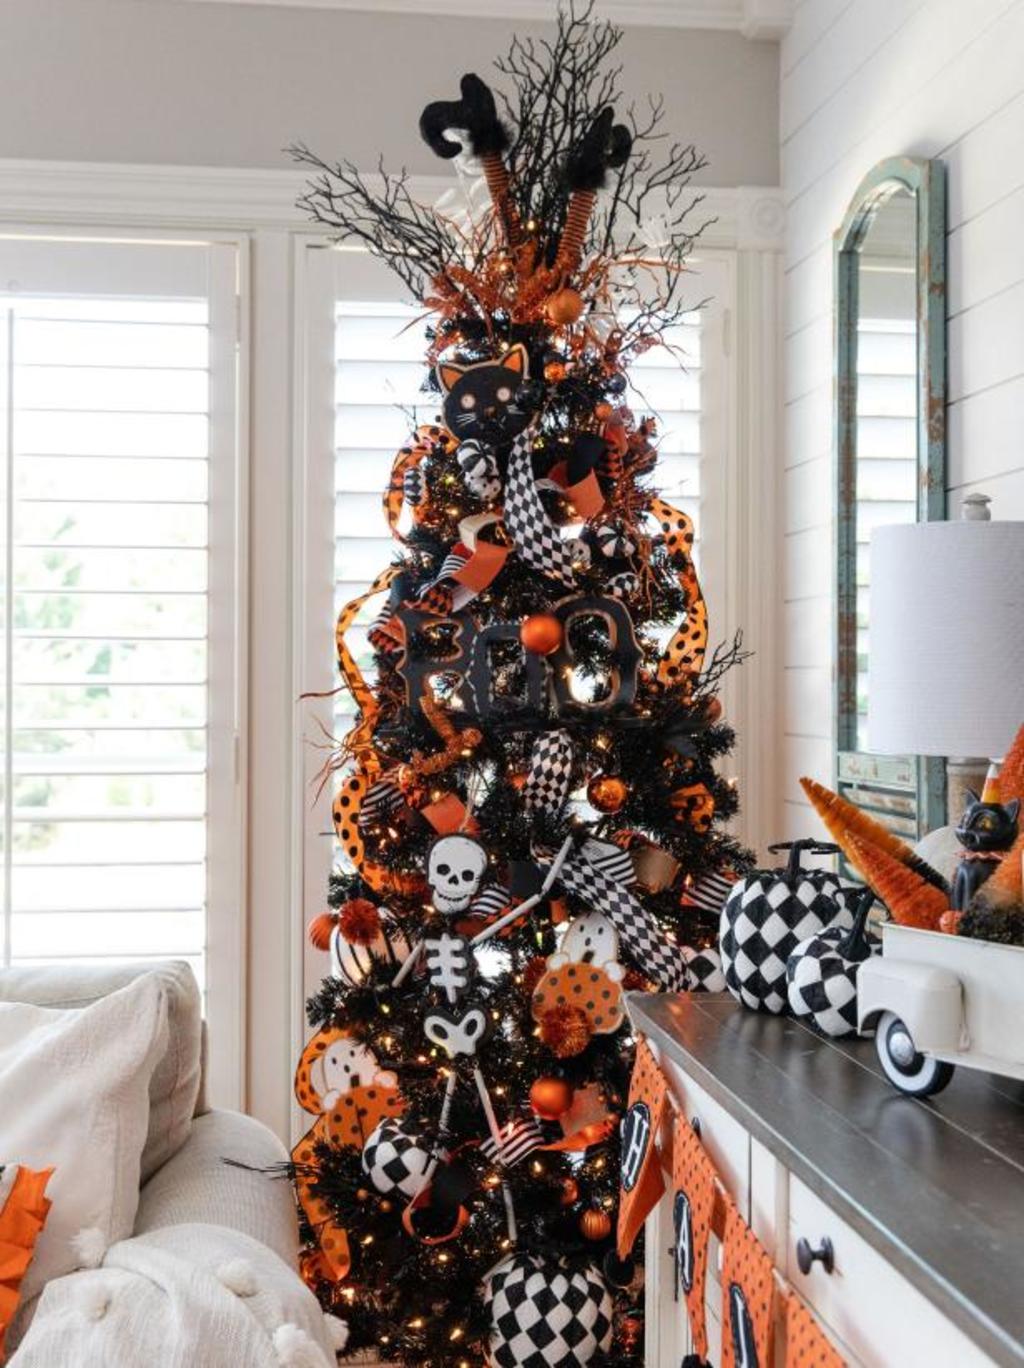
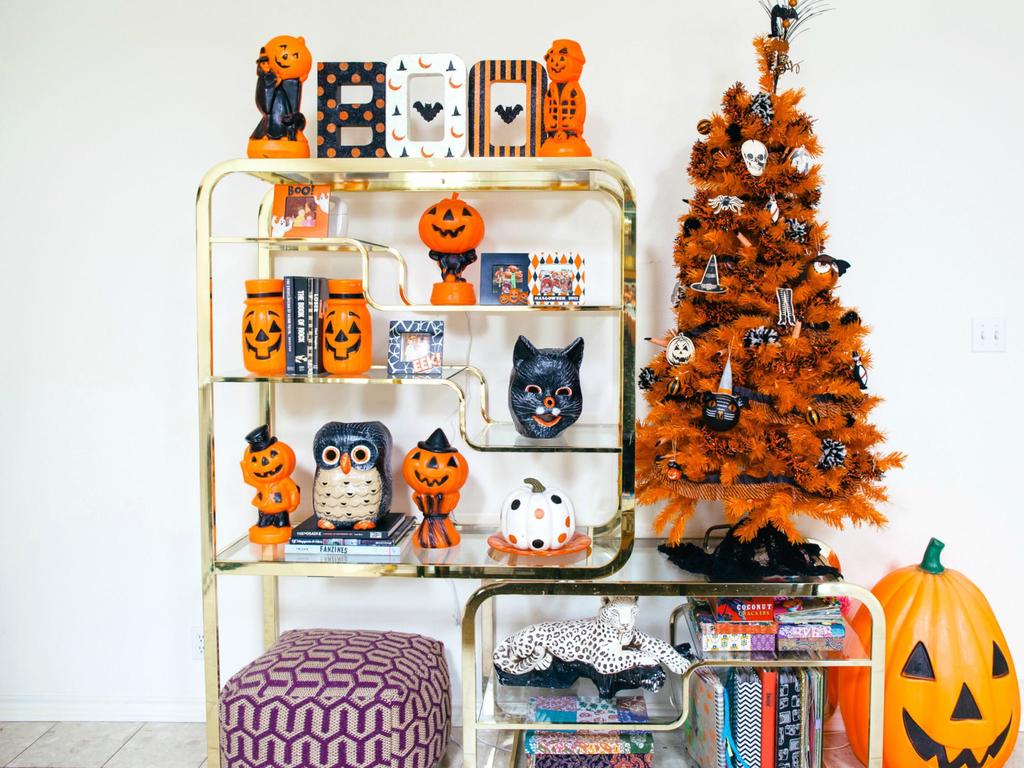
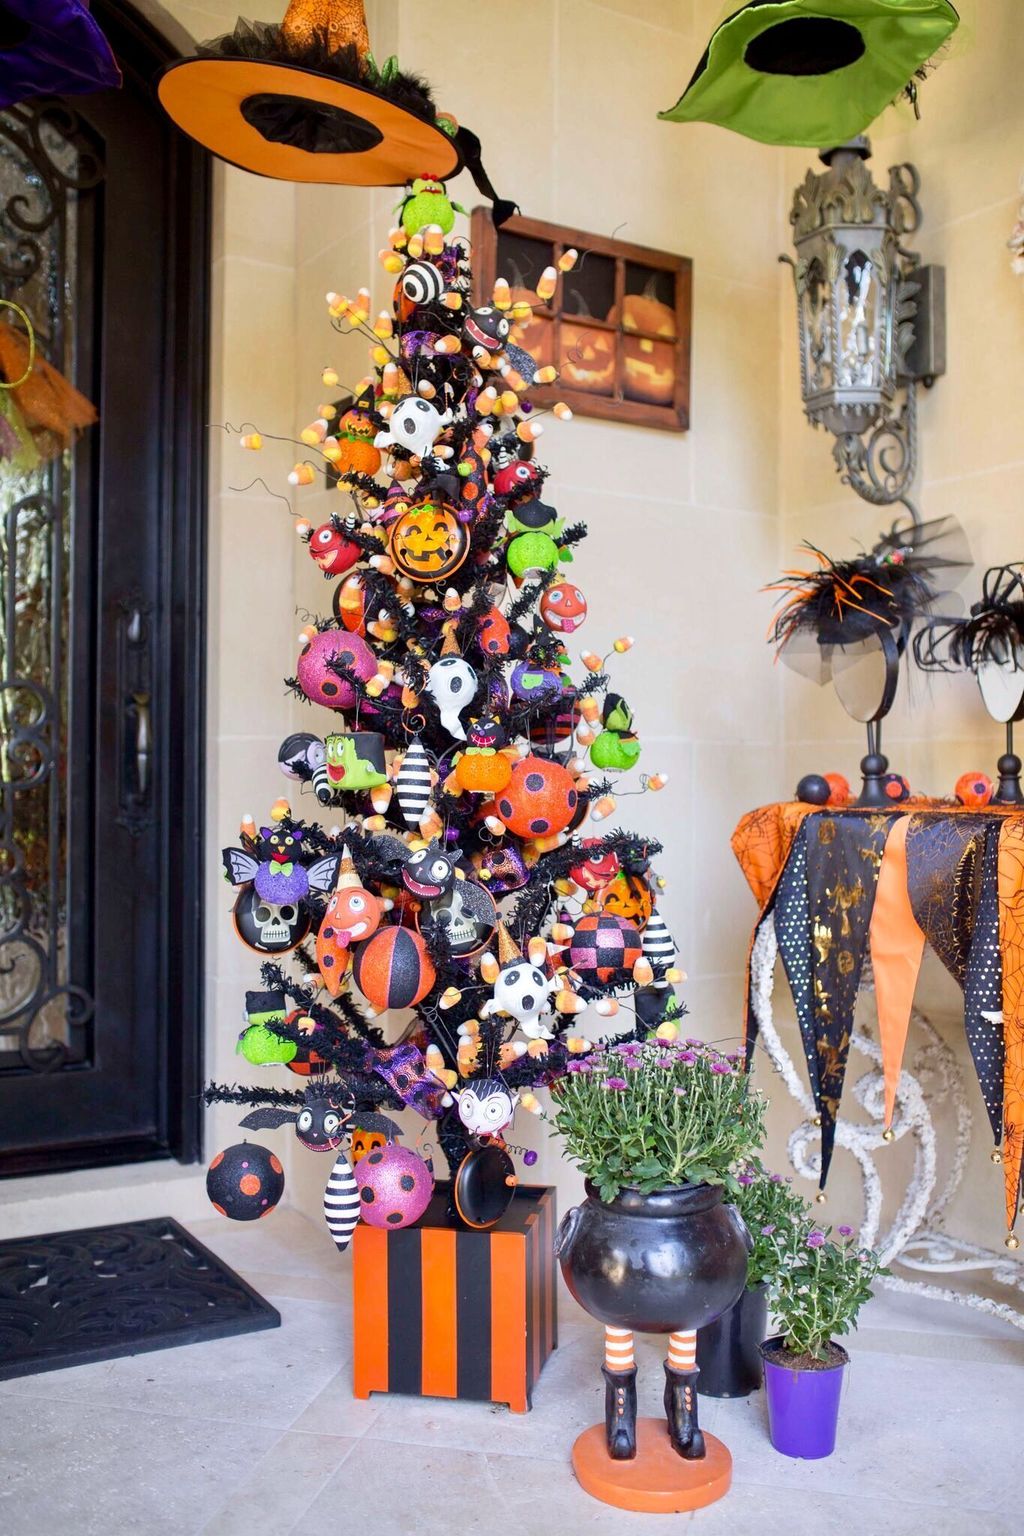
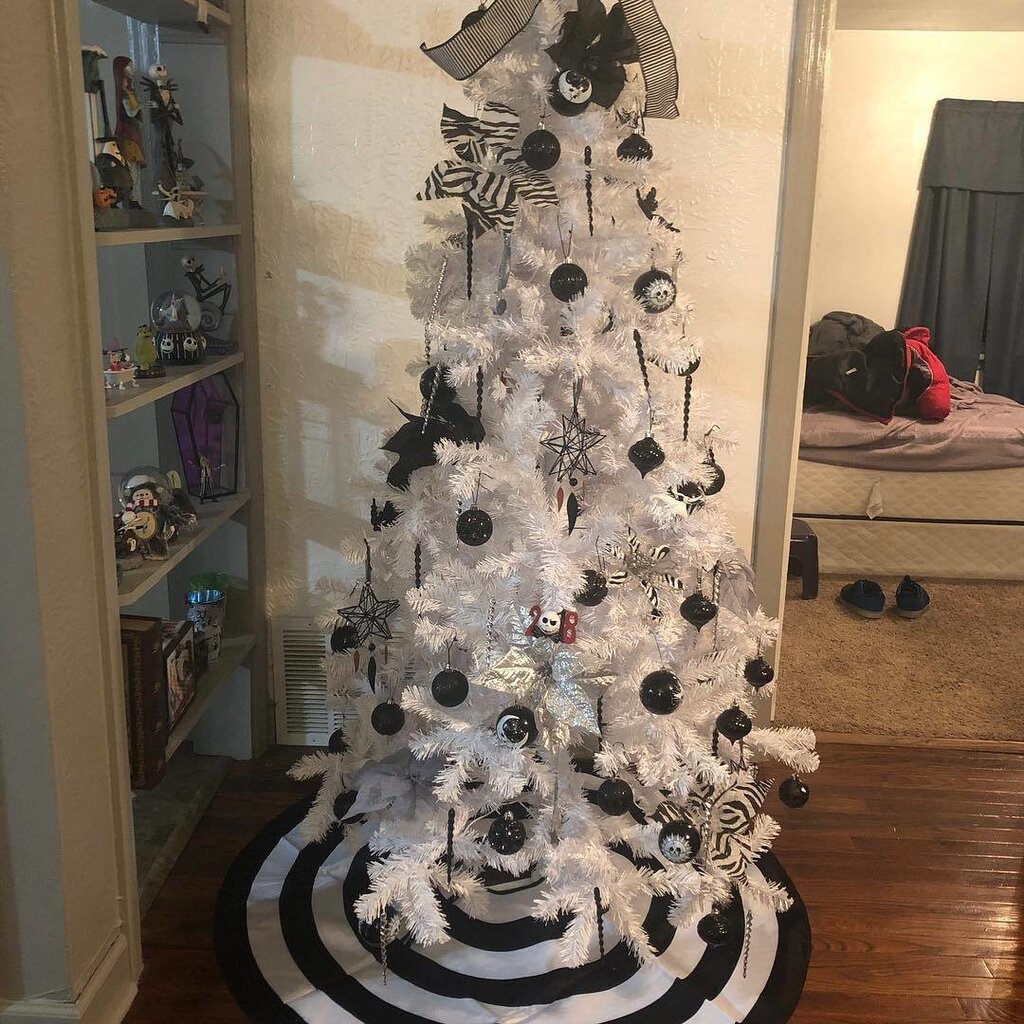
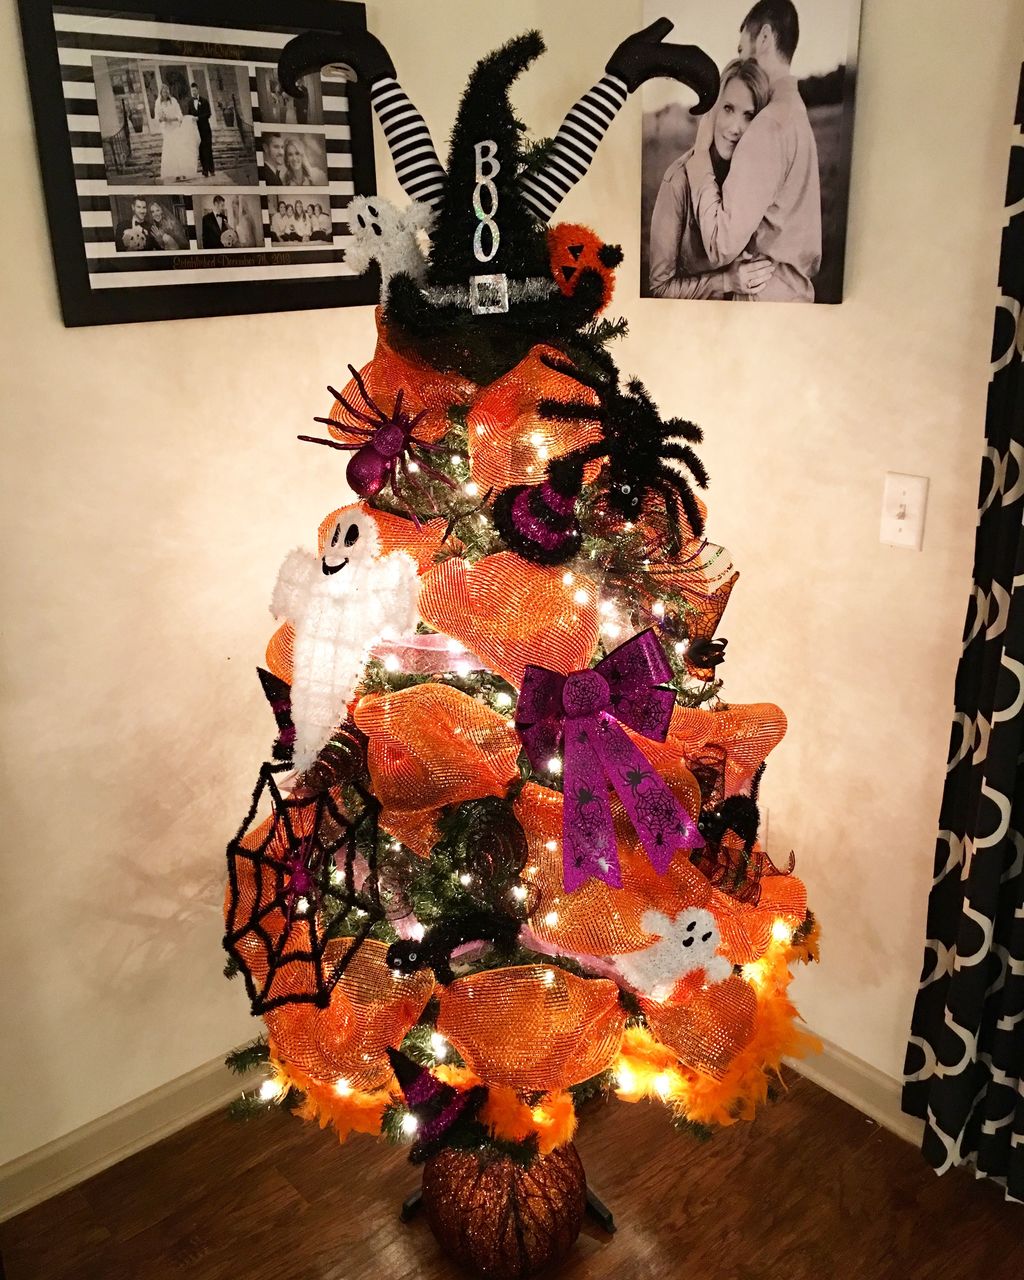
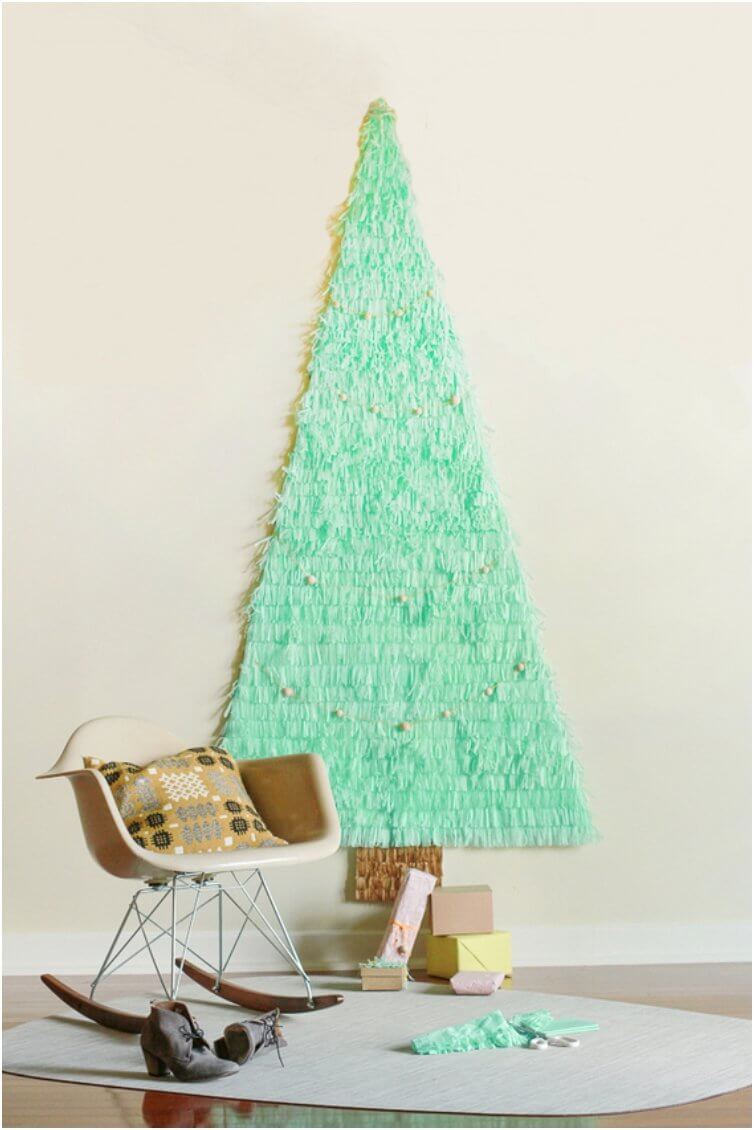
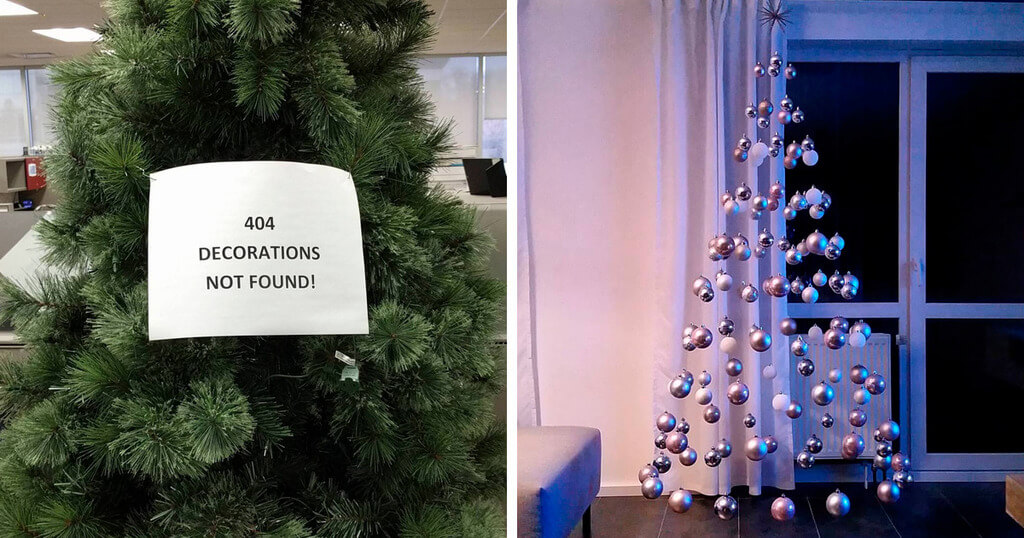
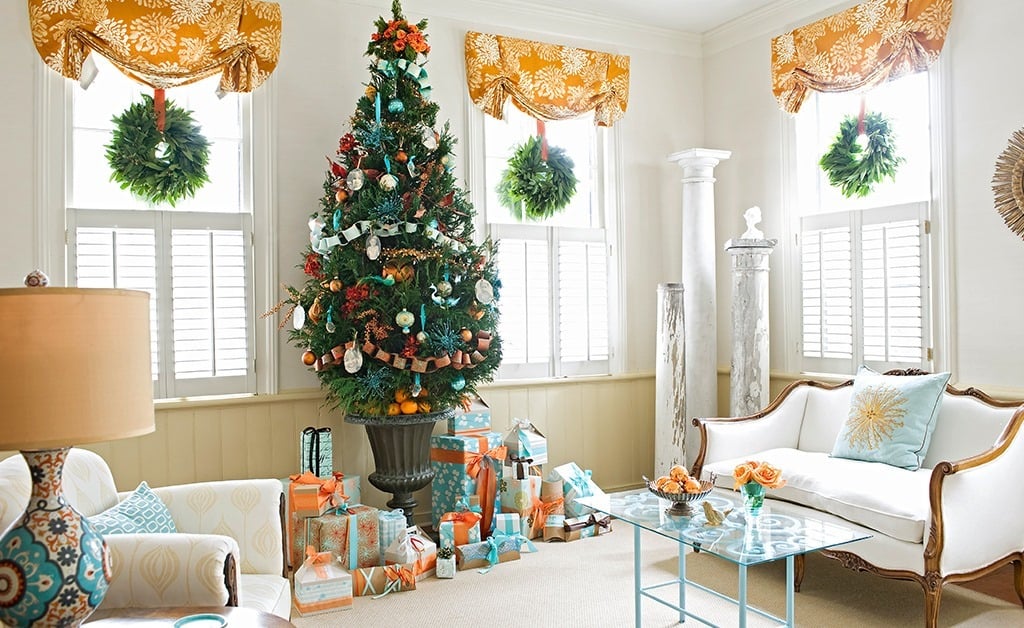
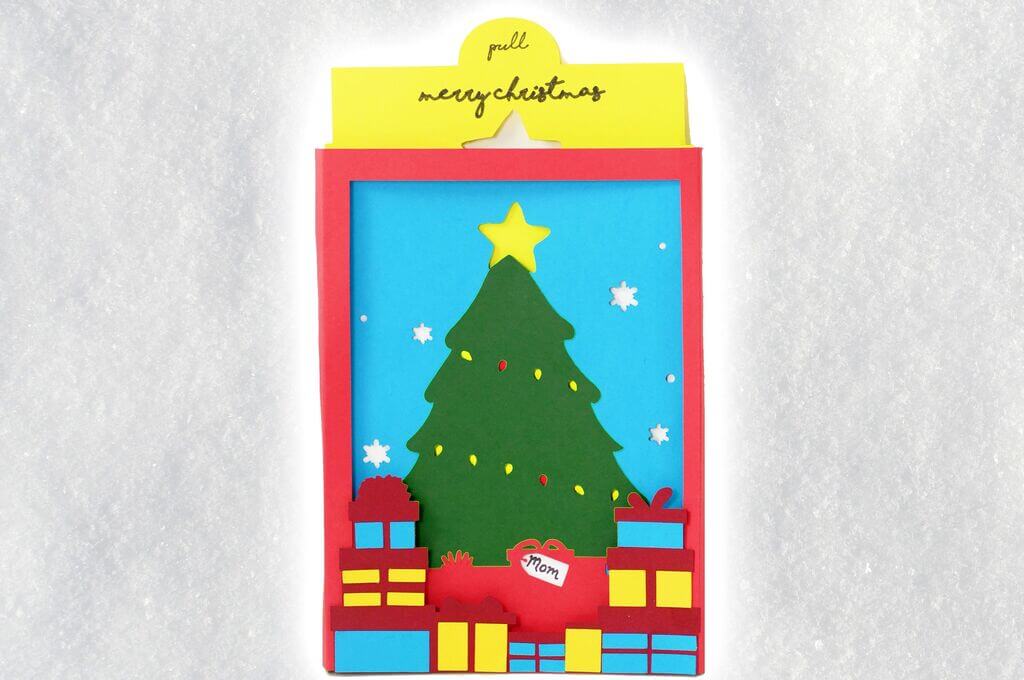
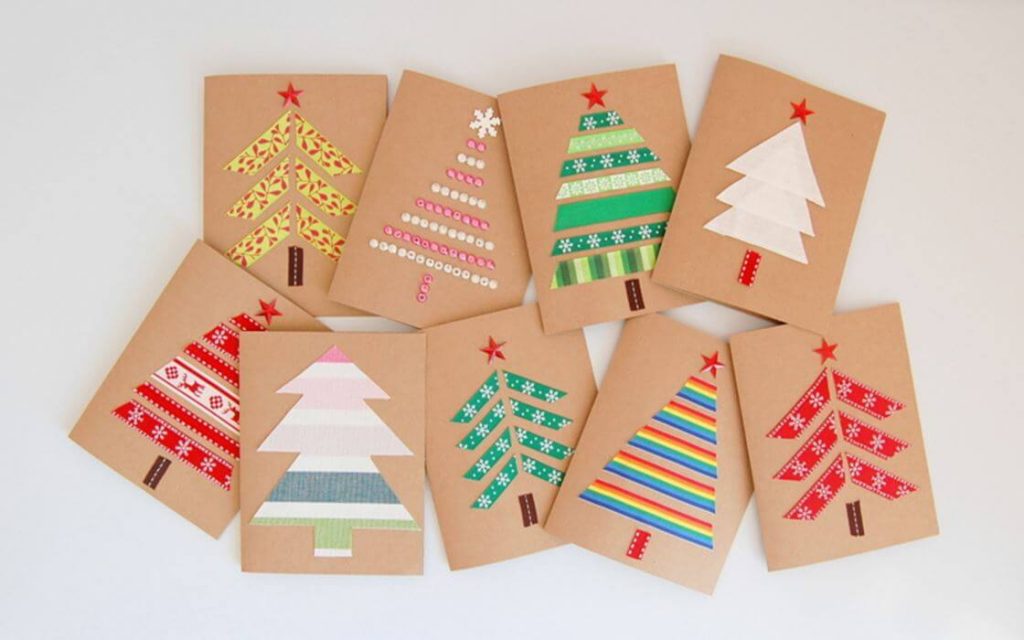
16. Make a Christmas Tree of your Own

Make a Christmas Tree of your Own

One of the best ways to get into the holiday spirit is to make a Christmas tree of your own. Personalize it with the decorations that mean the most to you. As an added touch, place the big tree close to the lobby area and craft smaller ones to place on each workstation.

17. Use Streamers for Decorations

Use Streamers for Decorations

Using streamers to spruce up your workplace is a simple and entertaining concept. Add some color to the cubicles with red and green streamers. To make the workplace seem more festive, you may attach them to walls or suspend them from the top.

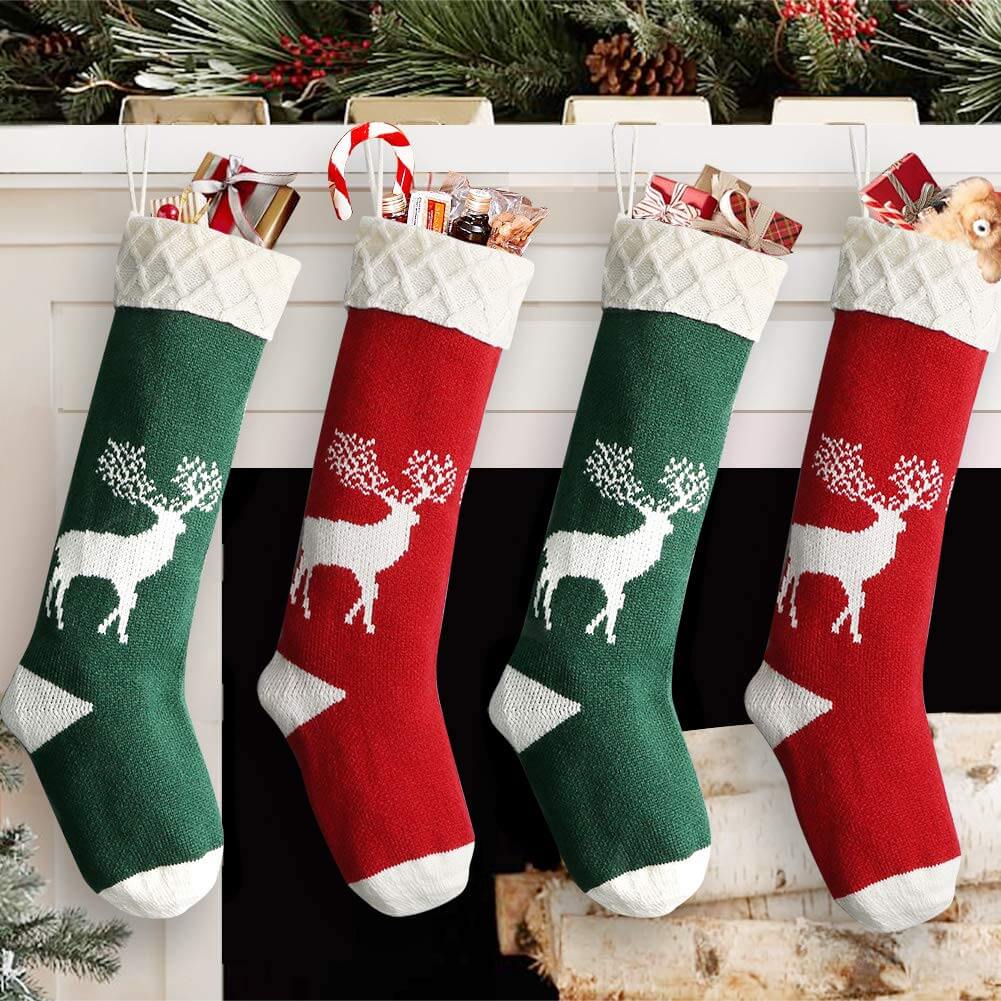
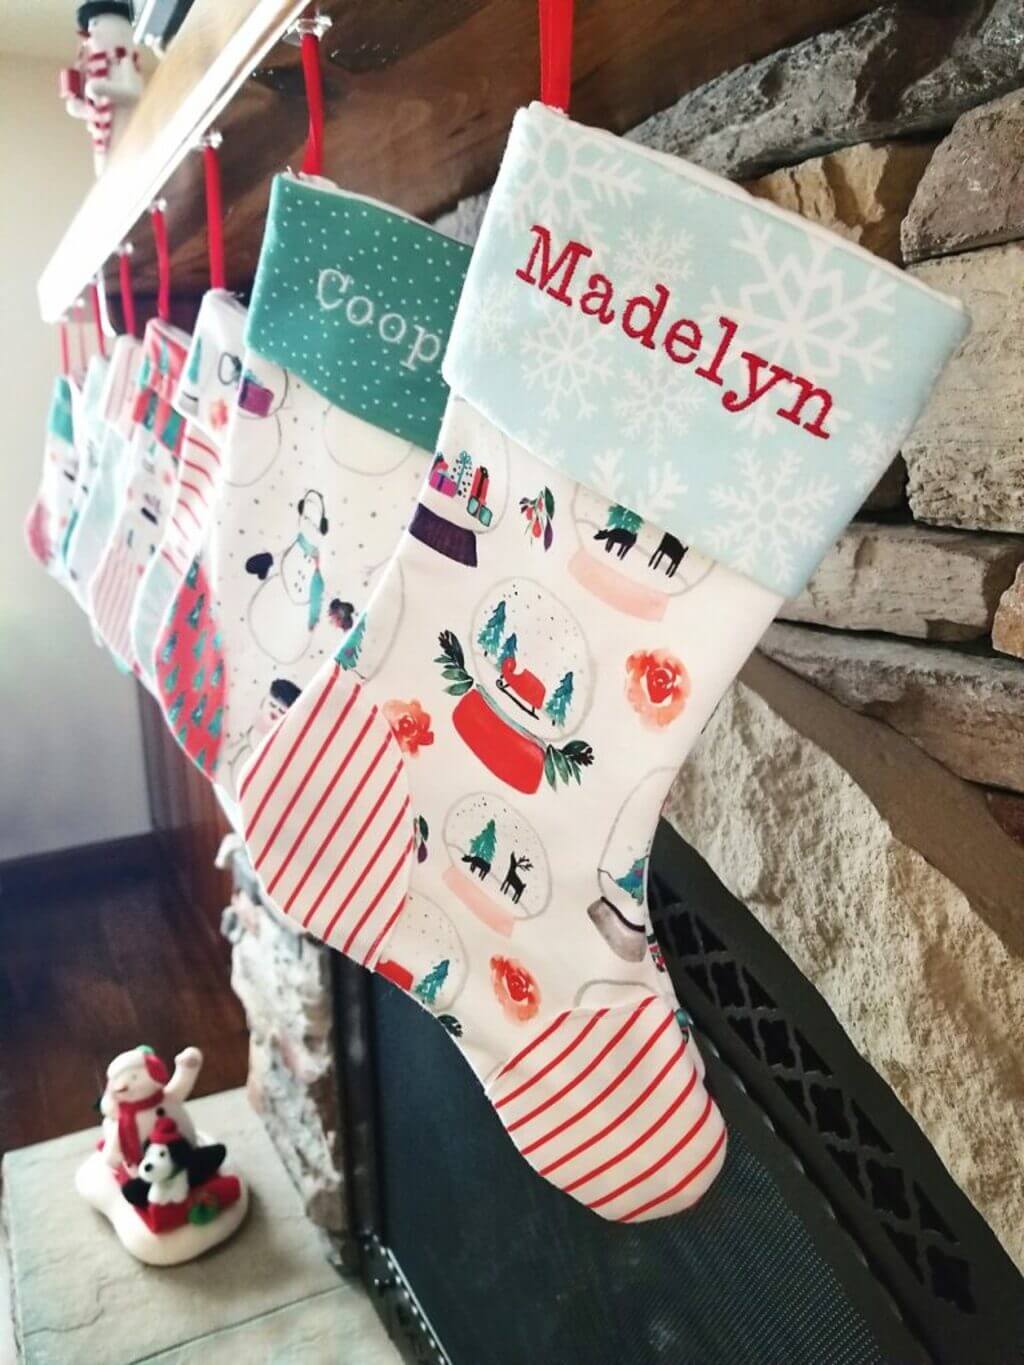
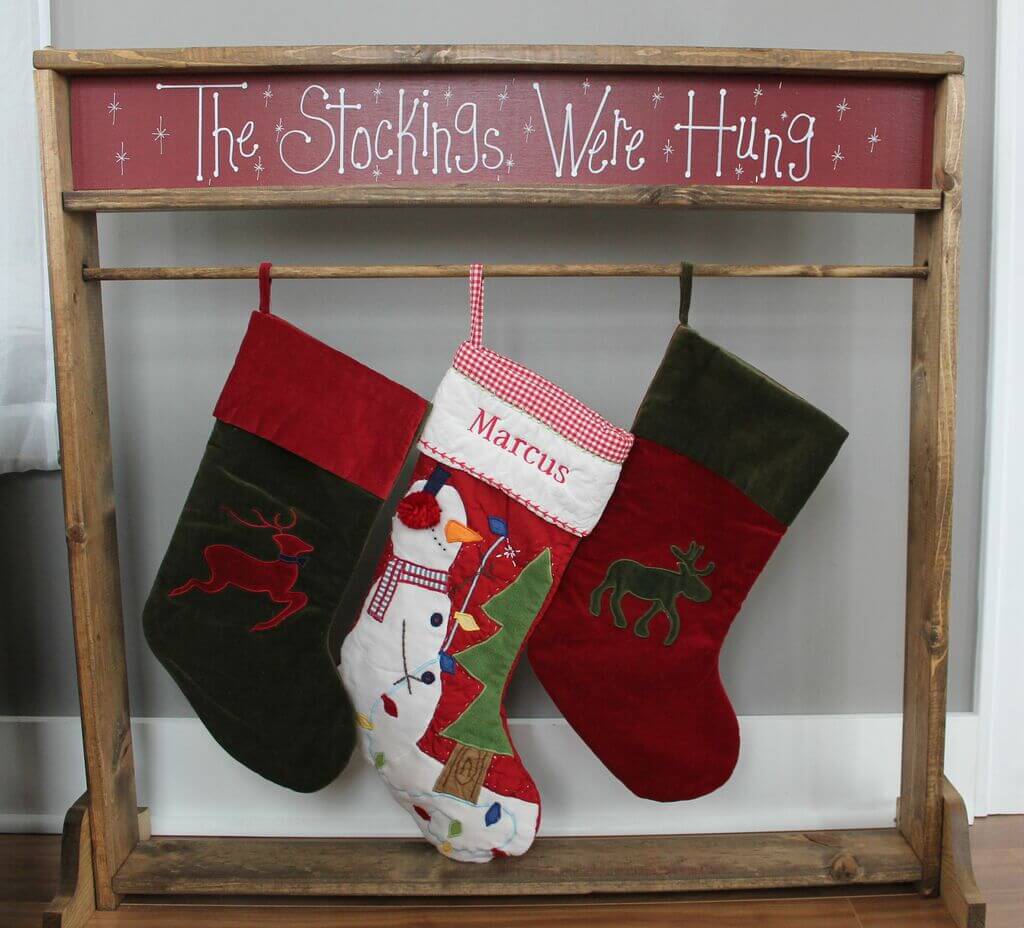
18. Hang Santa Stockings

Hang Santa Stockings

Make Santa stockings of your own out of printed fabric and ribbons. Put a personal touch on them by adding a name to each stocking before hanging or pinning them to the desks of your employees. It’s a thoughtful and original way to celebrate the season!

19. Decorate with Shiny Ornaments

Decorate with Shiny Ornaments

Hanging decorations from the ceiling, such as Christmas wreaths, bells, bulbs, etc., is a simple way to decorate. Anyone may try their hand at these easy office Christmas decorations!

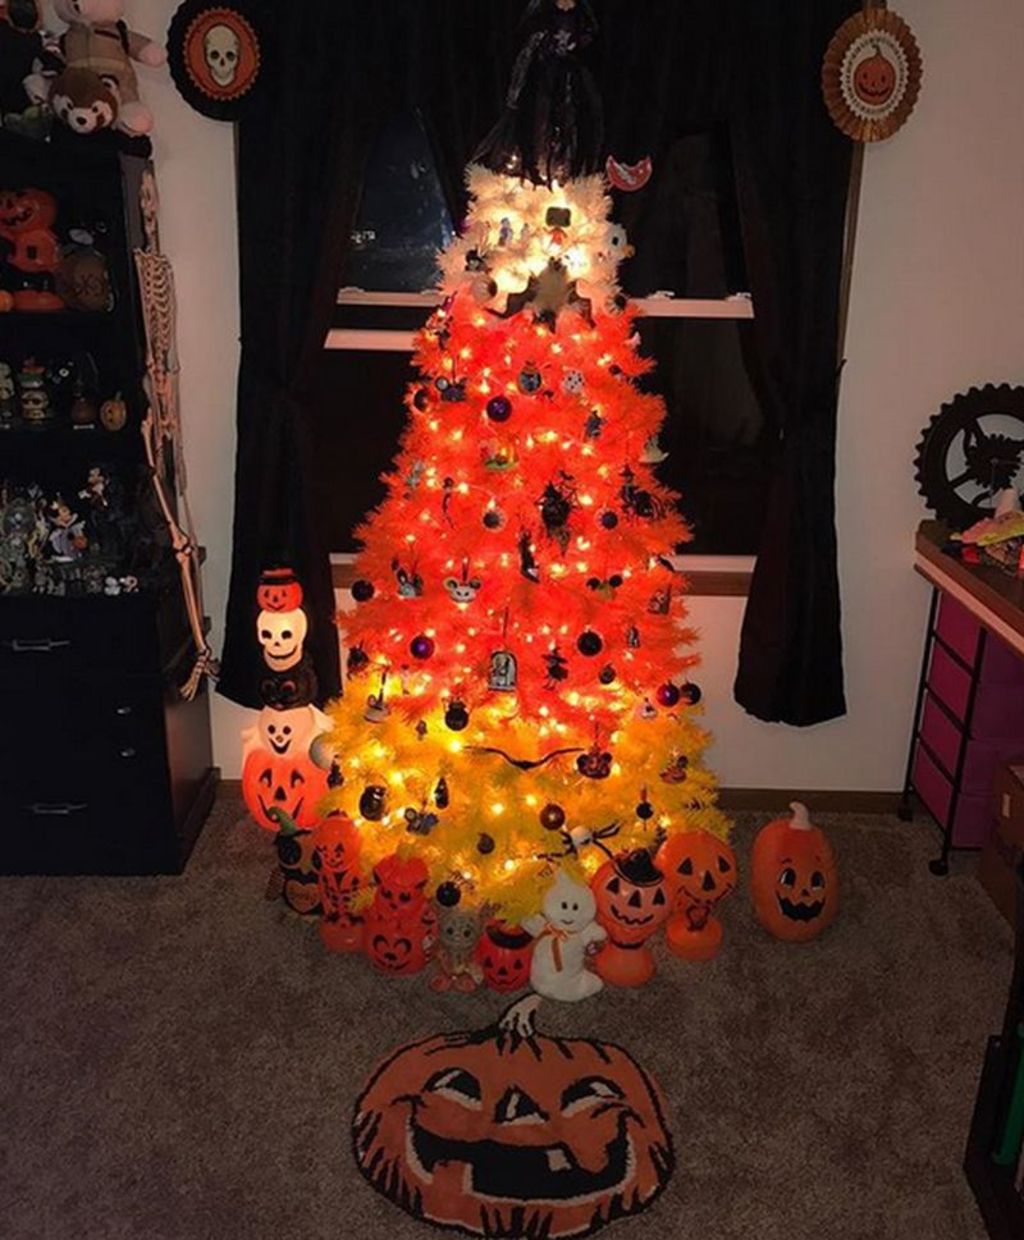
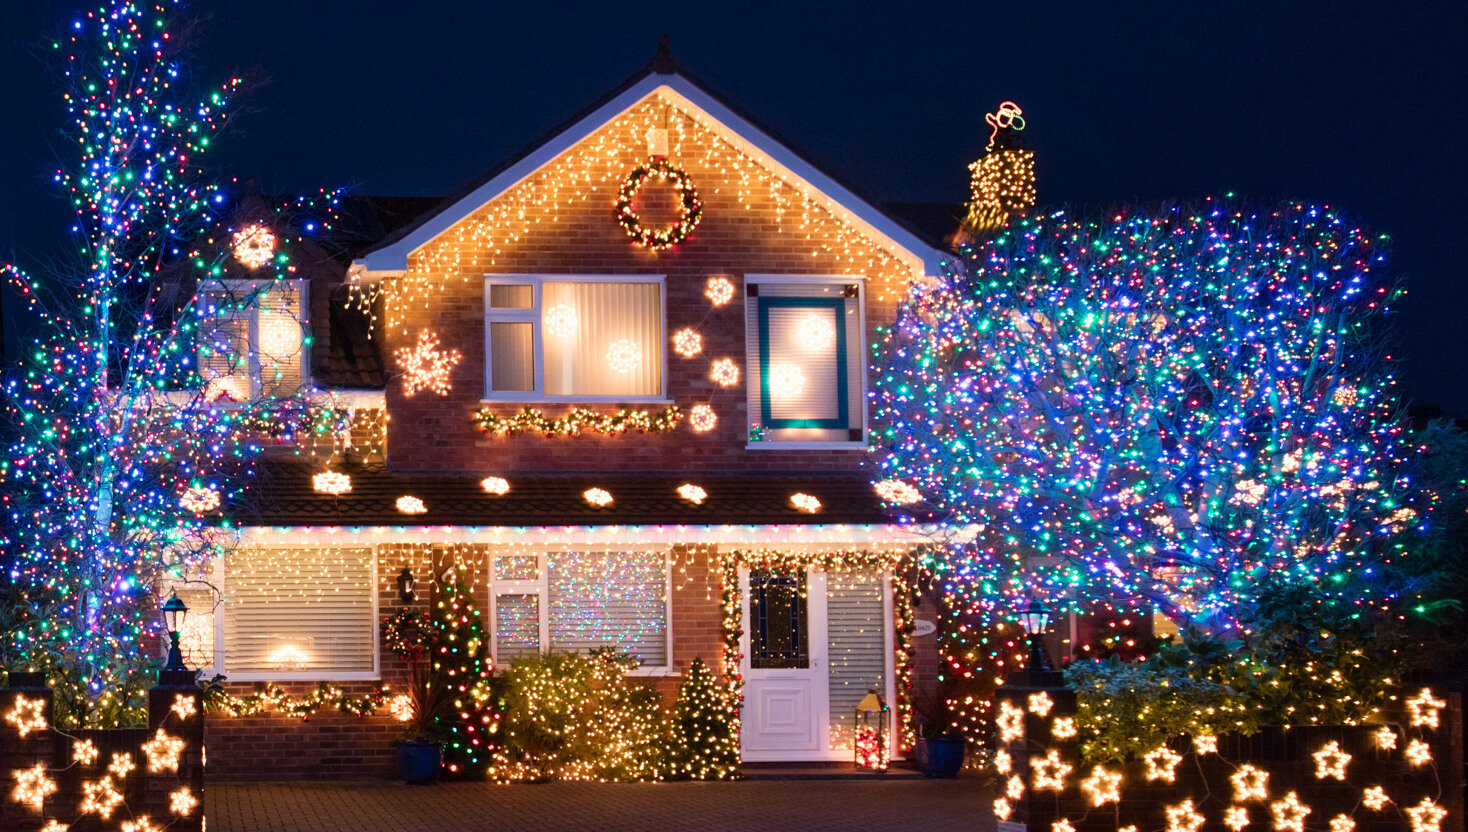
20. Let your Workplace Shine

Let your Workplace Shine

Draping fairy lights over the cubicles at work will have a dramatic impact on the mood. Play around with the lights to see what works best for you, or even use them to make a Christmas tree form. Bringing a little holiday brightness to your office is guaranteed to be a hit!

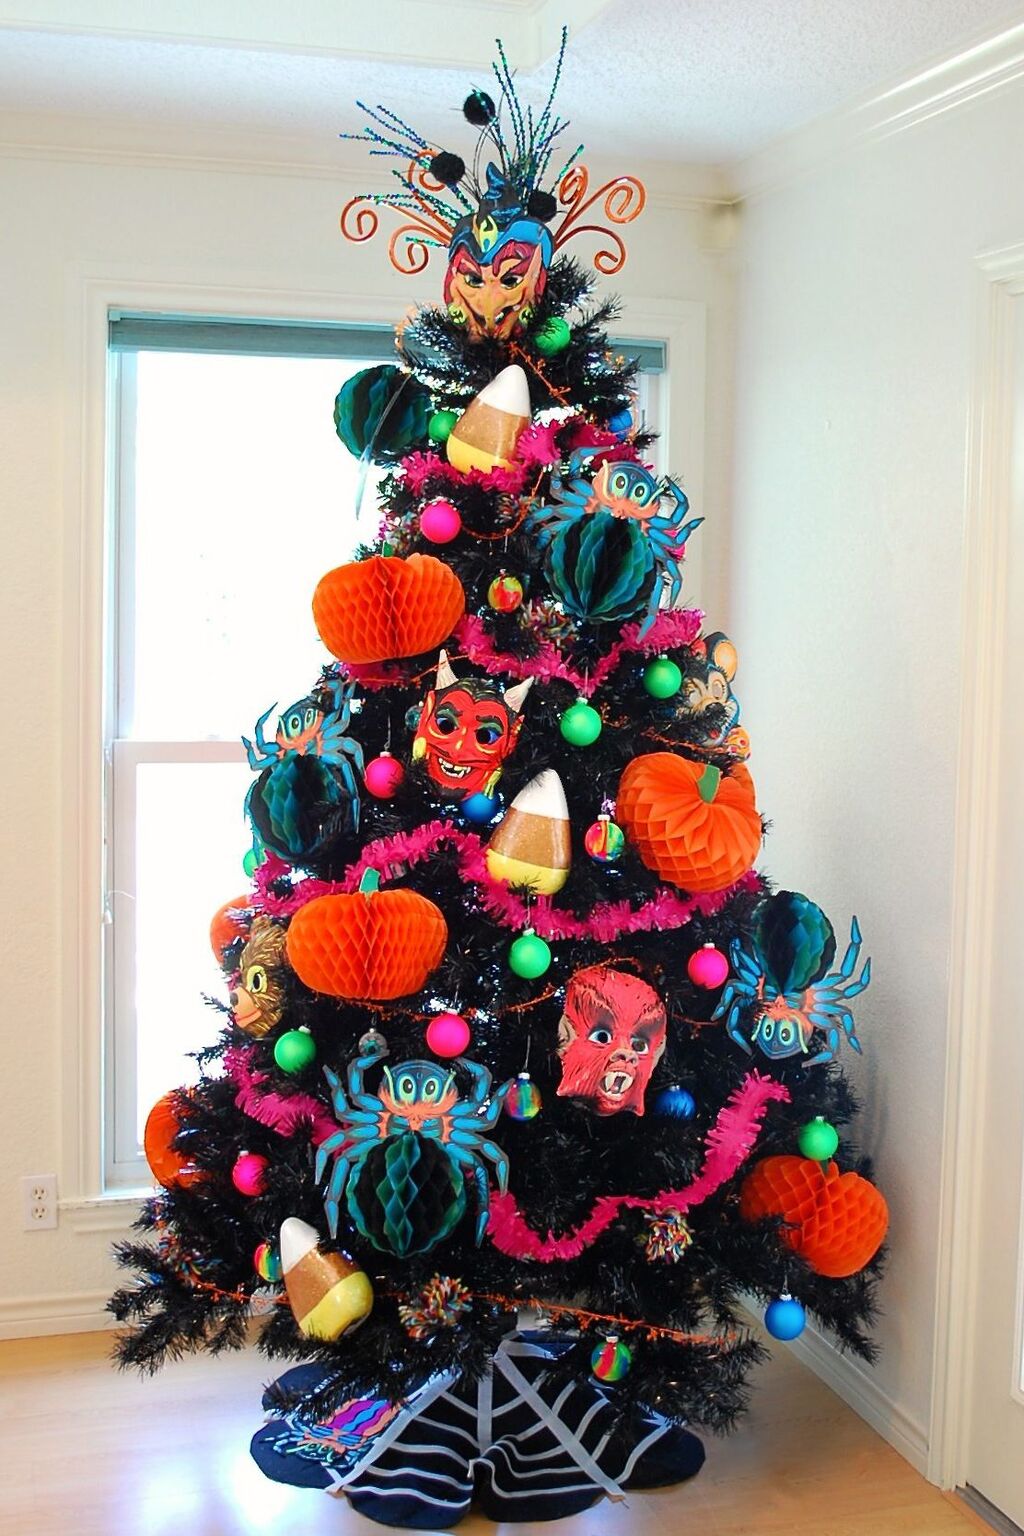
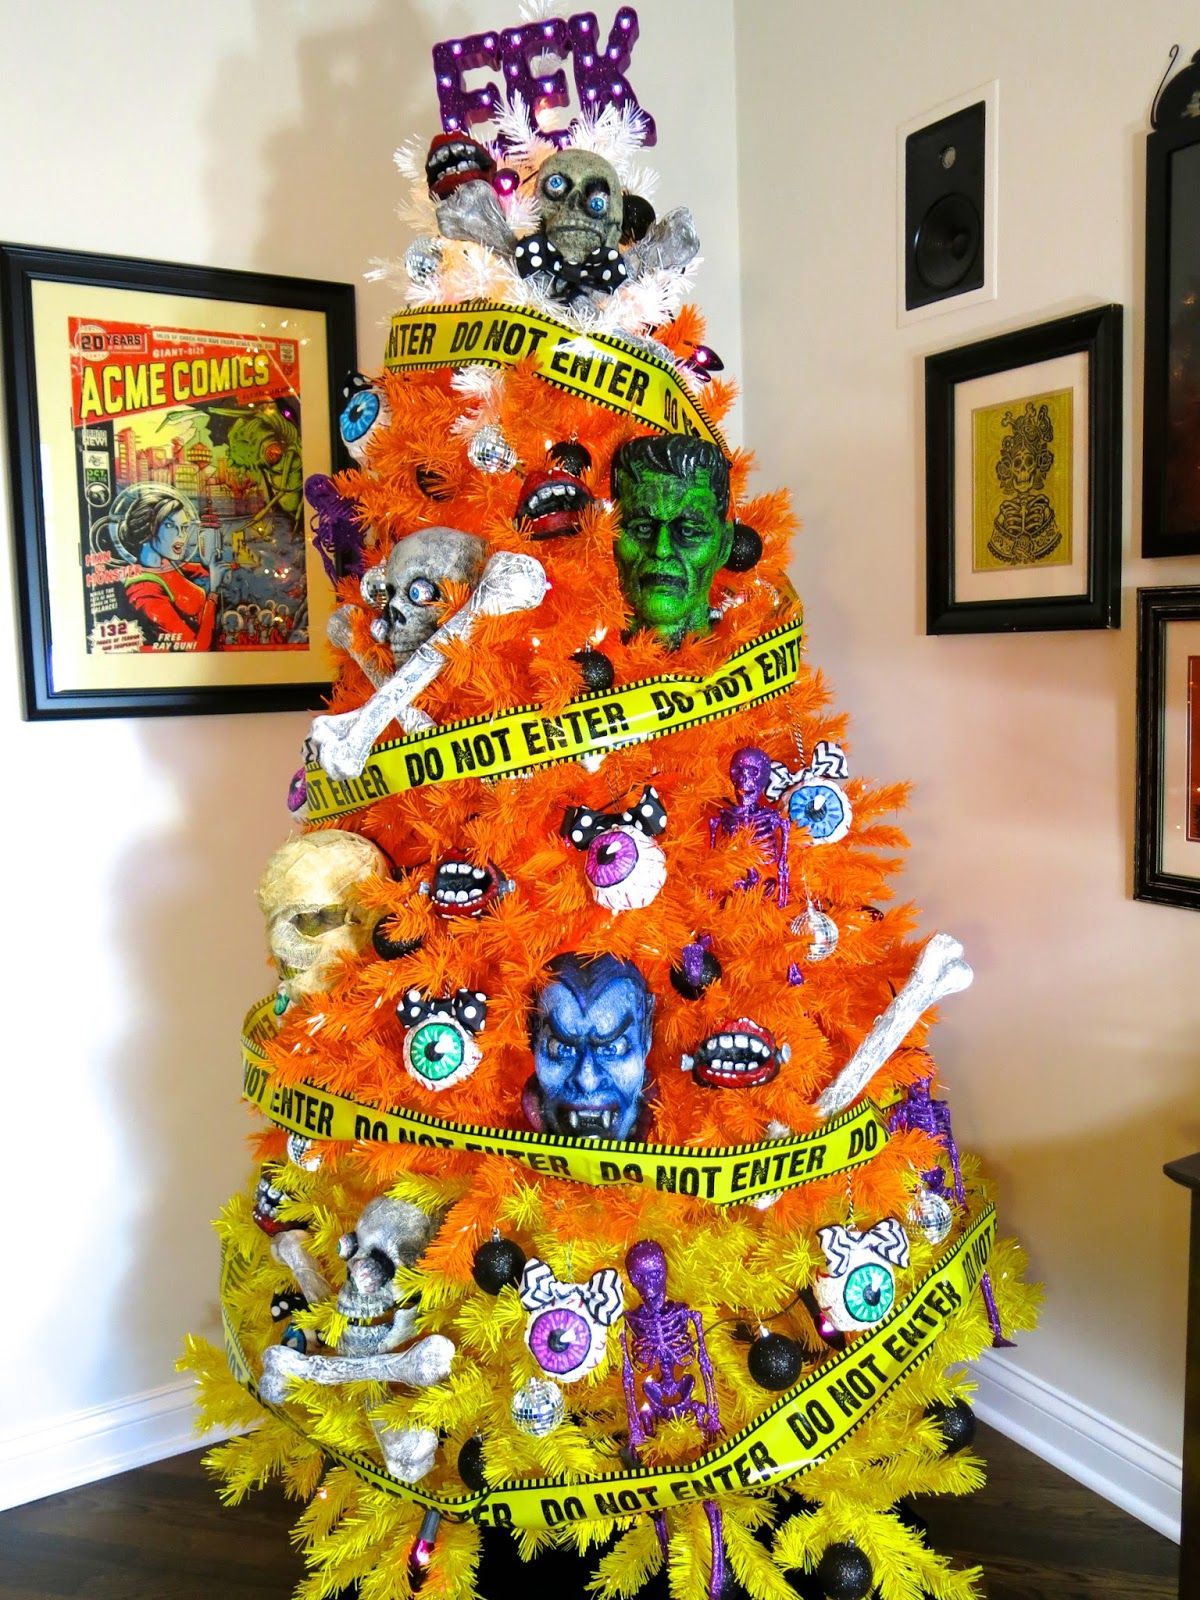
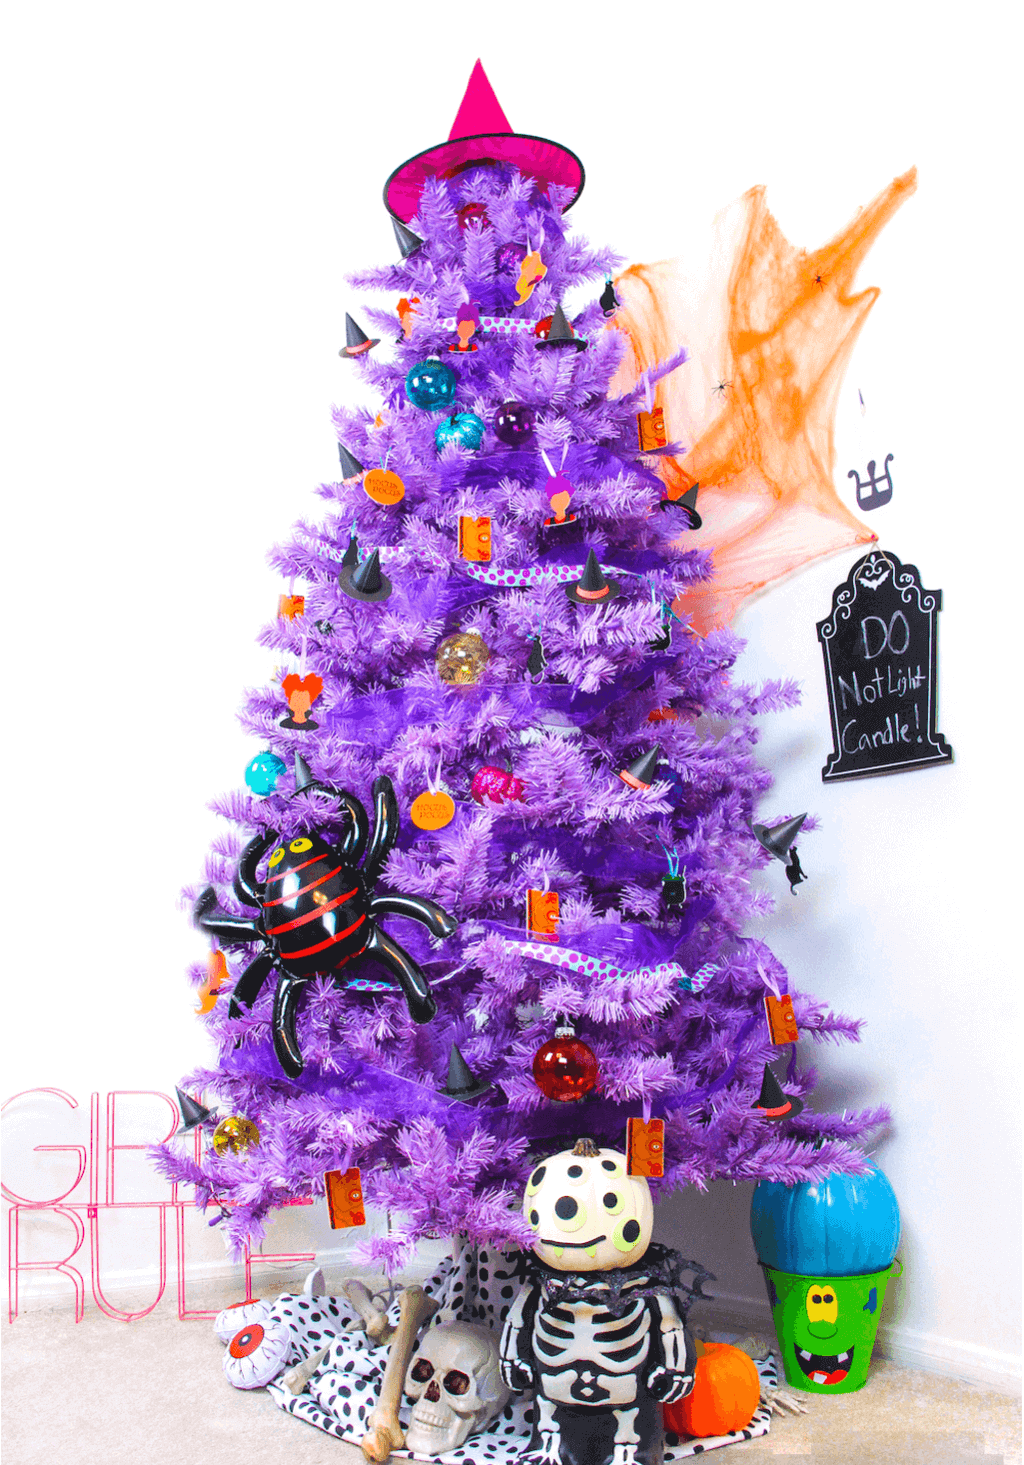
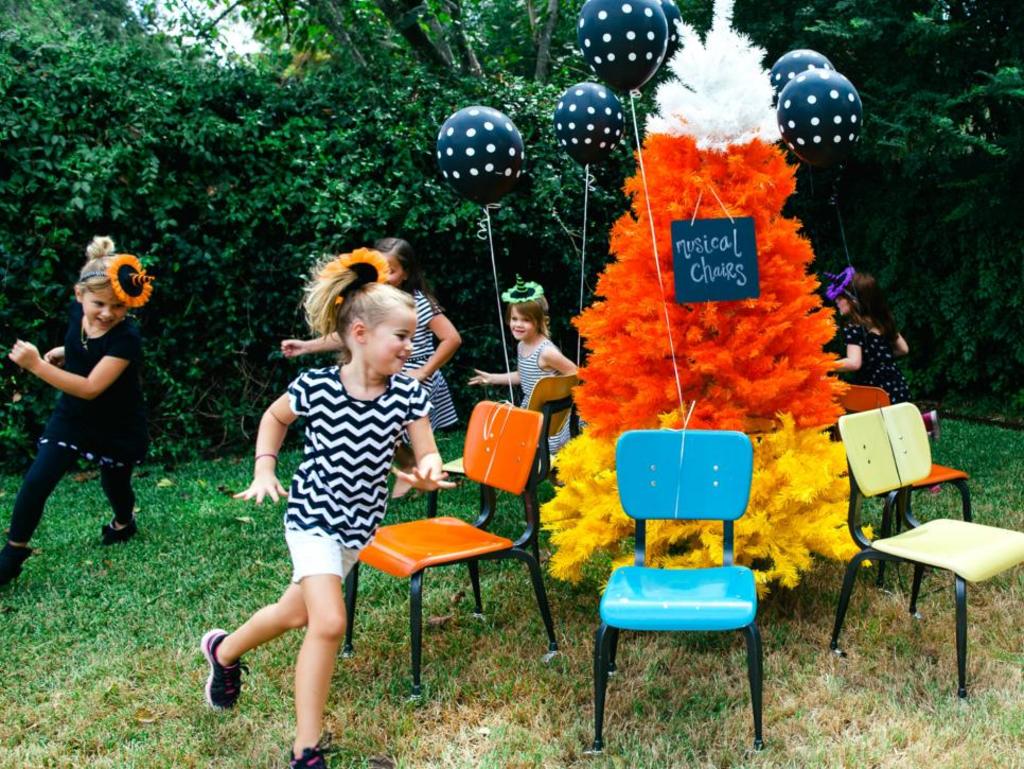
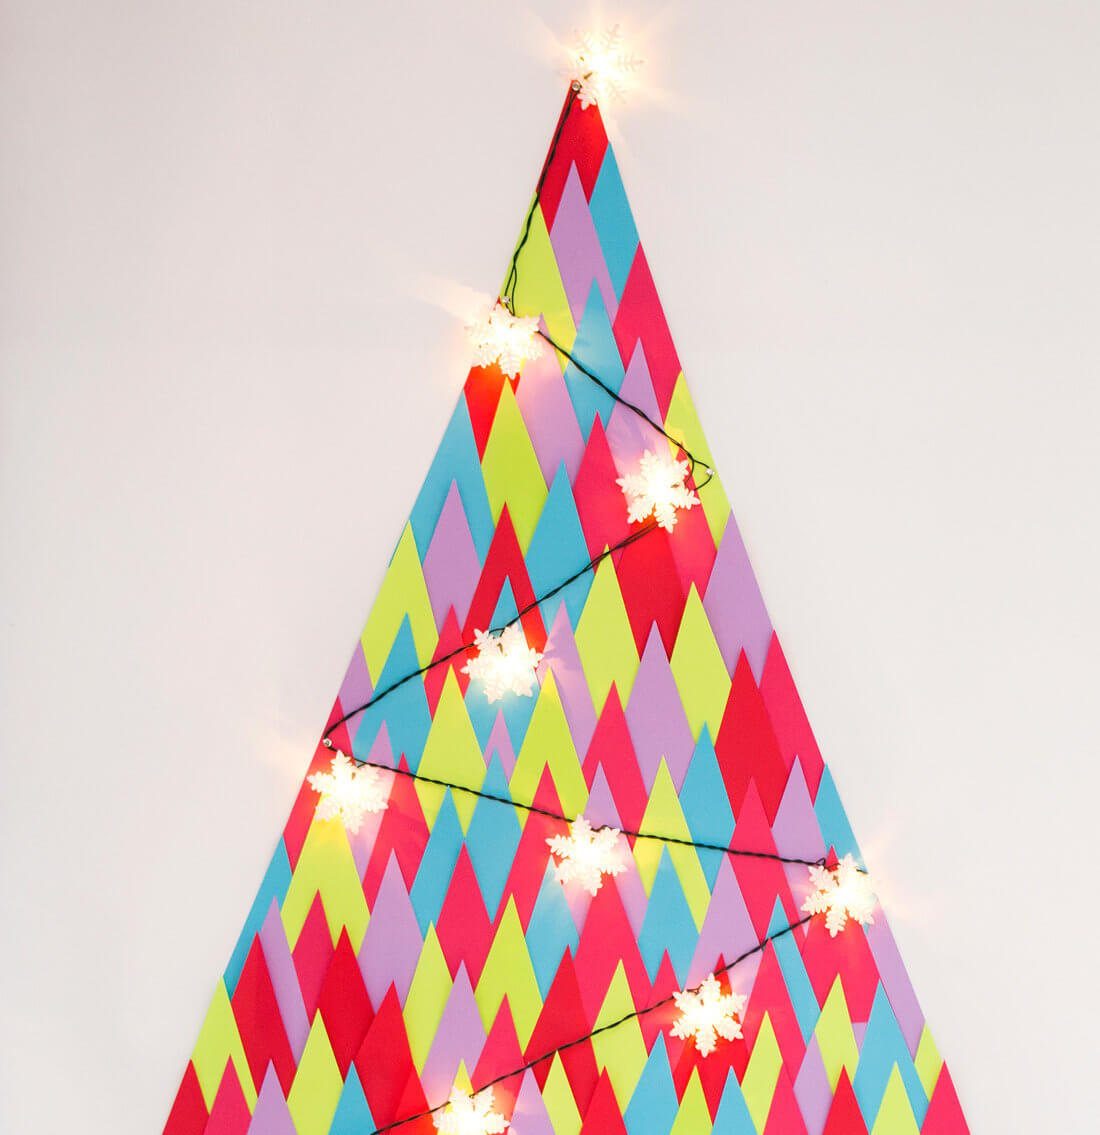
21. Rainbow Christmas Decor

Rainbow Christmas Decor

Swap out the typical white and red for some lively colors like pink, blue, yellow, and green to bring vibrancy to your office. Try using multi-color Christmas wreaths, patterned streamers with ribbons, bulbs, papers, and more. This idea will really pop, especially against dark-hued furniture and walls!

22. Use Post-it Notes for a DIY Wreath

Use Post it Notes for a DIY Wreath

Here’s a unique office Christmas decorations idea that not many people know about: build a Christmas wreath out of Post-it notes! Paste it on a wooden or glass door, even windows. To add a personal touch, ask your co-workers to etch Christmas greetings and messages on the notes. It’s a cool way to make the office festive!

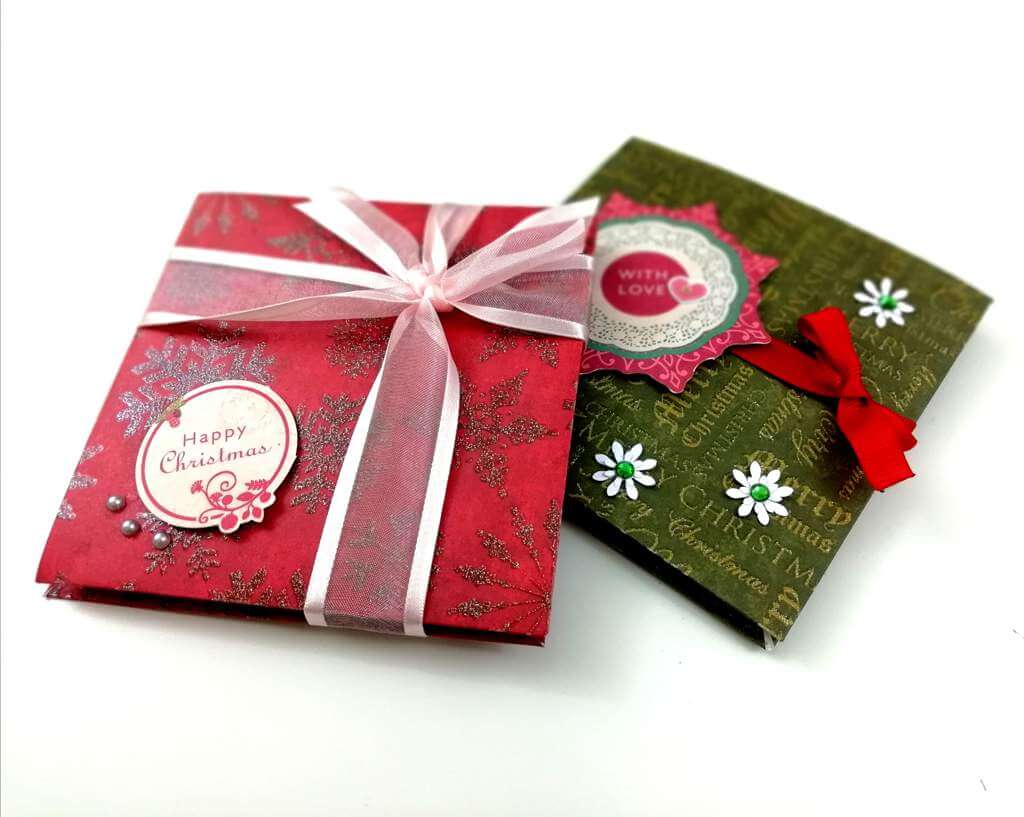
23. Set out Gifts on Every Table

Set out Gifts on Every Table

Wrap up cardboard boxes of various shapes and sizes with colorful gift paper. Put them on each desk, accompanying Santa caps and bows. It’s an easy idea that’ll bring joy and cheer to the office. Or, if you prefer, you can also purchase Christmas presents boxes!

24. Decorate Each and Every Corner

Decorate Each and Every Corner

Spread your best office Christmas decorations throughout the whole office, not just the reception area. Use pine cones, candy canes, baubles, and more to decorate. It’ll lift everyone’s mood and get them into the holiday spirit!

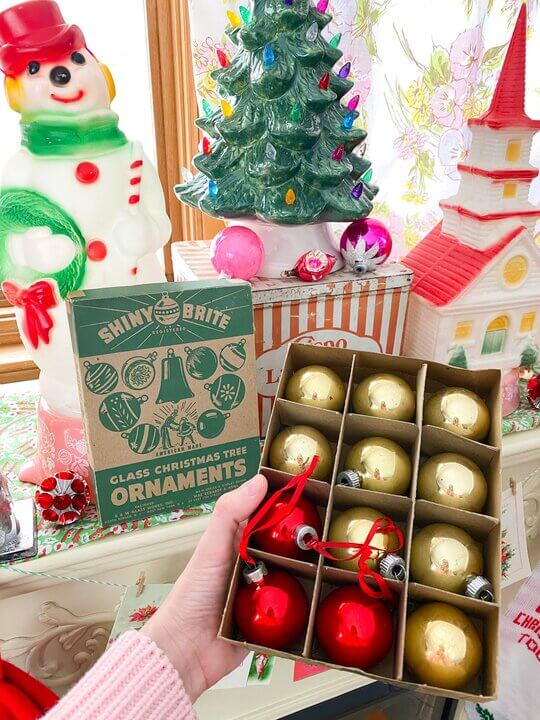
25. Opt for the Latest Ornaments

Opt for the Latest Ornaments

Add some modern fun to the workplace Christmas tree with these geometric ornaments made of shiny golden metal. Everyone at work is going to like this one-of-a-kind concept that will give the tree a touch of elegance and sophistication.
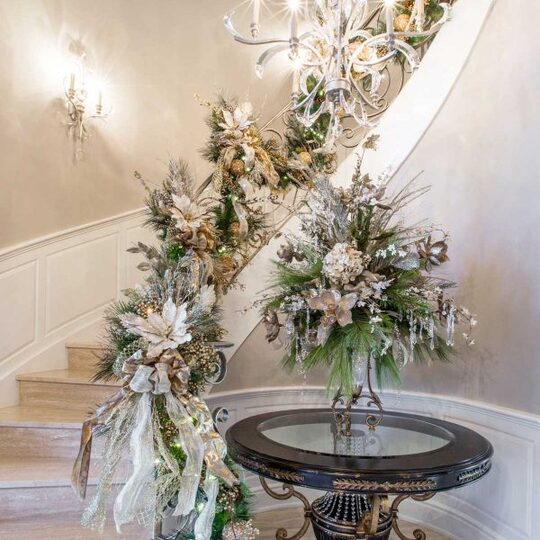
26. Go Floral

Go Floral

Flowers can really freshen up a place, even during Christmas! Spreading some cheer to your office with their decorative use is sure to lift spirits. Create a beautiful arrangement that embodies the spirit of the season by combining evergreens and fresh moss with flowers such as anemones and peonies.

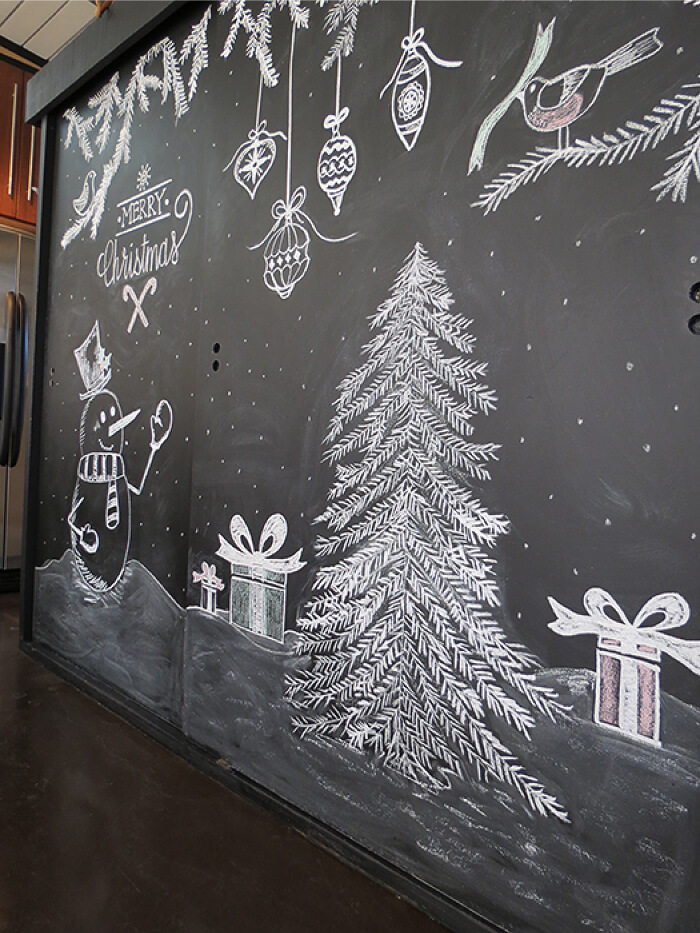
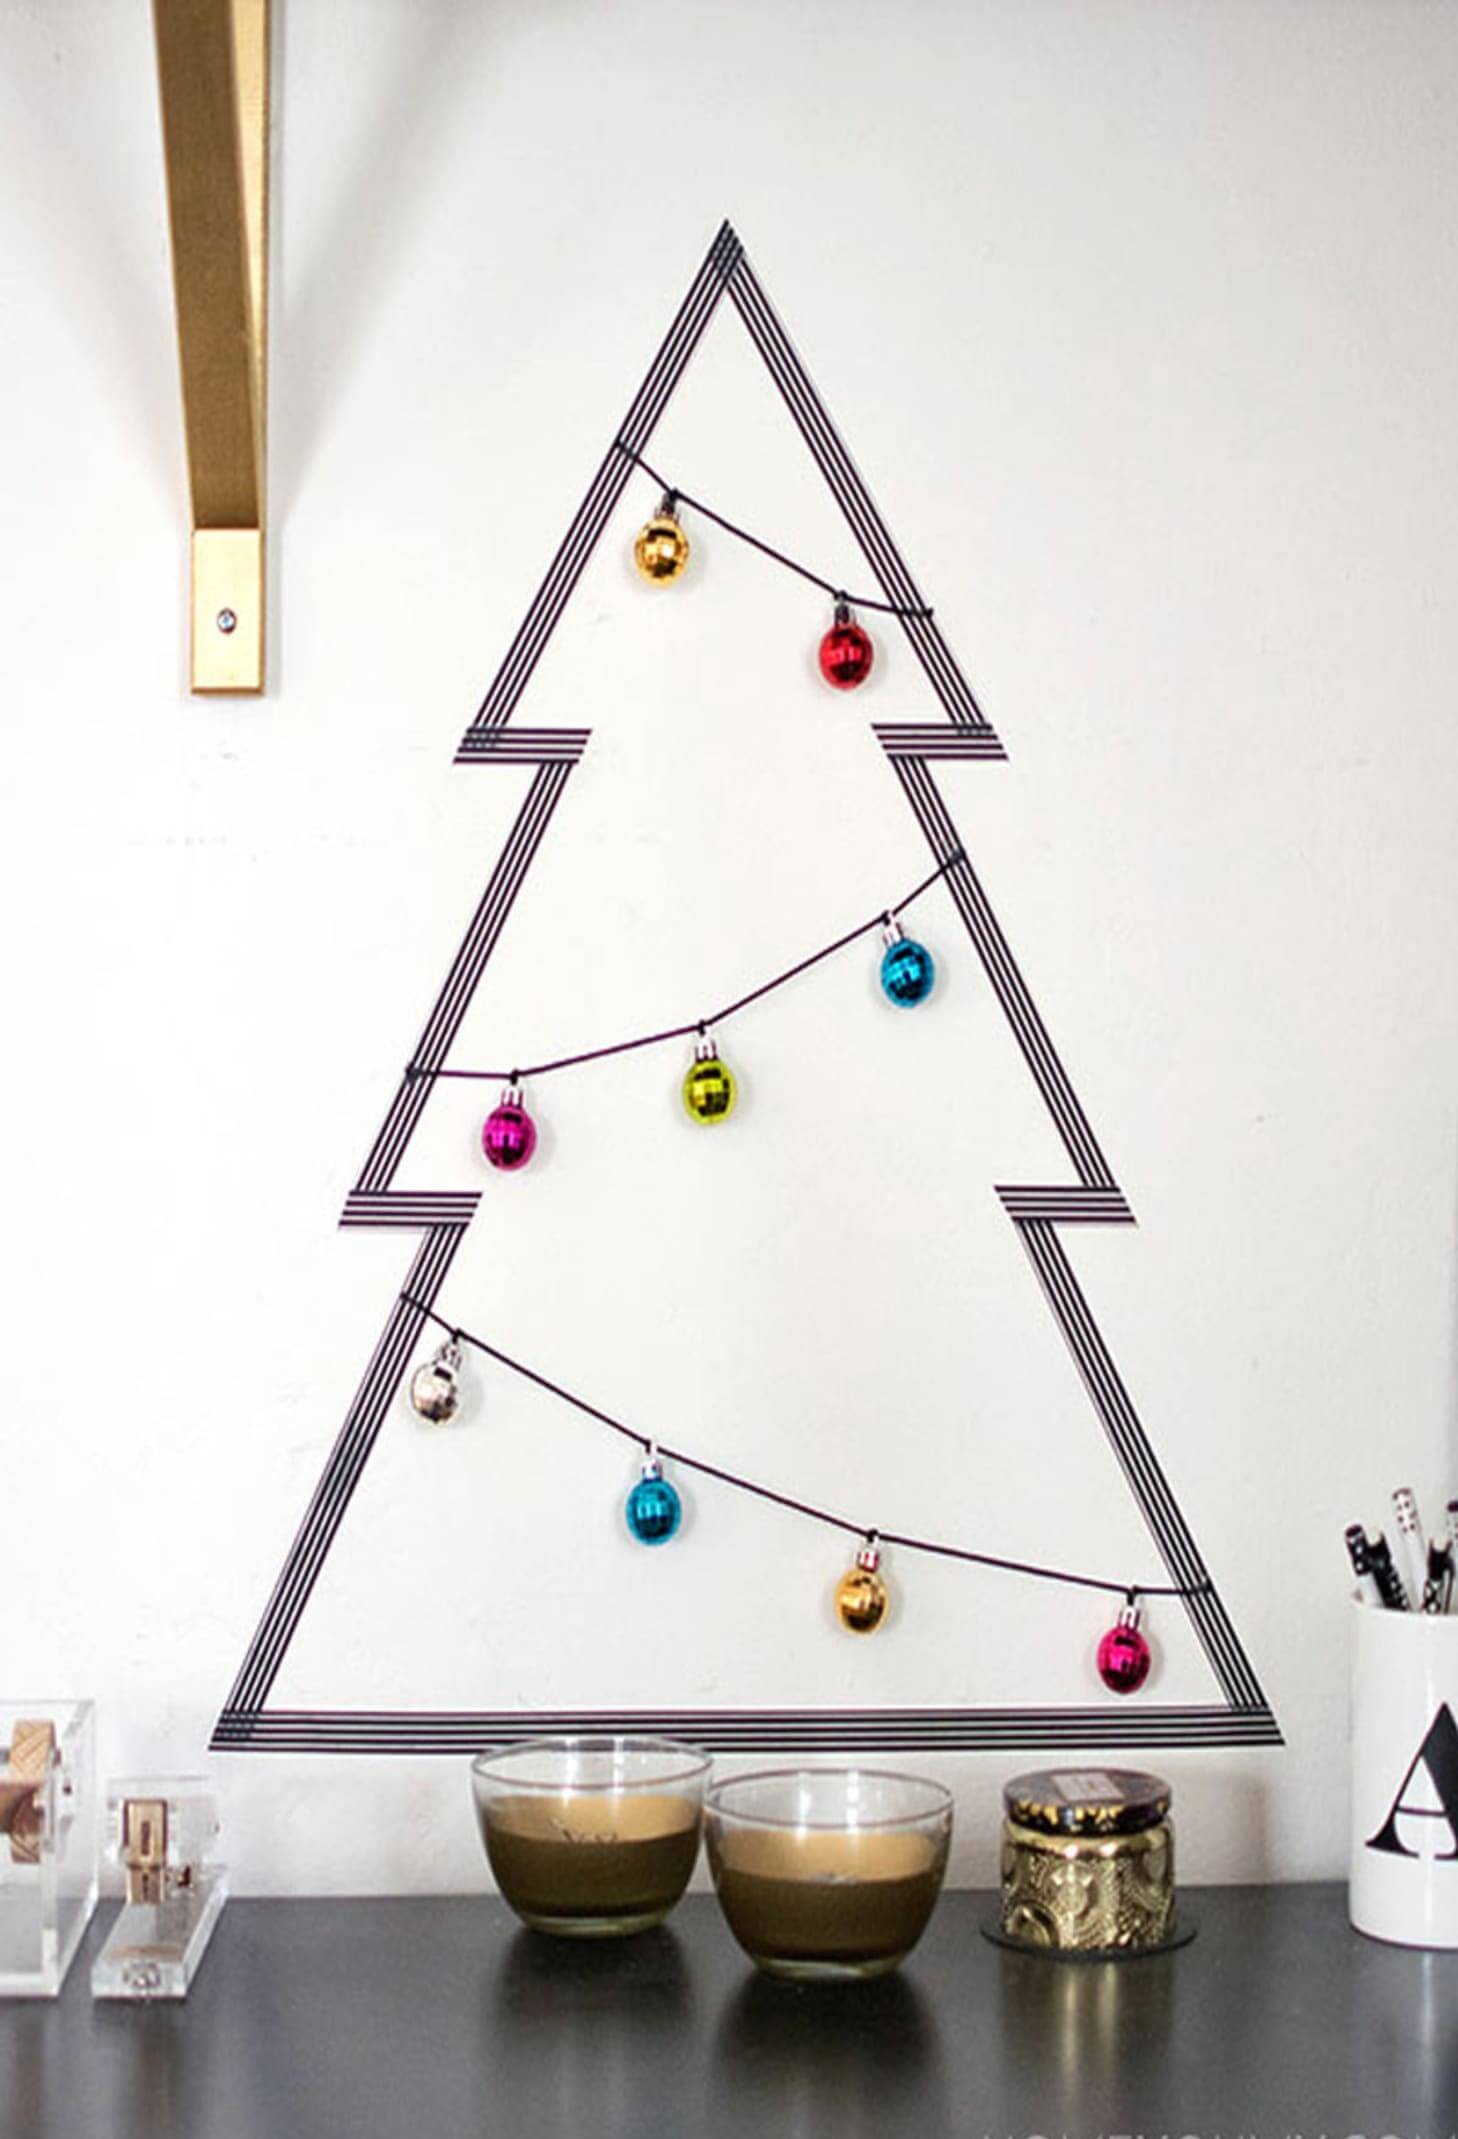
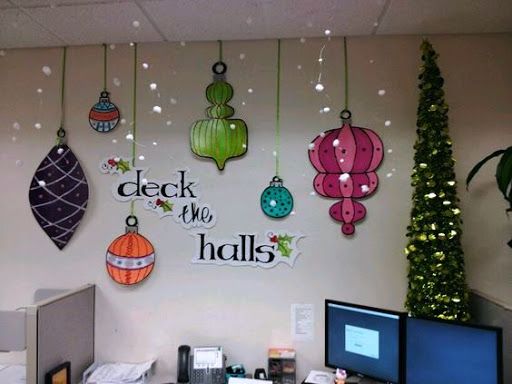
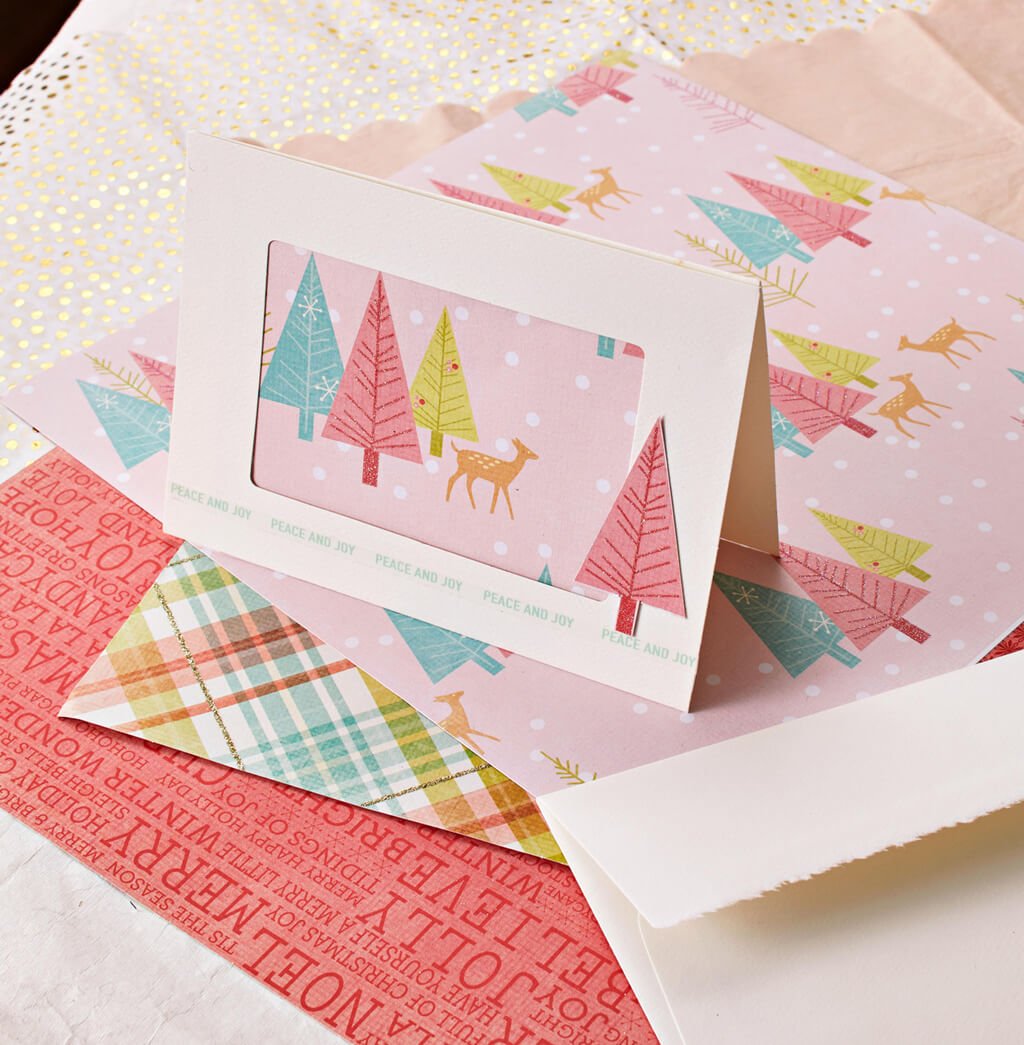
27. Don’t Forget the Walls

Don’t Forget the Walls

The moment has come to adorn those walls at the workplace! For the decorations, you can use colorful threads and cutouts from Christmas paper. This is a fantastic plan to prepare your office for the party!

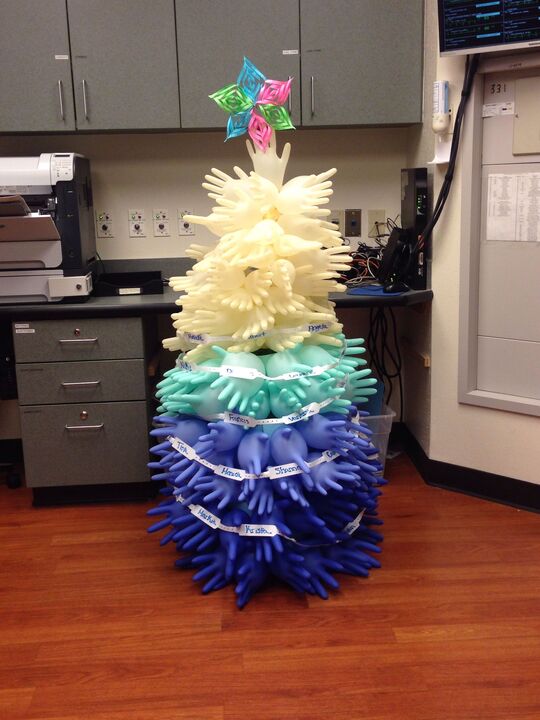
28. Craft a Christmas Tree Out of Gloves

Craft a Christmas Tree Out of Gloves

The time and work put into making a Christmas tree out of medical gloves will be well worth it. This is a great method to make a one-of-a-kind Christmas tree, and it’s perfect if you work in a healthcare facility.

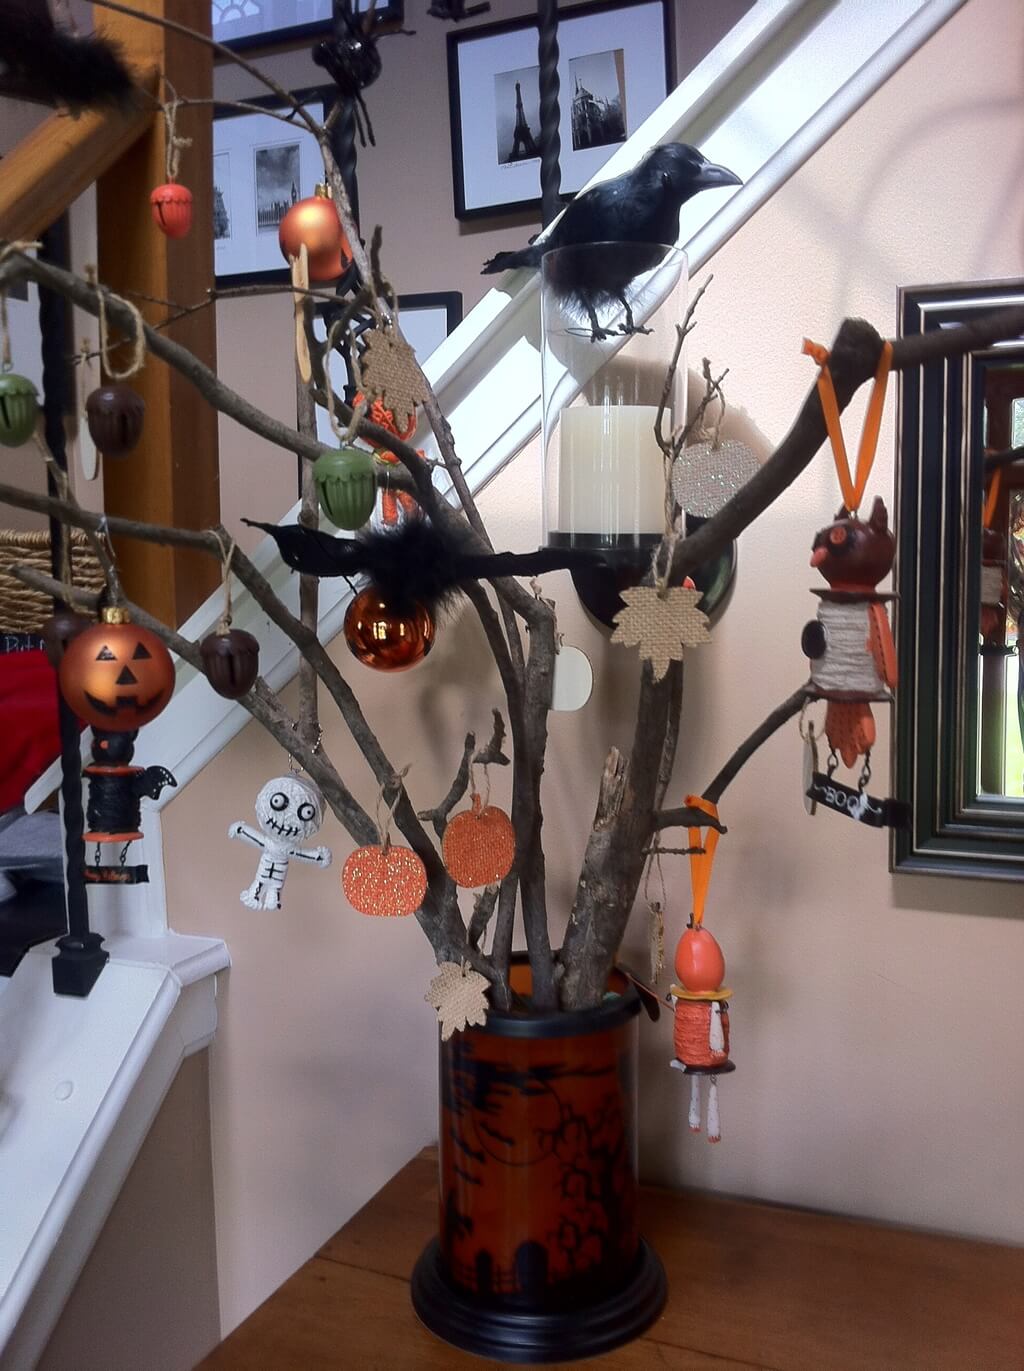
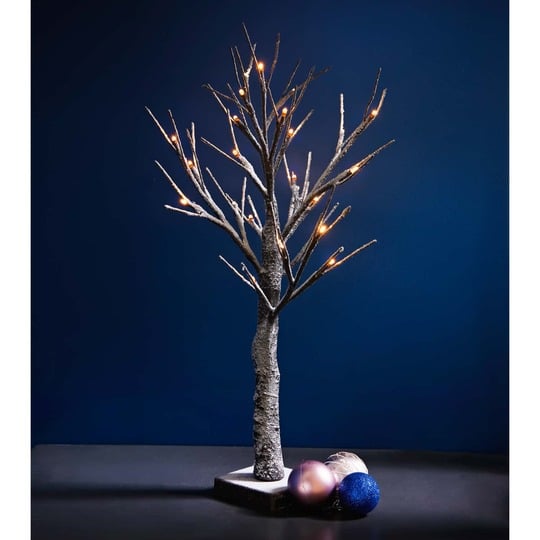
29. Beautify your Small Twig Tree

Beautify your Small Twig Tree

Decorate a twig with miniature Christmas decorations after painting it for a low-cost project. Plus, what’s great? You may skip watering it! A simple and fuss-free approach to adding some holiday flair is to stick the twig in a jar and set it on your desk.

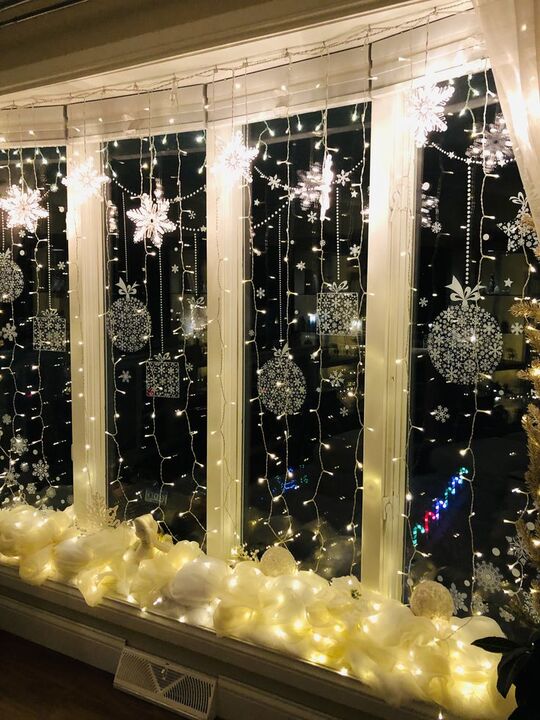
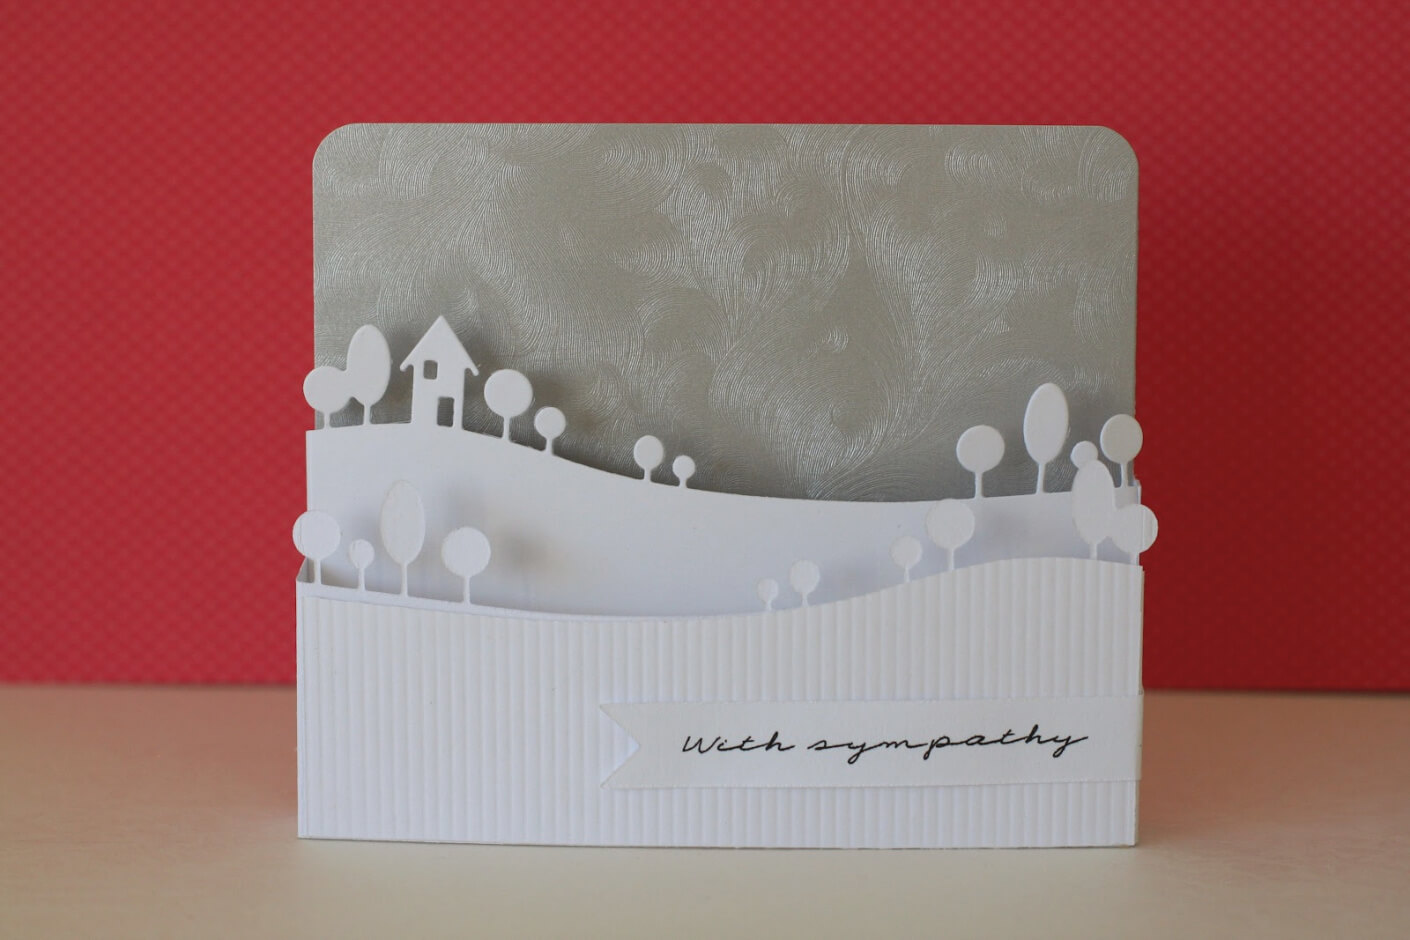
30. Use Windows to Lift up the Decor

Use Windows to Lift up the Decor

Put your imagination to work this holiday season by adorning the workplace windows. Lighted branches, decorations strung on ribbons, ornamental icicles, and a plethora of other creative possibilities await you!

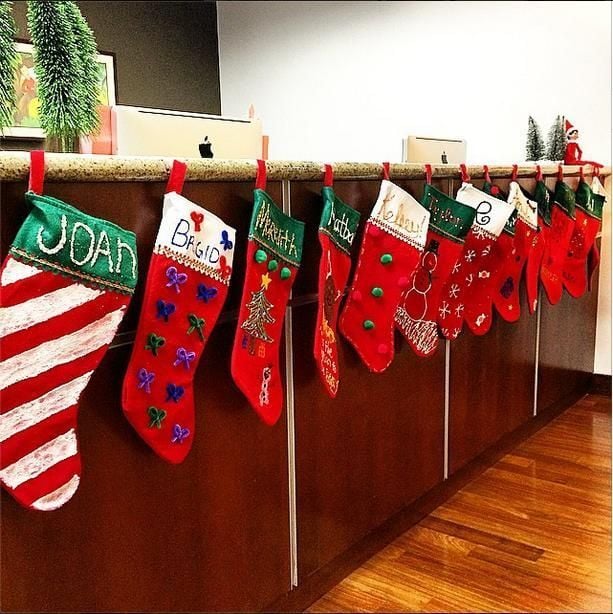
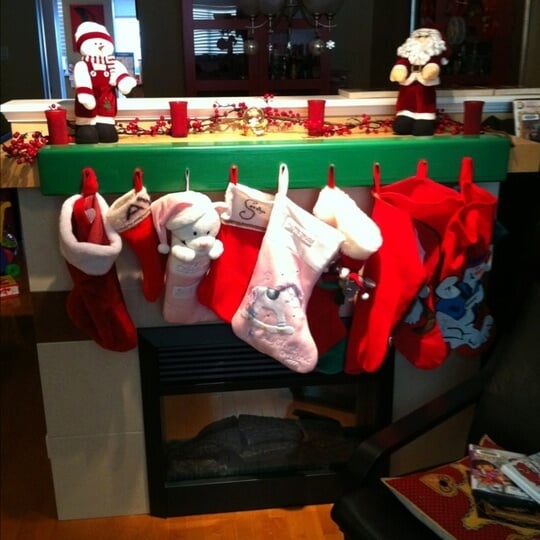
31. Use Your Front Desk as a Mantle for Stockings

Use Your Front Desk as a Mantle for Stockings

A simple and eye-catching idea is to hang stockings over the reception area. Use patterned or striped stockings, glamorize them with ribbons, and get creative by filling them with candy to offer to employees. It’s a fun way to spread some holiday cheer!

32. Create your Own Assortment Decor

Create your Own Assortment Decor

On your desk, mix all your Christmas stuff together, like stars, Santa, baubles, candy canes, you name it, to create a cheerful Christmas mix. It’s an idea that’ll bring liveliness and joy to your workspace!

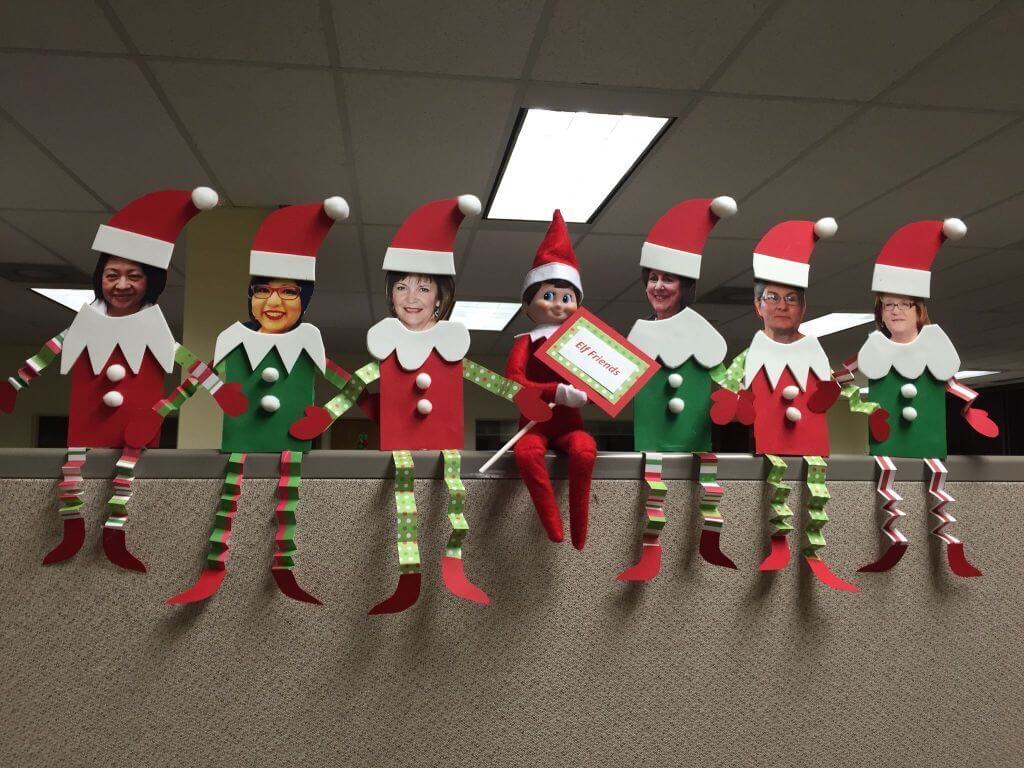
33. Use your Employees as a Medium of Decorations

Use your Employees as a Medium of Decorations

Here’s an adorable and one-of-a-kind idea! Take cutouts of employees’ faces, paste a Santa hat on them, and hang them above their respective cubicles. It’s a unique way to add a personal touch to the decorations!

34. Go All Natural with Pine Cone Décor

Go All Natural with Pine Cone Décor

Spray-paint pine cones white and use them as baubles on your office Christmas tree. They look stunning against the green branches!

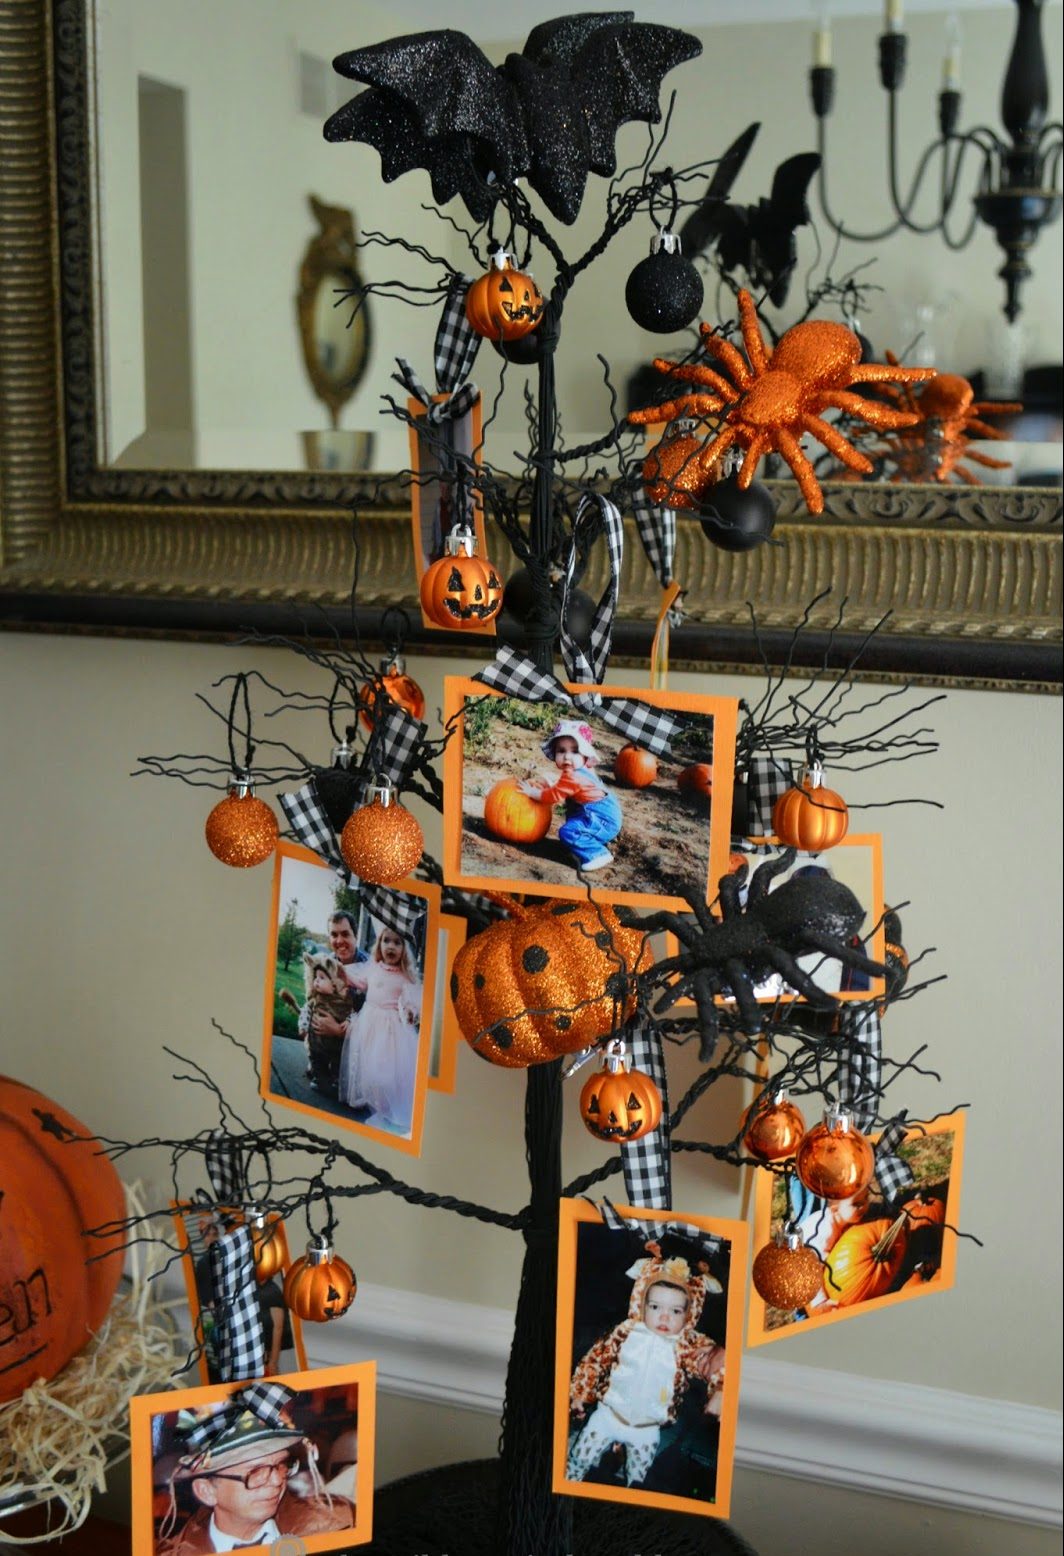
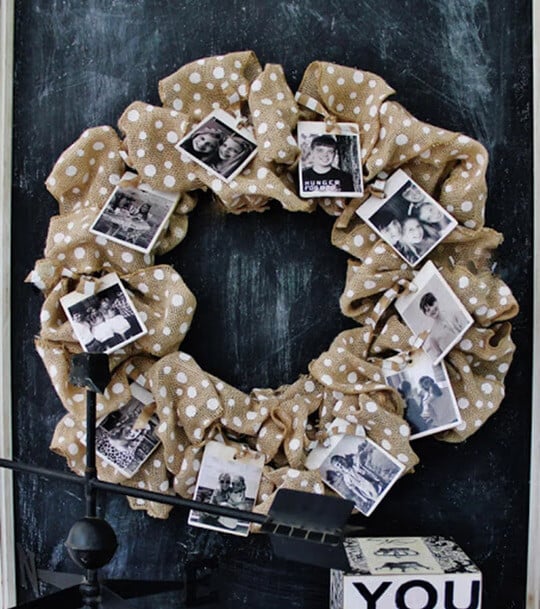
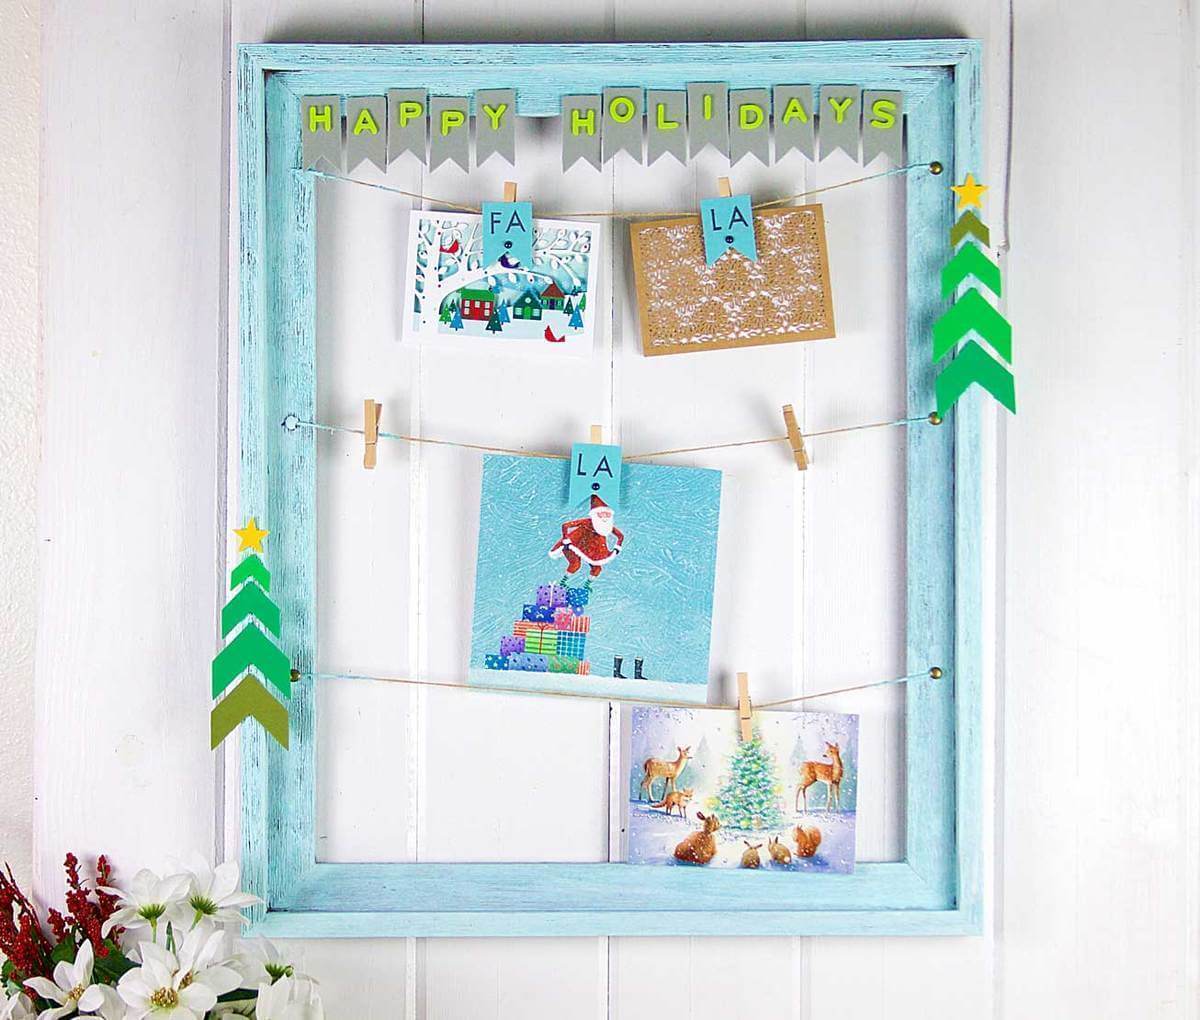
35. Make a Photo Wreath of your Own

Make a Photo Wreath of your Own

Make a photo wreath of your own using pictures of your coworkers. Don’t worry about damaging the originals—copies work just fine. It’s a fantastic idea that’ll surprise all the employees!

36. Use Pom Poms for Décor

Use Pom Poms for Décor

Make a small rainbow Christmas tree using pom-poms, perfect for a tabletop or desk. The colorful tree will quickly brighten up any space and make it feel cheerful. Don’t forget to add a tiny bow on top for extra charm!

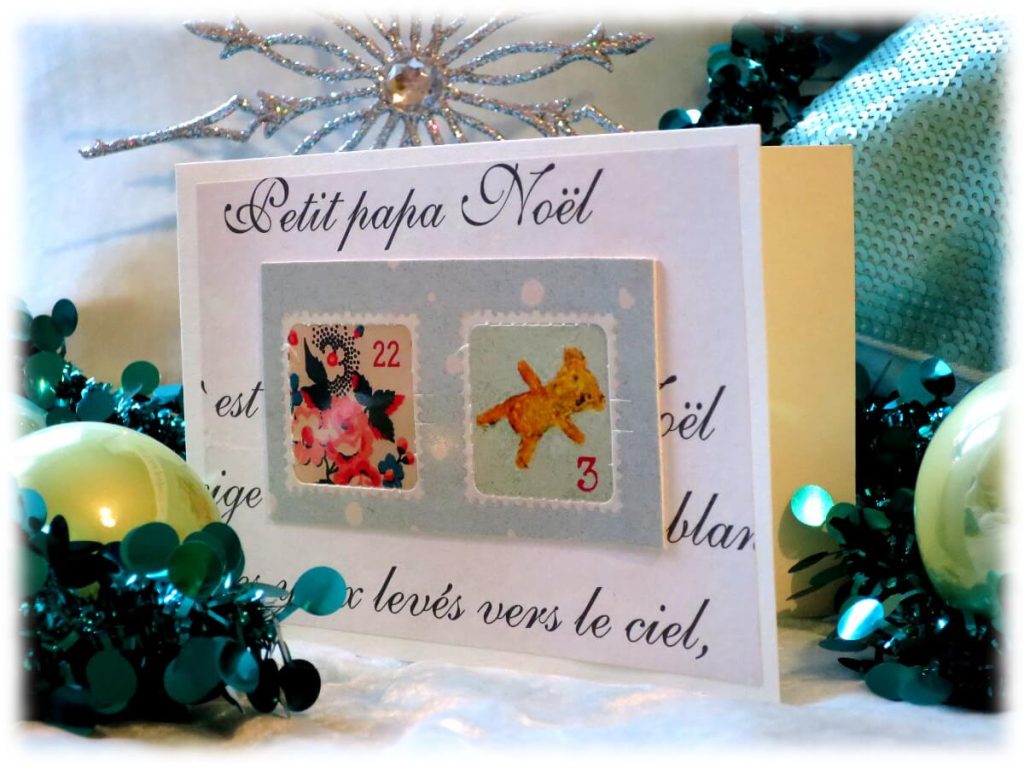
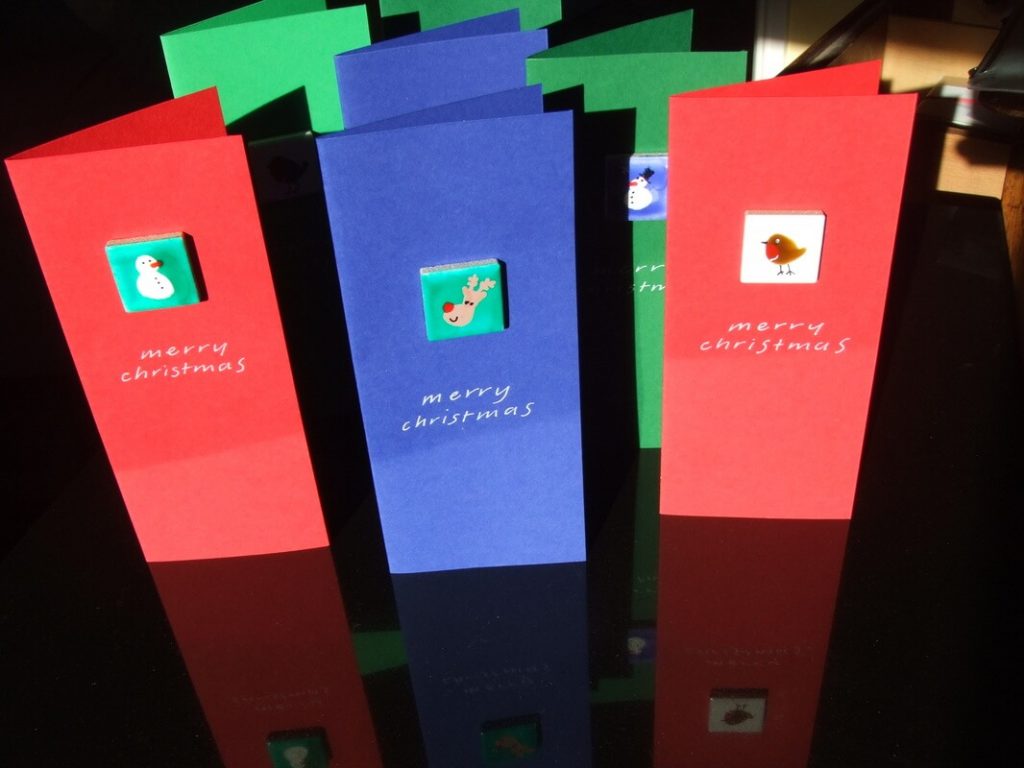
37. Make Bird Ornaments

Make Bird Ornaments

Make bird ornaments of your own using paints and paper. Cut out paper birds and add holes in them, then display them on the Christmas tree using colorful ribbons or strings. It’s a crafty way to decorate the tree!

38. Glow Up your Tree

Glow Up your Tree

Wrap the fairy lights to look like evergreens and pines for a warm glow. Scatter lanterns around the office to create a cozy and relaxing atmosphere.

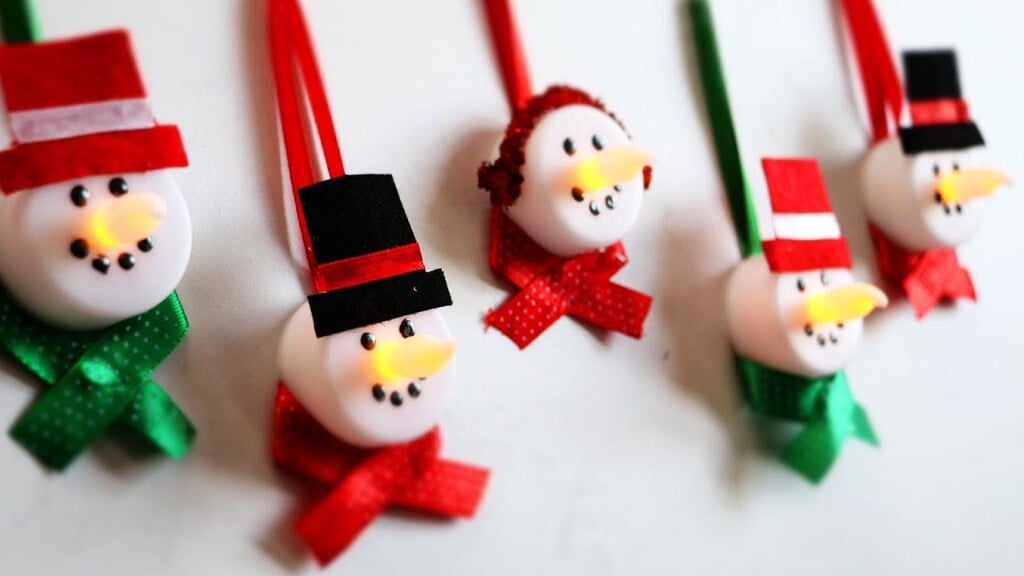
39. Make a Snowman Ornament Out of Tea Light

Make a Snowman Ornament Out of Tea Light

Here’s another cute and creative idea! Use a tea light, ribbons, and paper to make your very own miniature shiny ornament.

40. Customized Deer Cups

Customized Deer Cups

Make your Christmas coffee even more delightful by adding deer cutouts to your cups. It’s a funny way to spread smiles all over your office! Another option is to use deer straws in any cup for a festive touch.

41. Hang Small Wreaths

Hang Small Wreaths

Remember, ‘the more, the merrier’ definitely applies to mini wreaths! Hang them all over on walls, cubicles, or the office ceiling. It’s a brilliant idea that’ll make the atmosphere beautiful!

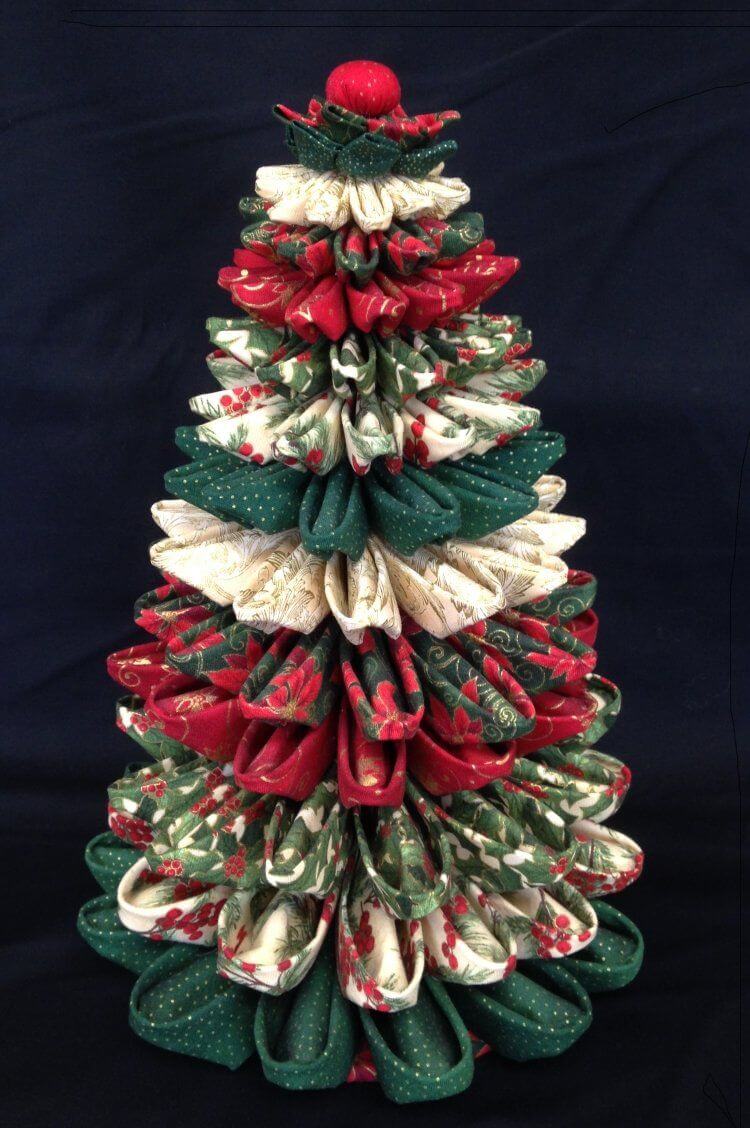
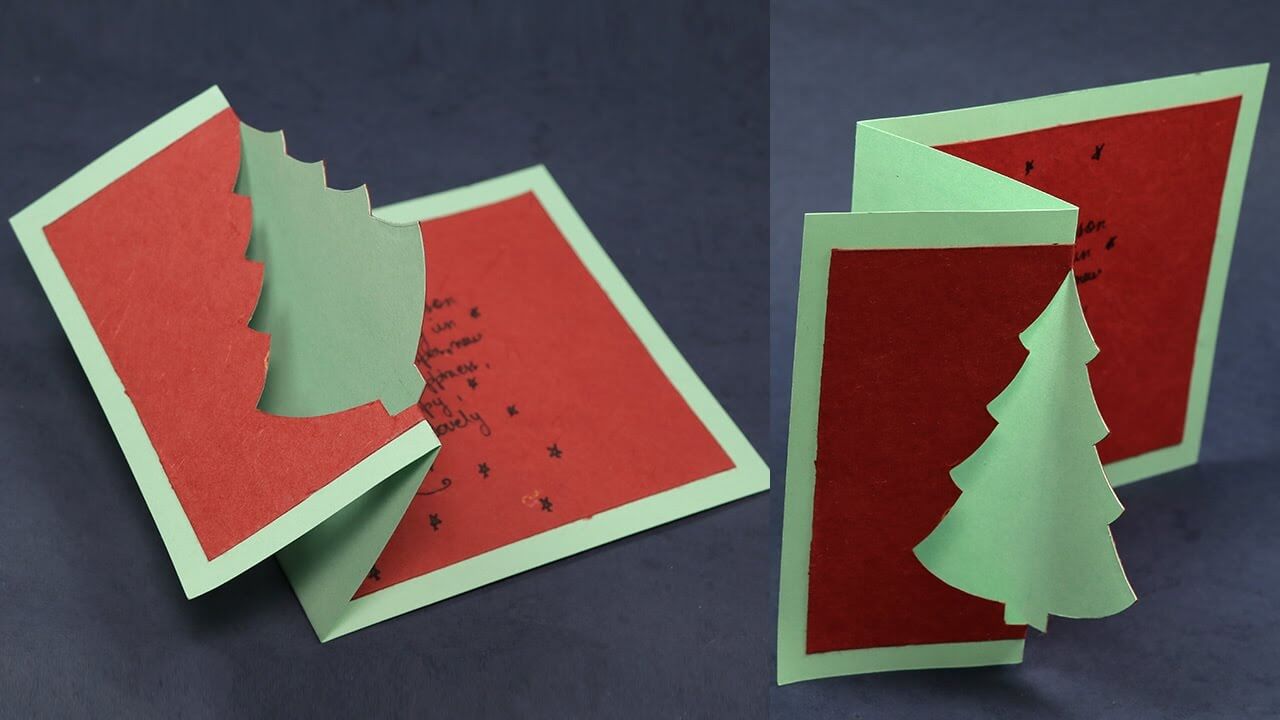
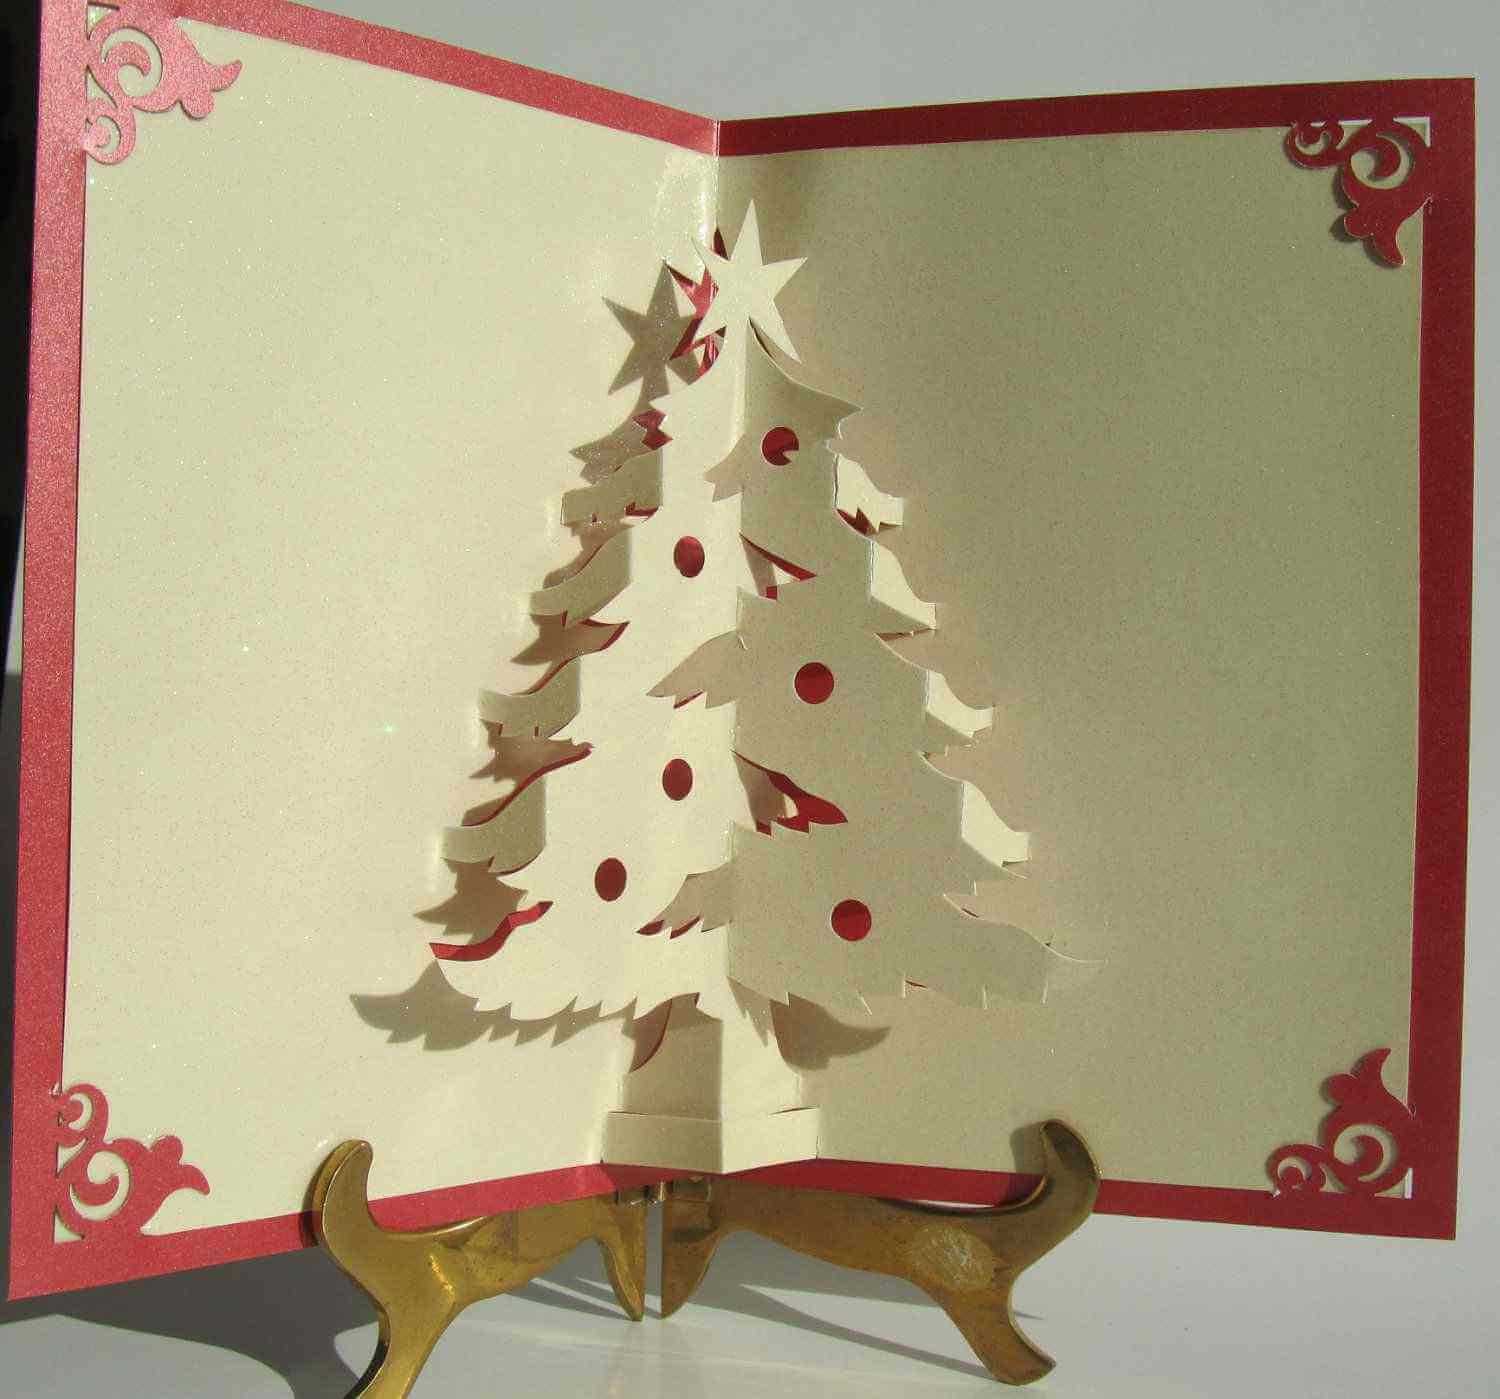
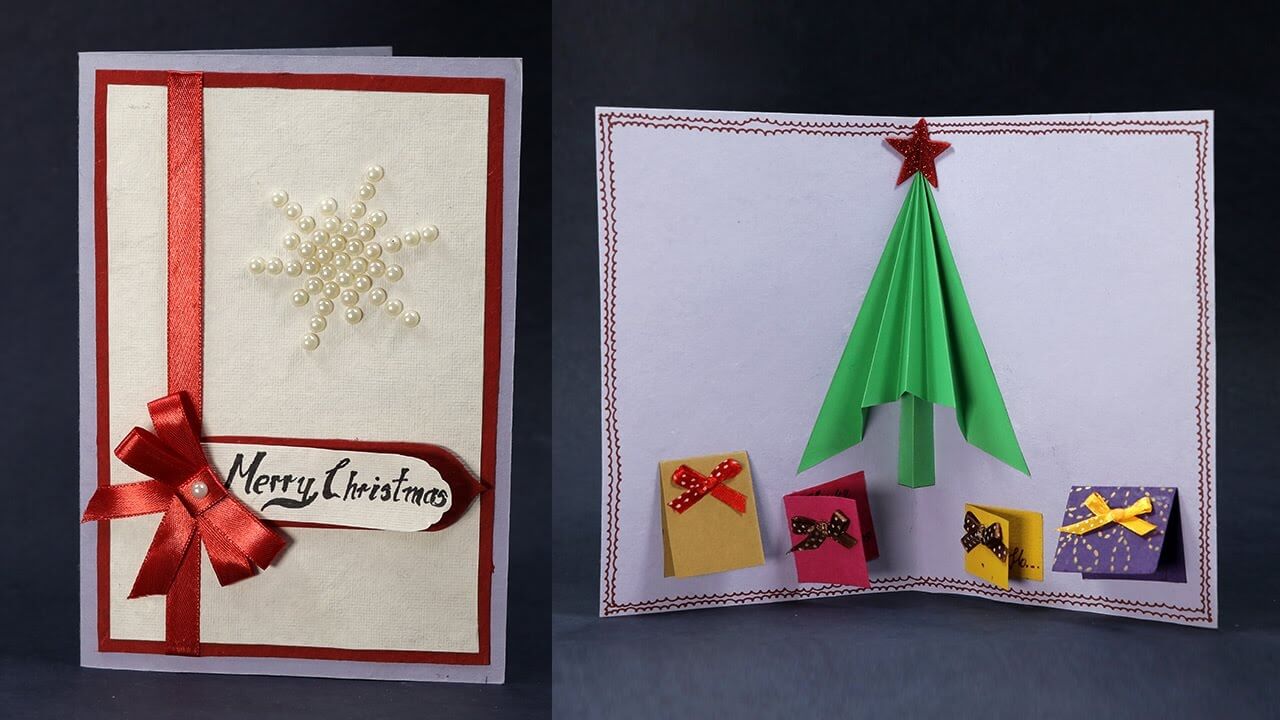
42. Make a Three-Dimensional Tree

Make a Three-Dimensional Tree

Making this tree is simple. All you need are basic ideas and raw materials like cardboard, fabric, craft paper, and adhesive spray. You can also fold and tuck them away til next Christmas. Put these trees in your cubicles and get into the Christmas spirit!

43. Chair Decorations

Chair Decorations

This holiday season, make your office chairs festive by using your favorite unwired ribbon. Tie a bow in the middle of each chair and add small berries, pine cones, and greenery to jazz up the bow!

44. Use Mittens as Advent Calendar

Use Mittens as Advent Calendar

Make an advent calendar by putting dates on mittens and hanging them on a thread. Use them to countdown the special day! Pour candies into the mittens and hang them at a discreet point in the office for a sweet surprise each day!

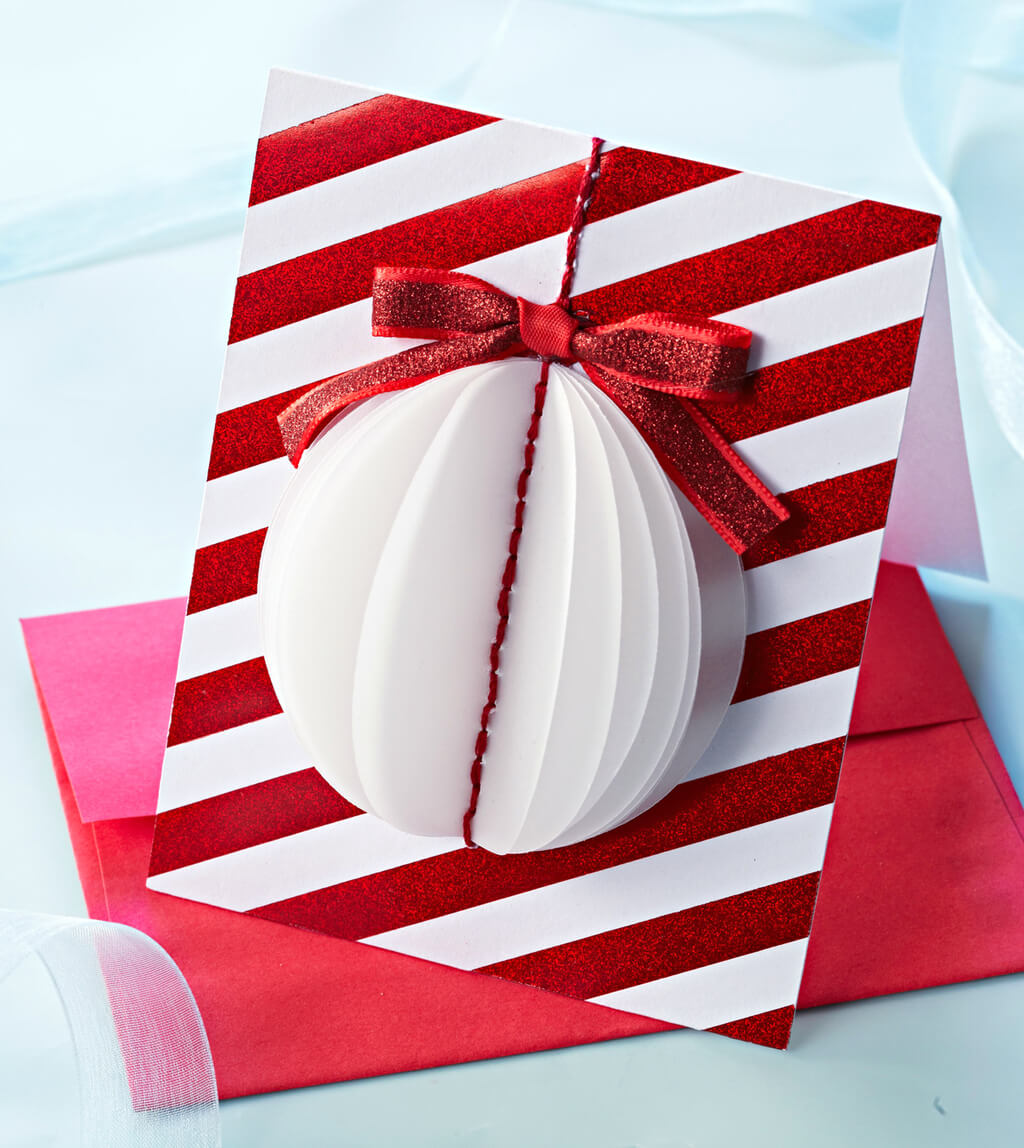
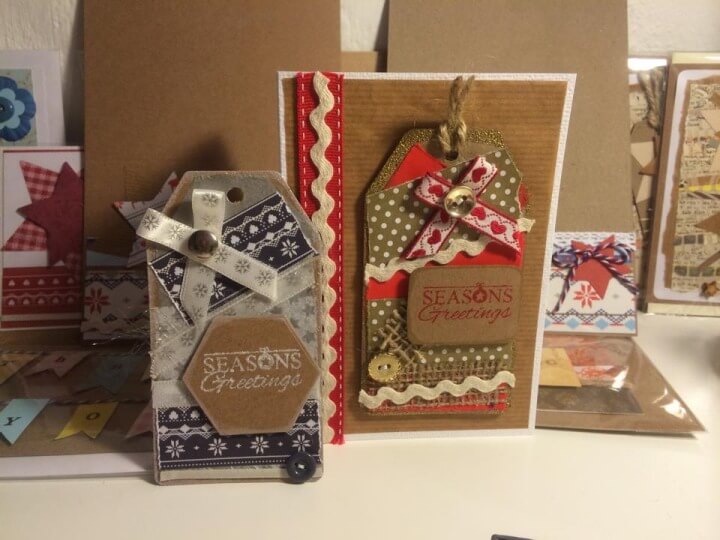
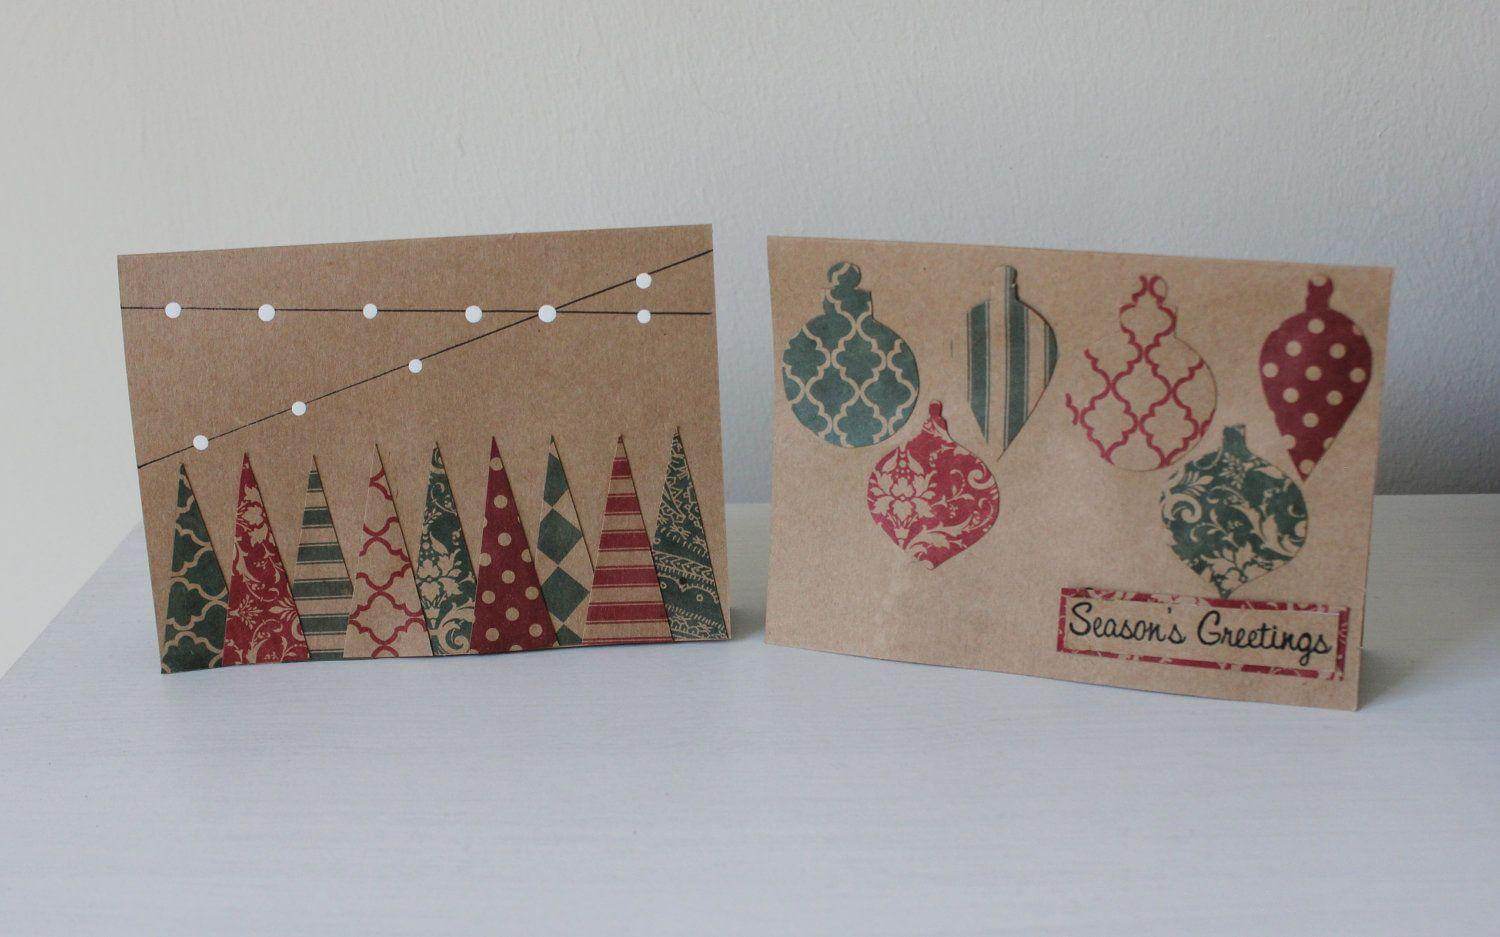
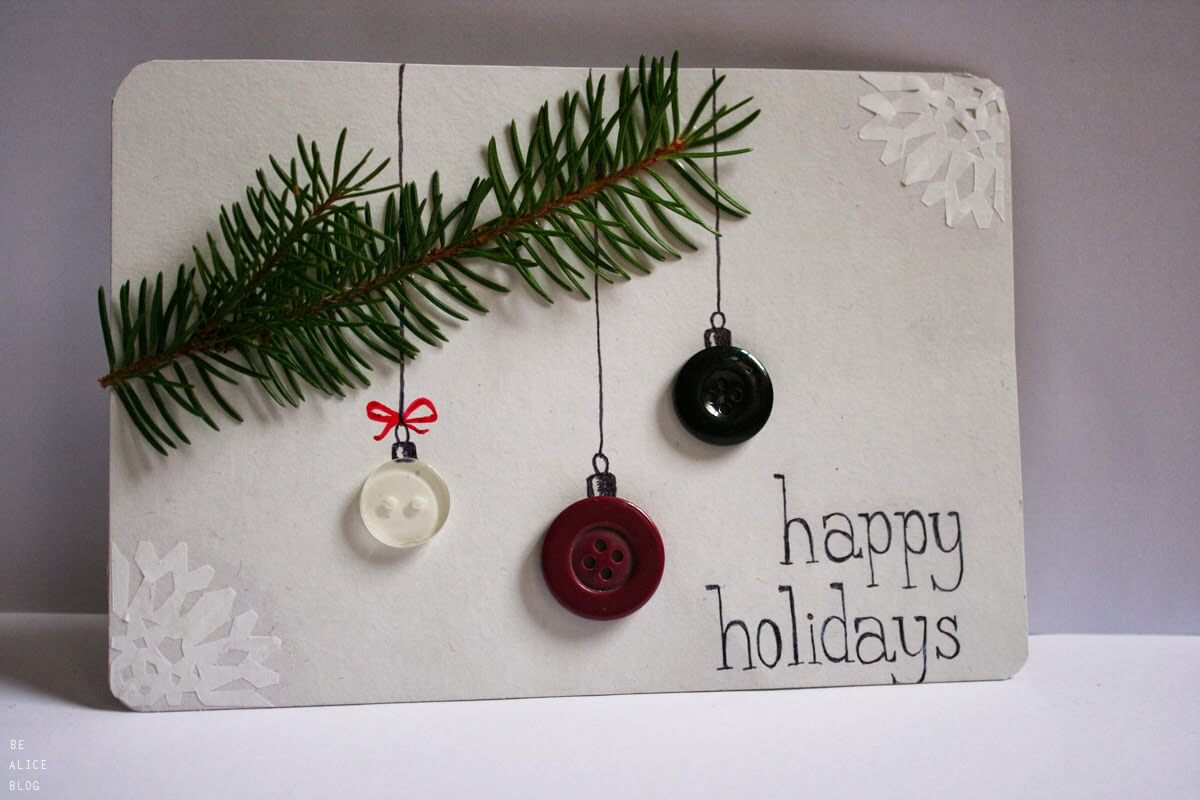
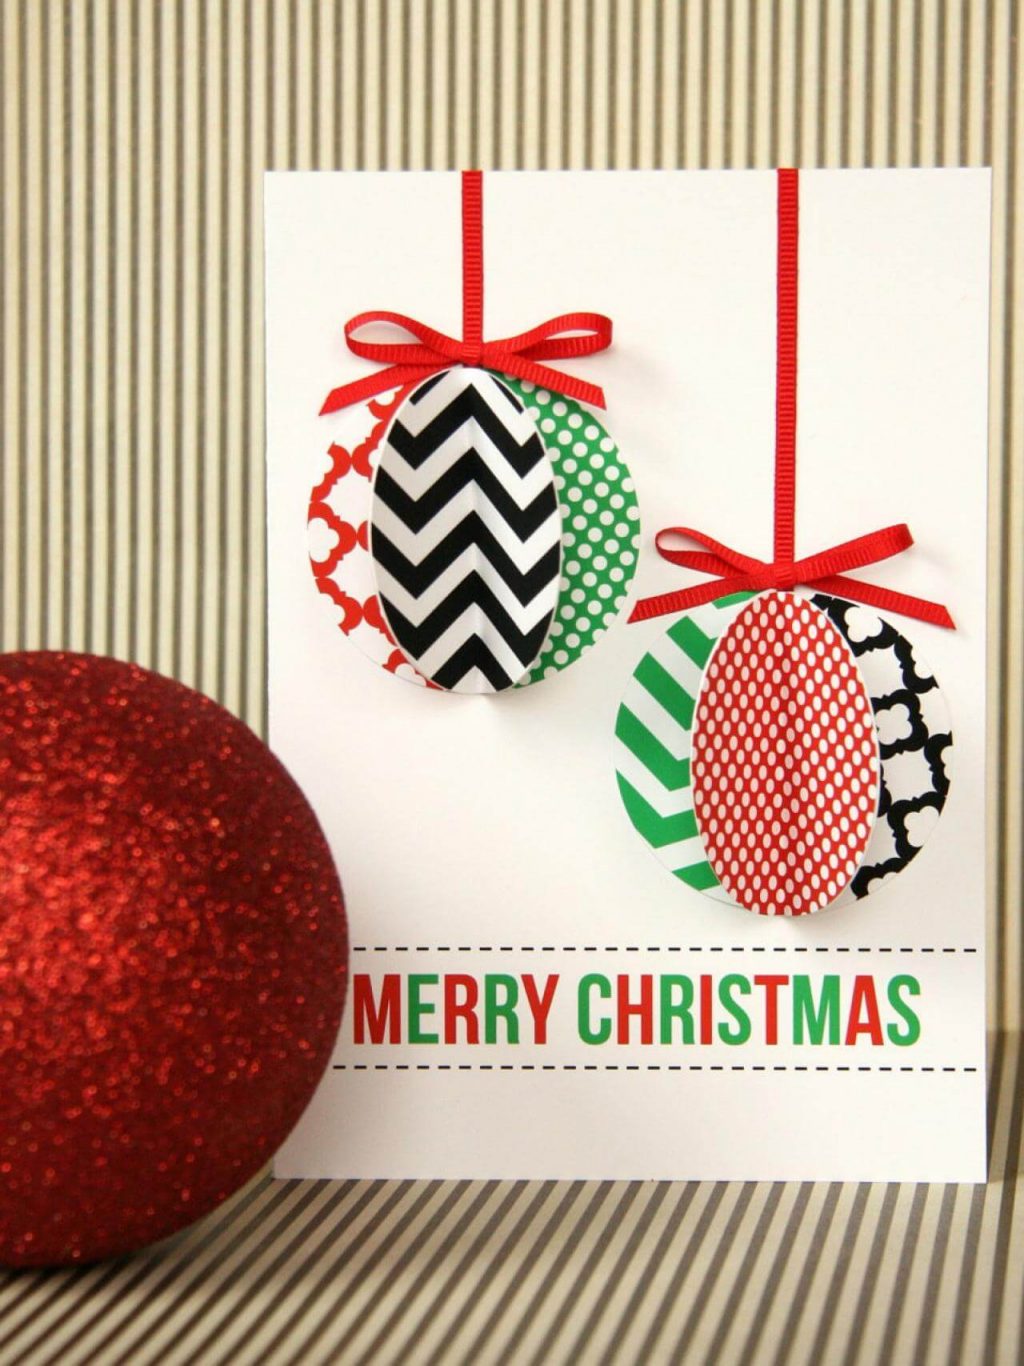
45. Make Paper Ornaments

Make Paper Ornaments

Make three-dimensional ornaments easily using patterned cardstock. And Make sure your paper ornaments match with the rest of the office decor. Add them to the trees or use them to decorate wrapped gifts; it’s a nice touch!

46. Let your Office Sparkle

Let your Office Sparkle

Grab empty mason jars and glue glitter inside them. Add tea lights in the jars for a sparkling glow. Put these fancy jars on your desks and bring joy!

47. Decorate with a Snow Wreath

Decorate with a Snow Wreath

Craft a grapevine wreath using glittered pine cones, berry signs, faux greenery, and flowers. Cover it with artificial snow for a wintry touch. Hang this lovely wreath on your office entrance door to give it a cheerful makeover!

48. Use a Disco Ball to Add Glamor

Use a Disco Ball to Add Glamor

Try this standout decor idea—it’s truly glamorous! Suspend a disco ball from the ceiling directly above the Christmas tree. The sparkle from the disco ball will beautifully complement the contemporary decor. To add extra flair, decorate the ball with ribbons for a more interesting look!

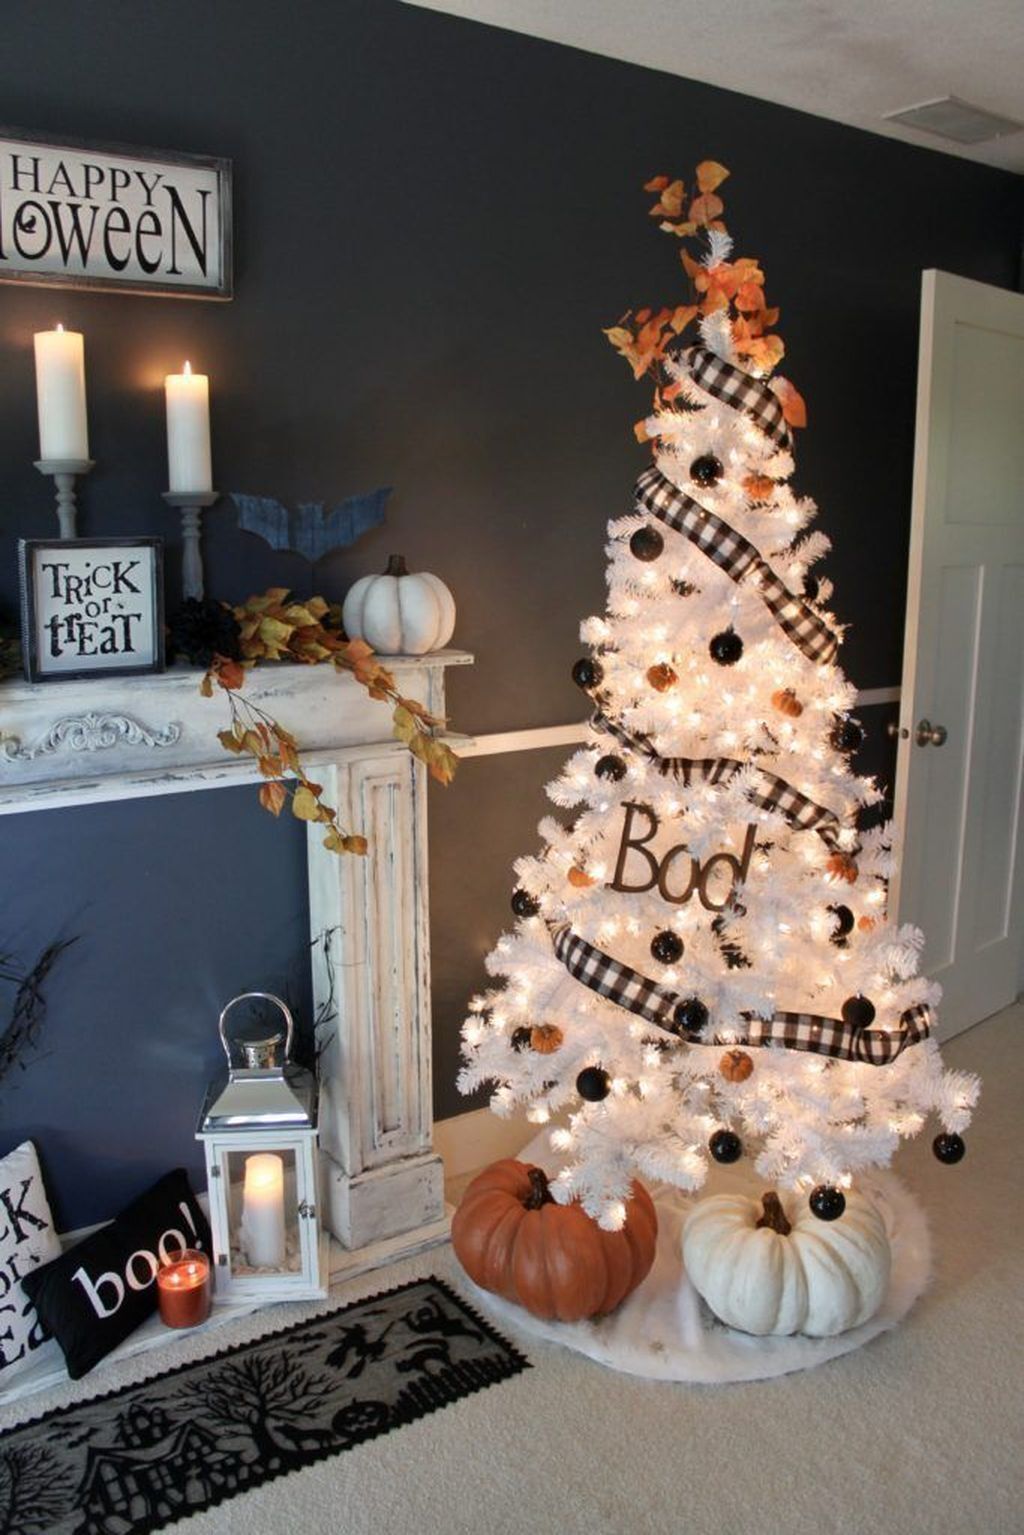
49. Follow a Color Scheme

Follow a Color Scheme

You don’t have to stick to the usual red and green for office decorations. Try a shimmery, icy theme as long as the colors match. It’ll make a lasting impression on workers!

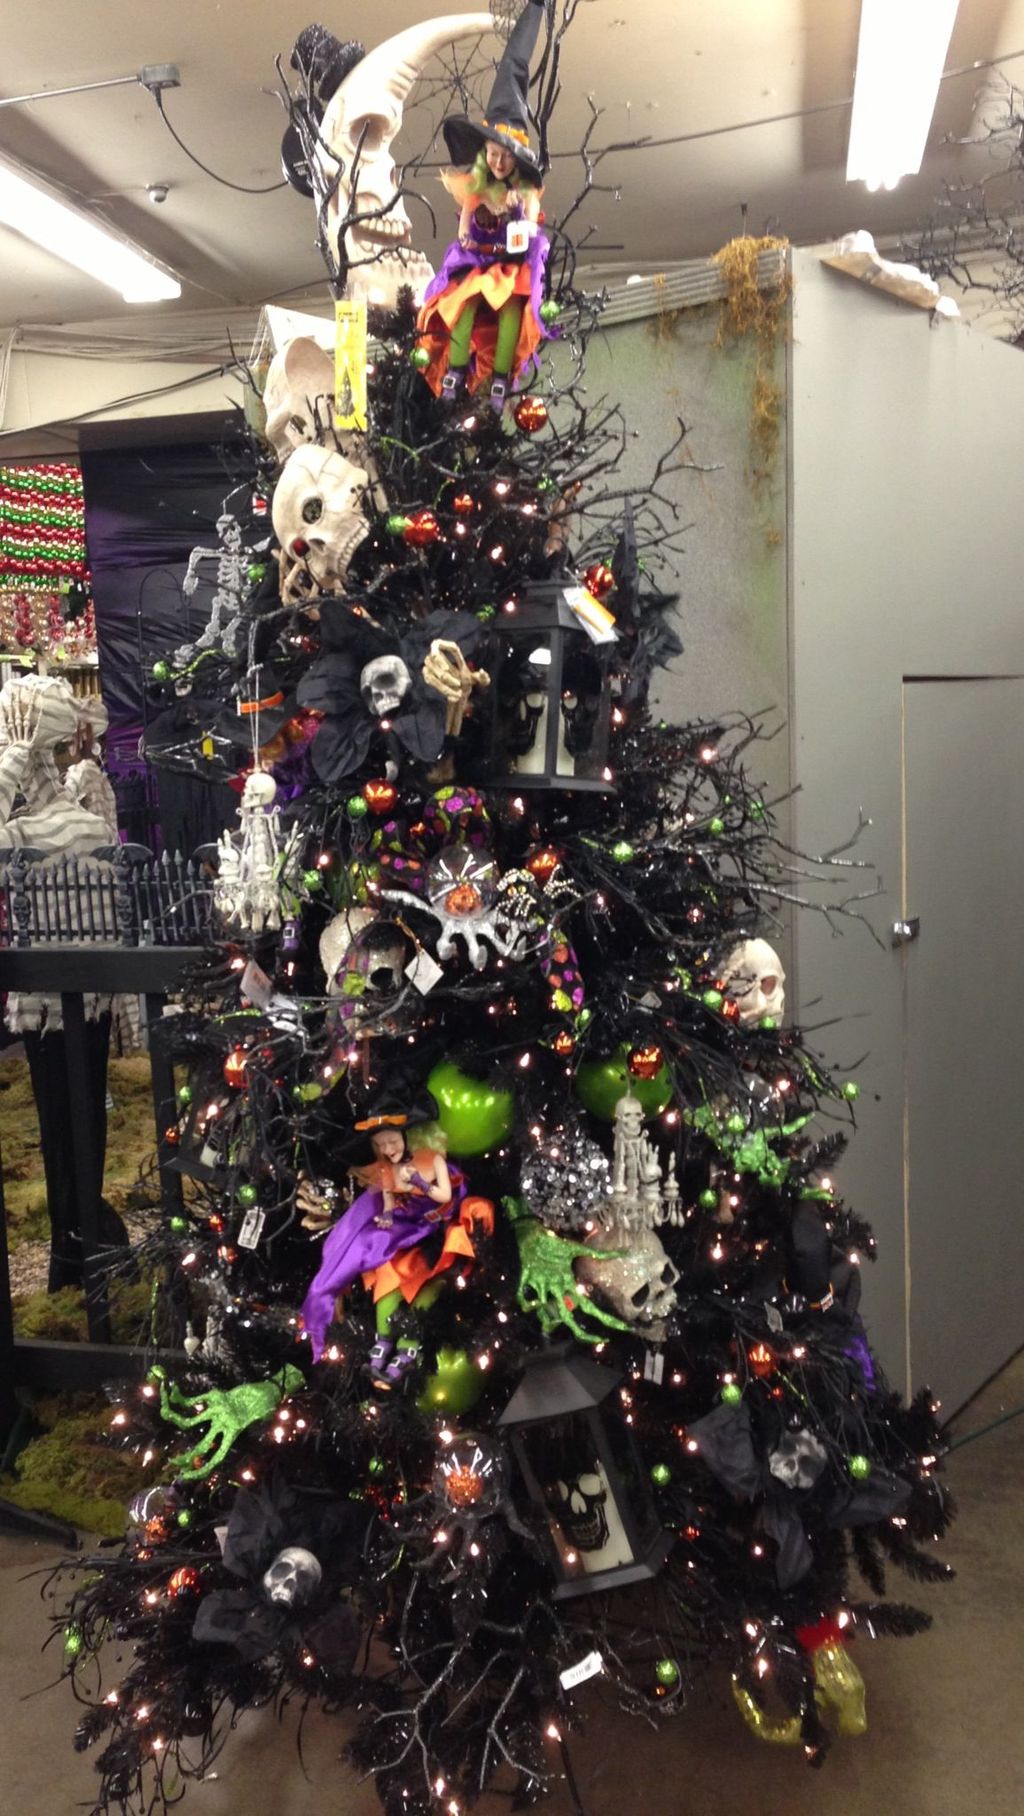
50. Add Bells to the Christmas Tree

Add Bells to the Christmas Tree

Add festive and rustic jingle bells to decorate your Christmas tree. Go for brass bells for that charming rustic vibe. Tie them together with a string and secure them on top of the tree for a lovely touch!

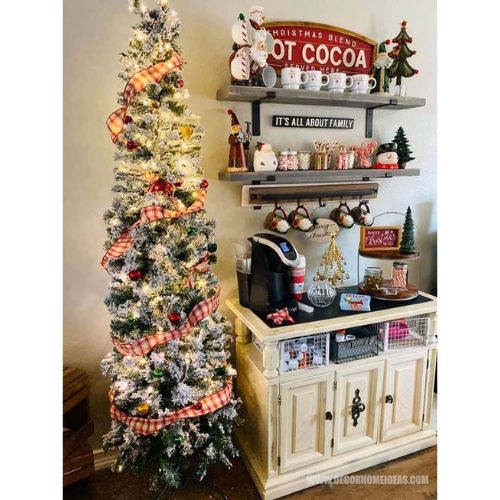
51. Festive Coffee Station

Festive Coffee Station

If your office has a coffee station, decorate it with a festive touch. Add Christmas-themed mugs, mini Christmas trees, or gingerbread cookie jars to create a cheerful place where everyone can grab a warm beverage.

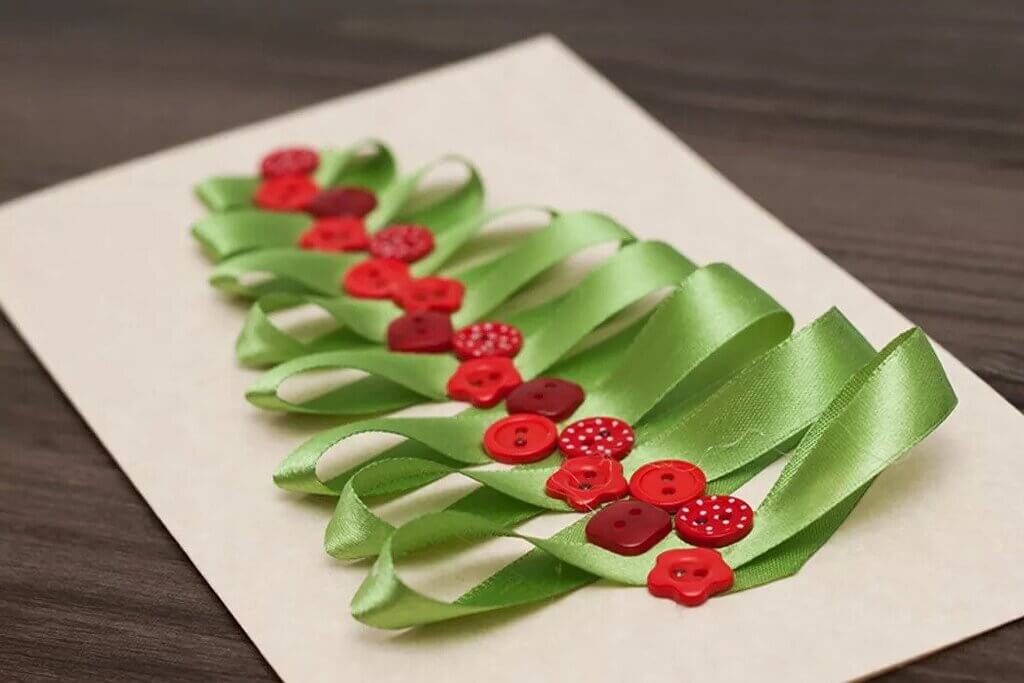
52. DIY Christmas Garland

DIY Christmas Garland

A homemade garland can add a personal touch to the office. Use materials like pinecones, cranberries, ribbons, and greenery to create your own festive garland. Hang it across the office or above doorways for a beautiful and rustic look.
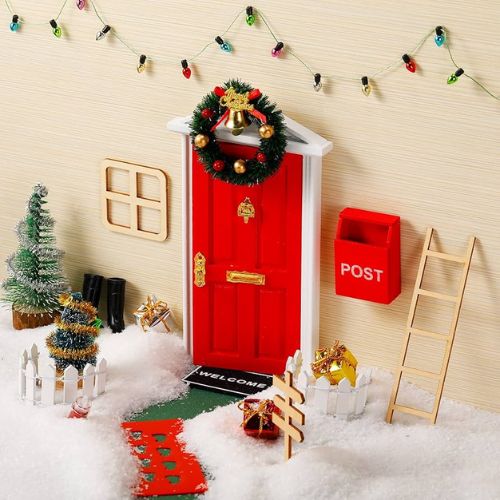
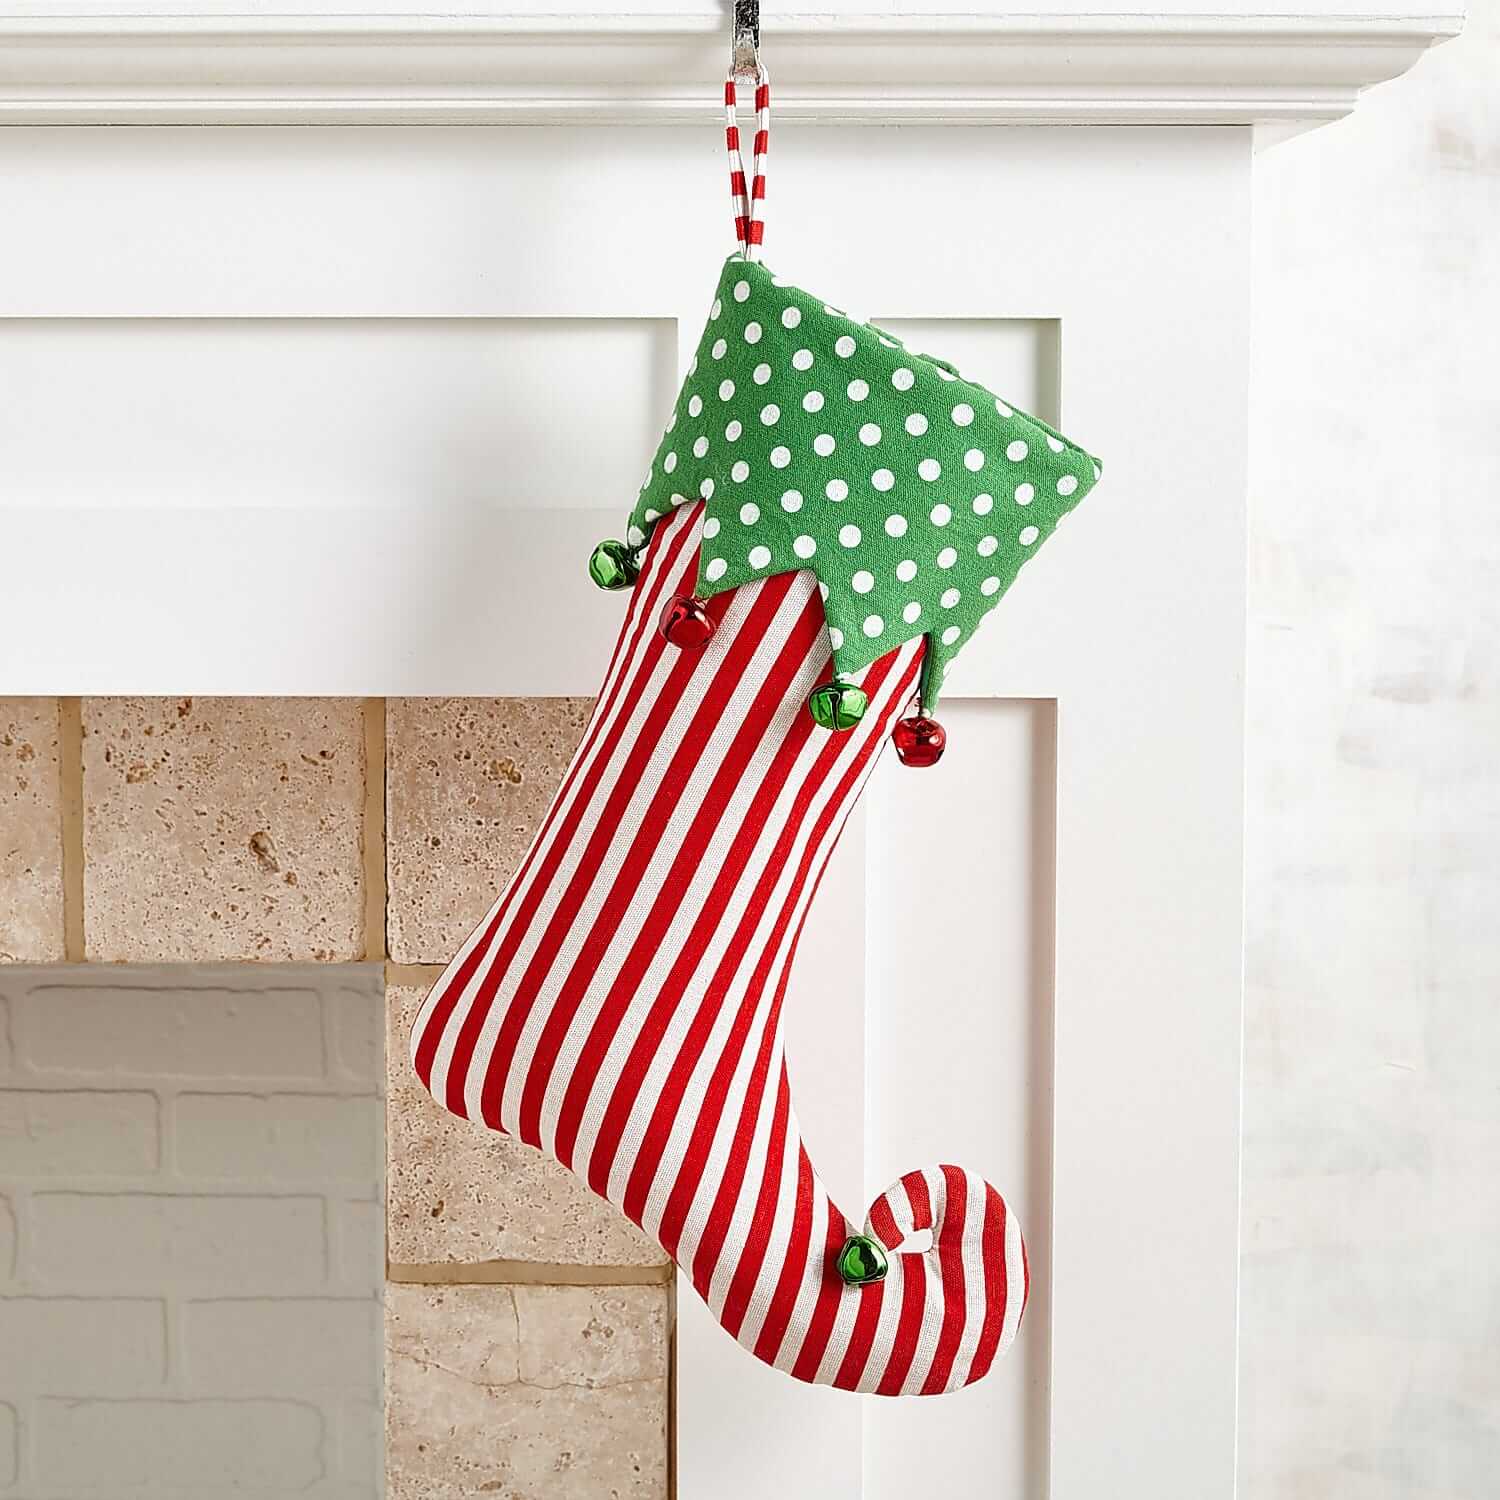
53. ElfThemed Office Door Decor

Elf-Themed Office Door Decor

One of the most charming Christmas office door decorating ideas is to create an elf’s door. Add playful elements such as elf shoes, hats, and even elf ears to your office entrance. Use vibrant colors like red, green, and white to evoke a cheerful and inviting vibe. For an extra touch, place a small elf figurine by the door holding a “Welcome” sign. This creative and whimsical design brings a festive, fun atmosphere to the office and is sure to delight your coworkers throughout the holiday season.

54. Christmas Countdown Decoration on the Office Door

Christmas Countdown Decoration on the Office Door

Create an interactive advent calendar on your door by using 24 small boxes or envelopes. Each day, employees can open one to discover a small gift, candy, or holiday message. This idea not only decorates your door but also builds excitement for the holiday season, creating a sense of community within the office.

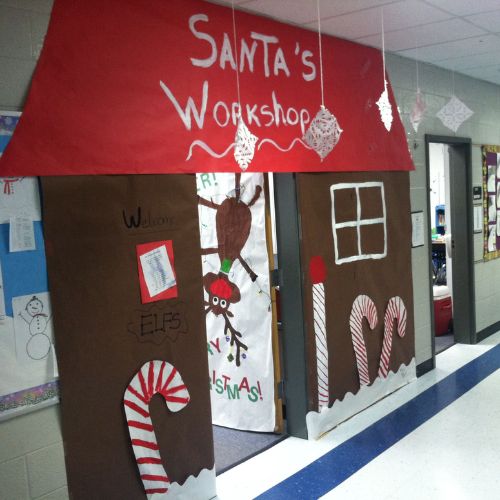
55. Santa’s Workshop-Themed Office Door Decor

Santa's Workshop-Themed Office Door Decor

Create a whimsical scene by turning your door into Santa’s workshop. Use wrapping paper with toy patterns, hang small ornaments, and add DIY “workshop” signs. Include figurines of elves or Santa holding a toy bag to make it more dynamic. This fun and colorful theme will brighten up the office and bring a sense of playfulness.

Conclusion

When you decorate the office for Christmas, it doesn’t just make it look great—it brings everyone together in a festive spirit. You can turn cubicles into winter wonderlands or team up for decor projects. There are so many ways to make your office Christmas decorations joyful and create a warm atmosphere that everyone will remember!

Explore Further:-

How to Decorate For Christmas Centered Around a Specific Theme

0
christmas centered around themes

Decorating your home, a room, or a party centered around a theme has been around for quite some time, especially around the holidays. 4th of July, Halloween, and Valentine’s Day all offer a multitude of decorating opportunities but there’s not one holiday that offers as many decorating options as Christmas.

Because Christmas has so many decorating themes to choose from, it only makes sense to narrow those options down. How many times have you been to someone’s house for the holidays or been to a holiday party and the decor looked like Christmas went in there and threw up all its decorations in one room? In other words, the holiday decor was tasteless and tacky.

But, to be fair, we can’t just go around calling people’s Christmas decorations “tacky”… Apparently, tacky depends on how you look at it. But there is an obvious sign when someone has clearly put thought and effort into their decorations and when they haven’t… let’s just say that.

Choosing a Christmas theme is the very thing that brings your overall look flow together from tree to room and from room to room. The theme and flow are what sets the precedence for all the small details you plan to add. Luckily, Christmas is still a few months away so you have quite a bit of time to decide on a theme or multiple themes you want to decorate your own home with.

Holiday Theme Ideas to Center Your Christmas Decor Around

Choosing your home’s Christmas theme is probably the hardest part but a great way to narrow things down is to decide what you like most about Christmas and what you want to display in your home and then build around that.

Are you a big fan of traditional decor or do you like the uniqueness of Christmas decor with a modern twist? Or maybe you have an ornament of sentimental value and you want to decorate based on that… Decor themes for Christmas come far and wide and from many different sources. When choosing your theme, think about colors, shapes, patterns, symbols, and even the feeling you want your decor to emit.

Christmas Theme By Color

Christmas Theme By Color

Sometimes people don’t necessarily have a symbol in mind like snowflakes or reindeer, they just know the color they want their tree to be and they’ll use that same color to decorate their entire house in as well. Decorating your home based on a color theme means you can decorate with practically any item, symbol, or pattern as long as it is the color or colors you want.

You may want to stick to the traditional colors of red and green; That means that you can have green snowflakes, red stars, red and green candy canes, poinsettias, etc, as decor for your tree and all throughout your home regardless of what the decor items are because they fall into the color scheme. Some might not like this theme and want things a little more uniform, but it actually is quite beautiful. All that red and green would look beautiful with handmade baskets made of wicker with red and green accents.

But then again, there are also gorgeous color themes done with silver and gold, white, purple, turquoise, and red, and gold. You can opt for one color or a mix of two and three colors; the choice is up to you. You really can’t go wrong in choosing your Christmas theme by color.

Christmas Theme By Passion or Hobby

Christmas Theme By Passion or Hobby

Maybe you are someone who enjoys traveling or taking photos; Then again, maybe you’re someone who’s big into DIY and crafting… If those are your passions or hobbies, why not use that as your Christmas theme this year?

If you’re a crafter, you can save yourself some money and make your own handmade Christmas ornaments and even put some of your DIY projects on display as well. This could actually be the boost you need to turn your crafting and DIY skills into a profitable business!

Christmas Theme By Symbol, Shape, or Character

Christmas Theme By Symbol, Shape, or Character
christmas centered around theme

Christmas has its own catalog of signature shapes, symbols, and characters, and while it’s fun to decorate with stars, Santas, and angels, you can also just choose one and let that be the theme of your decor.

Maybe you fell in love with snowflakes and the intricacies of each one. You can use snowflakes as your home’s Christmas decor theme and incorporate the symbol with candle holders, coasters, table centerpieces, and ornaments. You, of course, don’t want to be too monochromatic with it, so incorporate accent patterns and colors to make your snowflake theme really stand out.

Conclusion

I hope this article helped you narrow your Christmas theme options down or at least gave you a push in the right direction. By implementing these tips, you’ll be able to narrow down what you like and combine it with your own creativity to create a Christmas theme in your home you’ll enjoy all season long.

In case you missed:

Best Christmas Cards Ideas to Delight Your Loved Ones!

0
DIY Christmas Card ideas

Holidays are already started…and we all are in festive spirits! Every year at this time, our mailboxes get to fill with gifts. Also, envelopes containing joyful wishes and happy holiday messages. From ugly sweaters to matching family pajamas, we all love our Christmas gifts, right? Here you can get beautiful & easy DIY christmas card ideas.

Do you know what the most delightful Christmas tradition is? It is the holiday greeting cards that we send to our friends and family. I know it is easy to send digital cards, but there is something special about handmade cards. It adds a personal touch and a bond that a digital message can never do, right?

Many people love to make their Christmas cards because you can choose and create your own designs and sentiments. So if you love the idea of creating homemade Christmas cards and are looking for some great ideas to craft homemade Christmas cheer for your friends, keep reading this blog. Today we’ve gathered up some of the best DIY Christmas cards that will surely amaze your friends and family this season.

We’re sure that these DIY Christmas cards will spread a little joy and cheer. There are tons of options in the below list; you can select anyone and create cards for your loved ones. Some of them are for big DIY enthusiasts out there, and some are very simple that you can make with your kids. The best thing about this whole project is that you can make them with the simplest materials that are already present in your home, such as wrapping paper or leftover white buttons. 

Fun and Creative DIY Christmas Cards Ideas 

Each design that we’ve mentioned here is unique, and we also tried to give brief instructions so that you can create many cards without difficulty. 

1. Easy Lettered Holiday Cards

Easy Lettered Holiday Cards

Take some glossy paper and cut lettered holiday cards. You can also create your own pattern or download the pattern online. This perfect last-minute card, but it’ll look that you labored for hours making them. 

2. Artistic Ornaments Cards

Artistic Ornaments Cards Christmas card ideas

These Watercolor art cards look so artistic and beautiful. Try making these perfectly imperfect ornaments with art masking fluid and create a gorgeous handmade card. Don’t worry if you make a mistake because these masking fluids can easily come off with an eraser. 

3. French Fries Christmas Card Idea

French Fries Christmas Card Idea

This unique Christmas card will tell your friends and loved ones that you love them as much as you love French Fries. 

4. Simple Hand Drawn Christmas Cards

Simple Hand Drawn Christmas Cards

Do you Have good calligraphy skills? Use them to make these types of gorgeous cards with hand-drawn messages. I am sure that your friends will love it and they’ll also keep them in a frame! 

5. Gorgeous Cut-Out Ornament Cards

Gorgeous Cut-Out Ornament Cards

Send this lovely card with an ornament on top to your friends. They can tear the ornament and decorate it on their Christmas tree

6. Elegant Stamped Snowflakes Cards

Elegant Stamped Snowflakes Cards

Isn’t this black and white card with the intricate design of these snowflakes looks pretty? This may look difficult to make, but it is not. All you need is to buy the right stamping set and some embossing powder.

7. Cute Santa Claus Card Idea

Cute Santa Claus Card Idea

Christmas without Santa would be like the pizza without the toppings! Create this fun and cute Santa Claus card with a lovely message! 

8. Red Ornament Christmas Card

 Red Ornament Christmas Card

You’ll have a lot of fun while creating this handmade Christmas card. First, take a plain card, then add decorative paper to your card. After this, cut six to ten same-size circles out of tissue or paper and fold each in half. Stick all of them on the top, and lastly, add a red ribbon on the top of the ornament. Your card is ready! 

9. Bird on Christmas Card Ideas

Bird on Christmas Card Ideas

This sweet and simple card has a small chirpy bird that will give your message to your loved ones. To make this, first, paint a branch, then draw a bird with some colorful paint. You can also glue a piece of ribbon for extra flair.

10. DIY Creative Photo Card

DIY Creative Photo Card Christmas card ideas

These printable cards are my favorite ones. Share a glimpse of memory of your family or friends with this special card.

11. Reindeer Christmas Cards 

Reindeer Christmas Cards 

Look at these beautifully crafted Christmas cards. You can either make them from scissors or from an electronic die cutter.

12. DIY Cricut Filigree Card

DIY Cricut Filigree Card

This DIY Christmas card is for those who have a Cricut machine at home. You can actually create many pretty cards with various designs. Don’t forget to add some personal messages for the perfect final touch! 

13. DIY Christmas Cocoa Gift Card Holder

 DIY Christmas Cocoa Gift Card Holder

If you can’t drink real cocoa with your friends this Christmas, so gift them this really adorable gift cardholder. This is a perfect last-minute Christmas gift to give your loved ones.

 14. A Surprising Christmas Card With a Gift

A Surprising Christmas Card With a Gift

Want to give some unique cards? Try these cards that come with a gift! Here these printable cards have a special place to put eos round lip balm on it. An ideal card that also includes a gift that too in a budget! You can switch the lip balm with lipstick or any other accessory. 

15. DIY Family Portrait Christmas Card

DIY Family Portrait Christmas Card

Don’t have time to coordinate matching outfits for the family Christmas card? Try these whimsical digital illustrated version ones; they are a great alternative.

16. DIY Festive Cards

DIY Festive Cards

Save your valuable time and precious money by using these kinds of printable cards. Write a message inside, and it’s ready to be mailed. 

17. Chic Recycled Magazine Christmas Card

Chic Recycled Magazine Christmas Card

To create this card, all you need is some old magazines. Also, this is a fun way to show love and send personalized messages. You can use various texts, bold letters to make your card really unique!

18. DIY Button and Ribbon Card

 DIY Button and Ribbon Card

There is no need to buy expensive accessories to make a card. Take a look at the above card. It is just made from some green ribbon and red buttons. 

19. Happy Christmas Stamp Card

Happy Christmas Stamp Card

Wish someone HAPPY CHRISTMAS with this amazing card. No matter you use bright colors or more traditional holiday tones, these cards still look incredible. 

20. Simple Christmas Card

Simple Christmas Card

Simple but attractive, this card has a small sweet green wreath that can be made in a few minutes. The typewritten font and kraft paper background are adding a sophisticated vibe.

21. Vintage Christmas Card 

 Vintage Christmas Card 

No one will ever know that this card is made from scrapbook elements. You can select and create your card in shades of color and decorate it with wooden shapes, stickers, and bakers twine.

22. Artsy Watercolor Card

Artsy Watercolor Card

Watercolor Christmas cards can be seen everywhere. If you know a little bit about watercolor arts, try making these interesting cards. These are surely a non-traditional approach to annual Christmas cards, but we’re sure that your friends and family will surely be impressed with your artistic skills. 

23. Fun and Easy Eraser Stamp Holiday Cards

 Fun and Easy Eraser Stamp Holiday Cards

Looking for a fun Christmas craft to make with your children? Try making these cute cards. This will be a fun craft for your kids. 

24. Fast Christmas Card Idea

 Fast Christmas Card Idea

Are you in a hurry and looking for a simple DIY Christmas card craft? Just grab some washi tape and create this card. All you need is to cut and paste the tape in the shape of a tree, and your card will be ready in under a minute! 

25. Simple Scrapbook Christmas Card

Simple Scrapbook Christmas Card

You may already have some Christmas scrapbooking paper, so why not transform it into a beautiful card. First, cut a small piece of the scrapbook paper and glue it to the front of the card. Lastly, add some seasonal wishes using washi tape that has a written message, and your card is ready to send.  

Send Your Love Through Cards! 

So which DIY Christmas Card idea is your favorite? Whichever Christmas card design or pattern you choose to make this year, one thing is sure your friends and family will appreciate the homemade touch that you have put into it. All these cute cards will bring a smile to your loved ones’ faces.

You can also put homemade Christmas ornaments or any other personalized gift with the card to make it extra special. I hope these DIY Christmas Card ideas will help you make your own creative Christmas cards.

Discover More:-

Best Outdoor Snowman Christmas Decorations for Your Yard

0
Snowman Christmas Decorations

Wouldn’t or not it’s superb if we have a tendency to live in places. Wherever we have a tendency to may have the right white Christmas, with the fencing. Therefore the good white, flossy snow for the kids to play in? Perhaps you reside in a place that keeps inexperienced all-year spherical; however, there is no reason to miss the Christmas magic. Turn your yard into your personal pole with abundant less effort, and a long-standing result with a get alternative of artistic, unique, impressive, and elvish outdoor snowman decorations for Christmas to your construction and yard.

Even you would like your figure to be good and keep a watchful eye on your construction. Even once the sun peaks out his face through the clouds.

A lighted snowman standing in the snow
A couple of polar bears standing next to a christmas tree
A snowman made out of plastic bottles in front of a house
A snowman with a top hat and scarf
A large inflatable snowman in front of a house
A christmas scene with a santa clause and a snowman
A wooden snowman standing next to a christmas wreath
A snowman made out of christmas lights in the snow
A lighted snowman with a hat and scarf
A lighted snowman with a red hat and scarf
A couple of snowmen that are standing in the snow
A couple of inflatable snowmen standing on top of each other
A snowman wearing a red and blue hat and scarf
A snowman made out of a paper lantern
A large inflatable snowman with a top hat and scarf
A snowman with a green hat and scarf
A lighted snowman with a crown on it's head
s
A large inflatable snowman and a small boy standing in front of a house
A large inflatable snowman holding a christmas tree
A group of three snowmen wearing hats and scarves
A snowman with a black hat and red scarf
A snowman holding a broom next to a christmas tree
A snowman made out of a snowman's head
A group of snowmen standing in front of a door
A group of snowmen sitting on top of a pile of snow
A large inflatable snowman standing in front of a house
A couple of snowmen standing next to each other
A couple of snowmen sitting on top of a book
A lighted snowman standing in front of a christmas tree
A group of snowmen standing next to a christmas tree
A snowman is standing in front of a house
A large inflatable snowman holding a candy cane
A snowman with a top hat and scarf standing in front of a christmas tree
A snowman with a gift in his hand
A lighted snowman in front of a house
A lighted snowman standing next to a christmas tree
A snowman is standing in front of a house
A lighted snowman with a hat and scarf
A lighted snowman in front of a red house
A lighted snowman standing on a porch next to a wreath
A large inflatable snowman in front of a house with red hat

This illuminate figure can add the specified cheerful gray result to the front decoration of your house. This figure is ideal for the sunshine result of the front of your house while not the trouble of put up many little lights around the front entrance. Merely place the figure at the front and let it shine. No snow? Perhaps you do not wish the decoration to seem pretentious or out of place. Merely select the impressive, rustic decor and try outside Christmas decoration to wow the guests and passers-by. This trial could be a terribly tasteful, inventive, and fashionable statement in Christmas decoration.

In case you missed it!

Top 5 Benefits of a Regular Boiler Servicing

0
Boiler Service

Regular servicing helps the boiler continue working efficiently and smoothly. It prevents breakdowns, ensures safety, and gives your boiler a longer life. Moreover, regular boiler servicing can also keep your boiler in a position to maintain its warranty and save energy. Looking for expert care for your heating system in Southampton? Heatworks offers highly reliable professionals to maintain your boiler in perfect order. A professional will check these problems and perform all necessary repair work or adjustments.

Like all other machinery, boilers need periodic checkups and maintenance to work properly. Here are five crucial advantages of regular boiler servicing:

1. Higher efficiency and lower energy bills

Regular maintenance will help your boiler run at maximum efficiency. A typical boiler servicing Southampton involves cleaning parts of the boiler and inspecting and adjusting the burner setting for improved performance. Using less energy to heat your home will save you money on gas or electricity. Moreover, this increases your monthly heating costs and can strain the system. A well-serviced boiler runs smoothly and will save you money over time.

2. Enhanced Safety

Boilers run on gas, which isn’t safe and can cause real issues. Dangerous carbon monoxide leaks are a possible outcome. A regular service inspects for areas that might be leaking or about to, among other safety issues. They will also make sure that the ventilation, and gas pressure are within the parameters within which it can work safely. Even if the boiler seems to be running delicately, small problems that are not directly visible may be hazardous.

3. Extended Life of Your Boiler

A boiler’s life may be greatly extended with proper care and maintenance. A well-serviced boiler will have a longer life than one that is neglected, which in turn allows you to delay the cost associated with replacing it. Regular checks also allow the technician to spot early signs of wear and tear. Moreover, if you do regular maintenance, small problems that could have been minor and inexpensive to fix can quickly become bigger, more expensive repairs.

One preventative step that greatly extends the operating life of your boiler is servicing. Before they seriously harm a system, technicians may repair worn-out parts, calibrate systems, lubricate moving parts, and clean important components. By taking a proactive stance, the boiler’s efficiency is preserved and internal systems are less stressed, halting early degradation. Homeowners may be able to prolong the life of their boiler by a number of years by investing in yearly maintenance, which would ultimately reduce the need for premature replacement and guarantee steady, dependable heating performance for the duration of the system’s life.

4. Reduced Risk of Breakdowns

Having your boiler problems in winter is a worse thing. Namely, during servicing, unexpected failure can be prevented, and all sorts of troubles can be detected and fixed beforehand. In a service, the technician examines several parts of the system to identify the condition of the elements. Most of the breakdowns that occur with boilers are usually small problems that would have been easily avoided if the system had been checked.

The probability of unexpected and inconvenient boiler failures is greatly reduced by routine maintenance, particularly during the coldest months when heating is most important. Expert technicians can find early indicators of possible problems that homeowners would miss, such small leaks, component damage, or inefficient combustion. These preventative examinations assist in spotting emerging issues before they become serious, expensive repairs. You may avoid costly emergency call-outs, unplanned system shutdowns, and other safety hazards by taking care of minor problems early. The boiler’s entire operational lifespan is increased and failure risks are decreased by regular service, which also guarantees that all parts are clean, correctly aligned, and operating at peak efficiency.

5. Warranty protection

Servicing is also needed to keep your warranty. When your warranty has expired because you rarely service your boiler and a claim comes up within the warranty period, the manufacturer may not be ready to cover the repair costs. Such a condition is common for most warranties as they require annual servicing. Not doing so may leave one to have to pay some money from an individual’s pocket for repair costs that could have otherwise been covered.

Maintaining the warranty on your boiler requires routine maintenance. In their warranty documentation, the majority of manufacturers outline exact service requirements, usually requiring expert inspections and servicing at least once a year. These yearly inspections guarantee the boiler runs effectively and securely by spotting possible problems before they become serious ones. Professional service also provides written evidence of appropriate maintenance, which is important for warranty claims. During these service visits, technicians will usually test safety mechanisms, clean components, look for wear and tear, and make sure everything is operating at its best. Maintaining thorough service records will help you stay financially secure and provide you peace of mind regarding the state and warranty coverage of your boiler.

Final words

To sum up, the regular maintenance process will prevent breakdowns, provide you with safety, and even lower energy bills since it can ensure your boiler is working at its optimum. If you are looking for reliable and professional boiler servicing in Southampton, choose them and let them keep your home warm and safe. Hence, choosing regular maintenance extends the life of your boiler, giving you peace of mind throughout the year.

In Case You Missed It!

DIY Christmas Stocking Decorations for Your Home

0
Christmas stockings

Christmas is at the door, and so is Santa! Have you hung your Christmas stockings?

No? Like seriously? Where will Santa keep your presents? How can you forget the stockings? They are the prettiest thing on the earth and a non-living things that will actually make you feel every emotion.

It’s okay! If you forgot. But it’s not that late, still. You can still decorate your mantle with hot (because it’s already cold outside) and classic style DIY Christmas stockings. Yep! You read it right. DIY. Do It Yourself. We know the easiest way is to quick-decorate your mantle with stockings is by getting them from the market or ordering online. But you won’t get the quirk of festivity through that. And that is why we thought of providing you with some quick DIY ideas for Christmas stockings.

But before that, do you know why our mom just used to keep stockings, and not a bag? Is this a tradition or something? This tradition of Christmas stocking decorations has been passed on to us by our ancestors. We are following our moms and our moms followed their moms. But why is it so? And today, you will get an answer to this. So that whenever your toddler asks you the questions that you ask your mother, you have a proper solution, not a made-up one, like, because they can make your look house Christmassy. Or something like that.

According to the old saying, Saint Nicholas put gold coins in the stockings of three sisters as he knew they were very poor, and girls were extremely good in behavior. The three sisters hung their stockings on the mantle to let them dry, and the next morning they found stockings filled with gold coins. Since then, every child started to hang their stockings, hoping to get gifts.

Now you know the actual reason behind the Christmas stocking. So are you enthusiastic about making personalized Christmas stocking this year? The following are the ideas that you can use in creating your own unique Christmas stocking to impress Santa. (By the way, Santa knows everything, whether you have been a good child or not!)

We won’t tell you to sew stockings you can get simple ones from the store or online. And then let your creative soul do its work.

1. Pom-Pom Party

Pom-Pom Party decoration

Get a stocking and a pom-pom lace. Now place the lace on the upper part of the sock and sew it along the edge. You can also personalize it with your name.

2. Striped Soul

Striped Soul decoration

Get the striped stockings and cover the upper part with the burlap ribbon. To make it look more attractive, you can stick pom-pom or tasseled lace to it.

3. Plaid Pop

Plaid Pop Christmas stocking

Plaid is a new trend. Get a plaid stocking online or sew one with a blanket (of course of plaid print), and add a furry lace to it. You can also stick the cut-outs of snowflakes on it to give a Christmassy look.

4. Monogram Manual

Monogram Manual Christmas stocking

Simple yet classic. Get your initials embroidered on the sock and let Santa know which one is yours. The monogram effect on the Christmas stocking decorations is something different. You can play with prints in stockings, but make sure your monogram highlights. If not embroidery, then you can go for embossing.

5. Burlap Beauty

Burlap Beauty Christmas stocking

Sew burlap stockings. Cut two of the rounded L-shape pieces from burlap and then sew around the edges after leaving an opening at the upper part (for reference keep a sock with you). And decorate it with anything, from pom-pom lace to patchwork anything.

6. Classic Christmas 

Classic Christmas Christmas stocking

Go real Christmassy with the red and green theme for stockings. For this idea, you can go for a different print as well as the fabric but make sure red and green is a must thing. Velvet is a better option.

7. Bold Boom

Bold Boom Christmas stocking

Go bold with embossing on furry stockings. Stick the cutouts of Santa, Christmas tree, snowflakes, and other elements to make your stocking stand out boldly.

8. Elf Emboss

 Elf Emboss Christmas stocking

Let’s change the shape of stockings, from standard to something Elfy. Elf stocking is all about its form and for print, you can go for either polka or striped. You can also go for patchwork with the Christmas elements.

9. Jungle Jiggle

Jungle Jiggle Christmas stocking

Make jungle the center of attraction. Stick artificial leaves and flowers on the stockings and decorate the mantle with a green plant runner for the cover-up (real or fake! Up to you).

10. Patchwork Presence

Patchwork Presence decoration

Use fabric in your stash and make patchwork Christmas socks.

11. Tassel Trim

Tassel Trim Christmas stocking

Add tassels to the trim of the stockings. You can stick or sew the tassel lace on the side of the socks or just on the upper part. Select tassels of contrasting colors to make them highlight the area.

12. Knitted Know-how

Knitted Know-how Christmas stocking

Use your knitting skills and knit stocking from wool. It will give your mantle a warm look and gifts a cozy place to stay in.

13. Vintage Vibe

Vintage Vibe Christmas stocking

If you are going with the vintage theme for Christmas decorations, then this is the best one for you. For vintage style Christmas stocking, you will have to add the traditional elements of Christmas. And select the socks of dull color for the perfect vintage look.

DIY Christmas stockings
DIY Christmas stockings decoration
Christmas stockings

Gifts in the Stockings:-

Follow these Christmas Stocking Decorations idea for highlighting the area where you are going to hang your Christmas stockings. If you aren’t able to Create one get one from a real store or virtual store, but make sure it is one from the above ideas.

Discover More

How To Install Poolside LED Strip Lighting

0
poolside LED Strip lighting

Imagine transforming your pool area into an enchanting oasis where every evening swim feels like a dip in paradise. Poolside LED strip lighting can make this vision a reality, enhancing not only the aesthetic appeal of your outdoor space but also improving safety and energy efficiency.

In this comprehensive guide, we’ll walk you through the benefits of LED lighting around pools, help you select the right products, provide step-by-step installation instructions, and share essential safety and maintenance tips. By the end, you’ll be ready to give your pool the elegant and functional lighting it deserves.

The Bright Benefits of Poolside LED Lighting

1. Enhanced Safety

One of the primary benefits of installing LED strip lighting around your pool is the significant improvement in safety. Proper lighting reduces the risk of accidents by ensuring that steps, edges, and surrounding areas are visible, minimising the chances of slips and falls. This is particularly important if you have children or frequently entertain guests.

2. Aesthetic Appeal

LED lighting can elevate the visual appeal of your pool area, creating a stunning night-time atmosphere. Whether you prefer a tranquil blue glow or vibrant, colour-changing displays, LED strips offer endless possibilities for customising your pool’s look. These lights can highlight architectural features, create ambient lighting, and add a touch of luxury to your outdoor oasis.

3. Energy Efficiency

LED lights are renowned for their energy efficiency compared to traditional lighting options. They consume less power while providing bright and consistent illumination, leading to reduced energy bills. Additionally, LEDs have a longer lifespan, which means fewer replacements and less maintenance.

Selecting the Perfect LED Strip Lighting for Your Pool

LED Strip Lighting for Your Pool

1. Consider Waterproofing

When choosing LED strip lighting for your pool area, it’s crucial to ensure they are waterproof. Look for products with an IP68 rating, which indicates they are fully protected against dust and can withstand continuous immersion in water. This ensures durability and longevity, even in the harshest outdoor conditions.

2. Evaluate Brightness Levels

The brightness of LED strip lighting is measured in lumens per metre (lm/m). For poolside applications, you’ll want a balance between sufficient illumination and aesthetic appeal. Aim for LED strips with a brightness level of 1500-3000 lm/m to provide clear visibility without being overpowering.

3. Explore Colour Options

LED strip lights come in various colours and modes. Choose from single-colour options like cool white or warm white for a classic look, or opt for RGB (red, green, blue) strips that can create dynamic, colour-changing effects. Some advanced models even allow you to control the colours and patterns via a smartphone app for added convenience.

Installation Process: Step-by-Step Guide

1. Planning Your Layout

Before you start installing, plan the layout of your LED strip lighting. Measure the perimeter of your pool and decide where you want the lights to be placed. Consider areas that need extra illumination, such as steps and seating areas. This will help you determine the length of LED strips required and the best placement for optimal lighting.

2. Mounting the LED Strips

Begin by cleaning the surfaces where the LED strips will be mounted to ensure proper adhesion. Most LED strips come with an adhesive backing; simply peel off the protective layer and press the strips firmly onto the surface. If additional support is needed, use mounting clips or brackets to secure the strips in place.

3. Wiring and Power Supply

Connect the LED strips to a suitable power source. Ensure that the power supply is compatible with the total wattage of your LED strips to prevent overloading. Waterproof connectors and junction boxes are essential for protecting the wiring from moisture. Follow the manufacturer’s instructions for connecting the strips to the power supply and securing the connections.

4. Control Options

Modern LED strip lighting systems offer various control options, including remote controls, smartphone apps, and even voice-activated systems. Install the control unit according to the manufacturer’s instructions and test the lights to ensure they respond correctly to the commands. This allows you to adjust brightness, colours, and modes effortlessly.

Safety Tips for Installing and Using Poolside LED Lighting

Tips for installing Poolside LED Lighting

1. Electrical Safety

Working with electricity near water requires extra precautions. Ensure that all electrical components, including the power supply and connectors, are rated for outdoor use and are waterproof. Always turn off the power at the main circuit breaker before beginning installation, and consider hiring a qualified electrician if you are not confident in handling electrical installations.

2. Child and Pet Safety

Ensure that all wiring is securely tucked away and out of reach of children and pets to prevent accidents. Opt for low-voltage LED strips to minimize the risk of electric shock. Additionally, educate your family about the importance of not tampering with the lighting system.

3. Regular Inspections

Periodically inspect the LED strip lighting and all related components to ensure they are functioning correctly and safely. Check for any signs of wear, damage, or moisture ingress and address any issues promptly to maintain the integrity of the system.

Keeping Your LED Lighting in Top Condition

1. Cleaning the LED Strips

To keep your LED strip lighting looking pristine, regularly clean the surface of the strips with a soft cloth and a mild cleaning solution. Avoid abrasive materials or harsh chemicals that could damage the lights. Keeping the strips clean ensures maximum brightness and longevity.

2. Checking Connections

Over time, outdoor conditions can affect the connections between LED strips and power sources. Periodically check these connections for any corrosion or loose fittings. Tighten or replace connectors as necessary to maintain a reliable and safe lighting system.

3. Replacing Damaged Sections

If any section of the LED strip lighting becomes damaged or stops working, it’s important to replace it promptly. Most LED strips are designed to be easily cut and reconnected, so you can replace only the affected section without having to overhaul the entire setup. Follow the manufacturer’s guidelines for cutting and connecting the strips to ensure seamless integration.

Conclusion

Installing LED strip lighting around your pool is a fantastic way to enhance both the functionality and beauty of your outdoor space. From improved safety and energy efficiency to stunning visual effects, the benefits are truly illuminating. By following this guide, you can confidently select, install, and maintain your LED lighting system, transforming your swimming pools sydney area into a dazzling retreat.

Ready to get started on your poolside lighting project? Gather your supplies, follow the steps outlined above, and enjoy the bright new atmosphere your LED lights will bring to your home. The nights by the pool will never be the same again.

Explore Further:

Poolside Storage Solutions: Keep Toys and Accessories Safe

0
Poolside Storage

Owning a pool is a delight, but managing the assortment of toys and accessories that come with it can be a challenge. Toys scattered around, floaties deflating in the sun, and pool noodles tangled up can make your poolside look cluttered and uninviting. Efficient storage solutions not only keep your area tidy but also ensure that all your poolside essentials are protected from the elements and ready for fun. This post will explore creative, practical, and eco-friendly ways to organise your poolside space, making it a haven of relaxation and enjoyment.

Why Poolside Storage Matters

A pool is more than just a body of water; it’s a centre of fun, relaxation, and memorable moments. However, without proper storage, poolside clutter can quickly turn this oasis into a chaotic mess. Efficient storage solutions are crucial for maintaining an organised and functional space.

Firstly, effective storage protects your investment in pool toys and accessories. Sun, wind, and rain can cause significant damage to these items if left unprotected. Moreover, a clutter-free poolside reduces the risk of accidents and injuries, which is particularly important if you have children.

Secondly, organised storage makes it easier to find and use your poolside items. No more searching for that elusive snorkel or untangling a pile of water wings. Finally, a well-maintained poolside area enhances the aesthetic appeal of your outdoor space, making it a more enjoyable place to spend time.

Common Poolside Storage Challenges

Pool owners often face several challenges when it comes to storing their poolside accessories. One common issue is the lack of dedicated storage space. Pool areas are typically designed for leisure, not storage, leading to a shortage of suitable spots to stash your gear.

Weather damage is another significant concern. Pool toys and accessories left exposed to the elements can quickly deteriorate. The harsh sun can cause materials to fade and crack, while moisture can lead to mould and mildew.

Additionally, managing the variety of items needing storage can be tricky. From large floaties to small dive sticks, the range of sizes and shapes can complicate storage efforts. Finding solutions that accommodate this diversity while keeping everything accessible can be a daunting task.

Innovative Poolside Storage Ideas

Innovative Poolside Storage Ideas

Creativity is key when it comes to poolside storage solutions. Here are some innovative ideas to help you keep your poolside area neat and organised:

  1. Storage Benches: Multi-functional furniture like storage benches can provide both seating and a place to store your poolside essentials. They come in various sizes and styles, allowing you to find one that fits your space perfectly.
  2. Vertical Storage: Utilise vertical space by installing hooks, racks, and shelves on walls or fences. This solution is perfect for items like towels, pool noodles, and smaller accessories.
  3. Rolling Carts: A rolling cart can be a versatile addition to your poolside area. It can hold a variety of items and can be easily moved around as needed. Opt for a cart with multiple tiers to maximise storage space.

DIY Storage Projects

Creating your own storage solutions can be a cost-effective and rewarding endeavour. Here’s a step-by-step guide to building a simple yet functional storage unit for your poolside items:

Materials Needed:

  • Wooden pallets or planks
  • Screws and nails
  • Waterproof paint or sealant
  • Casters (optional, for mobility)

Approximate Cost: £30-£50

Instructions:

  1. Prepare Your Materials: Sand down any rough edges on the wooden pallets or planks to prevent splinters.
  2. Assemble the Structure: Using screws and nails, attach the pallets or planks together to form a box-like structure with an open top. Ensure it’s sturdy and stable.
  3. Add Casters: If you want your storage unit to be mobile, attach casters to the bottom corners.
  4. Paint or Seal: Apply waterproof paint or sealant to protect the wood from moisture and prolong its lifespan.
  5. Add Dividers: Install dividers inside the box to create separate compartments for different items.

Organisation Tips

tips for pool storage

Keeping your poolside storage organised is essential for maintaining a tidy and functional space. Here are some tips to help you stay on top of things:

  1. Label Everything: Use labels to identify the contents of each storage bin or section. This makes it easy to find what you need and ensures everything gets put back in the right place.
  2. Regular Maintenance: Set aside time each week to tidy up your poolside area. This might involve putting away toys, wiping down surfaces, and checking for any items that need repair.
  3. Seasonal Swap: Rotate items based on the season. Store away summer-specific items during colder months and bring them out when the weather warms up. This helps keep your storage area from becoming overcrowded.

Safety Considerations

Safety should always be a priority when organising your poolside storage. Here are some tips to ensure your storage solutions are secure:

  1. Sturdy Shelving: Ensure any shelves or racks you install are securely anchored to prevent them from tipping over.
  2. Chemical Storage: Pool chemicals should be stored separately from toys and accessories. Keep them in a cool, dry place, out of reach of children and pets.
  3. Lockable Units: Consider using lockable storage units to prevent unauthorised access to potentially dangerous items. This is particularly important if you have young children.

Environmental Impact

Eco-friendly storage solutions can benefit both your poolside area and the environment. Here are some tips for creating a more sustainable storage setup:

  1. Repurpose Materials: Instead of buying new storage containers, look for ways to repurpose items you already have. Old crates, baskets, and even furniture can be given new life as poolside storage.
  2. Choose Sustainable Products: When purchasing new items, opt for those made from sustainable materials like bamboo or recycled plastic. These choices help reduce your environmental footprint.
  3. Minimise Waste: Be mindful of the waste generated by your poolside activities. Encourage the use of reusable cups and plates, and ensure there are recycling bins available for any disposables.

Conclusion

Efficient poolside storage solutions are essential for maintaining a tidy, functional, and safe outdoor space. By addressing common storage challenges, exploring innovative ideas, and considering DIY projects, you can create a storage system that suits your needs and enhances your poolside experience.

Remember to keep safety in mind, practice regular organisation, and opt for eco-friendly solutions wherever possible. With these tips and strategies, your poolside area will be a welcoming and enjoyable place for family and friends to gather.

We invite you to share your own creative storage solutions in the comments below or contact our pool builders melbourne for any questions. Together, we can inspire and help each other make the most of our poolside spaces.

In Case You Missed It!

Effective Tips for Creating a Poolside Meditation Area

0
Poolside Meditation Area

In today’s bustling world, the pursuit of serenity and well-being has become more relevant than ever. Homeowners are increasingly seeking ways to transform their living spaces into personal sanctuaries where they can unwind and recharge. One growing trend is creating a poolside meditation area—a peaceful retreat that combines the soothing presence of water with the calming practice of meditation. This blog post will guide you through the process of designing your very own poolside meditation sanctuary, highlighting the health benefits of meditation and offering practical tips to make your space both beautiful and functional.

Planning Your Space

Before diving into the design, it’s crucial to plan and select the ideal area for your poolside meditation space. The right spot can significantly enhance your meditation experience, providing a serene and relaxing environment that helps you disconnect from daily stress.

1. Privacy Matters

Privacy is paramount when creating a meditation area. Choose a location that offers seclusion from neighbours and street noise. High fences, hedges, or even tall potted plants can help create a private enclave where you can meditate without distractions. Consider incorporating elements like bamboo screens or trellises with climbing plants to add an extra layer of seclusion and natural beauty.

2. Consider Sunlight

While sunlight can be uplifting, it’s essential to balance light and shade. Select a spot that offers dappled sunlight or can accommodate a pergola or shade sail. This ensures you remain comfortable during longer meditation sessions and protects your space from becoming too hot. If possible, position your space to take advantage of the natural movement of the sun throughout the day, so you can enjoy different lighting conditions during your meditation practice.

3. Proximity to Water

The sound of water can be incredibly soothing and enhance the meditation experience. Position your meditation area close enough to the pool to hear the gentle lapping of water, which can serve as a natural, calming background noise. Additionally, consider adding water features such as fountains or small waterfalls to amplify the soothing sounds. The reflective quality of water can also add a visual element to your meditation, aiding in relaxation and focus.

By thoughtfully selecting and designing your poolside meditation space, you can create a harmonious environment that supports and enriches your meditation practice, making it a cherished part of your routine.

4. Design Inspiration

Your poolside meditation area should reflect your personal style and preferences. Here are some design inspirations to consider.

Minimalist Serenity

For those who favour simplicity, a minimalist approach might be ideal. Opt for clean lines, neutral colours, and a few carefully chosen pieces of furniture. Natural materials like wood and stone can add a touch of warmth without overwhelming the senses.

Luxurious Retreat

If you prefer a more opulent setting, consider luxurious elements such as plush seating, elegant lanterns, and high-quality textiles. Incorporating a mix of textures and rich colours can create a lavish environment that feels both indulgent and inviting.

Nature-Inspired Oasis

To truly connect with nature, incorporate natural elements into your design. Use lots of greenery, including potted plants, hanging gardens, and even small trees. Water features like fountains or small cascades can add to the tranquil atmosphere.

Essential Elements to Transform Outdoor Space into a Serene Meditation Haven

Key components can transform a simple outdoor space into a serene meditation haven. Focus on these elements to create a harmonious environment that soothes the mind and nurtures the soul.

1. Comfortable Seating

Comfortable seating is essential for any meditation area. Whether you choose a cushioned bench, a hammock, or plush floor pillows, ensure that your seating supports good posture and relaxation. Consider adding a few extra throw pillows or a soft blanket to enhance comfort, especially during longer meditation sessions. The right seating can make a significant difference in your ability to stay focused and at ease.

2. Ambient Lighting

Lighting can significantly influence the mood of your meditation space. Soft, ambient lighting like fairy lights, lanterns, or solar-powered garden lights can create a calming atmosphere, especially for evening meditation sessions. For daytime meditation, consider using natural light filtered through sheer curtains or positioning your space under the shade of a tree. The gentle play of light can help deepen your sense of tranquillity and connection with nature.

3. Greenery and Natural Elements

Plants not only beautify your space but also purify the air and promote relaxation. Incorporate a variety of plants such as ferns, succulents, and flowering pots, along with natural elements like stones, wooden accents, and water features to create a harmonious and grounding environment. The sound of rustling leaves or flowing water can further enhance the meditative experience, making your sanctuary a true retreat from the hustle and bustle of daily life.

Practical Tips

Once your poolside meditation area is set up, practical considerations can help maintain its beauty and functionality.

1. Maintenance Made Easy

Regular maintenance ensures that your meditation area remains inviting. Choose durable materials that can withstand weather conditions and require minimal upkeep. Regularly clean seating, check plants for pests, and ensure that any water features are functioning correctly.

2. Safety First

Safety is paramount, especially around water. Ensure that any electrical elements like lights or speakers are waterproof and safely installed. Non-slip mats or surfaces can prevent accidents, and it’s wise to keep first aid supplies nearby.

3. Establishing a Routine

Creating a regular meditation routine can help you fully utilise your new space. Set aside specific times each day for meditation, and consider incorporating other wellness practices like yoga or tai chi. Consistency can enhance the benefits of your meditation practice and make your poolside area a cherished part of your daily routine.

Conclusion

Creating a poolside meditation area can transform your backyard into a serene retreat, offering a perfect escape from the stresses of everyday life. By carefully planning your space, drawing inspiration from various designs, and incorporating essential elements, you can create a sanctuary that promotes relaxation and well-being.

Remember, the key to a successful meditation area lies in its ability to reflect your personal style while providing a peaceful and inviting environment. As you embark on this journey to create your poolside sanctuary, may it bring you endless moments of tranquillity and joy. Dive into the world of serene outdoor living and let your perth pools backyard become a haven of peace and rejuvenation.

In Case You Missed It!