A mudroom serves as more than a mere spot for dropping off shoes; it’s a pivotal area that can change the way your home looks. By turning your entryway into a thoughtfully designed mudroom, you create a welcoming and orderly environment that sets the tone for the rest of your home. Let’s take a look into a range of creative mudroom ideas that can inspire you to craft a space that’s not only practical but also stylish and inviting.
1. Entryway Mudroom Ideas: Setting the First Impression
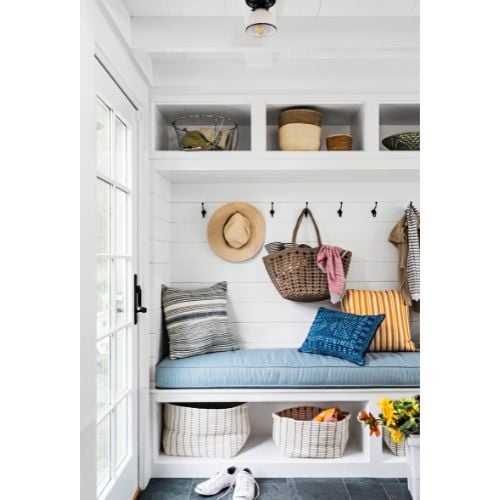
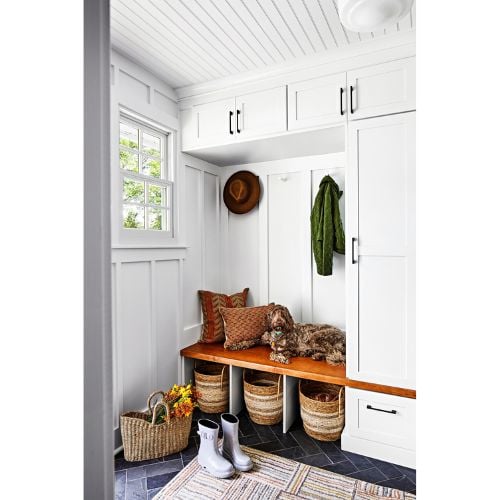
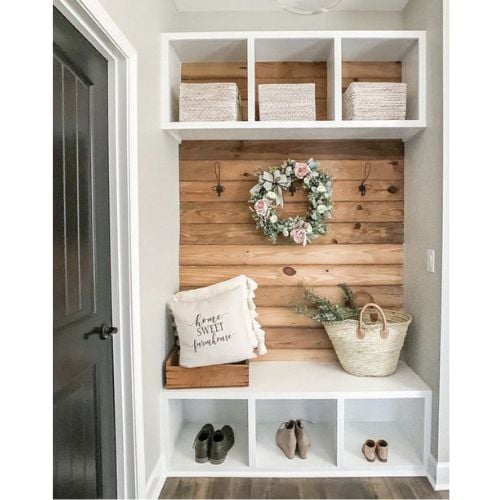
A small mudroom entryway serves as your home’s frontline against clutter, acting as a crucial transition between the outdoors and your living space. Creating a contemporary and practical small mudroom not only makes a positive first impression but also improves home organization.
Integration with Home Decor:
Ensure your mudroom entryway blends with your home’s overall decor. Select colors, materials, and accessories that coordinate with the rest of your interior design to create a balanced look.
Color and Lighting:
Use color psychology to elicit a welcoming home. Light, bright shades can make the space feel more expansive, while well-placed lighting ensures both visibility and functionality.
Space-Saving Solutions:
Small entryways can still offer ample storage with smart design choices. Opt for built-in features like cubbies and shelves to maximize space. Multifunctional furniture, such as benches with hidden storage, can enhance utility without sacrificing style.
By thoughtfully addressing these elements, you can transform your small mudroom entryway into an efficient space that brings out the beauty of your home.
2. Small Mudroom Ideas: Maximizing Limited Space
Don’t let a compact area deter you from building an operational mudroom. With innovative design and smart storage solutions, even the smallest space can become a useful focal point.
Vertical Space:
Maximize your walls by installing shelves and hooks, which keep items organized and off the floor, enhancing the sense of openness.
Compact Furniture:
Opt for slimline benches and foldable furniture to conserve floor space. Wall-mounted racks and cubbies can efficiently utilize vertical space while keeping the area clutter-free.
Design Strategies:
Light colors can visually expand a small space. Adding mirrors and glass elements will help reflect light, further amplifying the sense of roominess.
By using these strategies, you can turn a small mudroom into a functional space that doesn’t compromise either style or efficiency.
3. Laundry Mudroom Ideas: Blending Function with Style
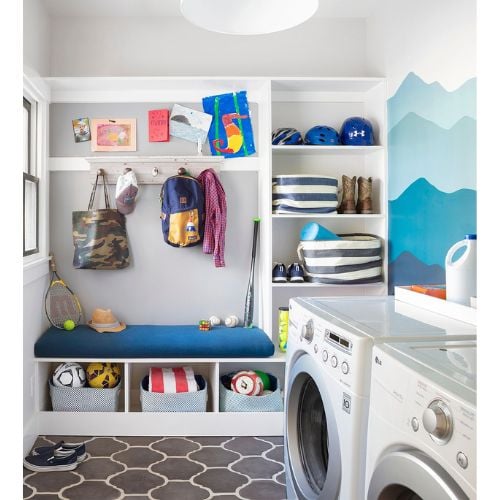
Commixing laundry functionality with mudroom organization can transform a high-traffic area into a streamlined, efficient space. A well-designed laundry mudroom not only tidies up your laundry tasks but also offers a convenient drop-off point for dirty clothes and gear.
Organized Laundry:
Optimize your space by placing laundry supplies on shelves above the washer and dryer. Incorporate built-in hampers and dedicated folding stations to simplify and speed up your laundry routine.
Design Considerations:
Select durable materials that can handle the demands of frequent use. Balance practicality with aesthetics by adding personal touches that make the space integrate with the rest of your home.
By blending these elements, you can create a beautiful laundry mudroom that improves organization.
4. Garage Mudroom Ideas: Taming the Chaos
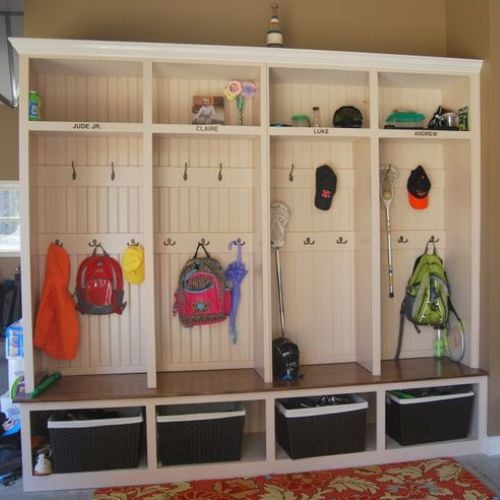
Transforming your garage into an organized space is achievable with a well-planned garage mudroom. By designating specific zones for coats, shoes, and sports gear, you can eliminate clutter and create a more welcoming setting.
Storage Solutions:
Maximize storage efficiency with overhead racks and wall-mounted systems. Custom cabinetry and lockers can provide tailored organization and keep items neatly arranged.
Design Tips:
Choose weather-resistant materials that can endure the harsh conditions of a garage. For a unified look, select design elements that harmonize with your existing garage decor.
With these strategies, you can elevate your garage from a chaotic storage area to a streamlined, inviting space.
5. Mudroom Storage Ideas: Creating a Well-Organized Space
Effective storage is fundamental to creating a well-functioning mudroom. By implementing diverse storage solutions, you can maintain order and foster a clutter-free atmosphere.
Essential Elements:
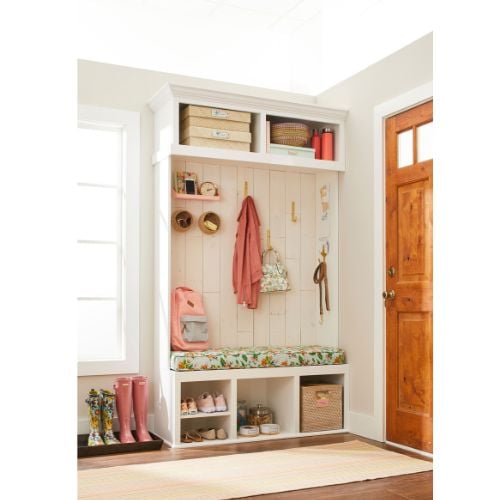
Integrate hooks, shelves, and cubbies to manage coats, shoes, and accessories efficiently. A bench with built-in storage compartments can further enhance practicality, offering a convenient place to sit while storing items.
Innovative Solutions:
Consider hidden storage options like built-in drawers or cabinets to optimize space. Modular storage systems can be adapted and customized to fit your evolving needs, providing both flexibility and functionality.
Customization:
Design storage solutions tailored to your family’s unique requirements and habits. Personalize individual compartments for each family member to ensure everything has its designated place, promoting a more organized and harmonious space.
6. Mudroom Bench Ideas: Adding Comfort and Functionality

A mudroom bench is more than just a practical addition; it enhances both the functionality and style of your space. It offers a convenient spot for sitting while putting on or removing shoes, and it can also provide valuable extra storage.
Functionality and Design:
Select a bench style that aligns with your needs and complements the overall design of your mudroom. Whether you opt for built-in, freestanding, or cushioned models, the right choice will enhance both comfort and aesthetics.
Added Features:
To maximize space, choose a bench with storage compartments beneath. Customizable cushions and upholstery allow you to tailor the bench to your personal style and add a touch of individuality.
Placement and Arrangement:
Strategically position the bench within your mudroom so as not to hinder the flow of the room. Integrate it with other storage elements to create an efficient design that works harmoniously with the rest of your space.
7. Mudroom Wall Decor Ideas: Enhancing Your Space
Don’t overlook the potential of wall decor in your mudroom. With thoughtful design and personal touches, you can turn this space into a welcoming area.
Enhancing Aesthetics:
Select wall colors and textures that foster a warm, inviting environment. Add character with decorative elements such as artwork or mirrors, which can infuse personality and brighten the space.
Functional Wall Decor:
Maximize utility by incorporating wall-mounted hooks and organizers for easy access to frequently used items. Consider adding chalkboards or corkboards that blend practicality with decorative appeal.
DIY and Budget-Friendly Options:
Welcome creativity with DIY projects to give your mudroom some uniqueness. Choose budget-friendly materials to achieve an attractive and personalized look without overspending.
8. Mudroom Shoe Storage Ideas: Keeping Footwear Organized
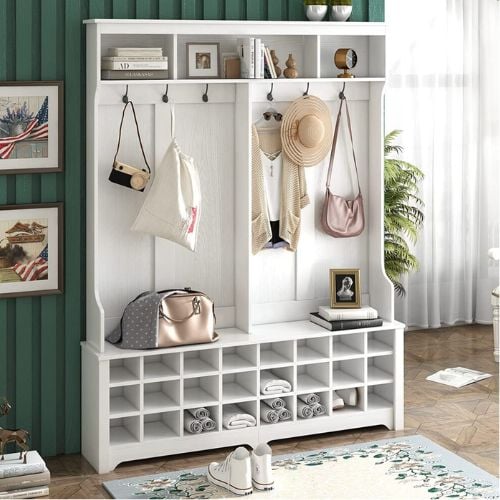
A well-thought-out shoe storage system is crucial for keeping your mudroom orderly and efficient. With a range of options available, you can find the ideal solution to manage your footwear and reduce clutter.
Effective Organization:
Consider shoe racks, cubbies, and shelves, each designed to accommodate different types and sizes of shoes. Tailor your storage choice to fit your collection and usage needs.
Design Integration:
Select storage solutions that easily blend with your mudroom’s design. Maximize space by utilizing under-bench or vertical storage, ensuring practical design while maintaining a put-together look.
Maintenance and Accessibility:
Choose materials that are easy to clean and keep frequently worn shoes readily accessible. This combination will enhance the overall efficiency of your mudroom.
Conclusion
Revamping your entryway into a mudroom can transform the space into a highly organized and attractive area. By integrating a range of mudroom ideas, you can create a welcoming environment that keeps your family organized and prepared. Focus on your family’s unique needs and preferences during the design process. With thoughtful planning and creativity, you can craft a mudroom that fits your lifestyle perfectly and adds a touch of charm to your home.
In Case You Missed It!