Home Blog Page 175

Meet Assel Baimakhan Of Casa Azzurra – A Famous Interior Designer

0
Interior Designer interview Assel Baimakhan

Welcome to the ArchitecturesIdeas #asktheexperts series. In this series, we will be interviewing professionals in the architecture field and will help you in knowing them better. Who knows you might get inspired by their story! 

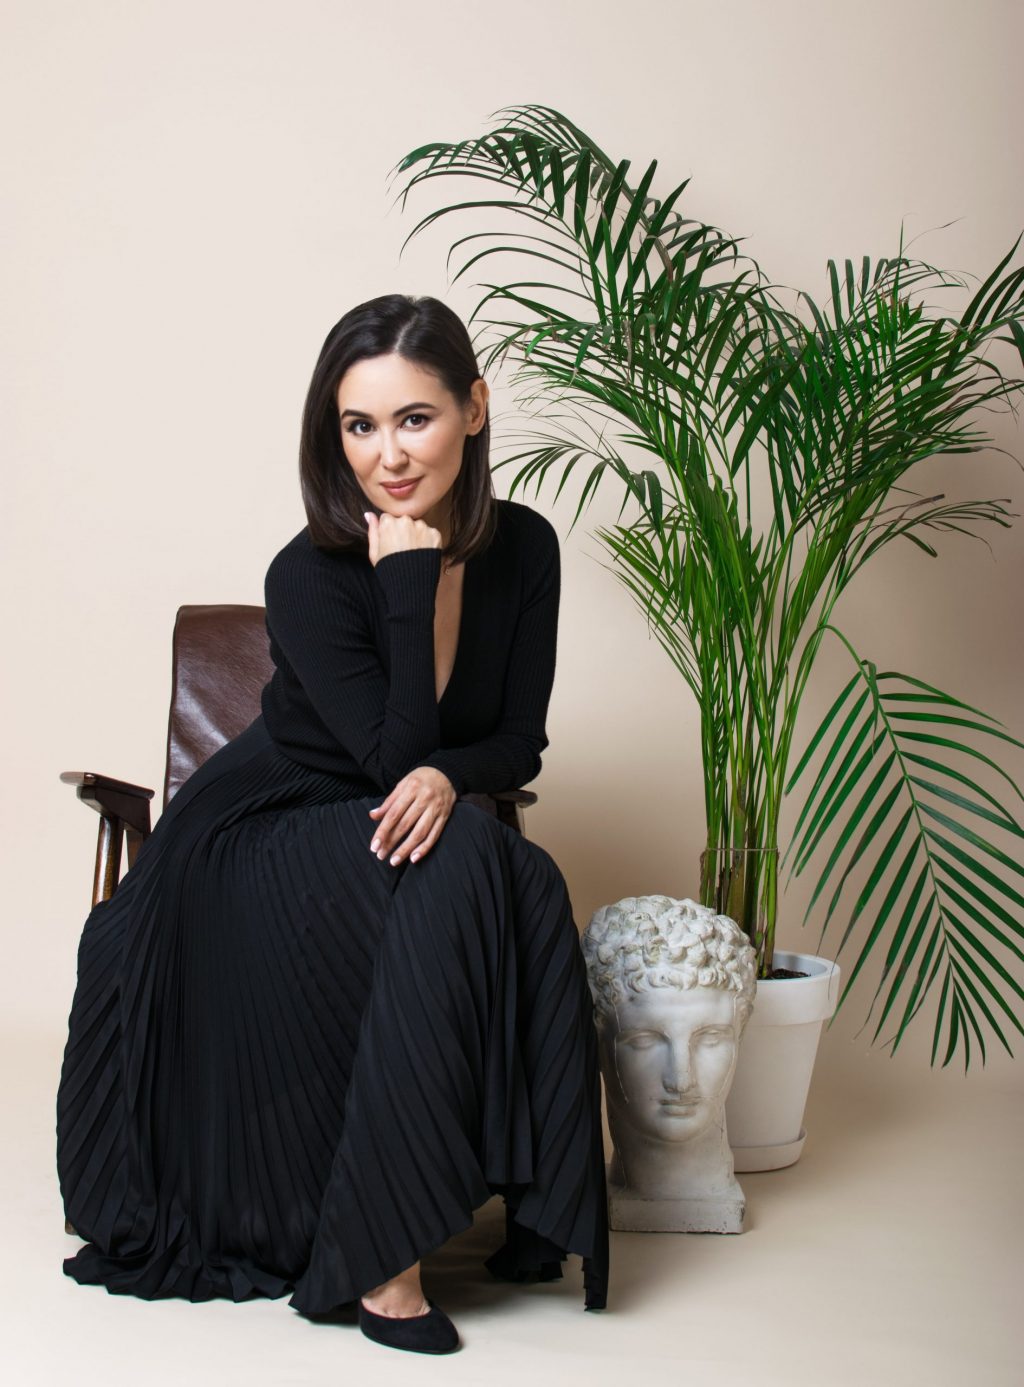
The architecture field is vast, from the exterior and interior designers to construction personnel, everyone has their own experience and point of view. Today we have an interior designer interview with a famous interior designer, the one who is recognized in a Forbes magazine for her aesthetically beautiful projects and the owner of Casa Azzurra, Assel Baimakhan.

Interior Designer Interview Assel Baimakhan

Let’s talk with her and find out about her inspiration, point of view, and importantly few insights into an interior design career.

Assel Baimakhan on Interior Designing FAQs (Frequently Asked Questions) 

First was the most basic and ideal question,

Can you tell us something about yourself, when, and how did you start your journey as an interior designer?

My name is Assel Baimakhan, I am an architect and interior designer who works around the world. I graduated from a university with a degree in architecture and slowly started working as a freelancer in this field.  

Design is my passion, I studied styles in great detail, I tried to keep abreast of all the trends and novelties, so I visited an endless number of exhibitions that were held in different cities around the world, I read a lot of literature about design, and of course I studied the world market in order not to miss anything and to be a competent professional.  

In 2006, for family reasons, I moved to Dubai, UAE (United Arab Emirates), I decided to start a business in the trade sector and opened a 700 sqm showroom with Italian furniture. During this period I was growing as a professional designer.  Soon I opened a design studio and in addition to the furniture, I started my dream business. 

Dubai is a huge market where all sorts of brands are represented, an ideal environment to start your journey towards interior design.  As I mentioned above, I work around the world and currently have studios in Kazakhstan and the US.

Then we asked about the topic that every professional feels proud talk about,

Can you please brief us about one of your most successful projects?

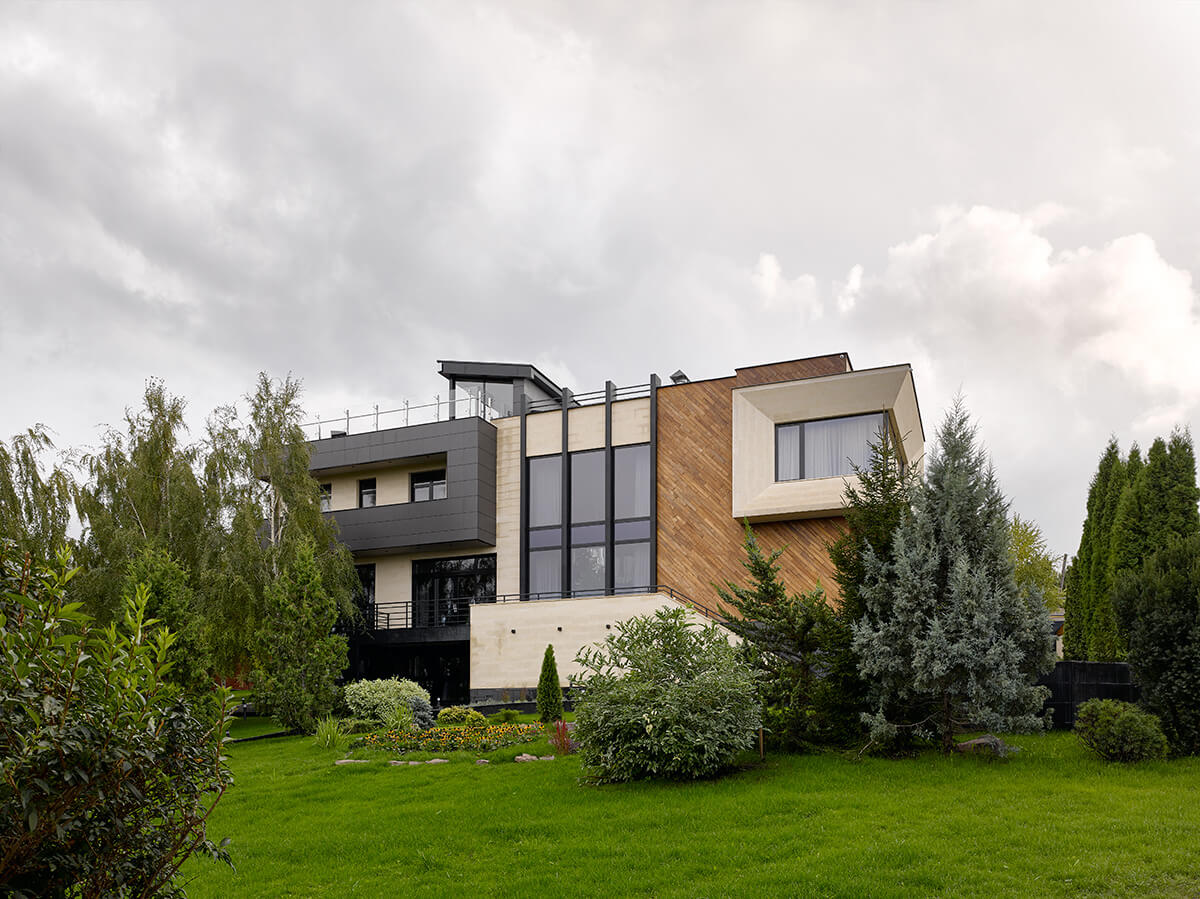
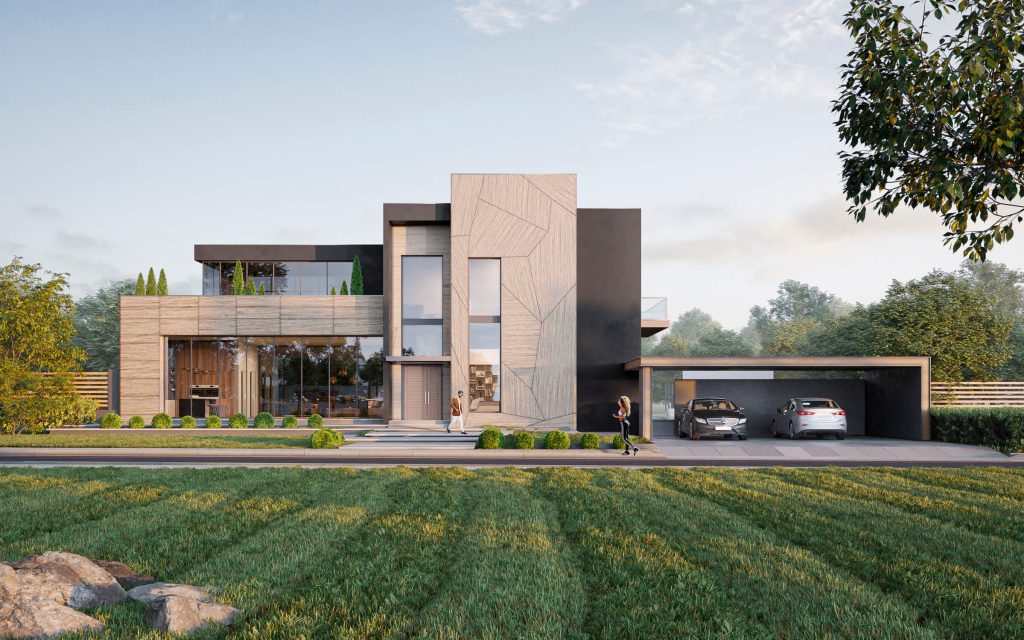
One of my most successful projects is Mountain House, a 686.92 sq. m. house.  For this project, I won the “Best Designer of the Year 2020” award and was published in the February issue of “Salon Interior – Best of the Year” magazine, which I am very proud of! 

 I like everything in this project – functionality, colors, textures, furniture, accessories, and of course the abundance of greenery, and most importantly, that the customer was completely satisfied with the final result.

What does it take to make the project successful? (This question will help new interior designers to grow and gain inspiration.)

In order for the project to be successful, you must first learn about the needs of the customer, correctly allocate the budget, and set the right priorities (because the original design is for him only).  

While interior designing you can apply all knowledge in creation by giving it a character from choosing furniture to accessories.  Knowledge and experience will allow you to work in a given style, or combine several styles, which will lead to interesting solutions with stunning, and unique results.  The main thing is to try, and don’t be afraid of bold decisions.

successful project of architecture

Of course, to stay abreast of all the latest trends, you need to visit exhibitions, read current literature, and magazines too, you expand your horizons, use all resources to gain new knowledge, they will never be superfluous.  You need to stay side by side with the latest technologies, collections, etc. so that you can offer only the best to your customer.

Every creative person has its own style, the answer for the same of Assel B. made us more proud to have her.

What is your signature style and how did you develop it? (Inspiration behind it.)

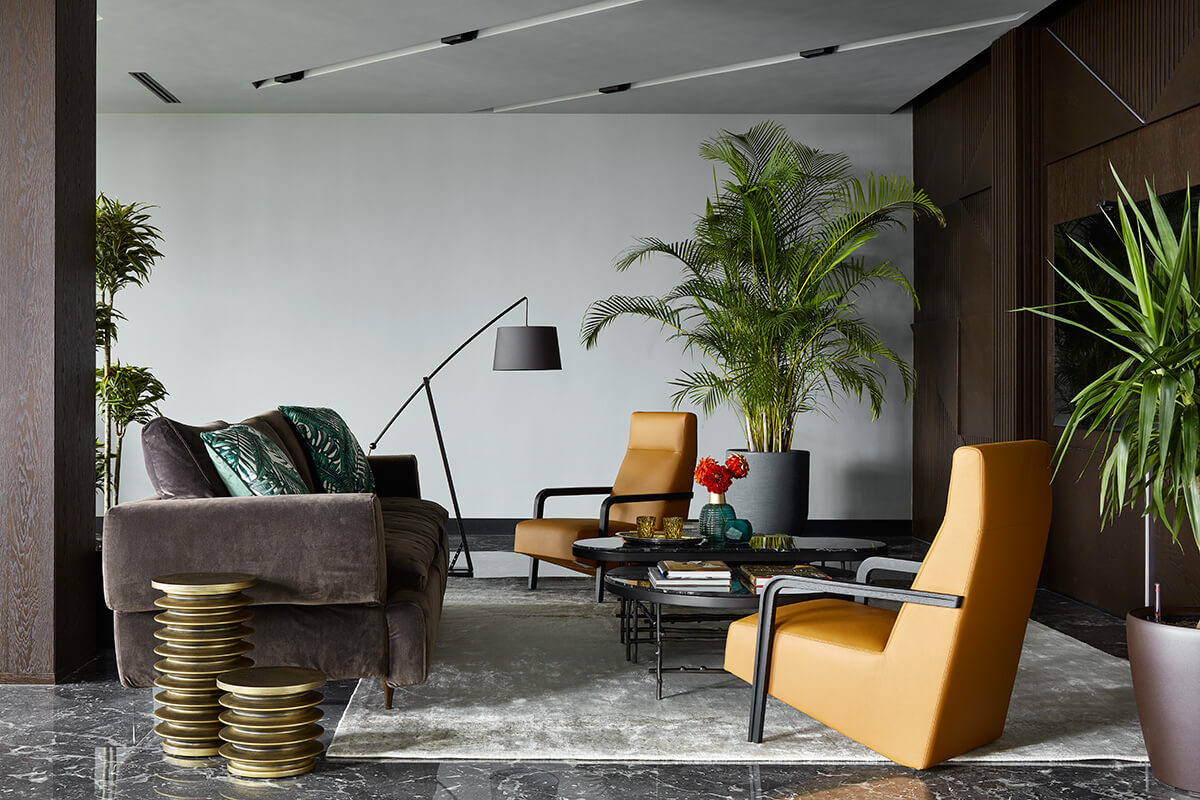
I like to work in different styles and to combine them so that the result is unusual, harmonious, and of course aesthetically pleasing.  I like to work with textures, colors, and combine seemingly incompatible elements in interiors.  I like to give completeness to interiors with accessories, decor elements, paintings, and textiles.  Perhaps all this creates my own unique style, as I put my heart and soul into every interior.

You should definitely follow her on Instagram. You will be in love with her work!

Interior Designer Interview Assel Baimakhan

During this period of isolation, what are you focusing on professionally as well as personally? 

Even during isolation, the work does not stand still, I design houses, create interiors, there is more time to read and learn something new, write down ideas for future projects – it’s in my professional life. 

In my personal life, I do yoga, spend time with my family, and just relax.  Life doesn’t stand still and it’s important to spend even such a hard time with benefits and stay positive.

Next up is a tough one but still, what are the three things that you don’t like about this industry? And why is it so?

Indeed, the issue is complicated, for all my love of interior design, I can still highlight three things that are not that I do not like, but rather create discomfort in the implementation of the project.  Three things I have highlighted: the budget, time, construction work.  

It also happens that one comes from another like a small budget, on the one hand, you can not make a luxury interior, and on the other hand, it is the ground to think and offer alternative solutions to make it no less worthy (for future designers). 

As for time and construction work – these are the two aspects from which there is nowhere to go, because the repair does not pass quickly, and if it is a complex design, it requires double time.  With a good foreman everything goes smoothly and on time, but to reduce the time of construction work to a minimum is impossible, so the last option is to accept these facts and work up accordingly.

Where do you see yourself 10 years from now?

In ten years I see myself not only as an architect and designer but also as a major developer, working around the world. I am already taking baby steps towards it, I like it, it is interesting.

In 14 years of experience, have you ever faced a strange request from the customer? If yes, what is it?

For fourteen years of my professional activity, I’ve met only the best and most loyal customers, and I’m very grateful for them. I didn’t observe any strange things, but if in any circumstances a customer voices a wish that is not compatible with the proposed basic idea. I offer a more suitable alternative that will suit both the customer and me as the author of the project.

What is your dream project? Or any project that you are looking forward to?

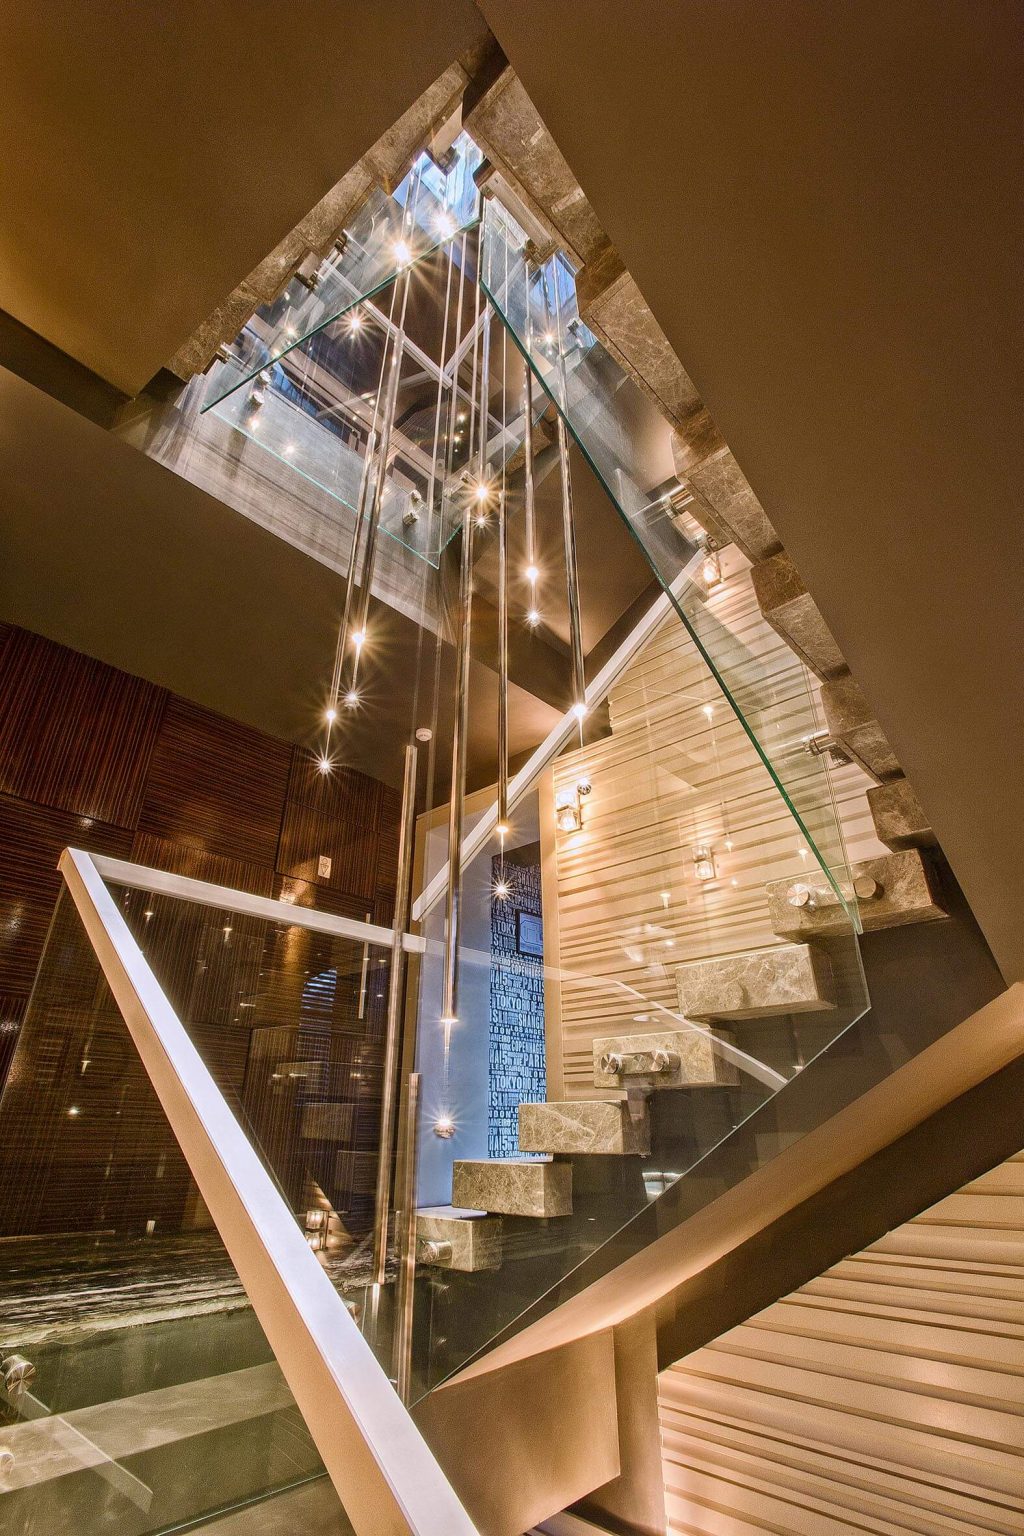
I am looking forward to every project, I have a lot of ideas that I am ready to implement.  I like my work, I like to come up with solutions for complex projects such as non-standard shapes of the room, or crossbars passing through the ceiling and others. 

Why? Because it allows your imagination to come up with incredible solutions to solve these small problems, and the result is pleasing to the eye, not only to the customers but for me as well, it will emphasize your professionalism.

Last one, what do you think about our website (ArchitecturesIdeas)? Please share your honest reviews.

I find your site very informative, as I said above, it is important to be aware of innovations in architecture and design to work in this area.  Not so much quality content can be found on the Internet to emphasize something new for yourself.  

I think it’s interesting not only for potential readers who are just defined with an architectural solution for themselves but also for architects who are already working because technology is not static.

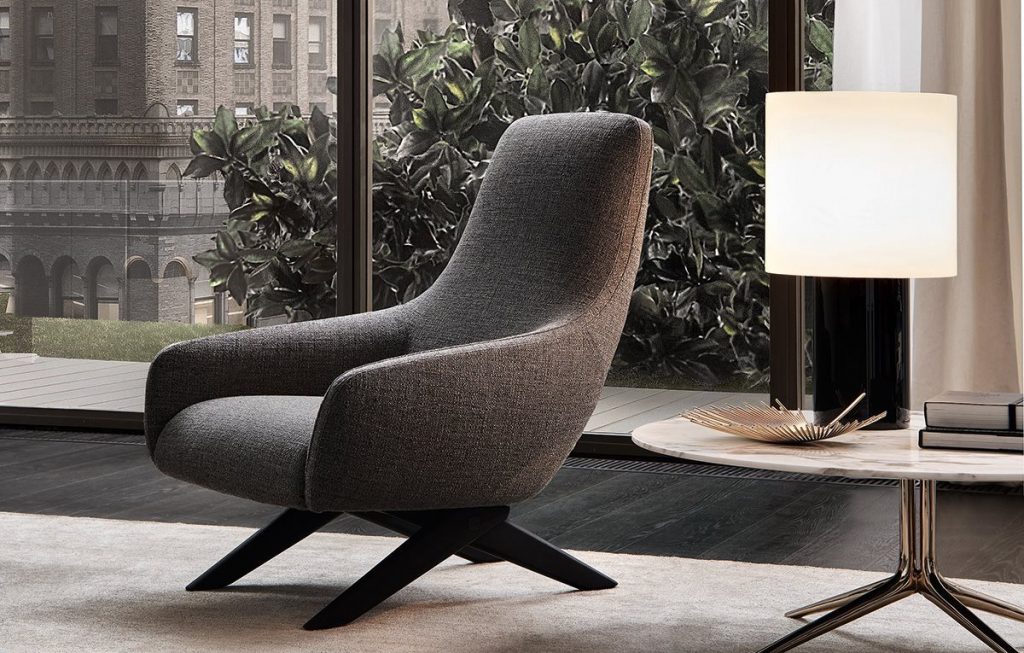
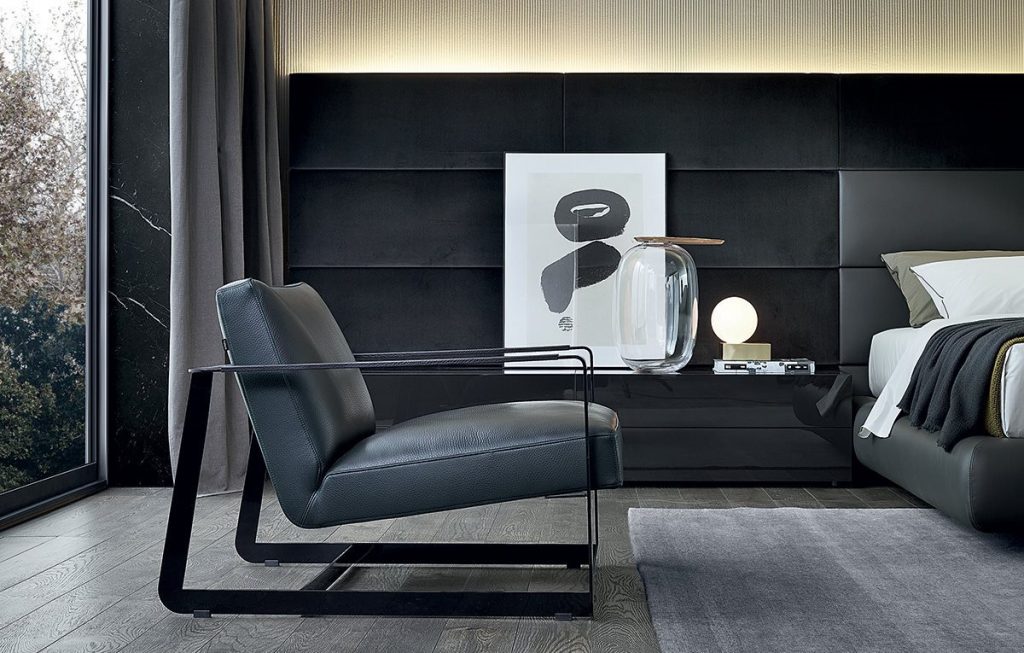
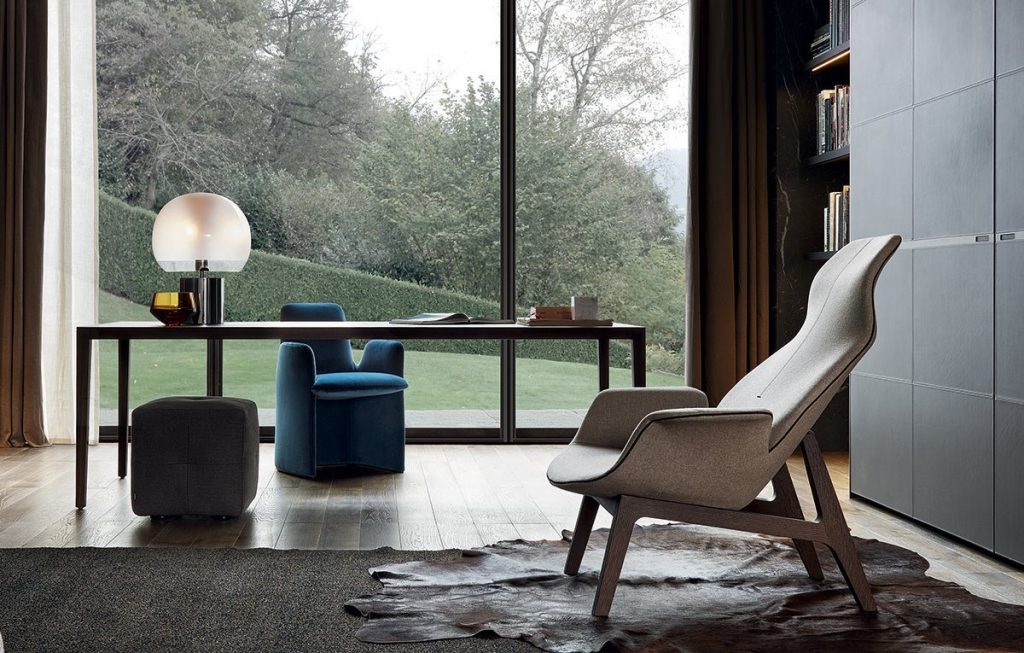
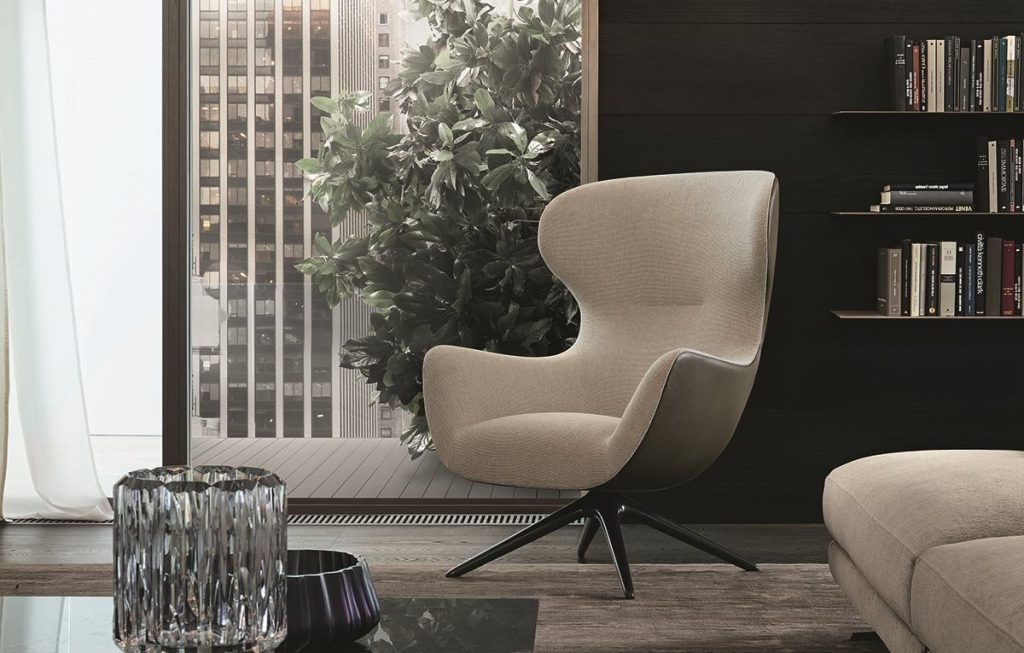
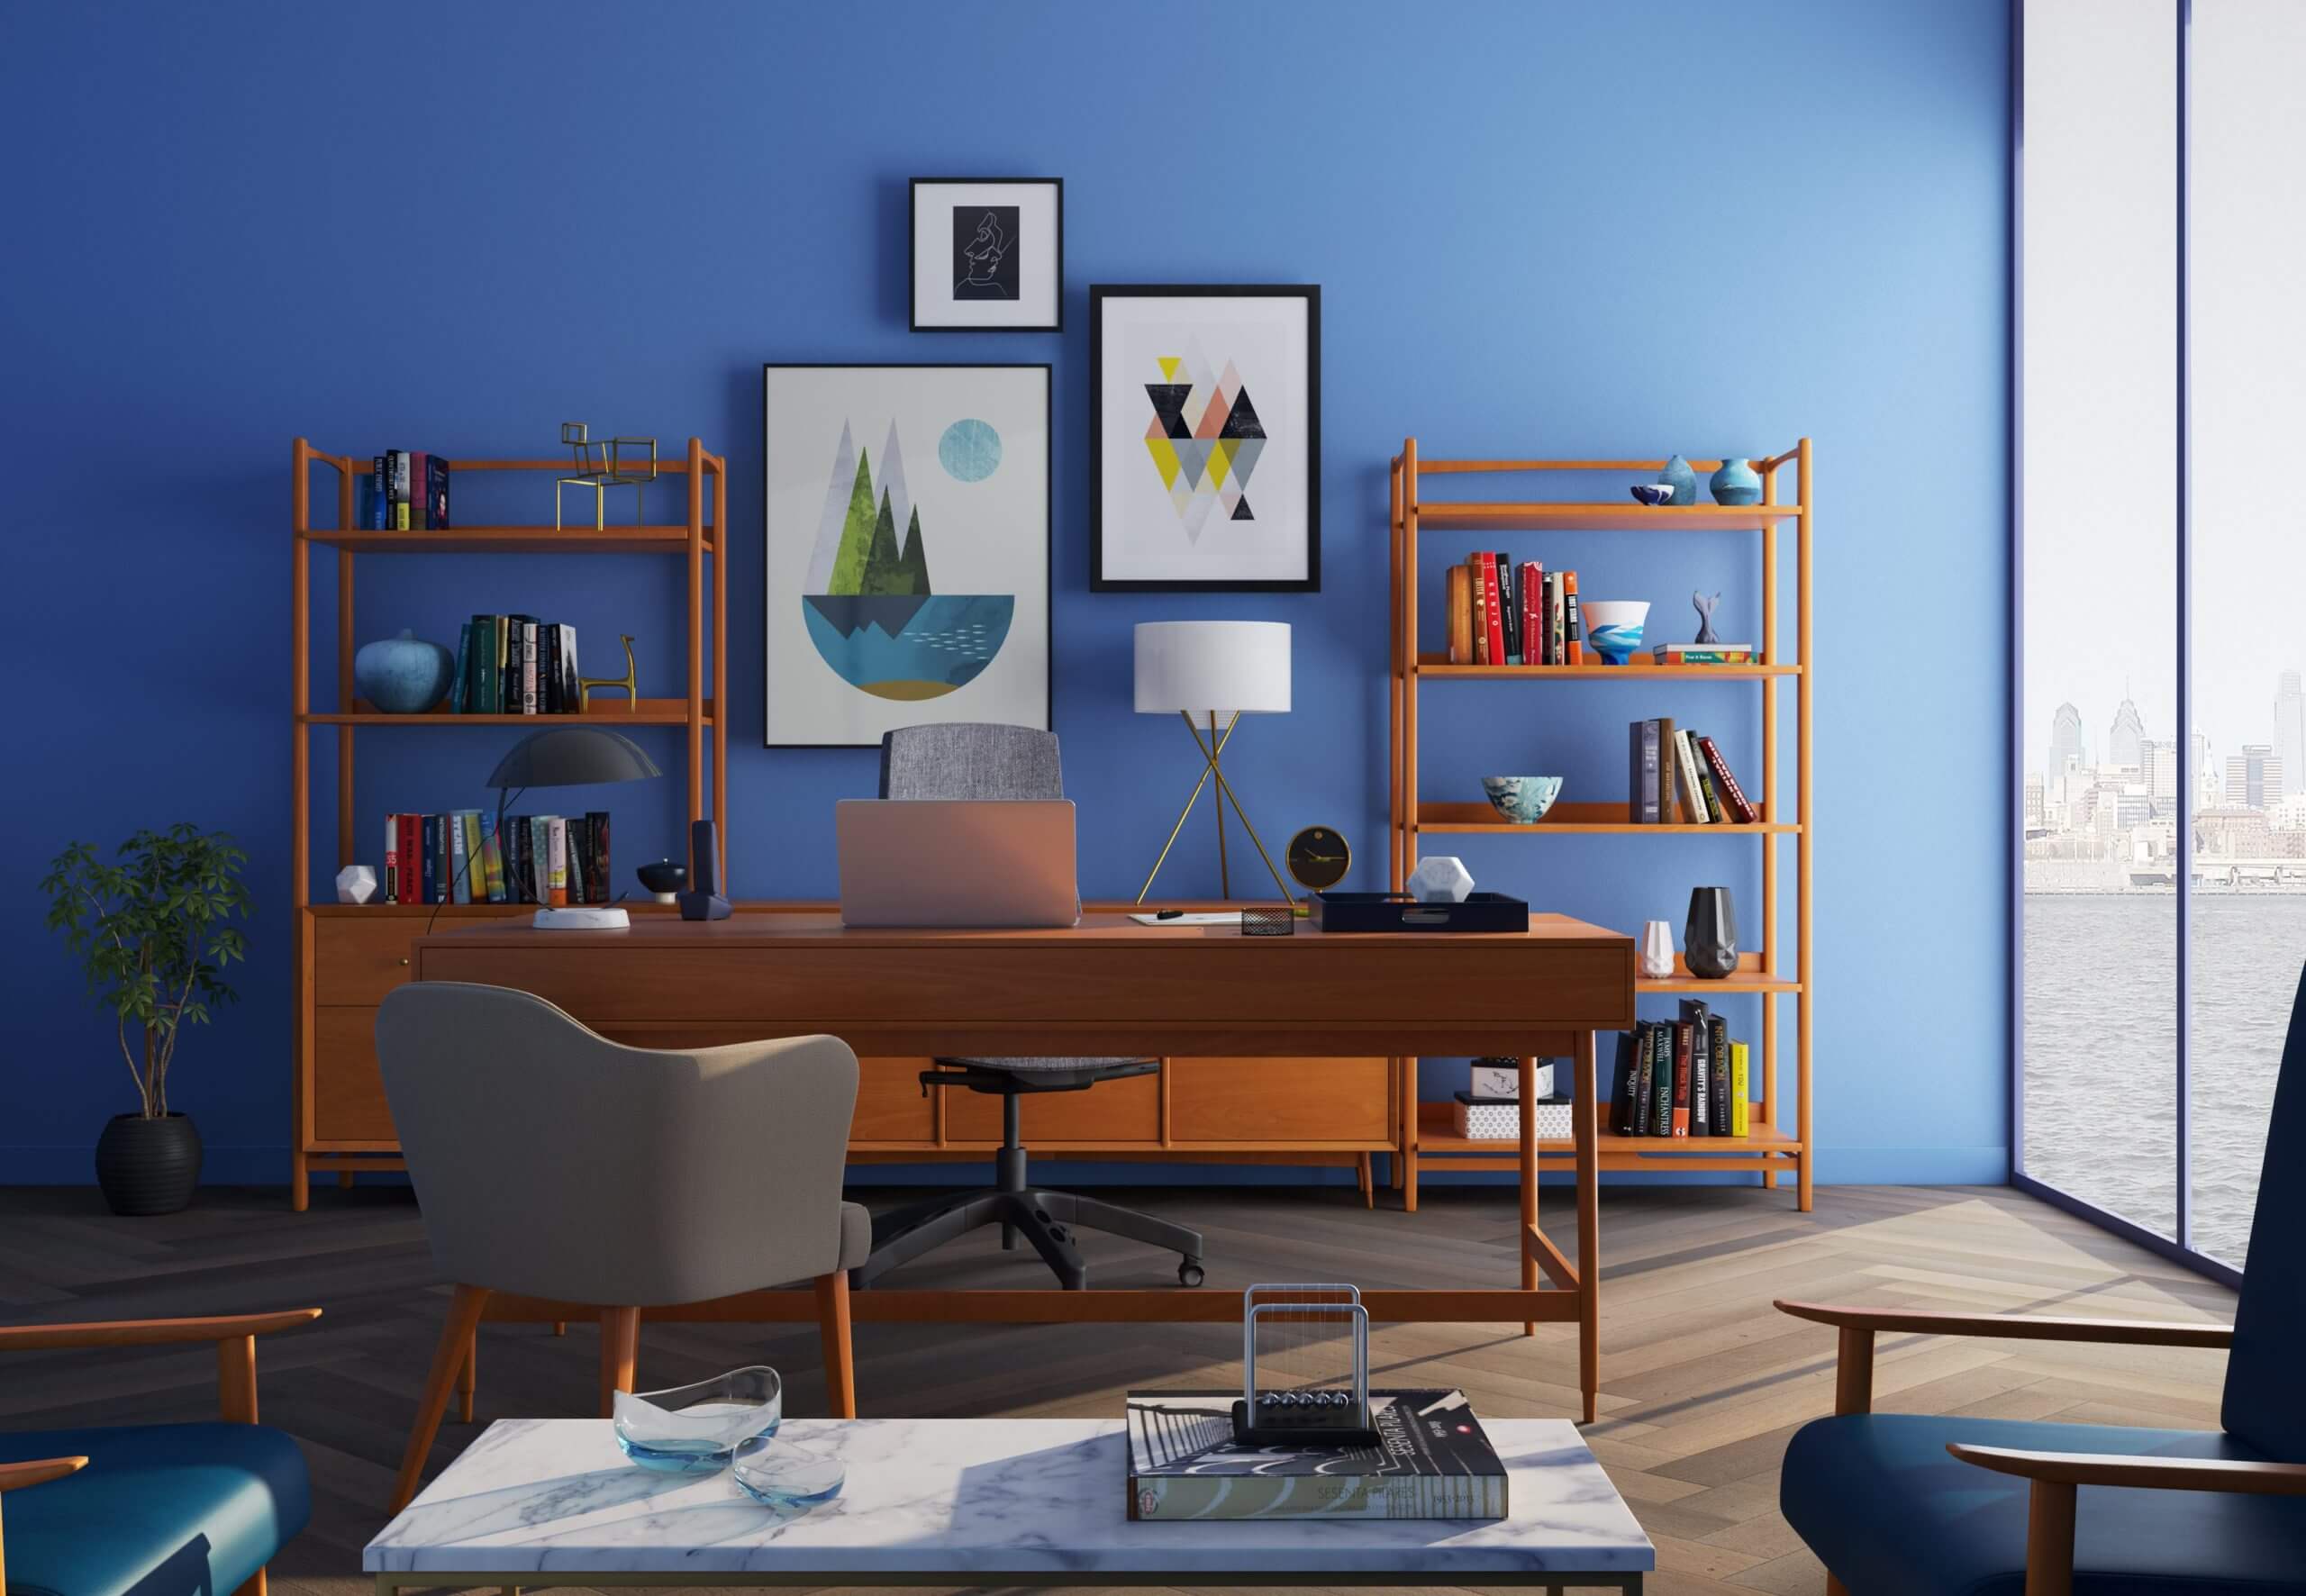
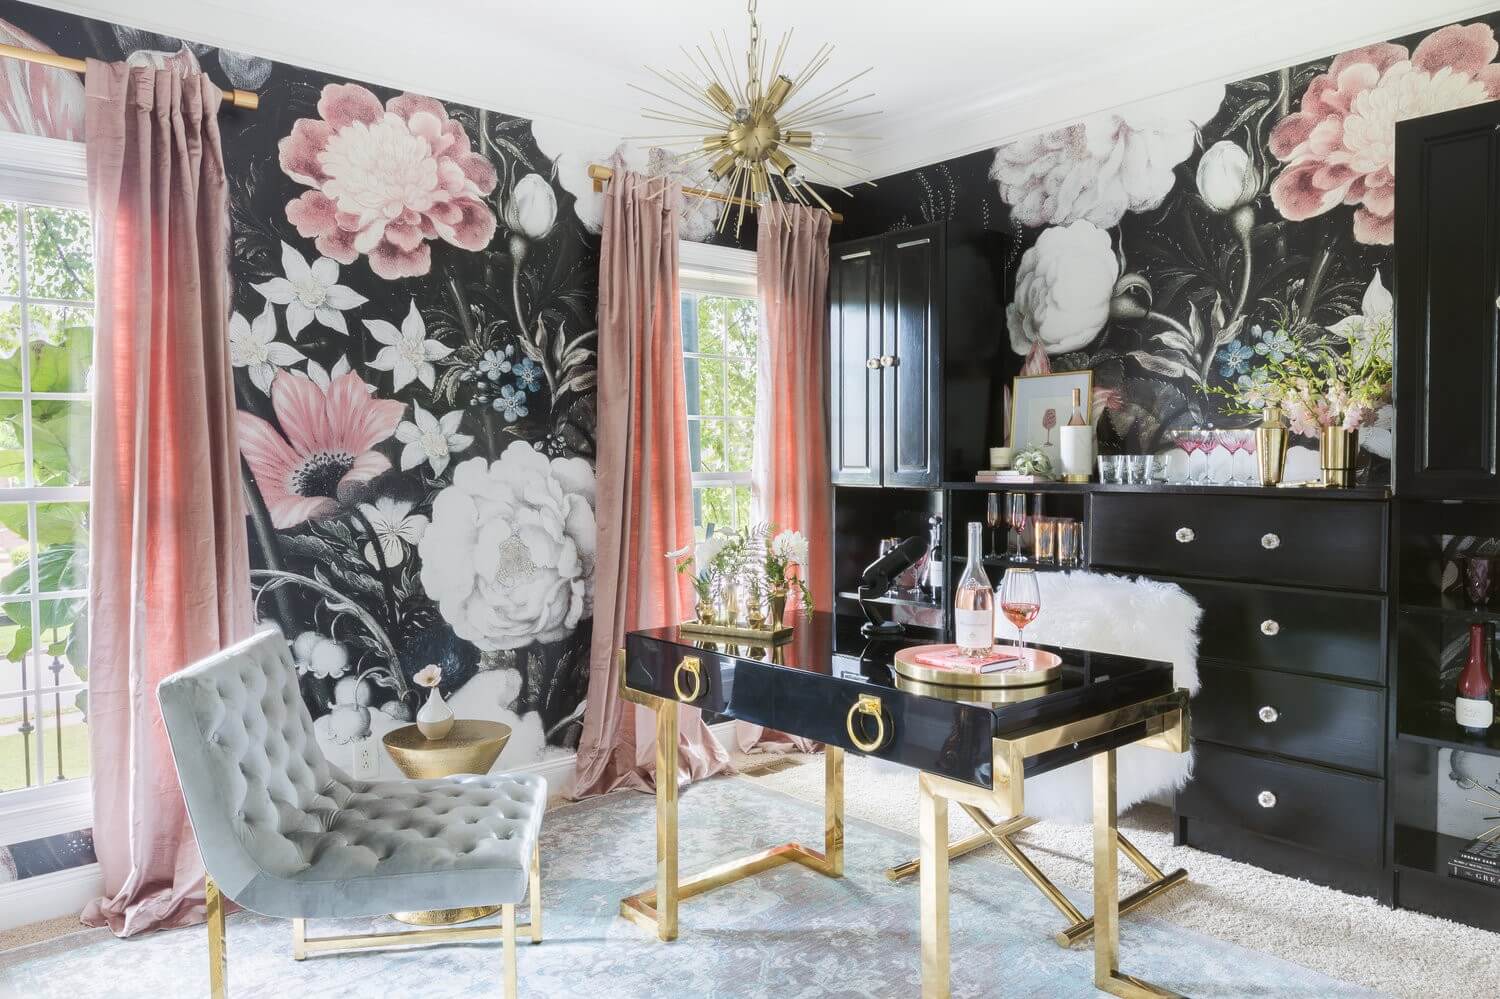
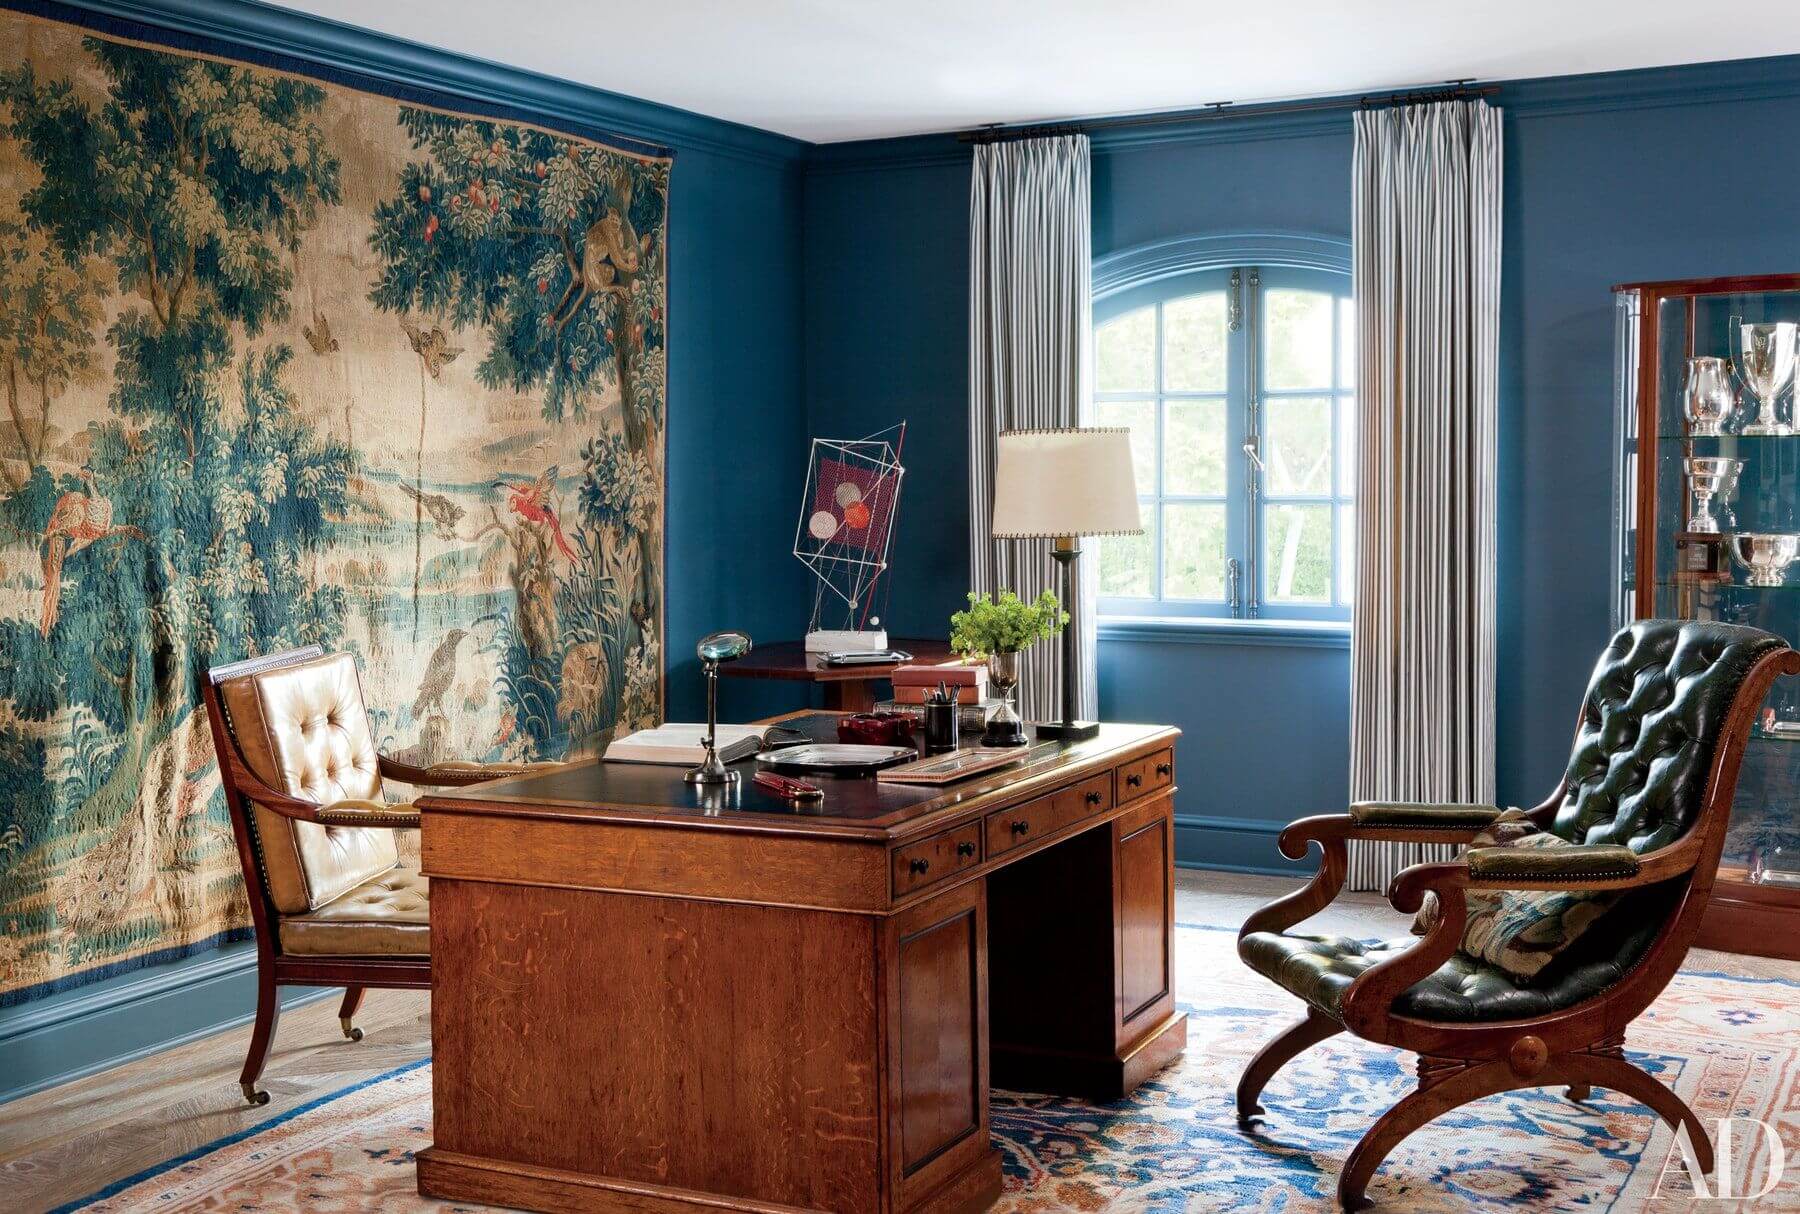
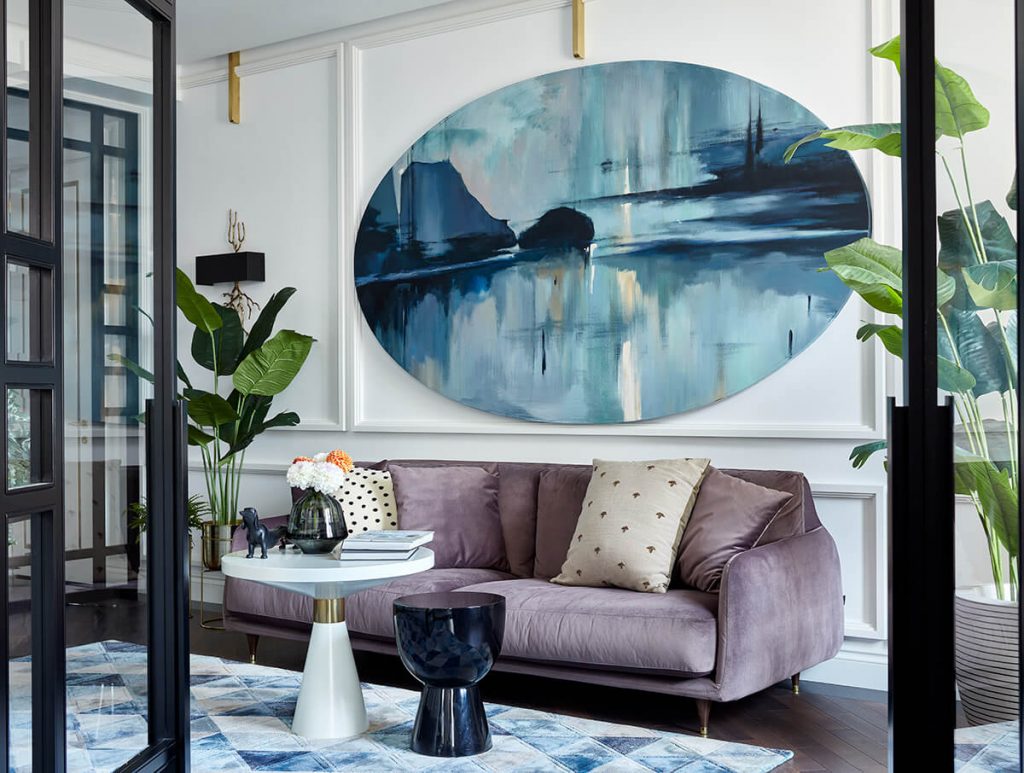
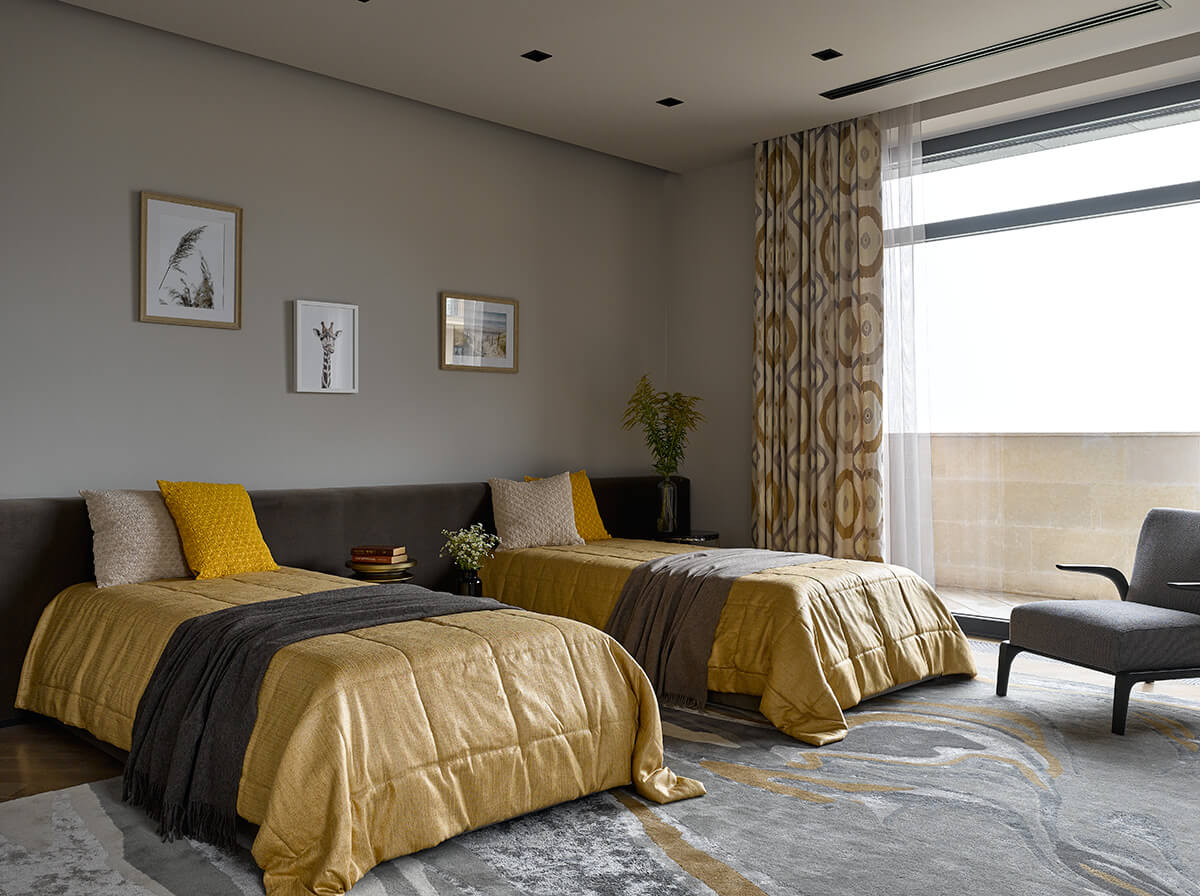
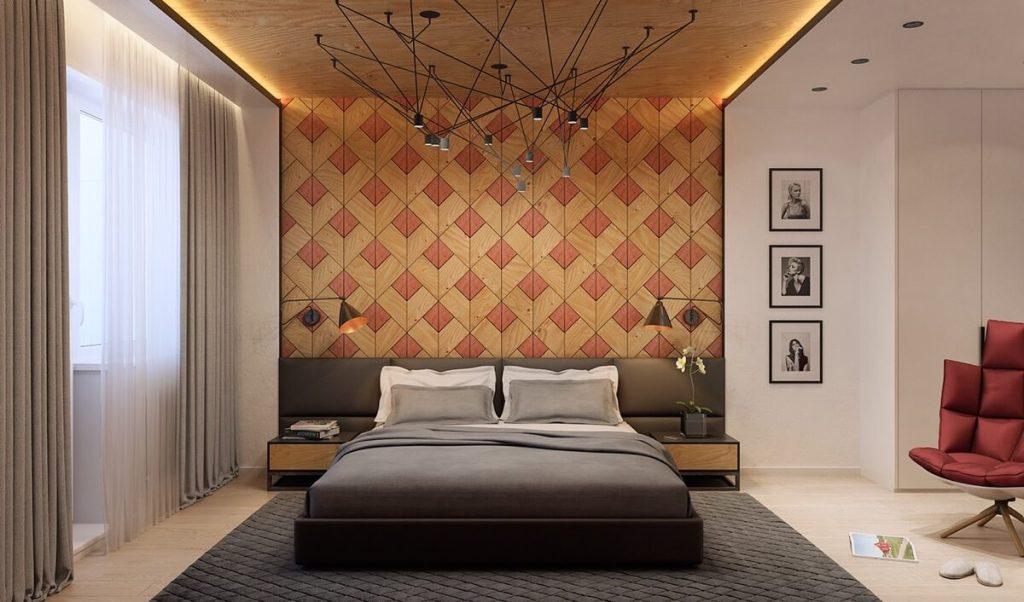
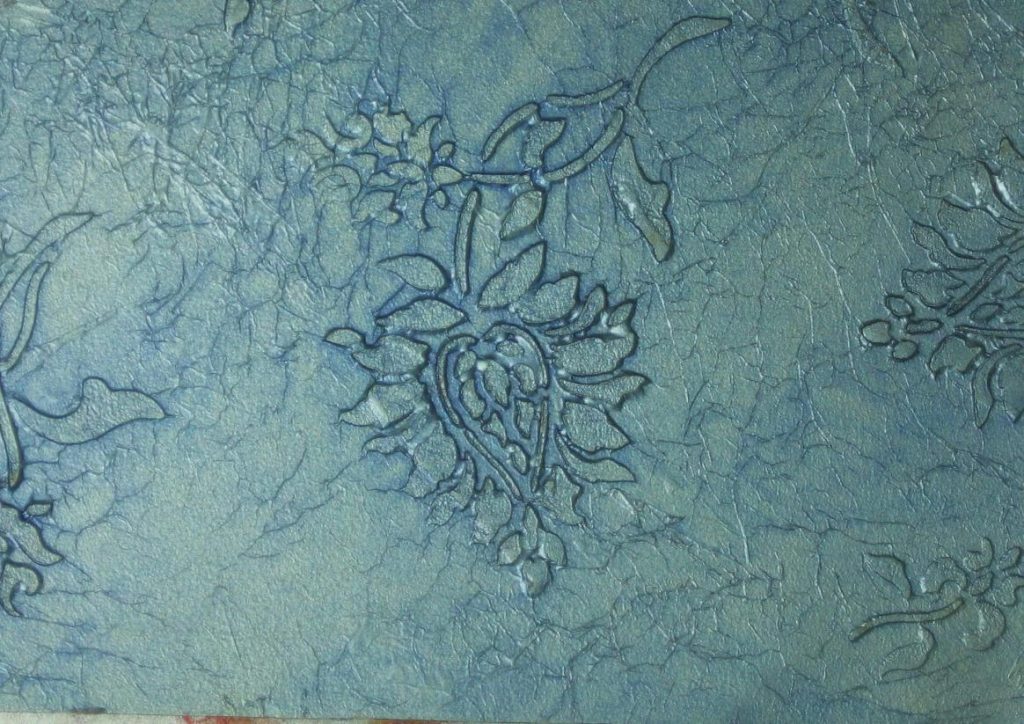
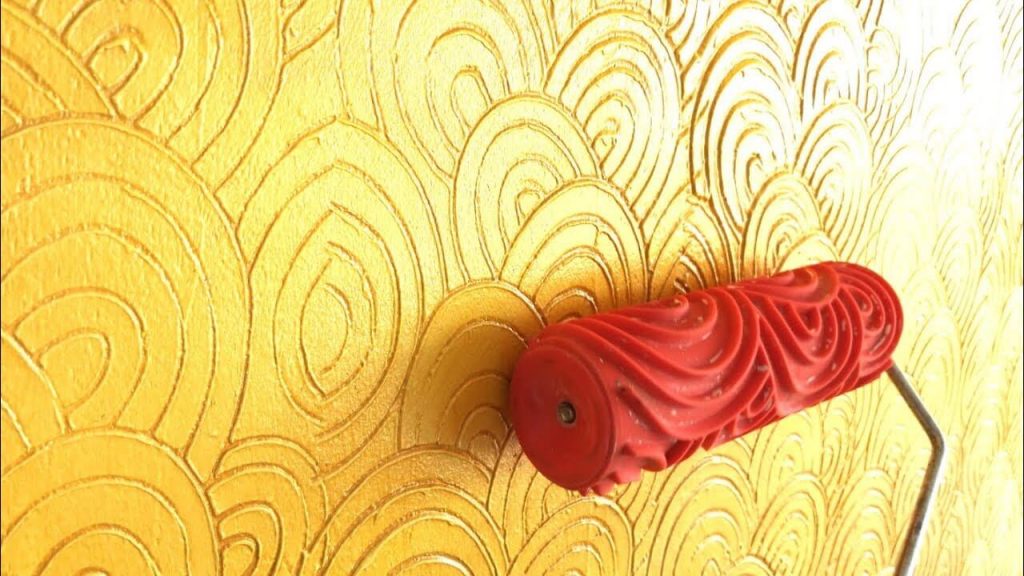
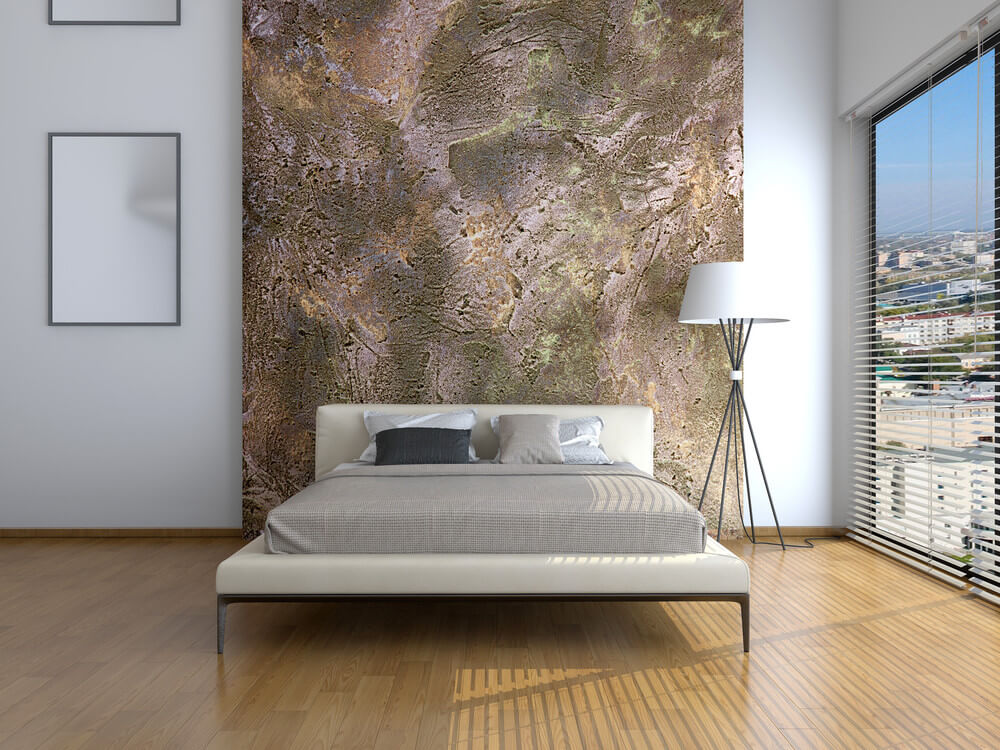
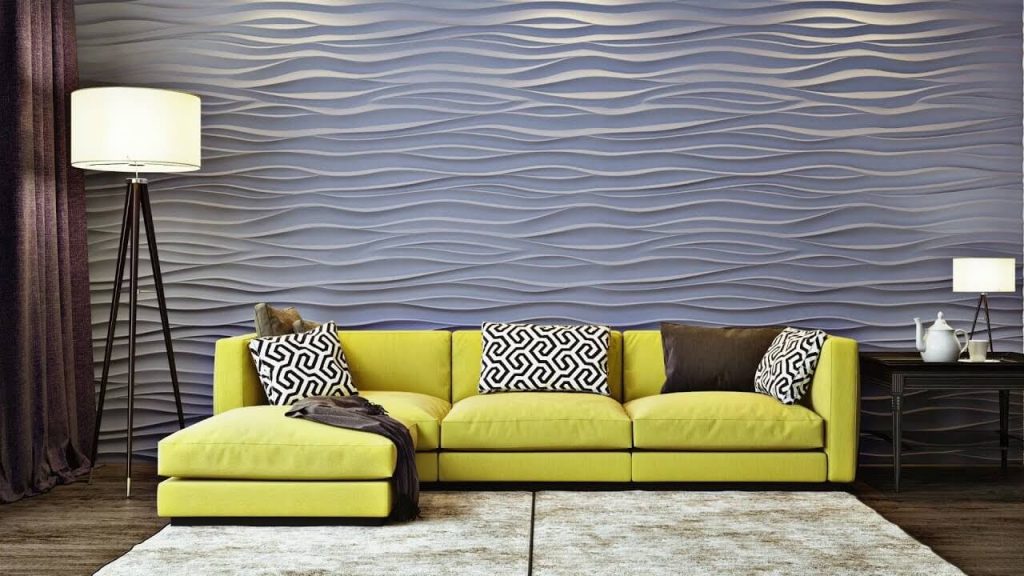
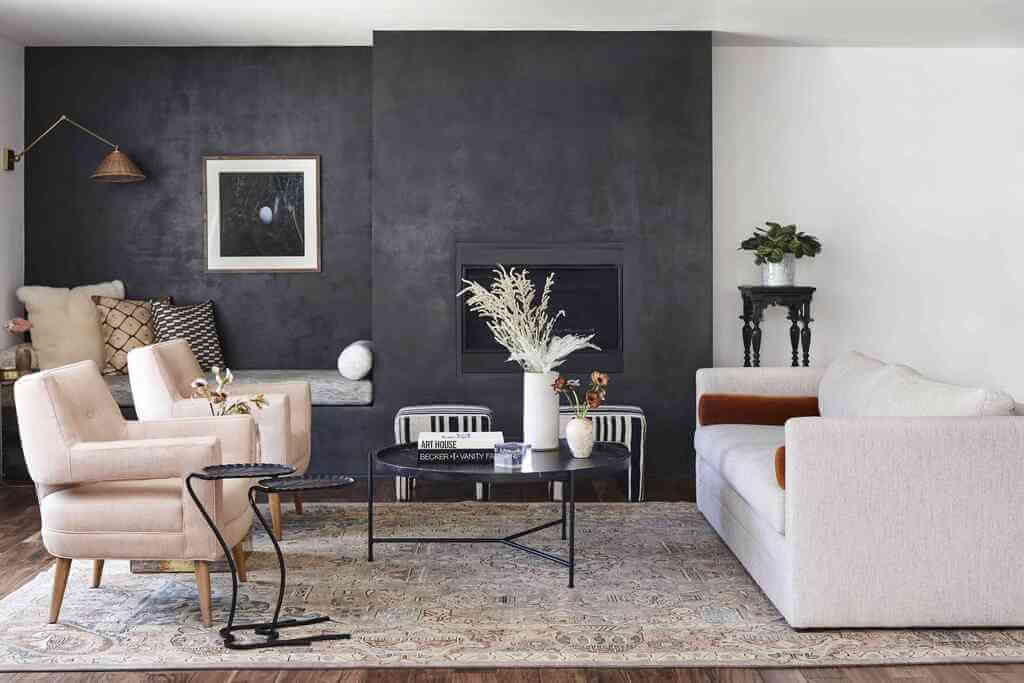
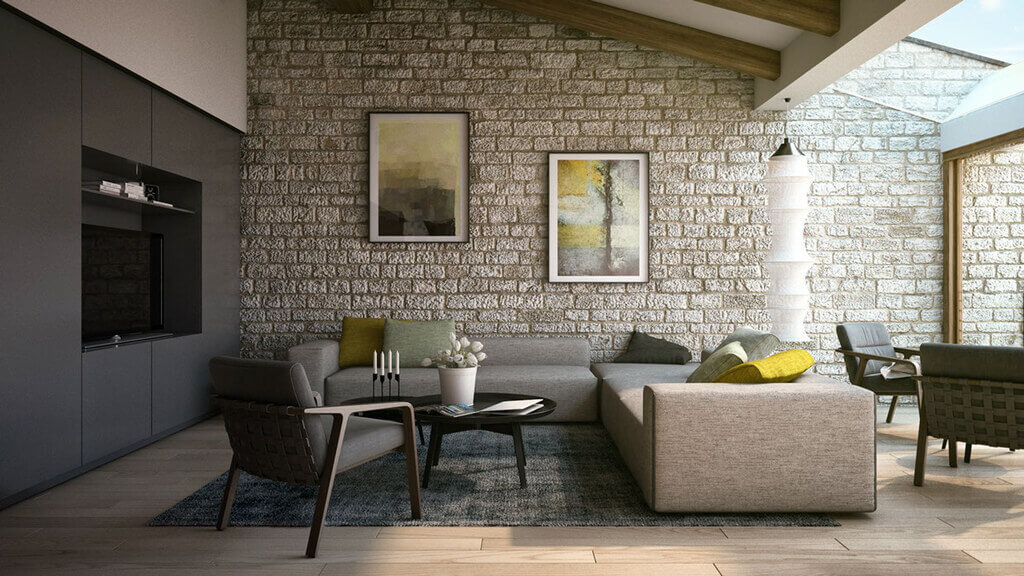
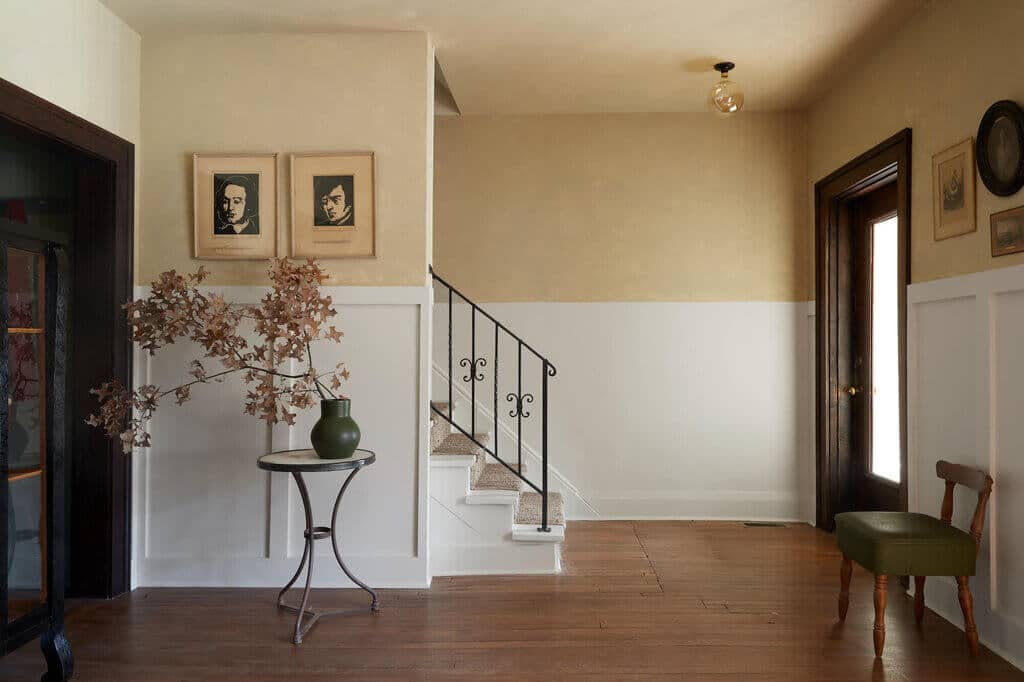
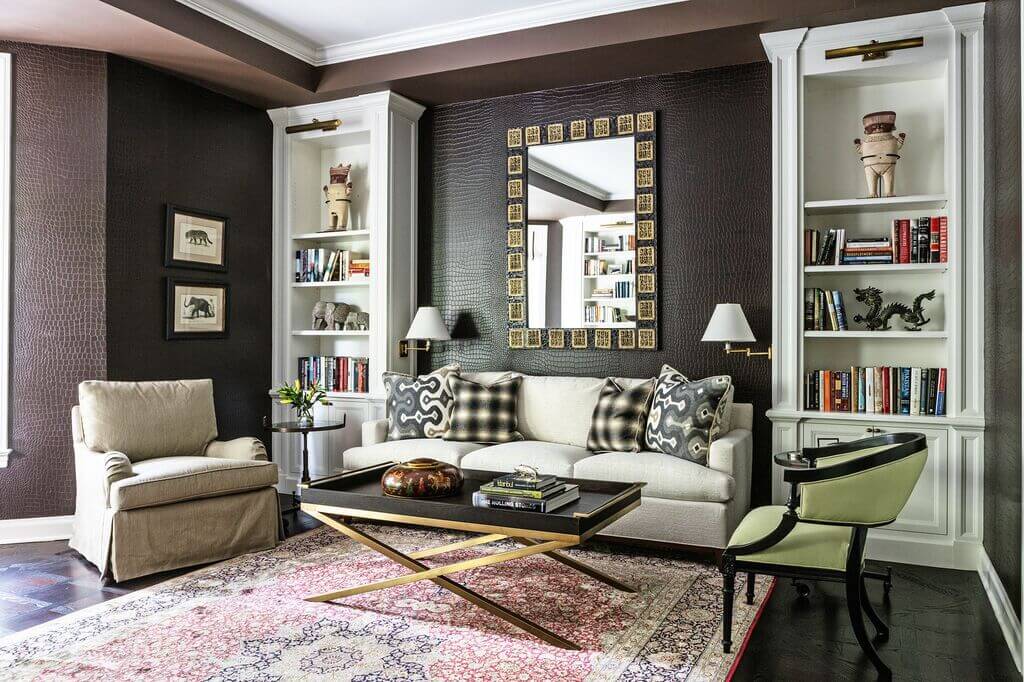
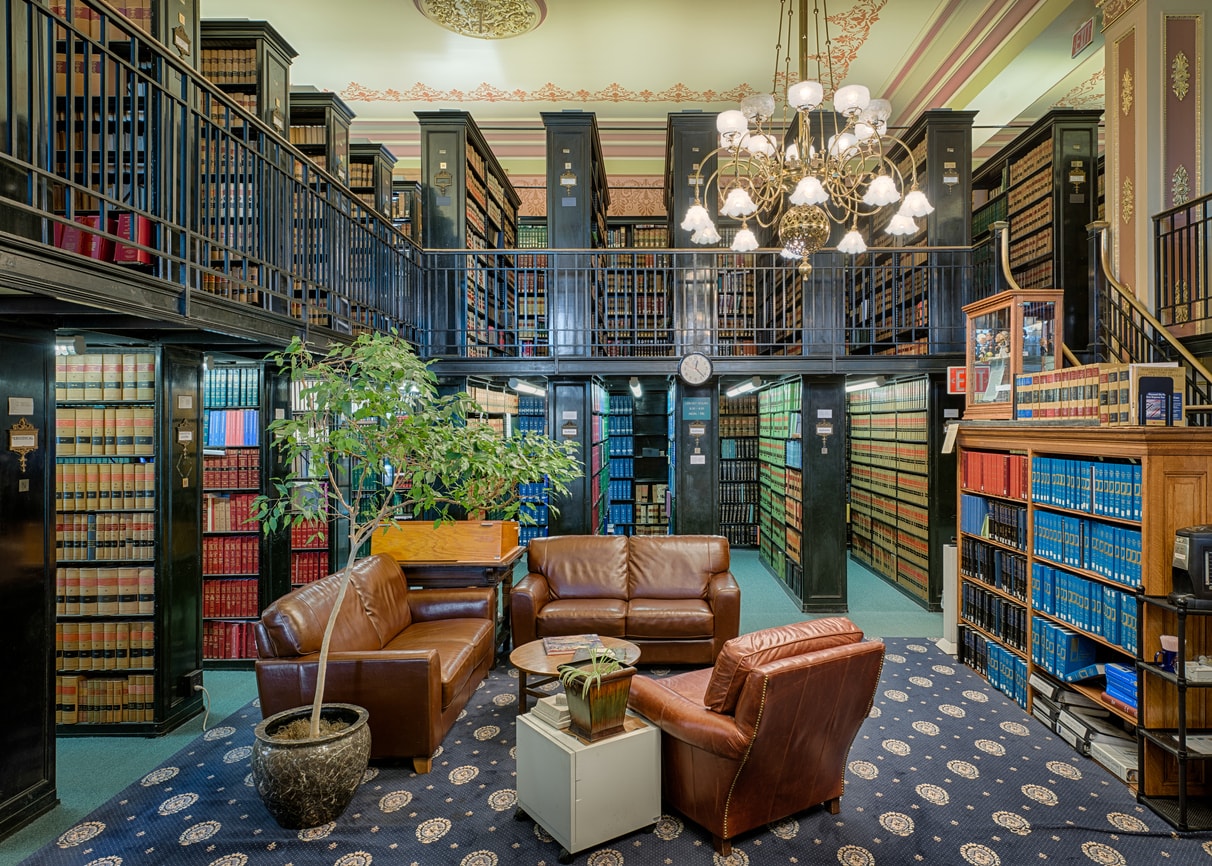
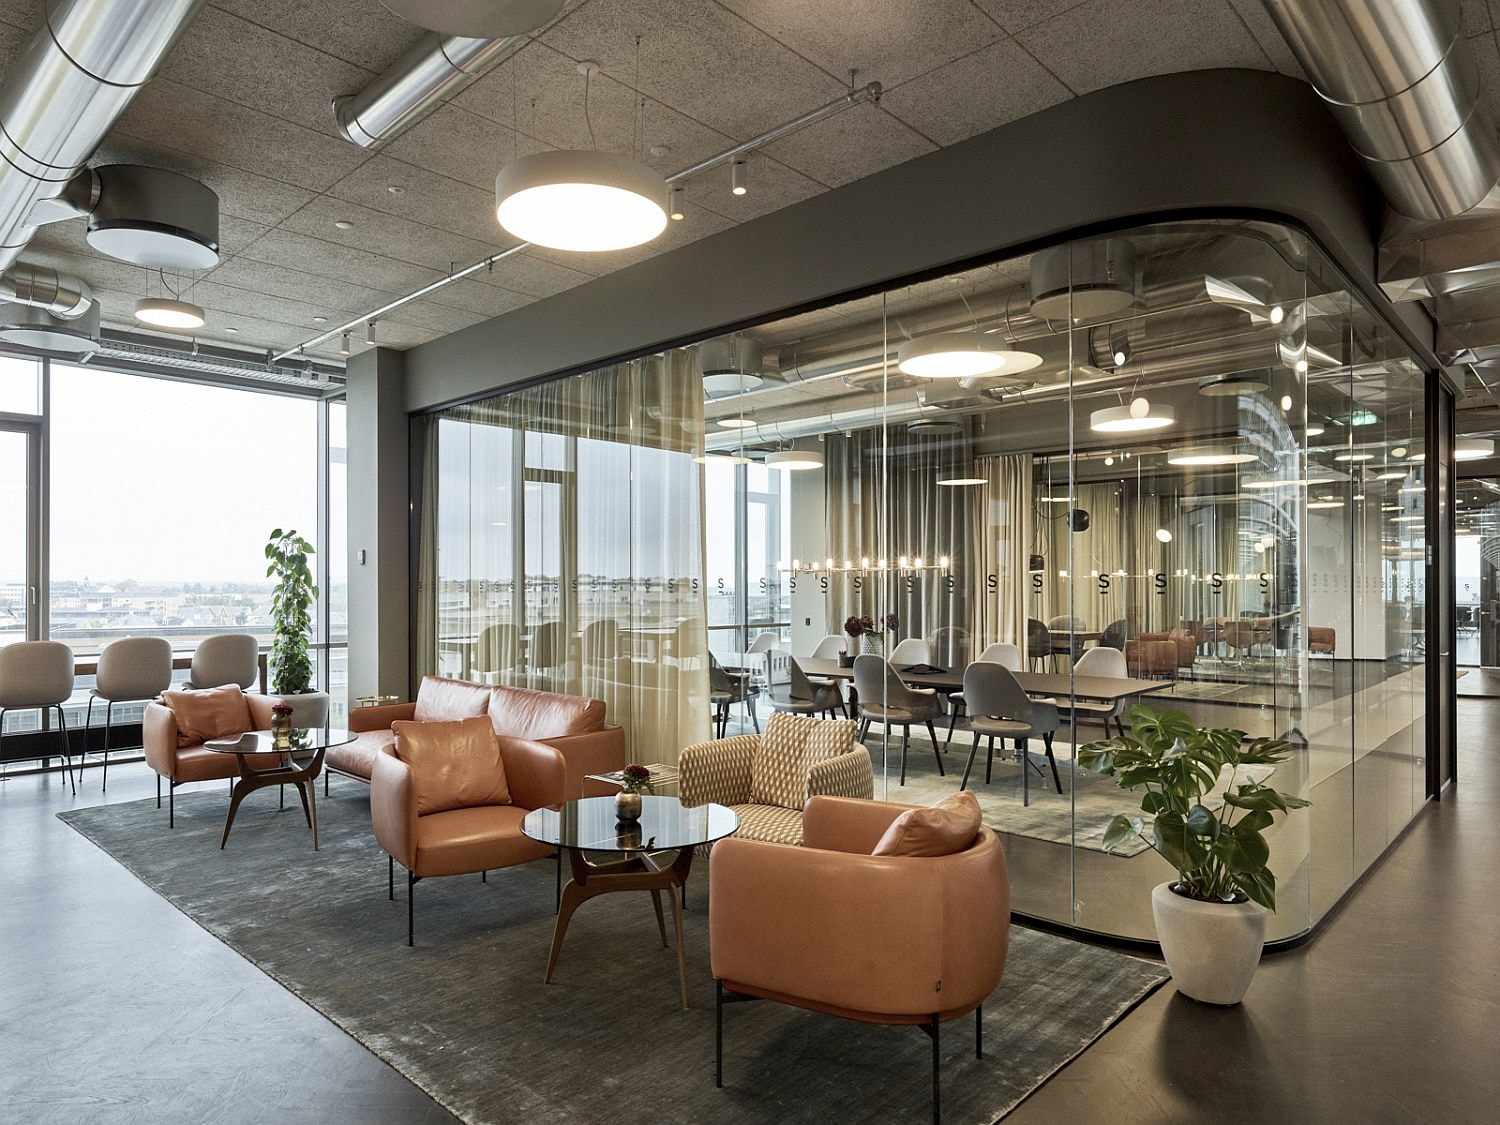
Look-book to Her Projects

Look-book to Assel Baimakhan Projects
Assel Baimakhan Projects
Interior Designer Interview Assel Baimakhan
Assel Baimakhan Projects

A Handful of Information on Interior Designer’s Life

In 14 years of experience, Assel Baimakhan has grown personally and professionally with time. From moving countries to starting her own business and then a studio, she had it all. This was all possible because of her will in achieving something. 

She has her own unique style, sees her every upcoming project as a dream project, and is willing to provide you the best she can! If you are looking for a designer for your next project or want to gain inspiration to grow as an interior designer, she is the one.

Discover More:-

How to Texture a Wall: 7 Effective Ways to Know

0
How to Texture a Wall

Texturing a wall is a great idea to give a new life to ceilings and walls. And when you do it yourself, this will become Pocket-friendly too. When you retexture the walls, it further adds a unique and exciting touch to your old and bare walls. It might sound tiring to do it on your own. But in reality, it is a pretty simple task. With the help of the right equipment and tools, you can do this in no time. Today we’re going to tell you: how to texture a wall with common supplies.

Doesn’t matter whether you want to repair your ceiling or just want to fill the unpleasing drywall seams, these techniques will surely help you out. In this blog, we have explained everything in detailed steps. 

With the help of various objects such as combs, sponges, and whisk brooms can be used to retexture a wall or ceiling. This helps to gain the finished and polished walls, which look stunning. This blog helps you to learn how to texture drywall for various textures. So let’s start the texturing procedure.

Types of Texture Paints

Types of Texture Paints

The first thing is to choose a texture or pattern. They can be used even to add extra beauty to the ceiling or to repair the unwanted seam lines. There are many types of textures, such as:

  • Smooth texture paint
  • Sand texture paint
  • Knockdown texture
  • Popcorn texture
  • Orange peel texture

If you want to know more about the various types of ceiling textures, then read our blog, which has 20+ unique texture types and decide which one you want on your wall or ceiling. After you pick one texture, it’s time to start the process.

What You’ll Need

What You’ll Need

Here is the list of necessary tools and materials that you’ll be required to texture a wall. All these items you may already have, and if not, then they’re easily available in the market, you can buy them.

TOOLSMATERIALS
Drop clothsPainter’s tape
Plastic sheetingDrywall compound
Drywall knifeFlat paint or drywall primer
Drill and paint mixer attachmentPaint
Paintbrush 
Paint tray 
Trowel 
Paint roller and cover 
Sponge 

Working Time: 30 mins

Total Time: 4 hrs

Skill Level: Beginner

Estimated Cost: $20 to $30

How to Texture a Wall

Today in this blog, we’re going to tell you four different ways to texture a wall. So whether you want an orange peel or ridged texture on your wall or ceiling, by following these simple steps, you can achieve any pattern or texture. so, let’s begin with the first method:

1. How to Texture a Wall with Joint Compound

How to Texture a Wall with Joint Compound
  • The first step is to clean the walls, then let them completely dry.
  • Now combine the joint compound with the water as per the instructions written on it. It should have a consistency of a thick batter.
  • Use a wide putty knife or a trowel to spread it on the wall.
  • And after that, whatever texture you want, you can use the tools accordingly to create the desired texture.

TIP: For example, if you want a cross-hatched texture, use a notched trowel and draw lines in the joint compound. 

  • Once you textured the entire wall, check whether there is any requirement to do touch-ups. Add the joint compound in the required spaces.
  • Before you start painting, allow this to dry completely for at least 24 hours.

2. How to Texture a Wall with a Texture Sprayer

How to Texture a Wall with a Texture Sprayer

If you want to texture your wall in the orange peel or in popcorn texture, you’ll definitely need a sprayer. By the way, it is the easiest way to texture a ceiling or wall.

Just follow these steps:

  • The first step is always cleaning the surface of the wall. Whether you’re texturing your wall or ceiling,  first clean them and then leave them to dry.
  • Then cover all the furniture, floors as you don’t want to ruin them, right?
  • Combine the joint compound with water then add it to the sprayer’s hopper.
  • After adjusting the nozzle, use slow motions to spray onto walls.
  • After you’re done spraying on the whole wall, leave it for dry for at least 24 hours, then you can start painting.

3. How to Texture a Wall with a Sponge

How to Texture a Wall with a Sponge

With the help of a simple paint sponge, you can create a beautiful faux texture.you can also finish this in less time as it takes less time in drying. So let’s know how to do this sponging technique: 

  • If you want two texture wall effects, then first paint the wall in a base color and let it dry completely.
  • After that, soak your sponge in the paint of different contrasting colors or the same color (depending on what kind of texture you want) for a more striking and elegant look.
  • Then dab dab dab..repeat this step to create a random texture pattern until the entire wall is filled with the design. 

TIP: For more natural patterns, use sea sponges, and for uniform & rectangular patterns, use a synthetic sponge. Both are easily available in the market.

4. How to Texture a Wall with a Roller

How to Texture a Wall with a Roller

Another easy way to texture a wall is by using a paint roller. This is a very simple technique and also quite popular among people. You can use this technique to create both kinds of texture: textured paint or faux finish.

Texturing with Joint Compound or Textured Paint 

  • You already know the first two steps, right? Yes, clean the walls and mix the joint compound with water.
  • After that, pour this mixture into a paint tray, then soak the roller in it, and roll over on the wall.
  • Wait for some time so that the joint compound will settle on the wall, then again roll over.
  • By doing this, a wonderful 3D texture will occur on the walls, which look absolutely beautiful. 
  • Use a brush for the corners and then let it dry for 24 – 48 hours.

Texturing with Paint for a Faux Finish 

  • After cleaning the wall or ceiling, paint the wall in a base color and allow it to dry.
  • Then take a stencil or a thick nap roller and with the help of a complimentary glaze paint the wall. You can also use the secondary color. That’s it!! and your faux finished wall is ready!!

TIP: If you want something different and unique you can achieve it by using various types of painting tools and techniques.

how to texture a wall

Wall Texture Tips & Tricks

  • Always prepare the wall with a drywall primer before applying the joint compound.
  • It is advised to strip the existing texture before applying a new one to get a more finished look.
  • For acoustic and popcorn ceiling repairing, touch up spray is available in the market.
  • To highlight the textures, you can also use satin paint on top of a wall or ceiling.

Easy, Fast and Budget-Friendly

Easy, Fast and Budget-Friendly
A living room filled with furniture and a fire place
A living room filled with furniture and a brick wall
A room with a table and a vase with flowers on it
A person using a paint roller to paint a wall
A living room filled with furniture and a large mirror

Once you know how to texture a wall, you can experiment with various techniques and patterns. This is an effortless DIY project and we’re pretty sure you’ll enjoy doing it. It also requires low cost and simple tools & supplies, which is also easy on our pockets, right? 

But if you’re planning to cover large areas, it’s better to call a professional. Other than that, you can easily decorate your walls and ceilings all by yourself. The whole process is fast, and also it has less drying time. I hope this guide will help you, and you’ll end up with beautiful texture looking walls.

Explore Further:

3 Tips For Servicing Your Home Air Conditioner

0
Home Air Conditioner service

The air conditioner is one of the most hard-working appliances in our homes. We tend to take it for advantage until it stops working when a heatwave hits. An emergency callout to have your air conditioner fixed will cost you a premium, not to mention the inconvenience and headache! Routine maintenance can prevent this from happening to your A/C unit and will also save you money by cutting down on your energy usage. Here are some tips to guide you in getting it right:

Home Air Conditioner Service

1. Do Regular “Housekeeping”

There are other maintenance efforts you can put in to make sure that your system continues to work efficiently. One of the most important jobs is to change the air filter. You’ll find this part in the unit’s filter slot. To change it, slide out the filter. Then, simply slot the new air filter in. Make sure you take note of the direction of the airflow so you know which side of the filter needs to face outwards. Also, check the instructions to ensure you buy the correct filter size and replace it properly.

Home Air Conditioner Service

Also, check the indoor vents to see if they are clean. Your outside unit also needs a bit of spring cleaning. Remove any debris such as leaves or twigs that could clog it up, and ensure there are no plants within two feet of it. Never open the outside unit. If you feel it needs a more thorough clean, and you can’t achieve this without taking it apart, call in a professional team. They’ve got the skills, tools, and safety knowledge to do the dirty work. While they’re in, ask them for advice on what you can do to prevent this happening more regularly. They may recommend trimming trees that are near the unit, for example.

2. Get a Pro to Service it Annually

Get a Pro to Service it Annually

Calling in the company that installed your air conditioner is recommended as they know the system and history. The expert AC company in Tampa recommends you schedule a regular service at least once a year. Spring is the best time to get this done.

If you have pets or kids with allergies, it’s worthwhile changing the filters more regularly. Your air conditioning service team will also be able to give you some guidance here. Filters come in varying strengths. If you have fur babies in your home, you may need your filters serviced monthly or invest in a filter that has a higher rating. If you have family members with allergies, work on the 90-day schedule to have your filters cleaned, or do them yourself. Pollen and dust mites are common triggers for those that are sensitive to allergens. If yours isn’t coping with the needs of your family, discuss this with your technician and see what other solutions they can offer. They may recommend a single unit in the bedroom of the affected family member, for example. 

Another reason to schedule a professional service of your aircon system is that this might be one of the rules in place according to your warranty. If you’re not sure, check your warranty and make sure you adhere to the clauses laid out in it. You don’t want to be landed with hefty bills down the line simply because you forgot to schedule a totally affordable annual maintenance.

3. Keep an Eye on the Performance of Your A/C

Keep an Eye on the Performance of Your A/C

Have you noticed your electricity bill creeping up? A problem or inefficiency may be causing it. To test your system, take some time to turn it up to the highest setting. Is it making any odd sounds? This process will give you an idea of how your system is working overall. You may notice a smell – this is just the system clearing out dust and is nothing to be concerned about. 

Here Are Some Questions to Run Past Your Technician:

  • Give you advice on the best time to use your aircon and tips on how to use it efficiently to minimize energy use.
  • Ask them to set up an annual reminder to service your A/C system. 
  • Ask them to give you an idea of which parts will need replacing soon. At some point, it may be worthwhile to replace your system rather than continuing to replace parts.
  • How energy efficient is your system? Air conditioners are constantly advancing in technology and it may be worth your time to look into a new system that is environmentally-friendly and will save you money in energy bills in the long-term.
  • Can they give you advice on how you can insulate your home to support the aircon system to be more efficient? There are simple strategies you can put in place too, such as keeping doors (external and internal) closed when you are running your aircon. 

To get more information:

The Different Types, Configurations, and Materials of Toilet Partitions San Diego

0
Toilet Partition

Toilet partitions are often overlooked but are truly important in public restroom design and can make a huge difference in the overall aesthetics of a restroom. This article discusses the different types, configurations, and materials considered in choosing toilet partitions for your public toilet.

Toilet Partitions

Toilet partitions are basically enclosures that surround toilets in public restrooms. They’re a public restroom staple that people tend to take for granted in terms of its contribution to a restroom’s design. But toilet partitions San Diego are pretty important, especially considering that they’re the only thing that provides restroom users privacy in an otherwise public setting.

In choosing toilet partitions when designing a public toilet, you have to consider the different types, layouts or configurations, and materials used to create these partitions. It’s important to know and differentiate among these choices as different combinations will work for different restroom situations.

Toilet Partitions San Diego: A Brief History 

People haven’t always enjoyed the level of restroom convenience and privacy we do today. Public restrooms, in the olden days, were very much public. It wasn’t until the Industrial Revolution that partitions were developed.

We’ve come a long way since the flimsy wooden partitions of the past – those wouldn’t stand a chance against the wear and tear and vandalism that our current toilet partitions undergo. Partitions have evolved so much since then that they now have many different types, configurations, and makeup.

Types of Toilet Partitions

Although toilet partitions are a staple in public restrooms, they don’t come in one form. In fact, there are a lot of different types. But the 3 most common types of toilet partitions are the standard partition, the European partition, and the single use-room.

Standard

Standard

This type of toilet partition is one you can normally find in American establishments. This partition has a 12-inch gap at the bottom and a small gap at the edge of the door, allowing for a sightline.

European

European Toilet Partitions

By the name alone, you can tell that these partitions are the ones found in European establishments. Compared to the standard toilet partitions, these ones are more private and enclosed.

The bottom of this partition features a much smaller gap compared to the standard partition. There aren’t any sightlines, either. Some European toilet partition models connect to the ceiling, making the toilet enclosure resemble a small room.

Single-use Room

Single-use Room Toilet Partitions

This toilet partition type provides users the most privacy because they’re basically one-toilet restrooms – rooms that only allow one toilet user at a time. You don’t share the restroom with other people at all.

Of course, as completely enclosed rooms, there are no gaps or sightlines.

Configurations of Toilet Partitions

The configuration or layout of toilet partitions would depend on the traffic the restroom expects to receive. Smaller establishments naturally have smaller space for restrooms and would, at average, have at most 3 toilet stalls: 2 standard stalls and 1 handicap stall.

Configurations of Toilet Partitions Toilet Partitions

The different toilet partition configurations include:

Standard

The standard configuration is the most basic of all – it’s the most common configuration of toilet partitions/stalls.

Handicap

Handicap stalls are also known as ADA stalls. They’re larger than standard stalls as they allow more space of wheelchair users to navigate inside.

These stalls are a requirement in all restrooms in the United States.

Between Walls

This stall is literally configured in between two walls. The layout may be done this way to accommodate plumbing equipment/supplies. 

In-Corner

Toilet partitions can be set in the corners of public restrooms. This may be done to maximize space or just to once again accommodate plumbing equipment and supplies.

The Makeup of Toilet Partitions

Compared to the materials used to make toilet partitions of the past, the materials used now are usually waterproof, more durable, and sustainable – mostly to withstand the beatings they normally take from vandals.

The Makeup of Toilet Partitions

The best materials to use for toilet partitions are as follows:

Powder Coated Steel

A toilet partition made from powder-coated steel will give you a rust-free and anti-fade finish. True to its name, it gives off a powder-like finish. This is achieved through the process of electrostatic coating – a process that uses charged particles to paint the partition. 

The best thing about them is that these partitions usually sell for cheap. So you get functional partitions with a good finish without having to break the bank.

Plastic Laminate

This toilet partition material is the most affordable one. However, they aren’t recommended for public restrooms that are near the ocean or other bodies of water. They also aren’t recommended for use in high-moisture areas like showers and locker rooms.

Plastic laminate toilet partitions are durable and economical. They’re also pretty sanitary as dirt, grease, and even cosmetics won’t penetrate its laminated surface – you don’t have to worry about these being absorbed into your partitions.

Solid Plastic

Solid plastic or HDPE is among the pricier material options. However, they would be worth the investment if your public restroom is for a high-moisture area. This is because this material is non-porous. This means that moisture will not be absorbed into and damage your partitions. 

This material does not only not absorb odor, but it also never peels and molds. 

Stainless Steel

Stainless steel toilet partitions are definitely pricier than other materials and for good reason! They don’t only look good, they allow for easier cleaning as well. They’re damage resistant, too. So this material is a good investment if you’re building your public restroom in an area where vandalism is commonplace and you expect your stalls to take a beating.

Phenolic

Phenolic toilet partitions are made out of layers of Kraft paper put under intense pressure to be infused with resin.

Like stainless steel partitions, these ones also cost a pretty penny. This is because they’re not only strong and durable, they’re also lightweight. 

Like solid plastic partitions, they are also water and moisture-proof, making them perfect for high-moisture areas and areas near bodies of water.  

Explore More

5 Key Benefits of Garage Insulation

0
Garage Insulation

Wondering why your electric bills are unusually higher than your household’s actual power consumption? You tried to lessen the use of major appliances, put out all the lights at night, and even prohibit prolonged television and computer use. Despite all these power-saving efforts, your monthly bills don’t seem to change, and it just keeps costing you money. Before you convey your grievances to your electrical service provider, perhaps you should try to access the present condition of your property.

A building’s heating, ventilation, air conditioning system (HVAC) consumes the most electricity, and lack of proper insulation can force the appliance to work even harder. This causes your energy bills to soar high. Poor-quality home insulation may also be the reason why you experience discomfort in your homes during the summer and winter months.

Improve your everyday home living by planning the proper insulation of your home. If your garage is attached to your main interior, consider insulating the same for a lot of benefits. Your local building codes may also require you to insulate your garage.

A Garage filled with lots of different types of items

Here are the five key benefits of garage insulation:

Comfort

In most homes, garages are no longer strictly dedicated to cars and other vehicles. Aside from storage, they now become a favorite spot for workouts, hobbies, and DIYs. However, during the cold winter months, your garage can be a freezing zone and unsafe to use for any activities. With proper insulation, you can enjoy your garage all year-round.

Protection

Insulating your garage means protecting your car investments and other valuable items in storage. Maintaining a warmer temperature in your garage, for instance, preserves the battery of your car and makes it easier to work in cold mornings. An insulated space also helps preserve precision tools and chemicals that are easily damaged by humidity and temperature extremes.

A garage with a work bench and tools in it

Quieter Home

Do you often bring your DIY projects to your garage? The noise that comes from running your power tools may be disturbing your neighbor’s nap time. If you don’t want to attract attention in your neighborhood in a negative way, you better insulate your garage and keep the noise down. You never know when your kids will need the garage for band practice, so better make a move right away.

A man standing next to a ladder in a garage

Energy-efficiency

You may not know it, but your uninsulated garage can be the reason why your monthly bill is speeding up. This is usually the case in residential and commercial properties with an attached garage. HVAC systems are forced to work hard once your garage becomes extremely hot or cold, thus increasing power consumption.

Value

Aside from adding comfort and beauty in your home, deciding to insulate your garage today can get you highly beneficial returns once it’s time to put your property in the market. With an insulated garage, you can sell your property twice easier and at higher market value.

Garage Door Insulation

A man insulating a garage door with pink paint

Before you forget about it, make sure to insulate that big garage door, too. Insulating your garage makes no sense if you have a regular door where the heat or cold air can seep through. Studies have shown that insulating your garage door can reduce heat loss through the garage by more than 70%. What’s more? According to Jams L. the founder of Calgary Garage Door Repair: Insulated garage doors have increased strength and are less susceptible to dings and dents than uninsulated ones. There are different types of insulated garage doors that you can choose from depending on your budget and aesthetic and working requirements.

Should you hire a professional to handle your garage door insulation?

If you are spending on garage door insulation, you better hire professionals to do the job for you. There’s a lot that could go wrong with your DIY plans, including misaligned or mismeasured panels. Without experts to help you throughout the process, you are at risk of doing an installation redo, costing you more time and money.

To get more information:-

What You Need to Know About Designing Your Luxury Law Firm

0
luxury law firms

It’s important to decorate your law office in a way that is professional, attractive, and comfortable. The way one’s office looks can make or break a client’s perception and can ultimately impact whether or not he or she wants to work with you. Your office is the first thing that people see when they enter your law space; oftentimes, they will notice the way the office looks before even meeting you or anyone else on your team.

In addition to making a space look professional and comfortable, it’s also a good idea to make it luxurious. Not only will a luxury office be aesthetically pleasing to look at for you and your team, but potential clients will also be intrigued by this gorgeous space. This post will give you some tips on how to decorate and design your office to be luxurious. 

How to Make Your Law Firm Luxurious

There are a lot of things to consider when designing your law firm office to be the right amount of luxurious and professional. A life insurance attorney pointed out, “It’s crucial that lawyers decorate their office with their potential clients in mind. Lawyers need to design and decorate their space to fit the kind of people that will be visiting it.” With that being said, here are some tips that will make your law firm’s office luxurious and can be incorporated into any kind of law
office space.

Make it Modern

This is true for any kind of office space but is especially true for law offices as many people expect to be impressed when they enter a law firm’s space. There are a number of ways to make your space modern, here are some ideas:

luxury law firm Make it Modern
  • Incorporate art- art is the easiest way to make a law office modern and luxurious. Look for eclectic and unique pieces of art to hang on the walls and around your office. Art will instantly add a modern edge to space.
  • Show off your technology- technology is another easy way to make a space look modern. Consider showing off your computers, televisions, and other technology by strategically placing it in a sleek space that is otherwise bare besides your technology devices. 
  • Paint your office white and use accent colors- this is a modern interior design risk that companies all over the world, mainly tech companies, are using. A white office looks luxurious and classy and adding an accent wall, perhaps red or blue, will add a modern look to it.

Incorporate Transparency

luxury law firm Incorporate Transparency

Incorporating transparency is both a metaphor and a luxurious interior design choice for law offices. Transparency in a law firm’s office space can mean including glass walls to show what is going on behind closed doors; or it can mean adopting an open floor plan, also showing off what is going on behind the scenes. Transparency is beneficial for both employees and potential clients because it looks luxurious and sophisticated while also reinforcing organizational habits and community.

Additionally, glass walls and open floor plans will make space look bigger and will maximize the square footage in the space. Clients will enjoy this luxurious design because it is current, up to date, and aesthetically pleasing to look at. 

Pay Attention to Lighting 

Lighting can make or break the way that a person feels in a space. Lighting can have a positive or a negative impact on a person’s emotions, and in a law office where a client often comes in already with emotions on their mind, it’s important to create only positive emotions with lighting. 

luxury law firm Pay Attention to Lighting 

When thinking about luxurious lighting in your office, make sure to not make lighting too bright. Lighting that is too bright is uncomfortable for the eye in any given situation; however, it can be especially uncomfortable to the eye when under stress; and law offices house a lot of stress for both lawyers and clients. Fluorescent lights are often harsh on the eyes because they are known to be bright and to flicker. Consider installing LED lights that can be dimmed.

In addition to the light bulb that you are installing, it’s important to pay attention to lighting fixtures. In order to create a luxury law office, lighting fixtures should have a minimalist yet modern look to them. This means that law firms can make their space look authentic and luxurious with hanging lights rather than typical lights that are installed right into the ceiling. A luxurious lighting fixture can be a geometrically shaped light in the conference room or it can be a uniquely styled lamp in the waiting area.    

Take Advantage of Your Law Library

Libraries are an interior design staple in law offices; they are both practical and aesthetically valuable to lawyers and clients alike. With the use of the internet and online law libraries, lawyers can look up information in seconds, making a physical library seemingly pointless. However, law libraries still have value and can pull together a law office making it look classic and luxurious.

luxury law firm Take Advantage of Your Law Library

Law libraries should feature books you read and had to study in college as well as the latest editions of each, this will allow you to have physical copies of information, as well as showing potential clients your extensive knowledge on certain subjects.

Though law libraries are still relevant, they can be condensed in size because of the internet. Take advantage of the extra space by filling shelves with awards and photos from some of your law accomplishments; this will make a law firm office look luxurious as well as professional and welcoming. 

Law and Luxury

As you design your law office space, keep these design tips in mind. Also, consider looking at other law offices’ images online for inspiration. It’s important to preserve luxury and law in your office as you redecorate.

Explore More

Check Out Easy Steps To Replace A Toilet Flange

0
Replace toilet flange

If you are not aware of the word Toilet Flange, then here is what it means – the toilet flange is a circular part of the toilet that connects the toilet to the floor and is further connected to the drain/sewage pipe. These are made of PVC, rubber, or metal. Let’s see how to replace a toilet flange.

How will one come to know that it’s time to replace a toilet flange?

Water leaks at the base of the toilet, the toilet becomes loose and moves with wrecked sound, shaky units, and damaged flooring are some of the signs that indicate that it’s time to replace the toilet flange. If not repaired or changed on time, then it will create significant damage over time. Over and above, it creates unnecessary hygiene risks in the home.

How to repair/replace a Toilet Flange?

Below are the steps one should follow to replace a toilet flange. This activity doesn’t take much time, and also, not much expertise is required.

1. Gather all the required items/materials to replace a flange

 Gather all the required items/materials to replace a flange

Below are the materials required –

The below materials can easily be available in any hardware shop. They are not very expensive.

  • Toilet flange – to buy the toilet flange, you should take the old one to the store for the correct size and type. Toilet flanges are made of PVC, copper, and iron. You can select the one which fits your needs.
  • Toilet flange extender – if the existing flange is the glue to the drainpipe
  • Bolts – buy some new toilet flange bolts so that they can be replaced with old ones in case they have been rusted or worn out.
  • Wax ring – it helps to hold the flange to the base of the toilet
  • Wrench – it is used to unfasten the old bolts of the toilet around the flange
  • Multi-head screwdriver – it is used to loosen the screws and remove the toilet
  • Putty knife – it is used to remove old wax around the seal of the flange
  • Old rags and newspapers – it is required to block the outflow pipe.
  • Mask – to cover your nose and mouth from awful toilet odor
  • Gloves – not to make your hands dirty

2. Flush and Empty the Toilet

Flush and Empty the Toilet

Turn off the knob to stop the water supply to the water tank. Flush the water tank until it gets empty. Disconnect the water supply hose from the toilet. Keep a big tub/vessel to collect the leaking water, if any.

3. Remove the Toilet

Remove the Toilet

Cover the bathroom with old newspapers. Use a wrench to remove the bolts that hold the toilet down. Now with the help of someone, lift the toilet and place it away from the work area and keep it in the newspaper, so the area doesn’t get spoiled.

4. Block the Outflow Pipe with a Rag

 replace toilet flange

Once the toilet is removed, immediately stuff the old cloth rag in the outflow pipe to prevent an awful odor. Do not stuff much inside that it becomes difficult to pull it outside again.

5. Remove the Flange

Remove the Flange

Use a putty knife to clean the wax from the flange. Remove the bolts with the help of a wrench, then with the use of a multi-head screwdriver to loosen the screws and take off the toilet flange. Keep a small bowl handy to keep the bolts and screw in it, so it does not get misplaced.

6. Replace the new Toilet Flange

Replace the new Toilet Flange

Remove the rag stuff in the outflow pipe. Now place the wax ring on a clean surface. Insert screws and put the new flange on it. Now with the help of someone, place the toilet on the replaced flange and apply pressure to set the seal. Make sure the toilet is placed straight at once, as it cannot be moved once placed on a wax ring. Tighten up the replaced toilet flange with bolts (use new bolts if old ones are worn out).

7. Reconnect the Water Supply

Reconnect the Water Supply

Reconnect the water supply hose and start the water supply. The tank will begin filling, meanwhile, examine if there is any leakage of water between the toilet tank and supply line. Flush the water several times to check if there is no leakage. If the floor is dry, then you have succeeded in replacing the toilet flange. But if there is a leakage, then you will have to install it again or call a plumber to do the same.

Above were the steps to install or replace a toilet flange, which is detachable and also simple to install.

Now let’s discuss the Toilet flange extender 

A toilet flange extender fits over the existing flange to raise the drain connection to the surrounding flooring. Plastic flanges typically cannot be removed because they’re the glue to the drain pipe. So in such cases, we’d like to use toilet flange extenders, which are made from plastic rings that are available in various thicknesses. Most extenders are secure by fastening them to the subfloor with screws driven through the holes within the old flange.

The materials required for installing a toilet flange extender are the same as that of a regular toilet flange. The only additional piece of equipment needed is silicone caulk. Sometimes toilet flange extenders have rubber gaskets that will not require caulk for sealing the space between the floor and the extender.

Now while installing the toilet flange extender, the procedure remains the same as that of replacing the toilet flange. One minor change is that as the flange is the glue to the drainpipe, the extender is to be applied above the existing one. Apply a liberal amount of silicone caulk on the bottom of the flange extender. Place the extender on the top of the old flange, including spacers as required. Place the screw holes in the extender into the old extender. Tighten up the screws to the extender with the floor.

Since the extenders are not replaceable, one needs to check the durability of them.

replace toilet flange

FAQ’S

What kind of toilet flange extenders should one buy that will last for a longer time?

An extender that has a stainless steel ring will last longer than that of plastic material as they are more prone to damage. It is essential to buy superior quality flange material because the toilet being the moist area is in constant contact with the toilet waste, which makes it more prone to damage.

How often should one change the Toilet Flange?

A wax seal material is used between the toilet, and the flange helps to retain the water from leaking as it passes from the toilet to the sewage pipe. It also seals the awful odors. A wax seal will often last up to 20 to 30 years without needing to be changed.

Conclusion

To conclude the above, there are two methods to replace toilet flange extenders, which are easy to install if done correctly. If you feel that you are not comfortable with doing this work, then a plumber is always there to fix the problem.

Discover More: 

3 Ways to Use Digital Marketing Techniques to Boost Your Real Estate Recruitment Campaign

0
Digital Marketing Techniques to Boost Your Real Estate Recruitment Campaign

In this day and age, creating and maintaining a professional online presence is crucial to successful real estate recruitment. After all, more applicants are now primarily searching for work using the Internet. While creating your own online application portal is a good start, it will all be pointless if nobody knows that it exists. Additionally, posting job ads on forums and social media platforms won’t do much if they fail to reach your ideal candidates.

A woman sitting at a table using a tablet

The good news is that you can leverage your brokerage’s online presence to attract top-notch talent. In fact, many successful real estate agencies such as KW recruiting make use of digital marketing techniques to boost the effectiveness of their recruitment campaigns. If you’d like to give it a try, here are three ideas for incorporating Internet marketing strategies into your own recruitment process:

Determine Your Applicant Personas

When coming up with a digital marketing campaign, the first thing you need to do is craft your buyer persona. This is a research-based profile that describes what your ideal customer is like, how they spend their time and the challenges that they face. It’s also common for a business to have multiple buyer personas in case they serve several different industries and niches.

By determining a buyer persona, companies can better tailor their marketing campaigns to their ideal customers based on their pain points and personal goals. This kind of messaging helps brands show that they understand and care about their customers. In turn, these customers will be more likely to trust and do business with said brands.

In the world of real estate recruitment, you can achieve the same results by creating a detailed applicant persona. It functions much the same way as a buyer persona, digging into the reasons why an applicant would consider joining your agency. This profile should cover how your ideal candidate looks for information, their average level of education, their previous job experience, and what they value most when it comes to making career decisions.

Invest in Quality Content Marketing

Put simply, content marketing refers to the creation and distribution of relevant content that’s attractive to your target market. By consistently delivering valuable information to your customers, you’ll slowly build up their trust and loyalty in your brand, eventually leading to a sale.

Given that a candidate’s perception of your agency will influence whether they’ll apply or not, investing in content marketing should be a no-brainer. With the right approach, you can build a solid brand image that will encourage the right candidates to join your team.

When researching your agency, the first place that most applicants will land on is your company website. Thus, you’ll want to make your website look as clean and professional as possible. Make sure that it contains all the information that a candidate would need to make an informed decision, such as pages expounding on your agency’s culture, achievements, and team members, to name a few. Don’t forget to create a company career page, too, as it is one of the best channels for sourcing candidates.

To attract more talent, start writing value-packed blog posts that your target applicant would find helpful. You can also create entertaining informational videos to engage your audience. Then, share this content in relevant online forums and social media platforms to help drive traffic to your agency website.

Keep Segmented Lists of Your Applicants

With the right digital marketing tools, you can track the path that a customer takes from start to finish. For example, an email campaign management software can tell you whether a customer opened your email as well as the exact time that they did so. Similarly, a website analytics tool can show which pages each customer visited and how long they spent on each one. With this data, you’ll know whether your emails or website are working as intended. 

The same idea can be applied to your recruitment campaign. By knowing the actions of each applicant, you can profile them according to their behavior. Then, you can decide which ones are worth reaching out to.

A group of people sitting around a table with a tablet

For example, a candidate that clicked around and spent a long time on each of your site’s pages was most likely doing research on your company. This may mean that they’re serious about applying to your job ad and want to put their best foot forward. Compare this with an applicant who only spent a few seconds on your site before immediately sending in their resume. Such behavior implies that they did not bother to learn more about the company and what the position would entail, which may hint that the candidate may be quite careless.

In Conclusion

With the right tools and resources, you shouldn’t have a problem getting the attention of the best real estate agents in the market. Just remember that digital marketing techniques are constantly changing, so make sure to always stay up to date on the latest trends. This way, you can always expect to get the best results for your recruitment campaigns!

Keep reading:-

Tips For Modern Outdoor Lighting

0
Modern Outdoor Lighting

Summer season is the best time to spend evenings outside or have a small celebration in the backyard. To relax or to celebrate, outdoor lighting is an important aspect to look after. Of course, morning sun-baths are fun, but don’t let the fun end post-sunset. In the evenings, modern outdoor lighting can create a whole new mood. Though, you need to put in some efforts to set up the outdoor lighting. But it’s all worth it!

Setting up modern outdoor lighting is not just about putting a wall light or some string lights. So to plan a beautiful outdoor arrangement, you need to choose the right type of lighting for your space at the same time check the fixtures. The online world is loaded with inspiring ideas about setting up outdoor spaces. Here we have put together some tips for you to set up outdoor lighting for entertaining and fun evenings.

To start with, choose some basic types of outdoor lighting like the below:

Decorative Outdoor Lighting

Decorative Outdoor Lighting

Decorative outdoor lightings can do wonders! They can drastically change the appearance of the backyard or garden. But implementing it is a task, however, designs are now so advanced yet modern that even an old porch lantern can make the ambiance better looking. To add some style to the exteriors, you can use outdoor pendants and wall sconces, eliminating the dull old lamps. Advanced outdoor lighting is not only great for summer evenings, but they also provide safety and security for your home. Another important decorative lighting one must add to the list is overhead lighting, which is also known as ceiling lights. They are usually a significant part of the interiors of the house, but today’s modern outdoor lighting provides ceiling lights in more decorative looks. Ceiling lights or even hanging lights can be a great addition to your backyard.

Landscape Lighting

Landscape lighting is one of the most technical outdoor lights, which needs more attention to organize and install in comparison to other outdoor lightings. To install landscape lighting, you might want to take the services of a professional as it can be a tedious task if you plan to do DIY. There are numerous types of landscape lighting like path lights, deck, step lights, and recessed ground lights.

Landscape Lighting

Path lights: Path lights are to lighten up the pathway. You need to take a call on which areas you want to put these lights. Its installation asks for enough patience and commitment. It is not necessary to install these lights on the pathway only. You can also place them near the pool, garden beds, or surrounding the house fence. Make a plan about the placement of the path lights. For example, following the driveways, leading to the backyard, or the main route to the front door. To install path lights, there are solar options and wired options that need to be connected to underground power sources.

A row of lights that are on the side of a building

Ground lights: Recessed outdoor lighting offers a very modern and chic look, and it doesn’t need much hardware. You can place them in your courtyard, deck, or driveway. The fixture of the light will blend into the landscape, and only its effect will be prominent. To decorate more, you can use them on the perimeter of the house, plants, around trees and other objects on the ground level.

A set of stairs lit up with lights

Deck and Step Lights:  Deck and step lights are to be installed on the staircase around your home, and its installation needs a lot of planning and time. You can decide to make it a permanent fixture as the results will look great, improving the appearance of the house, visibility around, and safety as well. Be a little careful if you have pets. Stepping on these lights might damage the connection.

Outdoor Wall Lighting

Outdoor wall lightings can be installed on any wall where connection and wiring are available. These are some of the most preferred modern outdoor lightings out of all. You will come across plenty of options and varieties of wall lighting providing different light effects. Wall lightings can create a unique impact on the whole arrangement as per their type. You can take inspiration from images online and decide the effect of the light washing walls uplight or downlight depending on the structure of your home.

Outdoor Wall Lighting

If you do not wish to place lighting permanently, then one of the most convenient options is to use modern portable lighting. To decorate your yard with potable lights, you can use floor lamps, table lamps, and other decorative lights. Other advanced lightings you could use are wireless lights, which can light in weight, weather-resistant, and rechargeable. The best part is you can carry them anywhere and place them wherever you need.

Now let’s go through some points you need to consider while setting up your modern outdoor lighting:

Set Your Goals

Before making any purchase, you need to plan and establish how you are going to arrange the lights, where, and what kinds of lights you will need. Choose where you want to install the lights, be it a garden, driveway, poolside, etc. Calculate how many lights are to be installed in a particular area and then accordingly tally it with your budget. Picking LED light bulbs or using low-voltage lighting will help you decrease electric bills for a longer period.

Set Your Goals

Check Fixtures and connections

Take measurements so that you don’t choose fixtures, which may be too big to install. You must know the size and location of the installation before purchasing anything. For example, if you plan to install an outdoor wall light, the size of the wall scone should be roughly 25% of the height of the door.

Check Fixtures and connections

Replace Old Lightings

If you are revamping your backyard, then you should replace old lights as there are chances that the old fixtures were outdated. Inconsistency of old lighting may affect the overall look of the revamped version.

Replace Old Lightings

Use Portables

To keep the options open to replace the lighting whenever and wherever then, you must use portable outdoor lighting. Portable or wireless lights can be plugged anywhere and are rechargeable. They are one of the best alternatives to hardwiring fixtures. A variety of designs are available with different accessories.

Use Portables

Consider Safety

It is essential to invest in lights focusing on safety as well. The security of the house is as important as making the place look beautiful. You must check if there are any dull spots on your property like some sideways or multiple entry points. Make sure all entrances of your house are well lit and add wall sconces or landscape lighting wherever you feel there is a dull spot. Various kinds of security lights are also available in the market like Motion Sensor lights, Dusk to Dawn lights, and a version of both together. Security lights provide a bright flood-like light perfect for keeping the entrances and sideways bright. You can also find decorative motion-sensor lights ideal for a busy area as they turn on automatically when needed.

Consider Safety

If you consider the above information while setting up your modern outdoor lighting system, then you can do it all like an expert. Outdoor lighting has numerous benefits. It does make the exterior look appealing but also creates a unified look along with plus points for safety and security. Endnote is if you need help with fixtures and wire connections, you must contact a professional to do the needful. If you know the basics and do your research, then you are good to design your outdoor space in your style.

For additional insights:

An Ultimate Guide on Buying a Mattress in 2025 for a Kid-Like Sleep

0
Buying a Mattress

The best sleep can make your mood fresh and day more enjoyable. Getting proper sleep is like going to heaven, not everyone can have it. How can you get it? By doing good deeds? It can take you to heaven, not a night of sound sleep.

For a soulful sleep, there are many affecting factors like peace of mind, how tired you are, the amount of caffeine you had, and many more. The most important factor influencing the pattern of sleep among them is Mattresses. Getting one is not rocket science, but you need to know about its features and your requirements.

Mattress’s features can let you sleep peacefully or will make you toss and turn the whole night. In addition to that, it also adds charm to your bed’s frame and bedroom. Comfort is the foremost thing while getting a mattress. Your decision to change the current one is most likely because of the lack of comfort.

A man and a woman sitting on a couch looking at a mattress

So how to get a bed for the most satisfying good night’s sleep? As said earlier, there are many features to look at while getting one. To help you with it, we have outlined a 7-step guide on buying a mattress in this article.

You can buy a mattress from a physical store or online.

While buying from a physical store, you can check its quality with a personal touch. Know its bouncy-ness, size, fabric, and comfort. But if you are going for the online purchase, make sure to go through the review section and product description. Along with it, take a background check of the company as well. 

If you are going to purchase it online, here’s the one we found reliable, ‘mattress in a box.’ It has all the characteristics, which makes it a favorable mattress of ours as well as many of its users too.

Know the Ideal Size 

How would you feel getting a mattress that won’t fit on your bed frame? Waste of money and time, right? So before you start searching for it, measure the size of the bed. This way, you will know the perfect size to get. 

Know the Ideal Size 

There are six different sizes available, go through the size chart, and decide on by yourself, which one will go for your bed.

King-size bed76 x 80 inches 110 lbs
California King-size bed72 x 84 inches110 lbs
Queen-size bed60 x 80 inches88 lbs
Full-size bed54 x 75 inches74 lbs
Twin-size bed38 x 75 inches53 lbs
Twin Extra Long bed 38 x 80 inches60 lbs

Acknowledge the Firmness

Opting for a mattress just after knowing the size is not the right way, you should also look for the firmness of the bed too. Now there’s a myth that a soft bed can make you sleep like a log. In some cases, yes, it does, but it all matters on your sleeping position, weight, and height.

There are four types of firmness in the bed, soft, medium soft, medium-firm, and firm. If you are a side sleeper or the position changes throughout the night, go for the softer or medium-soft one. Firm or medium-firm mattresses are comfortable for one with back pain or overweight. If you are suffering from back pain choose saatva mattress here you can read saatva reviews.

Try it before you get it

If you are getting it from the store, don’t hesitate to try it on. Ask for permission, and lay on the bed, check whether it is comfortable or not. Don’t fall for the spring or coil count to know the bouncy-ness or the comfort level of the bed. 

Several types of research show that spring count doesn’t affect the comfort-ness of the bed. Lay on the for a good time. This way, you will be able to know if it is causing you pain or giving ultimate support to the back.

Look at the Types of Mattress

There are different types of mattresses available in the market, such as an open spring mattress, pocket spring mattress, innerspring mattress, memory foam mattress, latex foam mattress, hybrid mattress, air mattress and a bed in a box mattress.

Look at the Types of Mattress

The last one we mentioned might be new to you, but this one is a game-changer in the world of mattresses. If you are going to buy online, the bed in a box mattress will arrive packed in a box. 

Master the Mattress Purchase

This is an important step to follow, you should have information about the companies selling mattresses. Get reviews about the firm itself and its product. Go to google for help or watch youtube review videos. 

Once you have gathered all the information and compared everything about the beds, you are good to go. You have mastered the art of getting a mattress. The certification of it is a comfortable bed you will have to sleep on!

Ask for the Trial Period

We advised you to buy it after trying it, but what if it is an online purchase? The trial period is the answer. Always look for the brand that provides you the trial period for the bed. Once it has arrived, unbox it and start using it. 

If you feel comfortable, make it permanent there, and if it isn’t, you can always opt for a refund or exchange. Most brands give you a 120-night sleep trial period.

Ask for the Trial Period

Check About the Warranty Period

Whether you are buying a mobile phone or a mattress warranty period is a must to look for! The one we recommended has 20 years of the warranty period. The minimum life of the bed is as long as its warranty period.

Guide Yourself Before Getting a Mattress:

These were the points that you have to keep in mind while selecting the mattress for your room. From its size to its warranty, every step should give a pleasing output, only after that move to placing an order. 

Discover More: