Today, people are more prone to choosing small apartments over massive houses. For the most part, it boils down to the cost and maintenance of large homes. Large homes are also almost always the choice of larger families. But one-bedroom apartments are ideal for a young professional, student, or even someone looking for a compact living situation. But while they may be ideal, they do present some challenges, with the biggest of those being space and storage.
Especially if you are used to having more room to spread out, having limited space can be challenging. However, with a bit of creativity, you can maximize your small space, and here’s how.
Multifunctional Furniture
When buying furniture for 1 bedroom apartments in Los Angeles, this can often be the most stressful exercise. However, if you are looking for an apartment and furniture simultaneously, you can rest assured that Tripalink has got you covered. Not only do they cater to young professionals and students who need accommodation, but also, they ensure that finding your ideal location via their website is a complete breeze.
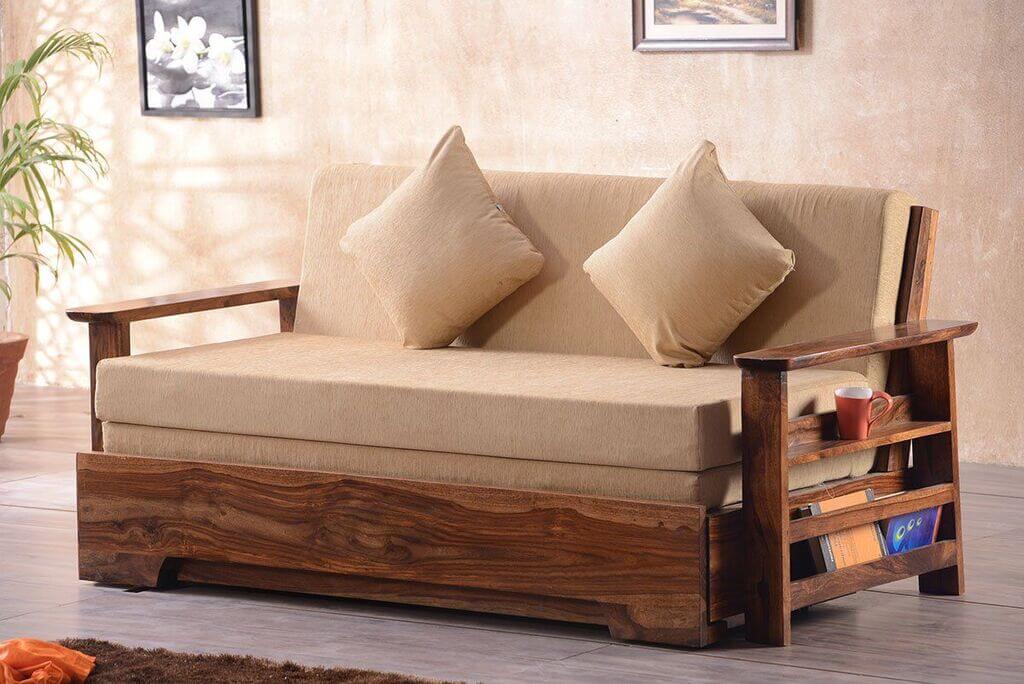
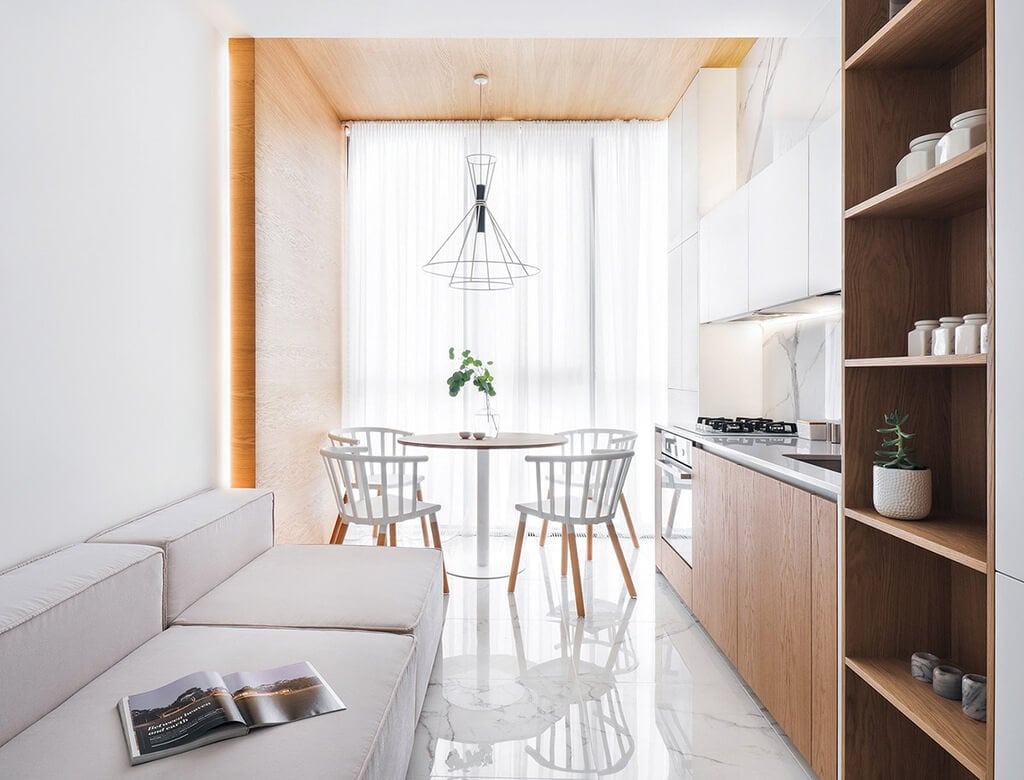
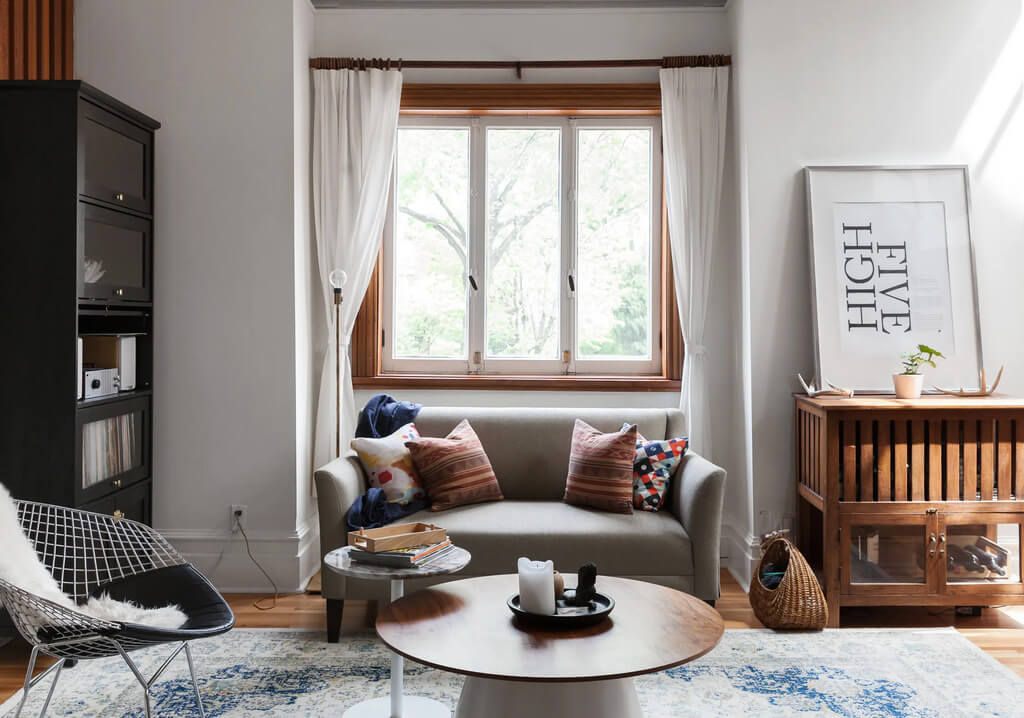
A great way to maximize space in a small apartment is to choose multi-purpose furniture, such as a sofa bed; for example, it can be used as a couch during the day and converted into a bed at night. A coffee table that comes with storage space is another great idea. You can use it to store books and magazines, and even a cozy blanket. You can literally have it all and choose stylish and functional furniture items.
Use Your Vertical Space
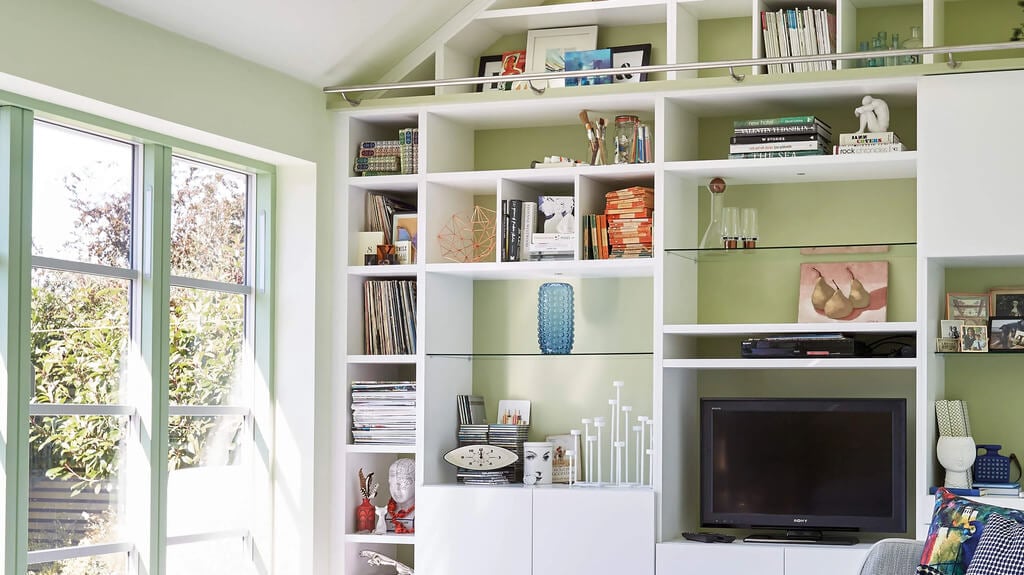
Vertical space is often left bare, but you can create more storage solutions by utilizing it effectively. Opt for shelves and bookcases on your walls that you can use to store several items, not just books. You can also use these shelves and bookcases for decorations. Next, look for storage bins that can be easily stowed away under a table or next to a wall, where you can stash any miscellaneous items you want out of sight.
Optimizing your space is also about creating visual effects that make your home seem bigger than it is. Hang your curtains higher than you normally would since this creates the illusion of higher ceilings. Use any free space in your cabinets or cupboards for storage.
Light & Bright
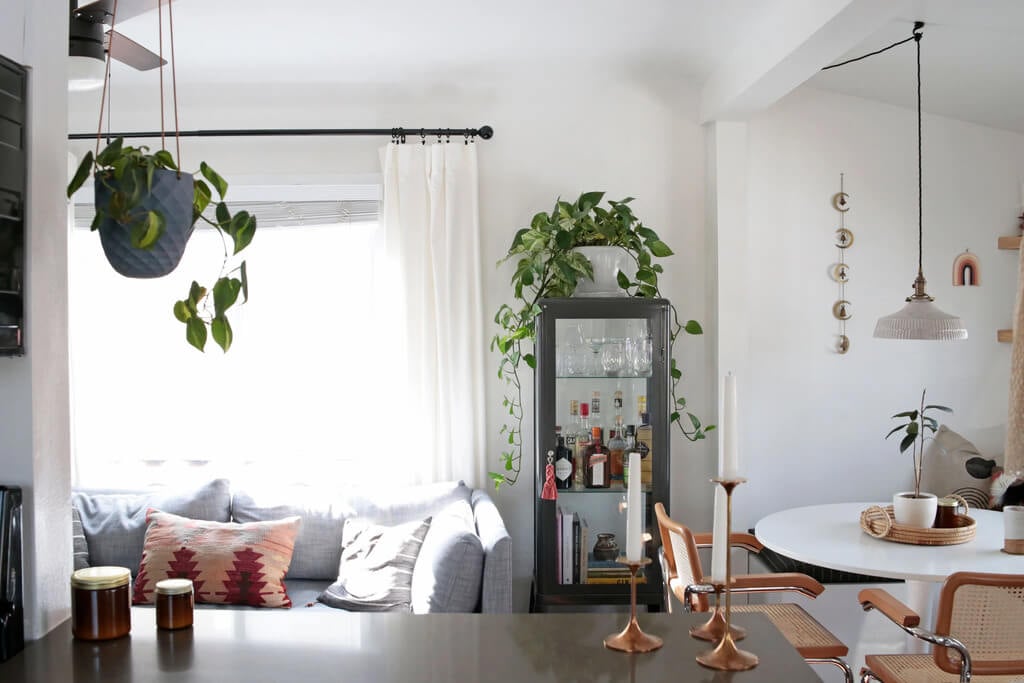
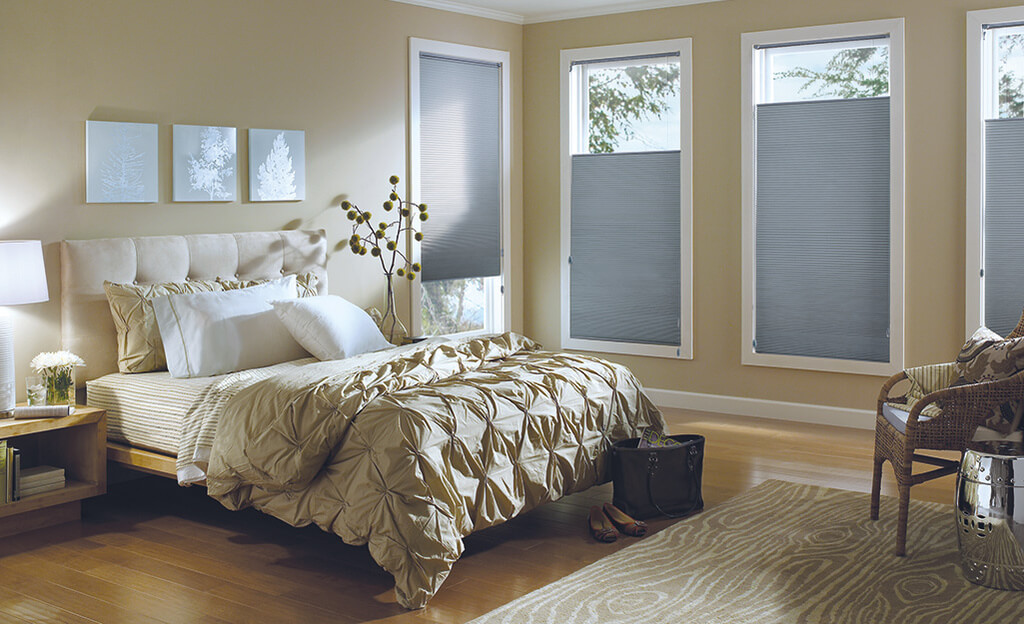
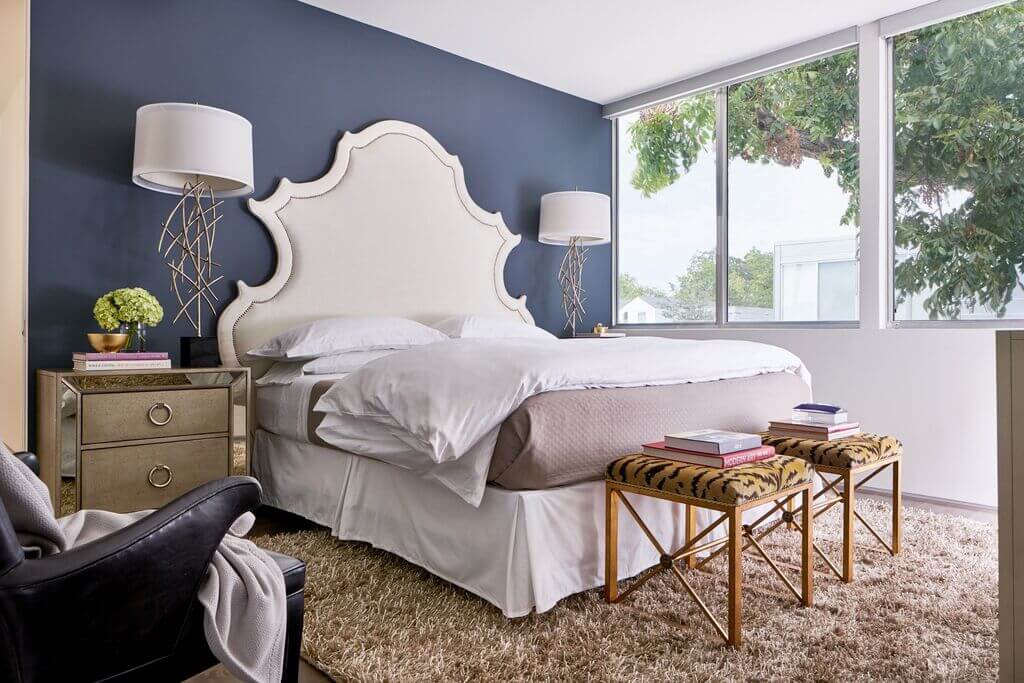
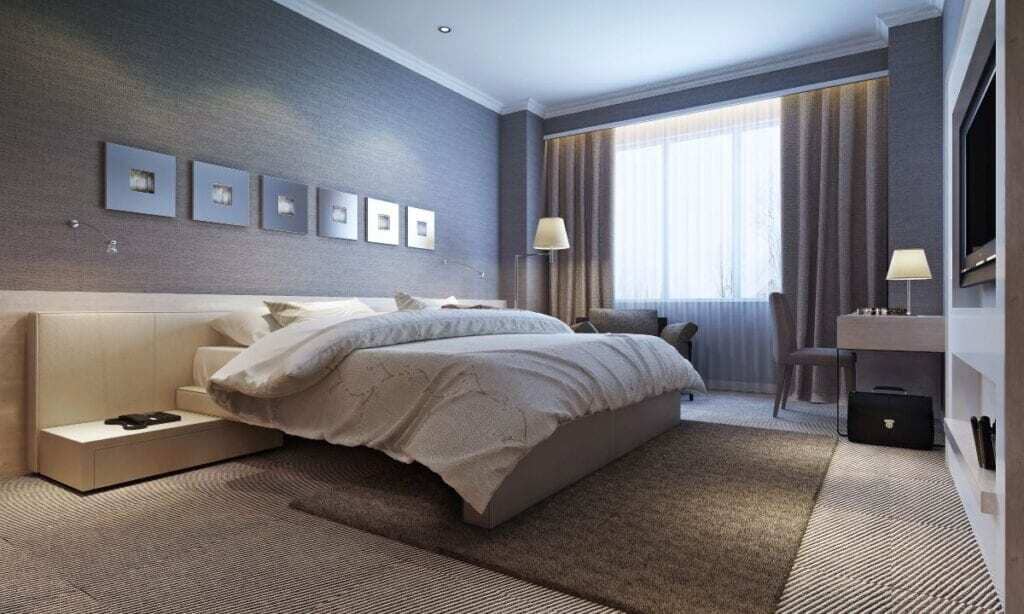
Dark spaces almost always look smaller than they are. This is why you need to keep your space light and bright. Try to avoid dark paint, and keep your place light by using bright paints and wallpaper. Also, opt for sheer curtains or blinds to ensure natural light is always coming through into your apartment. If there’s a particularly dark corner, try brightening it up with a lamp.
Storage
Figuring out where to store your goods can be tricky. For small apartments, storage will always be key. One way to clear the clutter to maximize space is to buy furniture with storage space, such as a couch with pull-out draws. You can also buy a closet organizer and a hanging shoe rack. You should also make use of the space underneath your bed by storing as much here as possible. Even your accessories can be optimally stored using accessory organizers.
Lighting Is Important
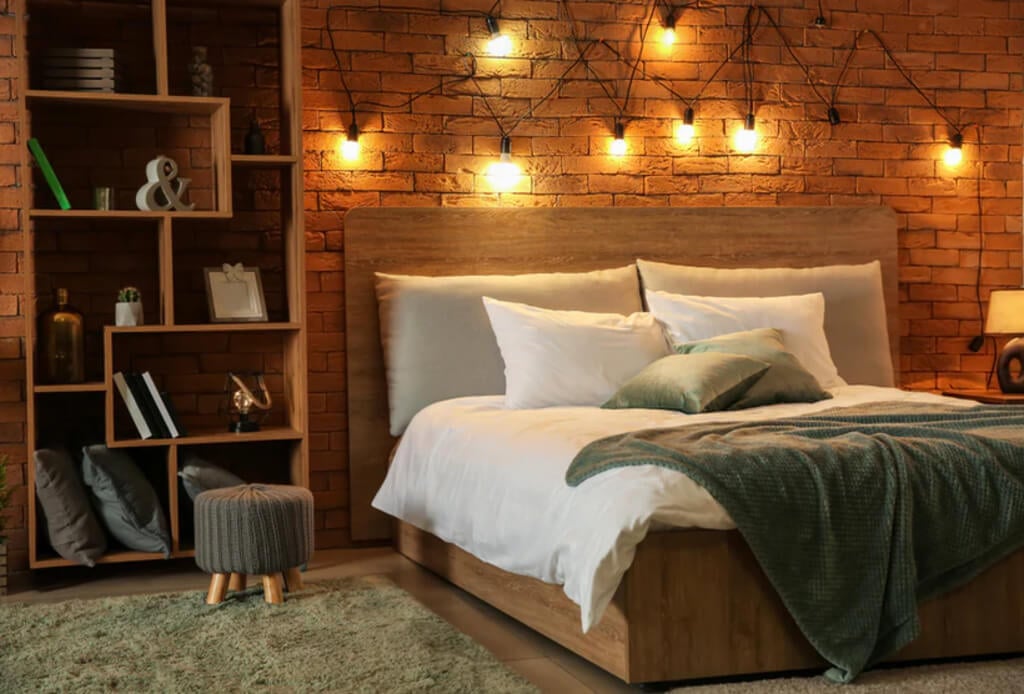
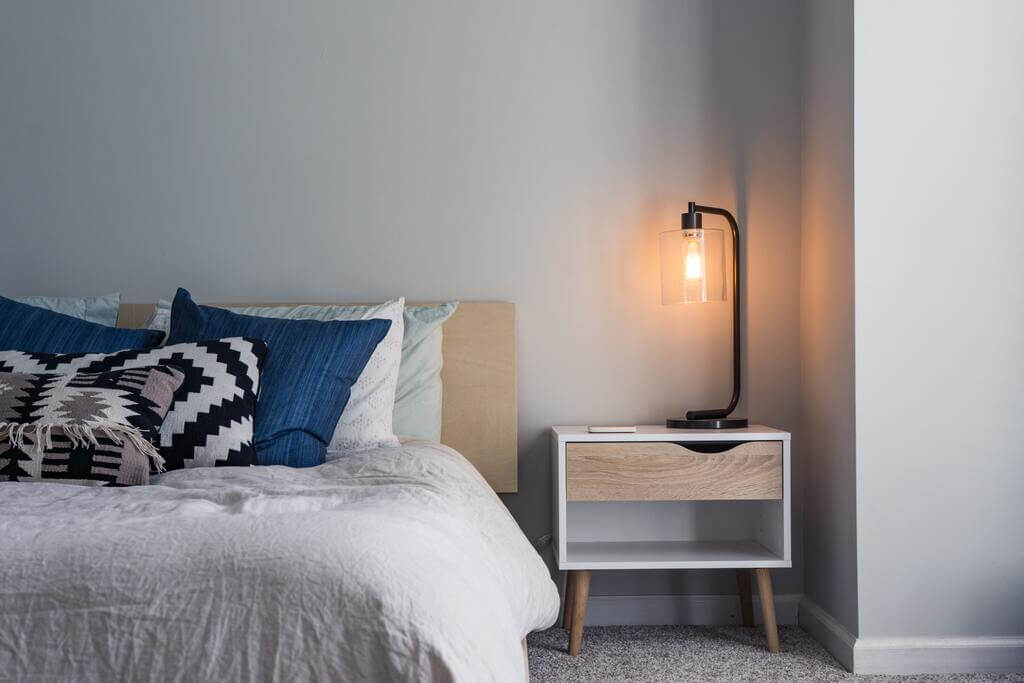
While you now know that keeping things bright makes your apartment look bigger, here are some more tips to help. You should opt for lighting that serves two purposes: functional and stylish. And yes, it’s possible to have both! Interior lighting design transforms spaces, so it’s great to play around and figure out what works for your space.
Experiment with overhead lighting, table lamps, and even floor lamps. These lighting options create a warm and inviting atmosphere. You can also install dimmer switches on your main lights to set the mood of the apartment.
Create the Best Spaces
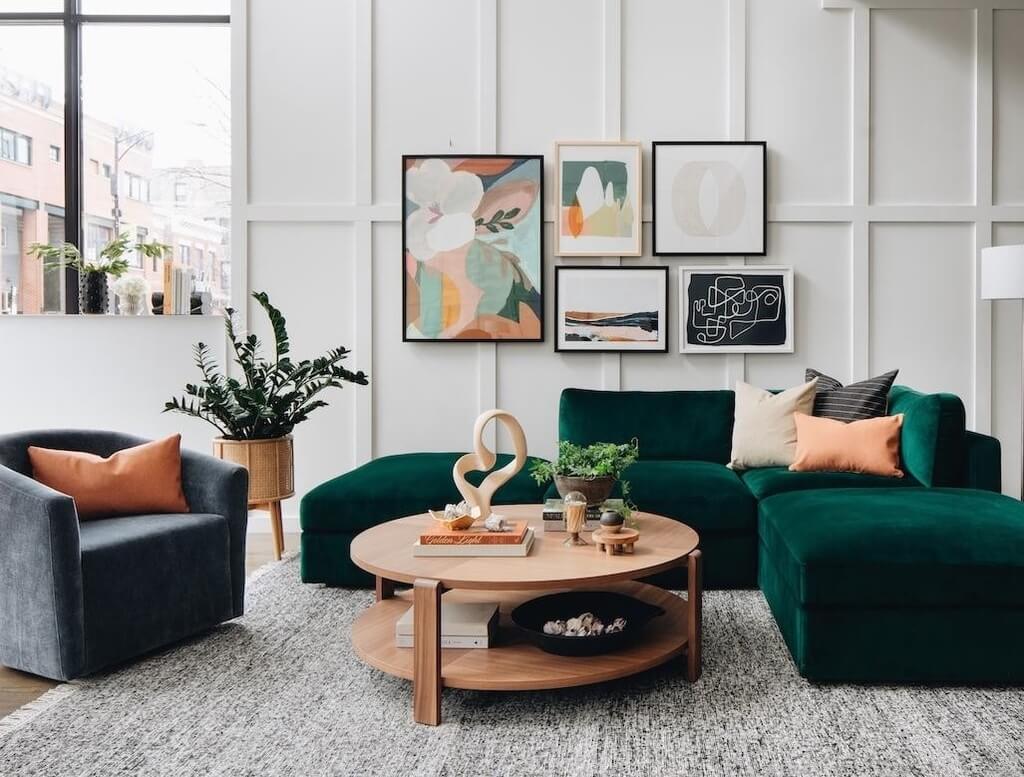
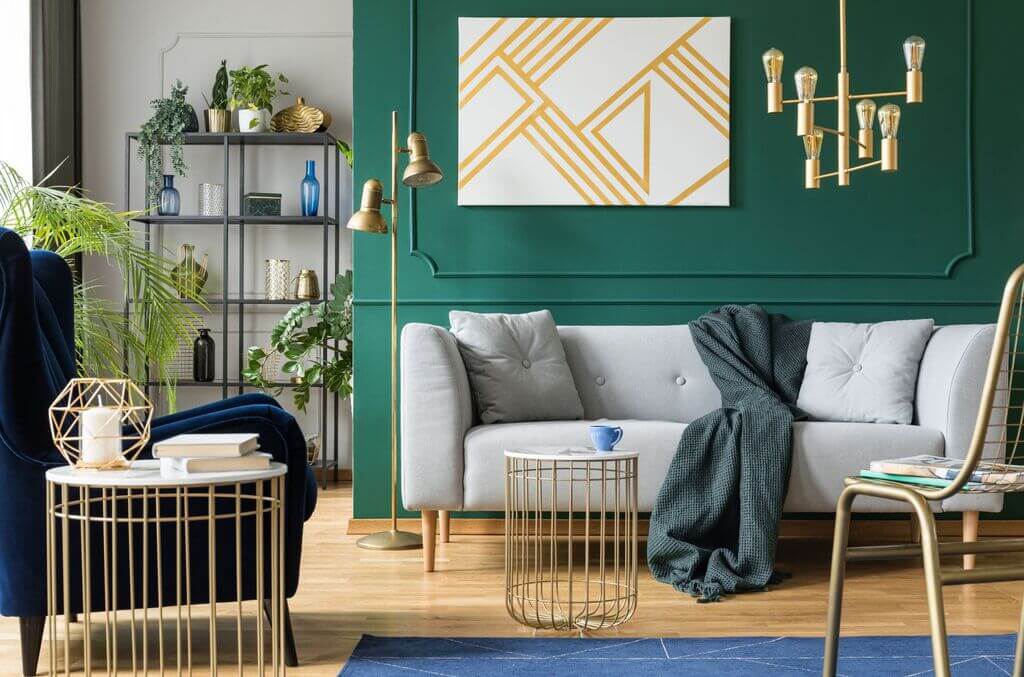
A small apartment can have different optimal spaces, such as a reading nook or a dining area. One way to distinguish between these spaces is by decorating them differently. Use a different color, or even something as simple as an ornament or rug to differentiate between all your spaces, then choose the appropriate furniture that will align with each activity in each space; your apartment won’t feel as small once you see all the functional things you can do.
Organization is key
Clutter tends to creep up on us, but you are fully in control when it comes to keeping your space organized, and here’s why that’s important. Clutter will make your space look smaller. You will find that all the work you put into organizing each space just falls away once clutter takes over. To overcome this, use storage bins or baskets for anything that does not have space. Then go through these ad hoc storage bins once a week and toss or organize everything in there.
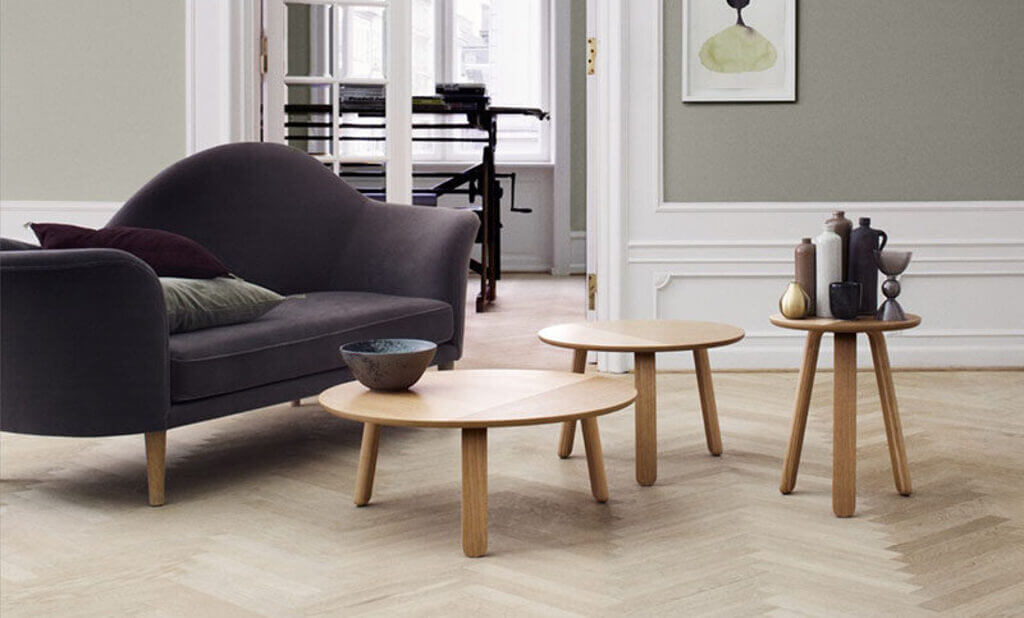
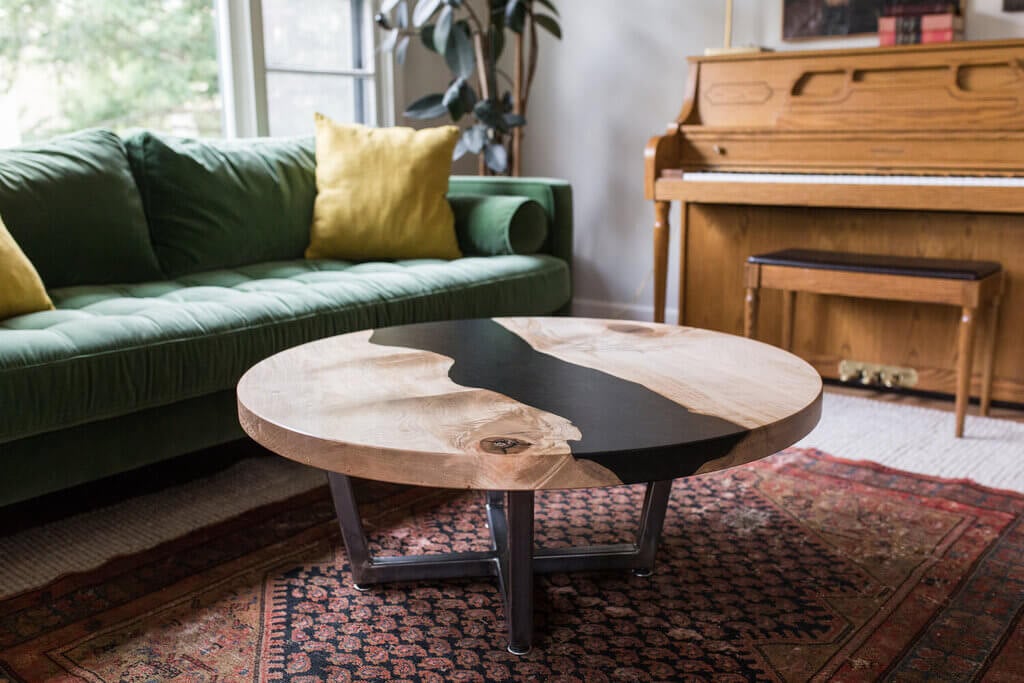
When it comes to decorating your home, choosing sustainable and eco-friendly furniture options is becoming more and more important. One such option is the round wood coffee table. Not only is it a timeless piece of furniture that can be incorporated into any design style but it is also a sustainable choice that can help reduce your carbon footprint. In this blog post, we will explore why round wood coffee tables are the perfect addition to your home.
1. Sustainable and Eco-Friendly Material
Choosing sustainable and eco-friendly materials is becoming increasingly important when it comes to furnishing your home. One such material that has gained popularity in recent years is wood. And in particular, a round coffee table is a perfect addition to any living space.
There are several reasons why round wood coffee tables are a great choice for your home. Firstly, wood is a renewable resource that can be sustainably sourced, making it an eco-friendly option. Additionally, wood is incredibly durable and long-lasting, meaning that investing in a high-quality round wood coffee table is a smart choice that will last for years to come.
Furthermore, round wood coffee tables offer a timeless and classic design that can complement a range of interior styles. From modern to traditional, a round coffee table can be incorporated seamlessly into any space.
In summary, if you’re looking for a sustainable and eco-friendly addition to your home that is both stylish and long-lasting, consider investing in a round wood coffee table. Not only will it enhance the overall aesthetic of your living space, but it will also contribute to a greener planet.
2. Durability and Longevity
With the wide range of options available in the market, it can be overwhelming to make the final call. However, if you are looking for a furniture piece that offers both durability and longevity, a round wood coffee table is the perfect addition to your home.
Wooden furniture has always been a popular choice among homeowners due to its natural beauty and sturdiness. Round wood coffee tables, in particular, have a timeless appeal that can effortlessly complement any interior decor style. Additionally, wood is a resilient material that can withstand everyday wear and tear, making it an ideal option for a high-traffic area like a living room.
Furthermore, the circular shape of a round wood coffee table provides better flow and circulation in a room, making it more spacious and inviting. With the variety of wood finishes and designs available, there is a round wood coffee table to suit every taste and budget.
If you are looking for a coffee table that offers both practicality and aesthetic appeal, a round wood coffee table is the perfect choice for your home. Its durability and longevity make it a valuable investment that will serve you and your family for years to come.
3. Versatility in Design
Round wood coffee tables are a versatile and functional addition to any home. With their classic design and natural elements, they can easily complement any decor style. These tables come in various sizes, shapes, and finishes, making them a perfect fit for any room in the house.
Round coffee tables have a timeless appeal that makes them an excellent choice for any design scheme. They are a perfect blend of form and function, making them an ideal centerpiece for any living room. These tables are also easy to move around, making them a practical choice for smaller spaces.
One of the significant benefits of round wood coffee tables is their versatility in design. They can be rustic, modern, traditional, or anything in between, depending on the chosen finish and accents. This flexibility allows homeowners to choose a table that complements their style and adds character to their home.
A round wood coffee table is an excellent choice if you’re looking for a functional and stylish addition to your home. They offer versatility in design, making them a perfect fit for any decor style. With their timeless appeal and natural elements, these tables add warmth and character to your living space.
4. Warm and Inviting Atmosphere
Wood is known for its ability to create a warm and inviting atmosphere in any room. The natural texture and color of wood can add a cozy, rustic feel to your living space. A round wood coffee table can become a focal point in your room, drawing the eye and creating a welcoming atmosphere for your family and guests.
5. Easy to Clean and Maintain
Round wood coffee tables have become increasingly popular in recent years, and for a good reason. These stylish and versatile pieces of furniture add a touch of elegance and sophistication to any living space while also providing a practical solution for your coffee and snack needs. Moreover, round coffee tables are incredibly easy to clean and maintain, making them the perfect addition to any home.
Whether you prefer a rustic or modern aesthetic, there is a round wood coffee table to suit every taste and style. Made from high-quality materials such as oak, mahogany, and walnut, round wood coffee tables are durable and long-lasting, ensuring that you get the most value for your money.
When it comes to cleaning and maintenance, round wood coffee tables are a breeze. Simply wipe them down with a damp cloth to remove any dust or spills, and apply a wood polish or wax to keep them looking shiny and new. With their timeless appeal and effortless upkeep, round coffee tables are a smart investment for any homeowner looking to add a touch of elegance to their living space.
6. Sustainable and Responsible Manufacturing
Many round wood coffee tables are made by companies committed to sustainable and responsible manufacturing. They use environmentally friendly practices, such as using water-based adhesives, minimizing waste, and recycling materials. By choosing a round coffee table from a responsible manufacturer, you can support sustainable practices and reduce your impact on the environment.
7. Unique and Handcrafted
Round wood coffee tables can be handcrafted by skilled artisans, creating unique pieces, one-of-a-kind pieces. Each table can have its unique features, such as knots, grain patterns, or natural imperfections, making it a unique piece of furniture. You can add a personal touch to your home and support local artisans by choosing a handcrafted round wood coffee table.
8. Timeless and Classic Design
Round wood coffee tables have a timeless and classic design that never goes out of style. They can be incorporated into any design style, from traditional to modern, and complement any color scheme. Unlike other trendy furniture pieces, a round wood coffee table is a timeless investment that can be enjoyed for many years to come.
Conclusion
Round wood coffee tables are a sustainable and eco-friendly choice that can add warmth, style, and functionality to your home. From their durability and longevity to their unique and handcrafted design, a round wood coffee table is a perfect addition to any living space. Choose one that fits your personal style and decor, and enjoy the beauty and sustainability of a round coffee table for many years to come.
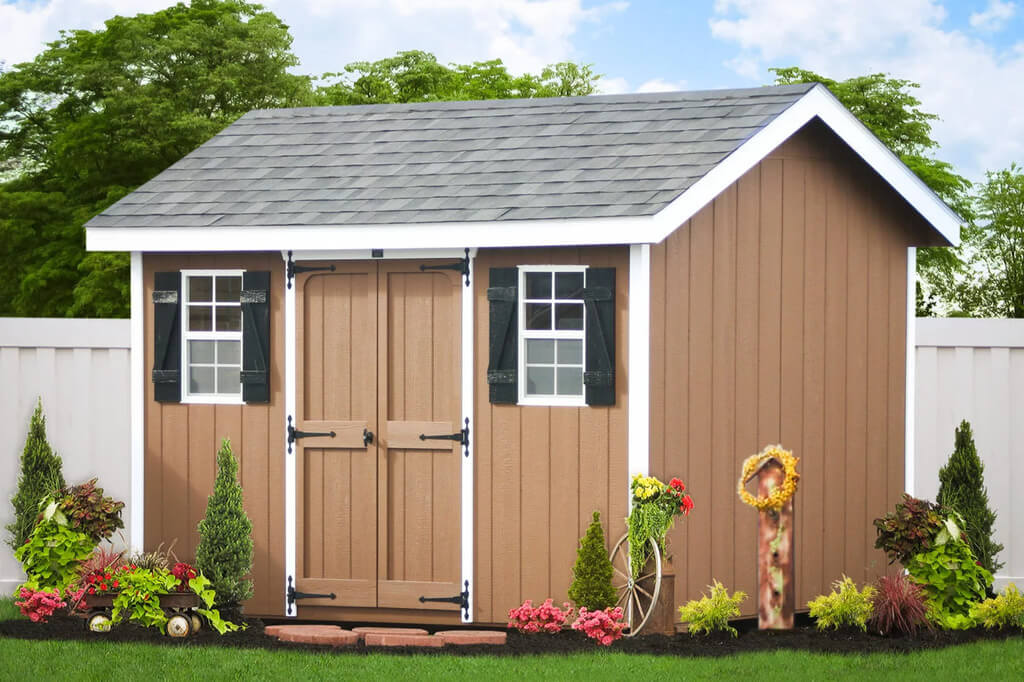
DIY garden shed kits are pre-cut and pre-fabricated shed components you can purchase and assemble yourself. These kits are designed to make building a shed easier and more accessible for people without much construction experience.
There are many different types of DIY garden shed kits available, ranging from basic tool sheds to elaborate multi-room structures. Some kits come with everything you need to build the shed, including pre-cut wood panels, windows, doors, nails, and hardware, while others require you to purchase additional materials like roofing shingles and paint.
When shopping for DIY garden shed kits for sale, it’s important to consider factors like size, style, and durability. You should also think about your level of DIY experience and the tools you have available to complete the project. Some kits are designed for beginners and require only basic tools, while others are more advanced and may require specialized equipment.
Before purchasing a DIY shed kit For your backyard, it’s a good idea to read reviews from other customers and research the company to ensure they have a good reputation for quality and customer service. You should also carefully review the assembly instructions to ensure the kit suits your skill level and needs.
Advantages of Buying a DIY Garden Shed Kit
There are several advantages to purchasing a DIY garden shed kit:
1. Cost-Effective:
DIY garden shed kits are often more cost-effective than buying a pre-built shed or hiring a contractor to build one for you. By assembling the shed yourself, you can save on labor costs and other expenses associated with hiring a professional.
2. Customizable:
DIY garden shed kits come in a variety of sizes, styles, and configurations, giving you the flexibility to choose a design that meets your specific needs. You can also customize the shed to match your home’s aesthetic and landscaping.
3. Easy to Assemble:
Most DIY garden shed kits come with pre-cut and pre-fabricated components, making assembly much easier than building a shed from scratch. The kits typically come with detailed instructions and all the necessary hardware so that you can complete the project quickly and easily.
4. Quality Control:
When you assemble the shed yourself, you have greater control over the quality of the final product. You can ensure that the shed is built to your standards and specifications, and you can make adjustments as needed throughout the assembly process.
5. Sense of Accomplishment:
Building a DIY garden shed can be a rewarding experience. You can take pride in the fact that you built something with your own two hands, and you’ll have a functional and attractive addition to your property that you can enjoy for years to come.
Tips for Installing a Garden Shed
Installing a garden shed can be a great DIY project, and for the most part, you just need some basic carpentry skills and at least one other person to assist you. Here are some tips to help you get started:
Choose the Right Location:
Make sure the ground is level, and the site is clear of any debris or obstacles. Also, check with your local authorities to see if there are any zoning or building code restrictions for sheds in your area.
Prepare the Site:
Before you start building, you’ll need to prepare the site. This may involve clearing vegetation, leveling the ground, and laying a foundation. Depending on the size of your shed, you may want to pour a concrete slab or use pre-made pavers.
Assemble the Shed:
Follow the manufacturer’s instructions carefully and use the recommended tools and hardware. Depending on the type of shed you’re installing, you may need to build walls, add a roof, and install windows and doors.
Secure the Shed:
Once the shed is assembled, make sure it’s anchored securely to the ground. This will help prevent damage from high winds and storms.
Finish the Interior:
If you plan to use your shed as a workspace or storage area, consider adding shelves, hooks, and other storage solutions to maximize the space.
Remember to always prioritize safety when installing a garden shed, and don’t hesitate to seek professional help if you’re unsure about any aspect of the project.
So, if you are looking to add additional storage space to your property or if you want to add some charm and character to your backyard space, a do-it-yourself shed kit is definitely worth a look. Take your time and do your research. Also, make sure you have at least one person to help you with assembly and plan on a full day or two of assembly and finishing. Once it’s complete, you’ll be glad you made the purchase!
As the seasons change, so too do our lawn care needs. During the winter, your grass is taking a break and doesn’t need much attention, but as spring approaches, it’s time to start preparing your lawn for its active growing season. Preparing your grass for spring is essential in ensuring a lush and healthy yard throughout the summer.
Maintaining a consistent routine is key to having a healthy and beautiful yard in the spring. To kick-start your lawn and prepared for the upcoming season, here are eight essential steps.
1. Test Your Soil
Different lawns also have different types of upkeeping that it needs. One way to ensure you supply the right amount and type of nourishment to your yard is through soil testing. Soil testing can tell you how much nitrogen, phosphorus, and other essential nutrients your soil requires.
While this may seem complicated, you can run to your local garden centers or soil labs for all the needed supplies and guidance for testing your soil.
2. Clear Debris
It is vital to remove any debris that has been collected on the lawn over winter. Dead leaves, sticks, or other materials can smother your grass and cause it to die. Clear away all these items before you start prepping your lawn for spring.
You’ll also want to check for any weeds or unwanted plants growing in your yard and tidy up the edges of flower beds or walkways. This will help give a neat, tidy look throughout the season.
3. Aerate Your Lawn
Over time, foot traffic and mowing can cause the soil to become compacted. Aerating your lawn helps create healthy soil by loosening compacted earth and allowing air, nutrients, and water to reach the grass roots more easily. This will enable new blades of grass to grow for a fuller, thicker lawn.
Make sure to aerate before you start fertilizing and overseeding, as it will enhance the effectiveness of these processes. You can easily rent an aerator from your local garden center or reach out to the heroeslawncare.com team of professionals to accomplish this for you.
4. Control Weeds
Winter weeds are one of the biggest nuisances in lawn care, but luckily they can easily be controlled with the right tools. These unwanted plants can rob your grass of essential nutrients and moisture, affecting your yard’s overall growth and health.
You’ll want to use an appropriate herbicide to rid your property of these pesky plants and keep them from taking over in the spring. Do this in the early spring before temperatures start rising.
5. Feed Your Lawn
Fertilizing your lawn is essential to promote green and healthy growth throughout the warm summer months. It provides vital nutrients that can help compensate for any deficiencies in soil testing and encourage lush growth.
Make sure to choose a fertilizer specifically formulated for a spring application, as it will be the most beneficial in helping your grass thrive this season. Apply it evenly across the entire area instead of patching it in specific areas.
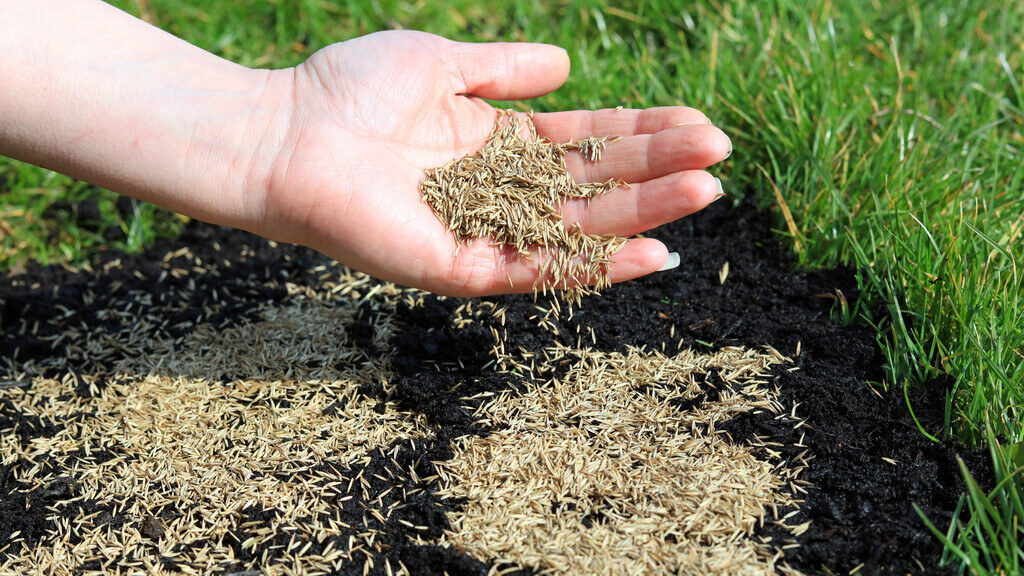
6. Re-seed Bare Patches
If you notice any thinning or bald spots in your lawn, consider re-seeding them, as spring brings more suitable temperatures for germination and growth. Over-seeded grass is more resilient and hearty than untreated property, so it will help fill bare patches and thicken your lawn. It also helps crowd out weeds and improves overall turf health.
Be sure to choose the right seed for your lawn’s needs. Purchase seed that matches your current grass type and spread them lightly over the desired area before watering regularly to ensure proper germination of the sources.
7. Irrigate Regularly
Establishing an irrigation schedule during spring will help keep your grass green and healthy throughout the growing season by ensuring regular hydration without overwatering or underwatering. Ensure to water deeply but infrequently by giving the soil enough time to dry between waterings.
For lawn care, it’s best to water early in the morning so that there’s enough sunlight left in the day for evaporation without creating puddles in which fungal diseases could thrive later in summertime heat waves.
8. Mow Regularly – But Not Too Low!
Proper mowing is essential for a healthy and full lawn. The right length will ensure that the grass remains longer to collect more energy from the sun and stay warmer during cooler months.
As spring approaches, start lowering your mower blades until you reach the desired height for your lawn. Make sure not to cut too low, as this can cause stress on the grass, leading to disease and pest infestations. A good cut leaves no less than 2 inches of blade length.
These lawn care steps can help ensure your lawn is ready for the new season. Take time to know your lawn’s needs and treat it carefully to keep your outdoor space looking its best all year round!
Are you wondering if your home needs an attic retrofit? Many homeowners are not sure what an attic retrofit is or how to identify whether their home requires one. This article will explain the importance of an attic retrofit, provide some tips on how to determine if your home requires one, and suggest a few steps to take when planning for a successful project.
Why an Attic Retrofit Is Necessary:
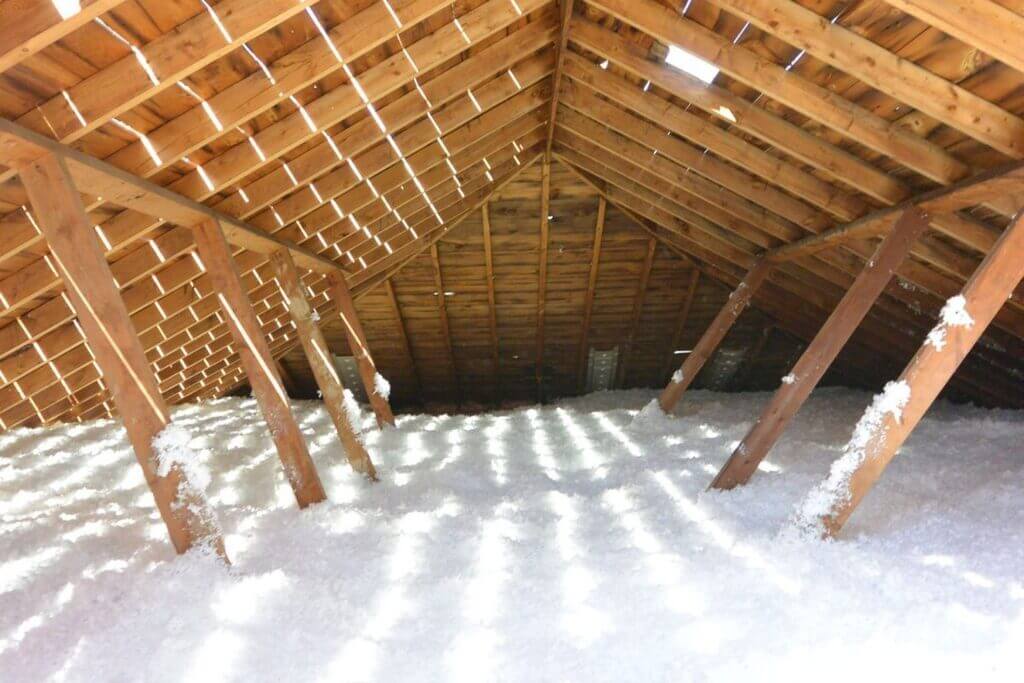
An attic retrofit is important because it can help keep your house cool in the summer months, reduce energy costs, and improve indoor air quality. By sealing any leaks in the attic and adding insulation to keep warm air from escaping during winter months, you can maximize energy efficiency in your home. A retrofit can also help reduce the risk of fire and water damage caused by inadequate attic ventilation and insulation.
Here are the signs you should be looking out for when trying to identify if your home needs a retrofit. Once you’ve identified these signs, look for a good insulation company to take care of the job.
Sign #1: High Energy Bills
If your energy bills are unusually high, then an attic retrofit may be necessary. This is especially true if you haven’t made any major changes to your home, such as adding new windows or doors. Poor insulation and ventilation can cause your cooling and heating systems to work overtime in order to keep your home comfortable, resulting in higher energy bills.
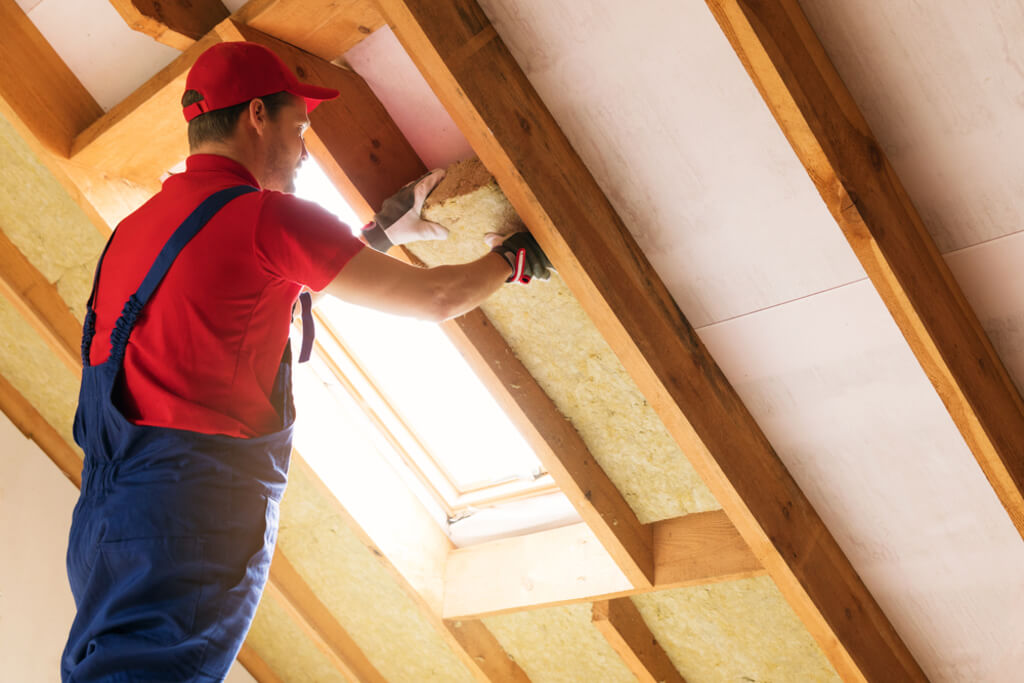
To fix the issue, you’ll need to inspect your attic for any gaps or leaks. If they are present, you should seal them to prevent warm air from escaping in the winter months and cold air from entering in the summer months. You may also want to add more insulation to your attic, as this can help reduce energy costs significantly.
Sign #2: Uncomfortable Living Spaces
If you notice that certain parts of your home feel colder than others during winter months or warmer than others during summer months, then a retrofit may be necessary. This is a sign your home has that there’s inadequate insulation and ventilation in your home, which can lead to uncomfortable living spaces.
In order To fix the issue, you’ll need to inspect your attic for any gaps or leaks. If they are present, you should seal them to prevent warm air from escaping in the winter months and cold air from entering in the summer months. In addition, adding extra insulation can help keep your home comfortable all year round.
Sign #3: Excessive Condensation or Mold
Excess condensation or mold is an indication of inadequate ventilation in the attic and a lack of insulation. This can result in increased moisture which leads to excessive condensation or even mold growth in the attic space.
In order to address this issue, you’ll need to make sure that your attic is properly ventilated and insulated. You can also use a dehumidifier to reduce the moisture levels in your home, which will help prevent condensation and mold growth.
Sign #4: Aging Roof Shingles
If you notice that the shingles on your roofare aging faster than normal, then a retrofit may be necessary. Poor insulation and ventilation can cause the temperature in your attic to fluctuate drastically, which can cause damage to your roof over time.
To fix this issue, you’ll need to inspect your attic for any gaps or leaks. If they are present, you should seal them to prevent warm air from escaping in the winter months and cold air from entering in the summer months. You may also want to add more insulation to your attic in order to keep it at a consistent temperature throughout the year and reduce energy costs.
Sign #5: Visible Ice Dams
Ice dams on the roof of your home are a sign that your insulation and ventilation need to be improved. When warm air escapes from the attic, it can cause snow to melt on the roof and then refreeze, leading to ice dam formation.
In order to eliminate ice dams, you’ll need to inspect your attic for any gaps or leaks. If they are present, you should seal them to prevent warm air from escaping in the winter months, which will reduce ice dam formation. In addition, adding extra insulation can help keep your home comfortable all year round and further minimize the risk of forming an ice dam.
Steps for Planning a Successful Attic Retrofit
Once you’ve identified signs that your home needs a retrofit, it’s important to plan the project carefully. Here are some tips for planning a successful attic retrofit:
Make sure to hire a professional contractor who specializes in retrofits. They will be able to inspect your home and provide you with the best advice on how to proceed.
Invest in high-quality insulation materials and make sure they are installed properly. This is key to reducing energy costs and creating a comfortable living space.
Ensure that your ventilation system is working properly by checking for any drafts or leaks in the attic space.
Consider adding features such as solar fans that can help keep the attic cool during the summer months.
Schedule regular maintenance on your retrofit to ensure that it is working effectively.
By following these tips, you’ll be well on your way to planning a successful attic retrofit and creating a comfortable living space for yourself and your family.
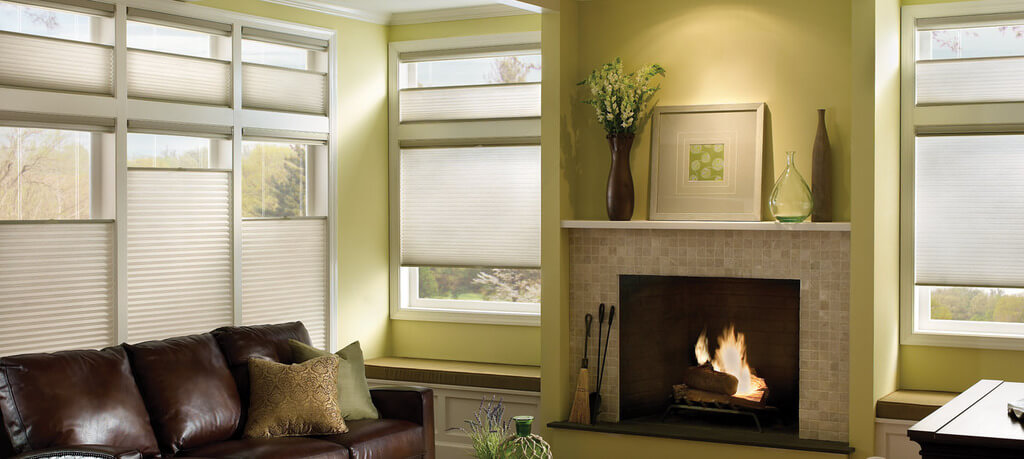
You might overthink privacy risks, sun rays, and the overall interior look when you have your own space. To add a unique style touch while addressing these problems, putting up treatments for your windows is an excellent choice! Blinds are one of the most popular choices that balance affordability and functionality.
They come in different styles and colors so that you can customize them for your specific needs. With some creativity, you can create unique blinds that will give your space an individualized look while providing all the benefits of traditional blinds. Here are some suggestions for customizing your window blinds for a unique look!
1. Select an Unconventional Color
Choose an unexpected shade to draw attention to the space to make your window stand out. Instead of the standard black or white, you can select from vibrant reds and blues to soft, subtle pastels and neutrals. This could also showcase your taste and statement by bringing a unique character touch to any room.
For a more personalized feel, you can match various colors of blinds and arrive with a more wondrous and aesthetic mix!
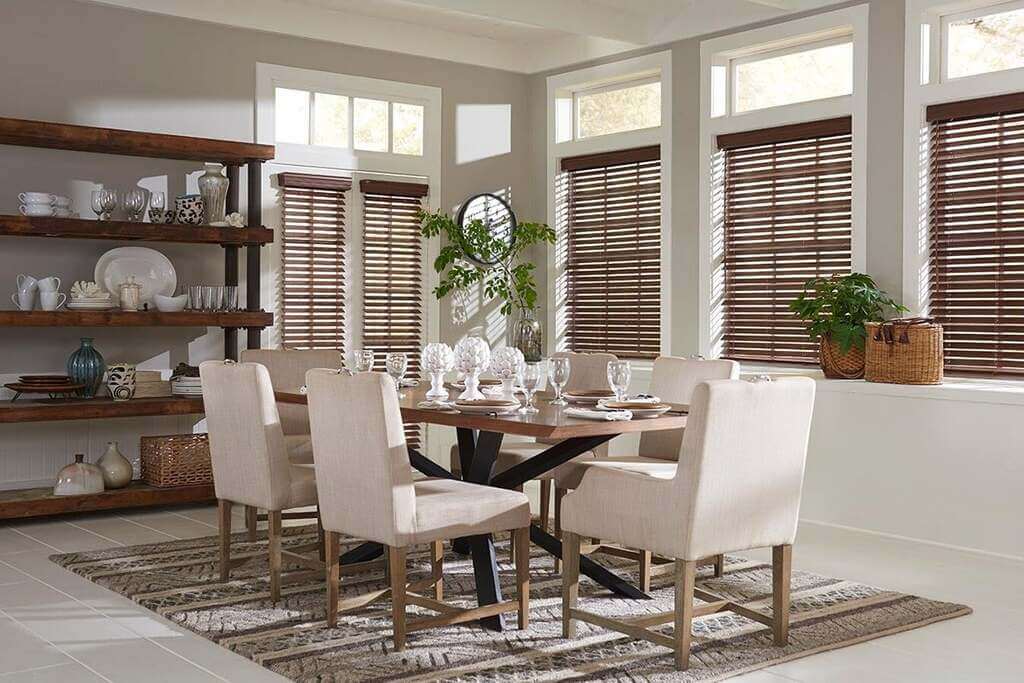
2. Feel Closer to Nature with Faux Wood Blinds
Faux wood blinds are another way to add the warmth of natural wood to any room. They come in various colors, finishes, and textures that look like real wood—but with less maintenance! Plus, they’re more affordable than traditional wooden blinds, making them perfect for those on a budget.
If you’re up for faux-wooden treatments, This company can help customize window blinds to find the perfect match for your space.
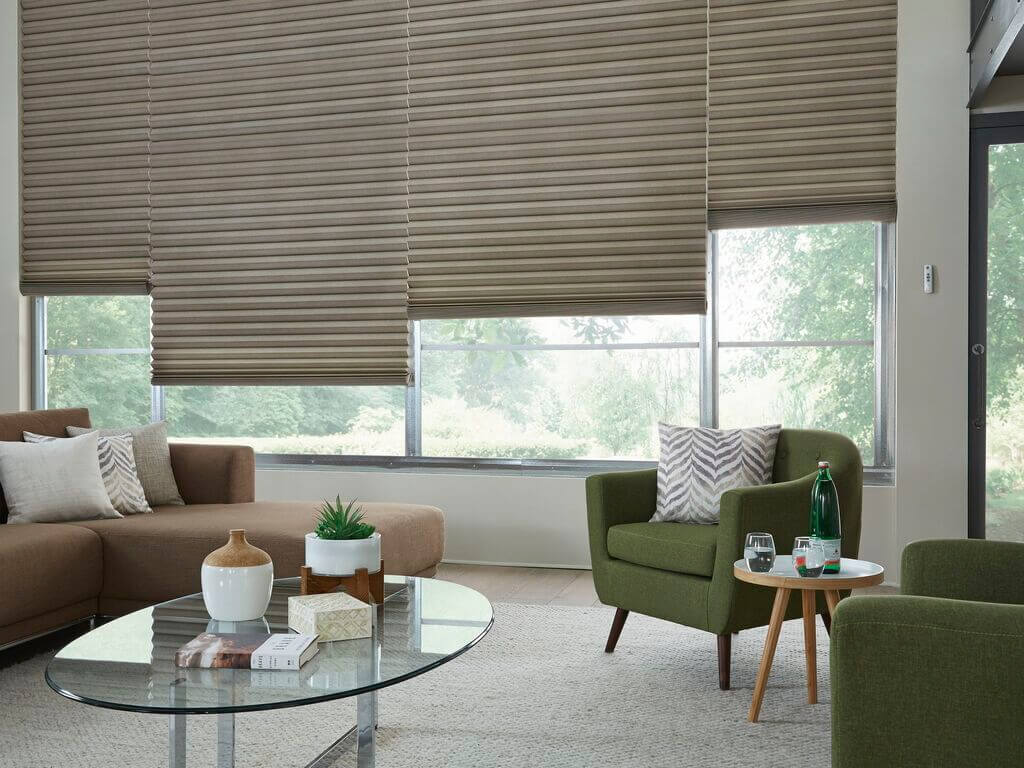
3. Choose Textured Fabrics for an Interesting Effect
One great way to make a statement in any room is texture! Textured fabric blinds come in various materials such as woven wood, bamboo, or grass cloth to give off an exciting look and feel. Or you could also choose from classy and sophisticated options: linen, suede, and velvet fabrics.
Depending on the weave of the material, these window treatments can provide varying levels of light control while still looking great!
4. Look for Unique Shapes and Patterns
Aside from colors and textures, you can also find window blinds with unique shapes and patterns. From geometric designs to floral motifs, these are great for those who want to spruce up their windows with something more unusual!
These kinds of blinds don’t just look great—they can also be used as conversation pieces that will surely draw attention. With these, you can create an eye-catching display on your windows that will impress anyone who enters the room!
5. Layer Your Window Treatments with Curtains or Valances
If one layer isn’t enough to suit your needs and style preferences, pair it with other treatments like curtains! This combination helps balance the light in your room while providing you with a unique look that accents your style.
Depending on its purpose, you can opt for different types on each layer—for example, sheer curtains to filter sunlight, blackout curtains for more privacy or patterned valances to add character. This will give your windows a layered look that is sure to be eye-catching!
6. Add Accessories or Trimmings
Consider personalizing with decorative additions, such as tapes or sequins, for an easy yet decorative approach. These extra details will give an individualized touch and make your blinds stand out!
The design possibilities are limitless– from tassels to scallops, and stripes to checks. You can even match it with the colors of your walls for a cohesive look! Just be sure to pick one that complements the overall look of your window treatments.
7. Try an Asymmetrical Style
Try an asymmetric design to add some unusual visual interest to your windows. This could mean having one side hanging lower than the other or one section of the blinds slightly longer than another. Asymmetry can go a long way in making your windows unique and stand out from the rest!
8. Install Stained Glass Inserts
For a truly rare look, consider installing stained glass inserts in your window blinds! These are perfect for those who want to elevate their windows with luxurious and timeless artistry. Stained glass can transform any room into an eye-catching showcase that will impress everyone.
You can personalize the glass to match your home’s theme or color scheme.
9. Make Your Designs
Lastly, why not make your blinds if you’re feeling more creative and adventurous, why not make your blinds? You don’t have to be limited by what is available in stores! Trust in your DIY skills and create something unique that no one else has.
Try painting wooden slats in different colors or adding fabric panels to your slatted blinds. You can even combine other materials and textures to create a one-of-a-kind look that will stand out in any room.
With these tips, you can make your window treatment extraordinary with a look that suits your style and needs. Whether you choose bold colors, interesting textures, or unique patterns, the possibilities are endless when customizing your window blinds!
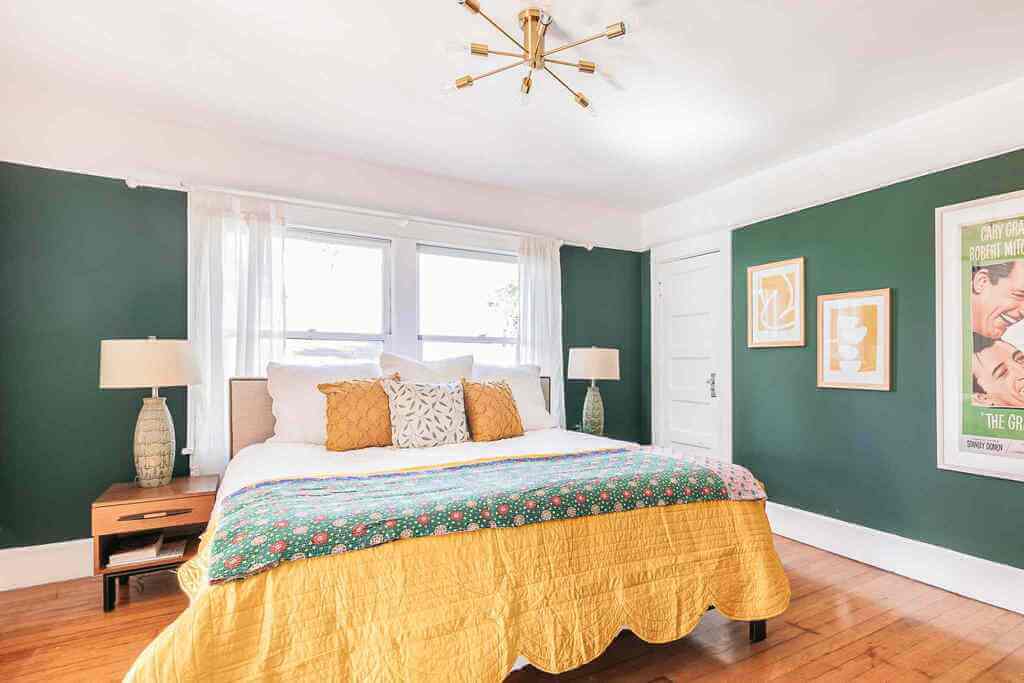
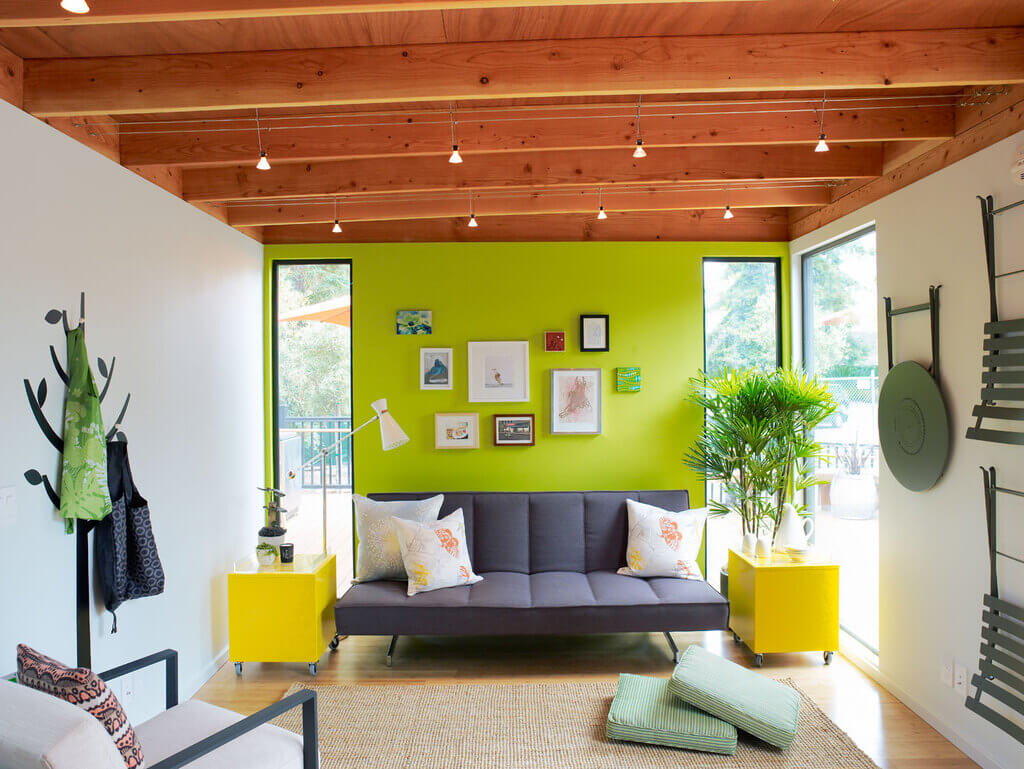
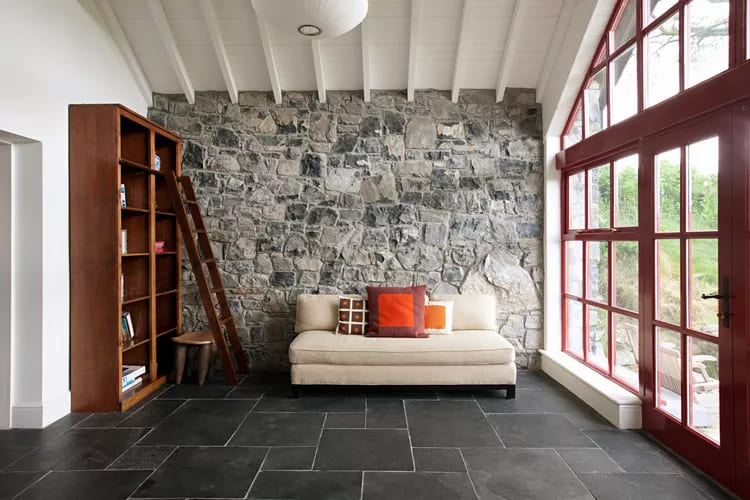
The walls function much like canvases. If you want to make a statement, the installation of an accent wall can be the ideal way to accomplish this goal. But what exactly is a feature wall?
One wall in a room that is painted differently than the other walls in the space is referred to as an accent wall. Typically, an accent wall features more vibrant and striking colors, but it can also feature a unique pattern or texture.
A room can have a focal point created with an accent wall, or an accent wall can be used to break up an otherwise plain-looking wall. How exactly does one achieve a professional look when painting an accent wall?
In this article, we will offer some advice on how to carry out the aforementioned task successfully. Here is everything you need to know about how to paint an accent wall like a pro:
1. Choose the Right Paint
When it comes to selecting the appropriate paint for an accent wall, one of your primary goals should be to ensure that the wall will be visually distinct from the other walls in the room. Choose a color or pattern that will stand out visibly against the rest of the decor in your space. Bright and bold colors, as well as vibrant hues like reds, oranges, and yellows, are great options to go with as well.
You may want to go with a matte finish rather than a glossier one, depending on the feel and appearance that you’re going for. You can even unleash your inner artist by experimenting with various paints, such as chalkboard paint, metallic paint, glitter paint, or faux-finish paint.
2. Prep the Wall
It is essential to guarantee that the wall has been adequately prepared before beginning the painting process. This could mean patching any cracks or holesin the wall with spackle, sanding off any imperfections on the surface of the wall, and performing a final wipe-down on the wall, if necessary, to ensure that the wall is clean.
Before beginning the project, it is always a good idea to measure the area of the accent wall so that you can determine the amount of paint required for the task. By doing so, you eliminate the risk of purchasing an inadequate or excessive quantity of the item.
First and foremost, you will need to protect the areas of the wall that are adjacent to the accent wall by taping them off so that the paint does not get on them.
3. Apply Primer
Applying a primer to the wall before starting to paint is the next step to take after you have prepared the wall and purchased the paint you intend to use.
Primers help create a smooth surface that the paint can adhere to more effectively and also help ensure that the color of the paint will show up more accurately and brightly. Before moving on to the next step in the painting process, check that the primer has been allowed to dry fully.
They are typically applied in two layers, as recommended by most authorities in the field. It is recommended that rollers be utilized to apply the second coat after the first coat has been applied with a brush.
4. Get Creative!
Painting the wall is not just about applying one solid color — there are some fun techniques that you can use to create unique patterns or textures. Or hire a team with the tools and expertise to execute the task.
Here’s one idea if you want to do this on your own. Paint a striped pattern on your wall by taping off stripes of varying widths and painting them in the colors of your choice. You can also achieve interesting effects, such as chevrons or herringbones, through the use of painter’s tape.
Experimenting with freehand painting is another option. You can choose to create intricate designs on your wall through freehand painting with a brush, as well as use sponges and cloths to get interesting textures and patterns. The possibilities are practically endless!
5. Finish Up
Once you have achieved the desired look for your accent wall, it is time to finish up the project by sealing the wall with a protective layer. This will help protect the paint from any dust or dirt that might settle on your wall and ensure that it looks as vibrant and fresh as when you first painted it.
After completing this step, all that is left to do is admire your work and bask in the glory of having successfully created an attractive and unique accent wall.
Conclusion
Painting an accent wall can be a fun and creative way to add character to your home. Following the steps outlined in this article, you should have no problem achieving the desired effect for your project. With careful preparation and creative experimentation, any homeowner can confidently set out on their painting journey.
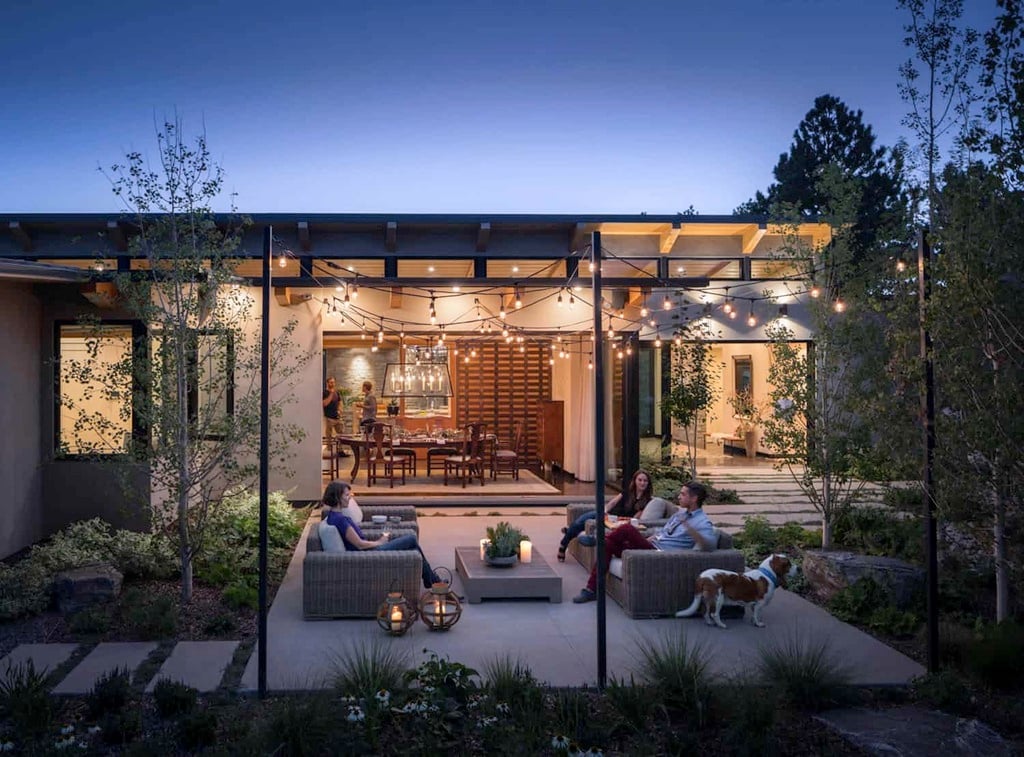
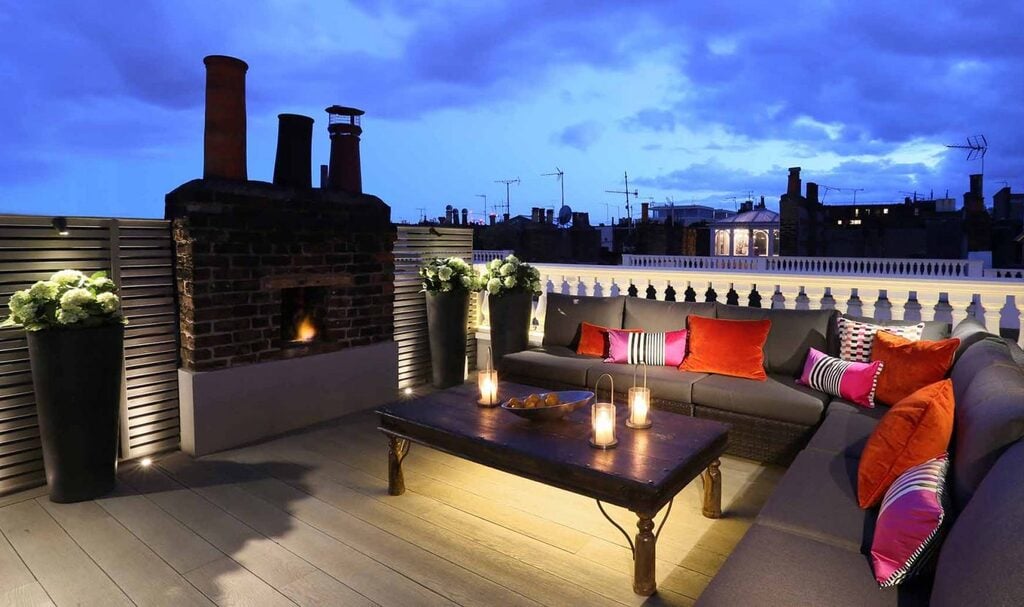
Nothing can be quite as tranquil and relaxing as a rooftop garden. Not only does it provide an escape from the hustle and bustle of everyday life, but it also adds color and beauty to your home or apartment. But even the most beautiful rooftop garden can become dull and monotonous if you don’t take the time to spruce it up.
Adding lights to your rooftop haven is one way to make it come alive. Whether you’re looking for aesthetically pleasing lights or want to create an inviting atmosphere, there are plenty of creative ways to bring much-needed cheer to your rooftop.
Things to Consider When Adding Light Fixtures
Consider the space size and your budget before investing in new lights.
Think about the overall style you’re trying to achieve—is it a romantic, cozy vibe or a modern, industrial one?
Look for energy-efficient styles that will last long term and save you money.
Installation can be tricky and expensive, so consider hiring lighting experts at if you’re unsure or don’t have the necessary tools.
Different Lights to Brighten Up Your Rooftop Garden
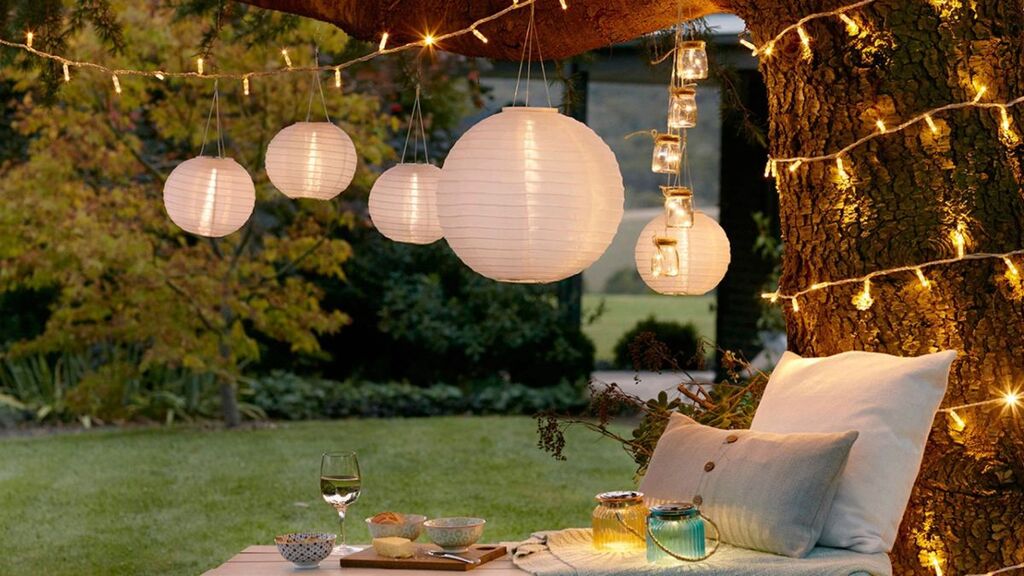
1. String Lights
Add string lights around the perimeter of your garden to create an intimate, cozy atmosphere. String lights come in various colors and styles, so you can easily match them to your decor. For a more dramatic look, consider hanging lights in clusters or groupings.
Types of String Lights:
Fairy Lights: These dainty, delicate lights give off a subtle glow and can be used to create a whimsical look.
Globe String Lights: These are perfect if you’re looking for a bright and cheerful look.
Edison String Lights: These vintage bulbs give off a warm glow and will add a touch of nostalgia to your garden.
Icicle String Lights: If your garden has a modern feel, opt for these bright and bold lights.
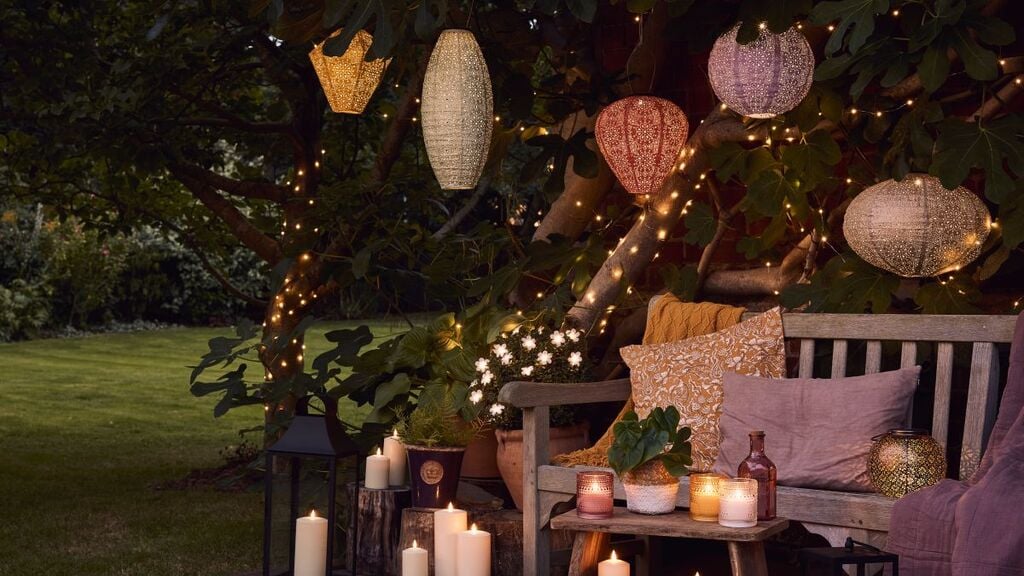
2. Paper Lanterns
Hang paper lanterns to provide a soft, dreamy glow. If you’re looking for more of a statement piece, try hanging larger lanterns from Shepherd’s hooks or tree branches. Most paper lanterns also have battery-operated lights, so you don’t have to worry about running wires through your garden.
Types of Hanging Lanterns:
Round Paper Lanterns: These classic lanterns are perfect for adding a soft glow to your garden.
Star Paper Lanterns: These festive lights will add some sparkle and shine to your outdoor oasis.
Chinese Paper Lanterns: If you want something more colorful, these bright and bold lanterns will make an impression.
3. Spotlights
Incorporate spotlights to add drama and brightness to your rooftop garden. Spotlights are best used to highlight certain features in your garden, like trees, shrubs, or water features. You can also use them to illuminate pathways or walkways for extra safety when walking late at night.
Types of Spotlights
LED Spotlights: These lights are easy to install and offer long-lasting illumination.
Solar Spotlights: Solar-powered spotlights are excellent if you don’t have access to an outdoor power outlet.
Halogen Spotlights: Halogen lights are best used to highlight your garden’s statues or other decorative features.
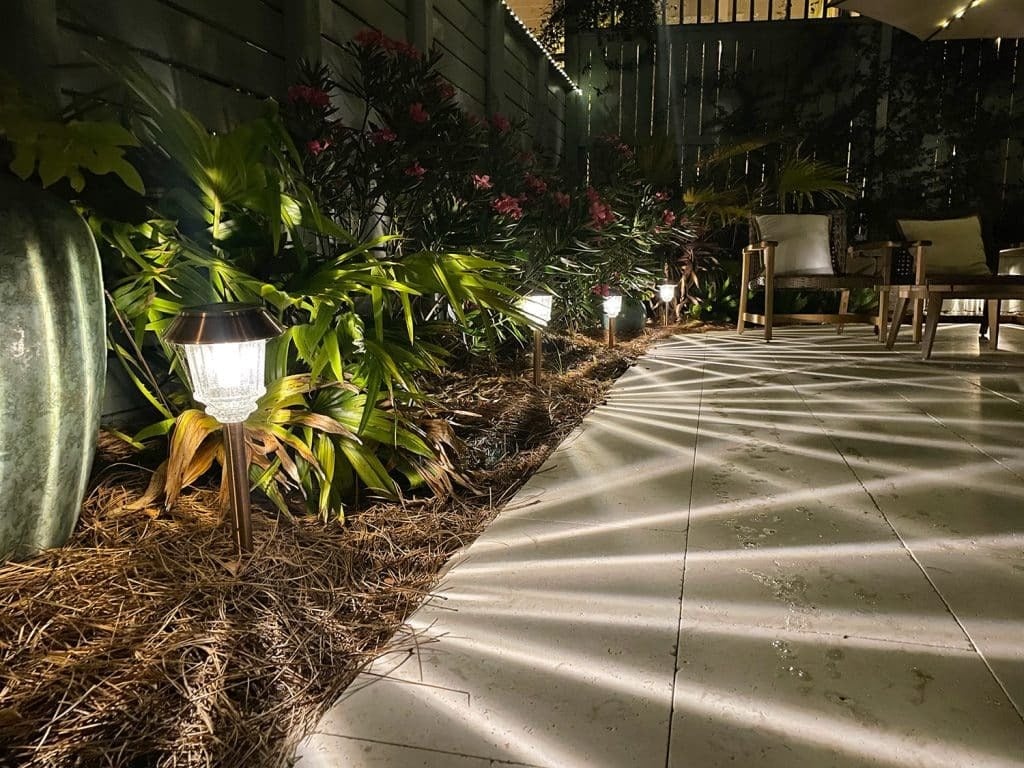
4. Pathway Lights:
Add pathway lights to create a brighter, more inviting atmosphere. These are great for guiding guests through the garden and adding a bit of extra light to the area.
Types of Pathway Lights
Solar-powered path lights: If you’re looking for an energy-efficient option, these solar-powered lights.
LED Path Lights: LED lights are known for their long-lasting illumination and low energy consumption.
Bollard Lights: Bollard lights are perfect for creating an inviting atmosphere and drawing attention to pathways or walkways.
5. Candles:
Use candles for a subtle, festive glow. Candles are an inexpensive way to add atmosphere and romance to your garden. Consider adding floating candles in a pool or birdbath for an extra special touch.
Types of Candlelights
Tealights: Perfect for adding a bit of warmth to your garden with their delicate, flickering light.
Votive Candles: These candles come in glass holders and give a soft, comforting glow.
Floating Candles: Opt for floating candles in pools or birdbaths for an ethereal look.
6. Led Strips
Incorporate LED strips for a more dramatic look. LED strips can light up walls, fences, and other surfaces. They give off a bright and bold glow that is sure to make an impact.
Types of LED Strips
Color Changing RGB: Opt for color-changing RGB lights If you want something more eye-catching, opt for color-changing RGB lights.
Waterproof LED Strips: These waterproof strips are durable and long-lasting for use in wet areas.
Flexible LED Strips: Flexible LED strips can be used to light up corners and other awkward spaces.
To Wrap Things Up
The type of lighting you should choose should depend on the size and design of your space. If you have a smaller area, then string lights or paper lanterns can work wonders in creating an inviting atmosphere. For larger gardens, spotlights or floodlights are best suited to brighten the entire area.
With the right lighting, you can quickly transform your rooftop garden into a charming space—no matter the time of day. Whether you’re looking for a more subtle effect or want something that will make a bold statement, there are plenty of creative ways to brighten up your rooftop garden. Go ahead and add some sparkle to your rooftop garden today!
Do you want your home to be fully environmentally friendly? So why don’t you include the flooring? If you believe that eco friendly flooring materials are easily damaged and do not endure, you are definitely incorrect!
These materials offer a wide range of alternatives in addition to being of great quality and durability. As more and more people are becoming eco-conscious, the world is coming up with unique eco-friendly solutions.
We have curated a list of 20 sustainable flooring ideas and their benefits for your next house renovation project!
Types of Eco Friendly Flooring Material
The definition of eco-friendly encapsulates a range of criteria, like carbon footprint, durability, sustainability, and so on.
Category
Description
Examples
Natural
Flooring materials that originate from naturally occurring sources, which are often biodegradable
Materials which use ecologically friendly production procedures and sustainable sourcing.
Ceramic tile flooring made from recycled materials, terrazzo flooring made with recycled materials, concrete flooring with low VOC stains
20 Most Popular Eco Friendly Flooring for the Eco-Conscious
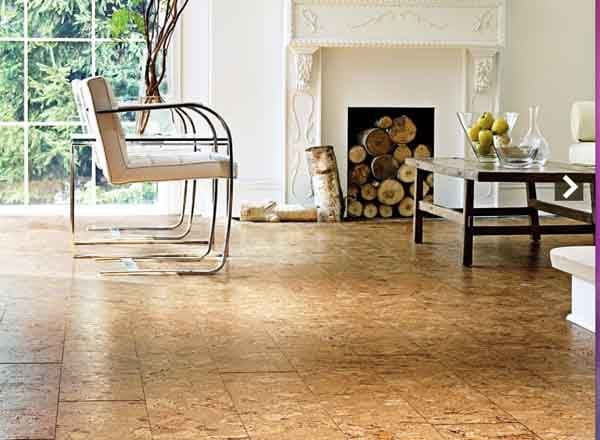
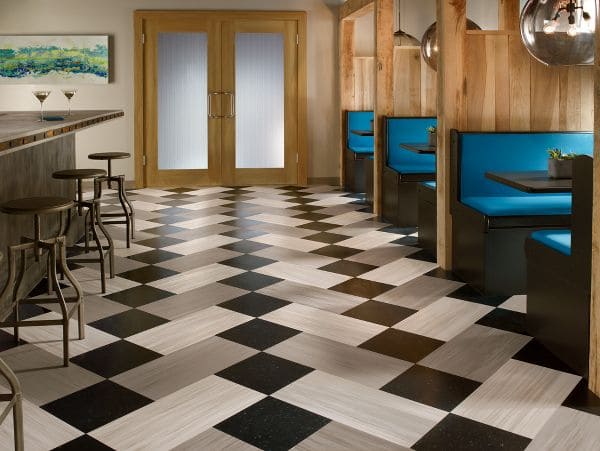
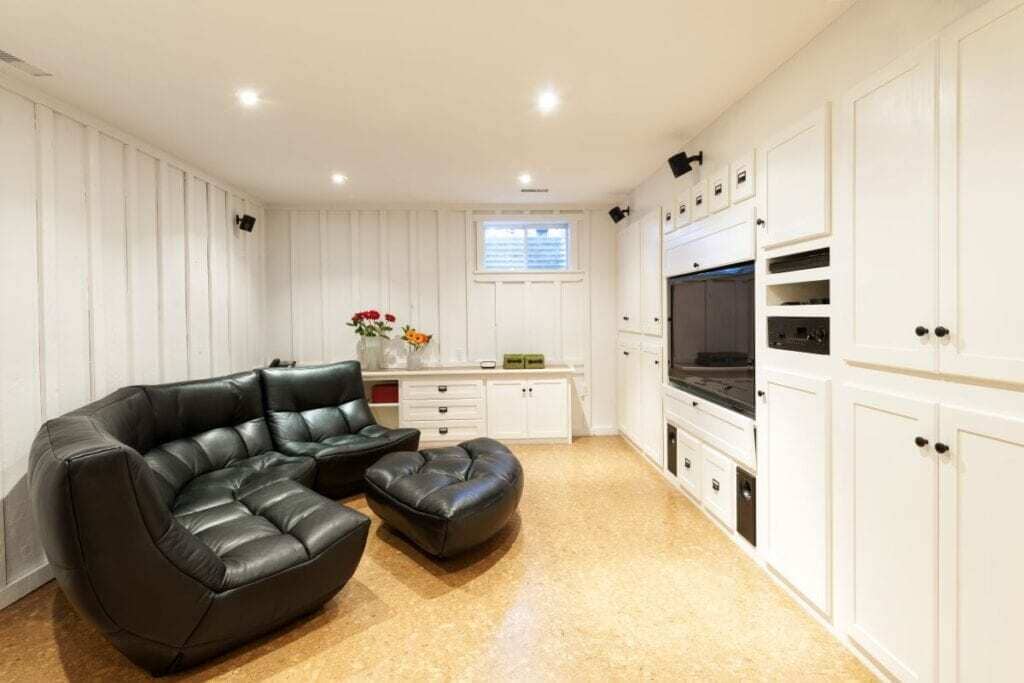
1. Cork Flooring
Cork is made from the bark of the cork oak, which grows back. Isn’t it incredible? The flooring is made from the strip of this bark. It is derived not just from nature, but also from a regenerating source.
There’s even more! Cork possesses anti-allergen qualities, is extremely durable, and is fire resistant. However, it has all of the rustic features of the wood. The same paints and finishes that you would use on wood may be used on it.
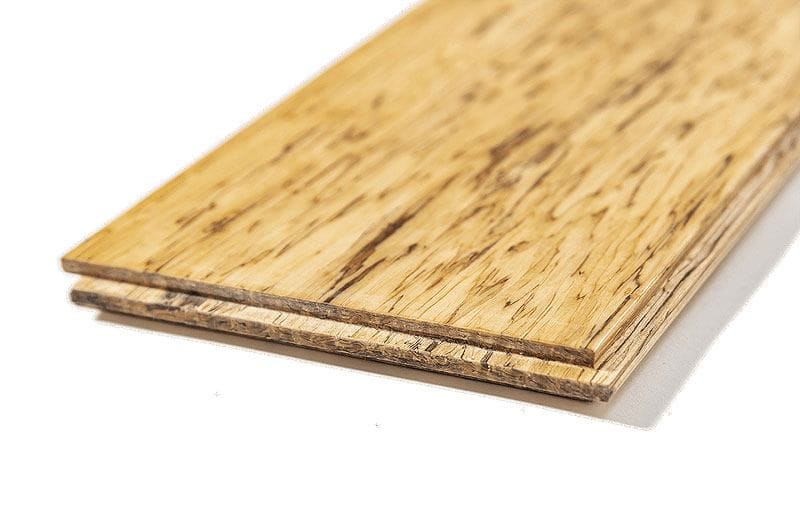
2. Bamboo Eco friendly Flooring
Whenever we think about sustainable construction, the first thing that pops into our minds is a bamboo house. Yes, this amazing material can be used in eco friendly flooring as well!
Bamboo is one of the fastest-growing plants, further increasing its sustainability quota. Additionally, its light-weight and durability make it better than traditional wooden floors. You can also experiment with grains, texture, and finishes.
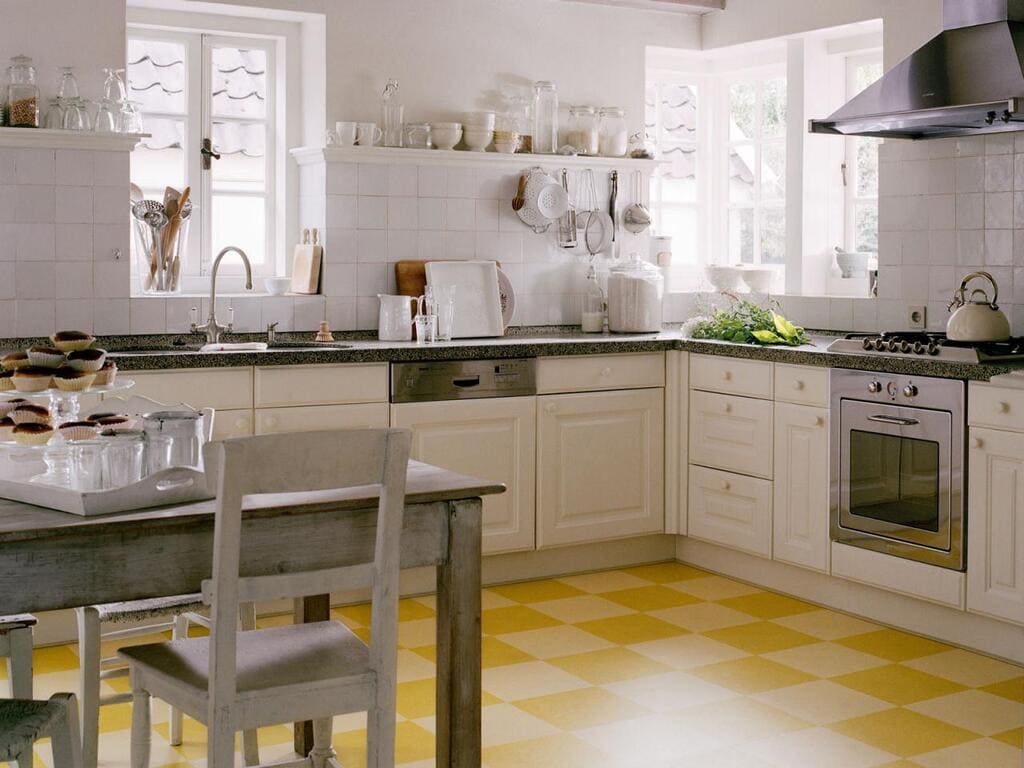
3. Linoleum Floors
Don’t confuse Linoleum with vinyl flooring. Yes, both of them have similar shine and versatility, but they are miles apart in terms of sustainability. Unlike vinyl, Linoleum is manufactured from organic elements like linseed oil, wood resins, cork dust, and ground limestone.
It processes high durability and fire resistance. What’s more? After lasting for about 20 years, you can burn it as fuel. Designers are striving towards making this eco friendly flooring even better.
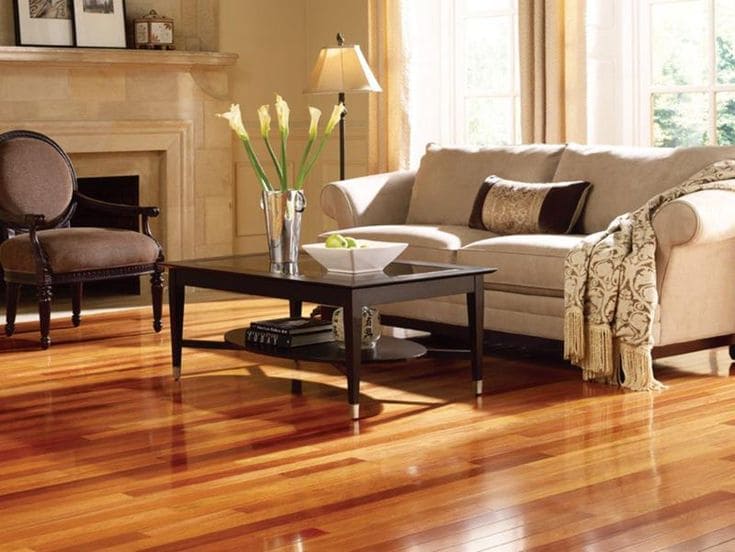
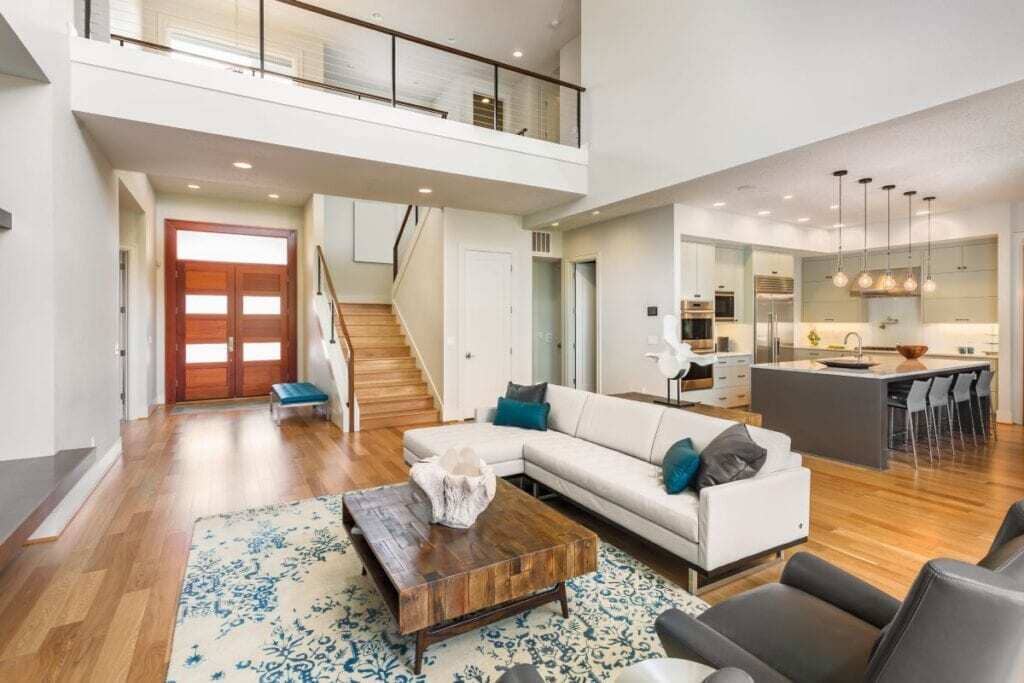
4. Sustainable Flooring with Hardwood
This is an easy choice for the list of the most eco friendly flooring solutions. The problem is that not all woods are deemed sustainable. One of the primary causes of deforestation is the extraction of wood.
As a result, selecting the correct wood for our hardwood flooring is critical. In the United States, for example, oak hardwood is commonly used since the forest service ensures that the trees are routinely planted.
5. Soft and Eco Flooring with Wool Carpet
If you live in a cold country, you will probably love the warm and fuzzy feeling of a soft rug under your feet. Well, you can get this exact feeling with eco-friendly options like wool carpets. It comes from one of the most renewable sources and is biodegradable. That means a very low carbon footprint.
Pro Tip: While you buy your wool carpet make sure that it is 100% natural with no artificial material. Also, regularly dust and clean your eco friendly flooring for longevity.
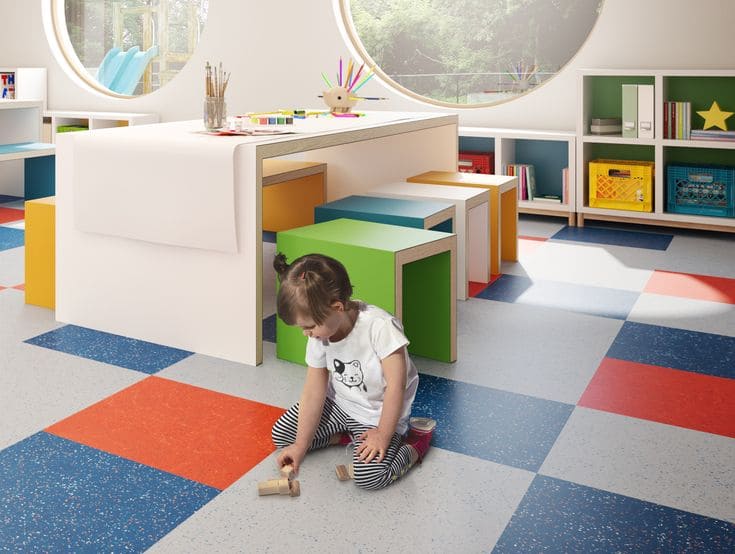
6. Natural Rubber Flooring
Do you want a vibrant yet eco friendly flooring option? Why don’t you consider the most versatile and renewable material source- Rubber? It is a sustainable resource, and can be moulded and sculpted into nearly anything. Natural rubber flooring offers a sturdy yet elastic surface that is sure to last long.
Pro Tip: Choose tactile or embossed patterns for improved slide resistance and grip, particularly in areas prone to dampness and spillage.
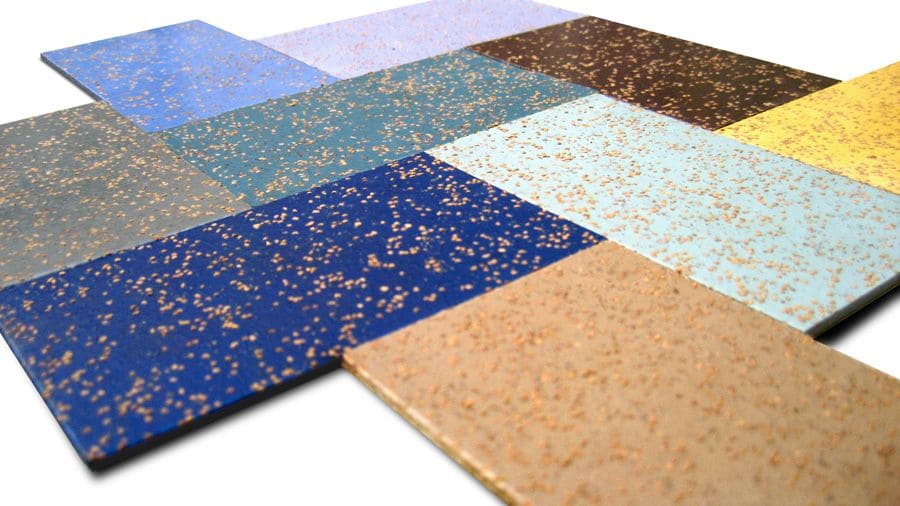
7. Eco Friendly Flooring with Recycled Rubber
\
Recycled rubber is typically sturdier than natural rubber. They are a combination of natural rubber and other synthetic elements that are used to reinforce the substance. Recycled rubber flooring is typically made up of a blend of SBR and EPDM rubber particles derived from vehicle tyres and a polymer compound.
If you want to contribute to waste reduction, this is one of the finest eco friendly flooring choices! They also retain more water and have less elasticity than natural goods.
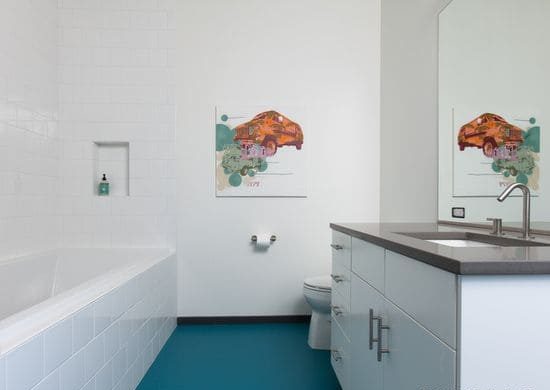
8. Recycled Glass Tile
Do you want to add vibrancy and intricate details to your flooring? You do not have to look into high-end synthetic materials to achieve that. Use recycled glass tiles instead!
These are made from reclaimed bottles and jars. Apart from being a sustainable flooring option, glass prevents dampness and mold. This makes it a great choice for kitchen and bathroom flooring.
9. Reclaimed Wood Flooring
This eco friendly flooring is not a new concept and has been used for ages! Reclaimed wood is made from old wood that was obtained from forests that grew organically and had to compete for resources such as water and sunshine. As a consequence, this timber is inherently stronger and more enduring than that of new-growth trees.
Also, the aging process improves the natural colors of the wood while drawing out the character of knots over decades. It is one of the best ways to retain the vintage quality of space with eco friendly flooring options.
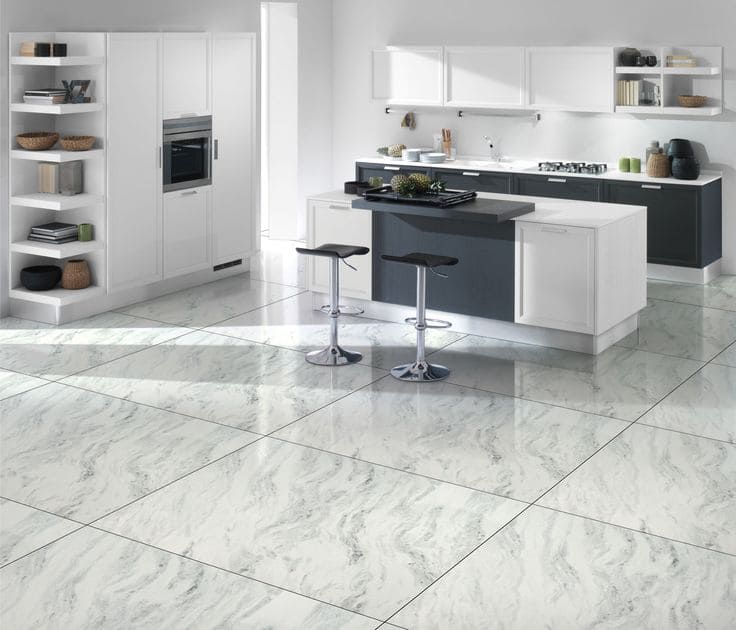
10. Eco friendly Flooring with Natural Stone
Another historic and durable sustainable flooring option! If you use this material you will tick all the checkboxes of eco-conscious design. Natural stones like Kota, granite, basalt, etc are usually sourced locally.
Furthermore, they are available in different high-end colors, textures, and finishes like a matte finish or honed finish. This way you can also cut down on the energy required to polish them.
Pro tip: A high-quality sealant will help prevent spillage from penetrating the stone and will make cleaning simpler.
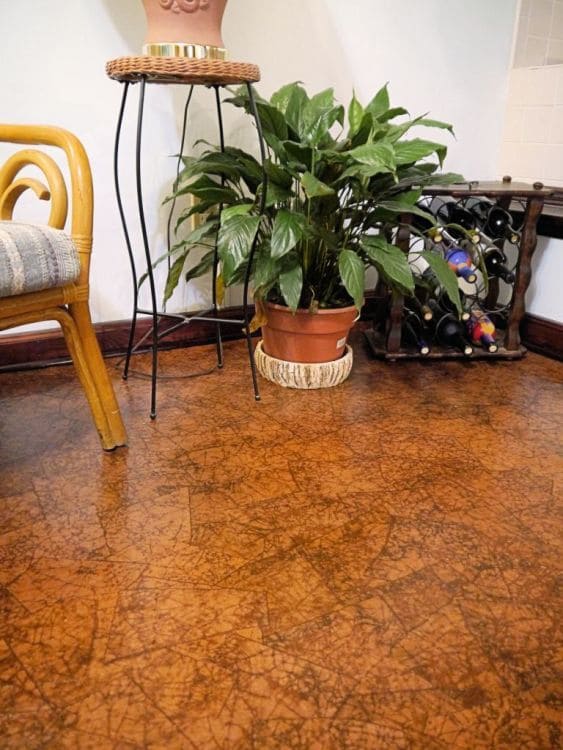
11. Paper Bag Flooring
Well, paper is definitely an eco friendly flooring option. But you must be confused about how such a fragile material can withstand the floor load! The magic is in the manufacturing process.
This flooring is made by recycling paper and pressing and treating it to create a sturdy yet appealing flooring substance. It is also hypoallergenic and mould and mildew resistant, making it an excellent option for households with allergies or asthma.
12. Eco friendly Flooring with Hemp
Hemp is in vogue among all environment enthusiasts! Now you can make eco friendly flooring from the fibers of the industrial hemp plant. It is a more environmentally friendly option to traditional flooring materials such as hardwood, which can add to deforestation.
Hemp carpeting is a long-lasting and resilient substance that is impervious to stains and dampness. It can be completed in a variety of styles and colors to complement any interior design, ranging from a natural rustic appearance to a contemporary polished finish.
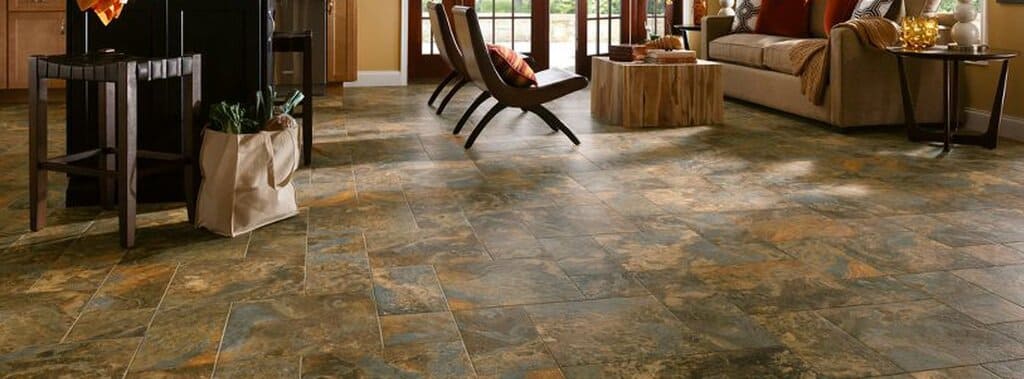
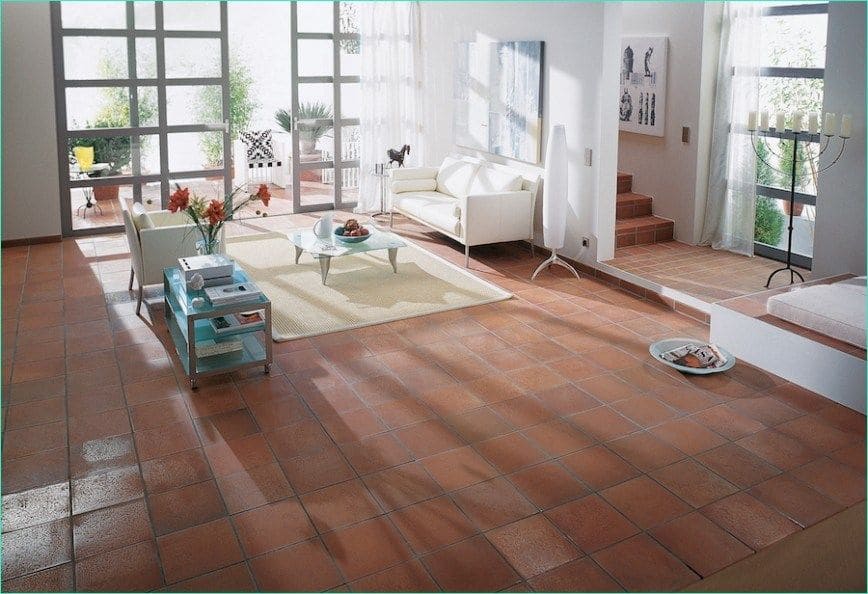
13. Clay Tile Flooring
Clay tile flooring is an excellent choice for those who want to add a bit of everlasting elegance as well as eco-friendliness to their house. For high-traffic places like kitchens and bathrooms, its durability and tolerance to moisture make it an excellent eco friendly flooring option.
Additionally, clay tiles are available in a wide range of hues, patterns, and surfaces to match any type of interior design. There is a clay tile choice to fit your preferences, whether you want a warm and rustic appearance with terracotta tiles or a sleek and contemporary finish with glazed and polished tiles.
14. Marmoleum Flooring
Look no further than Marmoleum flooring for an eco friendly flooring choice that is both stylish and durable! This modern material is produced from natural base materials such as linseed oil, wood flour, and jute.
Because of its anti-static qualities, it does not draw dust and allergens like some other flooring materials, making it an excellent option for those who suffer from allergies or respiratory problems. It’s the ideal option for those who want to help the climate without sacrificing durability or effectiveness.
15. Eco friendly Flooring with Ceramic Tile
Yes, you heard it right! The most common tile used across the globe can also be a sustainable flooring option. Ceramic tiles are made from natural materials such as clay and other minerals and appear in a range of styles, colors, and patterns.
Ceramic tile flooring is stain and dampness-proof, making it an excellent option for high-traffic areas such as kitchens, restrooms, and entryways. It is also simple to clean and keep, necessitating only regular sweeping and the odd mopping with a pH-neutral cleanser.
Pro Tip: In larger areas, consider using larger tiles. This can result in a more smooth and unified appearance while also reducing the number of grout lines.
16. Concrete Floor
Concrete is produced from locally accessible materials, lowering transit costs and carbon pollution connected with transporting materials from afar. It also contains no hazardous chemicals or VOCs (volatile organic compounds), which can off-gas and pollute interior air quality.
What makes this eco friendly flooring even better? It comes in a wide range of hues, textures, and patterns and can be polished or stained to create a one-of-a-kind and stylish appearance that compliments any décor.
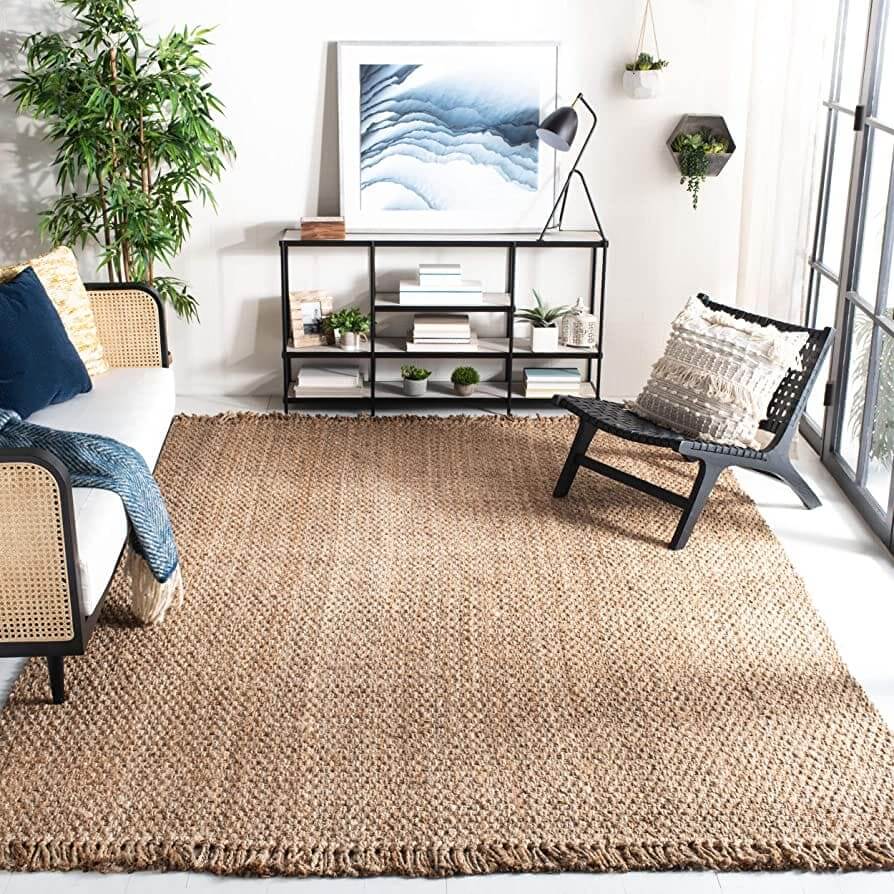
17. Eco friendly Flooring with Jute
Do you want to make your house more environmentally friendly while still keeping style and comfort? Jute matting is a natural and sustainable flooring choice with numerous advantages.
It is not only made of natural resources and biodegradable, but it is also soft and pleasant to walk on. This makes it an excellent option for high-traffic places such as bedrooms and living rooms. It has superb soundproofing qualities, which can help to lower noise levels and create a more tranquil and relaxing atmosphere.
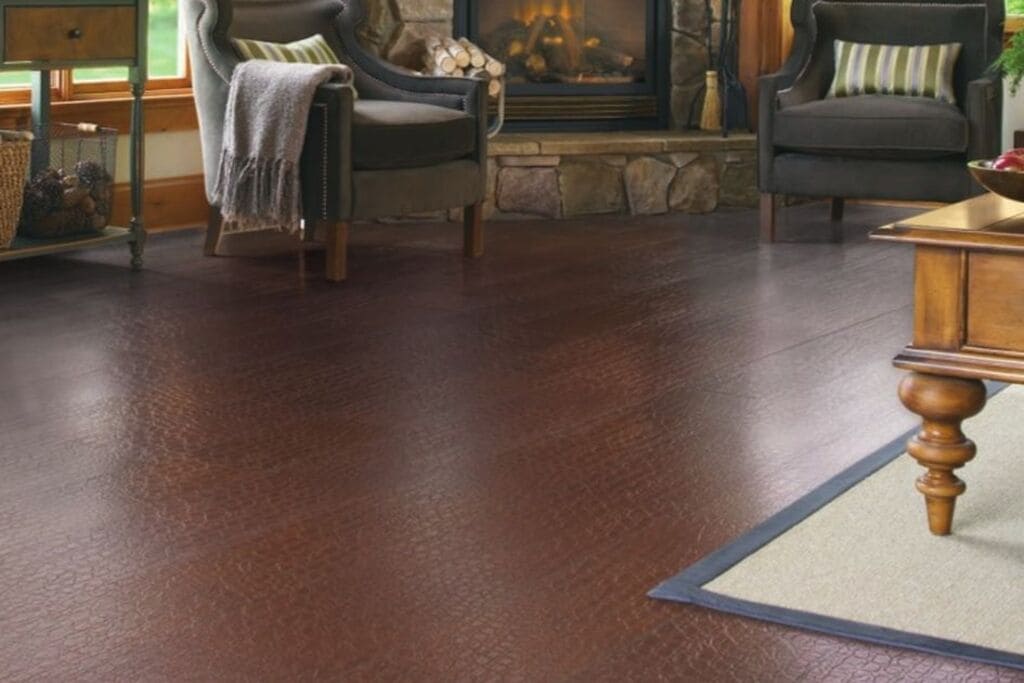
18. Leather Flooring
What can be a better material for luxe yet eco friendly flooring?
Leather carpeting is regarded as environmentally friendly because it is a byproduct of the livestock business, utilizing a material that would otherwise go to trash. Instead of being abandoned, animal hides are treated and processed to make long-lasting and fashionable carpeting. It also has excellent insulation qualities, which can aid in the regulation of interior temperatures and the reduction of energy usage for heating and cooling.
19. Sustainable Flooring with Biobased Tile
Modern designers continue to study new materials that have a lower environmental effect while increasing the performance of our industrial flooring goods. They have come up with ingenious eco-friendly materials like Biobased Tiles or BBT. It is manufactured from maize or corn, a rapidly renewable material.
Bio-based tile flooring is Generated from natural materials that do not release hazardous chemicals or toxins. It’s an excellent option for families with children or pets, as well as anyone who wants to ensure that their home or workplace is a healthy and safe setting.
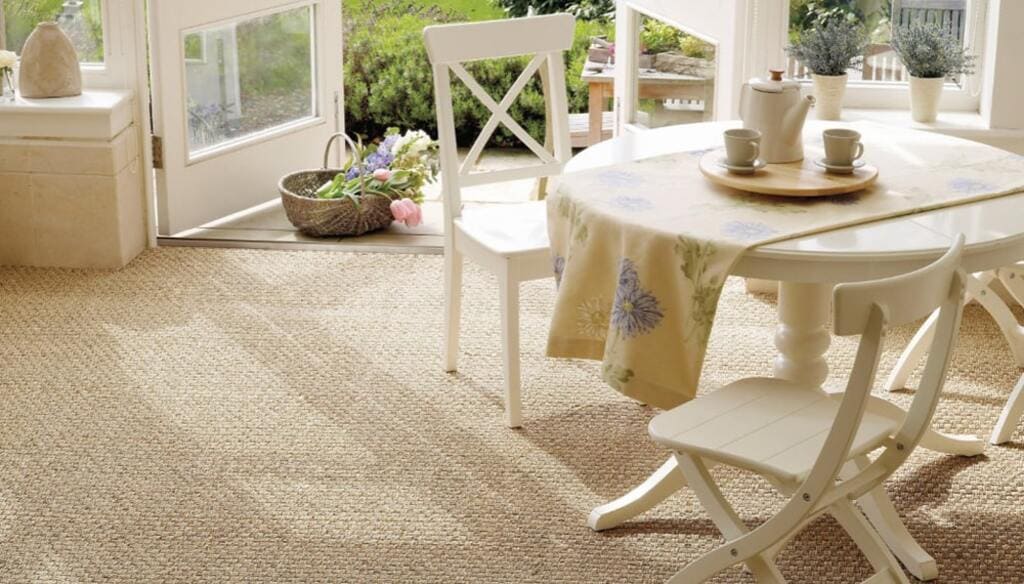
20. Seagrass Carpeting
Nature has provided us with immense possibilities and options to explore in our eco friendly flooring. Fibers of aquatic plants that grow in shallow shoreline waterways are gathered and made into rugs and other home décor items. Dust is not attracted to the hard, natural vegetable fibers, and germs cannot enter the fibers. Sand and fine grime do not harm sisal or seagrass rugs in the same way that they do traditional floor coverings.
Are You Ready to Start Your Sustainability Journey with These Eco Friendly Flooring Options?
Other than being environmentally friendly, you are undoubtedly mindful of the advantages of these eco friendly flooring choices by now! They are long-lasting and robust, and some of them are also water and fireproof.
So, whether you’re remodeling your home or creating a new commercial space, consider eco friendly flooring choices to take the first move towards a more sustainable future.
FAQs
1. What is Eco Friendly Flooring?
Eco friendly flooring is made from natural, renewable, and sustainable materials that have a minimal impact on the environment. Examples of eco friendly flooring options include bamboo, cork, reclaimed wood, and seagrass.
2. Why Choose Sustainable Flooring?
There are several benefits to choosing eco flooring options, including reduced environmental impact, improved air quality, and durability. Eco friendly flooring is also often hypoallergenic and easy to maintain.
3. Is Eco Friendly Flooring More Expensive Than Traditional Flooring Options?
Eco flooring options can be more expensive than traditional options in some cases, but it ultimately depends on the material and quality. However, eco friendly flooring can also save money in the long run by being more durable and requiring less maintenance.
4. Are Eco Friendly Flooring Options Easy to Install?
The ease of installation will depend on the type of flooring you choose. Some options, such as bamboo or cork flooring, can be installed similarly to traditional flooring. However, some options, such as reclaimed wood or seagrass, may require specialized installation.
5. How Do I Maintain Eco Friendly Flooring?
The maintenance required for any flooring will depend on the type of material you choose. Generally, eco friendly flooring options are easy to clean and maintain. It’s important to follow the manufacturer’s recommendations for care and maintenance to ensure the longevity of the flooring.
Minecraft has always been the most popular and enjoyable designing game since the first first time it was launched. This game has three versions; The Vanilla Version, The Bedrock Version, and The Java Version. In this blog, we would be discussing the Vanilla Version. The Vanilla version has always been known for its Minecraft Medieval House.
Vanilla Version is the original version of the famous designing game Minecraft. In this version of Minecraft, medieval houses are the most exciting feature people like to design, create, and build. The Minecraft medieval houses give you esthetic and authentic antiquated places.
So come, let’s see in how many different ways you can build Medieval Minecraft houses.
Before we start exploring the different ways, below are a few features that are usually included in Medieval Minecraft Houses:
A basement with access to a mining shaft, a small area to install a furnace, a proper crafting table with an anvil space, and a separate room for your chest storage.
You can design a kitchen for the main or the ground floor, including a pretty large space for barrel storage, and you can install a crafting table.
For the second floor, create a portion brewing area and a complete enchantment area covered with bookshelves and an anvil.
On the top floor, you can design an armor stand, bedrooms, and balcony to keep a watch on the mobs(enemies)
Besides, you can build a farming area for different kinds of farming and a stable to rest your fancy and royal horses, Donkeys, or Llamas.
Now let’s explore the different types of medieval houses in Minecraft:
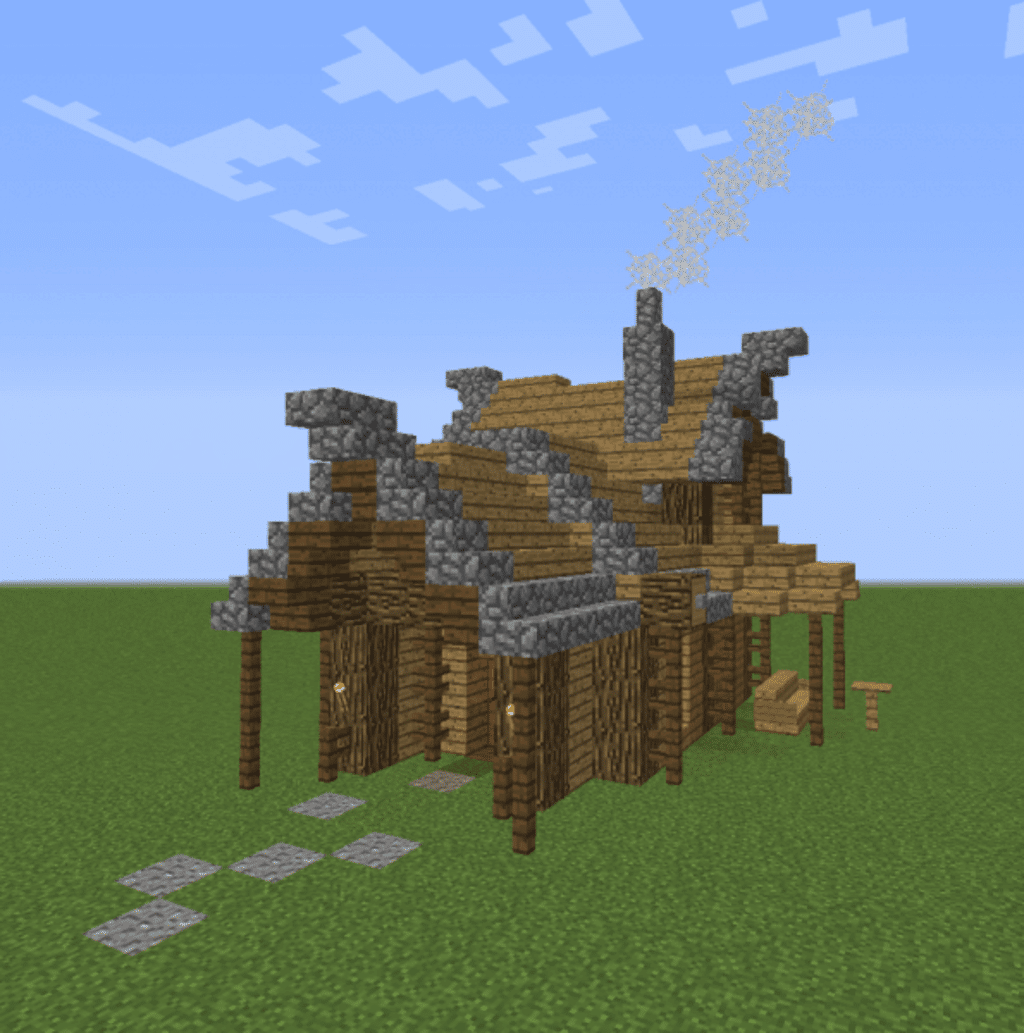
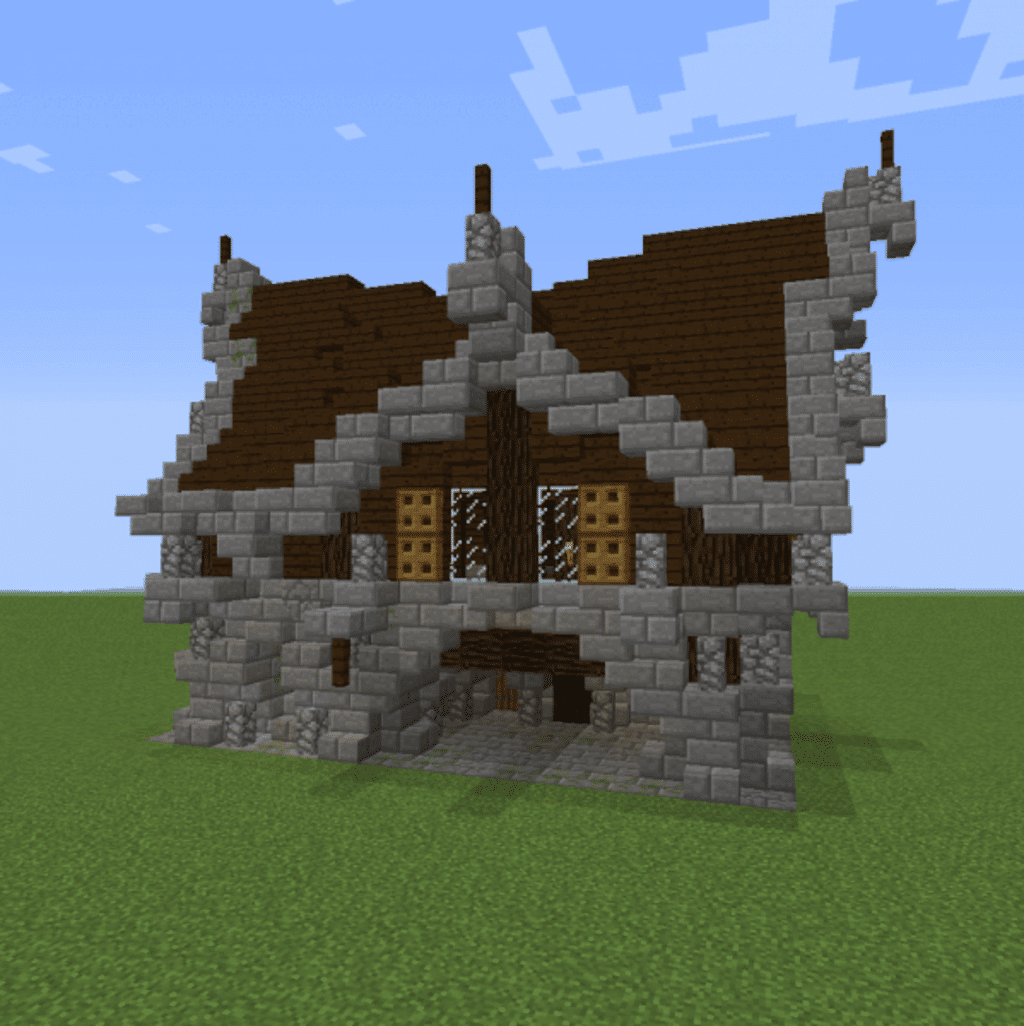
Spruce Medieval House 3
In this medieval house minecraft, space is usually tiny, so what you can do is, you can plot a small kitchen with two large chests, a compact sitting area.
Now for the second floor, you can install a bed, two armor stands, a furnace, and a large chest.
You can build a stable for horses and llamas for the house’s exterior and, if interesting, a farming area with animals and vegetables to farm. Besides, you can add an underground enemy farm through which you can collect ‘Experience’ essential for enchantments.
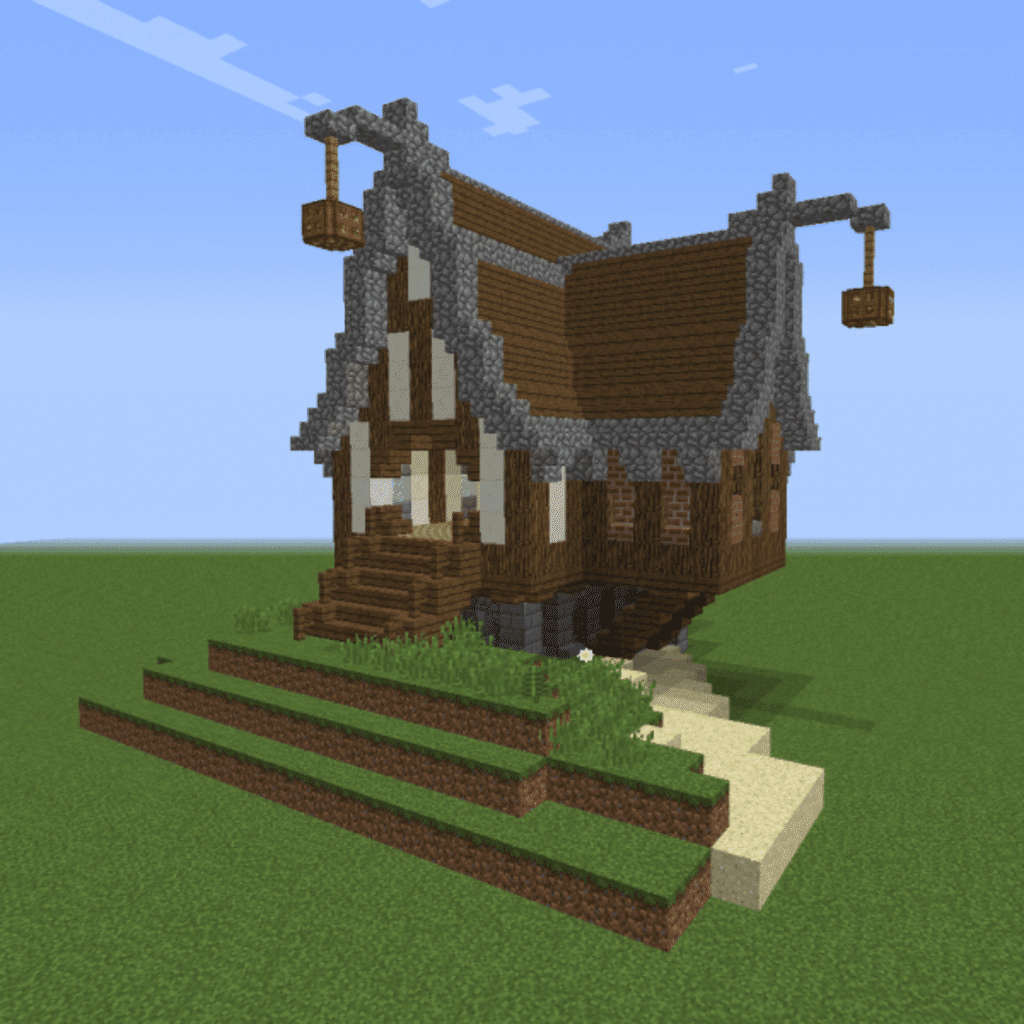
Medieval Rural House 3
Have you thought of designing and living in a cozy house? Then this is the best house you can build for yourself. Use pastel and light colors to build this house. For the main floor, you can install an enchanting corner table surrounded by bookshelves or an anvil.
You can have a separate living room and a kitchen. In the kitchen, you can install a furnace, chest, and storage.
Now moving on to the second floor, you can have a small balcony, a bedroom with a bathroom, and a separate room for an armor stand and closet.
For the houses’ exterior, you can build an outdoor shared bathroom, a stable, and a beautiful and attractive garden.
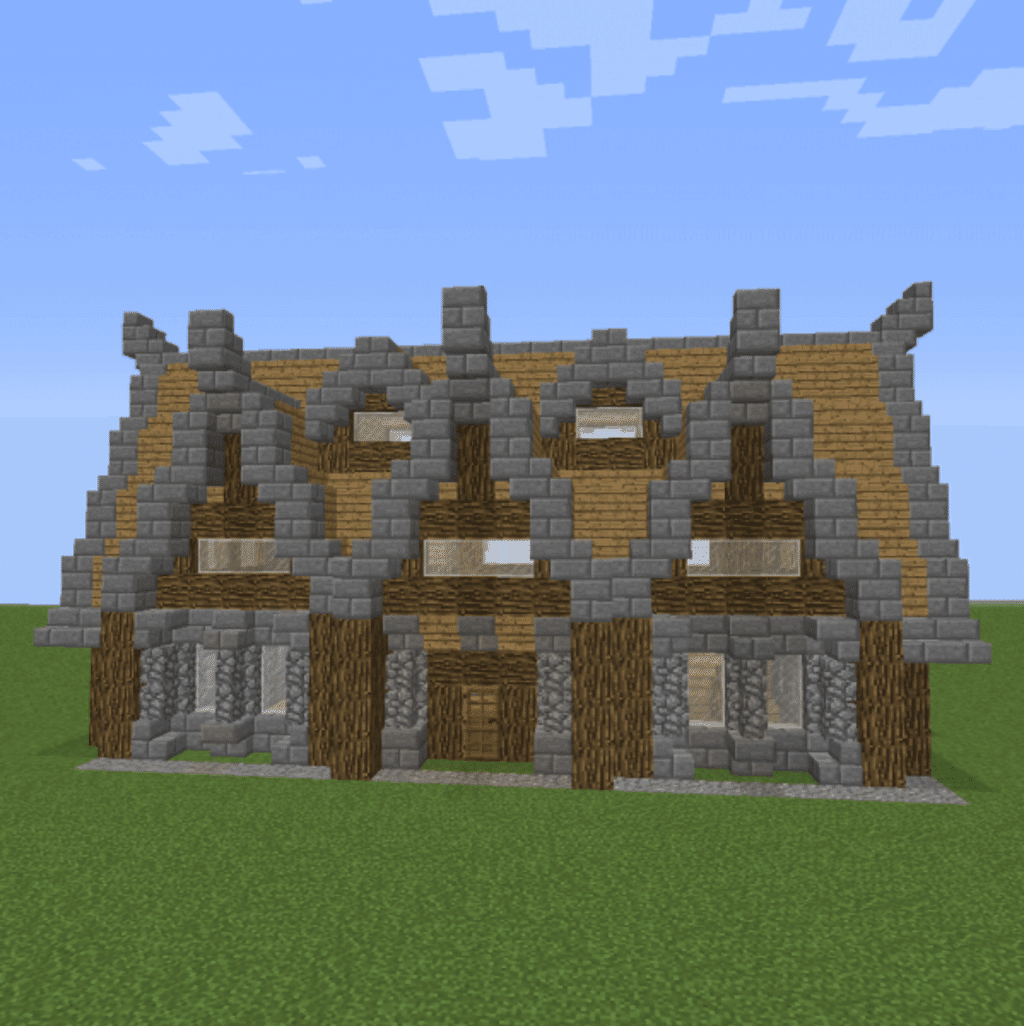
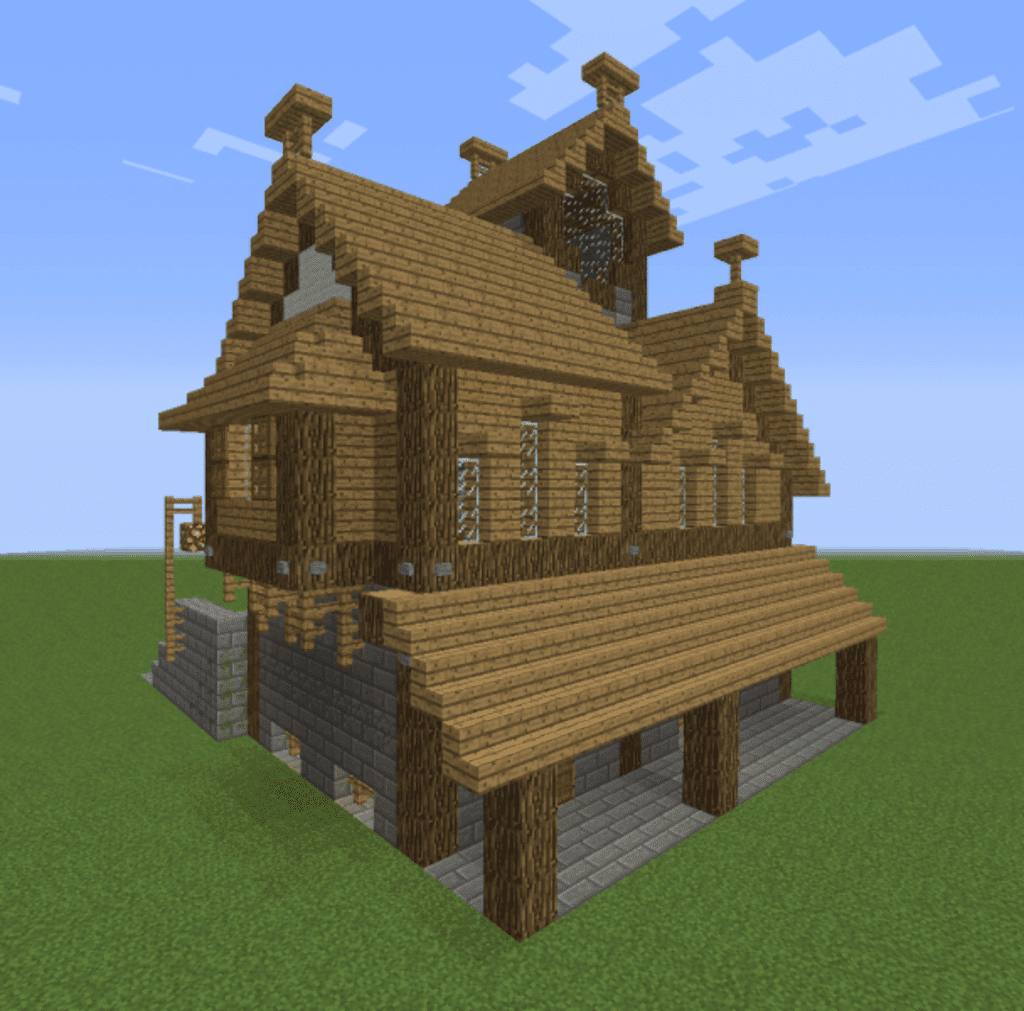
Unfurnished Nordic Medium House 2
In this large and beautiful Minecraft medieval house, you can fit all the features discussed above. So, to start with, you can build a basement including a large chest, a furnace, a large area for your collected mines, and a minecart for the mineshaft.
Coming to the main floor, you can design a central living room with basic couches with a center table; for the two corners of the room, you can install an enchanting table and a brewing stand area. You can have a spacious bedroom with a bathroom, a kitchen with maximum storage, and a shared bathroom for the rooms.
You can design two rooms; the first room can be a spacious bedroom with a standing balcony view, a large bathroom, and a corner sitting area. And for the second room, you can have two divisions; for the first one, you can install an ore chest, and for the second side of the division, you can have an entire closet of armor. And you can have a wall frame of chest tools.
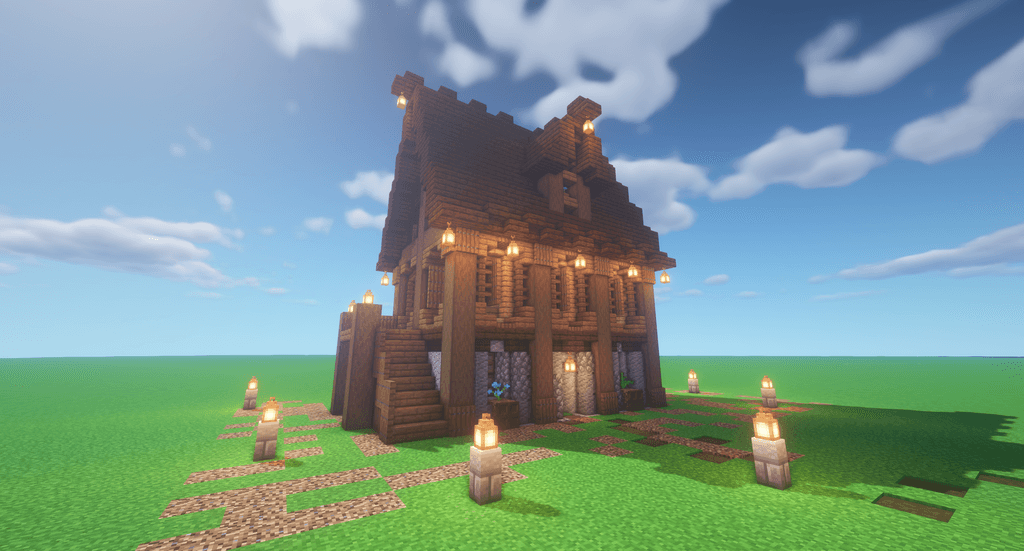
Gothic Medieval House 1
For this kind of house, focus on superficial features and give it an aesthetic look. You can use fire torches instead of lights. To start with, the main floor will have a pretty cozy living area and an open kitchen with proper storage and a furnace.
On the second floor, you can have an armor room and bedroom with an arcade to give it a look.
Now for the exterior part, you can add a beautiful farm to grow vegetables and grains, and on the other side of the house, you can build and design an attractive and eye-catching garden.
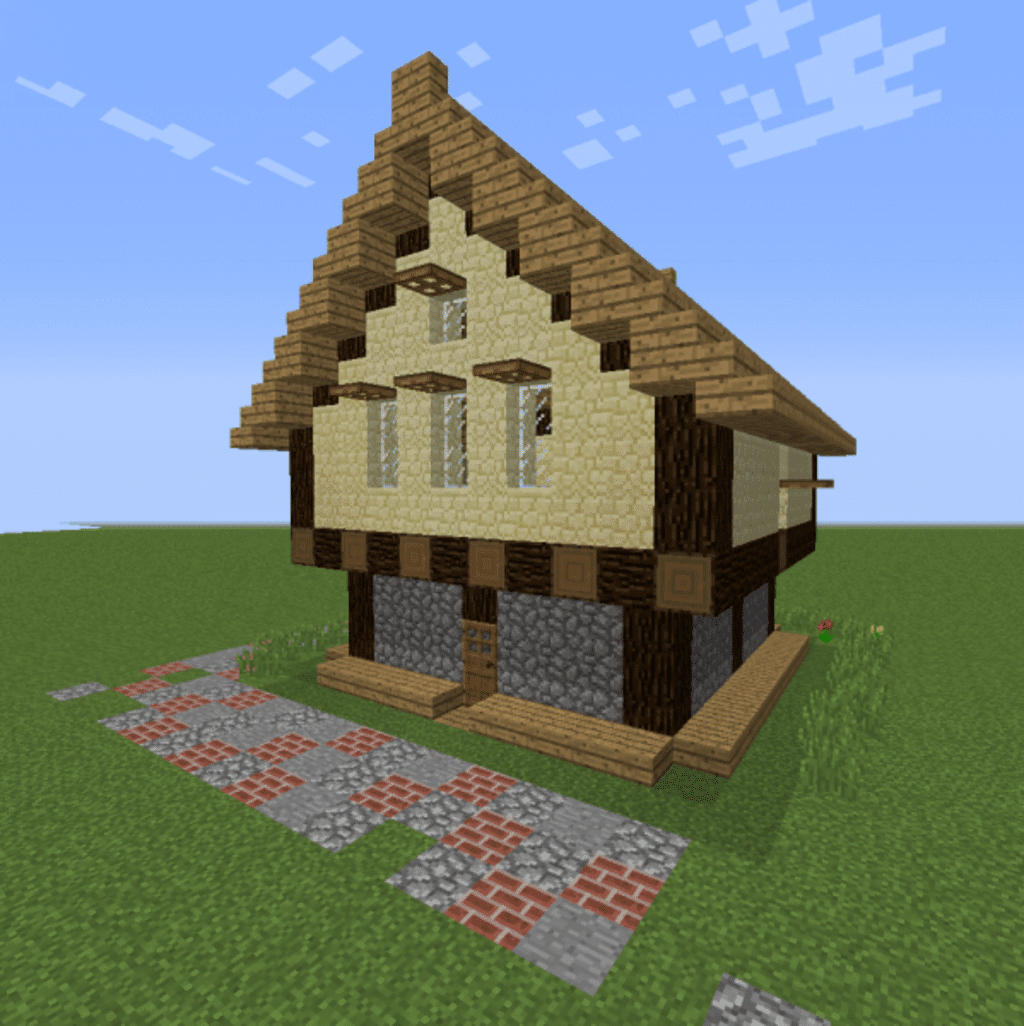
Tall Medieval Unfurnished House 5
For this Minecraft medieval house, you can have a grand entrance with a large living room and an attached open kitchen with a furnace and chest or barrel storage.
You can have a bedroom with a standing balcony. For the corner wall of the bedroom, you can install an armor stand or a closet. And in the corner of the living, build a shared bathroom. For the exterior, you can make Lily pads facing the bedroom balcony. And on the entrance, you can have a two-sided garden and a middle pathway to the house’s main door.
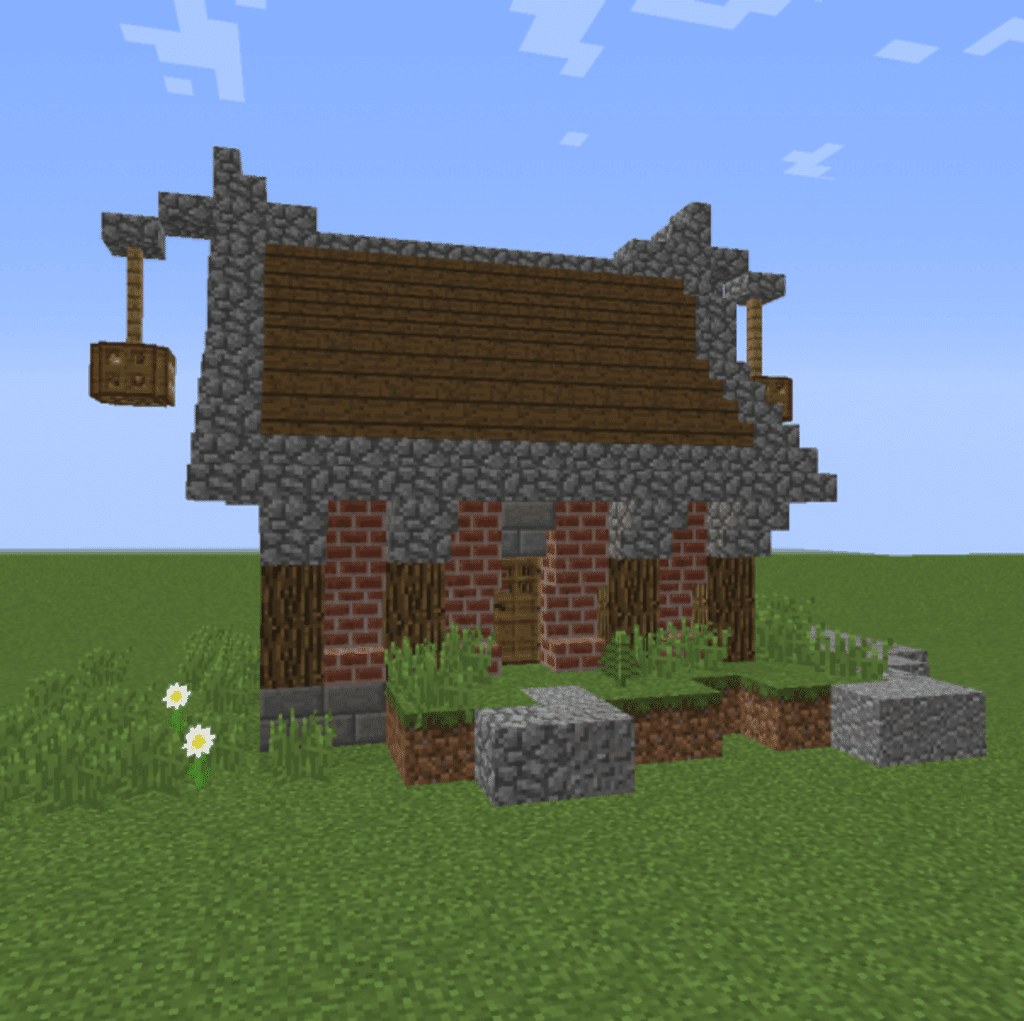
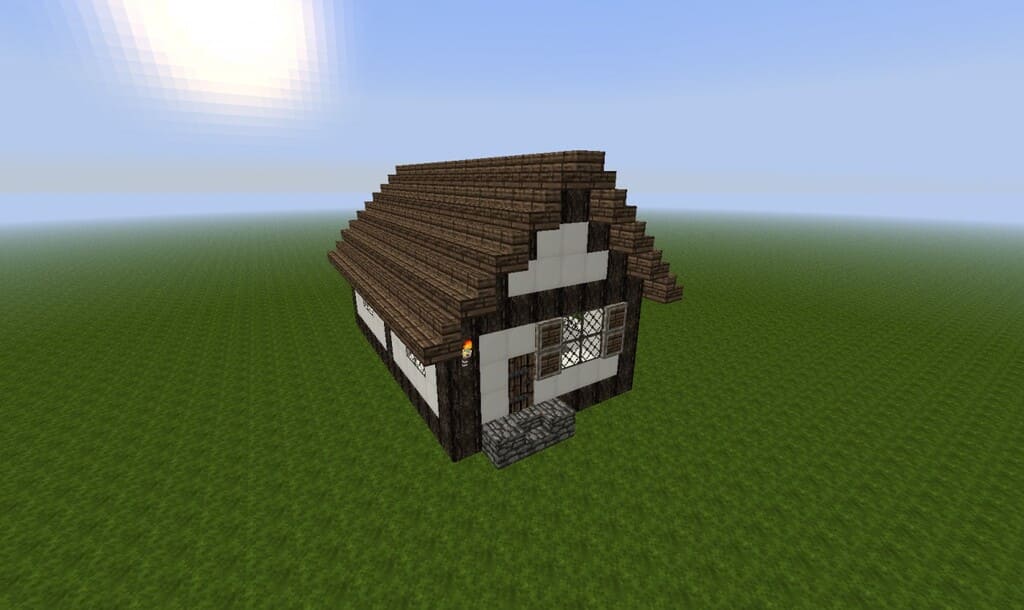
Unfurnished Medieval Brick House 3
Keep this minecraft medieval house blueprints simple and straightforward. Place a bed and single couch. Both the corners, install a large chest and furnace. For convenience, you can build an outdoor bathroom.
For making this house look beautiful, you can build a side garden and grow full trees to create the scenery.
Rustic Medieval Town House 3
For the Rustic Medieval Townhouse, we can imagine this place and time the best for living. It would be best if you kept this simple and beautiful. You can build an underground basement where you can store and hide large chest boxes and jukeboxes, and you can also set an armor stand or closet.
You can build a decent living space with a separate kitchen area for the main floor, including a furnace and barrel storage.
And for the top floor, you can have two bedrooms and a shared bathroom for the bedrooms. And also, you may have a small closet or secret room.
For the outer part of the house, plant trees and gardens make it look fantastic and attractive.
Warhammer Medieval House 7
You can be freely imaginative and design many things for this medieval house than the other medieval places. You can give this house a modern look by adding lots of furniture, rooms, and a much more excellent interior. For example, on the first or the main floor, you can have a massive kitchen with a furnace, a dining area, and a living space with a window and a walking balcony. On the terrace, you can plant trees and saplings to make the house look prettier.
You can divide it into two rooms; one where you can store and hide ores, armors, and tools. For the room, you can create a master bedroom with a separate closet area and sitting space.
On the exterior, you can maintain large trees and beautiful gardens.
Large Medieval Town House 4
This can be the best creation of your Medieval Houses. You can be creative for this house. You have three floors in this house.
For the ground floor, create a large space of a living room with sitting couches and a center table, a wall-mounted table. For decor, you can place indoor plants and a fire torch to give it a rustic look.
Later you can create a large kitchen with a big dining area and add all the kitchen appliances and a giant furnace.
On the second floor, you can be royal. You can have one king-size bedroom with a large walking balcony and a sitting area with plants and flowers for the view. One another bedroom with a closet and bathroom space and corner sitting area. You can have a different living area in addition to and create it in a secret room.
For the exterior portion of the house, create a lily pad and beautiful garden surrounding its side. On the other end, you can have a spacious cultivating farm with a stable to rest your animals.
Conclusion
Here we are with so many different ideas to build your interesting, beautiful, and attractive Minecraft medieval houses. I hope now you must have been clear with how to make a medieval house minecraft. So I guess you must be confused by now which idea to choose, or why don’t you try all of them. If you liked all these ideas and felt interesting, share it with all the Minecraft fans and help them find their perfect Minecraft Medieval House!