If you want to add a protective finish to your countertops, epoxy, and polyurethane are among the best options. However, homeowners are often stuck between choosing one. Each of them has unique characteristics that can protect and improve the countertop’s texture. So today, we shall look into polyurethane vs epoxy usage in countertops and determine which one fares better for your dream designs.
Epoxy vs Polyurethane: Why Choose Epoxy?
Countertop designers like epoxy as it has a double benefit. Epoxy resin has two compounds: the resin and the hardening agent. When these two combine, a chemical reaction releases heat to bind the two and create a fortified solid.
Epoxy resin has been popular among interior decor professionals because of its multi-use properties.
If you are looking for countertops for aesthetic reasons, epoxy resin can be a sealant to coat the surface. By doing so, you can retain the countertop’s long shelf-life and not worry about damages.
Additionally, you can also use it as an adhesive. Being an effective bonding material makes it perfect for joining two materials. Cured epoxy resin bonds have long-lasting joints and can protect your creations for years to come.
You can also use resin to repair damaged countertops. You can use it to substitute or replace chipped or rotten surfaces. Its fortified base makes it as strong as the wood it replaces.
It is flexible, durable, and has multiple residential and commercial uses.
Check out Caesarstone to learn more about the advantages and disadvantages of epoxy countertops.
Epoxy vs Polyurethane: Why Choose Polyurethane?
Similar to epoxy, polyurethane is a dual-compound substance. It also has resin and a hardener. However, unlike epoxy, polyurethane has higher flexibility.
A well-known countertop material, polyurethane has multiple uses. For example, it can resist scratches on surfaces thanks to its impact absorbent properties. So if an object crashes against your polyethylene countertop, you can rest easy knowing no significant damage took place.
The coating can last for a maximum of 25 years. Its glass-like glossy finish over wooden surfaces adds a protective layer that can help sustain the countertop’s quality.
Because it’s transparent, polyurethane also makes for a favorite among countertop creators as it sustains the quality and adds an excellent finishing touch to all projects.
While it cannot substitute damages as epoxy does, it can fill up the cavities left on damaged countertops. It’s hard setting over damaged holes makes it a great repairing agent for new countertops.
As an adhesive, polyethylene can help bond the base and the countertop surface with ease.
Polyurethane vs Epoxy Countertop: Which One to Choose?
If you are renovating your kitchen interiors or setting up your new home, a countertop is necessary. Epoxy and polyethylene are two of the best choices out there. Let us look into a quick comparison to help you decide:
Price
In terms of the affordability of epoxy vs polyurethane, epoxy is a better choice if you are on a budget. Polyethylene can be a bit costly if you are a first-time buyer. So if you have a large countertop design to work with for your new home, epoxy can help you save construction expenses.
Durability
Bonding two materials with epoxy will be stronger than bonding with polyethylene. It is more robust and can withstand higher levels of compression. With such toleration to wear and tear, epoxy makes a countertop perfect for a kitchen with high traffic throughout the day.
Chemical Resistance
Both epoxy and polyethylene have different reactions to chemicals. For example, sulfuric acid reacts better with polyethylene than with epoxy. However, many chemicals react poorly with epoxy.
Keeping this in mind, if you need to use any solvents or chemicals on top of the counterpart, it is best to opt for polyethylene.
Adaptability
Epoxy works better over more surfaces than polyethylene. However, keep in mind that both epoxy and polyethylene work perfectly over wooden countertops. So if you have a wooden countertop, you can opt for either without a second thought about which one would be better.
Humidity Resistance
Even if you keep an epoxy countertop wet at all times due to cooking, it does no damage. That is the sign of epoxy resisting heat and water at all times for longer periods.
One thing about polyethylene in this scenario is its flexibility. Extreme temperatures cannot make it brittle or break it. Rather, it can rapidly heat up and cool down, making it flex. However, polyethylene is not water-resistant. As a result, it can hold liquid for longer periods, which can gather dirt and grime.
Flexibility Levels
Epoxy might be more durable and fortified in the long run, but polyethylene is flexible. It flexes with temperature, adapting to it rather than resisting.
Therefore, while epoxy does last for a long time, it can usually wear out after several years. However, polyethylene’s adaptability makes it last longer.
Curing Speed
Polyethylene cures faster than epoxy. So if you have any dents on your polyethylene countertop that need a quick fix, you need minimal time to wait for it to cure. It dries up quickly and can fix your countertop in no time.
However, this benefit can also turn messy if a large area of damage needs to be fixed or cured, and the polyethylene cures before forming the required shape.
Scratch Resistance
Both epoxy and polyethylene are scratch-resistant. There is no need to worry about random cracks or scratches from everyday objects.
Endnote
When deciding on polyurethane vs epoxy for countertops, it is important to note they both have their benefits and drawbacks but can be perfect choices depending on your preference.
When purchasing online, check if the countertop goes with your budget, interior decor ideas, and the surrounding temperature of your kitchen. Talking to a professional might help you decide better which material to pick.
If you plan to work on your home roofing, the options for roofing nails are extensive. You can choose from many sizes and types of nails. Are you unsure which nails are best for your roofing system?
Roofing nails are designed to help you complete your job more effectively. Different roofing nails are made from different materials, which means they can be used for different conditions. They also have a variety of shanks to suit other roofing materials. Here, we will explain how to choose the appropriate roofing nails for your roof.
What Nails Are Used for Roofing?
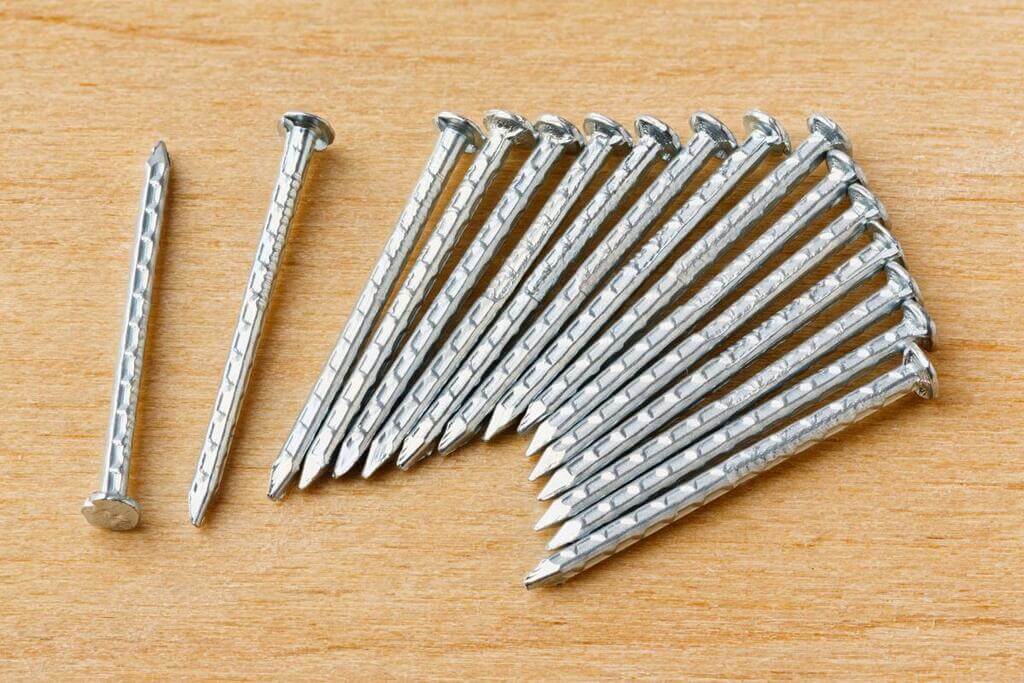
Roofing nails can be found in different sizes, lengths, and gauges. Two distinguishing features of roofing nails are a wide, flat head and a short shank. Their design allows them to cut through shingles, felt, and sheet metal without damaging underlying wood.
Nail type plays a vital role in how well your roofing is secured because each nail is different. They are generally divided into three categories: screw caps, ring shanks, and smooth shanks.
Square Cap
The square cap nail is more commonly used to attach felt underlayment rather than asphalt shingles. As opposed to regular nails, they have square heads instead of circular ones. The shank of this type of nail can be smooth or coiled.
Ring Shank
Ring-shank nails can also be referred to as annular roofing nails or corrugated roofing nails. These nails have rings on their shanks, as their name suggests. They aren’t attached together as screws are. The rings, however, ensure a more prominent grip or staying power of the nail in the sheathing and shingles.
Smooth Shank
It is the shanks of nails that penetrate the surface into which they are nailed. In simple words, smooth shank nails have smooth shanks. These roofing nails are the simplest and cheapest option.
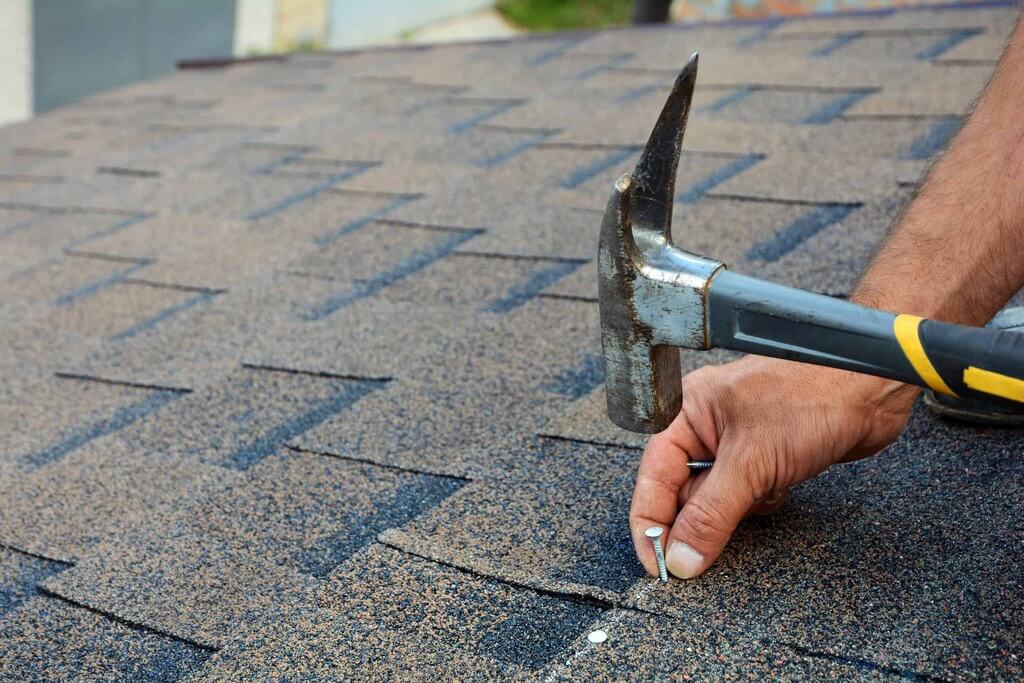
What Do Roofers Use for the Nail?
When it comes to roofing safety and efficiency, having a set of the right tools is essential. Roofers rely on hammers in addition to shingles and other materials to install new roofs.
Roofing hammers are used to drive nails into shingles and cut them. This tool is also known as a roofing hatchet. Roof hammers are equipped with magnetized faces for easy nail picking. There are even gauges you can use to determine the right angle for shingling placement.
Getting a suitable roofing hatchet for your roofing project will be essential if you plan to work on a roof installation. Magnetizing roofing hammers could be an effective option. Magnetic hammers use magnets to increase the speed and power of nail hammering. A hammer-like this appears to be made of ordinary material, but it contains a magnetic property that allows it to stick nails. This roofer’s magnetic hammer is designed to punch roofing nails and attach felt caps quickly.
Are Roofing Nails Magnetic?
There are many questions on the internet about whether roofing nails are magnetic. Many people ask this question on forums and blogs because magnetic nails make roof cleanup much easier. After installing your new roof, the first thing your contractor does is clean it of any debris and granular that fall from the shingles. In cleaning time, magnetic roofing nails become critical. Using a magnetic sweeper is an easy way to facilitate cleanup when nails are magnetic.
On the contrary, roofing projects employ a variety of nails. Steel roofing nails are the only ones that are magnetic. They are coated in a variety of colors to prevent rust. Steel nails work well with magnetic sweepers. However, stainless steel, aluminum, and copper are incompatible with magnetic sweepers. You can test a nail’s magnetic strength by picking it up with a magnet.
How Do I Choose Roofing Nails?
Roofing nails serve an important purpose when it comes to installing or repairing a roof. The right type of nails can make a big difference, no matter how small it seems. Certain types of roofing nails are best suited for specific kinds of roofs. Your roof and siding can last longer if you select the right type of nail.
Aluminum Nails
Aluminum nails are usually used to fix metal, asphalt shingles, or composite roofs. When constructing properties near seashores, it is not recommended to use aluminum nails due to corrosion risk caused by salty air. When it comes to strength, aluminum nails are on par with steel nails. Furthermore, they are often more affordable than alternative nails.
Stainless Steel Nails
Nails made of stainless steel are best since they are rust-free. Material with a hard finish makes it more resistant to salty sea air and won’t rust or deteriorate easily. The only downside to stainless steel nails is that they can be very expensive. It is a good idea to use stainless steel nails if your home is near the coast.
Galvanized Nails
After the nails are created, the galvanizing process is performed. The nails are made from steel but have been coated with zinc. Most commonly, they are used to attach asphalt shingles to roofing. Their rust resistance makes them a top choice for long-term use.
Copper Nails
Professionals generally recommend copper nails for securing slates or tiles. Despite its great flexibility, this material retains its performance level in all kinds of environments.
There does not seem to be a big difference between the type of roofing nails. But when it comes to protecting against moisture damage, tornadoes, and tropical storms, having the right nail can make all the difference.
Conclusion
After replacing your roofing system, it is imperative to clean up your old nails, pins, and metal objects. Be sure you and your contractor are both completely aware of the terms of your roofing cleanup contract. Roofing companies use a variety of equipment to clean their rooftops, including metal detectors and magnetic equipment. After cleanup, it’s worth spending a little extra time to check for residual nails. If any are found, you can request the contractor to clean up again.
Ready-mix concrete is one of the most popular options today’s professional builders use. The material is a trendy concrete option for use in large-scale construction projects. Consistent quality is a significant benefit of ready-mix concrete. Many construction professionals choose ready-mix concrete as their go-to product for various applications.
One of the most apparent advantages of ready-mix concrete is the amount of time it saves. On the building site, its use dramatically reduces the labor workers have to engage in. In light of this point, it is worthwhile to consider the other benefits of ready-mix concrete in Essex. Considering some of its disadvantages is also a good idea.
The Key Advantages of Using Ready Mix Concrete
The Convenience Factor – The most obvious benefit of ready mix concrete is the simple fact that it is more convenient than other options. Your work crew will not have to devote significant amounts of time mixing concrete when you choose this option.
Less Materials Waste – The use of ready mix concrete also means less wastage of materials on your building site.
Ready Mix Concrete Is an Environmentally-Friendly Option – The use of ready mix concrete Essex also has environmental benefits.
Ready Mix Concrete Is a Highly Versatile Option – The versatility of ready mix concrete is another key advantage. There are many construction project applications that it works well with.
The Key Disadvantages of Using Ready Mix Concrete
It Can Be Difficult to Transport Ready Mix Concrete Over Long Distances – A key disadvantage of using ready mix concrete is the fact that it cannot be transported effectively over large distances. This is because concrete hardens over time.
Because of this, ready mix concrete needs to be transported quickly so that it can be used right away.
Ready Mix Concrete Requires a Bigger Up-Front Investment – Though ready mix concrete can save you money in the long run, it does require a larger up-front investment for the product.
Ready Mix Concrete Is Not Ideal for Smaller Building Projects – Ready mix concrete is a great investment for large-scale building projects, but its cost-effectiveness decreases when dealing with smaller ones
Final Thoughts
Ready mix concrete has some compelling benefits as well as a few drawbacks. Choosing this option will often depend on the scope of your building project, but it can be a great choice when the circumstances are favorable for its use.
Gone are the days when a basement was only used as an extra room, storage space, or a dark part of the house. We used to put our extra or unused stuff in the basement, and it was a place that was either useless or had rarely been used. But that’s not the case now! These days, garage spaces have become an important part of houses. Explore best basement ceiling ideas for your home.
Now more and more people are converting their basements into second living rooms, amazing office areas, and workout gyms. Not only this, but basements also function great as home theatres, entertainment, and gaming zones.
Are you also planning to transform your basement? Do you want to make your basement look interesting and inviting? If yes, you should pay attention to one of the most important things: Ceilings! As if your ceiling has marks, cracks, and exposed beams, it will surely look a bit off and unattractive. So you have to transform your basement ceilings first and then think about the decorations.
There are so many methods and ways to cover your basement ceiling and turn it into another beautiful and functional space for you and your family. You can select the design according to your ceiling height or the trend and if it’s a bit confusing for you, keep reading this post.
Today in this blog, we’ve gathered up some of the cool basement ceilings ideas of 2022. We’ve included all types of ceiling for basement such as low basement ceiling ideas. So, you can select the one according to your specific apartment and requirement. Let’s start.
Creating a beautiful and useful space in your basement can seem easy, but it requires proper planning and designing. That’s why many people feel this is a bit challenging. Start with the basics, which are your basement ceilings! As most basements have exposed beams, a maze of pipes, wires, and ductwork, you should always tend to first think about them. These things make cleaning more difficult and tend to be an eyesore when guests are over.
No worries, there are many basement ceiling ideas to cover insulation available in the market. Below are some of the most popular and common types of ideas to cover the basement ceiling. You can use these methods on every type of ceiling, including standard, low and high. So, are you ready to give a fantastic makeover to your basement ceilings? Let’s start with the best basement ceiling options list!
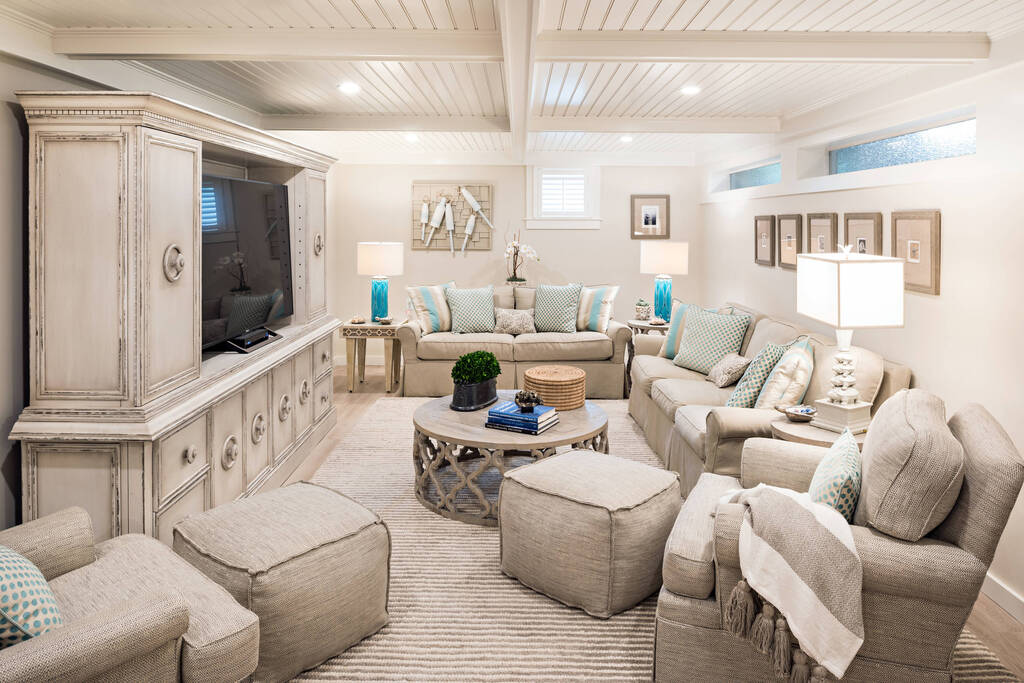
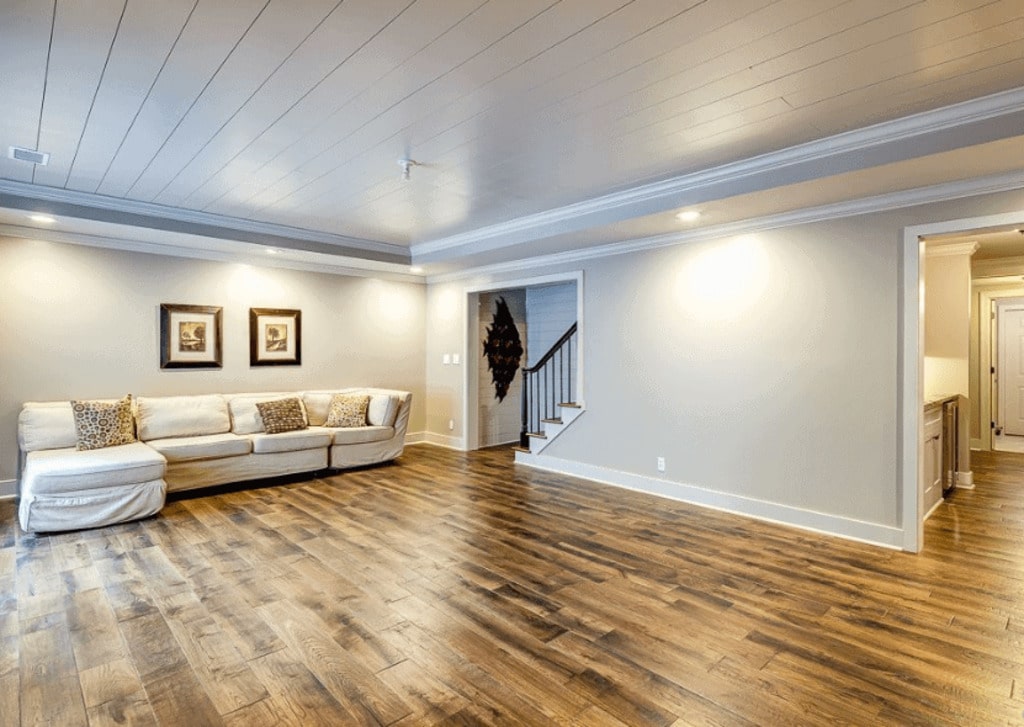
1. Cottage Themed Beadboard Ceilings
Does your basement have a painted plain or a popcorn texture ceiling? If yes, it’s time to transform them into a stunning masterpiece with beadboard ceilings! Whether your ceiling height is low or normal, these beadboard ceilings will work perfectly.
Nowadays, cottage-themed beadboard ceilings are so in trend. They make the room appear brighter and spacious, which is an important factor for the basement, right? These ceilings are durable and will surely give a warm cottage-like feel to your home.
Apart from covering the unevenness in the ceiling, it also adds a degree of insulation. This simply means that your basement will be warmer than usual on cold winter mornings. Another great thing about these ceilings is that they’re not too complicated to install and are relatively cheap. So, just add some light work, and your ceilings will be more visually appealing.
2. Drywall Basement Ceiling Ideas
One of the safe and cheap basement ceiling ideas is drywall. If you’re confused between many or want an affordable option for your ceilings, go with the drywall basement ceiling idea. Drywall gives a smooth, attractive living space, and maybe that’s why it is a widely used material.
So whether you want a good outlook and decorative appearance or a noise-free atmosphere, drywall is the best option. This material will effectively reduce the noise in your basement and make the ceiling resistant to fire. To get a finished look, all you need to do is apply a coat of primer and a coat of your favorite paint color.
Don’t forget to add fancy lighting like recessed lights to get the ultimate modern or futuristic appeal. This basement ceiling idea works perfectly with small spaces and basements with low heights.
3. Corrugated Metal Basement Ceiling
Does your basement have ceilings at low height? Rooms with low ceilings can quickly feel cramped if you don’t select the right type of ceiling. So how to overcome this problem? Experts have recommended using a decorative element to overcome this tight and compact feeling. These materials will bounce light and introduce a new texture without adding bulk. A simple and effective solution to this problem is Metal Roofs!
You may have seen these types of roofs on farms. Well, nowadays, these corrugated metal sheets are so popular and commonly used as an alternative for traditional ceiling materials. These roofs reflect light and create an artistic ambiance that makes them ideal for both normal height and low ceilings.
So, if you’re looking for an industrial ceiling that is cheap, use recycled tin sheets. For a rustic look, you can easily find these metal tiles in barns or purchase them new for that ultra-modernist feel. This will also hide all the beams or pipes and give a finished warehouse or steampunk design look.
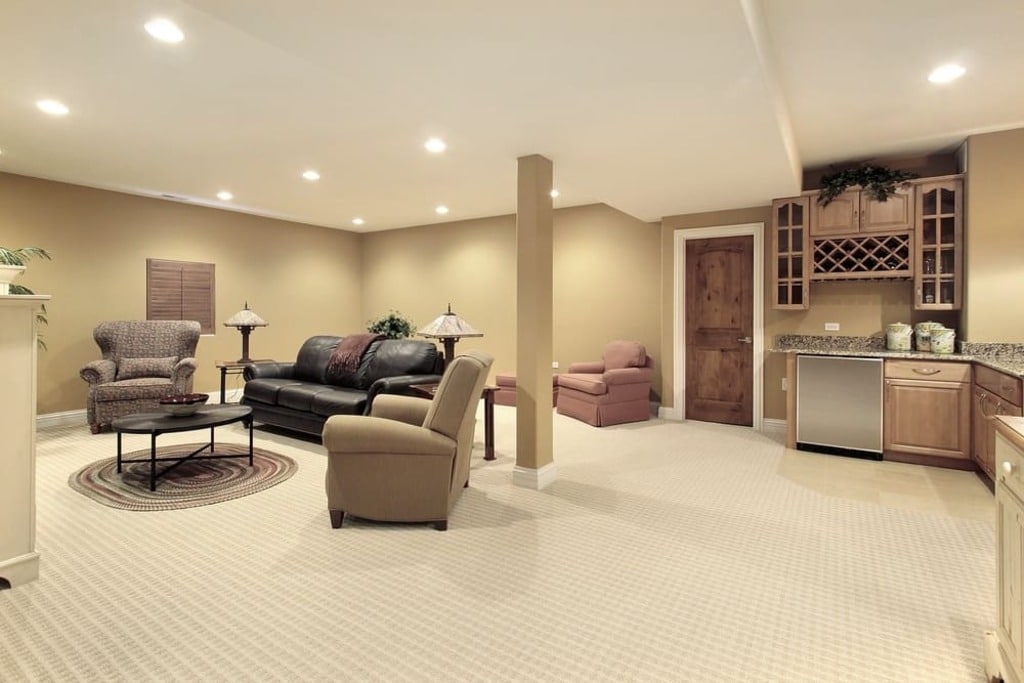
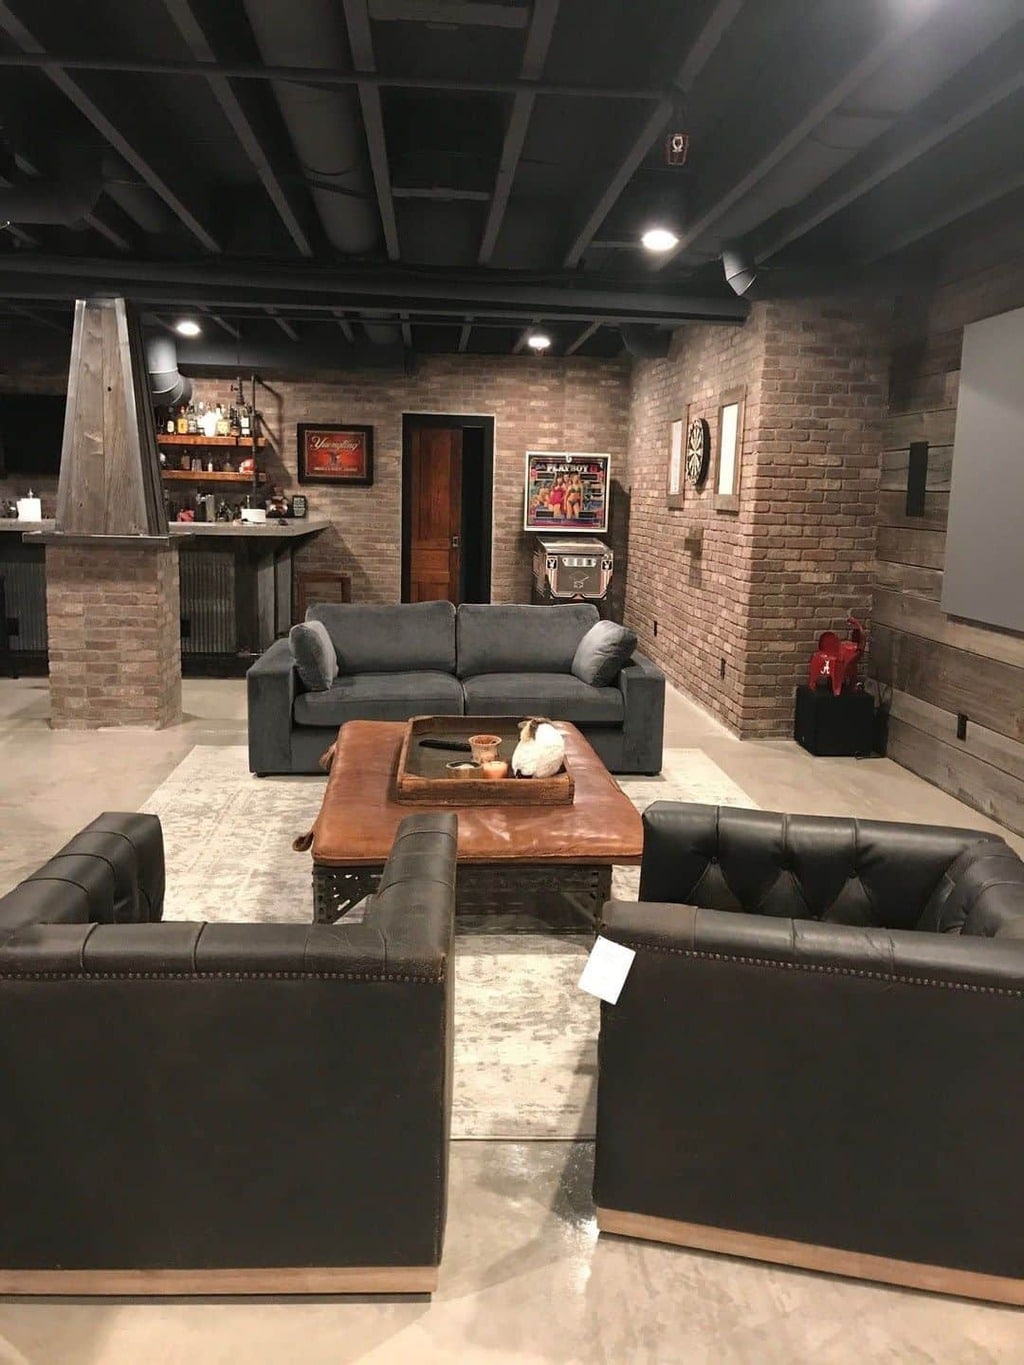
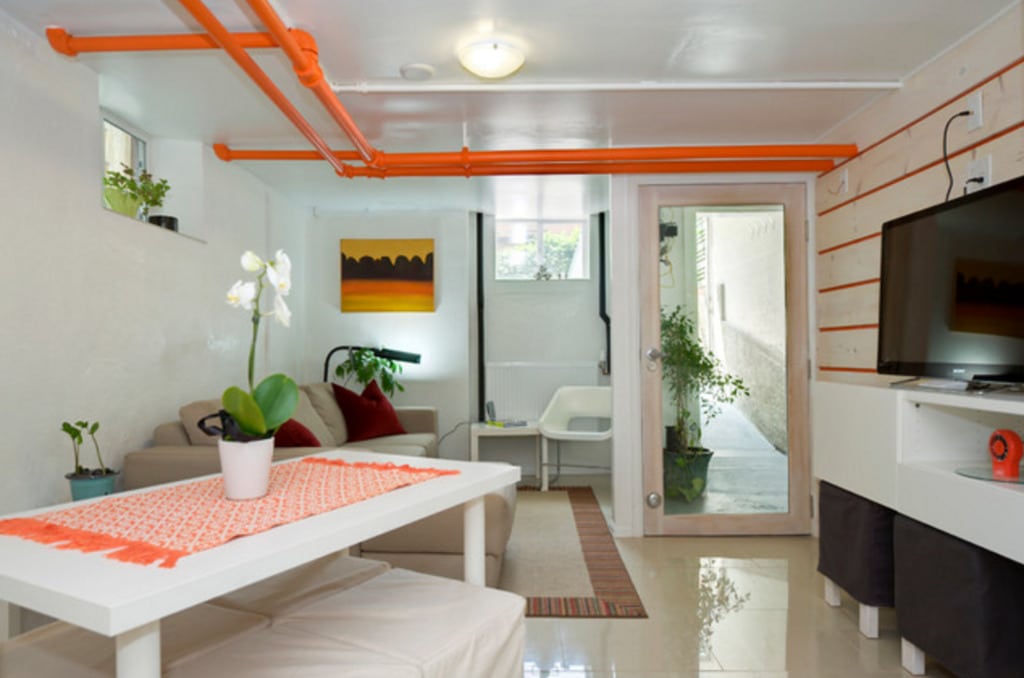
4. Painted Exposed Beams & Pipes
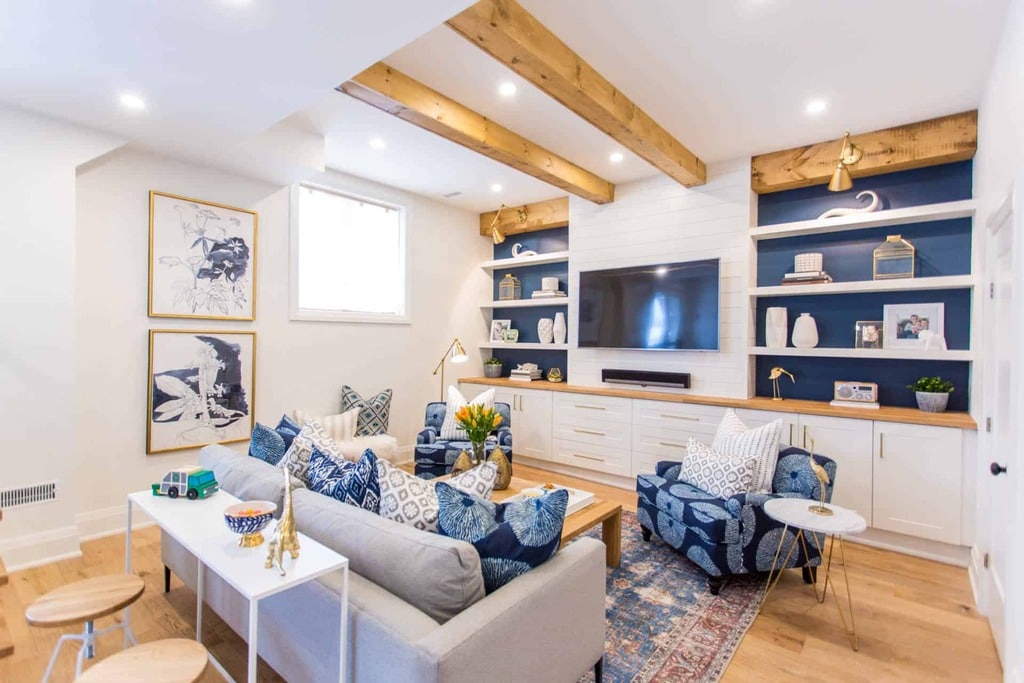
Another inexpensive basement ceiling idea is to paint the exposed beams and pipes of your basement ceiling. You may have seen these types of ceiling designs somewhere as they’re highly popular in coffee shops and other modernist locations. If your basement has ceilings with exposed rafters and joists, you should definitely try this ceiling idea.
With the help of just a couple of coats of paint, you can completely change the feel of an exposed ceiling. You can go with the all-white theme and paint everything white, including pipes, ductwork, and lighting fixtures. Or you can highlight the beams and pipes by painting them in contrasting colors like orange, yellow, and red. Just keep in mind that bright colors will liven up the space, and neutral ones will make it look modern and industrial.
One of the benefits of painting the beams and pipes is that if any type of repair is required, it can be easily done as it is all exposed. Whereas if you apply other types of the ceiling like drywall, you will have to pull apart the drywall completely.
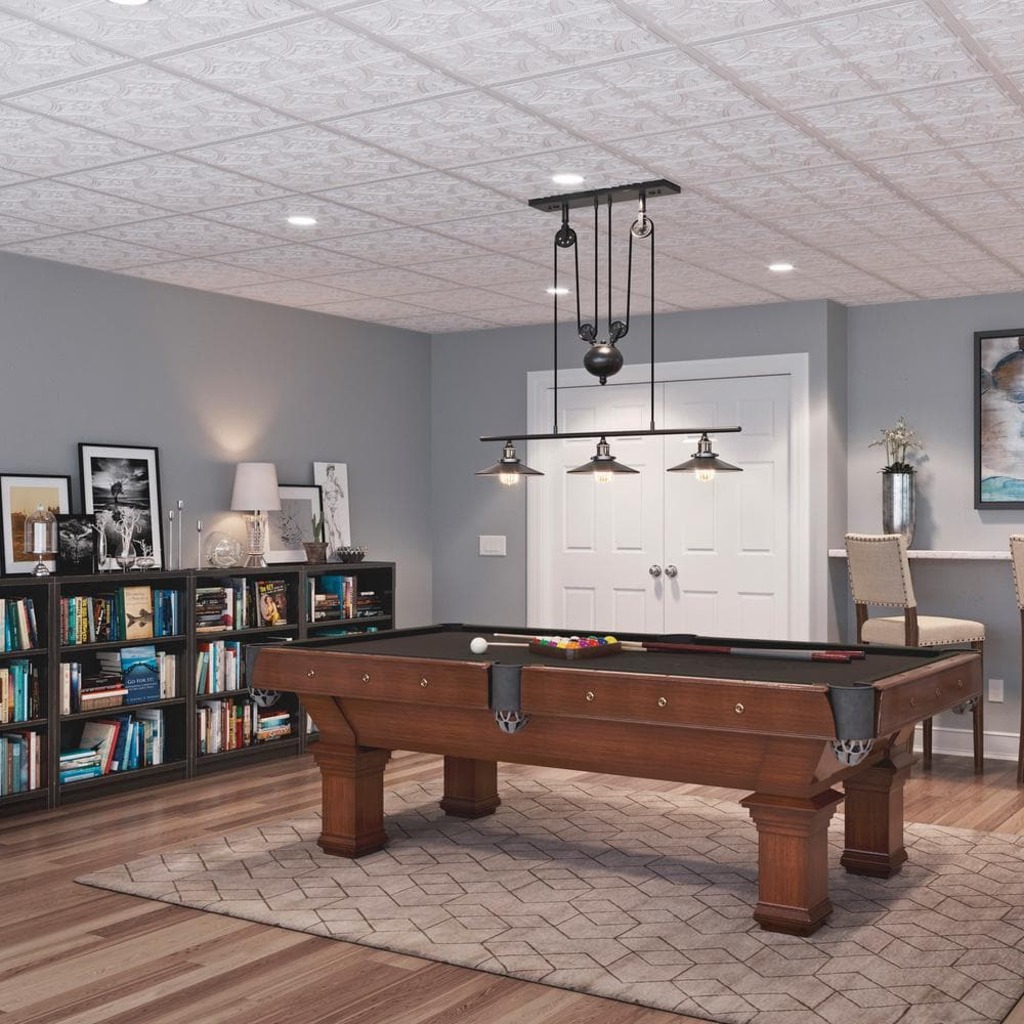
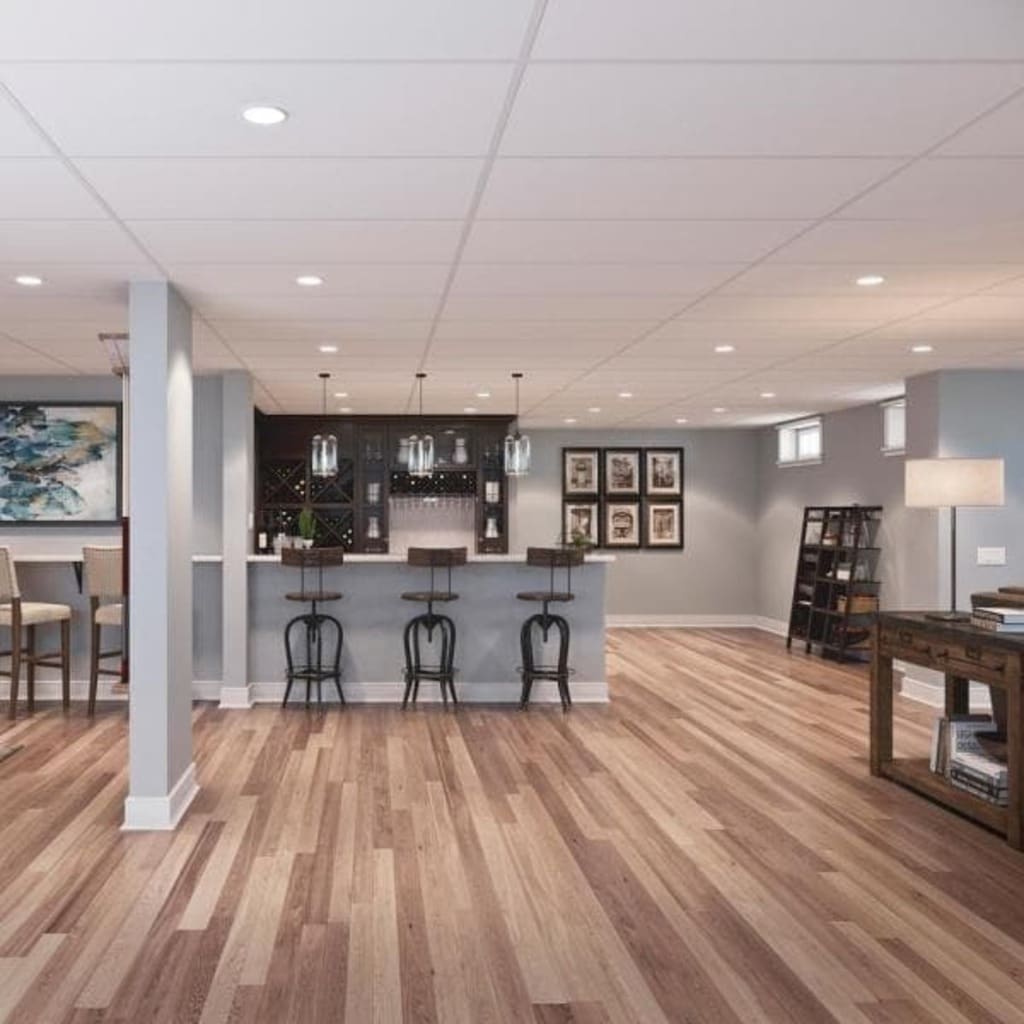
5. Drop Ceiling Tiles
Another way to add some decorative elements and stunning factors to the ceilings of older homes and the basement is Drop Ceiling Tiles! They’re one of the best cost-effective and attractive basement ceiling ideas.
These days, many homeowners are going with basement drop ceiling designs to make their space look more welcoming and cozy. Perfect for older basements where the wiring and pipes may be located below the beams. You can seamlessly hide all those unsightly wires, beams, and pipes under these pretty ceiling tiles.
Drop ceilings are actually a kind of false ceiling that is suspended below the original fifth wall. They’re placed with steel wires over a frame; that’s why their installation is easy. If any tile gets damaged over time, you can simply lift it out of the frame and pop a new panel in instead of fixing the entire ceiling. Plus, you can also put lighting fixtures in the tiles so that you’ll get ample light in your basement.
From the traditional white foam or particleboard panels to classy tin tiles, modern drop ceiling ideas for the basement are available in a wide range of varieties. You can create a grid overhead to establish a geometric pattern as it looks visually appealing. Drop ceiling tiles are water-resistant, and they don’t sag or develop mildew, even for twenty years. Pretty cool, right?
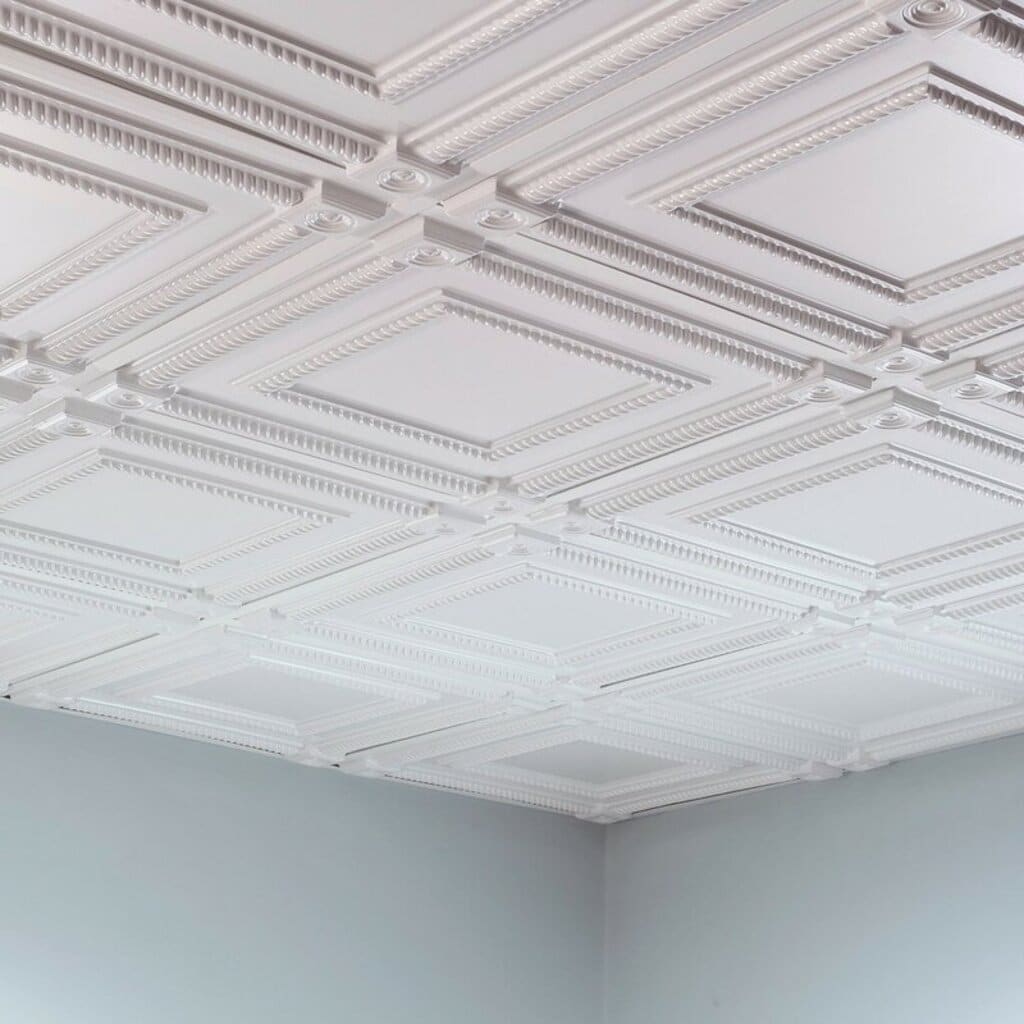
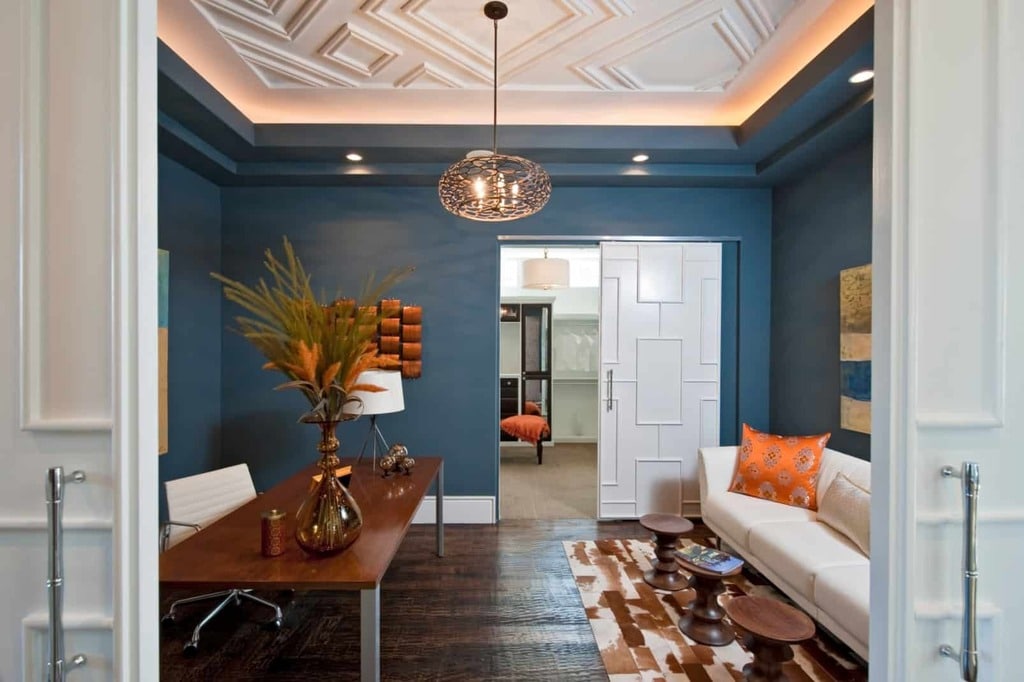
6. Traditional Coffered Ceiling
What do you think about having coffered ceilings in your basement? Yes, they look complicated and challenging to install, but they’re not actually. You can add these simple but really attractive coffered basement ceilings to make your space beautiful.
Look at the above basement, where in-lay tiles have been used to create this coffered ceiling design. The elements like beams and simple designs add just enough embellishment to the space. The whole ceiling design seems like it is an architectural element of a traditional coffered ceiling instead of any structural solution.
These types of ceilings are practical and look really pretty. They also come at a reasonable price which will be such a plus point. You can paint them or leave them as it is, both ways they’ll look elegant and classy. To add more drama to your place, you can include crown moldings. So, whether you’re planning to make your basement your office or a hangout spot, these ceilings will surely create a unique and stunning focal point.
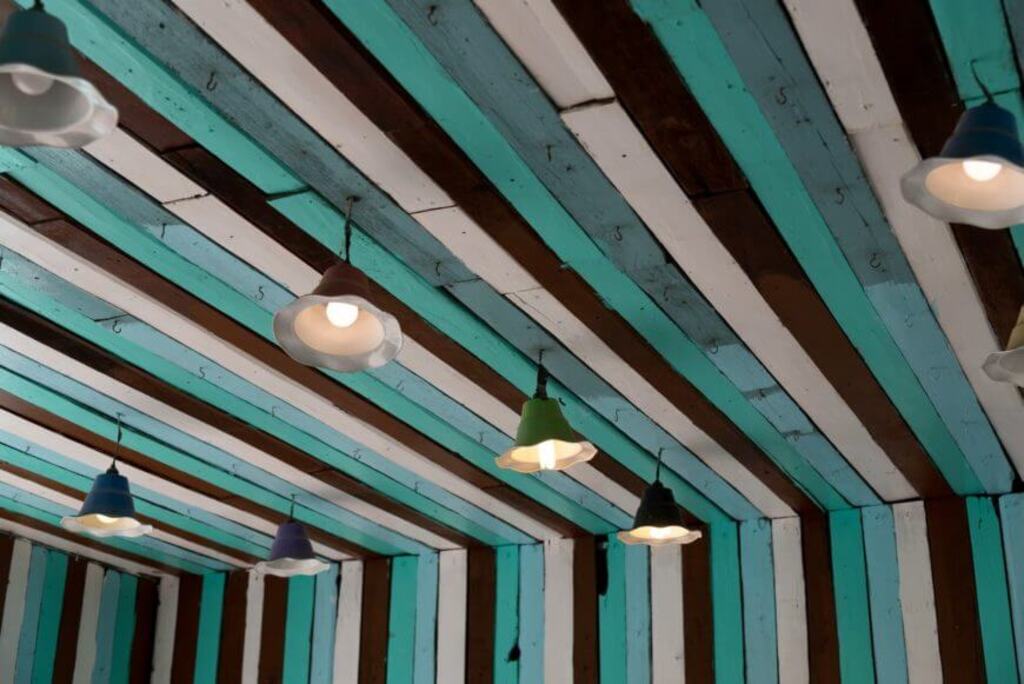
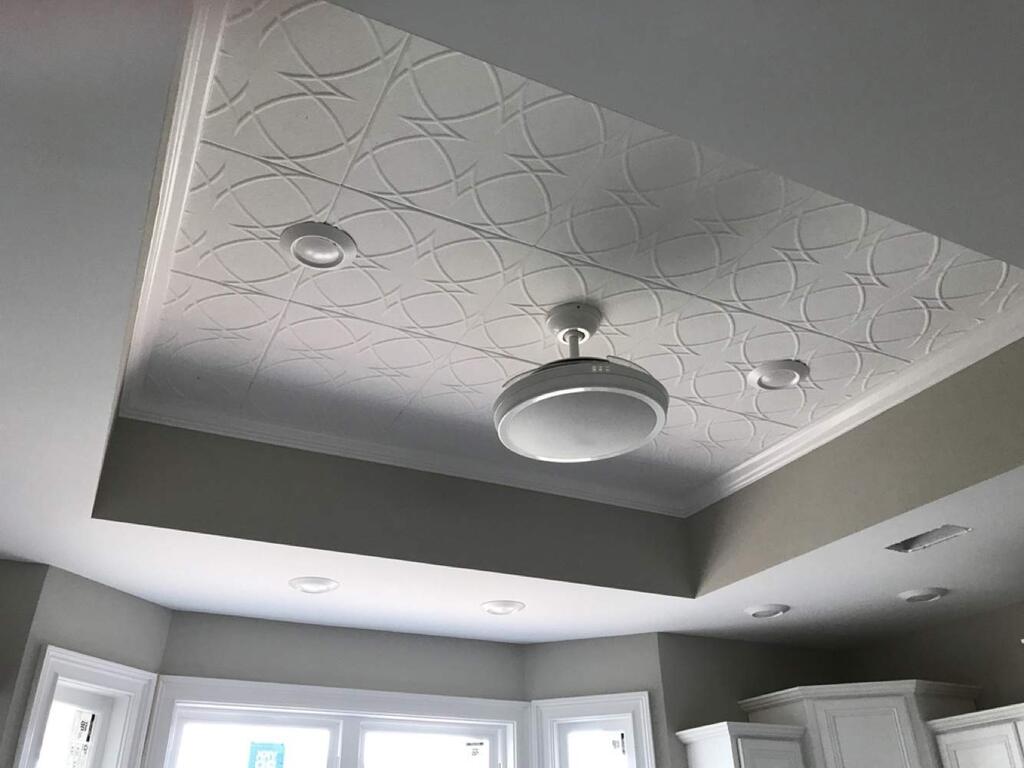
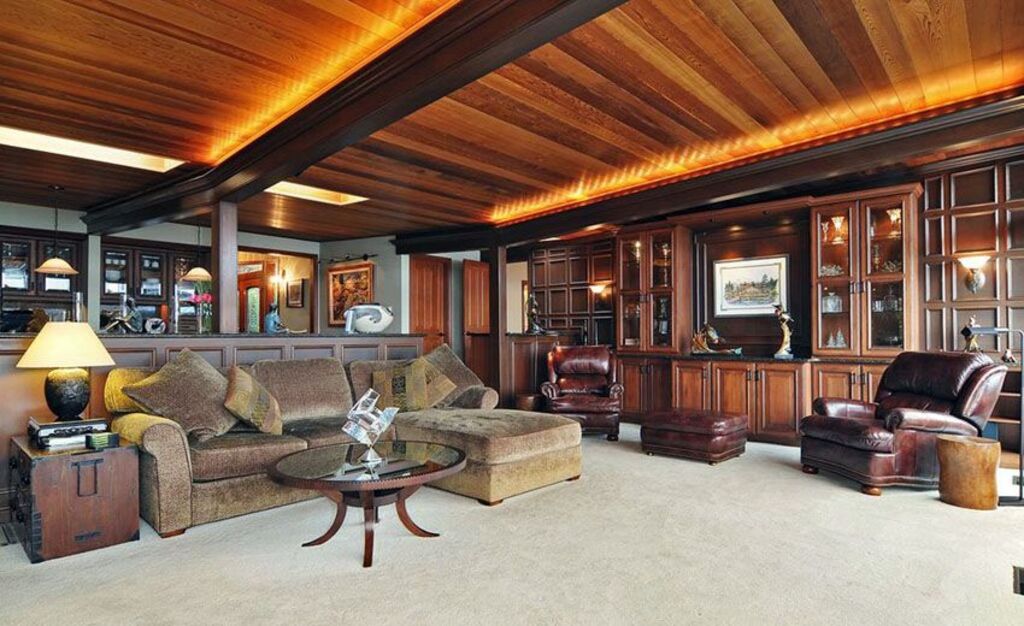
7. Wood Plank Basement Ceiling
Those who want a more modern and chic basement look can go with wooden plank basement ceiling ideas. These ceilings not only cover an exposed ceiling but can also be installed directly onto an existing ceiling, such as popcorn or drywall.
Lightweight and sturdy, wood planks are perfect as a basement ceiling. Moreover, if you want, you can paint or stain them for the desired effect. Instead of expensive wood, go with reclaimed wood as it is affordable than other woods and beadboards.
Add or hide lighting strips hidden inside support beams and enjoy the changing shades of barn wood. This will surely add a unique character to the overall space. It will make your basement feel comfortable and cozy. For a different look, you can also make patterns with wooden planks.
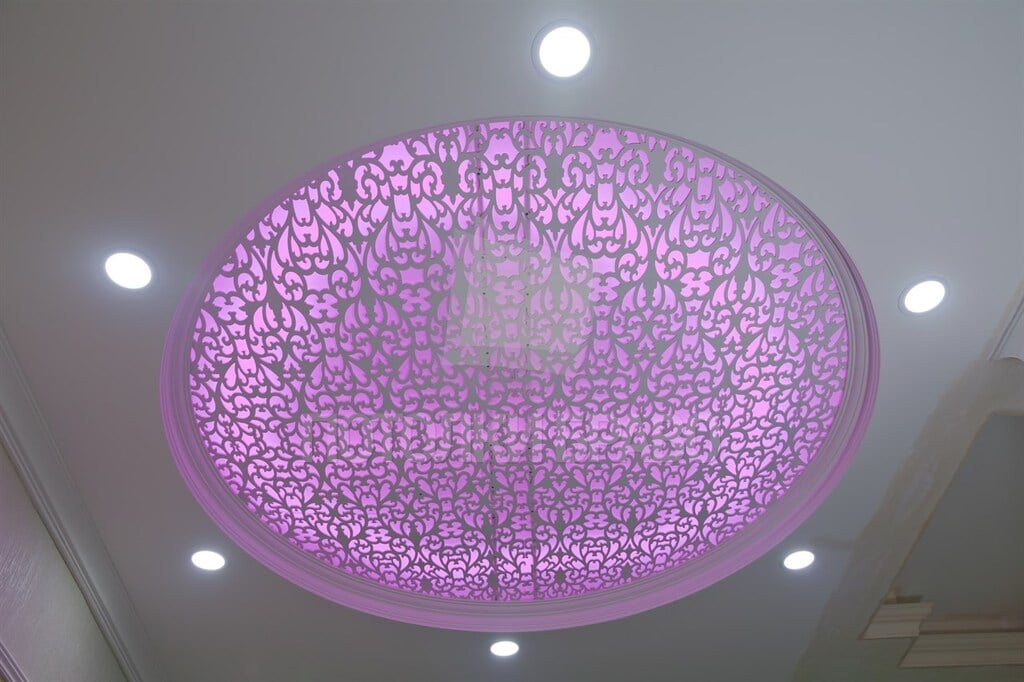
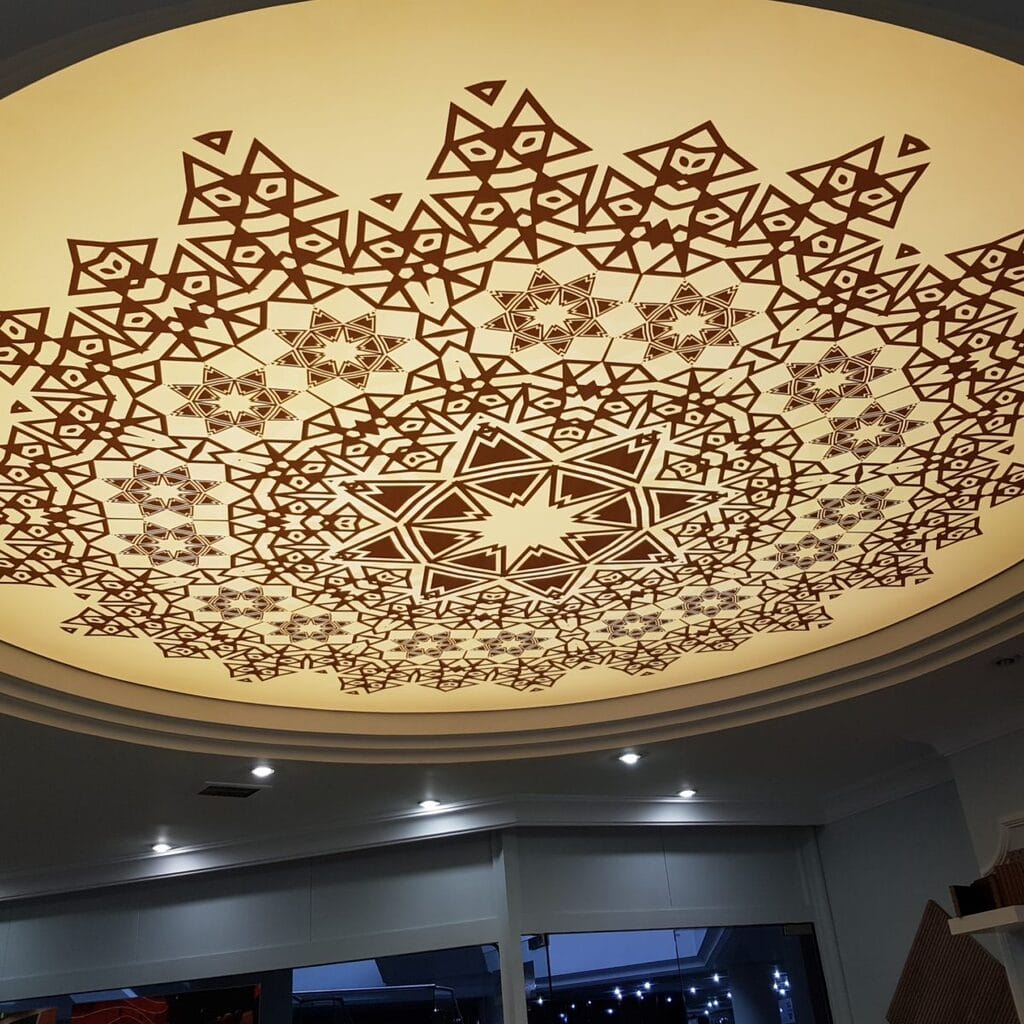
8. Stretch Ceiling
Do you want a visually appealing basement ceiling without involving a lot of work? If yes, stretch ceilings will be best for you! These ceiling designs will give off the appearance of luxury, and there is not a lot of furniture moving, messy work. They can be easily installed in a short timeframe.
This basement ceiling has a reflective and shiny outlook that makes it look really appealing. You’ll keep coming back to your basement just for the feel. The most amazing thing about them is that you don’t have to break the bank to set it up. It is one of the affordable basement ceiling ideas for standard basement decorations.
You can literally create any type of design and unusual shapes, including arches and domes, and that too without any visible light source. So, if you’re thinking about converting your basement into a home theatre, stretch ceilings are the best as they offer excellent soundproofing options.
9. Textured Glue-Up Tile
For those who are looking for DIY basement ceiling ideas, this one’s for you. This is one of the easiest removable basement ceiling ideas. Buy some textured glue-up tiles from the local store or the home depot. All you need to do is to paste them on your basement ceilings.
Start with smaller sections at first and glue all your tiles one by one. This way, you’ll get a beautiful and cheap basement ceiling. These glue-on tiles are made of polystyrene or fiberboard and come in a variety of colors, sizes, and styles. You can even paint them as per the interiors.
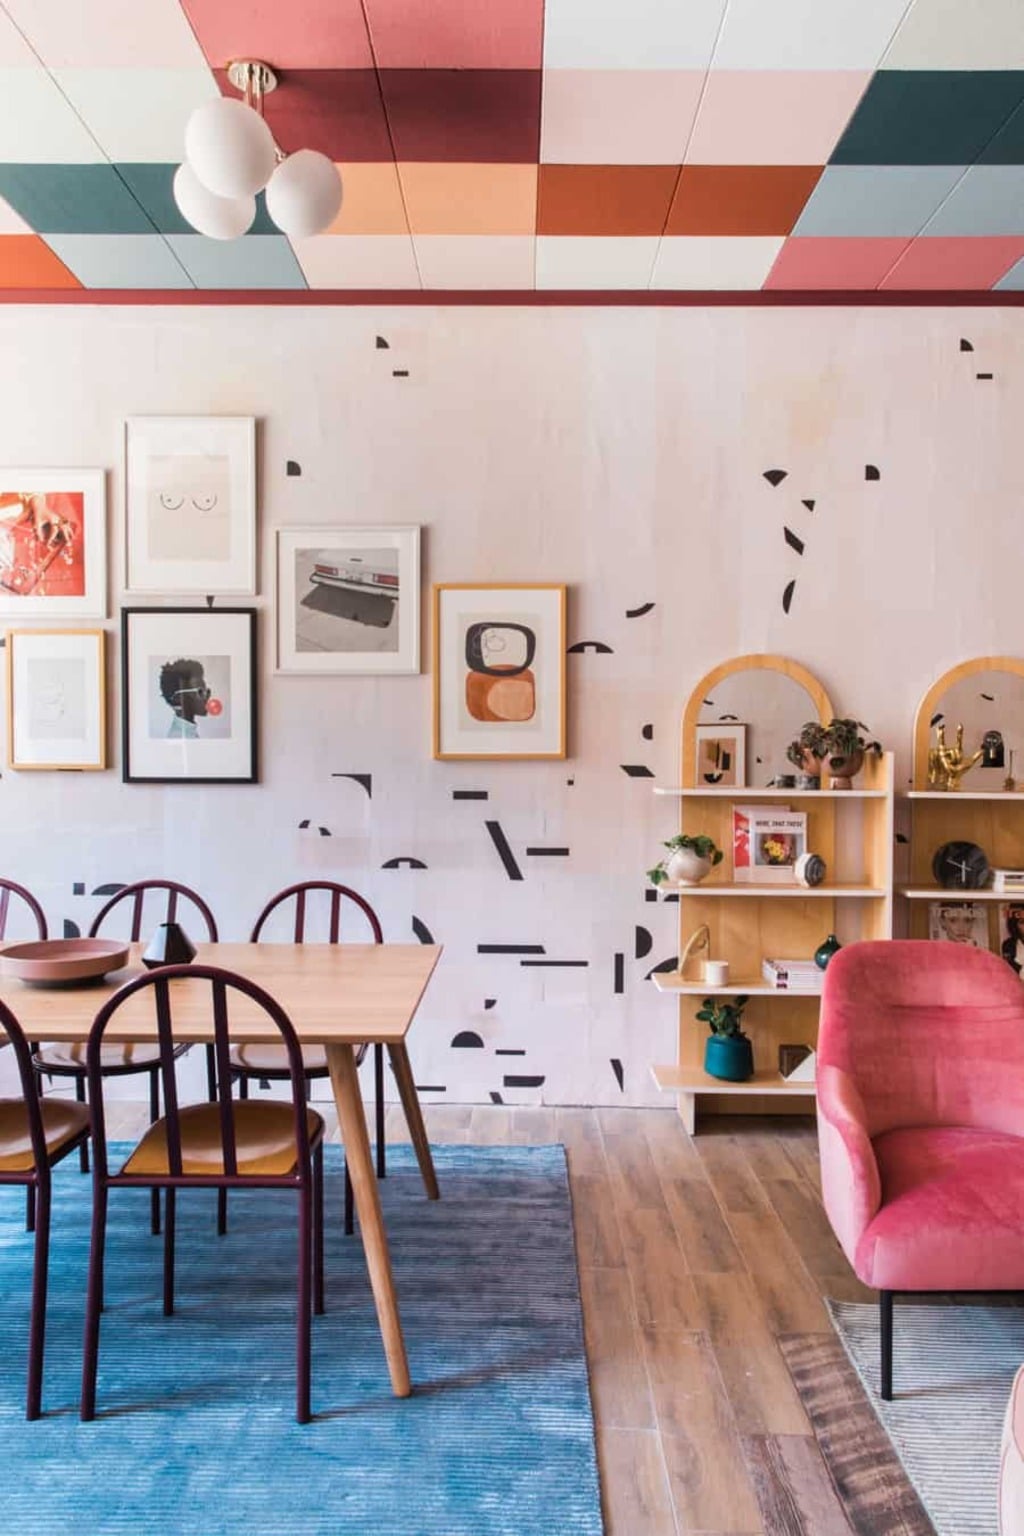
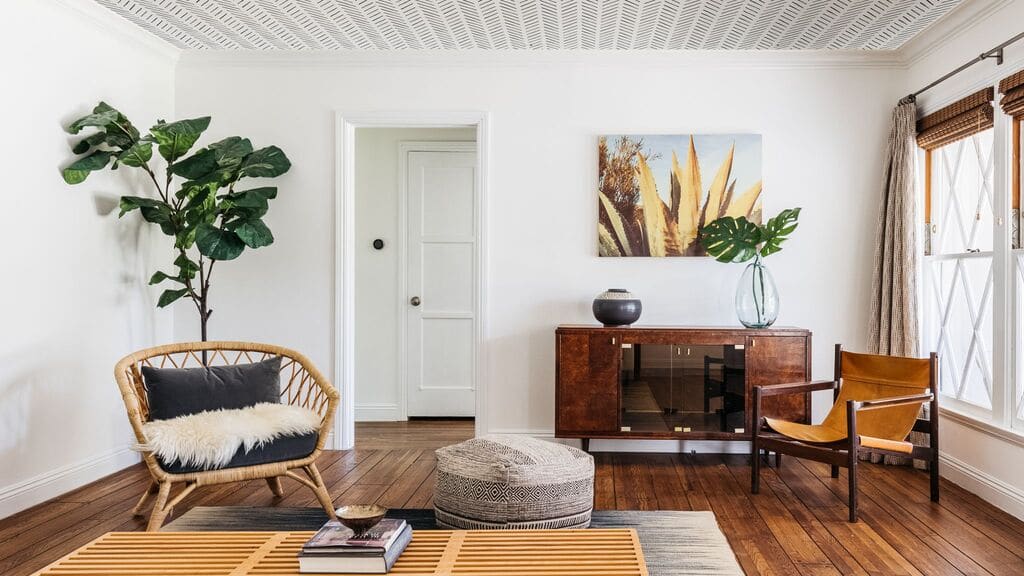
10. Wallpapered Basement Ceiling Ideas
Don’t have money or time to decorate your basement ceilings? No worries, get some wallpaper, and you’re done! You can find wallpapers in any design and pattern, from faux wooden wallpapers, sceneries to luxury and glamorous ones.
If your basement area is small, you can try solid colored ones or stripped wallpapers. Make a bold abstract statement and add a personal style and flavor into space with these types of wallpapered basement ceilings.
Here are some more stylish and modern basement ceiling ideas for you to get more inspiration:
Final Thoughts
So which ceiling idea do you like the most for your basement? When it comes to the installation of a ceiling, there are numerous ways to do it. You just have to be creative and think out of the box. Do in-depth research, and then according to your basement space and budget, decide the ceiling type and materials. You can also select the unique basement ceiling idea according to what you’re converting your basement into a room, entertainment room, or personal office.
Don’t be afraid to try ceiling options in different themes, colors, and styles for your basement. All these ideas that we’ve mentioned in this blog are cheap materials like wood planks, paint, PVC, and corrugated metals. They will surely end up making your basement ceiling look amazing!
I hope you liked this blog on basement ceiling ideas, and it has also helped you to pick the right ceiling design for your basement. Also, don’t forget to share this blog with your friends and family so that they can also get to know about these amazing inexpensive basement ceiling ideas and transform their spaces.
Sometimes it seems that the only choice left for television watchers these days is either to subscribe to cable or satellite TV or buy a large-screen LCD TV and connect it to one of their network interfaces. Here are some best tips to install a home Antenna.
Although watching live broadcasts of sporting events on your 50-inch plasma flat-panel monitor may be impressive, there are still enthusiasts who prefer to watch television programming as it originally appeared or was meant to be seen – on a standard “analog” tube display unit.
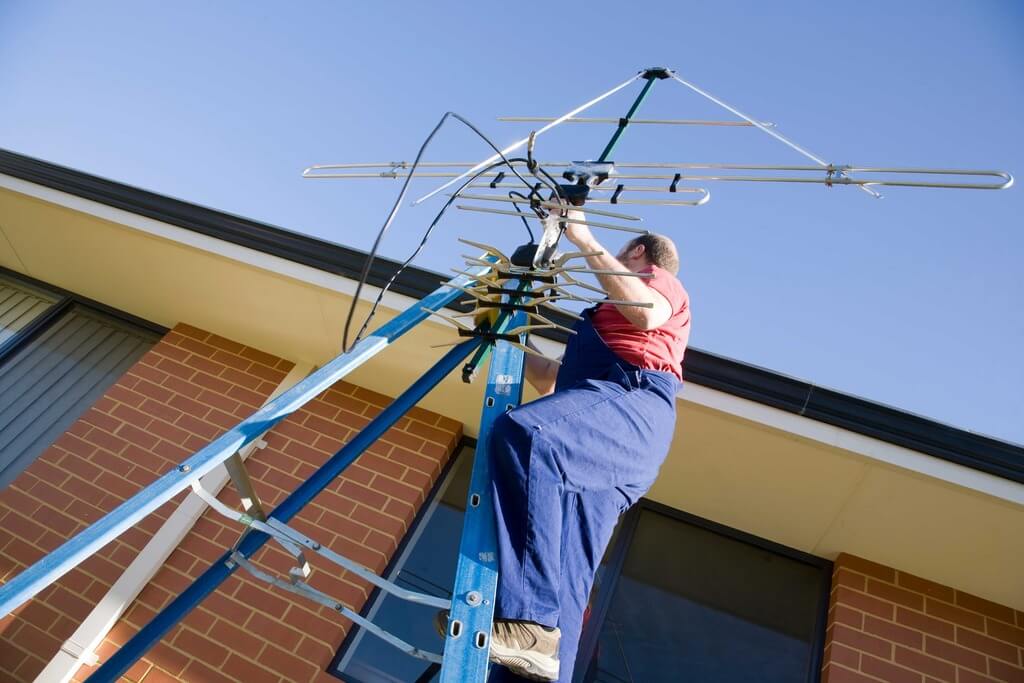
For fans of this viewing experience, an aerial is often the preferred way of receiving over-the-air video signals into the home. However, a drawback with aerial reception is that most people have no idea where to begin when looking for information about TV aerial installation.
The idea of aerial installation may seem intimidating due to the many technical terms and acronyms aerial technicians like aerial man Basildon use, but the basic concepts are quite simple for anyone to comprehend.
Here Are Five Important Tips Any Homeowner Who Wants to Install an Aerial in Their Residence Can Follow:
Get Educated About Aerial Installation Techniques and Jargon Before Heading Out to Purchase an Aerial Kit
Many components make up a typical aerial kit, including cables, connectors, wall mounts, brackets, and mounting poles or masts. Aerials come in all shapes and sizes (and prices), but it is best if you understand what each piece is used for before getting too deep into your shopping trip.
For example, a “masthead amplifier” is a device that sends amplified power from the aerial to the TV tuner located in the home. An aerial technician uses a masthead amplifier if their aerial installation project “hits a snag,” meaning something goes wrong with the reception, and they need to try again.
Shop Around for an Aerial Installer
Sure, it may be tempting to hire someone who works out of their van and advertises on television, but this could end up being a regrettable decision you make later down the road. Try talking to your friends, colleagues, and family members about aerial installers they have used in the past, including both good and bad experiences.
You can also check newspaper advertisements or Yellow Pages listings for local aerial installers in your area. Once you’ve narrowed down potential aerial installers to a few, call them up and ask about their services; compare the prices they tell you to their previous work.
Decide Whether the Aerial Installation Is Necessary When Deciding Where to Situate Your Aerial
A TV aerial won’t do much good if it installs on the side of your house that borders woods or runs along railroad tracks. So try to place it in an open area without too many solid structures blocking its line of sight between the aerial and broadcasting source (a tall downtown building works wonders).
If Possible, Hire an Aerial Installer Who Will Perform All of Their Magic by Climbing into Your Attic with a Special Antenna Signal Meter Called an “SWR Meter.”
If you are not sure whether the aerial installation is necessary for your residence, the aerial installer should be able to tell you by using their SWR meter. The aerial installer attaches a small resistor device onto the outside of your home’s TV aerial cable, known as the “download,” and then tests this download for signal strength. An aerial installer will also check your home’s wiring inside your living room or den to get an accurate picture of where the best place would be to install an aerial.
A Few Aerial Installers Have Websites to Provide Potential Clients with More Information About Their Business
These include testimonials from previous clients, background on their company’s history, and even aerial installation videos that customers can watch to understand the aerial installers’ work better. And, don’t forget about aerial forums where other aerial enthusiasts might answer your question!
You must know all the basics before hiring an aerial installer to come out and perform aerial installation services in your home.
Some people make the mistake of not doing their research before hiring an aerial installer, thinking it will be “easy” when they learn all there is to know during the actual aerial installation experience. But this could lead them to get overcharged or sell poor-quality equipment if something goes wrong with the aerial installation process.
Conclusion
Once you’ve gone through these five tips, you should have no problem identifying reputable aerial installers who are more than capable of giving your aerial installation a thorough inspection and installing a high-quality aerial that can provide you with all the free channels available.
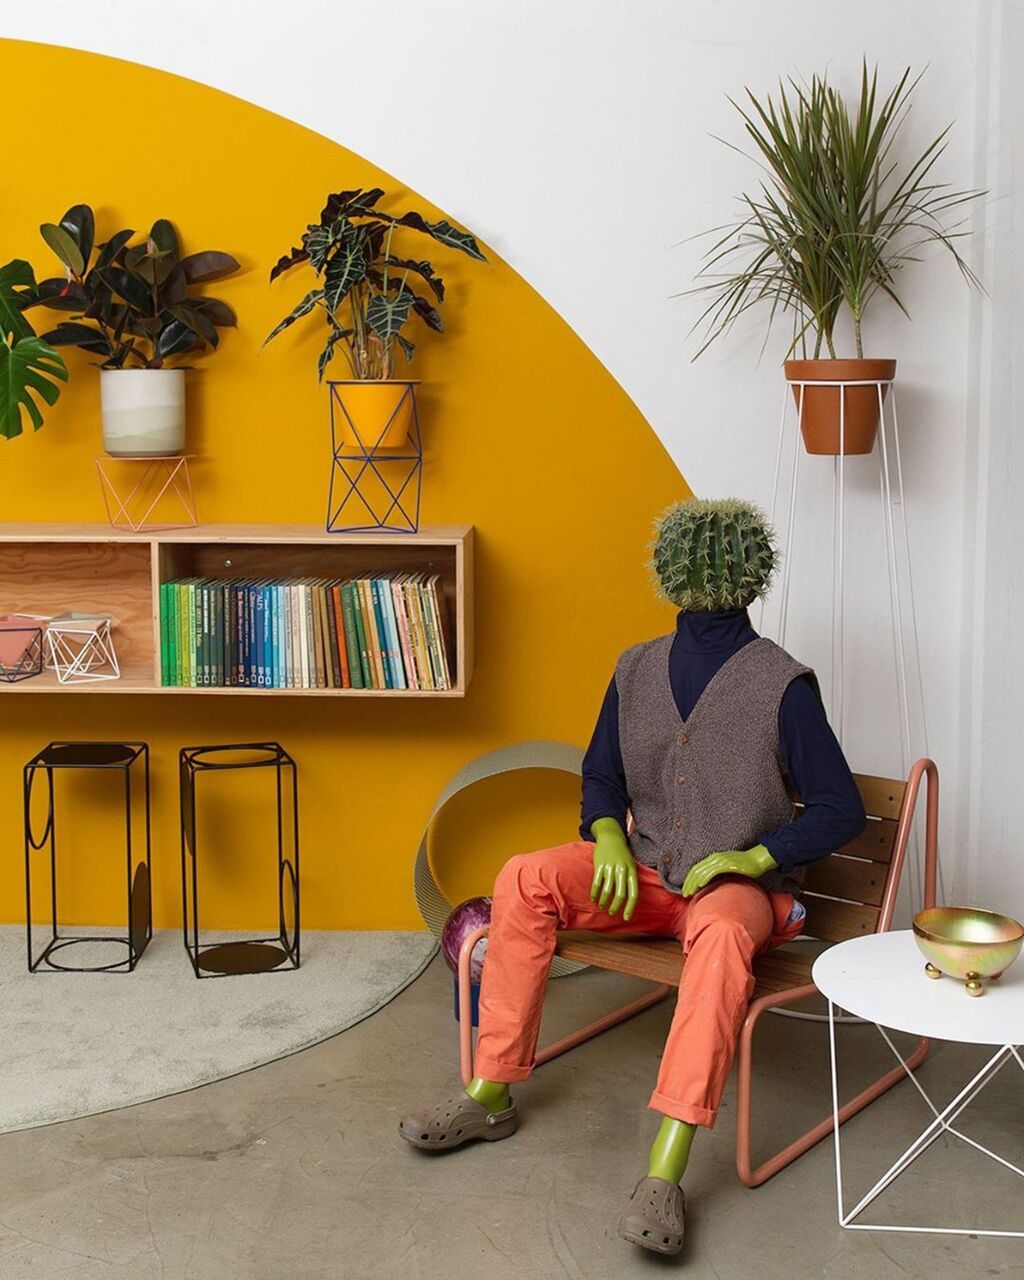
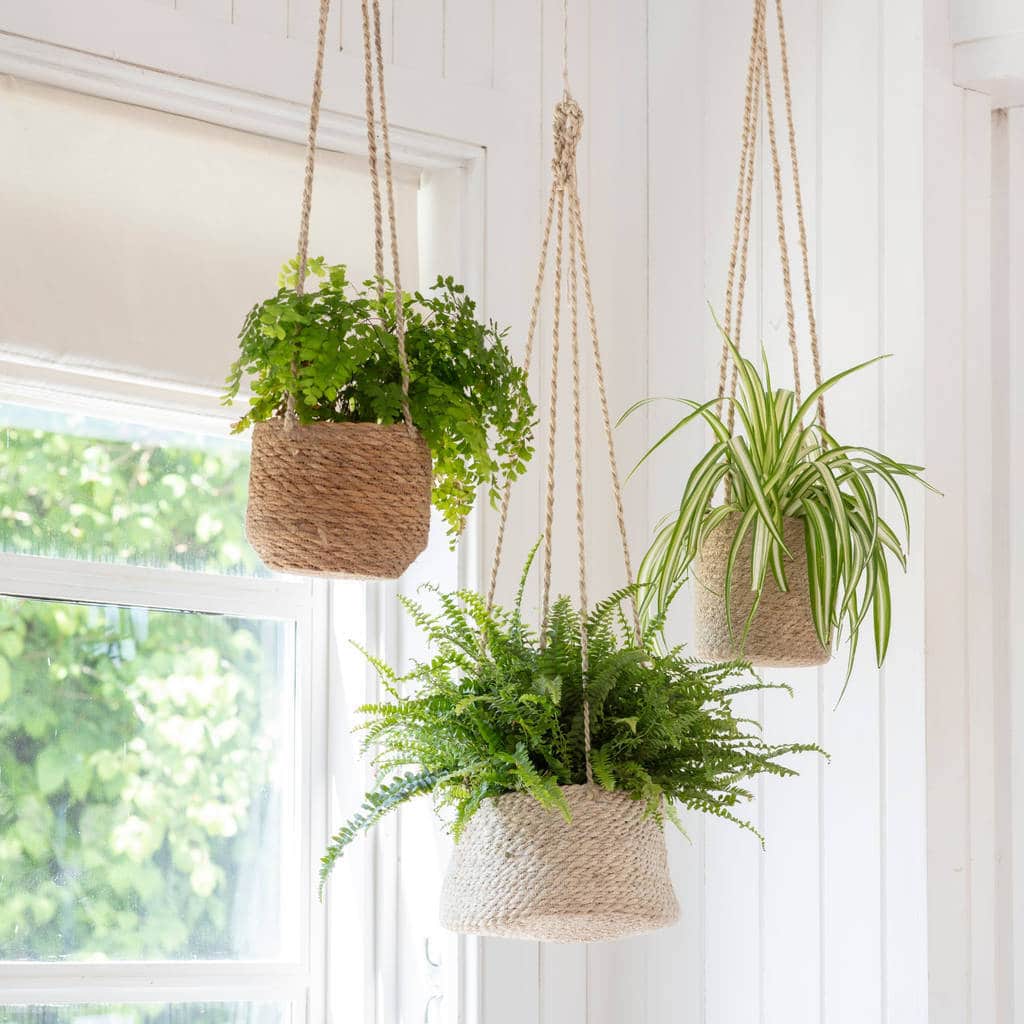
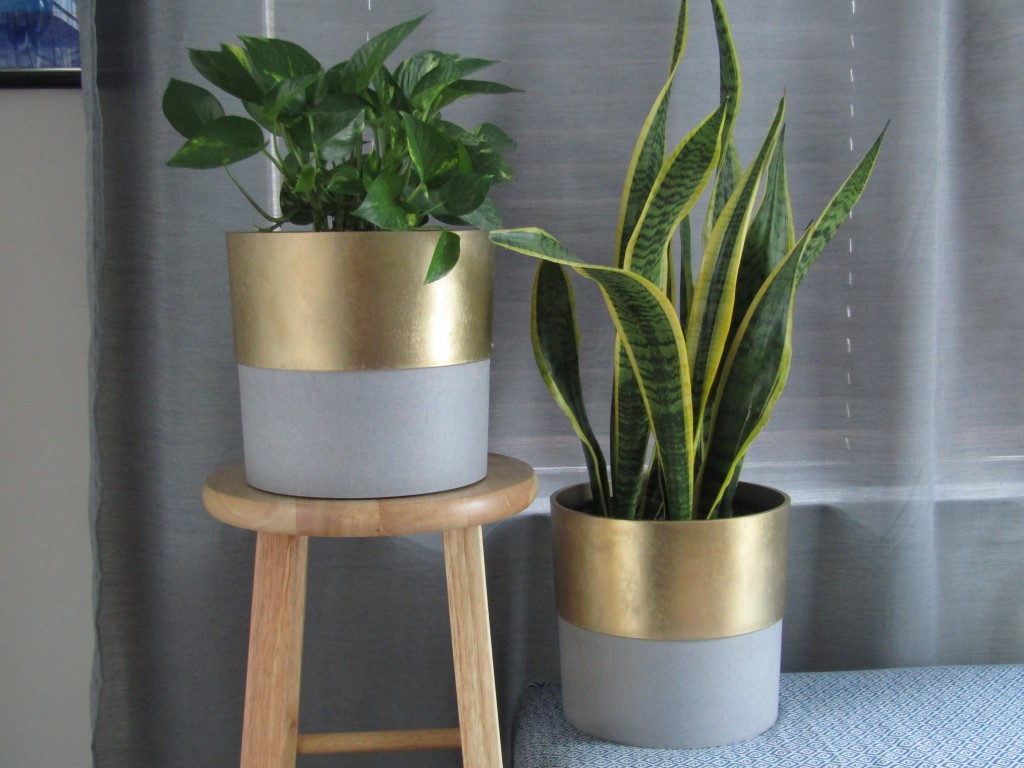
There is no better way to add a natural factor and element to our home than plants! One of the emerging trends of interior design is to bring nature from the outside to the inside of the house with DIY plant stand. Tall or small, big or tiny, indoor plants always offer many benefits, and you can place them not only in your homes but also in your offices and other spaces.
Whether it is summer, spring, or winter, you can always include these cute little fellas to decorate your space. From your living room, ding area to bedrooms and kitchen, you can literally put plants with DIY plant stands anywhere in your home. Another important thing is the way you display them. Plants placed in plant stands look way more modern and sophisticated. They have an important impact on the interiors and the rest of the decors of your place. That’s why you can easily create the perfect ambiance by adding some greenery.
Today in this blog, we’ve gathered some interesting and creative DIY plant stand ideas for you. You can surely buy planters and stands from online and stores, but there is something unique and personal about the DIY kind. The store-bought will simplify things, but they will never be able to add a personal touch and character to your space. Plus, they’re expensive!
So, if you want to create the perfect atmosphere according to your interiors and decors on a decent budget, try these DIY plant stands. Moreover, the following indoor plant stand ideas are pretty simple to create. You can even include your kids in this activity. These easy-to-make cheap plant stands will be a fun project for them.
We’ve included all types of stands in different designs and styles, from stylish modern stands to easy wooden ones. You can pick the one that you feel is right for your space and decorate it as you like. These inexpensive or almost free plant stand ideas will provide a high-end look. So, give your interiors a finished look with an indoor plant stand DIY way!
So are you ready to give a makeover to your space with these cute indoor plant stand ideas? Let’s start.
25+ Creative Indoor Plant Stand Ideas For Your Home & Office
Give your home, office, or any space a stylish look with these amazing plant stand ideas. Below is the list of some of the best indoor plant stand ideas. So, whether you want to create a modern, contemporary or minimal look, you can find the perfect DIY plant stand idea in the below list.
All of the ideas are beginner woodworking projects that you can make in just an hour or two. These DIY plant stand plans here include building directions, color photos, and styling ideas. All you need to do is to gather your materials and supplies, and you’re all set to start the process. Let’s begin.
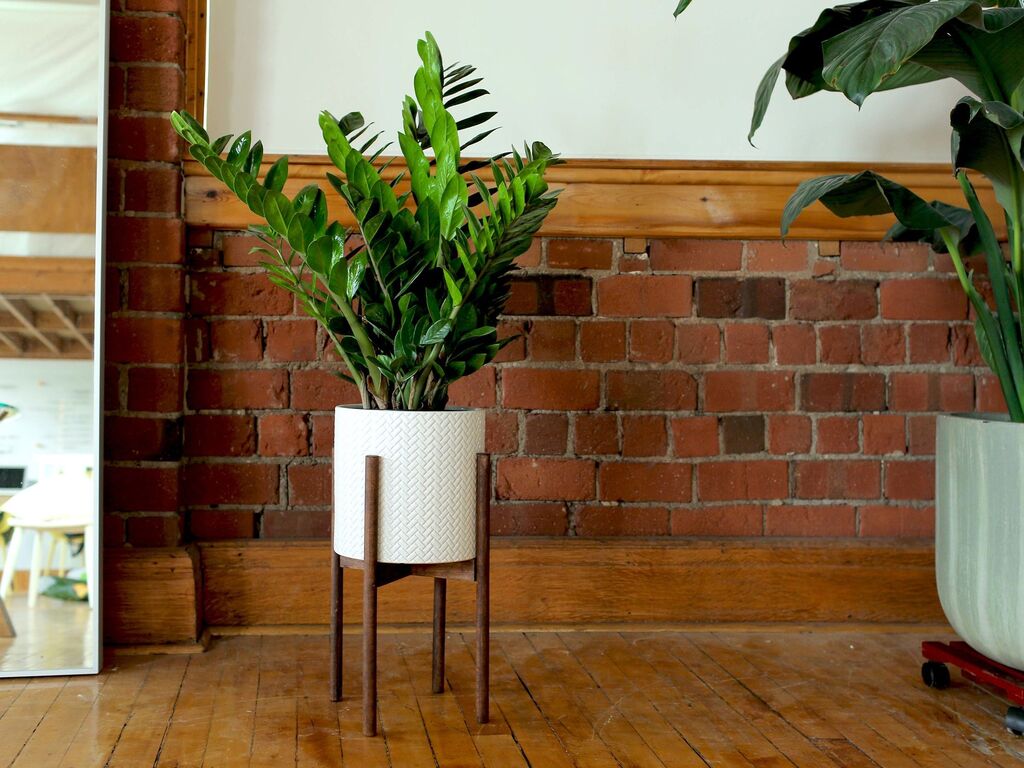
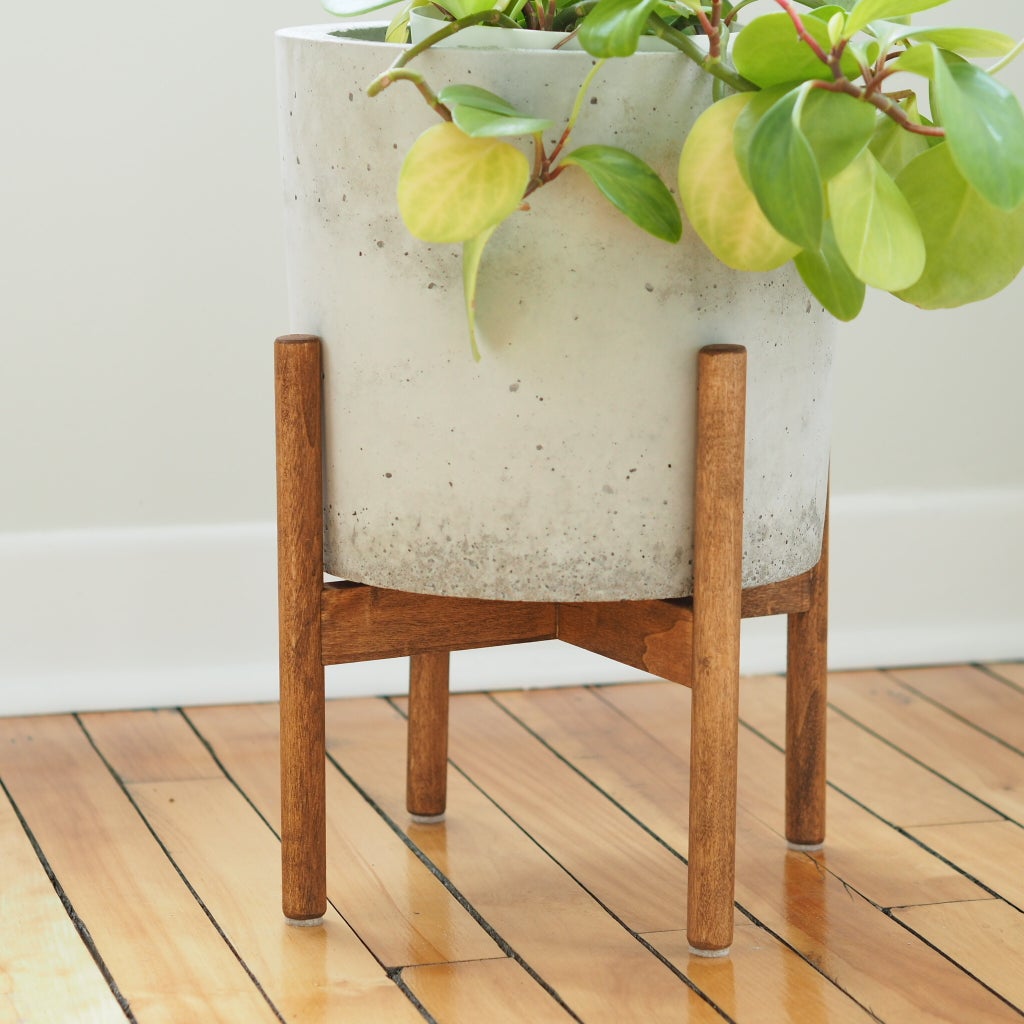
Mid-Century Modern Plant Stand
Mid-century modern style is popular these days. If you’re looking for some decor, this mid-century modern DIY plant stand will be perfect for you. To make this, all you need is some wooden planks and some white paint. This DIY mid-century plant stand has a large base, so it can easily hold big pots.
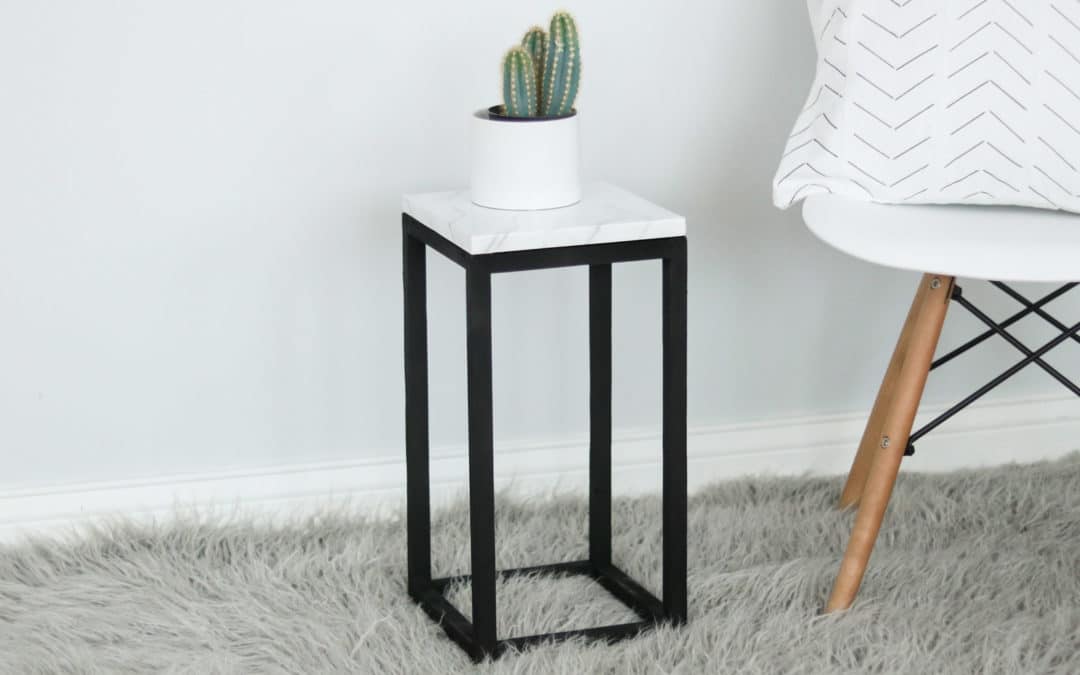
Minimal DIY Marble Plant Stand
This marble stand is perfect to create a modern and minimal ambiance. You’ll need some wooden dowels, a wood square, and a faux marble for the top part. First, make the square shape from the wooden dowels and paint them in black. After this, stick the faux marble stone on top of that. And your modern marble plant stand is ready!
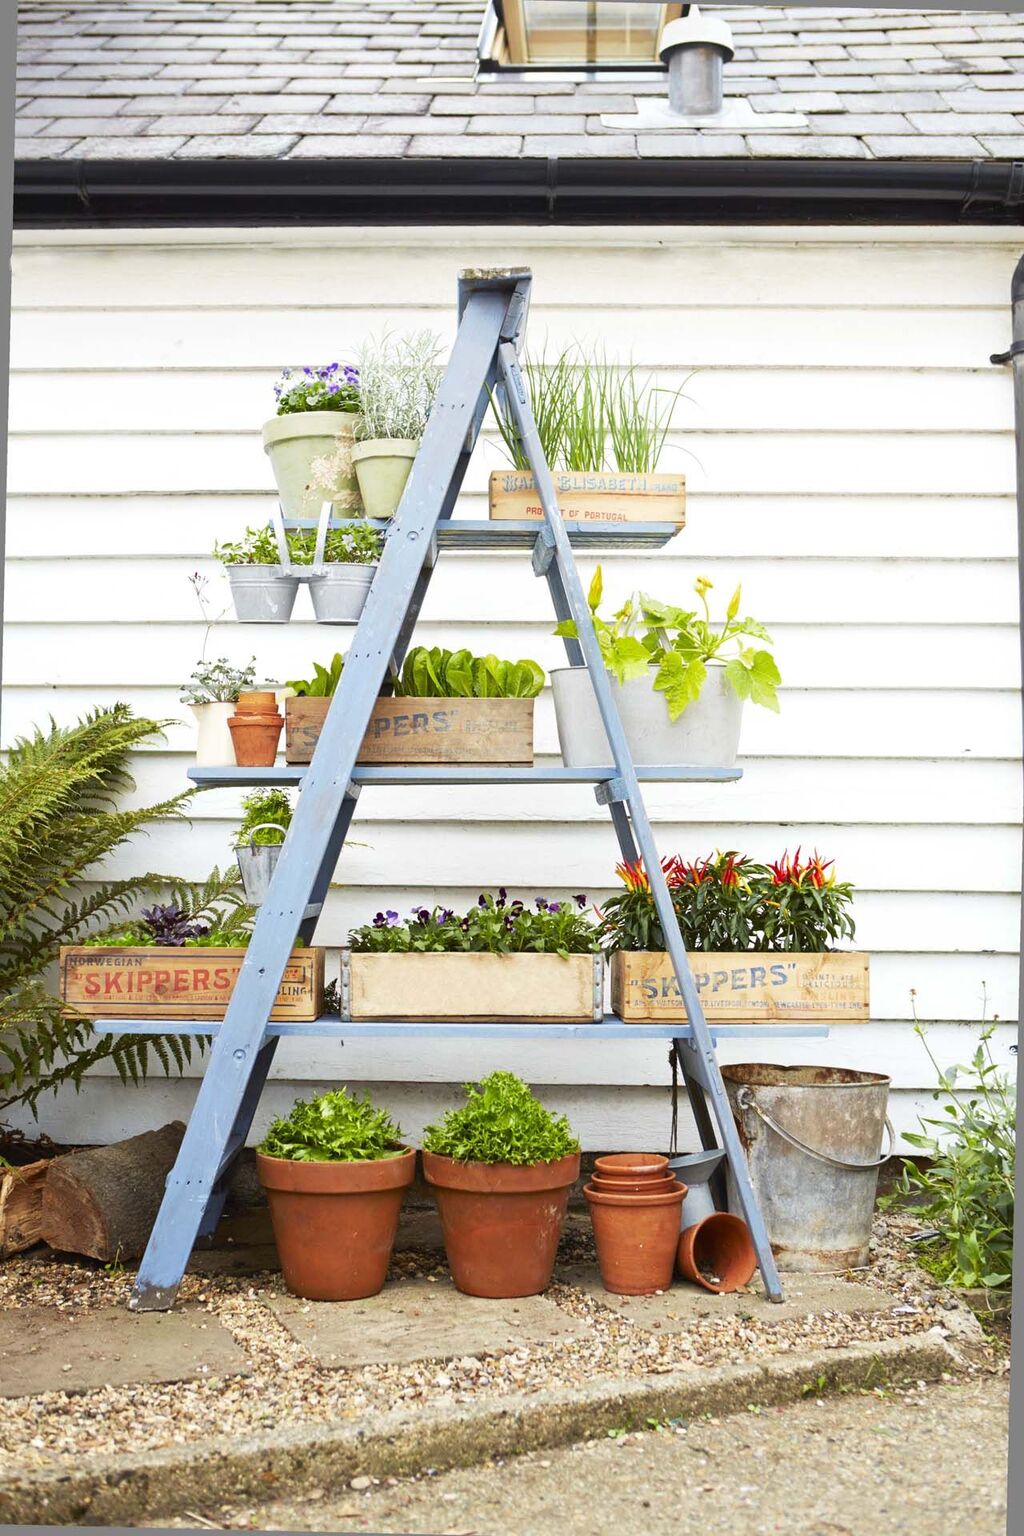
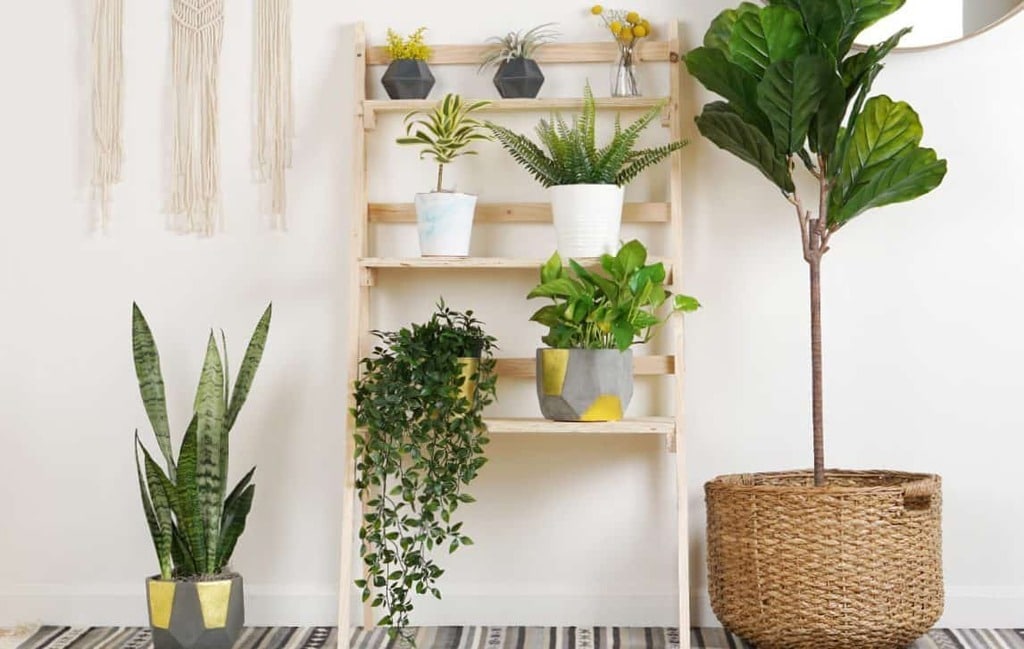
DIY Ladder Plant Stand
Do you love to collect many plants? Here’s the perfect stand for you: DIY plant stand ladder style! This will offer plenty of space where you can put all your small and big plants. To make this, all you need is a few pine boards and some basic tools.
Floating Plant Shelf
Give an extra treatment to your boring windowswith this cute floating plant shelf. You’ll need only two things: a wooden round and yarn or macrame. After this, hang the stand from your ceiling or in front of a sunny window. This DIY project is easy to make and looks really pretty!
DIY Tall Plant Stand
Create a unique ambiance by placing plants at various heights. For that, this tall plant holder is perfect. You can use either pine wood or any type of wood to create this simple and minimal stand for your plants. This will give Scandinavian vibes to your space.
A Colorful Book Plant Stand
You may have already seen these kinds of book plant stands on Instagram and other social media platforms. To add a pop of color, here books are painted in bright and bold colors. Later they all are glued together to make a sturdy stand. This is such a great idea to make a plant stand from old books.
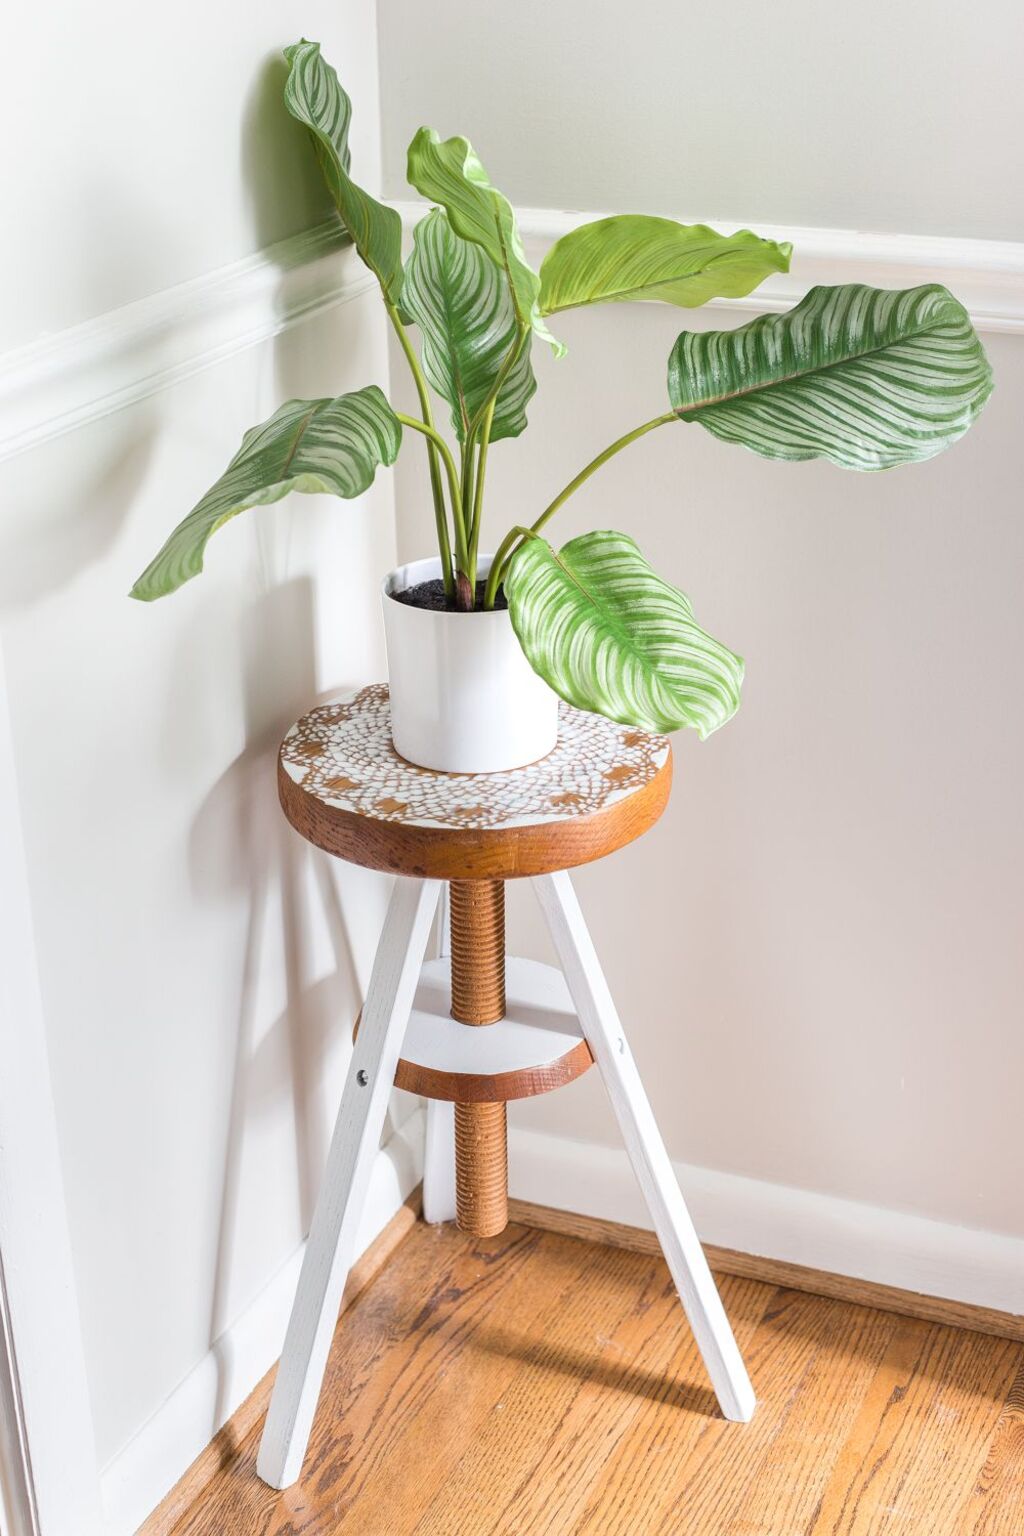
DIY Piano Stool Stand
Another way to repurpose your old stuff is this idea. If you have an old piano stool, convert it into a stunning plant stand. All you need to do is to put this stool at a good spot and then place a plant over it. Of course, you can give a makeover like painting and decorating if you want.
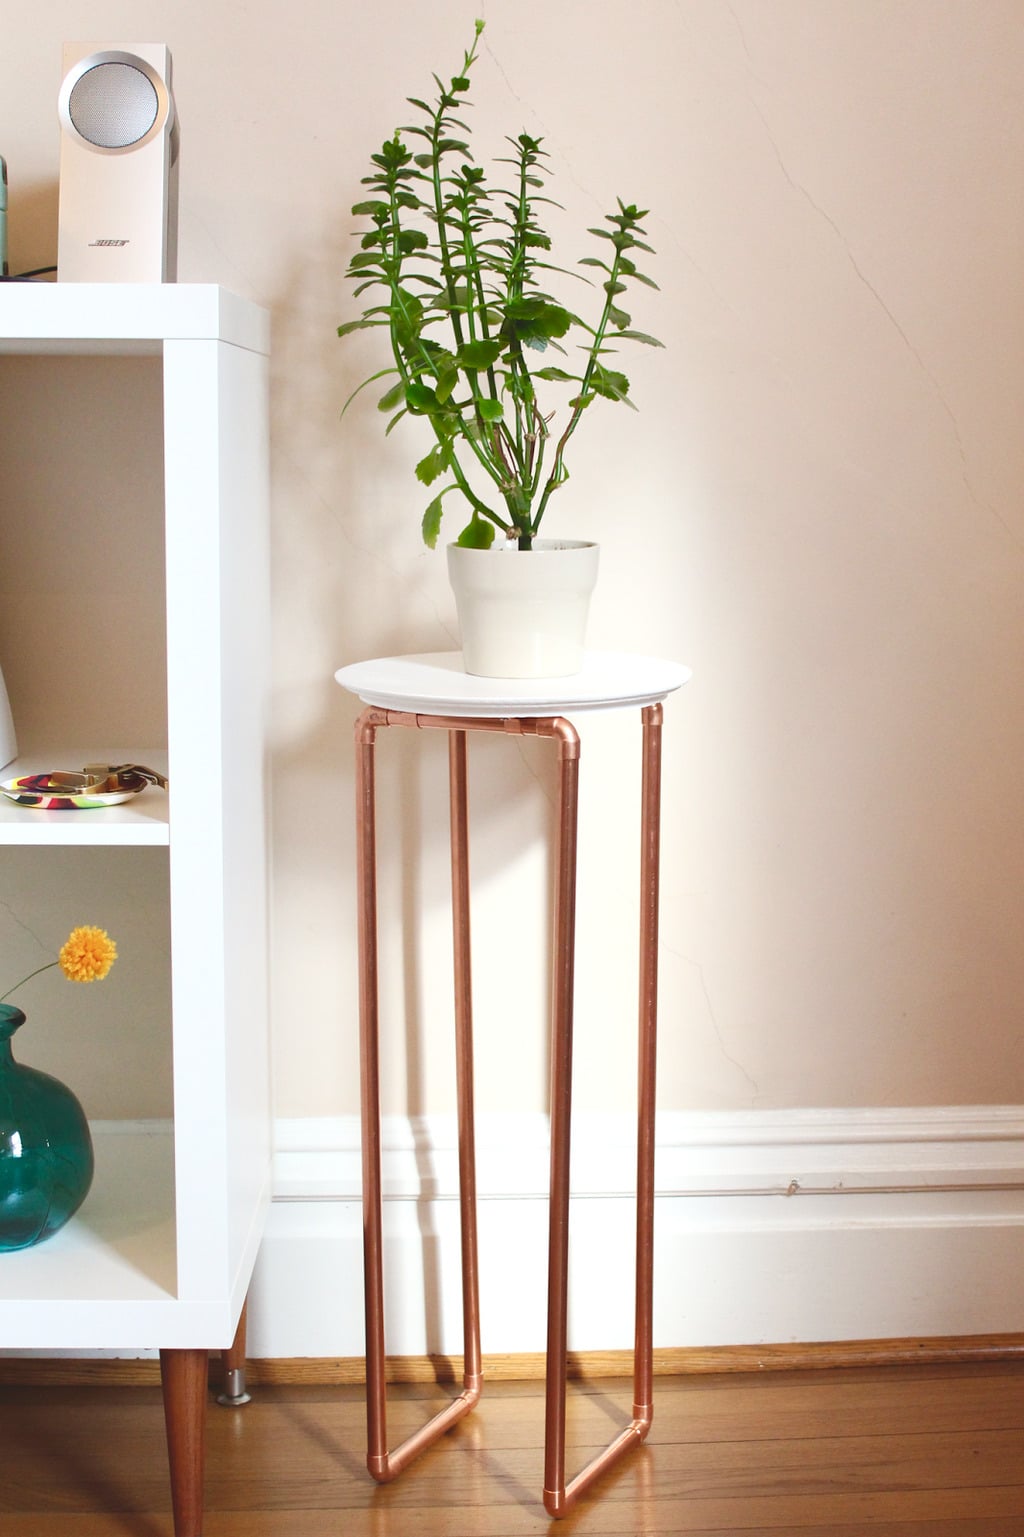
Copper Plant Stands
These DIY copper plant stands may look hard to make, but they’re super easy to make. First, buy some wire plant stands or make some and later paint them with copper spray paint. Lastly, use some inexpensive cotton rope to cover the top part, and voila! Your luxurious-looking copper stand is ready to be decorated. This stand will perfectly go with both Boho and modern interior designs.
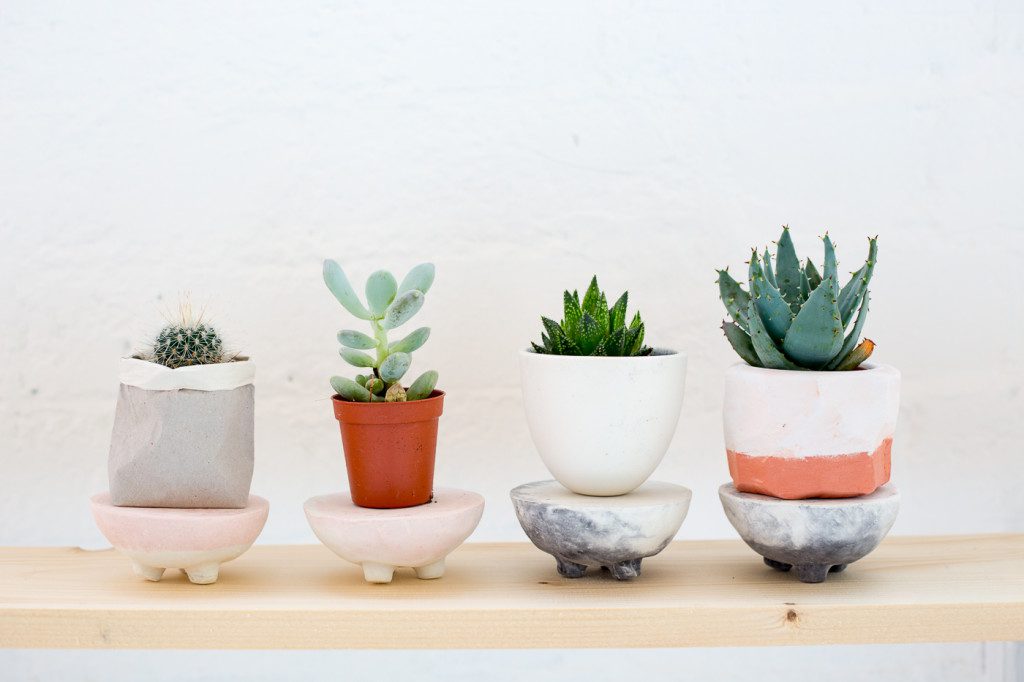
Tiny Desk Plant Stand
Look how cute this tiny wooden stand is. You can literally make this in a few minutes. All the supplies can easily be available in Target or any local store. If you want, you can also paint them various colors and decorate them on your working desk.
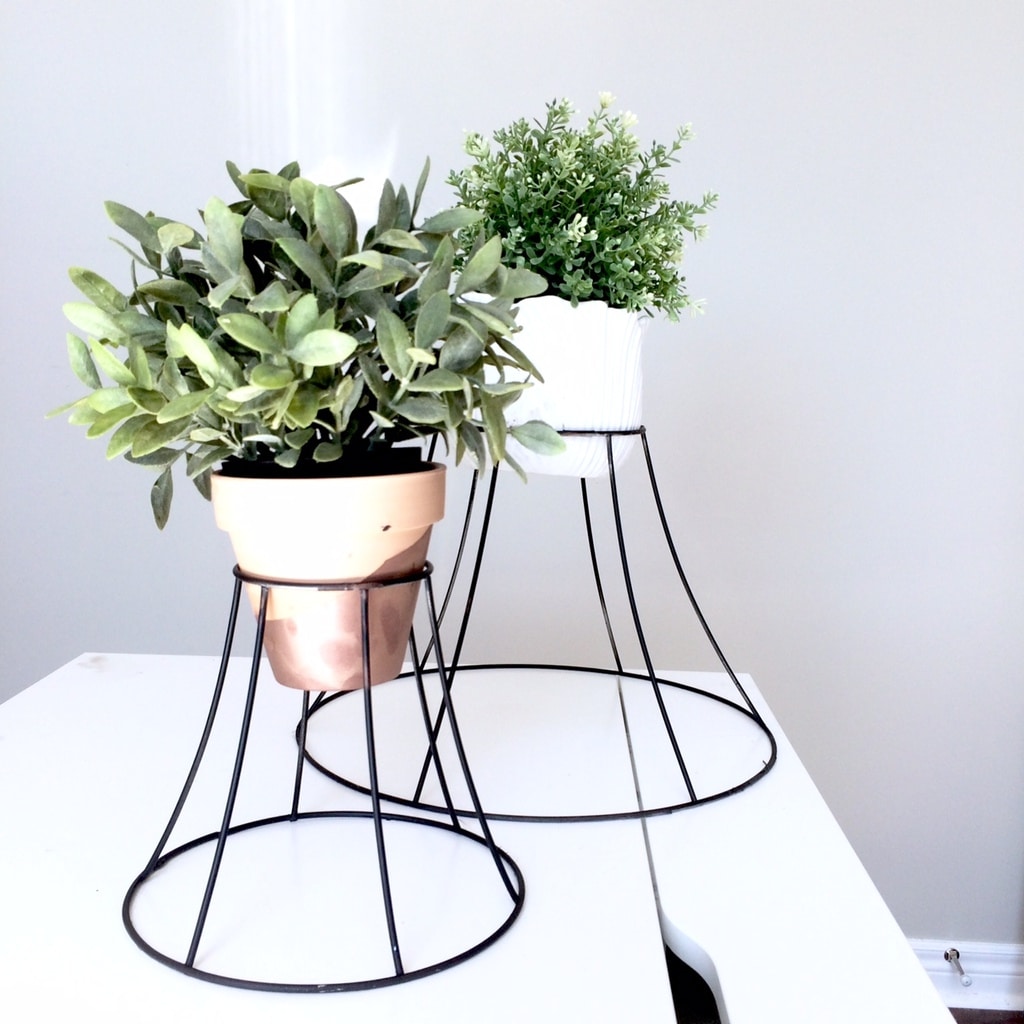
DIY Wire Plant Stand
To make these kinds of plant stands, you’ll require an old lampshade. Find the one that has wires connecting the top and bottom. That’s it! If you want to change the design, you can do that with the help of wire cutters. To make the planter stand out in your interiors, paint them in solid white, matte black, or gold finishes.
Drawer Plant Stand
Do you have an old working table? If yes, you can make use of one of its parts, Drawers! Here’s a cool idea for you, turn an ordinary-looking drawer into a unique plant stand. This is the perfect way to use the outdated and old furniture that is no longer in use. First, get the drawer out from the table or desk, then clean with sandpaper and add a fresh coat of paint and your stand is ready!
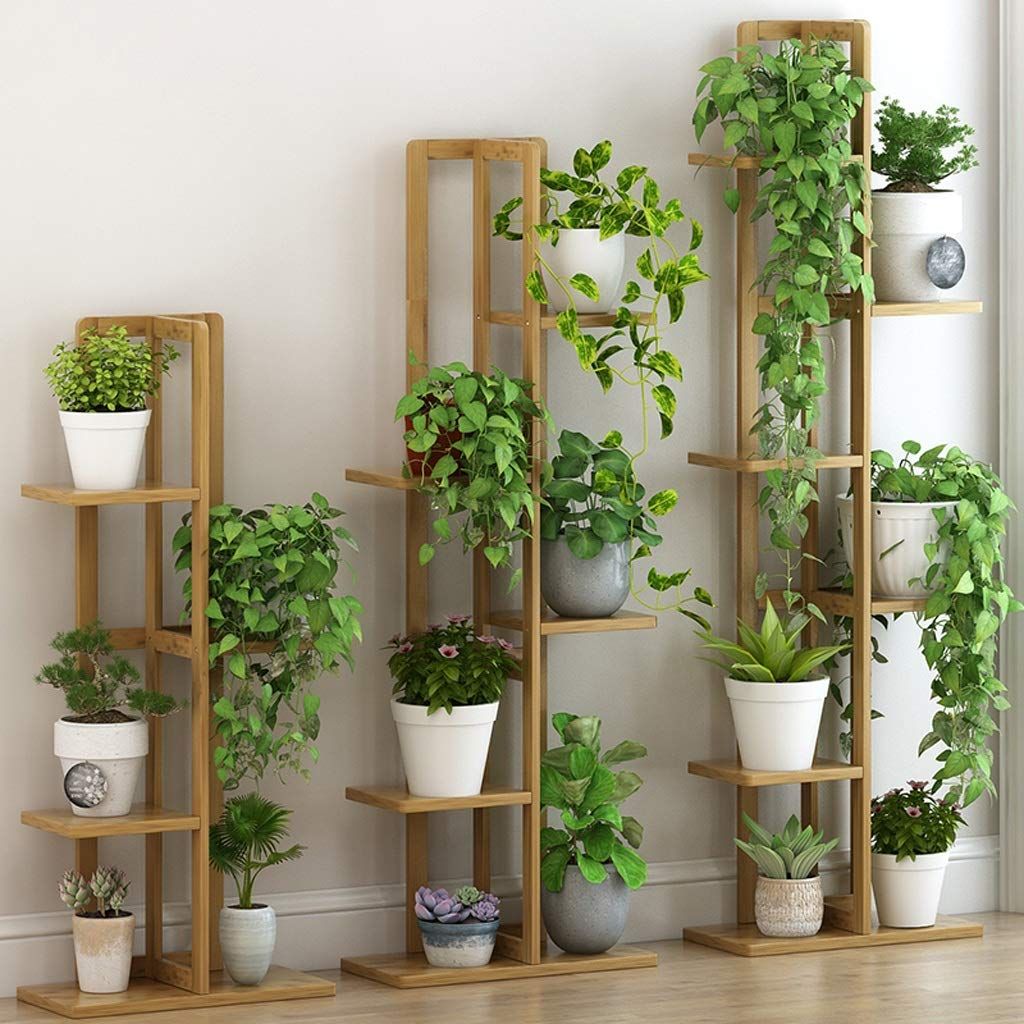
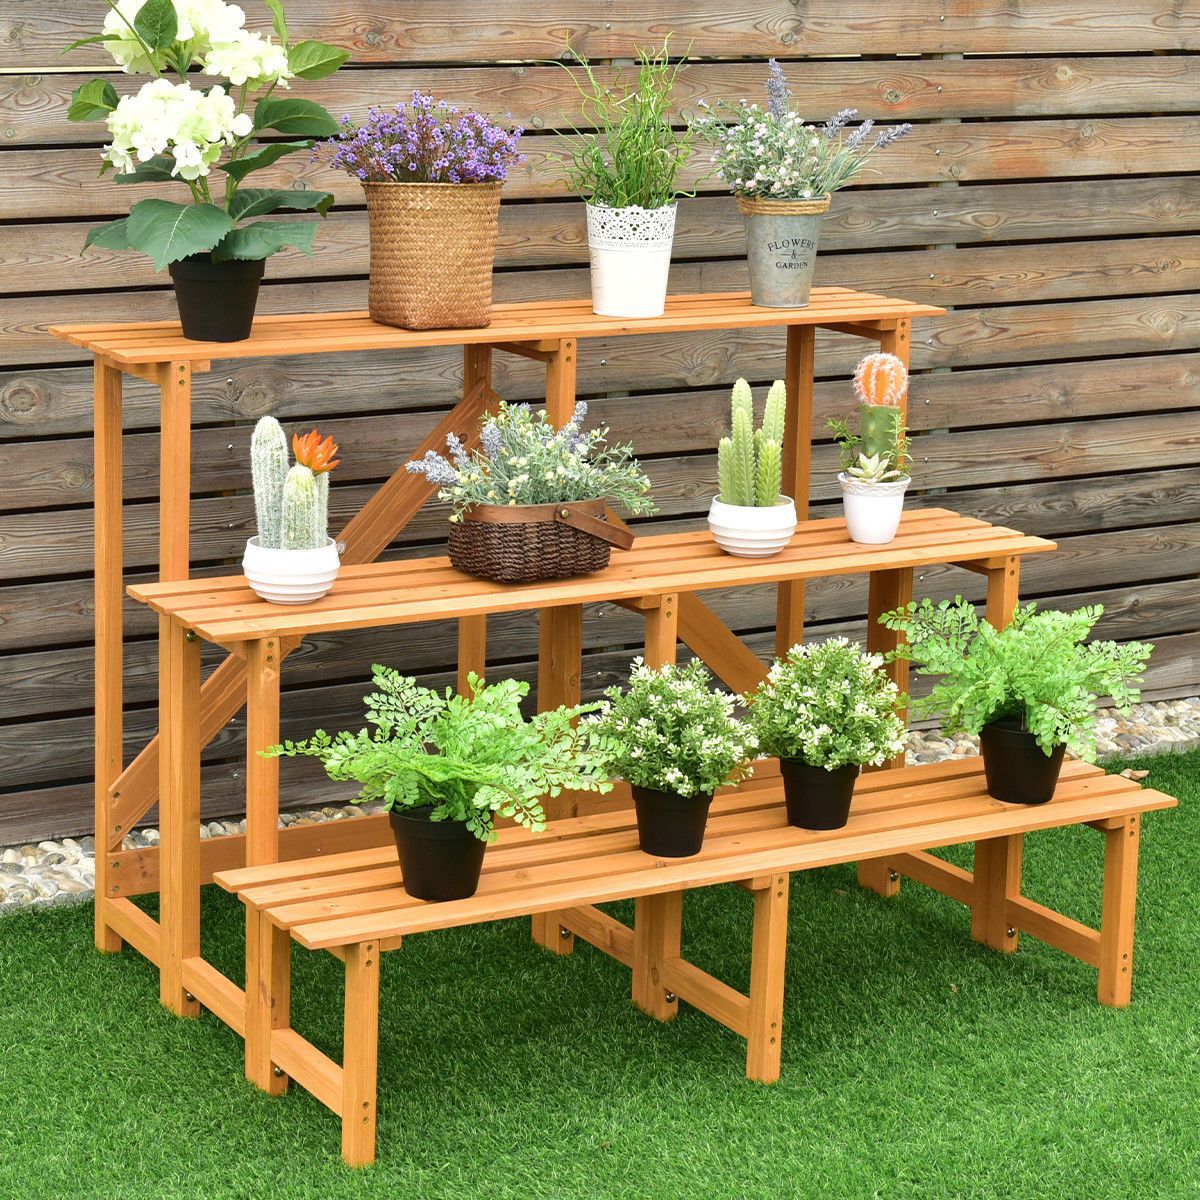
DIY Multi-level Plant Stand
This plant stand idea is perfect for those who live in small spaces or have many plants or both! This DIY multi-level plant stand can hold two small to medium potted plants. It is pretty easy to build and looks modern with decors.
This two-tiered DIY plant stand is tall and has a small platform at the top and a shelf at the lower part. You can display two beautiful planters on it. You can experiment with the design and create unique indoor plant stands for multiple plants.
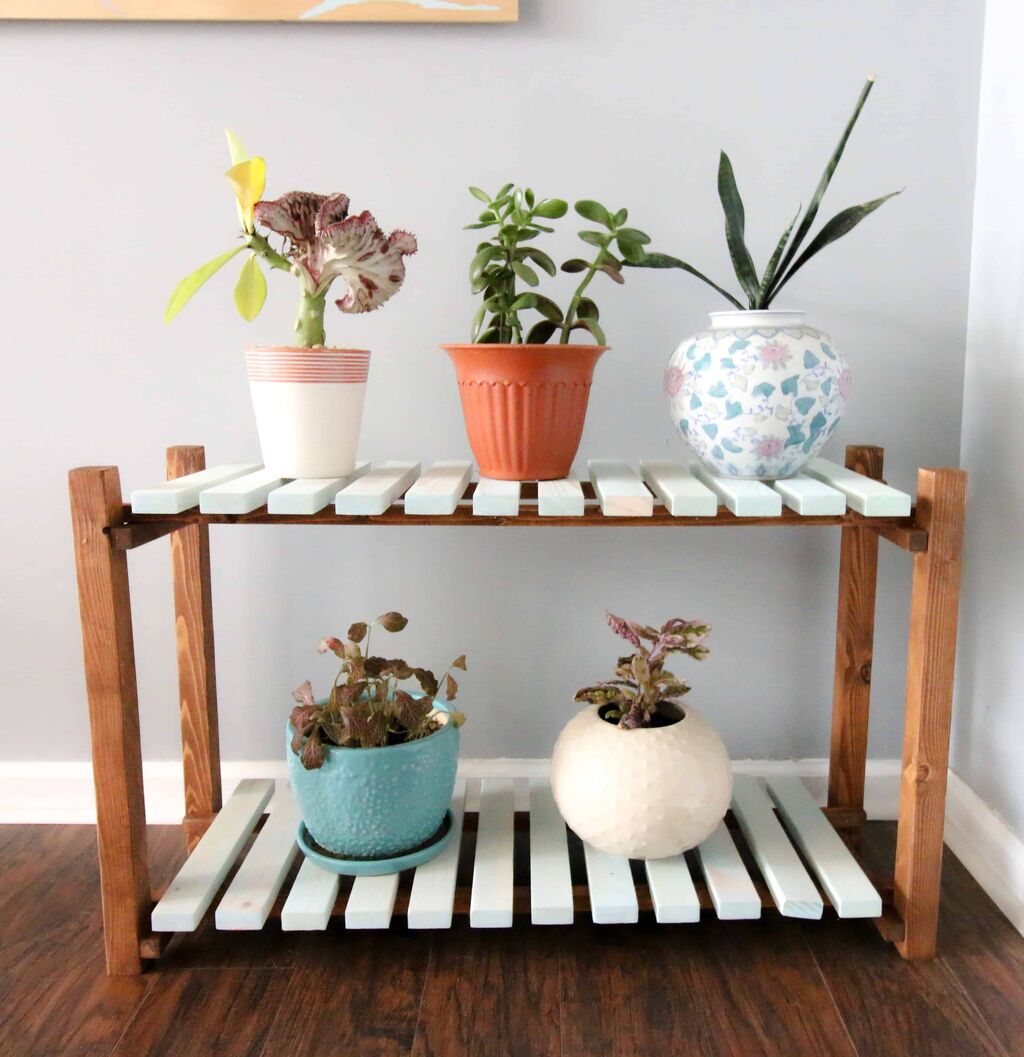
Low Wooden Plant Stand Bench
Another great stand idea for your tiny plants is this cute DIY plant stand bench. This low-riding, wooden indoor plant stand can hold all of your plants in one place. This makes the watering process easy as they all are placed on this DIY wood plant stand. You can use this DIY plant stand indoor and outdoor spaces.
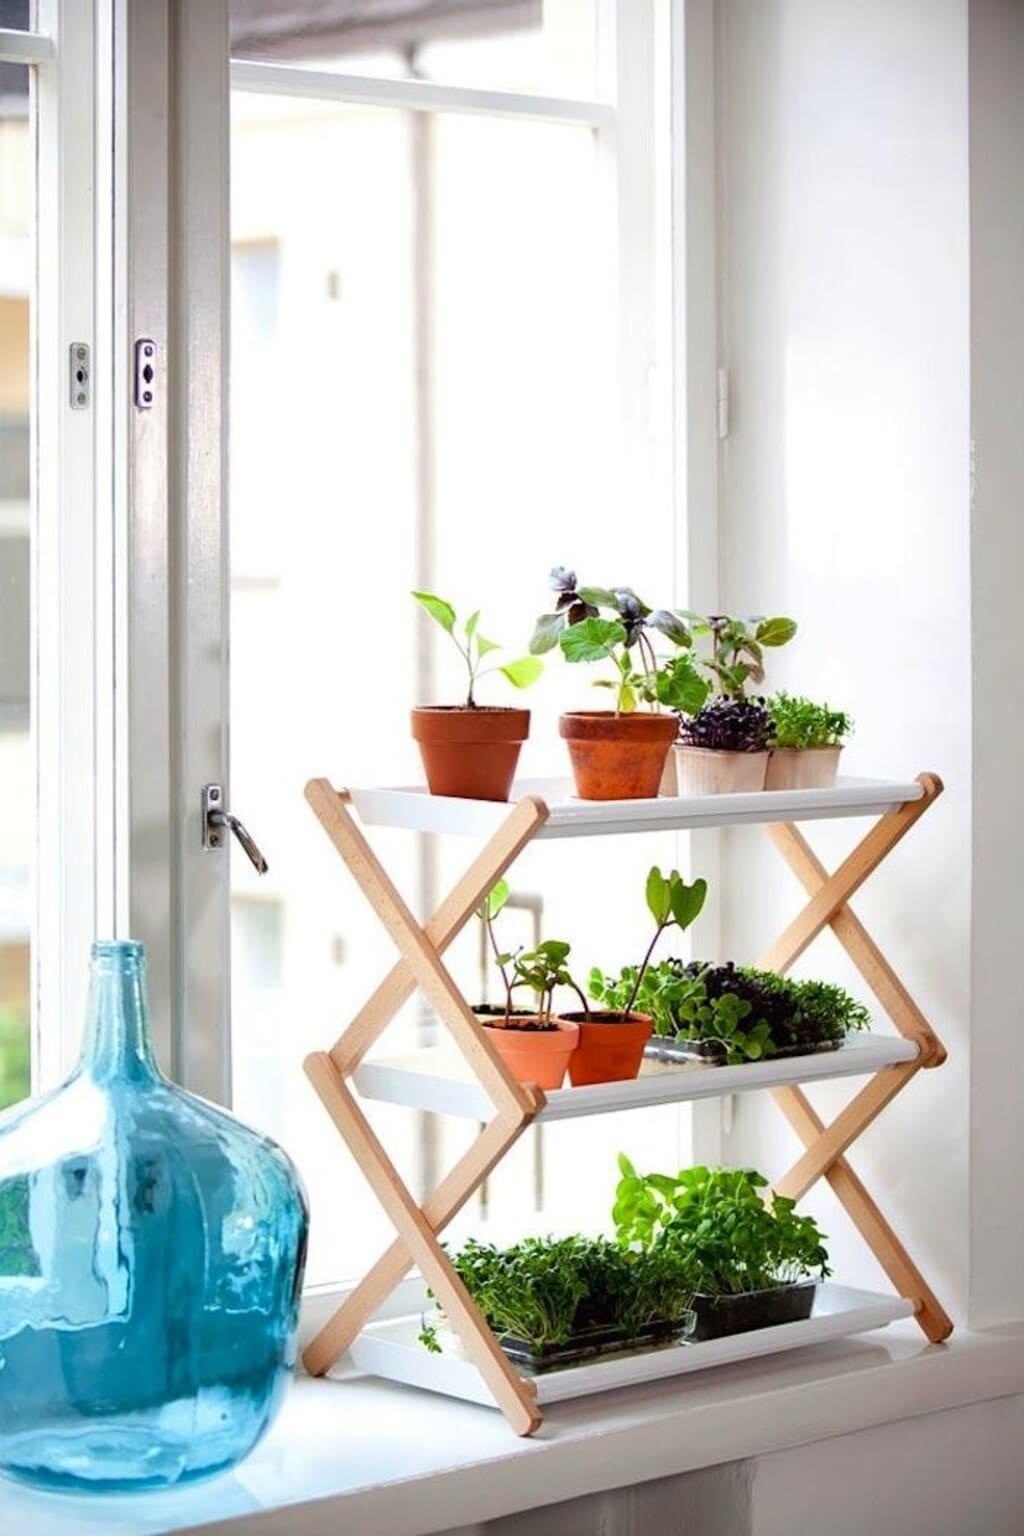
Accordeon Plant Stand
Look at this adorable tiny plant stand. This step ladder-style planter will be perfect for your windowsills. You can add many small planters to this stand and create a beautiful natural look.
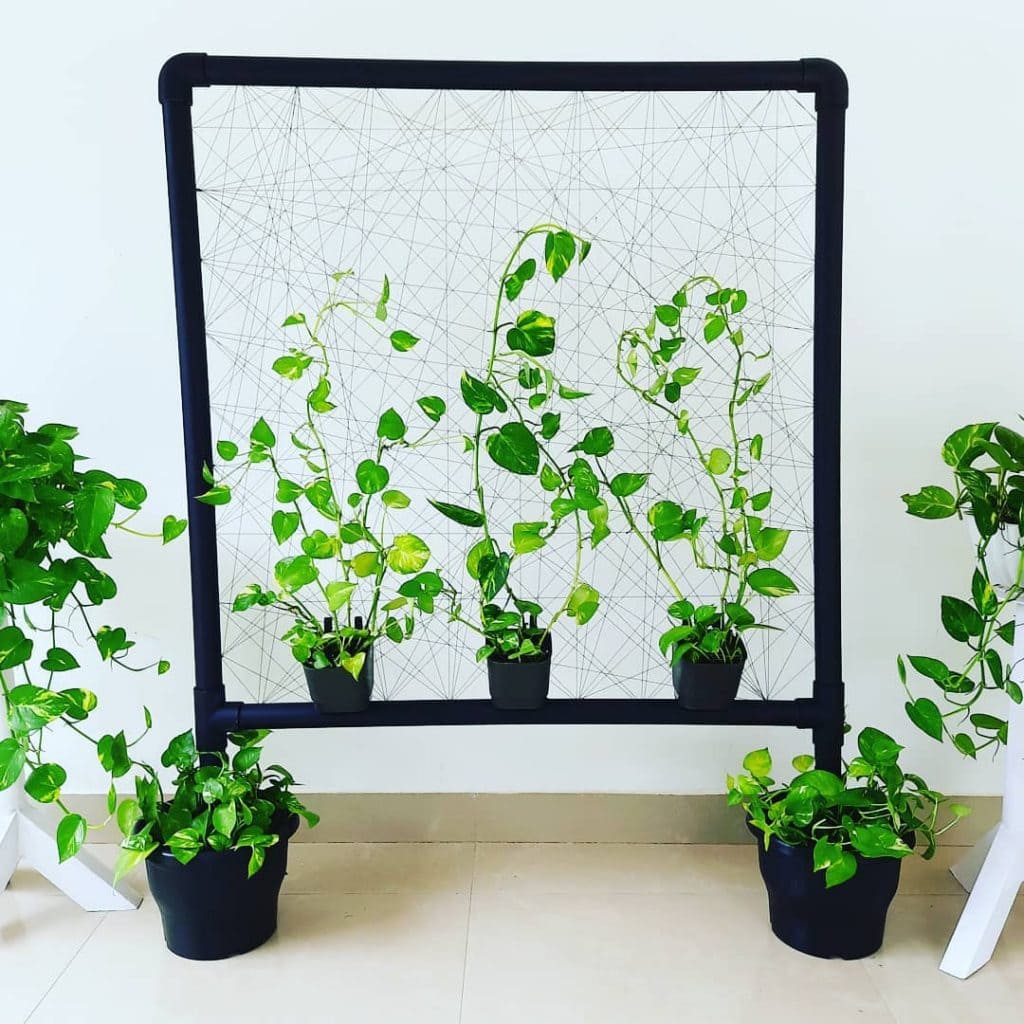
DIY Frame Plant Stand
Simple but elegant looking, these modern plant stands are something unique. They’ll surely add a certain amount of zest to your classic-looking indoor plants. To make this, you will need some wooden sticks and some nails. All you need to do is to make a square or any shape from the sticks and secure them with nails. These mid-century planter stands will make the ambiance of the space so much more stylish.
DIY Hanging Plant Stand
This masterpiece plant stand is so grand and special that it will catch the attention of everyone. It may look a bit challenging to make at first, but it is not. To make this multiple-shelf hanging plant stand, you’ll require some cotton ropes, planks, and a bamboo stick. Look at the above picture for reference. You can hang DIY Hanging Plant Stand in your living area, dining area idea, or any part of the house. It will work as an accent decor in the room.
Here are some more easy DIY plant stand ideas and inspiration for you:
Final Thoughts
So which DIY Plant stand idea do you like the most for your home? Plant lovers always find a way to bring more and more plants to home, so stands like these that we’ve mentioned are essential. These DIY plant stands are inexpensive and quite easy to make. You can create one or many according to your plant storage space and the space you have in your home or apartment.
You can repurpose many things to create these indoor plant stands, from old buckets, trash cans to bins and drawers. These cheap indoor plant stand ideas will help you keep order among your plants and also make your house look better.
I hope this blog has helped you to make your own DIY plant stand for your plants. Also, don’t forget to share this blog with your friends and family so that they can also make a stand for their plants and decorate their homes.
The rubbish disposal is very important, but also confusing and difficult. We all produce waste and sometimes it is difficult to get rid of it, but with the help of Composting garbage disposal service, you can get rid of easily. That’s the same if you are at home or work.
We must take action on how we dispose of our junk. Throwing away rubbish in a landfill is the easiest way, however, it isn’t environmentally friendly.
Proper waste disposal not only keeps our streets clear of any rubbish, but it also lowers any negative impact waste disposal may have.
By using the right waste disposal techniques and guidelines, you will be helping by making a positive impact on the environment. Junk Bunk rubbish removal will come as a help.
Proper rubbish management includes the use of garbage as a valuable resource, generally by recycling items that don’t need to be thrown away in a landfill yet. It is a process that involves not only rubbish removal syndicates but also households and businesses through the disposal of products they no longer need harmlessly and effectively.
Here are some techniques on how to dispose of your rubbish properly.
Arrange and Separate Rubbish
It is a good idea to separate your rubbish into the material that it is made up of. By doing this, they will determine whether or not it can be recycled. You should separate them into metal, wood, glass, plastic and general waste. Large and hazardous waste should be taken care of separately.
Be Careful by Dealing with Harmful Waste
Pay attention to directions on how to properly dispose of hazardous waste, don’t disregard the little signs that say “do not throw in trash”. If they are not taken care of properly, mixing them with general waste or throwing them away in public can have hazardous effects on the environment.
Medical pills and tablets that are expired, can simply be returned to the nearest medical centre or apothecary. Ensure that they are properly wrapped in a bag or container.
Avoid Liquids in Your Rubbish Bin
You should always be aware and empty any liquid from cans or drink bottles before throwing them into the bin. They probably will be spill everywhere during the removal process and contaminate rubbish that could have been recycled. It only makes the process that much harder, not to mention that it adds a lot of heaviness to your bin.
What Can and Can’t Be Recycled?
Many wastes are recyclable and many others are non-recyclable. Let’s make two lists in which we will list both types of waste. Take a look below to understand the waste separation.
No.
Recyclable items
Non-recyclable items
1
Newspaper
Food waste
2
Mixed paper
Ceramics
3
Glossy Magazines and Ads
Windows and mirrors
4
Cardboard
Plastic wrap
5
Paperboard
Wax boxes
6
Plastic drink bottles
Medical waste
7
The plastic product bottles
Hazardous chemicals
8
Aluminium cans
Wood
9
Steel cans
Light bulbs
10
Glass containers
Yard waste and tools
As recycling saves energy it also reduces greenhouse gas emissions, which helps to tackle climate change.
On-demand garden rubbish removal company Kwiksweep will dispose of all your rubbish and recycling where all waste where possible.
How Do You Properly Dispose of Glass?
Glasses can be recycled at your local recycling centre while broken glasses cannot. Not all glasses are made the same. So make sure to know which kind of glasses can be recycled.
Which Plastic Waste Can Be Recycled?
All plastic drinking bottles can be recycled through your yellow recycling bin or you can collect them and you can earn cash in exchange. “Scrunch able” plastic bags like shopping plastic bags and plastic food packaging can be recycled but not through your household recycling bin.
They can be recycled to a near local recycle centre. Other plastic items that cannot be recycled include things such as plastic forks, spoons and knives. They can’t be organized by machines when they reach the recycling centre.
Hire a Professional Company to Properly Dispose of Your Rubbish
Conclusion
If you are not sure how to properly dispose of any household rubbish is better for you to hire a group of pros, and they can do all the work for you.
Their waste disposal goal is to keep the environment clean.
Waste being properly disposed of means fewer health risks and hazards around to affect us.
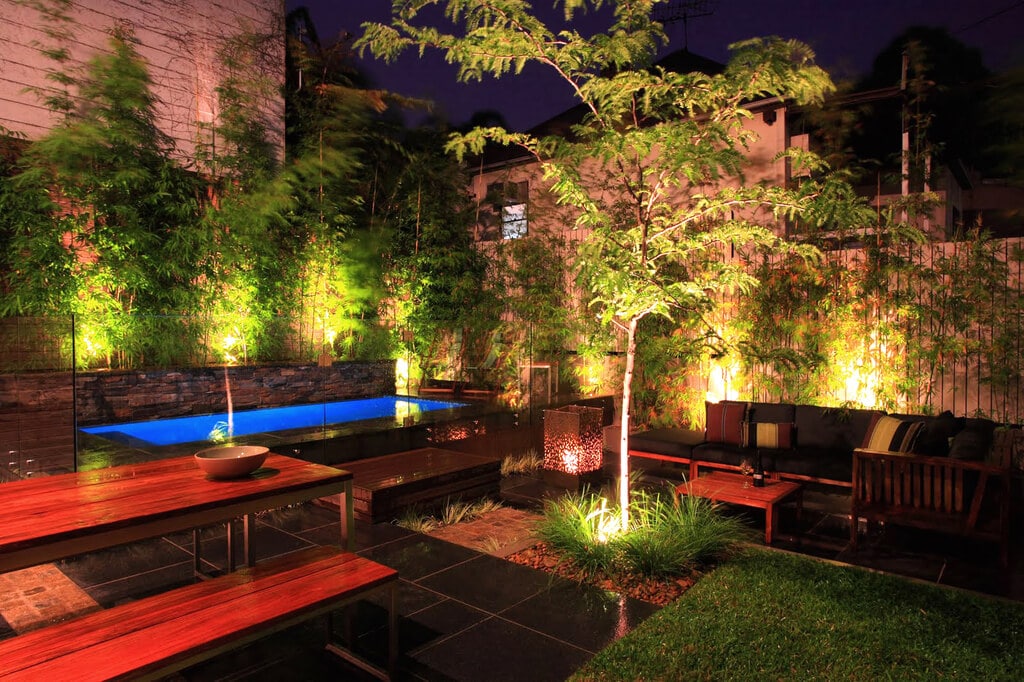
From bright pathway lighting to soft architectural accents, the temperature and brightness of your landscape lighting can make all the difference in the look of your home. With smart outdoor lighting systems and new technology that allows for changing color and temperature with an app on your smartphone or device, you can adjust your lighting to fit your needs. You can choose to illuminate your walkways with brilliant white light or highlight your exterior features with a range of radiant color options according to an event, mood, or to represent your favorite sports team.
Types of Color Temperature
An important factor when designing your landscape lighting is the quality of the color temperature. The warmth or coolness of a light’s projection is considered it’s color temperature. It is also important to note that more expensive LEDs that are made with higher quality, more controlled processes have a uniform coating across the surface, making the white color very consistent.
Less costly LEDs are not as consistent and can generally look colder (whiter) within the middle and yellow or even brown have a brown tint as you get closer to the edge of the light. This may create an unappealing beam projection which will be inconsistent in color and quality.
Soft White/Warm White
A fixture below 3500k will project a warm white color with a yellow hue. These lights are best suited for areas meant for relaxing and produce a warm and cozy feel to your space.
Bright White
Lighting fixtures between 3500k and 4900k will illuminate a brighter white appearance and bring a lively feel to the area. These lights are best suited for use as security lighting or in walkways because they give off a brighter glow without being intrusive.
Cool White/Blue Light
Any fixture 5000k or above will give a cool white glow and have an even brighter appearance. These lights enable the use of high activity or workspaces that otherwise might be hazardous to use at night such as pools or garages.
Considerations Related to Landscape Lighting
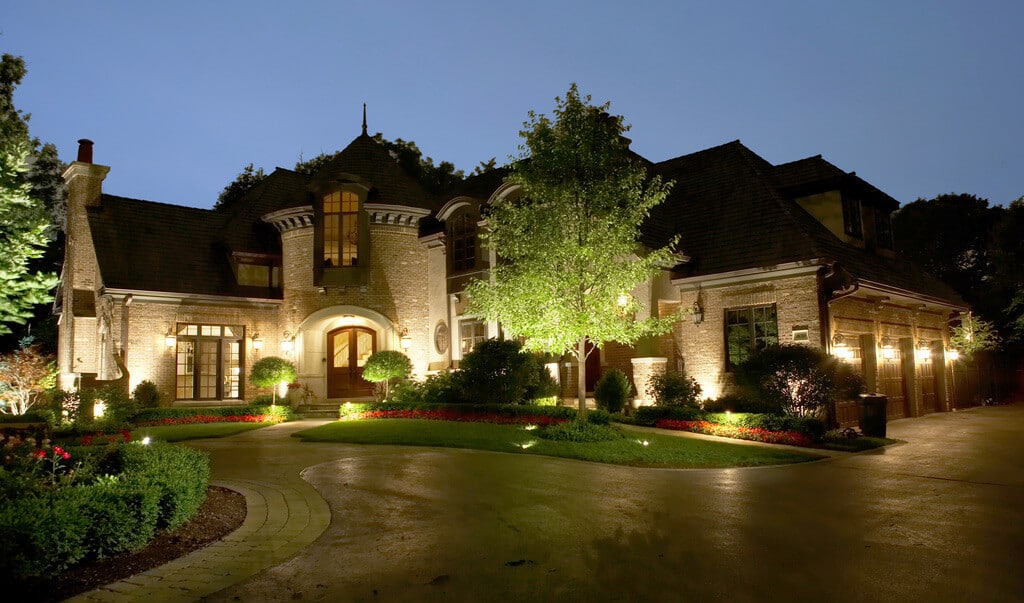
Architectural Elements
Uplights are perfect when used on a 1 to 2 story home and small to medium-sized trees up to 25 feet. Keep in mind that if you are lighting a building of 3 to 5 stories or tall trees and palms you should choose a fixture with a higher lumen output of at least 14 watts
A smaller feature light is ideal for accenting dormer windows, statues, small trees, and rock walls or bushes because it is discreet but able to cast a wider light. With this low-profile design, you can distribute the color or brightness you desire while capturing the beauty of your small lawn features and hardscapes.
Wall sconce lights are ideal for pool enclosures, lanais, and pergolas. They are the perfect accompaniment to illuminate any outdoor living space.
Plants
Think about highlighting your beautiful flowers, shrubs, and trees and still being able to enjoy them after the sun goes down. Highlighting trees in an accent color is a very classy look. Matching flower colors highlights your landscaping and is an exquisite way to add nighttime curb appeal to your home.
Moonlighting Technique
If you are looking for more of a soft-lit appearance, you might consider the moonlighting technique. Moonlighting is the placement of soft lighting in trees or structures above areas of your property that mimic the appearance of a moonlit glow. There are many placement options when moonlighting. It can be utilized throughout the entire property or create the perfect romantic ambiance for a patio or garden.
Security Lighting
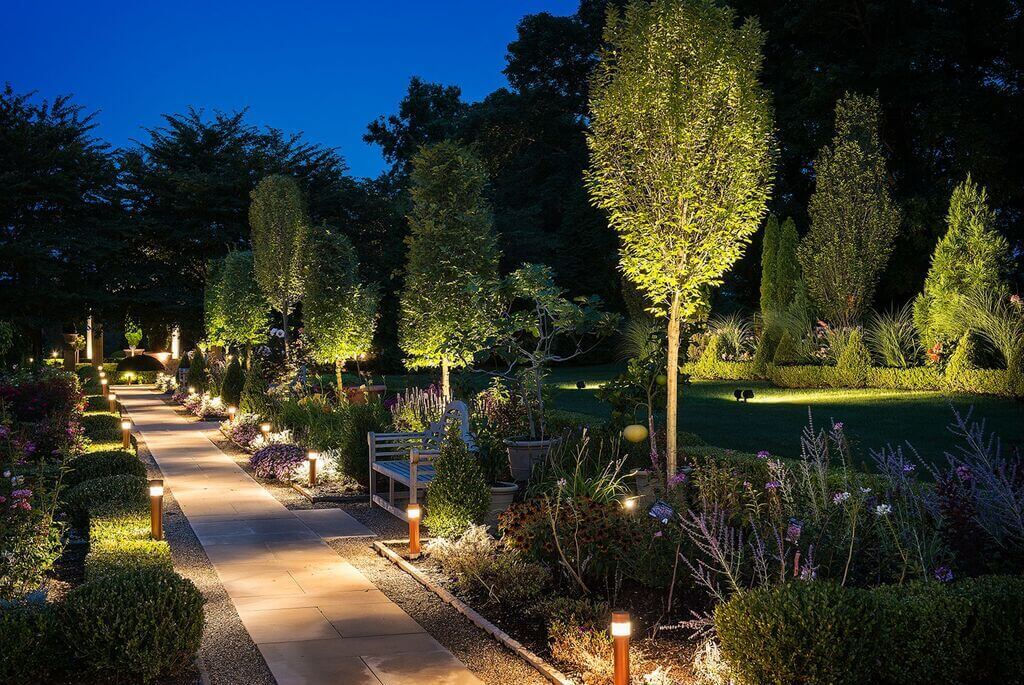
The safety of your home is always paramount. Whether you are a homeowner that wants to brighten pathways or would like to illuminate the dark corners of your yard, smart-outdoor lighting systems can do the job. It is simple to schedule the lighting to turn on at dusk, allowing family and friends to safely access steps and sidewalks. Bright outdoor lighting can also deter trespassers and unwanted activity, no matter the time of day or night.
Motion lighting is available with some smart lighting systems as an added layer of security for your home. Welcome guests with a safe path of light to guide them to the door and throughout the property. Path lights are an inviting and effective way of elevating security and safety while maximizing charm and appeal.
While there are certain recommendations for what color temperature and brightness work best for certain outdoor living spaces, this can vary by the preference of the homeowner. The latest trend in LED technology is to include multiple colors of white temperatures within the fixture and let the customer select the color option they prefer once the light is installed. Some fixtures even include classic white and full-color lighting varieties.
Considering that many homeowners are left guessing at which color they would prefer before their purchase, this is a much more user-friendly option and allows an unsure customer to decide after they purchase the product. Many factors affect LED clarity and color temperature, but knowing what options are available and how to best integrate them into your landscape design will assist you in choosing the landscape lighting that is perfect for your outdoor space.
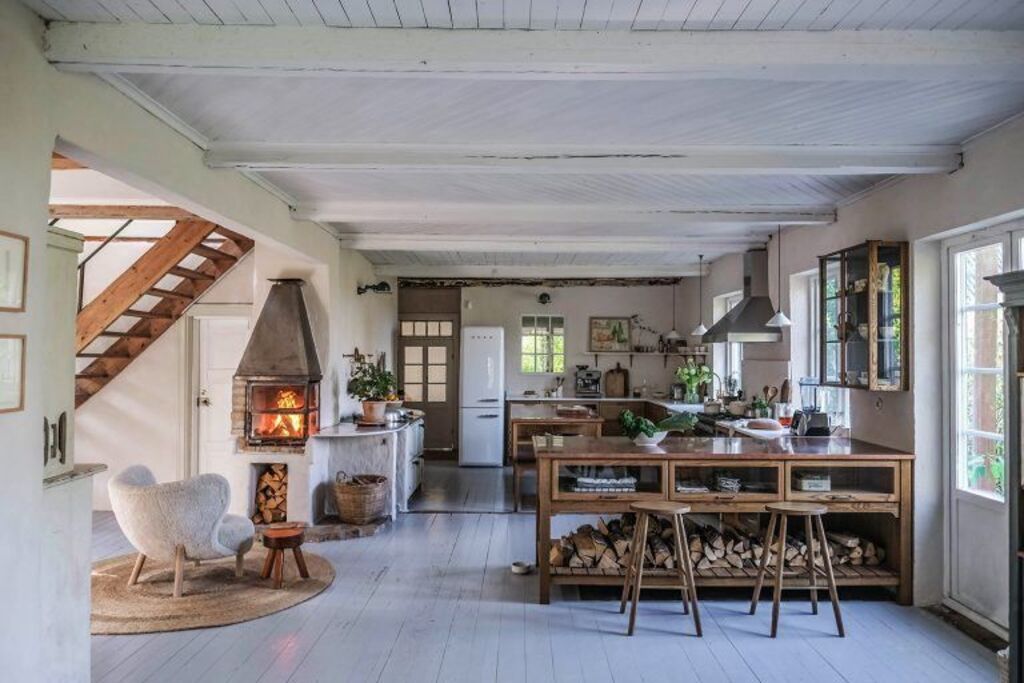
The kitchen is like a temple for all the foodies out there. It is that one space in the house that will never disappoint and will always serve you with happiness and comfort food. Kitchen design has come a long way from rear room to front and middle. Kitchen design trends have promising modeling ideas with class and convenience.
Kitchen design trends ideas can be overwhelming with so many choices, styles, and advice they come with. Whether you’re going for a new kitchen planning or remodeling of the existing one, you should consider what is currently trending to make your kitchen stand out.
Kitchen interior design trends have shifted from the typical white or neutrally tones kitchens to a bolder choice and bright colors. A well-planned kitchen is fuelled with great ergonomics, aesthetics, and liveliness.
Defining a Modern Kitchen
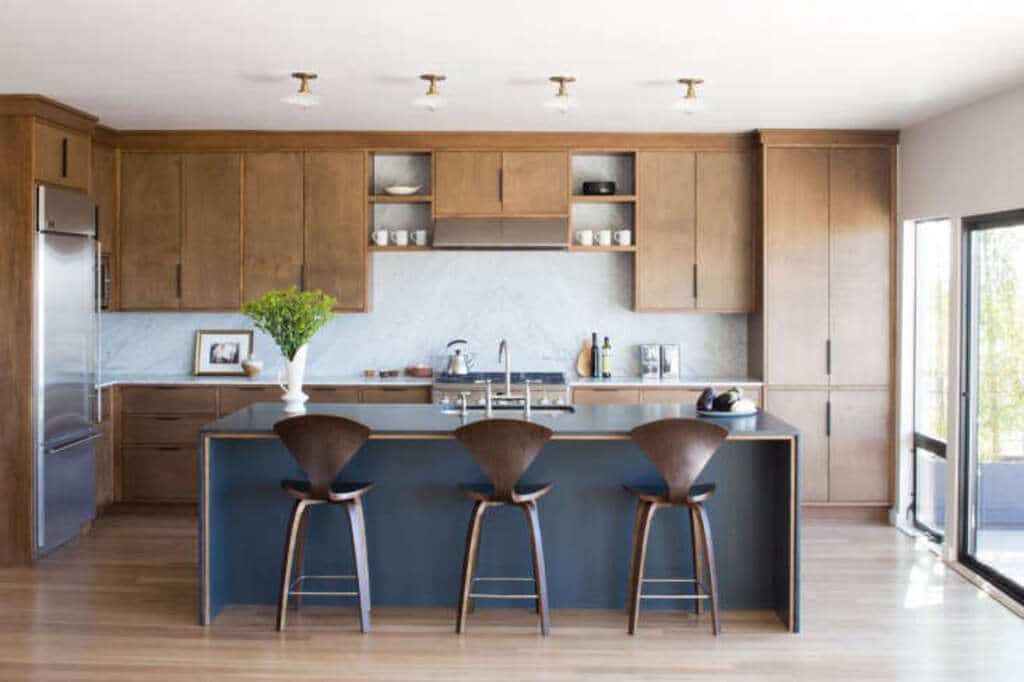
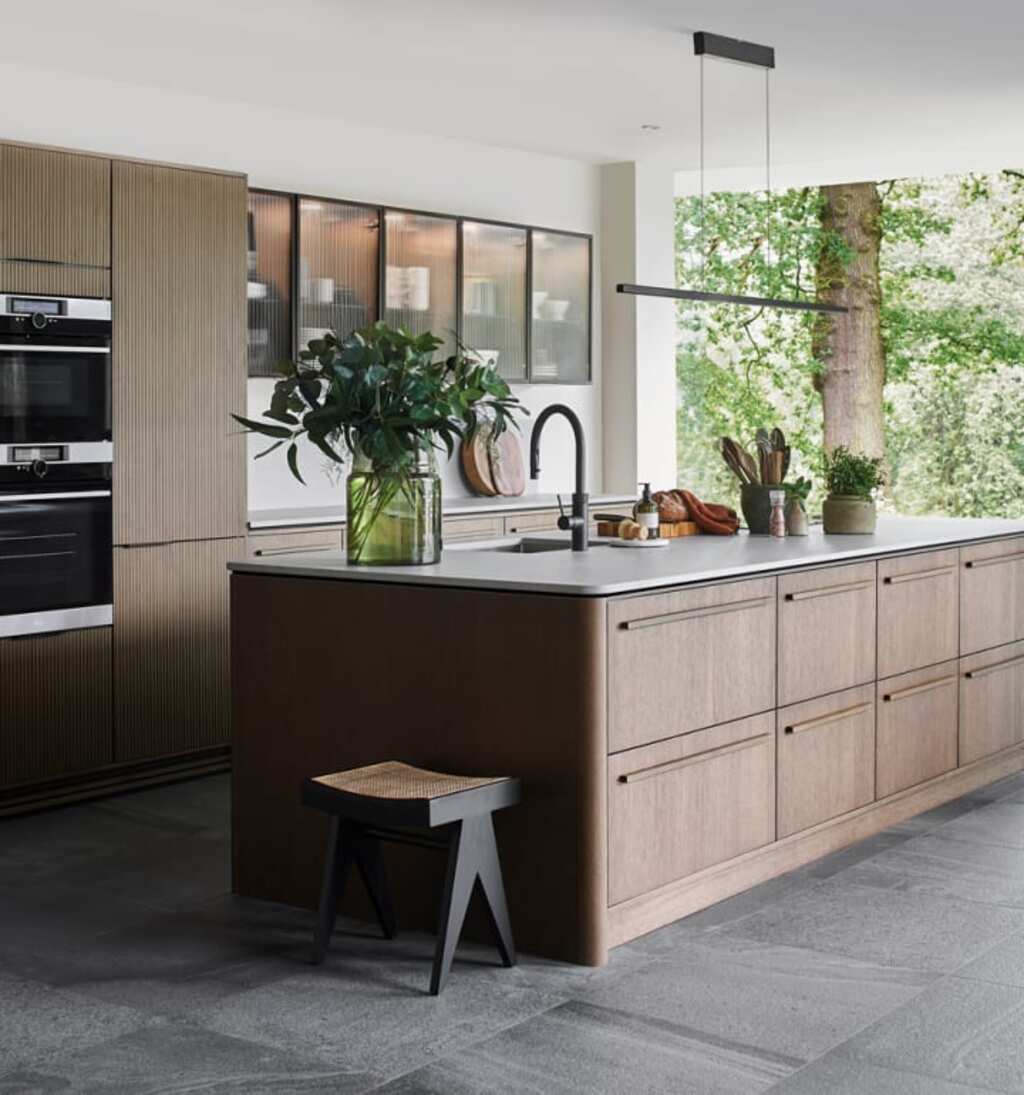
A modern kitchen is a mix of neat straight lines and geometry that imparts elegance and offers comfort for the users. The modern trend is a composition of contrasting colors, emphasized lines, and a sleek appearance. These spaces are often matched with the palette of the adjoining dining room and living room.
Kitchen design trends is more about uniting the spaces visually with an open plan and uniform materials, colors, furniture, shapes, and decor. Latest decor with leather upholstered seating and other eco-friendly materials impart a contemporary look to the design and form a seamless relation with living and dining areas.
The kitchen design trend has transformed dramatically over the years by bringing in contemporary ideas aligned with the latest technologies. The kitchen is no longer just a space to cook food, rather it has become a space that supports cooking, partying, and even working keeping in mind the work from home scenario.
Kitchen design trends now define a kitchen as multifunctional spaces with elegant interior decor.
The Idea of Room-like Kitchens
The latest kitchen trend is about integrating the space into living areas. The idea of open kitchen interiors has a major influence on the current design trends. Though the kitchen is not the main space of the house, it can be considered as a functional, harmonious, and beautiful space that merges well with the rest of the house.
With hidden work areas and ultra-sleek andmodern kitchen cabinets, the kitchen has a unique appearance that expresses the beauty of materials The latest trends explore minimalism and stylish spaces that blend well with the rest of the house decor and do not mark a separate territory for the kitchen.
Tips for Kitchen Design Trends
Many trendy designs and remodeling kitchen ideas can easily get you overwhelmed. Preparing before diving into the world of inspiring ideas is thus a good choice. Let’s consider these tips for great kitchen interior design trends.
1. Choose Bold Materials
Kitchen design trends explore the richness a bold material offers. These decors focus on functionality with equal beauty. Materials can be explored that add charm and elegance to the design and offer great durability.
2. Stick with the Theme
With a great variety of kitchen interior trends, it’s important to stay focused on the theme. A single or combination of two trends can be incorporated into the style to achieve a perfect level of balance and harmony. The theme must form a cohesive design with the rest of the adjoining spaces to form a seamless relationship throughout.
3. Think Ahead
As the trends are going bolder and louder, there is a need to look for the smart appliances and latest technologies in the kitchen equipment. Go for tough to open styles that are likely to stay trendy for the coming years with smart technology.
While thinking ahead with technology, make sure your kitchen comes out to be sustainable for a greener future.
Top 20 Kitchen Design Trends
With numerous kitchen interior design trends, it can be a challenging task to select the best one. Though having a sea of options sounds good, it can be mind-boggling.
Here are 20 kitchen design trends that may lead you in the right direction and offer you insights into the upcoming trends.
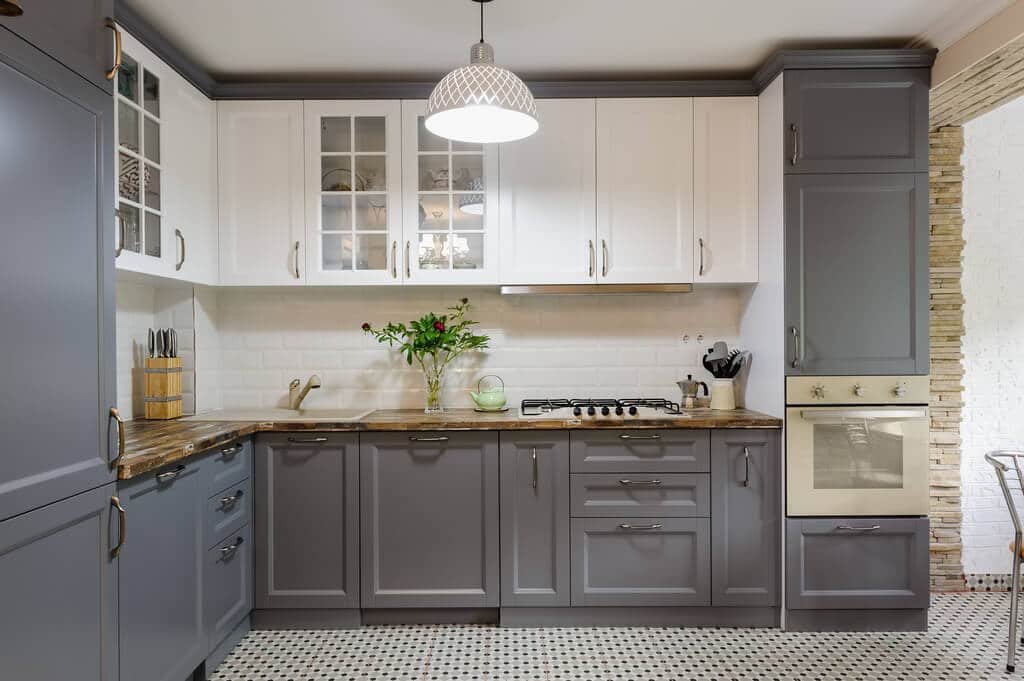
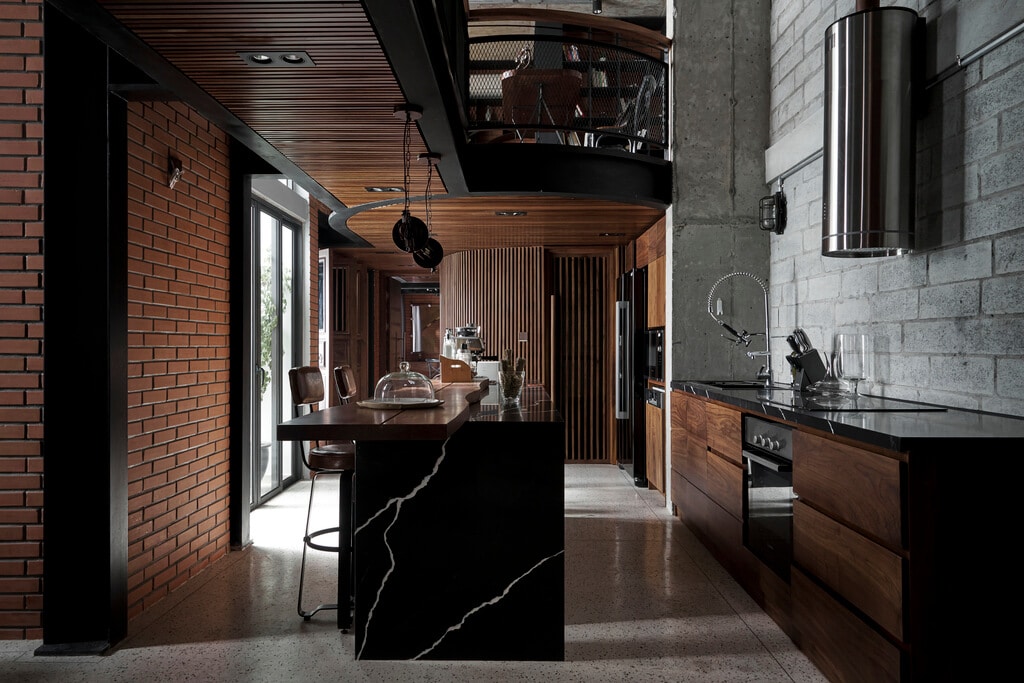
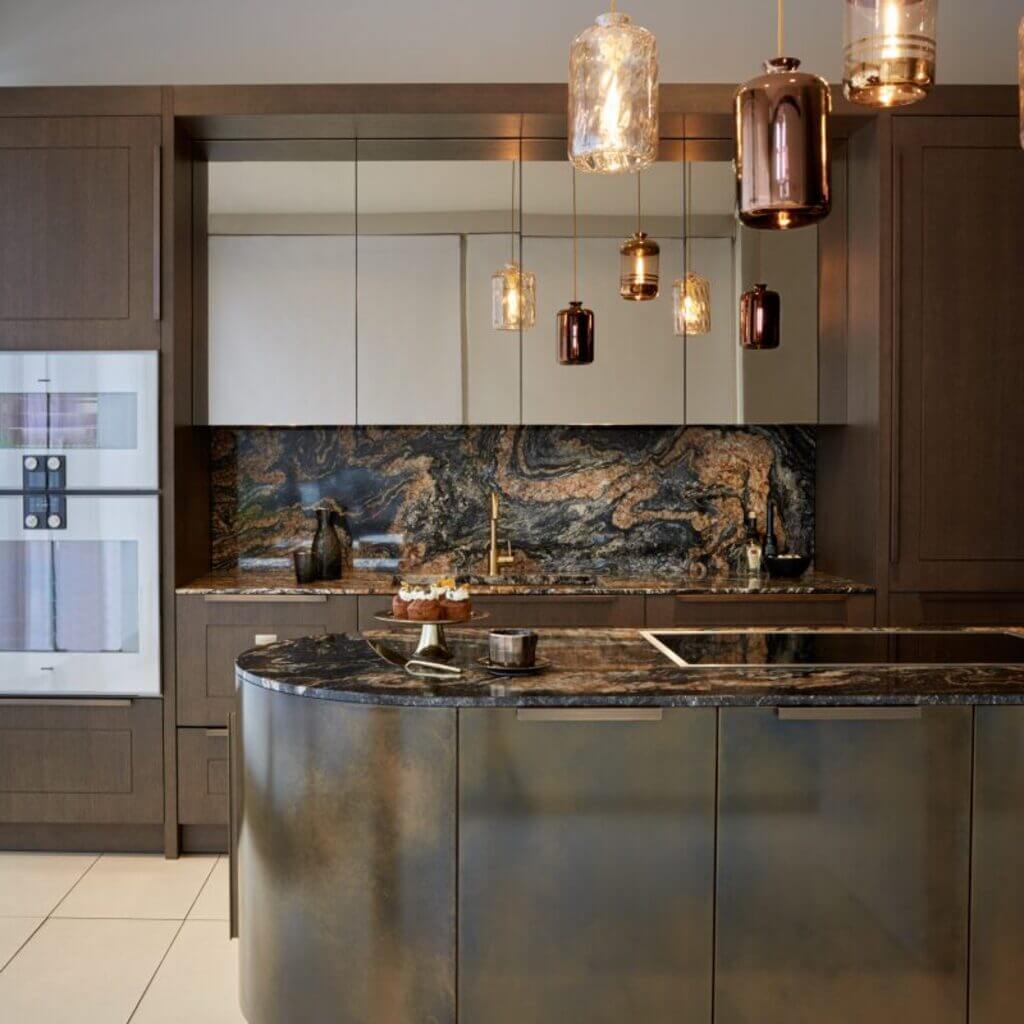
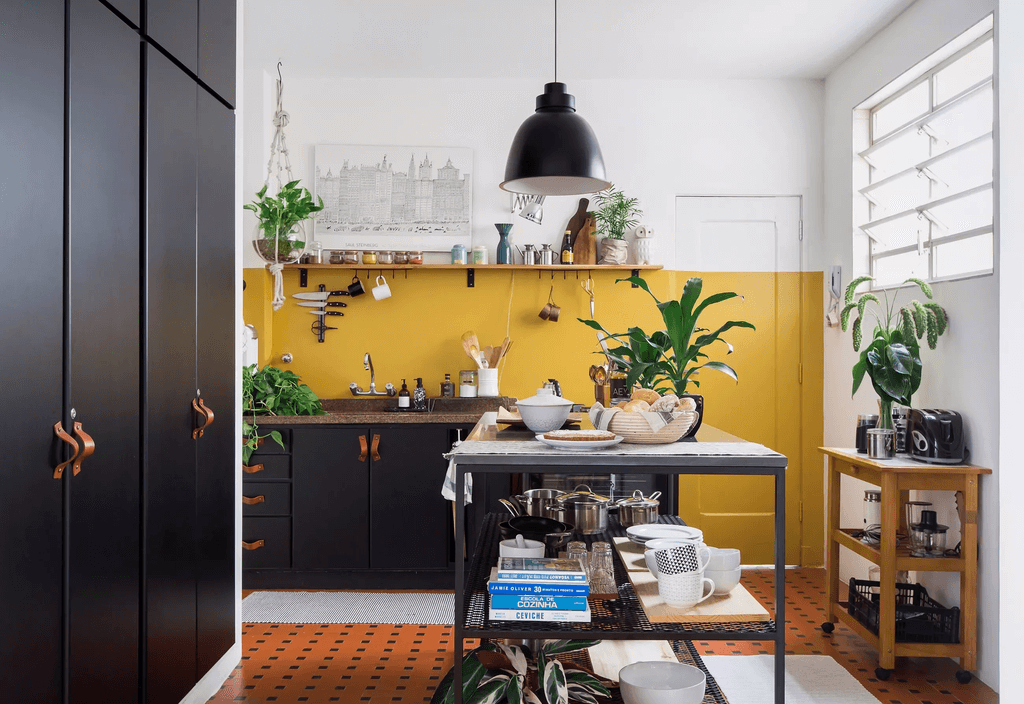
1. Going Bold: Leading Kitchen Design Trends Ideas
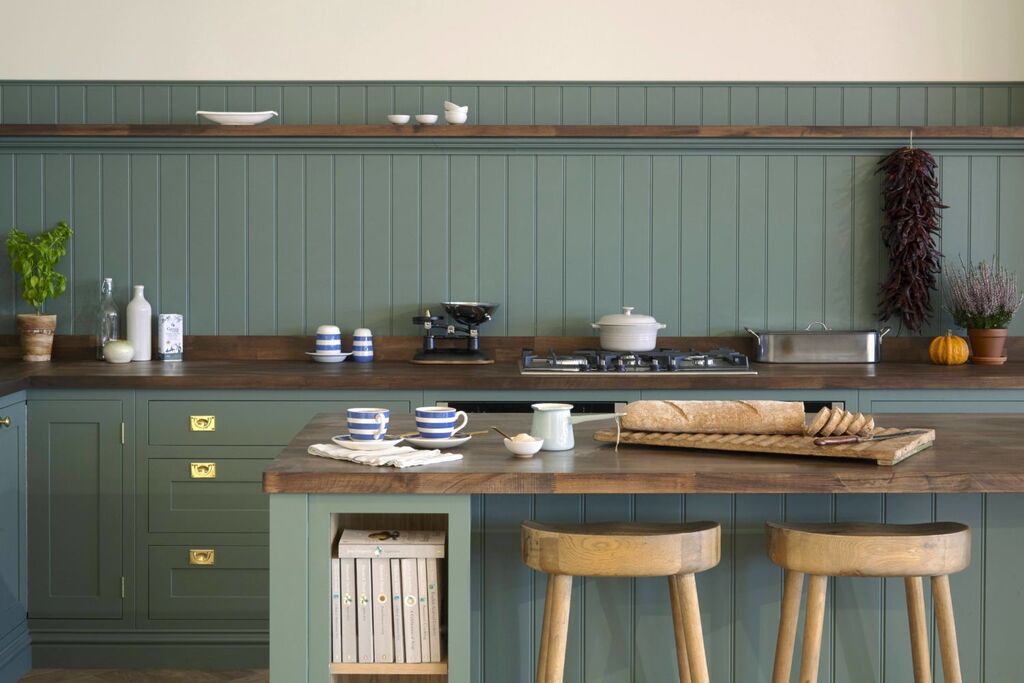
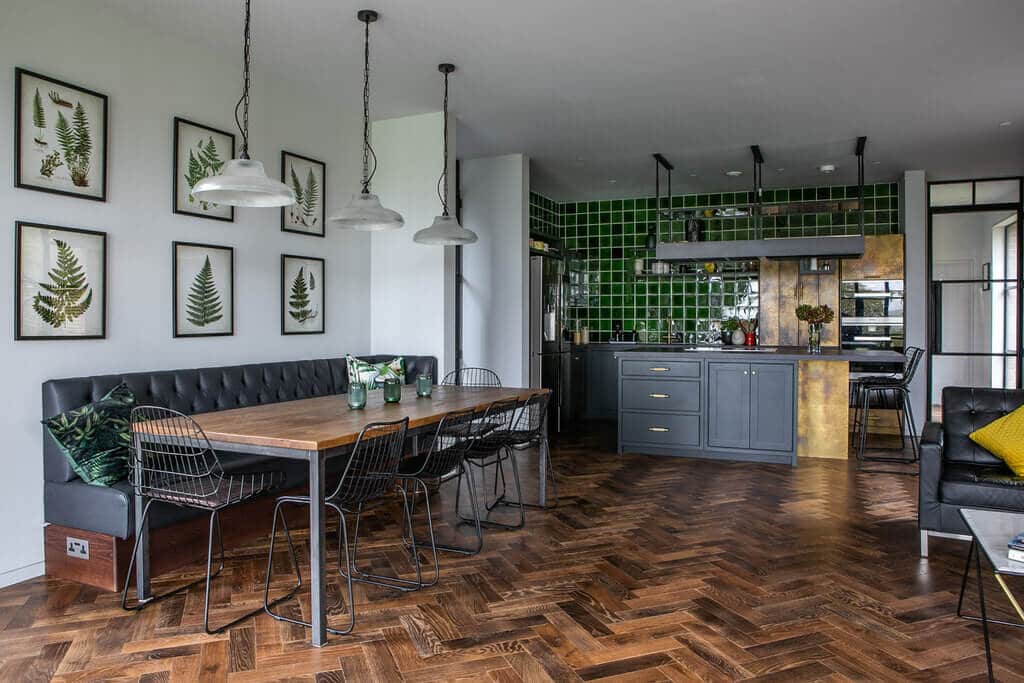
The use of dark, bold colors defines the kitchen design trends. From hues like forest green to burgundy tones- these are now being used in the kitchen interiors without hesitation.
The level of experimenting with bold tones is greatly hiking resulting in interesting spaces. These shades can be complemented with textured surfaces, metal accents, and cabinets in smoked glass to fill the design with glam.
2. Herringbone Flooring
Herringbone flooring is currently being considered and will definitely enter the kitchens with the upcoming trends. It imparts texture and warmth to the contemporary design.
3. Green Kitchen Design Trends: Recycled Kitchen
With the growing awareness of sustainable designs, recycled kitchens have reached their peak. Second-hand kitchens are functional and eco-friendly options that recycle elements in working conditions.
These may aid in availing up to 70% off, thus can prove to be purse-friendly as well.
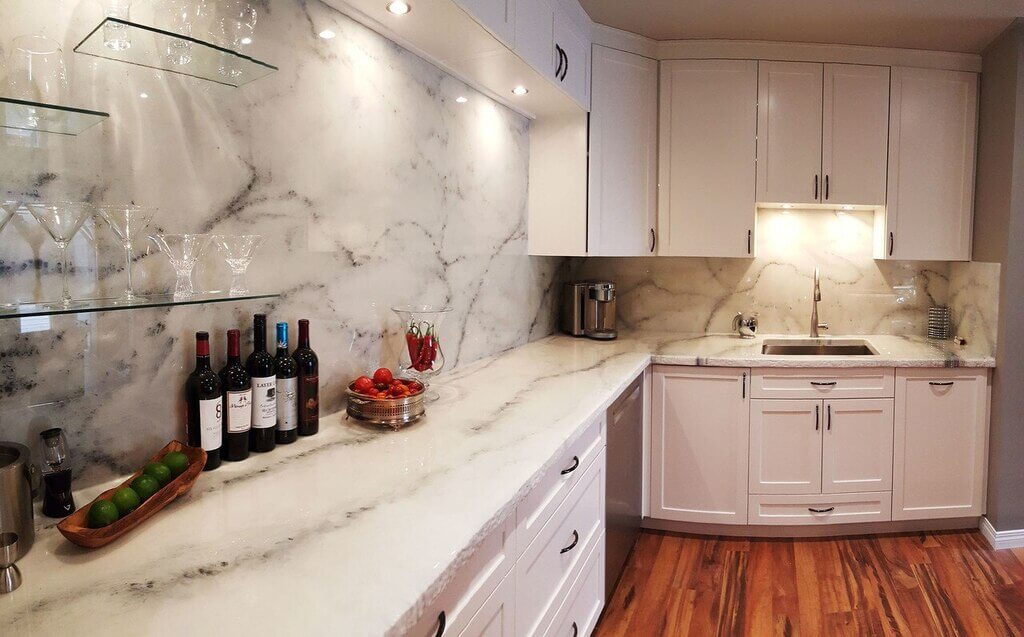
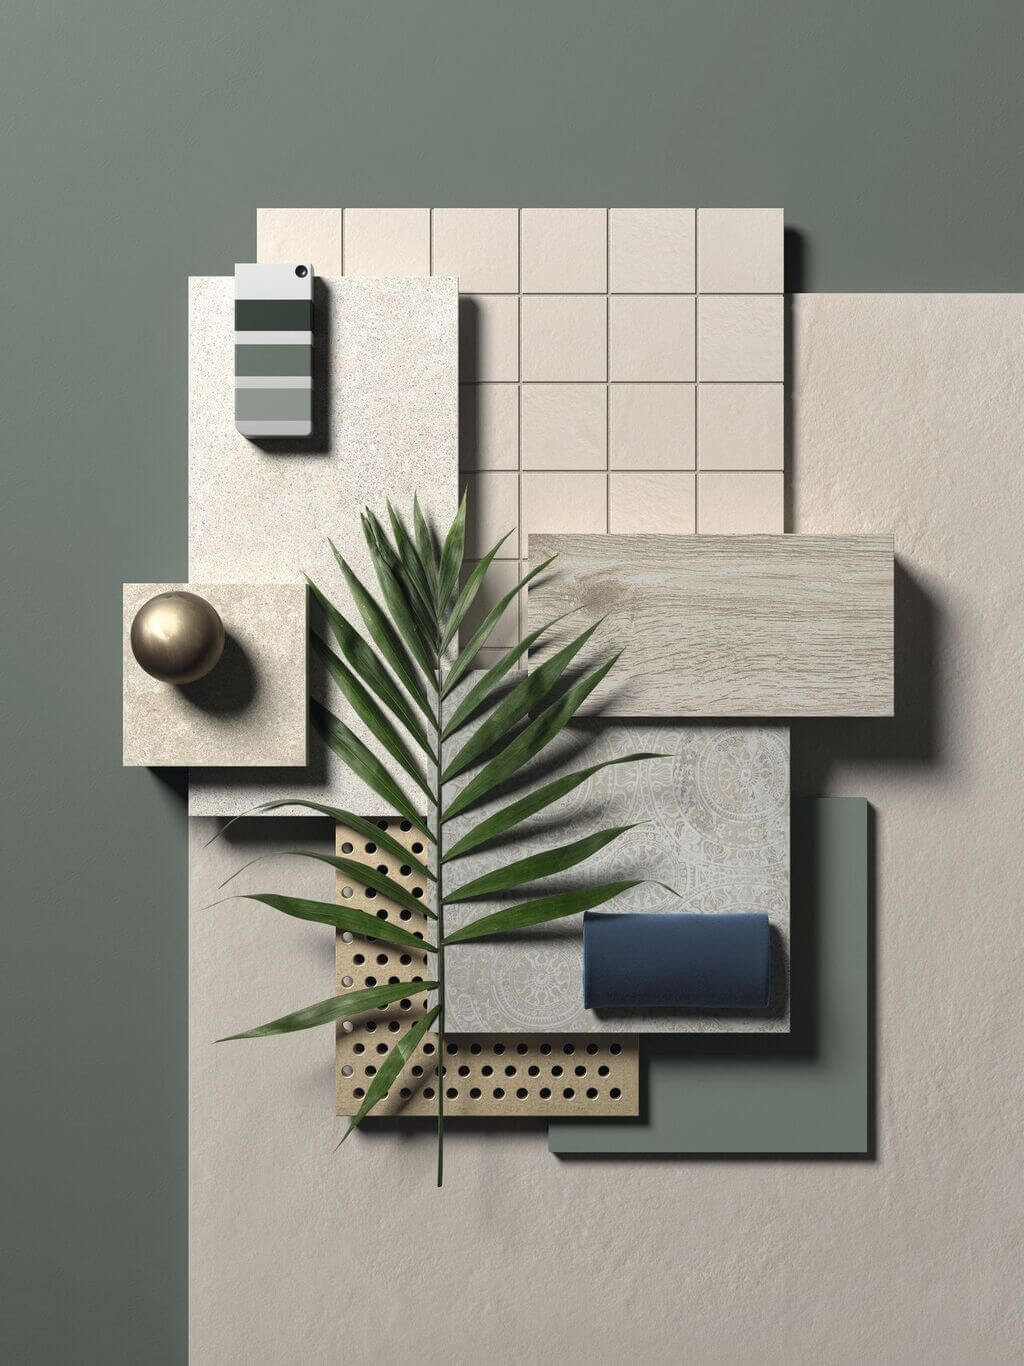
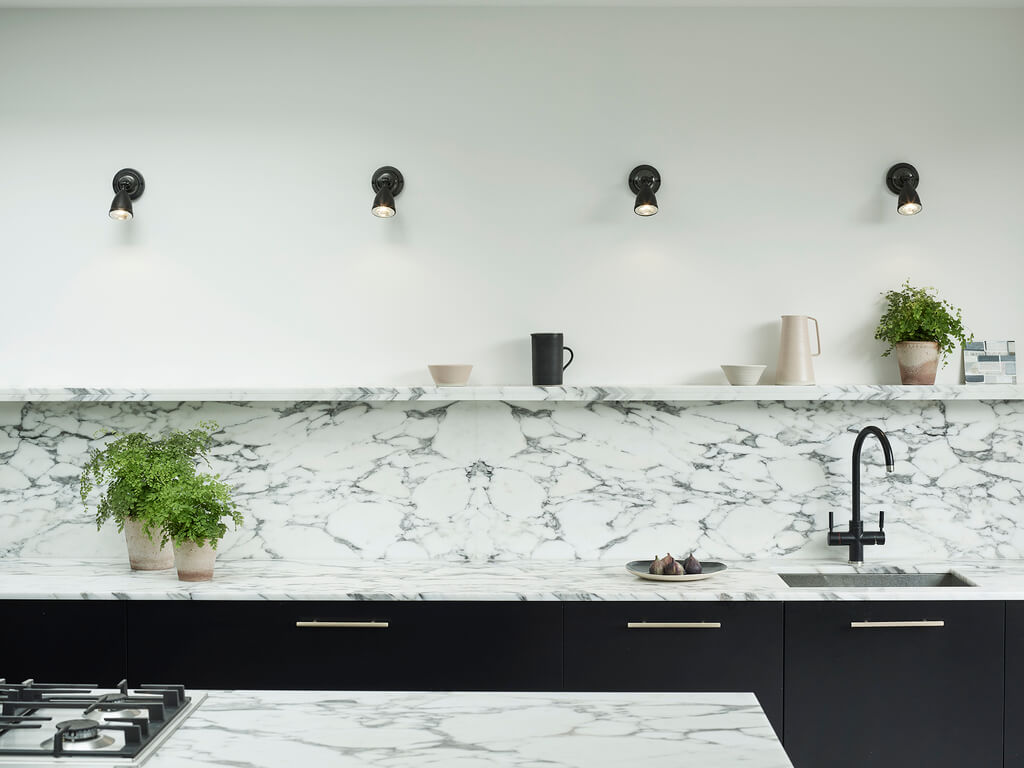
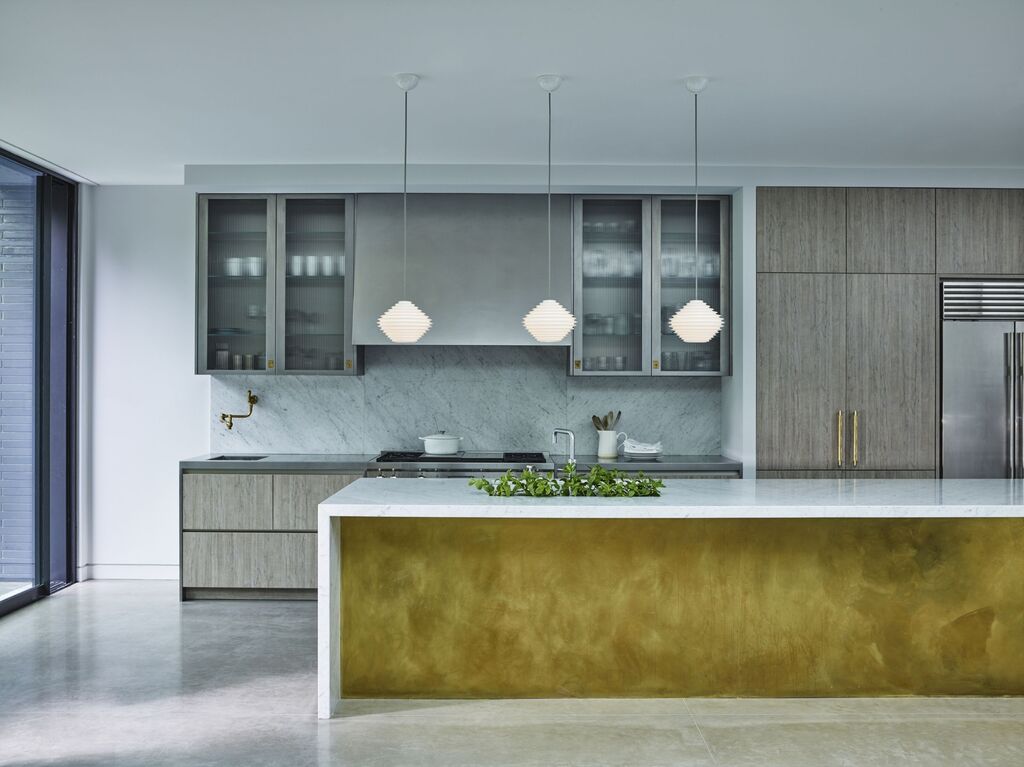
4. Marvelous Marble
The use of marble in kitchens imparts a sense of luxury to the space. It can be well-matched with complementing metal finishes like gold or brass.
Choosing neutral-toned marble can be matched with bold greens or blues to make the design even more appealing.
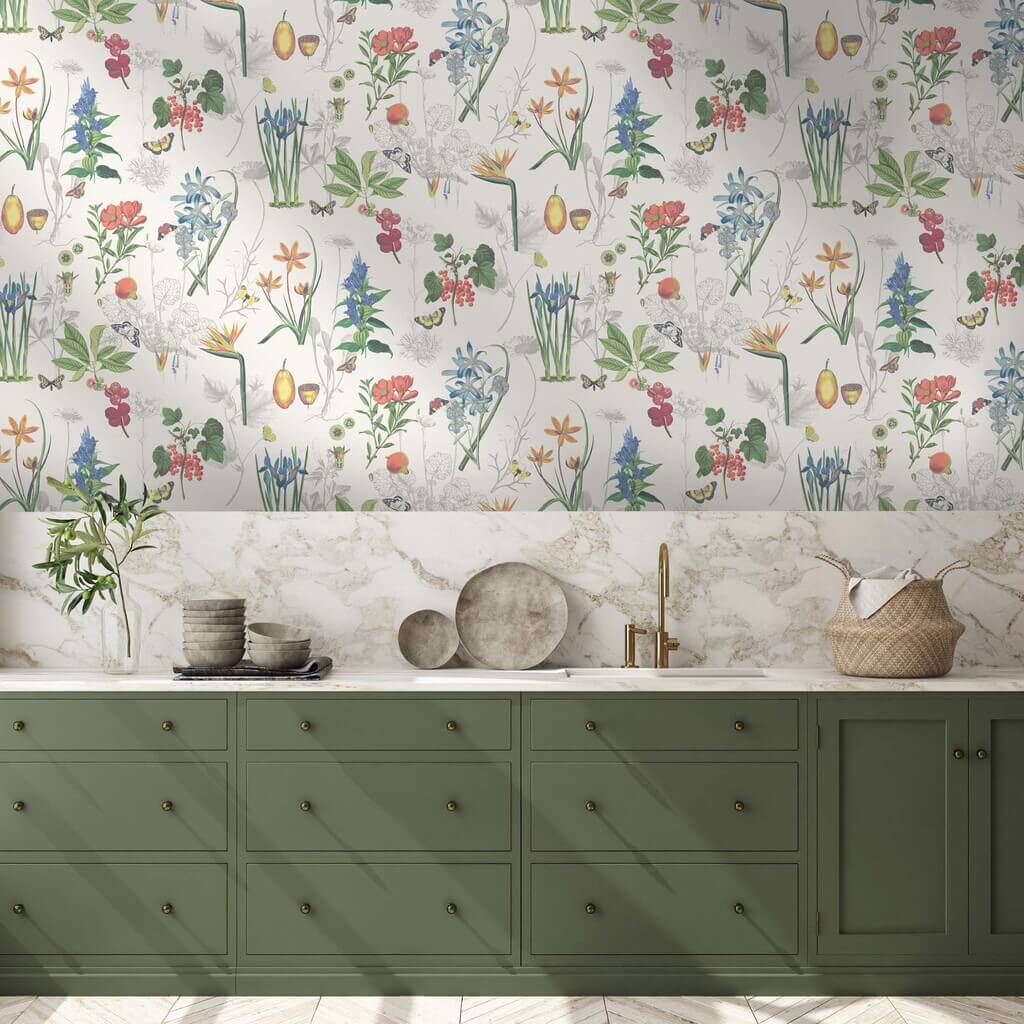
5. Wallpapered Kitchens
Adding wallpaper in the kitchen is a great idea as the latest innovations have come up with designs that fit well in a kitchen atmosphere and conditions.
These wallpapers can be coated with matt varnish and can be sealed on all the edges to prevent them from wearing out soon.
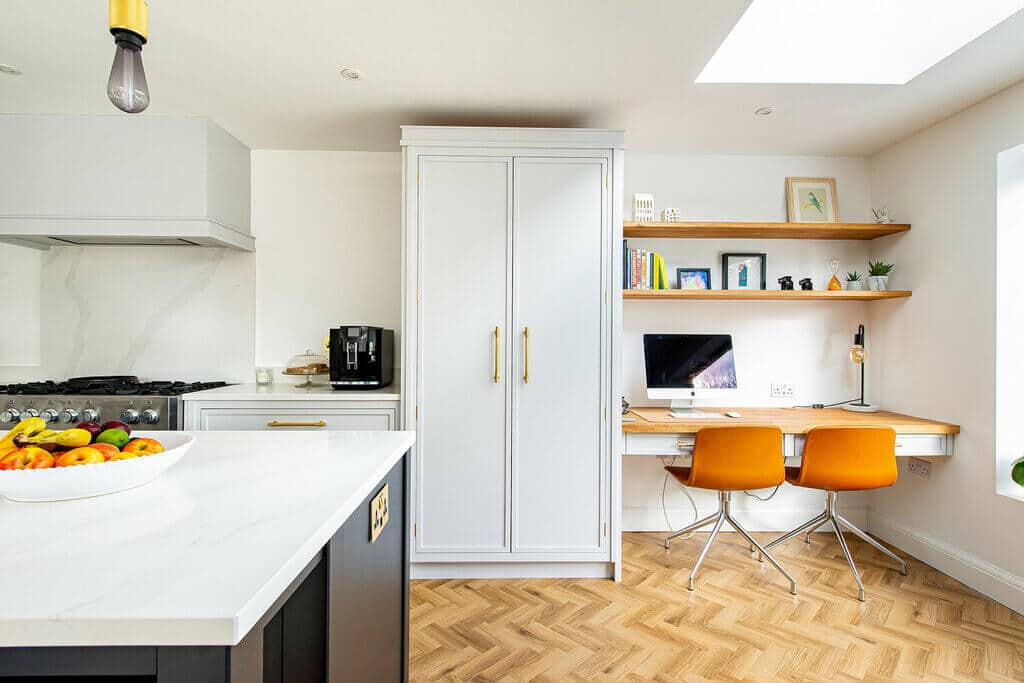
6. Kitchen Office
As the need for having home offices has observed a surge in the past year, designers have come up with a creative solution for that.
A kitchen can be used as an ideal office spot with a neat space set in a quiet corner.
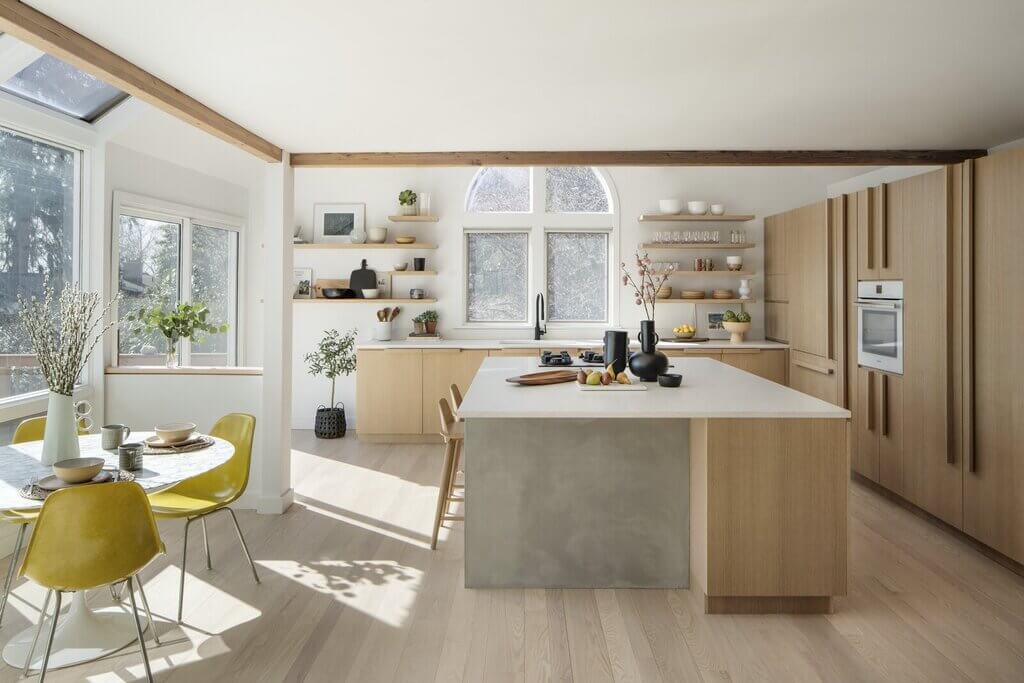
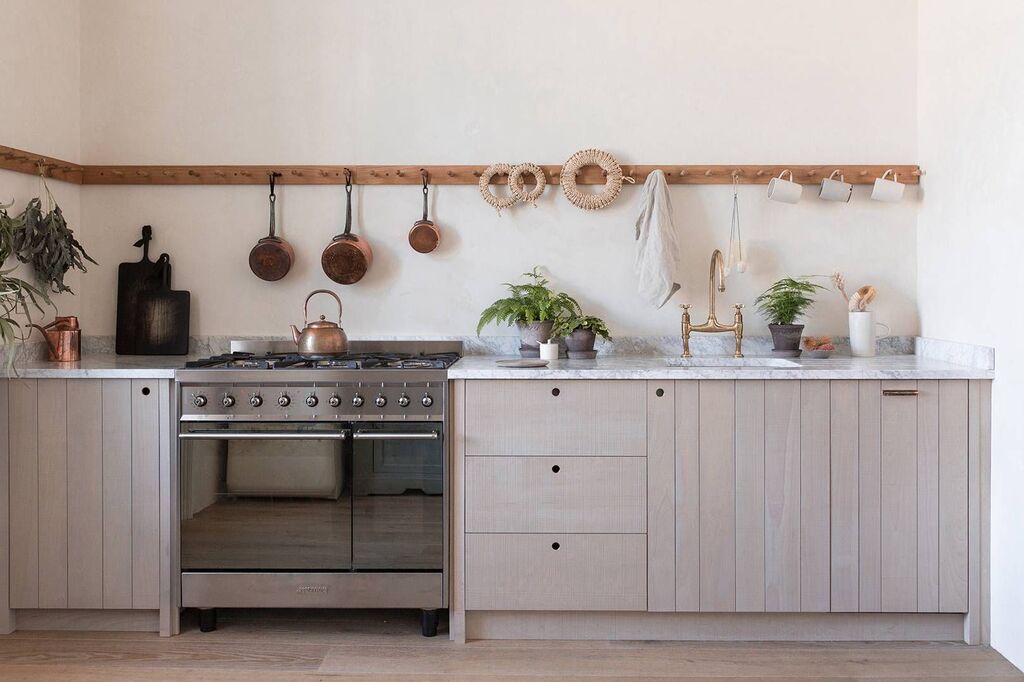
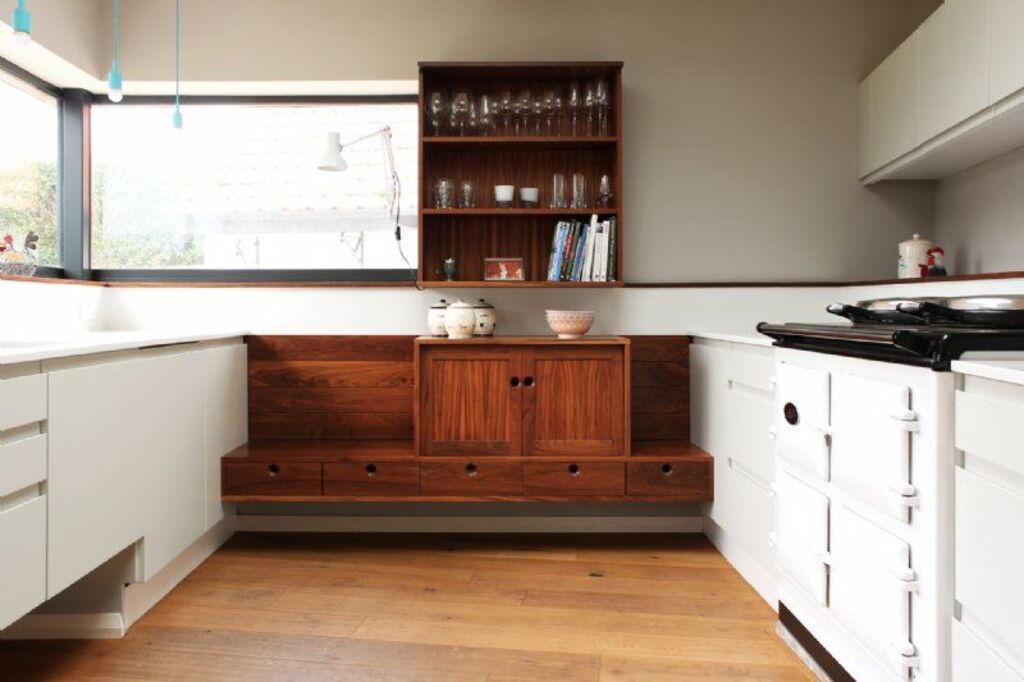
Wooden kitchens are not new in the market, however, with the latest design and creativity, it has made its way on the hot list for kitchen design trends.
From wooden finishes to newly introduced textures and treatments, these designs form a relationship with nature and offer a comfortable space.
8. Smart Kitchens
Smart appliances are getting even smarter with the coming innovations in technology. These majorly influence the kitchen design trends that are making their way to the market.
There are endless possibilities to incorporate hi-tech appliances in the kitchens. From boiling water taps to smarter versions of them, you need to keep your kitchens up to date with these products.
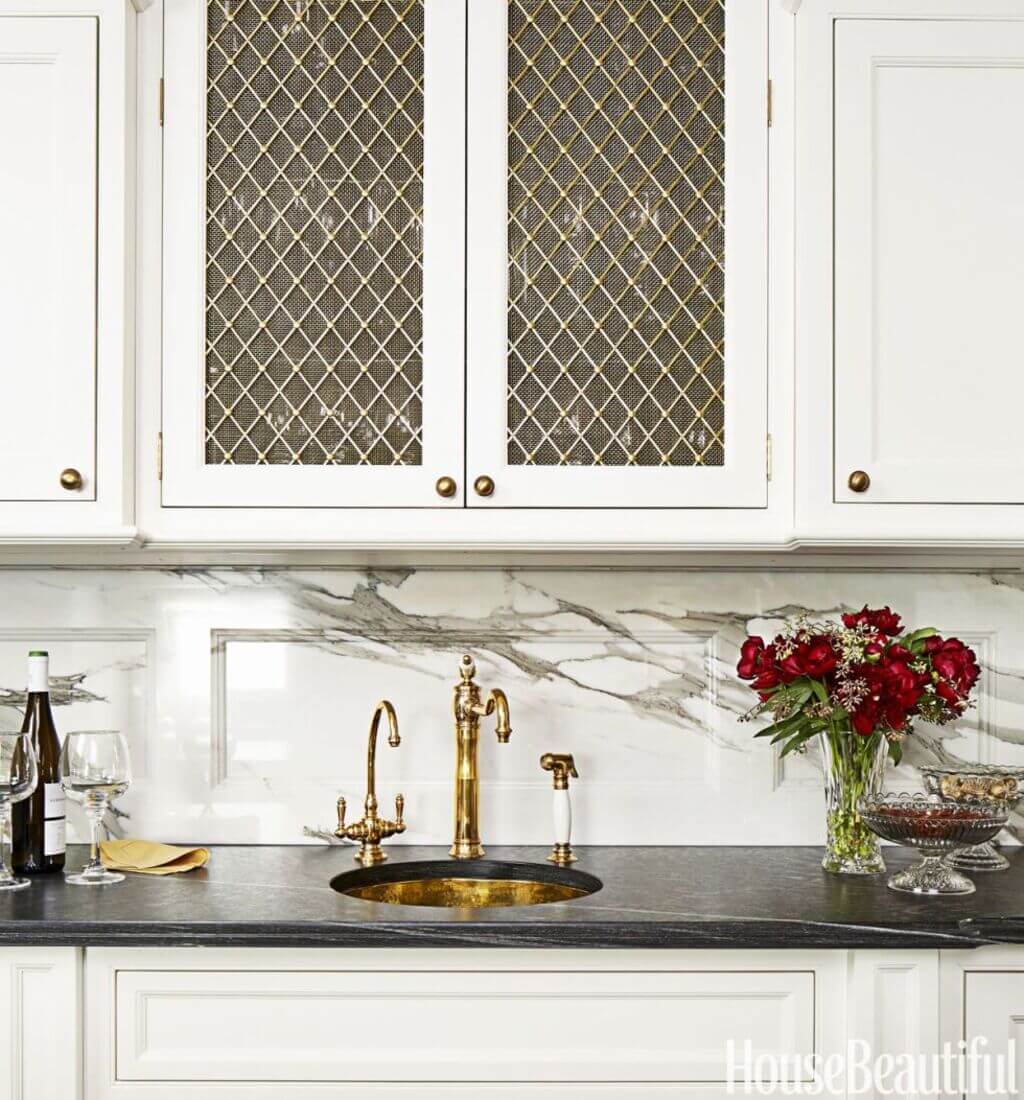
9. Meshy Cabinets
As metallic touches are highly trending, cabinet units can be added with meshed fronts. These offer a pleasing combination with solid units without making them look overbearing or heavy.
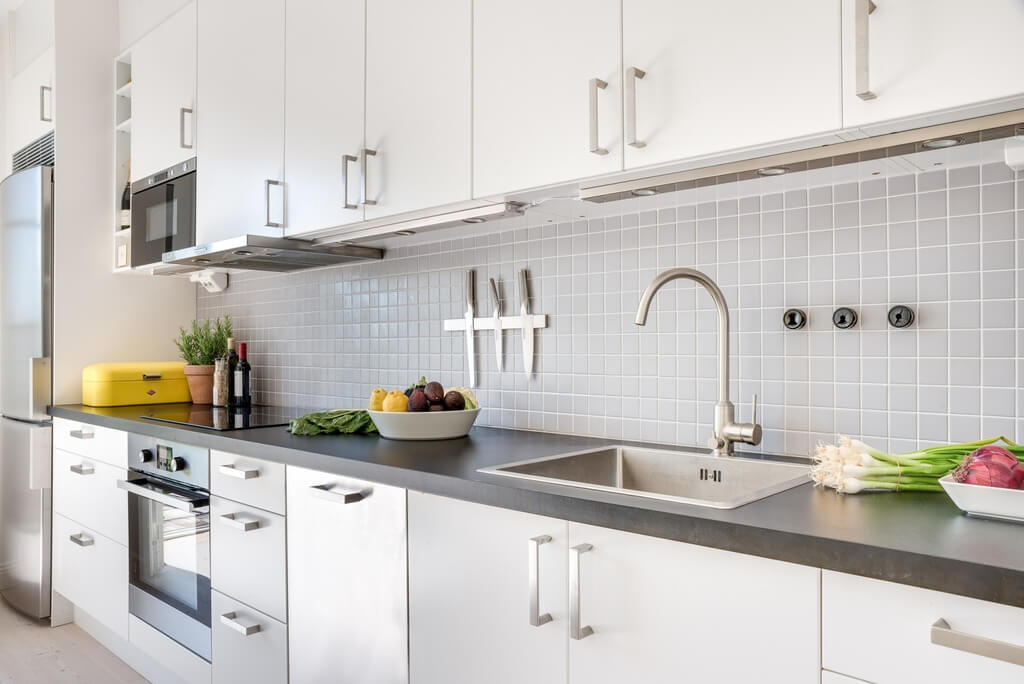
10. Simple and Minimal
Sleek, minimal designs offer a clutter-free area with neat lines. The straight lines with polished details in the kitchen can offer a serene space that may be used as a retreat zone from the daily hustle-bustle.
11. Headed towards Sustainability
Sustainability has seen a sharp acceleration in the green kitchen designs. This concept can be achieved with various eco-friendly steps while designing.
From sustainably sourced materials to A-rated equipment, sustainable kitchens are the best kitchen design trend to go for.
12. Mismatched Furniture
Taking a different road in the designing, mix and match kitchens offer a combination of various furniture finishes. This offers a creative appearance to the kitchen with a new vision for the furniture selection.
Old cabinets can be mismatched with modern metallic looks to impart a unique look.
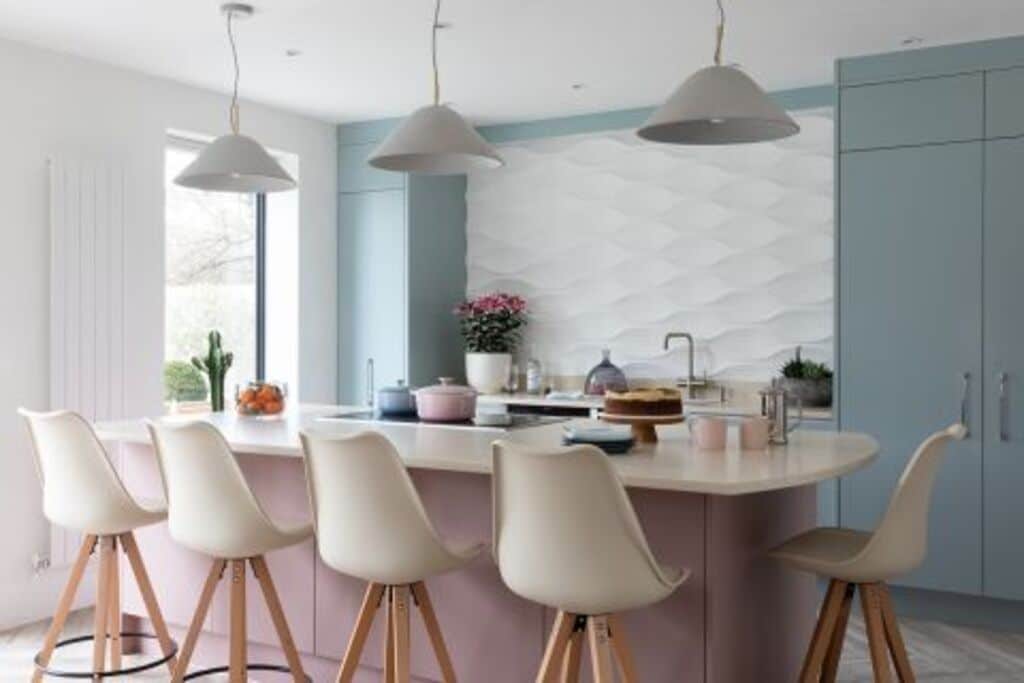
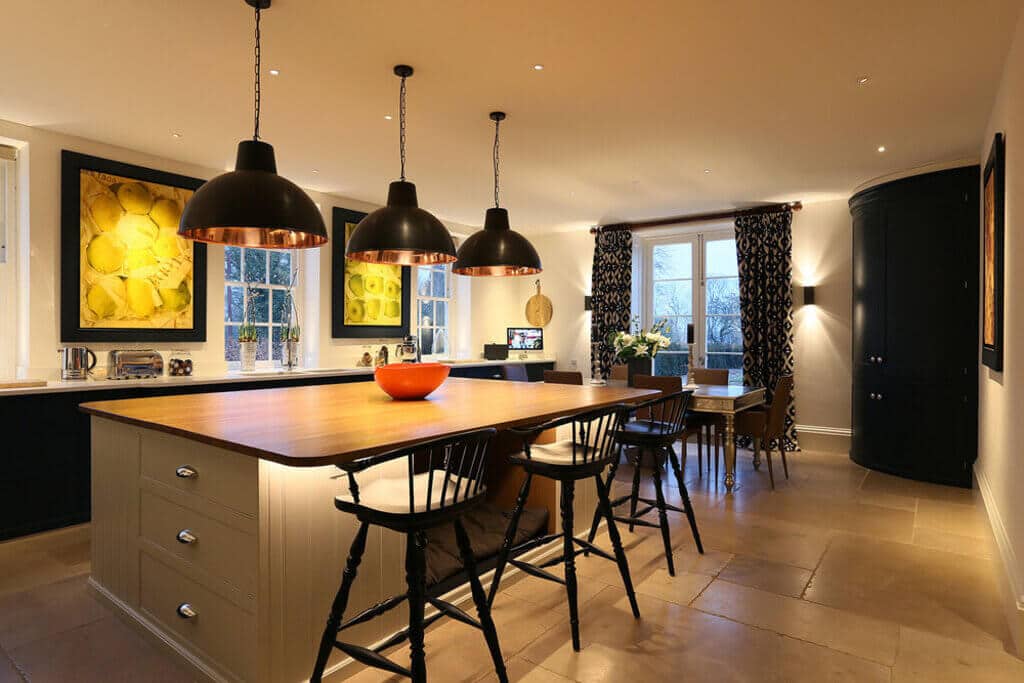
13. Lighting Making a Statement
Lighting is recognized as a crucial design element in kitchens. Being neglected for years, good statement lighting is leading the kitchen design trends. The lighting needs to be practical for efficient working and at the same time, it can impart extraordinary aesthetics.
Kitchens can be ornamented with pendant lighting or dangling pieces with a metallic coating.
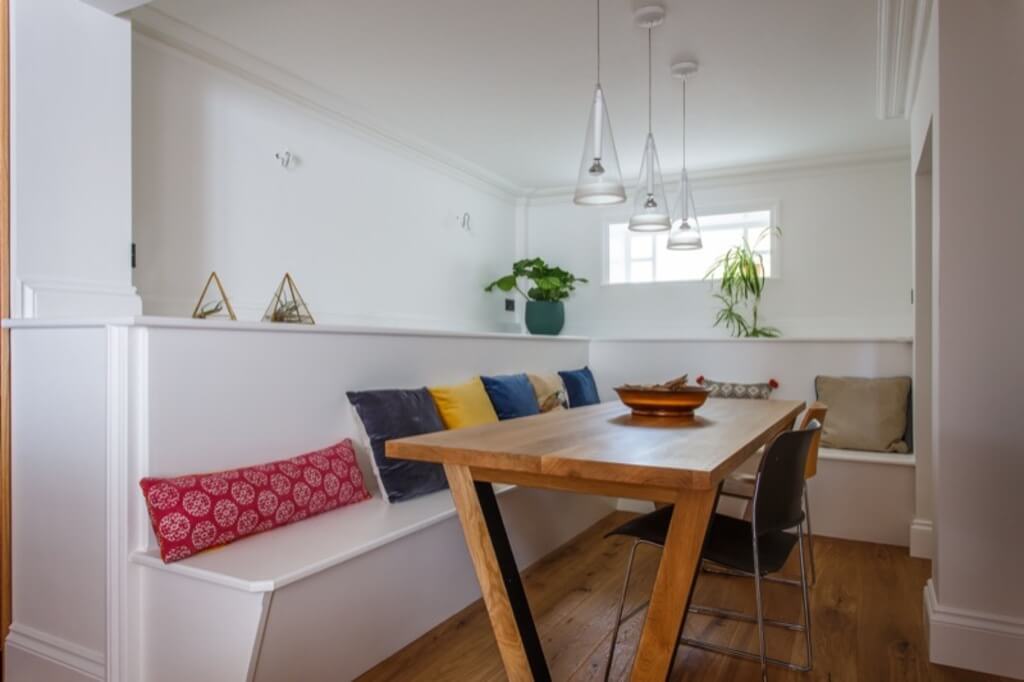
14. Built-in Dining
The open design allows the incorporation of dining spaces in the kitchen which makes the area for the kitchen large. Creative dining booths can be added in the kitchens to make the best use out of the allotted space.
15. Walnut Kitchen
Walnut kitchens are the best contemporary designs to add warmth and character to a kitchen. These designs ensure a modern space with natural finishes. These can be complemented with plain white or metallic and burnished surfaces for bespoke decor.
16. Glamorous Gold
From copper, brass to now gold, metal touch in a kitchen has slowly paved their way. Gold, stainless steel, and brushed nickel surfaces in kitchens are quite stylish and evergreen trends.
These are added by omitting marble in a few places to add a lavish and glamorous look to the kitchen.
17. Metallic Units
The limited use of metallics in kitchens like brass and other bold metals has now transformed into kitchens gleaming this metallic world. Kitchen design trends is about a shiny combination of metallic elements including metal unit fronts.
Gold taps and other reflecting surfaces have made their way into the latest kitchen designs.
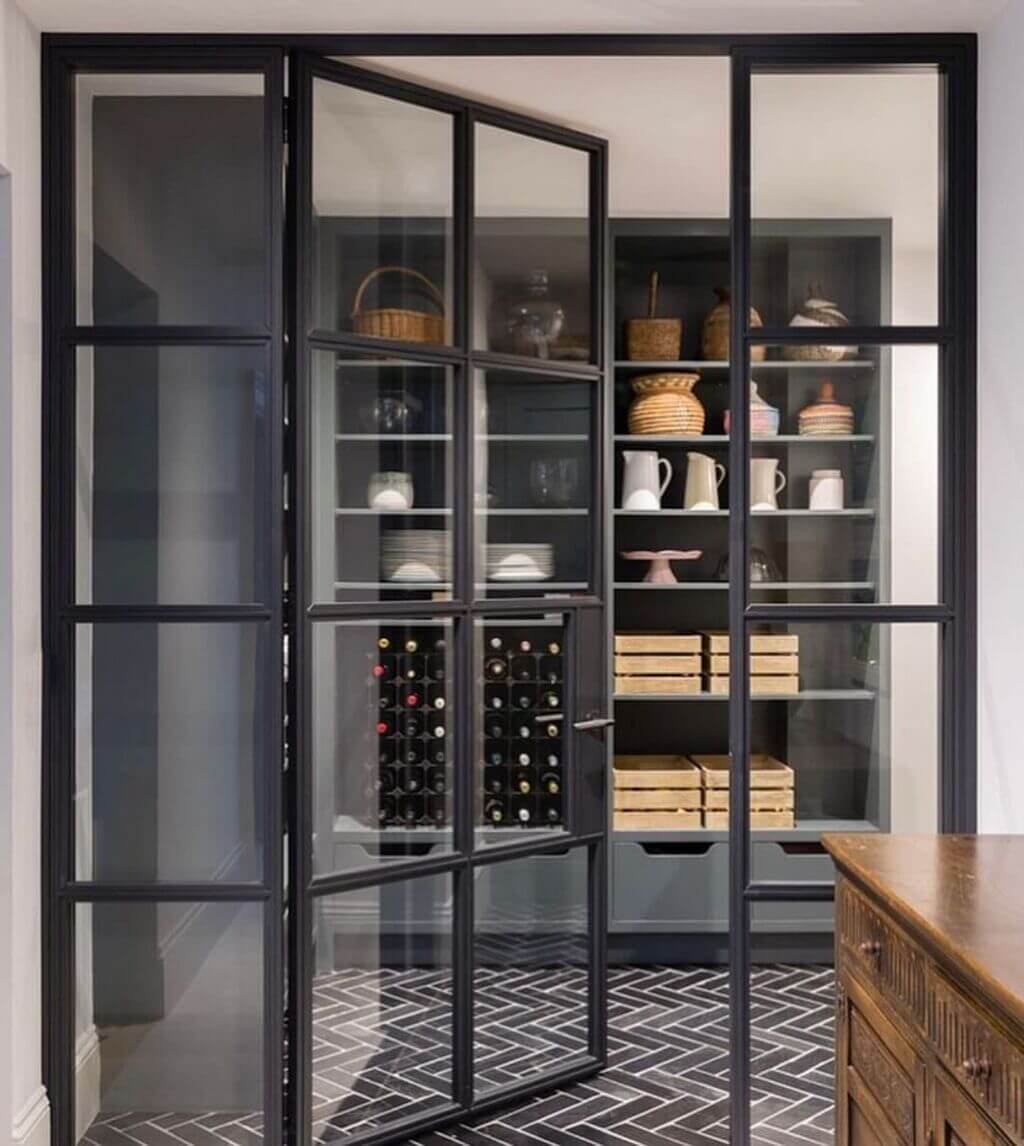
18. Glass Doors to Pantry
What’s more exciting than an organized look with transparency?
Kitchen interior design trends present the idea of separating the pantry with a glass door imparting an industrial look and at the same time making the space look neat.
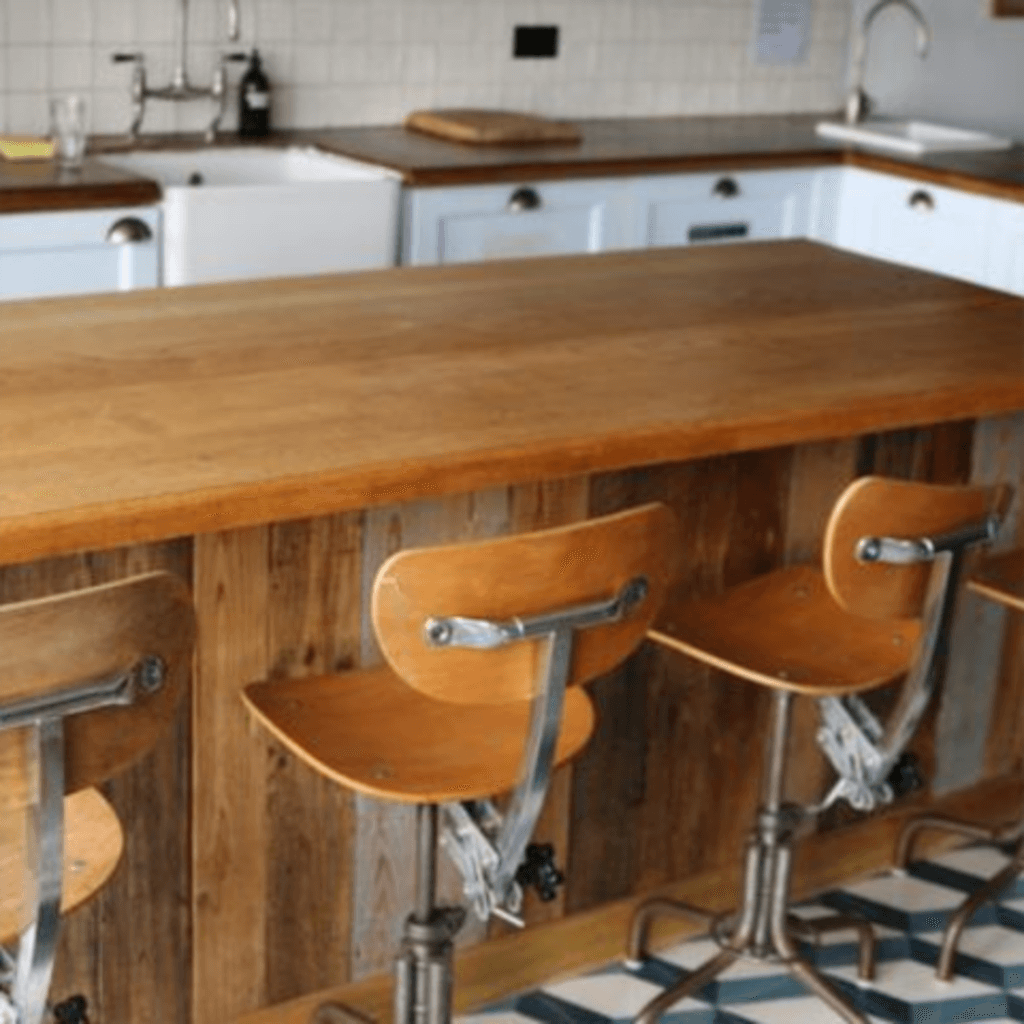
19. Lived-in Appearance
The kitchen design trend offers a space to cook and relax. The concept of multi-functional spaces has led to kitchens that offer a relaxing space as well.
The lived-in appearance is imparted by a wood-burning stove, cozy nooks, great shelving, and seating space. Using natural materials for enhanced aesthetics can make the space even more welcoming and comfortable.
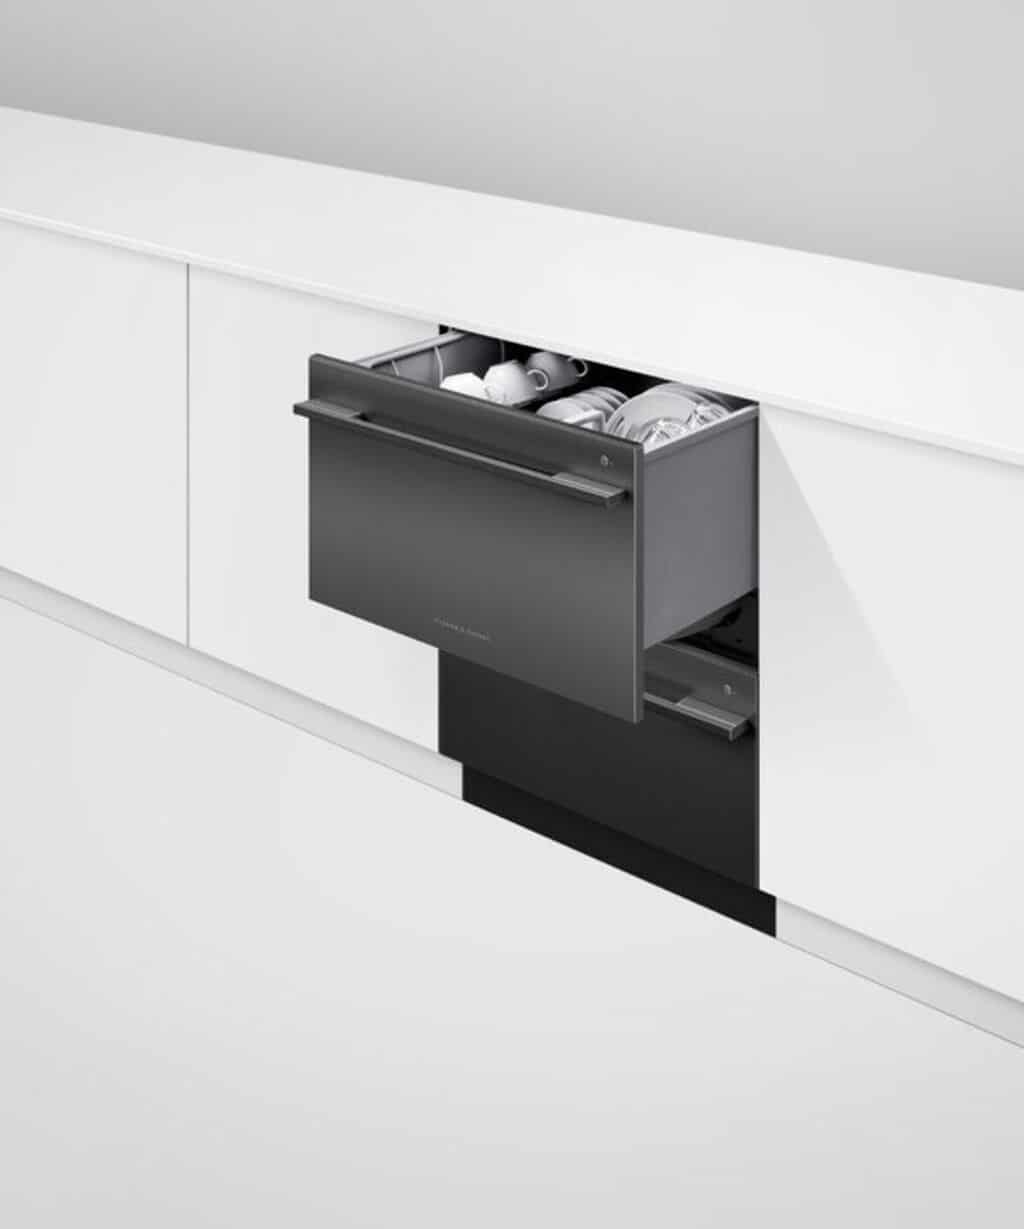
20. Drawer Appliances
A nicely planned kitchen with drawers has sidelines the conventional designs with tall cupboards. Drawers are gaining popularity rapidly in the kitchens with the convenience and comfort they offer.
Appliance drawers started with freezers but now have been upgraded to accommodate dishwashers and other equipment.
All Set to Design as Per the Kitchen Design Trends
These kitchen design trends can highlight your kitchen as a space that brings together friends and family. The sleek and stylish hub can offer a comfortable space with trendy elements.
Practicality and multifunctionality lead the board in the priority aspects while designing a kitchen and a great design can offer flexible space with beautifully appealing aesthetics. These creative trends can offer a kitchen space that can be fun and relaxing.
Breaking the typical notions of a kitchen being a boring area, modern trends offer a design that transforms the kitchen into a retreat. With the latest technology, green vision, and bold use of materials and colors, modern kitchen designs offer an uplifting space in the house.
This curated list can surely help you choose the right design based on your taste and requirements. Go for the style that reflects your personality to give your kitchen a bespoke design or remodeling.
Stained glass can bring dazzling light and vivid colors into any space. While it was originally used in churches, the modern industry has a stunning array of choices for indoor and outdoor decor. Discover six cool ideas to enhance your home or commercial property. Stained glass ranges from massive items to charming little pieces like suncatchers. Panels with flowers stained glass for doors and windows will enhance the decor of any room. The variety of creative options for indoor and outdoor design is astonishing. Consider the following ways to use stained glass.
1. Doors
Upgrade your doors to allow natural light to flow inside. Stained glass panels will let you have the necessary level of privacy without sacrificing the light, which will be amplified and beautified. A front door with stained glass will enhance the look of your property.
Flower patterns like cherry blossoms or canaries on a lemon tree look particularly impressive. Owners of Victorian-style houses can preserve and emphasize the vintage look of their properties by opting for Art Nouveau or Mackintosh designs.
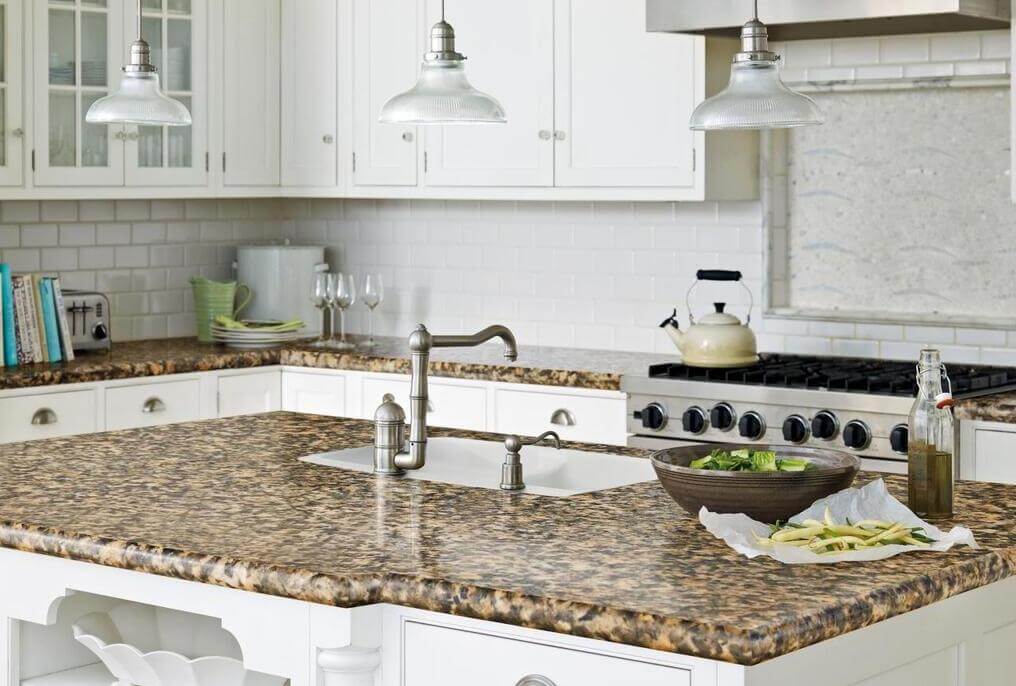
2. Kitchen Backsplash
This is a great and affordable way togive your kitchen a fresh look. It will add color and visual interest. In comparison with other common materials, such as stone, metal, or ceramic, stained glass provides the same functionality at a lower price.
Pick the patterns and colors matching your kitchen interior to achieve aesthetic elegance. Popular designs range from geometric shapes to landscapes to flower patterns. The backsplash will protect your wall from food stains and damage, and it will also be easy to clean.
3. Windows
Windows with stained glass elements give an impressive look and unique character to any indoor space. You can personalize them to tell a story or show a design aligned with your interior scheme. A perfect combination of colors will convey the right mood and enhance visual interest. Besides, you will still get the necessary privacy.
Contemporary homeowners choose from a stunning variety of flower designs, landscapes, geometric shapes, and more. Clear glass options like leaded and beveled glass are particularly suitable for the windows of Mediterranean-style homes. While texture provides the desired level of privacy, bevels make the aesthetic more modern and elegant.
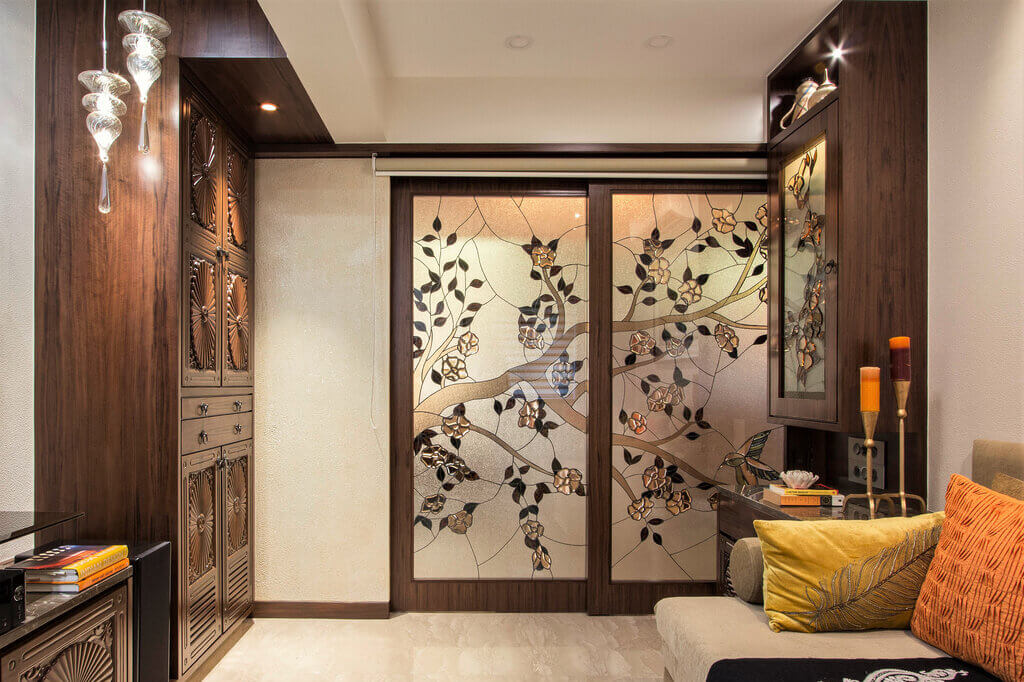
4. Partitions
Divide up your space in style to create multi-purpose areas. Here, stained glass provides the ideal combination of privacy, functionality, and aesthetics. You may opt for something simple like monochrome opaque partitions, or add a personal touch with custom patterns. Some owners choose rectangular or square blocks of different colors, others opt for elaborate designs with flower elements, animals, fruits, etc.
5. Basement Blocks
If you have a basement, consider adding stained glass windows to show a little personality. This will also reinforce insulation, which will result in lower heating and cooling costs. Colored glass blocks and patterns like diamonds are the most common choice.
6. Shower Doors
Taking a shower will be more enjoyable and relaxing if you upgrade the look of the bathroom with some stained glass. All those white countertops and tiles can be boring. Accentuate your space without overwhelming it. The bright colors and light will also boost your mood. You can make the shower super artsy by covering its doors with a flower design from top to bottom.
7. Ceiling
A ceiling adorned with stained glass makes any room, even the smallest and darkest space, seem larger and taller. The optical illusion creates the impression of a boundless space above this glass roof. Such a unique and memorable interior is guaranteed to impress your guests.
If you have a suspended ceiling made of wood or drywall, you can integrate a stained glass window into it and add backlighting. Such inserts are often found in dining and living rooms. Stained glass ceilings are commonly found in restaurants, coffee shops, private houses, and even apartments.
8. Tables
Even a trivial coffee table can become an aesthetic focal point. Add a stained glass countertop to any table! Aside from becoming a stylish decoration, it will maintain functionality. Sand-blasted glass withstands pressure and temperature. Do not be afraid to put something hot on it, or even write on the surface!
9. Add Small Accents
If you prefer something subtle, consider adding slight decorative touches. For example, you could use stained glass for mirror framing or hang decorative pieces from the ceiling. Stained glass lampshades and small fixtures are great for the living room and kitchen, respectively. Delicate accents will give your home a more inviting and luxurious look.