Every evening, every individual looks forward to getting the best sleeping after working throughout the day. No matter how hectic the day was, your bed is an ideal place to have quality rest. But, when you wake up in the morning feeling some back and neck aches, you will lose the happiness and excitement you always get from sleeping. This is a clear indication that your spine is not keeping proper alignment when you are sleeping. The solution for this problem is not visiting doctors every minute, day, or week but using the best Everlasting Comfort Knee Pillow for Sleeping – Hip, Lower Back, and Sciatic Nerve Pain Relief between your legs will improve your posture.
Also, this will promote the quality of your sleep at any time. Continue reading and learn more benefits associated with the use of a pillow between knees when sleeping.
Lessen Muscle Strains and Pressure
Due to several pieces of research done, it has been proved that most folks who sleep on their sides lock their knees or legs together when sleeping. Even though no discovery has been made to confirm that there is anything wrong with this method of sleeping on your bed, but without any doubt, it would help if you use a knee pillow. Sleeping when your legs lock together may cause pressure on your hips and lower back.
What usually happens is that your legs will be pulling your spine. This implies your natural spinal curve is twisted from its normal position. But when you place a pillow between your legs, it helps in reducing the pressure between your legs.
Lessens Sciatica Pain and Varicose Veins
Varicose veins do not look so appealing. The twisted and protruding dark veins may make you feel uncomfortable around other people. Sometimes you may experience pains in the affected area. Also, you may experience swelling ankles and pain, consistent skin itching, and a change of skin color. Some people may feel tired and restless.
To get over all these health problems, it will help if you use a pillow between your legs for your comfort.
Boost Circulatory System
In normal circumstances, you should wake up in the morning feeling strong and energetic. But some individuals wake up feeling numb, restless, and tired. If you have experienced this or the tingling sensation around your toes, it might be caused by poor blood circulation around your body, and the most common one is on your toes.
Conclusion
Circulation works when you are moving around, standing, or sitting in a proper position. For that reason, when you sleep for extended hours without a Knee Pillow; you may have a blood pool in your legs. Also, it implies a lower volume of blood is pumped through your body, so you are only getting less oxygen.
Before retiring to bed tonight, it is significant to ensure you place a knee pillow between your legs in a proper and recommended way, and you will have Everlasting Comfort.
In recent years, elements like natural decors in interior designing and architectural style have become extremely popular. People are now attracting more towards a sustainable lifestyle. After all, following a healthy lifestyle and adding a few natural decor pieces to your home is always an amazing and lively idea. One of the natural furniture that has been trendy for a few months and will be one of the emerging interior design trends of 2022 is the Live Edge Furniture and, more specifically, Live Edge Tables!
Live edge furniture looks stunning in any area of a home. Whether you want to decorate your living room or you’re looking for a table for your dining area, the live edge furniture is the answer! There are endless options in this type of furniture, from live edge table, consoles to bathroom counters and floating shelves. From eating food to celebrating birthday parties, you can use your live edge table for many more occasions.
Do you know every piece of live edge furniture is unique in itself? Yes, custom-made by mother nature, each piece is just as unique as your fingerprints! Isn’t it amazing? However, the more amazing thing about this furniture is that these unique pieces work perfectly with contemporary, modern, and minimalist interiors. Plus, you can also feature or display them in any other space of your home. So, whether you’re looking for some furniture to furnish your home or just want a statement decor piece, live-edge tables will be the best option.
Today in this blog, we’ve gathered up some of the best live edge tables of 2022. From traditional dining tables to modern coffee tables and bar tables, we’ve included every kind of live edge table for you. So, keep on reading and find the suitable one for your home. But first, let’s know more about live edge tables in detail.
What is a Live Edge Table?
Live edge tables come with original surfaces or edges. This means these tables have at least one side; sometimes, both sides are left natural or untouched.
In simple words, in live edge furniture, instead of sawing off the edge of a tree beneath its bark, its original gnarled shape is carefully preserved.
The remaining edges or sides are milled down to simple straight planes. Later these slabs are used to make live edge furniture like tables and benches. By doing this, the live edge tables get a raw and edgy look.
Live edge style incorporates various planes of the wood’s surface, including wormholes, bark, wood grain, etc. Unlike the traditional and regular finished tables, live edge tables bring the natural lines of the tree into the living space. Without making the space too congested or bulky, it brings the appearance of the outdoors inside from its unique design and style.
Are you excited to see the latest and stylish live edge tables? If yes, keep scrolling!
9 Trendy & Stylish Live Edge Table Ideas
Live edge desks and tables are available in various sizes and various kinds and shades of stain. From mid-century, contemporary to modern and bohemian style, you can find every type of live edge table in the below list. You can also select the one with a hairpin or metal legs to create an industrial and bold ambiance. So take a look at these live edge dining room table and other furniture ideas for your home and office:
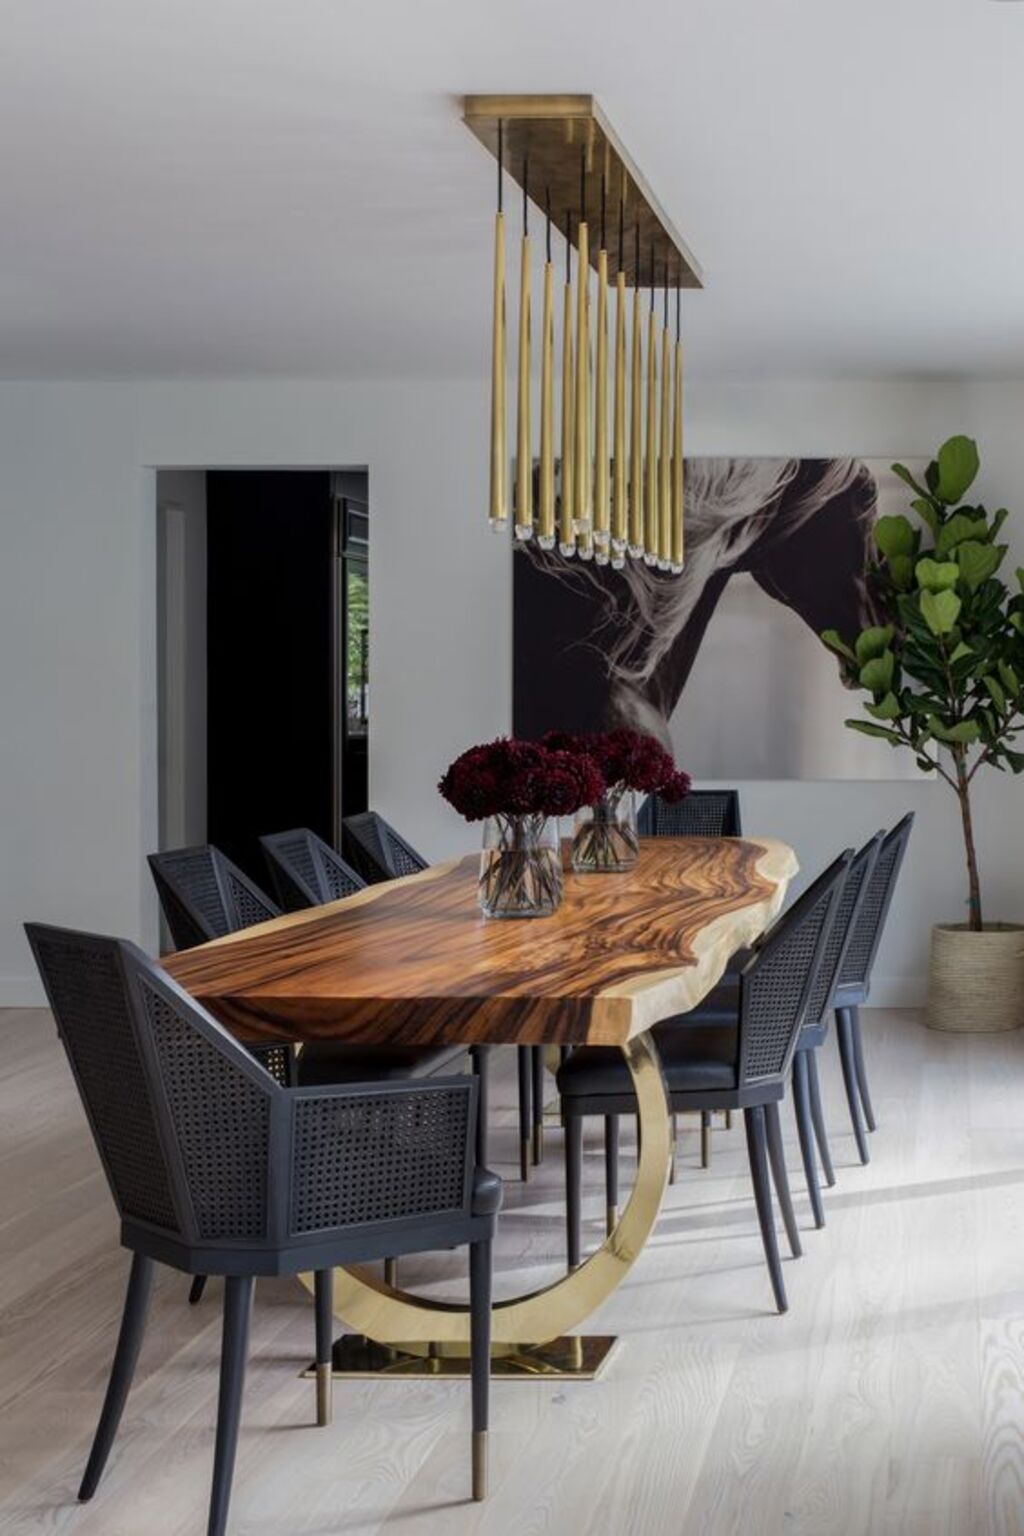
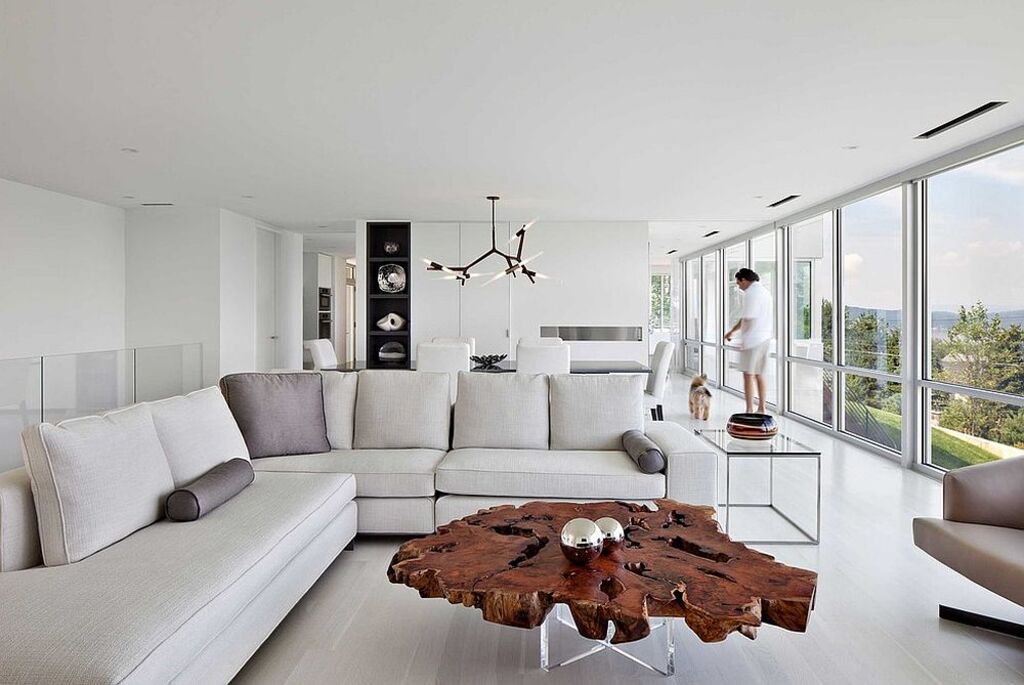
1. Modern Live Edge Dining Table
Provide an upscale addition to your plain dining room with these types of modern live edge dining tables. This table looks super elegant and adds a modern touch without catching too much attention towards itself. You can either go with matching dining chairs or pick the black geometric chairs.
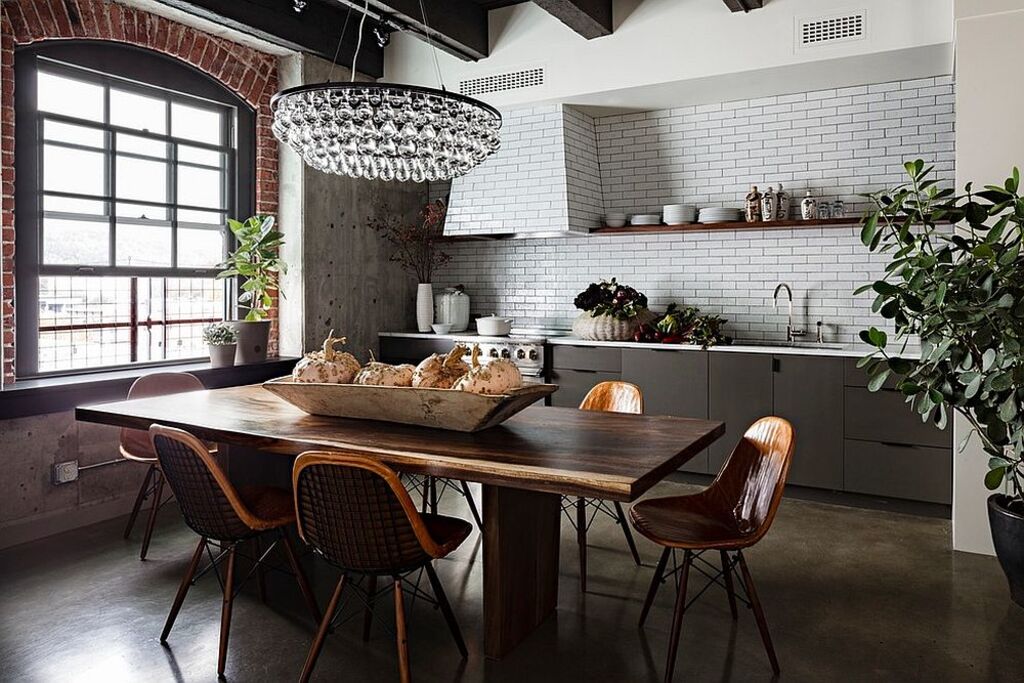
These types of live edge wood dining tables are perfect for open spaces. When the kitchen and dining area are combined, sometimes it is challenging to decide the right furniture for the space. However, picking these live edge tables will gracefully blend both the kitchen and dining space altogether. It will also bring the embedded luxury from its original design and looks into the room.
You can easily decorate it with any kind of interior design and style. This single piece of furniture makes the ideal boardroom table for corporate spaces looking to bring luxury and originality to their offices.
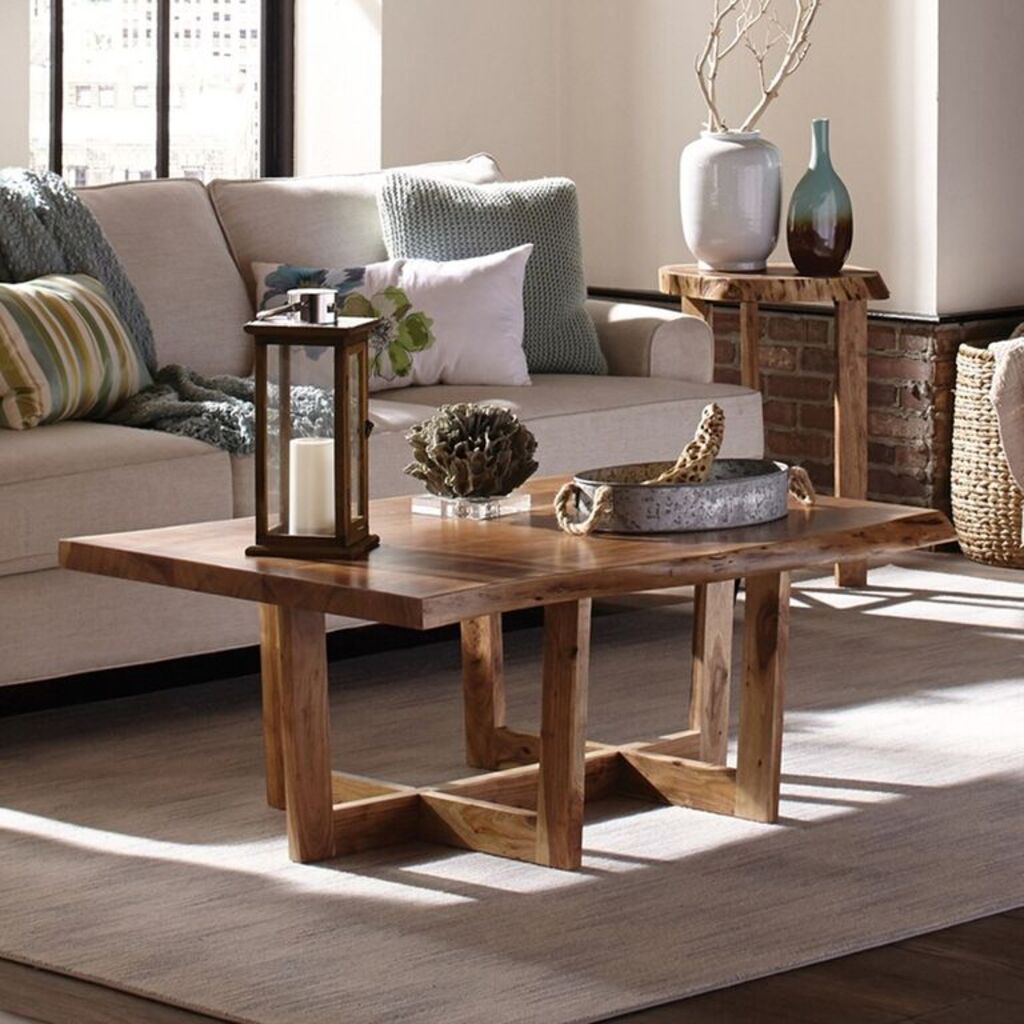
2. Berkshire Natural Live Edge Large Coffee Table
Are you looking for a replacement for your old coffee tale? Get home this modern and sleek live edge table. This table is from the Alaterre Berkshire brand, and it is made from gorgeous natural Acacia wood.
Apart from its shiny live edge sides and finished surfaces, its legs are pretty unique. Solids legs are in an unusual design, and no two live edge tables will be exactly alike. This is because the subtle imperfections such as knots and cracks in the wood surface are unique in every table.
This rectangular-shaped table provides ample space to put all your stuff like tv remote, food, and drinks. You can also display many home decor, books/magazines, or electronic devices on it. Another benefit of this table is that every table comes with nylon floor protectors. So, it will protect your floor from any type of furniture marks or scratching.
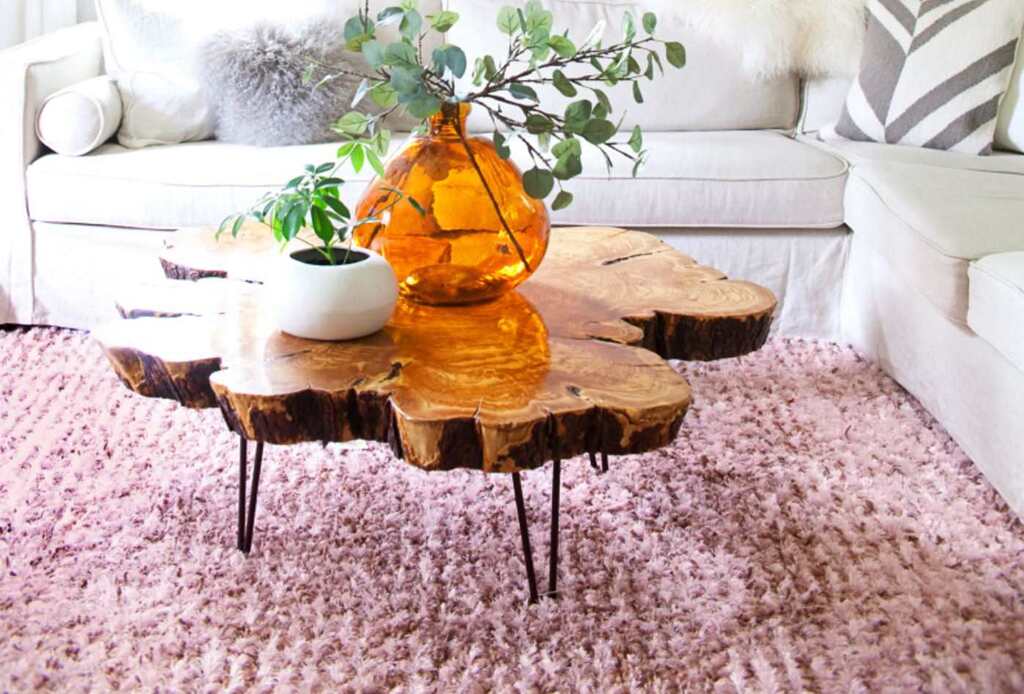
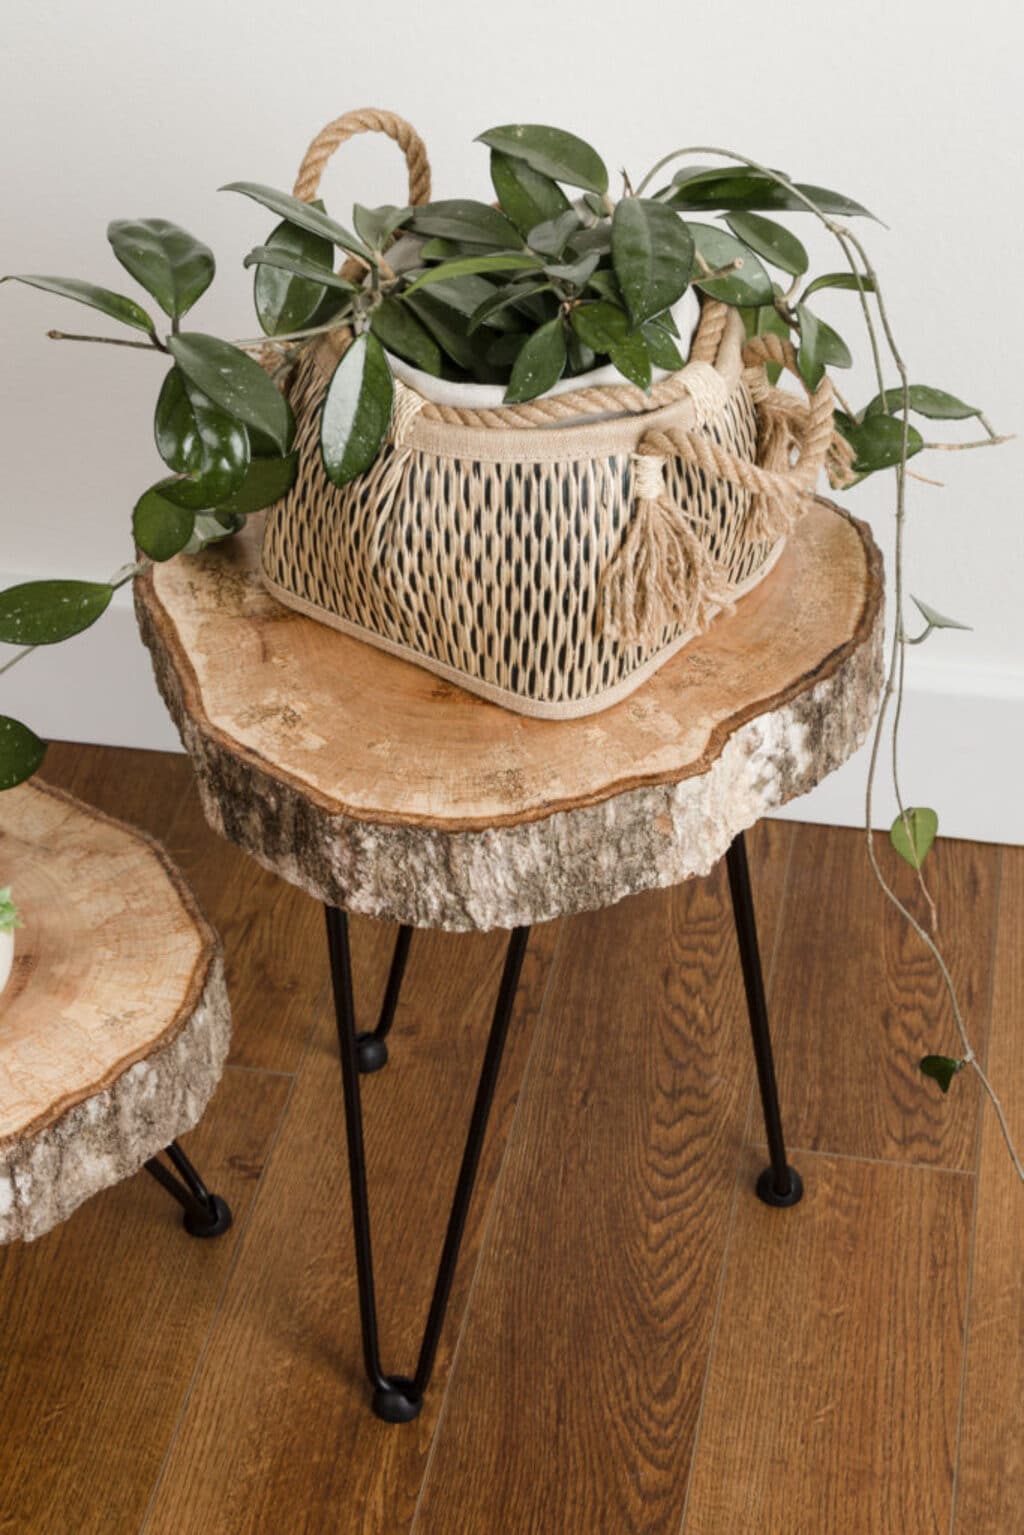
3. Tree Slice Coffee Table
Are you looking for a unique furniturepiece for your living room? Here’s another great coffee table option for you. Look at this live edge table; it’s not a regular table that you can find in any store or shop. It is uniquely designed and crafted by the designers.
These types of live edge tables are also known as tree slice tables or natural tables. They’re a solid cut piece of a tree trunk. With the black hairpin legs, this amazing table will add a chic and stylish touch to any room.
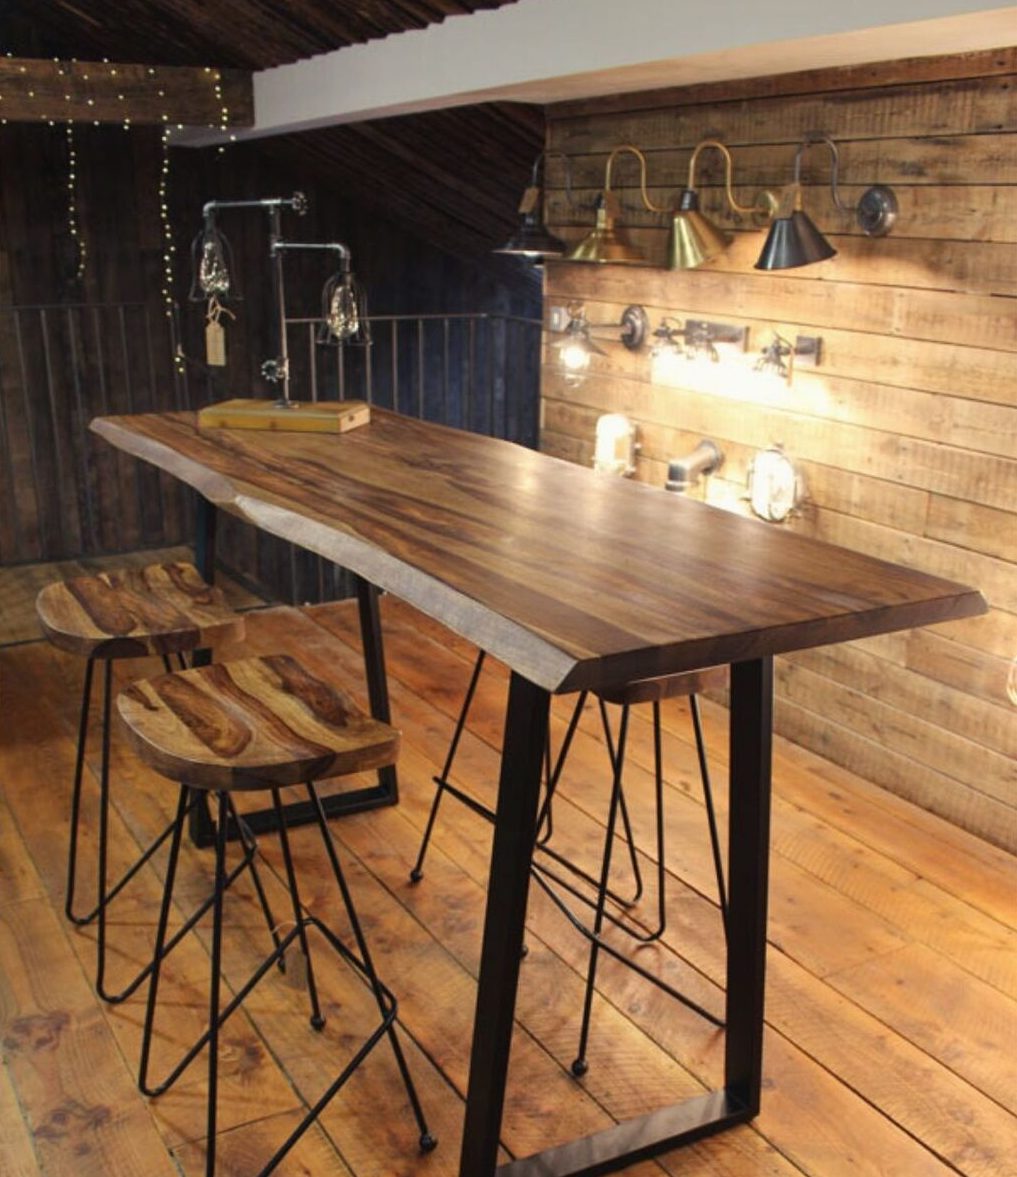
4. Live Edge Wood Bar Table
If you’re looking for some bar or counter tables for your kitchen, live edge tables can fulfill your dream! Yes, look at these stylish and trendy bar tables. From small to super large-sized, you can get these tables in any size.
Another interesting thing about this table is its hairpin legs. Here the super-sized, bar-level hairpins have been used for this large bar table. These types of legs will offer a modern and chic look to your space. Available in many shades, finishes, and colors, you can buy the one according to your interiors and decors.
So bring home this trendy bar table and have a fun time with your family and loved ones.
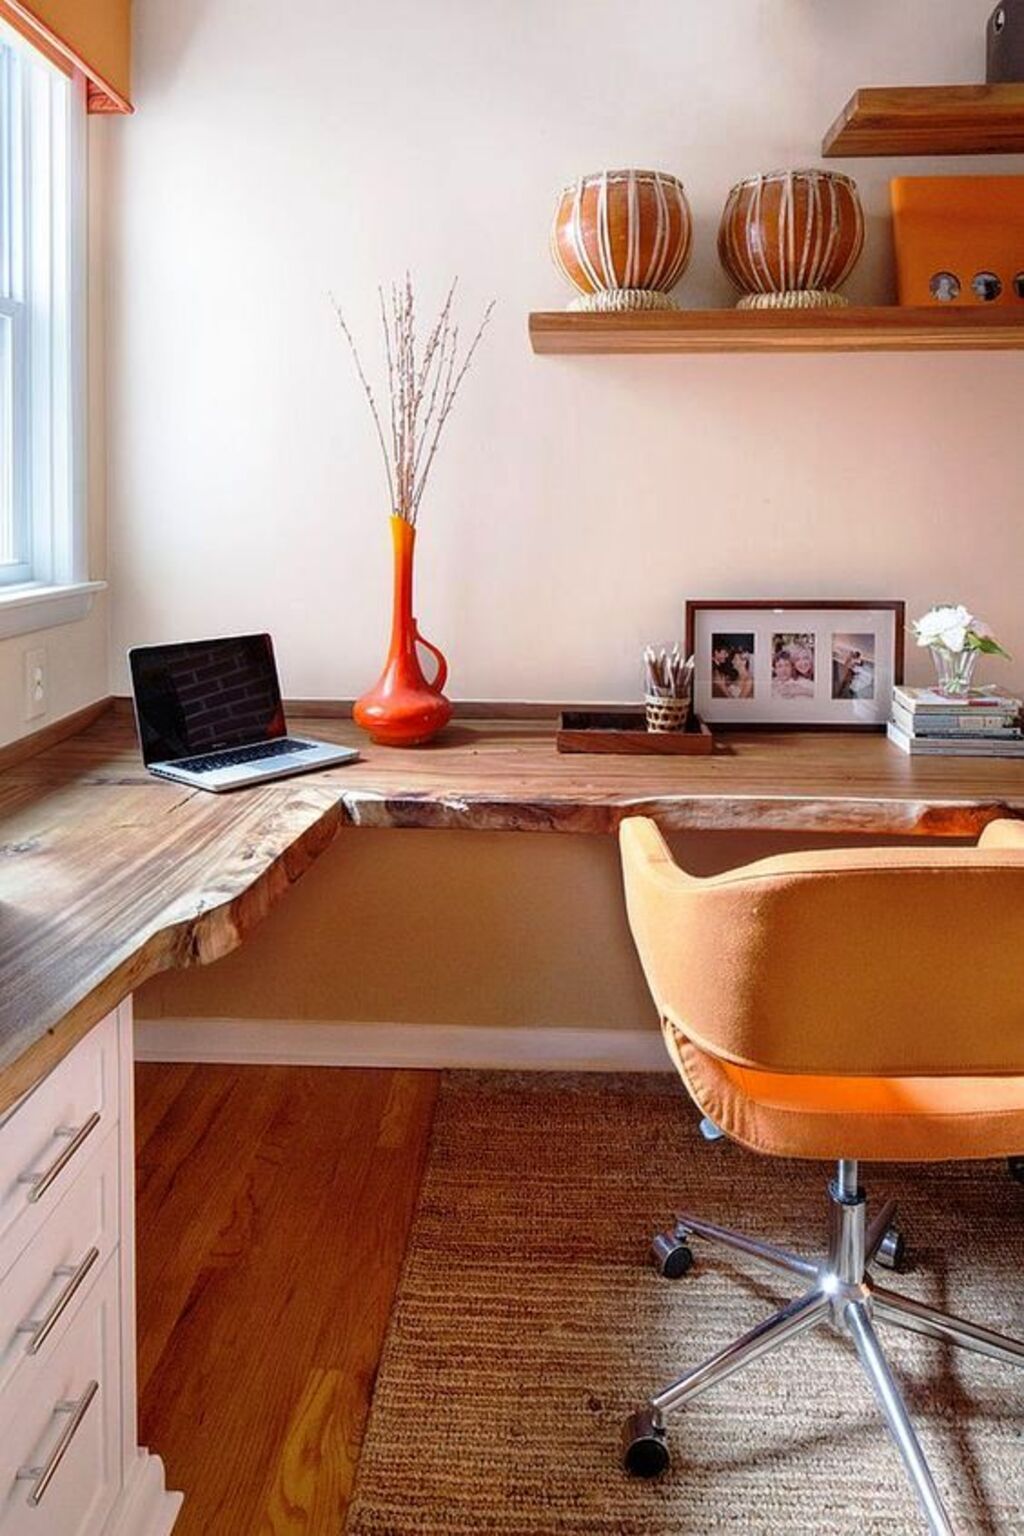
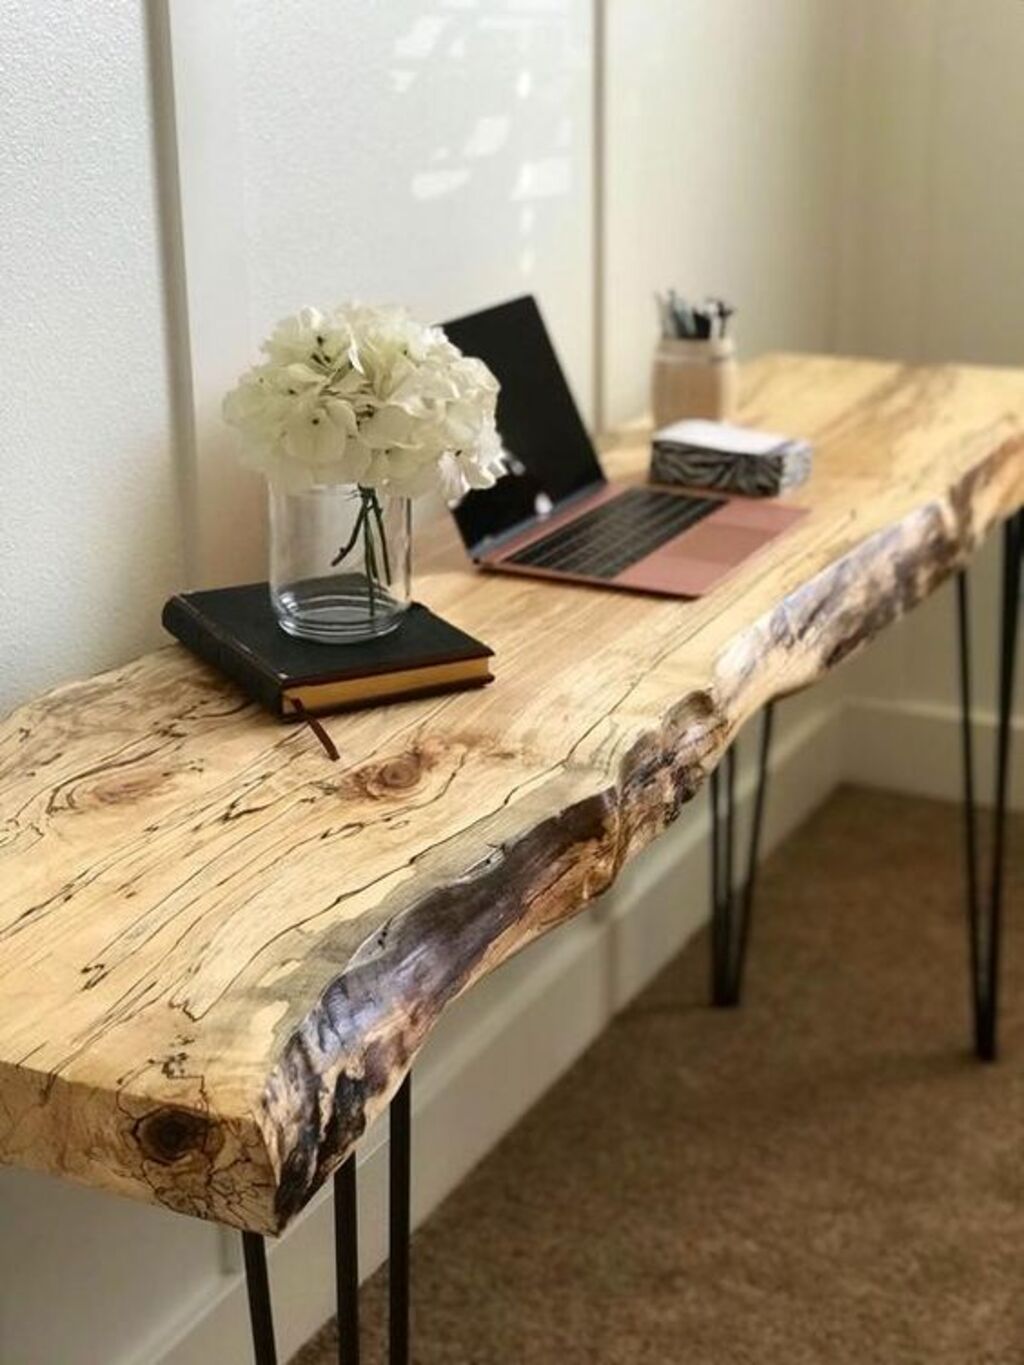
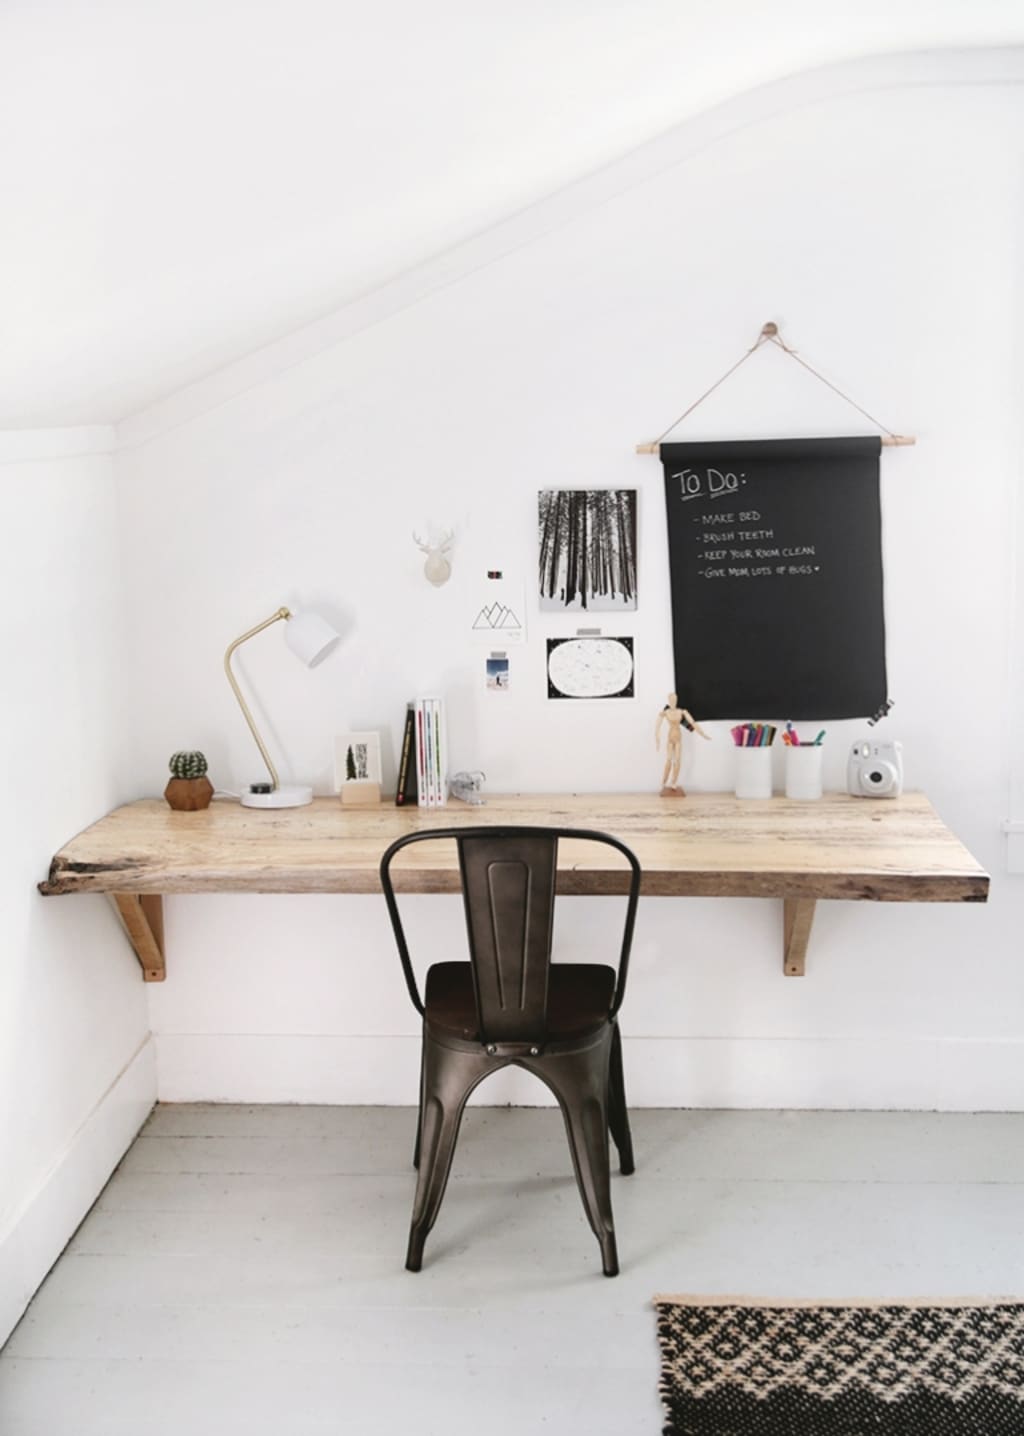
5. Live Edge Working Desk
Since the pandemic happened, people have started working from home. These days, more and more people are preferring this idea over regular office going jobs. Nowadays, working space has become a necessity rather than an optional space to have. So, if you’re also working from home and looking for a decent-sized table, you can buy these live edge working tables.
From L-shaped to regular rectangular tables and foldable ones, you can get live edge desks in any size and shape. They look aesthetically pleasing and also provide a comfortable space to work on.
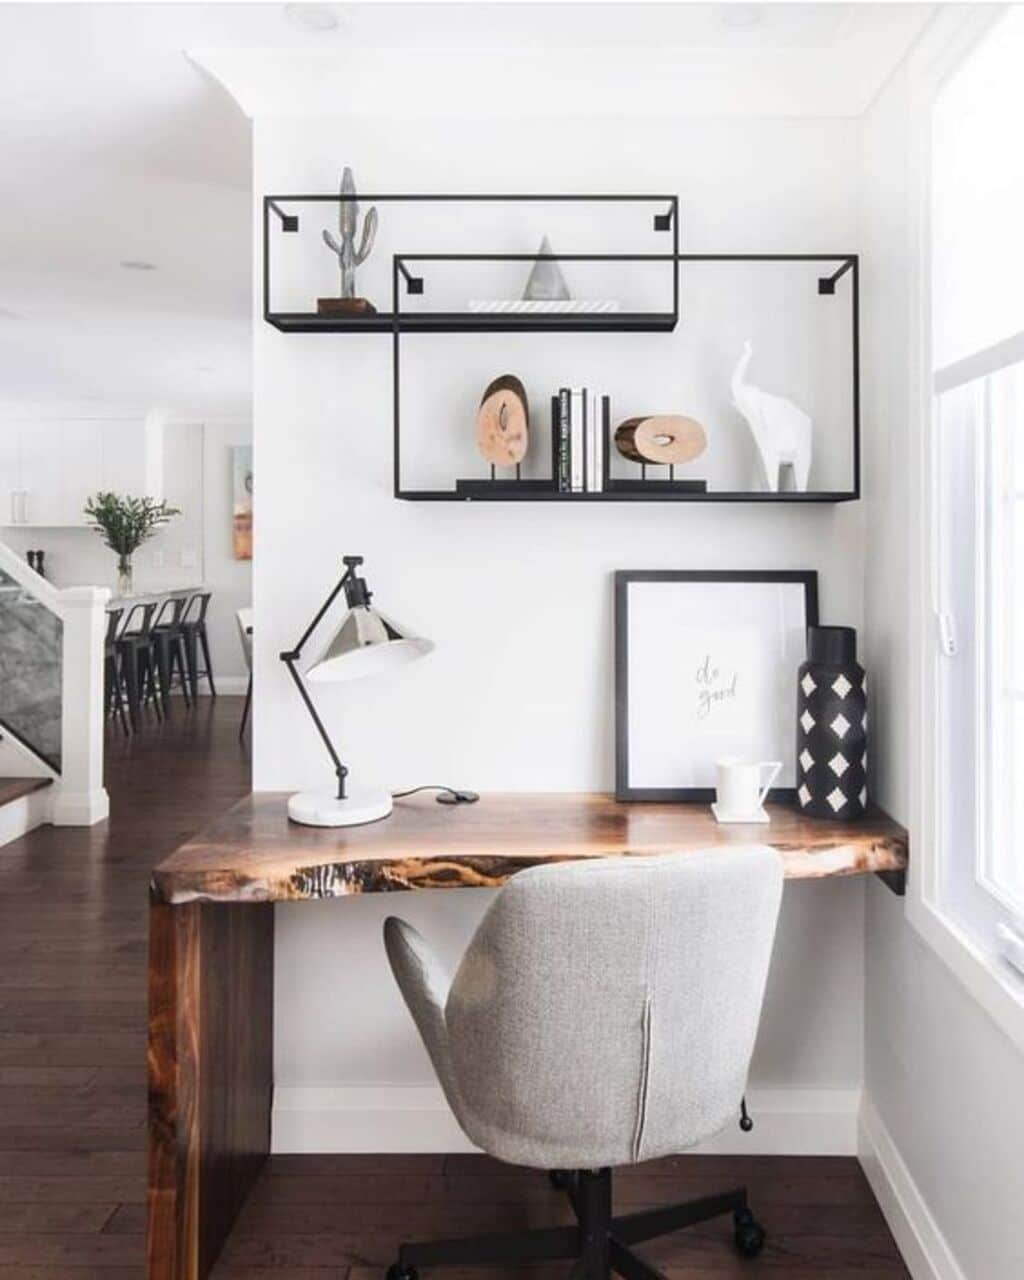
Look at the above table; you can buy something similar as per your space and work requirements. For example, for a mid-century modern look, you can get a live edge corner wooden desk with white drawers with mustard touches for a stylish and functional home office. On the other hand, for an industrial and edgy look, go with a small wall-mounted live edge wooden desk.
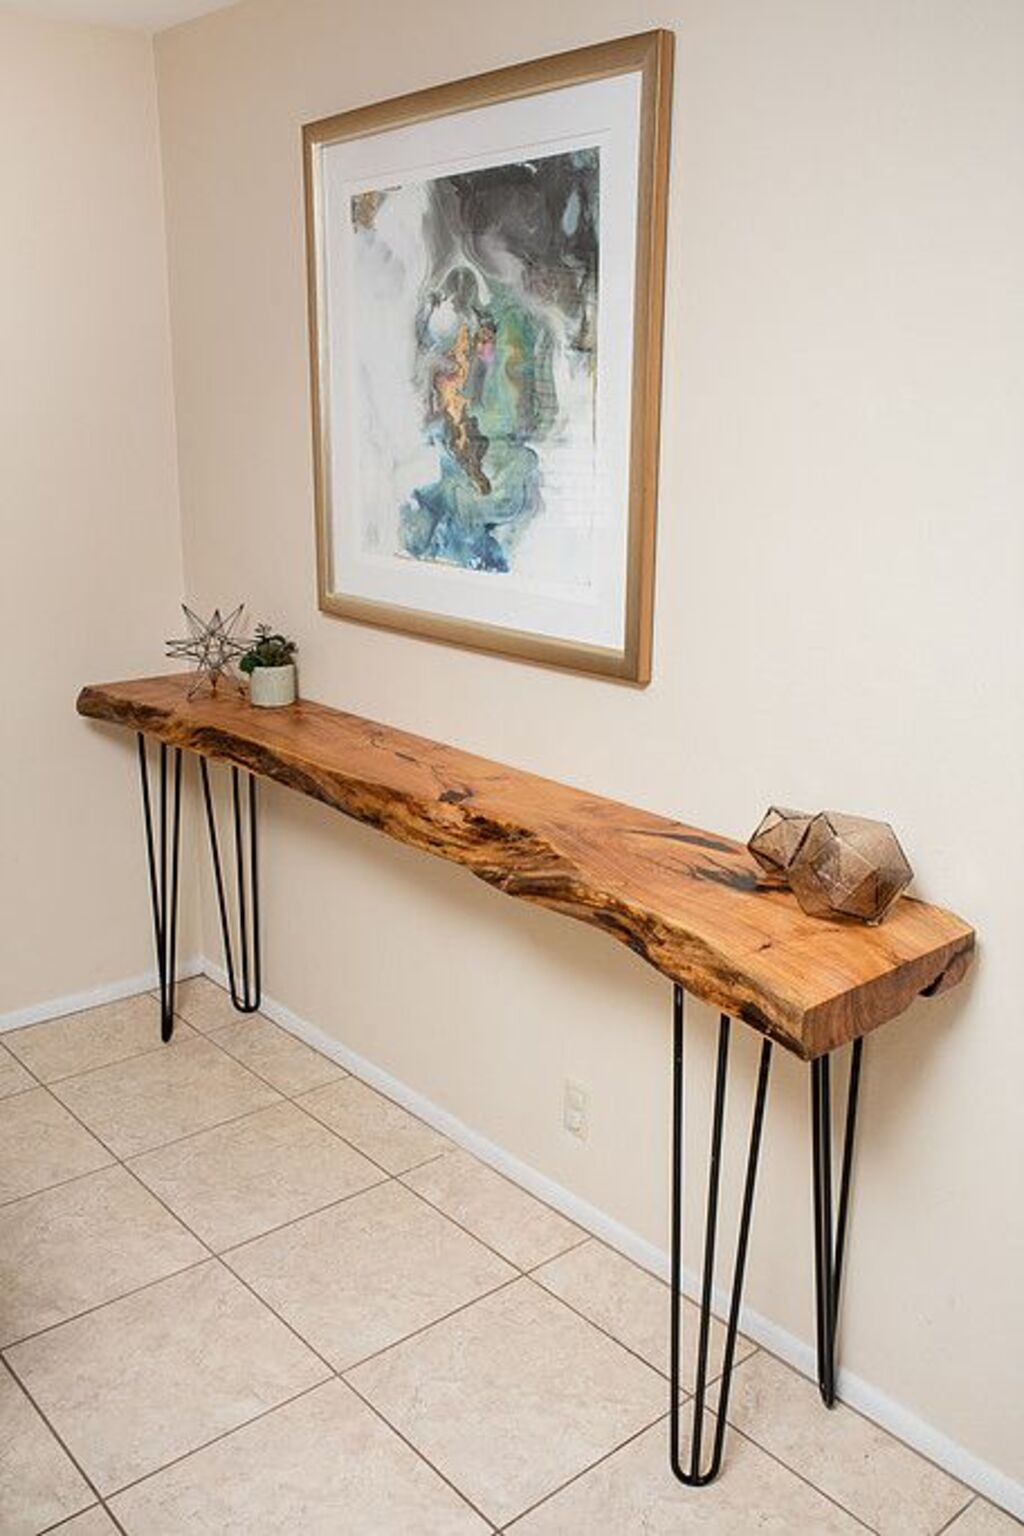
6. Live Edge Console Table
Add some drama and elevate the overall look of your entryway with these sleek live edge console tables. It’s a very important part of the house. After all, this is the first thing that your guests will notice while entering your home. So, you have to make this space special and give the right impression to your guests and visitors.
Not only in your entryway, but you can also put these live edge console tables in your hallway and passages. Look at the above table ideas, isn’t a great way to spice up any space? You can go with the sleek entryway console with a live edge and contrasting metal legs. This will provide a contemporary look with the latest style.
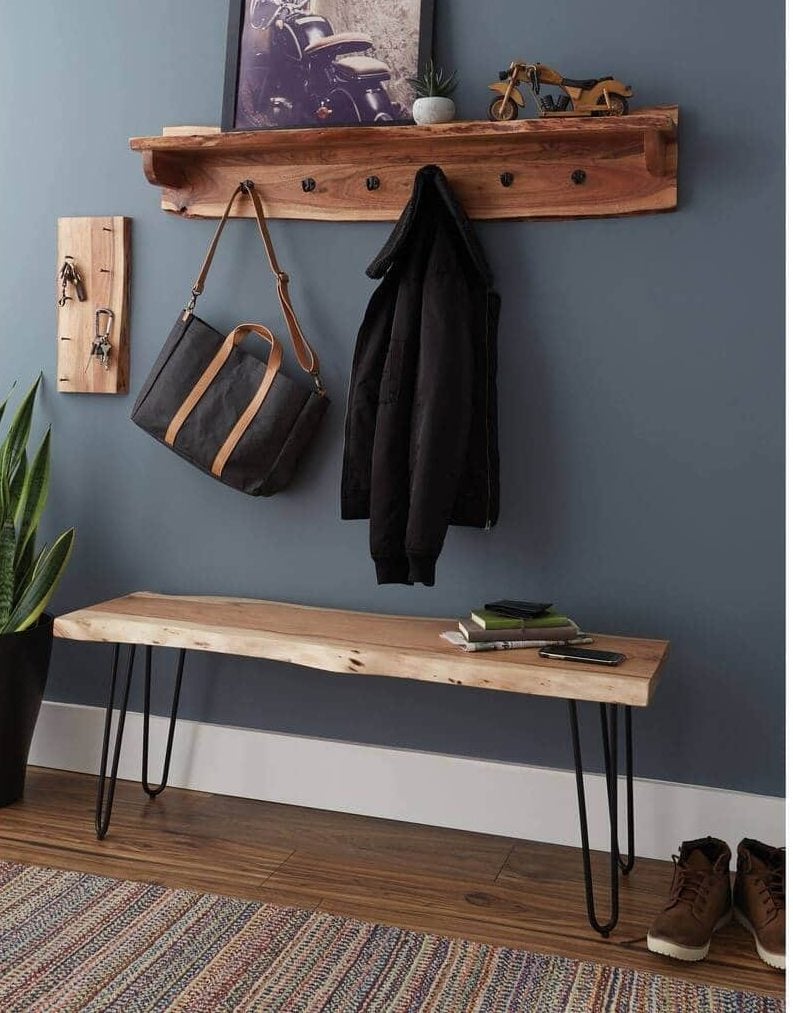
7. Hairpin Leg Live Edge Tables
Why go for simple and boring ones when you can get the latest and fashionable live edge table with hairpin legs! This is one of the increasingly popular leg styles these days. You can include various types of live-edge tables such as side tables, stools, bar tables, coffee tables, and dining tables.
Live edge tables with hairpin legs look so sleek and streamlined. They’re perfect furniture that complements a range of design styles. Look at the above pictures, see how beautifully hairpin legs have been used in different sizes and types of live-edge tables.
From outdoor ideas benches, console tables to dining tables and stools, you can include hairpin legs in any kind of live edge table. They’re also perfect for using both indoors and outdoors.
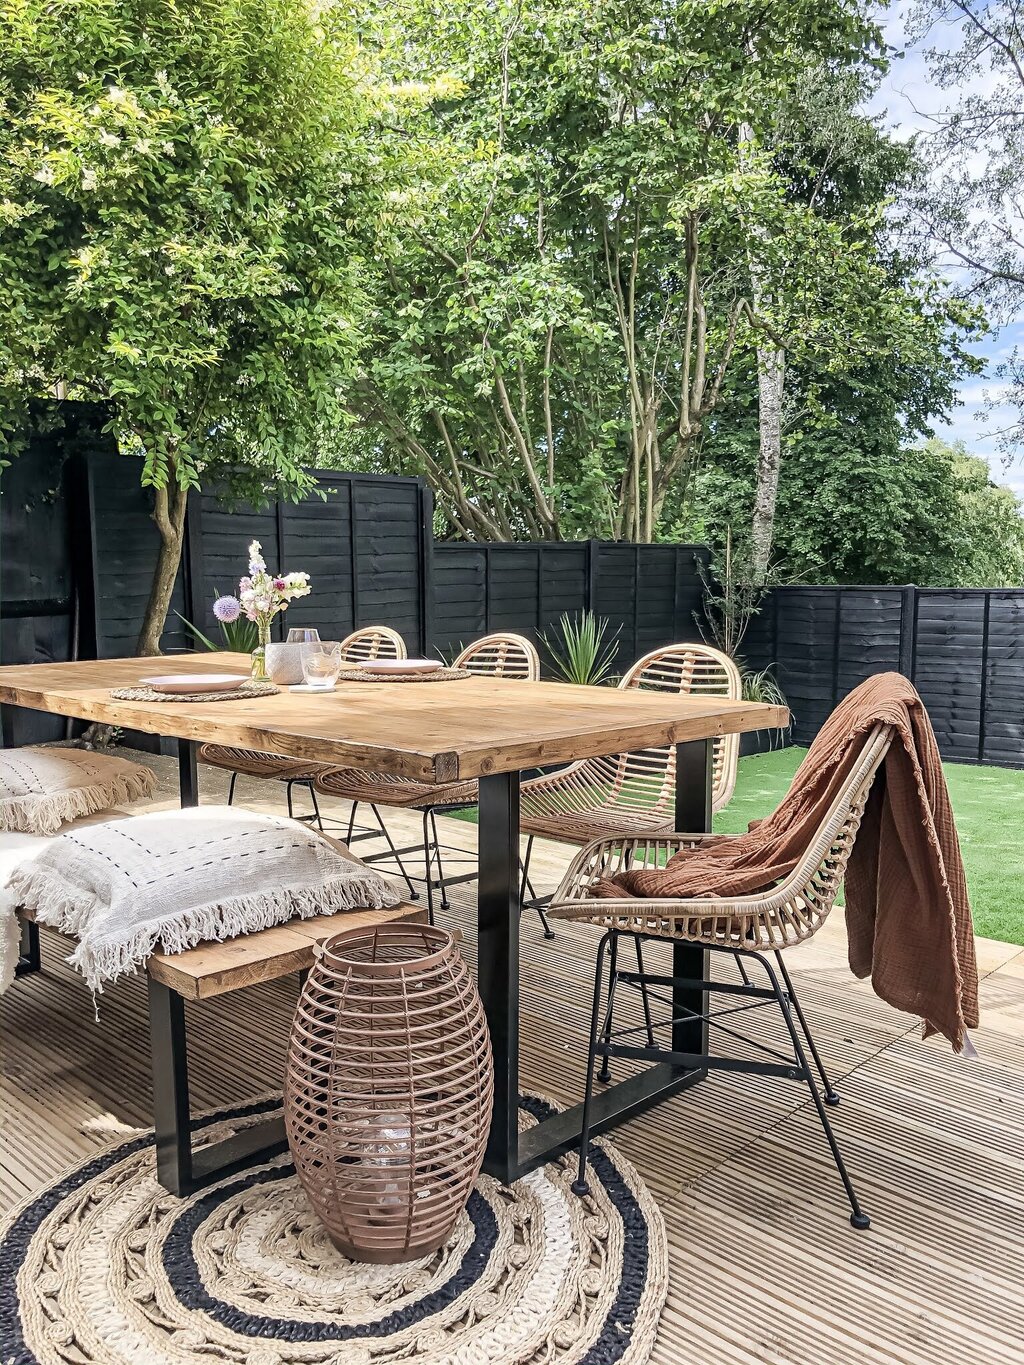
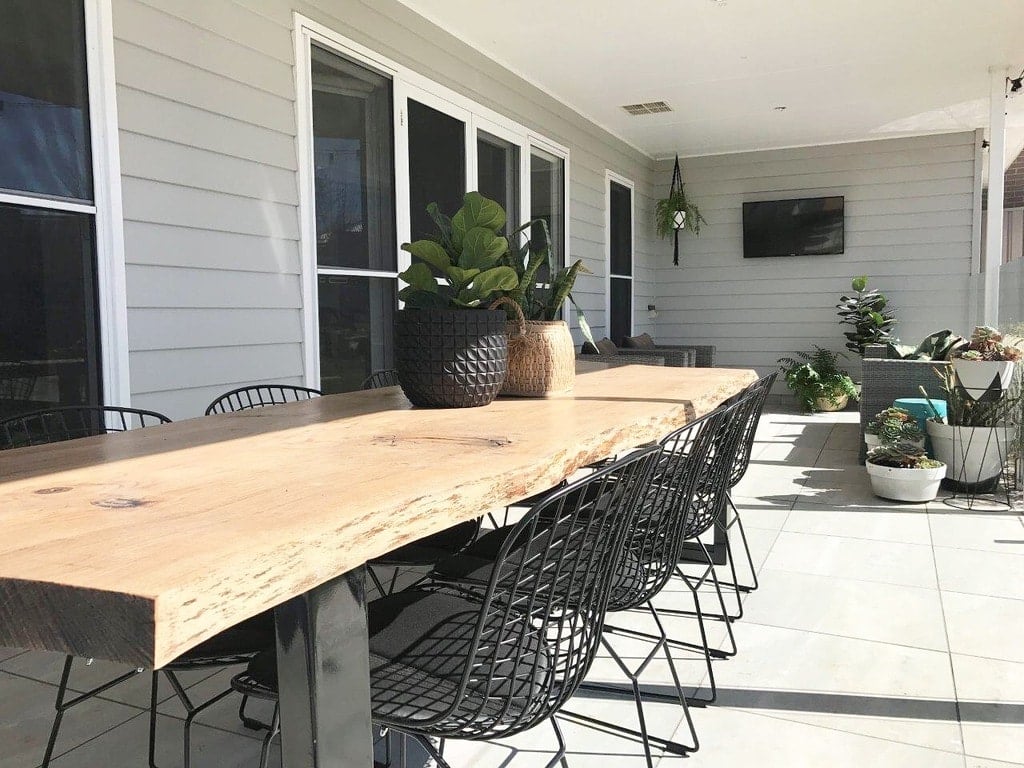
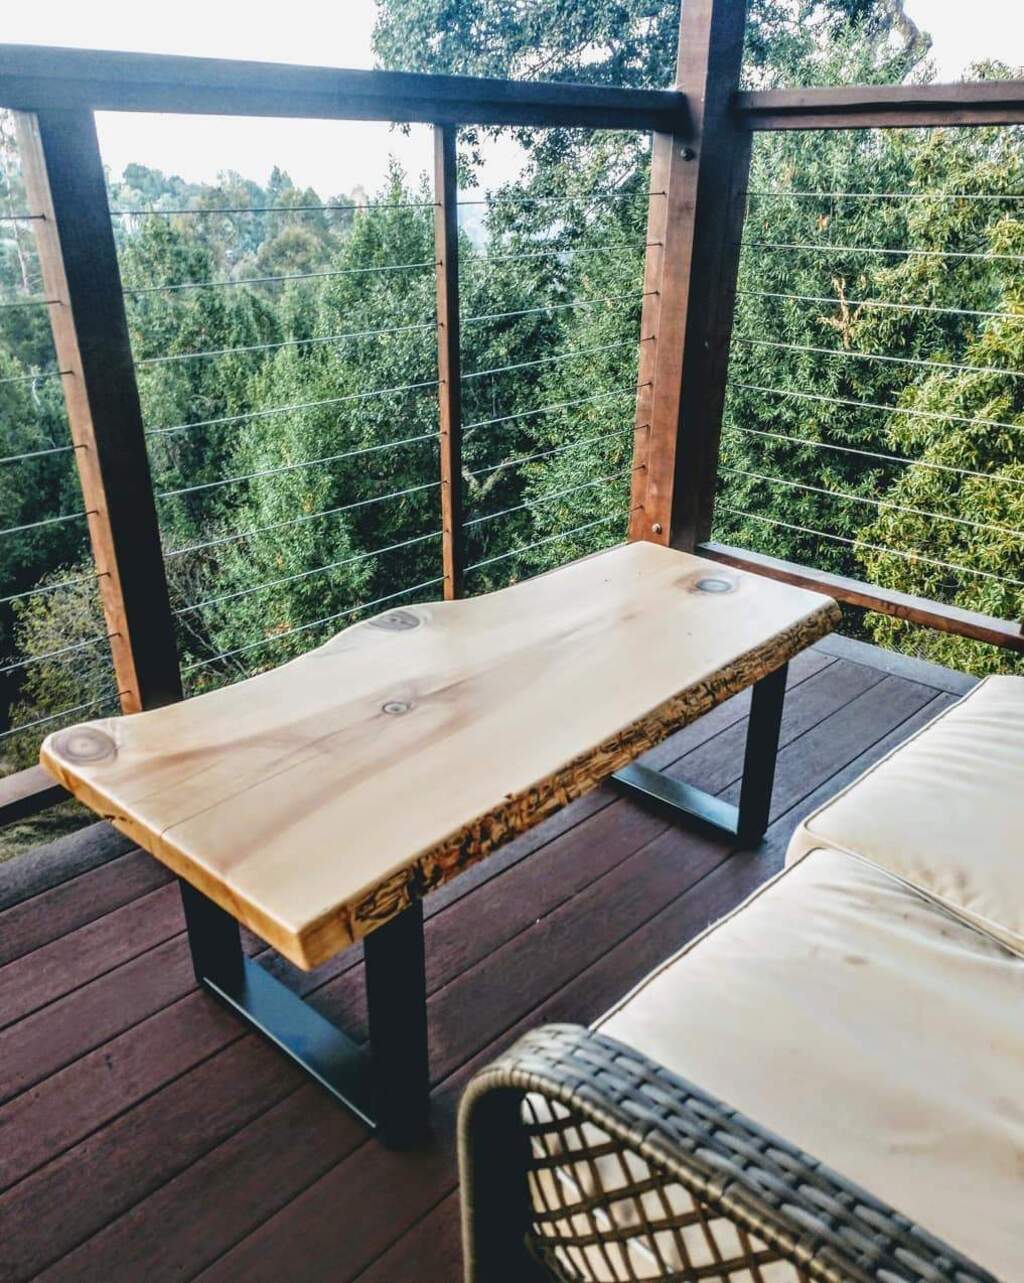
8. Live Edge Outdoor Table
Spice up your backyard or outdoor space with a natural live edge table! Having a proper siting and entertainment area on the deck or porch is a must thing. You can enjoy sipping your morning coffee here or watching the sunset with your loved ones.
To create a perfect outdoor hangout spot, there is nothing more suitable than live edge tables! You can get them in any size and style and create the perfect ambiance. You can even DIY live-edge tables according to your liking and personal style.
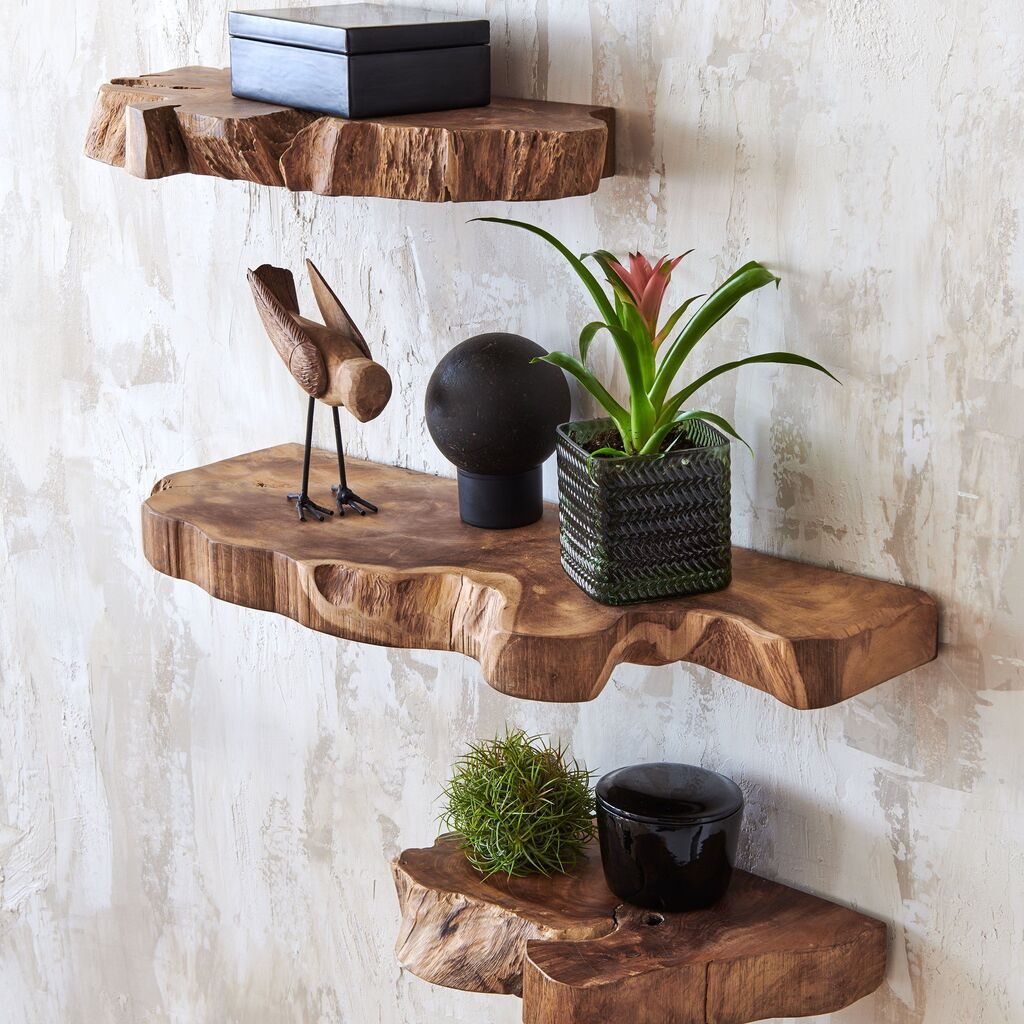
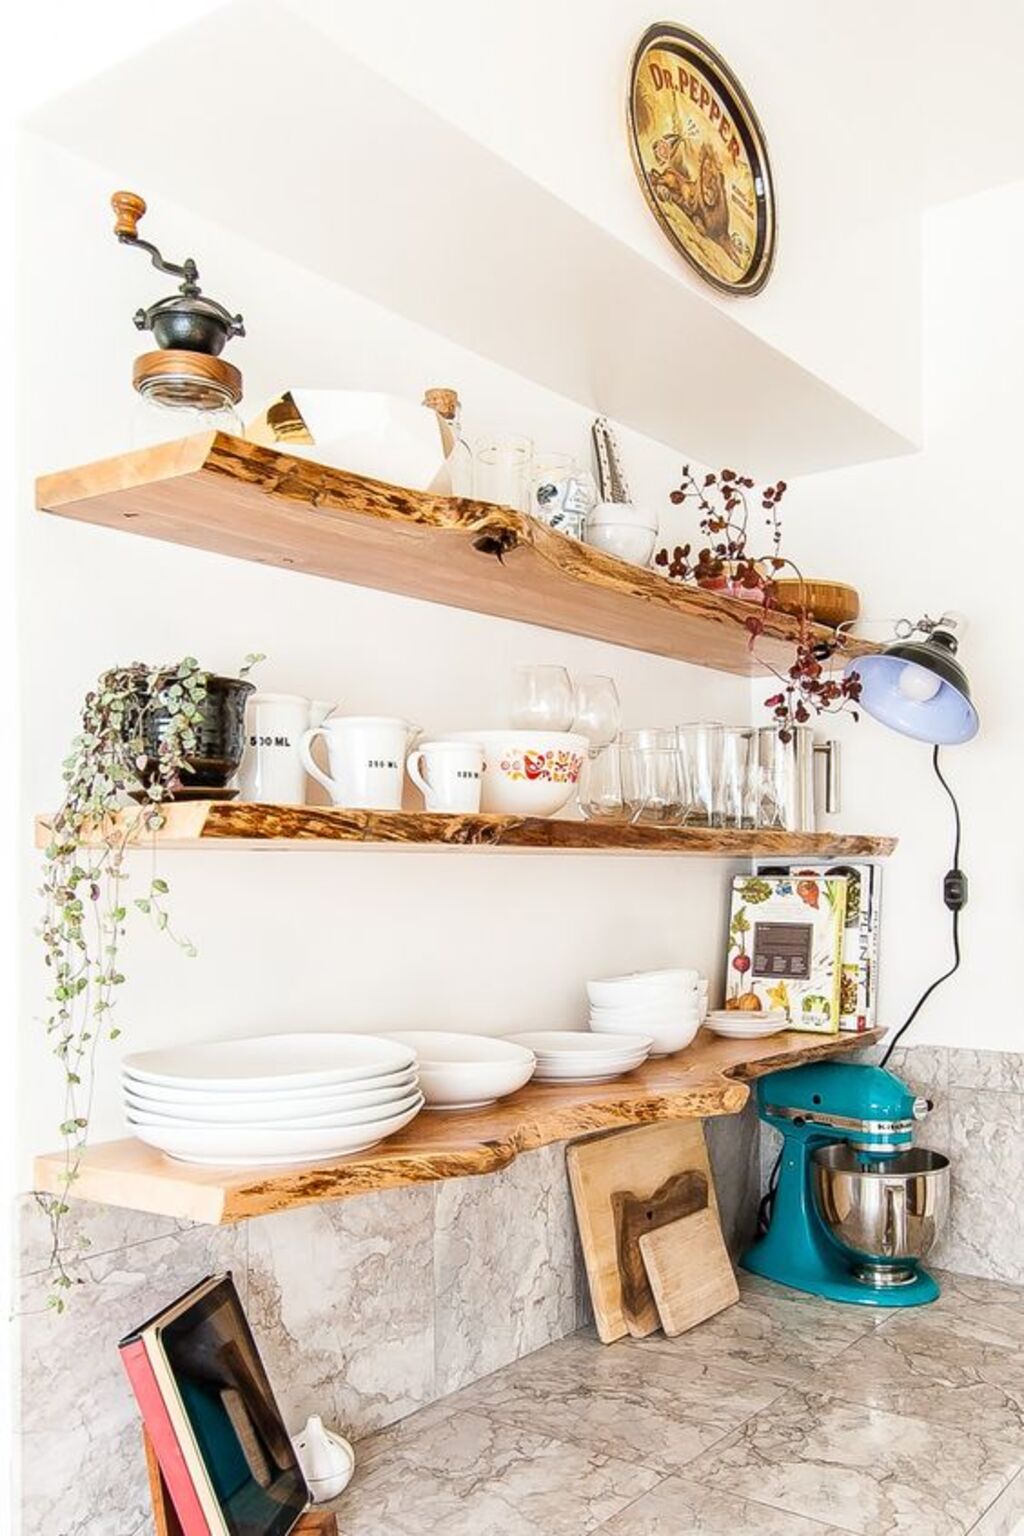
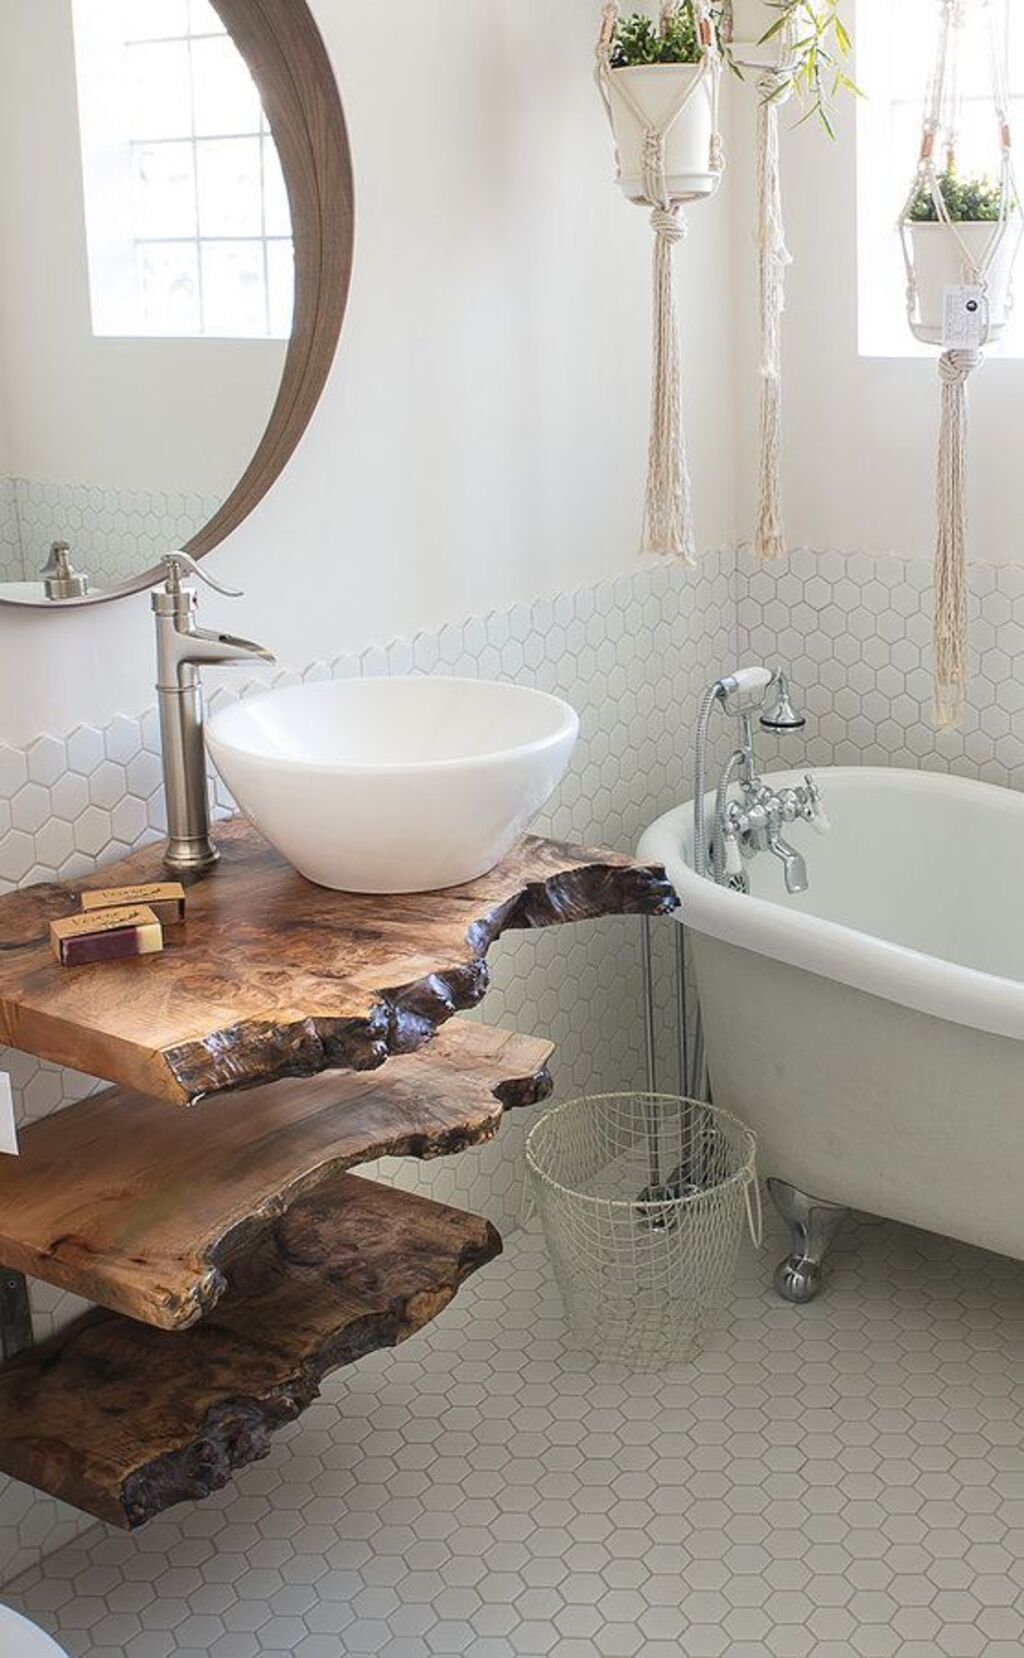
9. Live Edge Floating Table & Shelves
Another great way to use live edge tables is the mountable ones. Yes, we’re talking about a great space-saving option: Floating shelves. These things will instantly give your space a natural and edgy feel without making it too bulky.
All you need to do is to mount some live edge table slabs on the wall. From bathroom cabinets to makeup vanity and desk, you can literally use these shelves for anything. They not only look great in any room but also save a lot of floor space.
Here are some more live edge table and furniture ideas for you to get some inspiration for your home:
Final Thoughts
So which live edge furniture idea do you like the most for your home? Live edge tables work perfectly for the dining room, living room, or any part of the house. They’re eco-friendly
and sustainable and come with 100% natural finishes. Another advantage of having these live edge dining tables or furniture is that you can easily style them with any interior decor or design, and that’s why they never go out of style!
Live edge tables are available in so many different styles, colors, shapes, and sizes. You can get the one according to your space and as per your liking and taste. However, it is advised that before investing in one, always measure your space and the table.
So, this is all about the live edge tables. I hope this blog has helped you to pick the right live-edge furniture for your home. Also, don’t forget to share this blog with your friends and family so that they can also spice up their space with these amazing live edge tables.
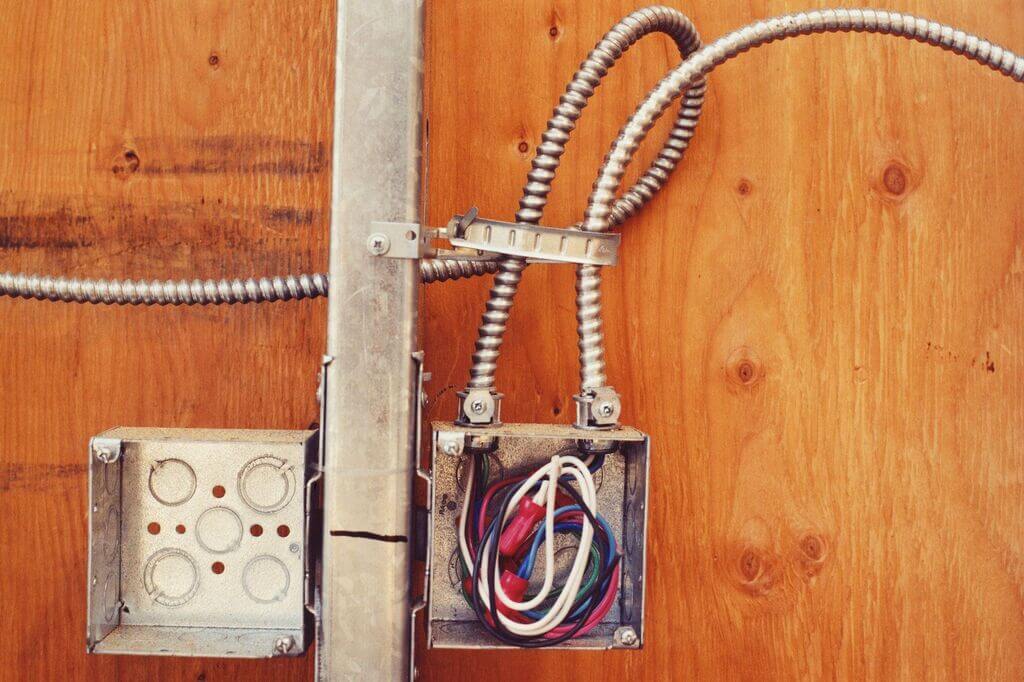
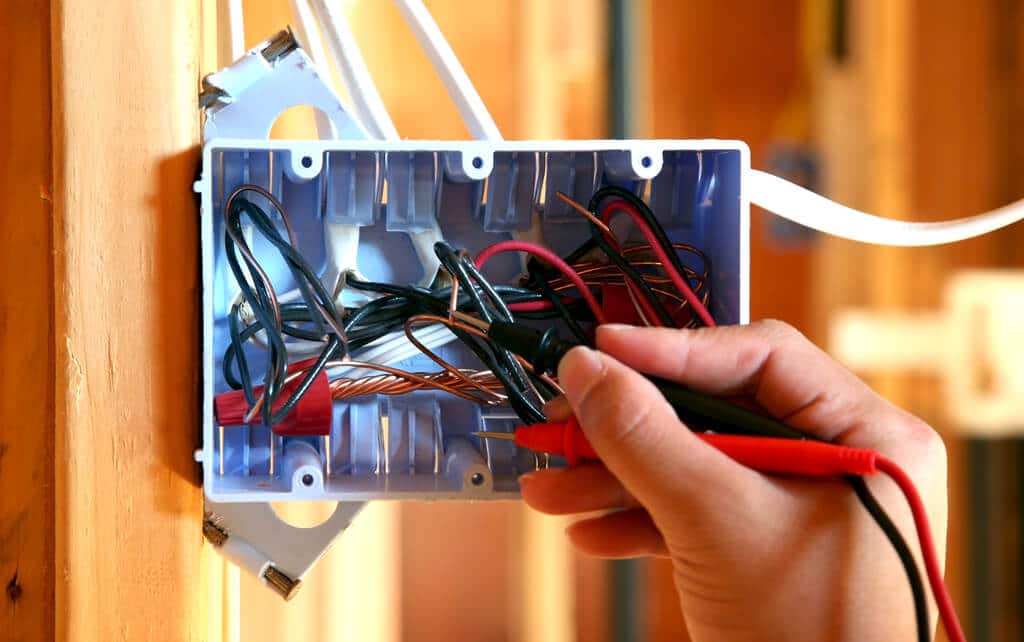
The electrical box provides safe housing for wiring splices to major appliances and circuits inside and outside the home. These boxes are different than the electrical panel, which is the hub of the home’s electrical system, housing all of the circuit breakers. Instead, electrical boxes are located throughout the home and come in many different shapes, sizes, and materials. Let’s have a look at the difference between metal and plastic electrical boxes.
What Is the Purpose of an Electrical Box?
The most common electrical boxes that you will encounter are rectangular boxes used for wall switches and outlets, square boxes for junctions, and octagon boxes for ceiling or wall-mount light fixtures and smoke alarms. Metal boxes are typically made from durable steel, and plastic boxes are made from PVC or fiberglass.
When to Use Metal Electrical Boxes
Generally speaking, metal boxes are synonymous with durability. If you choose a metal electrical box, you don’t have to worry about bending or warping over time. They can hold strong screws and will never melt if the wiring becomes too hot.
But all that durability comes at a price. Metal electrical boxes are almost always more expensive than plastic. They are also heavier, more challenging to work with, and can have sharp edges. But because they are metal, you can ground them, which means they are safer.
Plastic electrical boxes provide a cost-effective and lightweight alternative to metal electrical boxes. And because plastic is a natural insulator, these boxes do not need to be grounded to use them safely with electrical systems.
For most applications, these boxes also come in flame-retardant plastics. The downside to plastic boxes is that they do bend and warp, making them unsuitable for long-term outdoor use. And side-by-side, even the strongest plastic doesn’t hold up to the durability of steel.
Plastic electrical boxes are recommended for:
Romex Cables
Non-Metallic (NM) Wiring
Romex cables are a specific brand of non-metallic wiring. While the name Romex is widely used to refer to similar types of wiring sheathed in non-metallic materials, it is a bit of a Kleenex debacle with the brand name Romex specifically belonging to the Southwire Company in Carrollton, Georgia.
Many DIYers favor plastic electrical boxes simply because they are lighter, less expensive, and easier to work with. Most plastic boxes come with fabricated holes or doors that make them easy to use, and they have blunt edges that are easier to handle without injury. The biggest drawback to using plastic boxes is that they tend to melt when wiring gets hot, and they cannot be grounded.
You may find plastic boxes on the market that have been sprayed with a metalized product like a nickel coating. And some manufacturers will claim that this is sufficient for use with metal-sheathed cable or conduit. But using a plastic box with this type of electrical wiring is always a risk. For safety reasons, we recommend metal on metal.
What to Know About Exterior Electrical Boxes
Running electricity to the exterior of your home provides convenience and flexibility. Imagine how comfortable your patio would be without outdoor lightingor how easy it would be to power wash your home without an external outlet. But running electricity outdoors requires some additional considerations.
First, you will want to stick exclusively with metal electrical boxes as plastic boxes tend to wear and warp in the elements. Second, you’ll want to look for a box that is rated as weatherproof, containing seals to prevent moisture from reaching the electrical wiring. We probably don’t have to mention why electricity and water don’t mix!
The Bottom Line on Choosing the Right Electrical Box
There is a right and a wrong time to use each type of electrical box. And, surprisingly, there is a little more to it than personal preference. Metal boxes which are typically made from steel are durable and heat resistant. They make the best choice for metal-sheathed wiring, metal conduit, and outdoor applications.
Plastic boxes are lightweight and easy to handle. They make the best choice for Romex cables and NM wiring. Plastic boxes are also widely popular among homeowners opting to DIY their electrical fixtures.
Home electrical projects are the cause of more than 40,000 home fires, 400 deaths, and $1.3 billion in damages every year. Don’t get in over your head. Consult a licensed, professional electrician for help with any project, big or small.
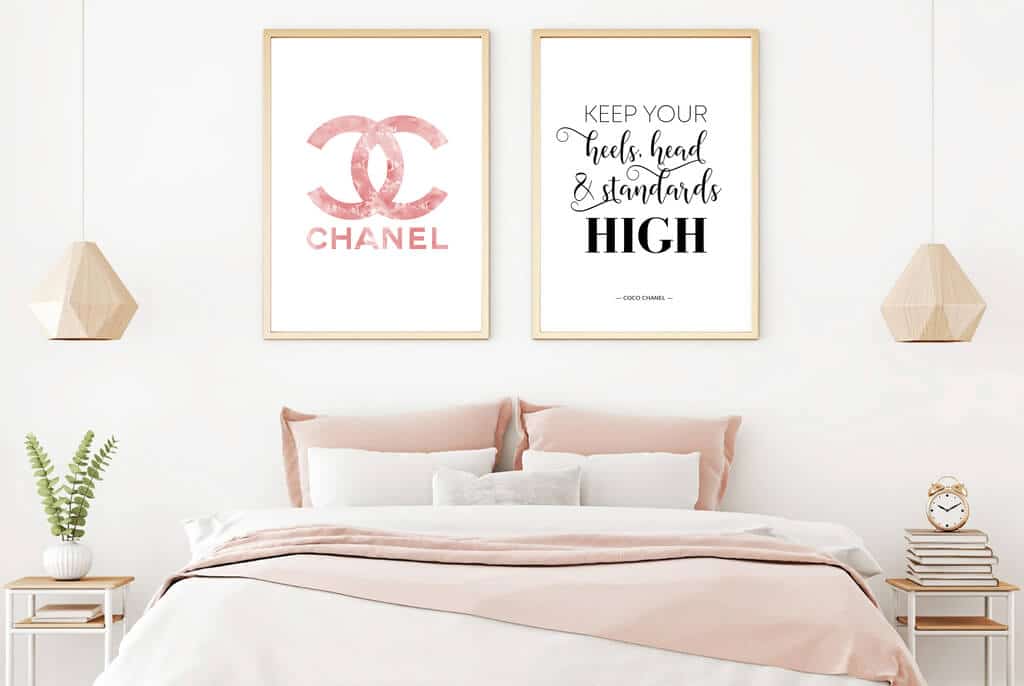
When we decorate our house, we usually leave the decoration of the walls until last and, in part, it is normal, since the interior design is the first thing that occupies our attention and, once the distribution of each element is resolved, we go on to buy the furniture and accessories that best suit our personality and the functionality we need. What’s more, there are people who prefer to go little by little and get inspired and have Chanel wall decor ideas to decorate each of the spaces in the house or even bring back memories of their travels or perhaps some inherited pieces that fill the home with soul.
But when the time comes to finish the design, apart from choosing the colors for the walls that fit with the rest of the furniture, we can opt for wonderful murals, modern paintings, witha large selection of chanel wall art decoration with photo frames and other ideas to decorate walls that we have given you in others occasions.
Decoration with Pictures to Dress the Walls of Your House
The most traditional option to fill our walls has always been paintings. However, its content is what really innovates and, unless you are an art collector and cannot go without exhibiting your works on the walls of your home, there are very diverse options to find cheap paintings to decorate every room in your house.
From modern paintings with phrases, paintings, youth paintings, illustrations. There is an infinite variety for all tastes, with different styles, reproduction of techniques, and formats. There’s no way you can’t find something that doesn’t suit your decorative tastes.
Decoration with Murals for the Walls of Your Home
For the most daring and who have very clear the motive with which they would decorate their walls, there is also the option of photomurals. They are the alternative to wallpaper and thus you will save yourself having to rack your brains to come up with ideas for painting walls.
With the photomurals, we will cover a complete wall with a unique image, which can be a photograph (a forest, a beach, architectural structures…) or the reproduction of a work of art with any type of motive (figurative, abstract…).
Within the ornaments to wall decor is something really daring, since you must be convinced that what you choose will be to your liking for a long time (it is not as neutral as the walls decorated with paint). However, we should not be afraid, as it is a relatively inexpensive solution to completely change a room.
Decorate the House with Wallpapers
If the decoration with interior murals can be risky and the decoration of walls with paint is too boring, you have an intermediate alternative, which is the wallpaper, which is more or less simple, can have patterns and motifs that are repeated and contribute character to any room.
Of course, those looking for a minimalist decoration will not resort to this decorative solution, but if what we are looking for is for a part of our home to make a difference, this is undoubtedly the solution.
Other Solutions to Decorate Walls with Images
But there are even more varieties to decorate the walls of your house with images, realistic, abstract, with 3D or perspective … Among them are posters, wall stickers, cork boards, scratch maps … and is that interior decoration from home can vary completely as a result of the decisions we make with the different accessories.
Now it only remains for you to find what you think best suits your personality. You can search through our content, on Pinterest, Instagram, or in traditional decoration magazines if you lack inspiration. The important thing is that you feel comfortable in your home and are proud of having chosen the best creative option for your home.
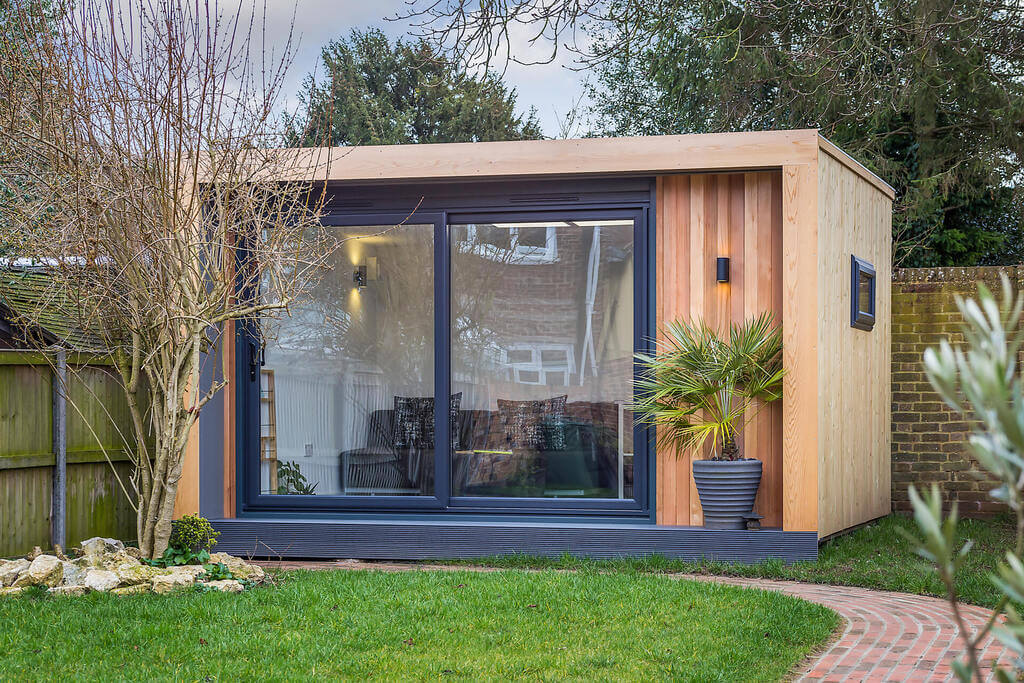
Garden Building is a great way to expand the living space of a country house. They are separate structures that can serve as a play area, a place for guests or leisure, a separate area for plants and raised beds, or other purposes. When building or installing a garden room, the most important thing is to correctly develop and calculate the project, as well as select the right materials.
What Can You Build?
The structure of the room can be open, semi-closed, and closed. The type is selected depending on the purpose and landscape features. If the territory allows, you can build the following options:
bath (sauna, hammam);
game room;
summer house;
gazebo;
workshop;
room for rest and reading;
summer kitchen, etc.
In addition, you should determine the seasonality of the construction right away. Often it is used only in the summer, which greatly simplifies construction. But if the building will be used all year round, you need to think about maintaining the most comfortable microclimate in it.
What Materials Should You Choose?
By their design, garden rooms consist of a foundation, a frame with walls, and a roof. Additionally, you can organize a bathroom, a terrace, an entrance area, and other elements. In other words, the building resembles a small house located in the backyard.
When choosing materials, the main emphasis should be on the climate of the region and the purpose of the room. Aerated concrete and bricks are not used, since the final weight turns out to be too heavy and will require a solid foundation, preparation of the territory, and even documentation.
For maximum convenience, comfort, easy installation, and high performance, you should consider using profiled bars. They can be used for open and closed floor plans. In addition, its other advantages can be noted:
durability and strength;
aesthetic appearance;
heat preservation and protection from cold weather;
environmental friendliness, hypoallergenic components, and safety;
noise insulation;
resistance to external factors.
This material is resistant to moisture, insects, precipitation, temperature fluctuations, and microorganisms due to its special processing. The metal is covered with a layer of sealer that goes deep into the pores and remains in them for a long time, protecting it from any external factors.
Plywood, plastic, glass is not functional materials and will not cope well with the task, since they require the use of additional solutions. As for the roof, it is worth using the same option as for the base structure (metal, roofing material, etc.).
Stages of Building a Garden Room
First, you need to find the right place. The room should be at a certain distance from the house so that the windows are not directly facing each other. This is done to create personal space.
Next, you should check the location of the necessary communications, the quality of the soil, and the presence of groundwater. The next stage is the development of a design project that will indicate the size of the room, the location of windows and doors, the depth of laying the foundation, exits, etc.
Foundation Construction
The foundation is chosen depending on the type of terrain and building. For garden rooms, it is worth giving preference to a columnar foundation, which does not require a deep trench and is stable.
Piles are used only if the soil is unstable. Any type of foundation must be waterproofed to protect the room from groundwater. In front of the house, you can lay a concrete slab, which should be located right in front of the entrance (for organizing the entrance zone).
Walling
Walling is performed right after laying the foundation. First, a wooden frame house is erected, which is gradually covered with other elements. In addition, do not forget about the floor slab, on which there must also be a layer of the subfloor, insulation, etc.
The wood must be treated beforehand and protected from external factors. When laid, grooved boards should form a regular square or rectangle. Along with the walls, window and door frames are immediately mounted, which are closed with polyethylene.
The walls are connected with dowels. For maximum reliability, it is recommended to follow a number of rules:
the depth of the holes should be 2 cm more than the pins;
all holes must be strictly vertical;
the distance between the boards should not exceed 1.5 m;
the alternation of elements should be carried out according to the principle of a checkerboard.
After the walls are put together, sheathing is done using sealers and insulation, and the roof is installed according to the floor principle.
Roof Installation
The most important thing is to correctly install the rafters for a single or gable roof. Fastening is also carried out using pins, after which the frame is sheathed with a bar. As in the case of the foundation, a waterproofing layer must be laid. In guesthouses, you can make a small semi-open attic, which will be used for storing things or separating a sleeping place.
Final Stages
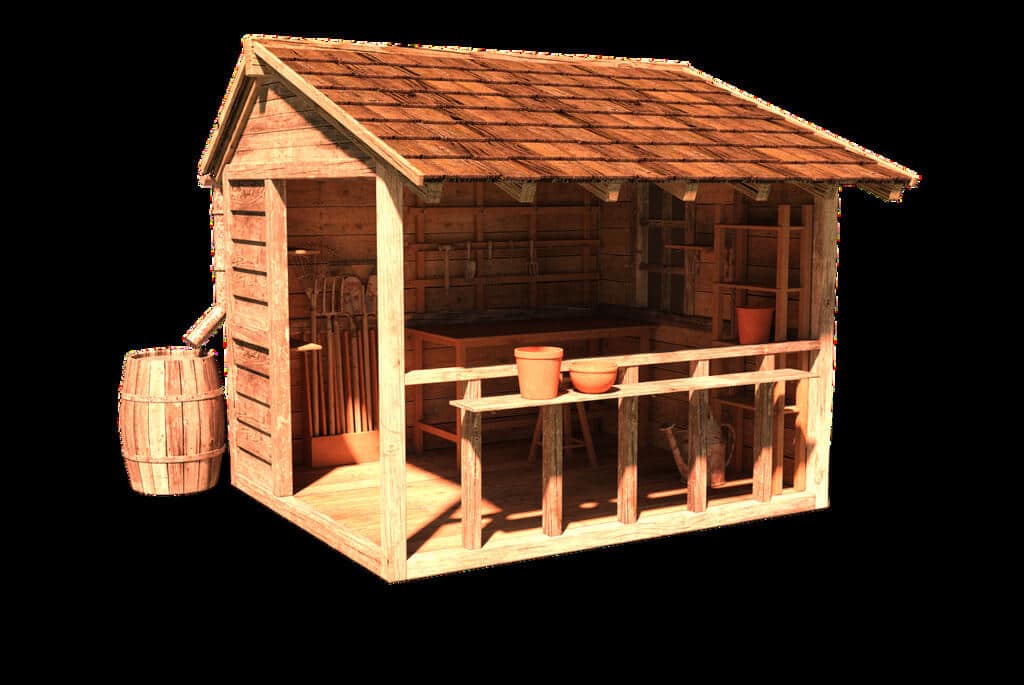
After the construction of the foundation, walls, and roof of the garden room, you can proceed to the installation of steps, windows, doors, the removal and connection of communications, and decorating the room. Often, the installation of the ceiling is not carried out to maintain the natural design and make the garden room appear more spacious (country style, Provence, rustic, etc.). Do not forget about the facade, which must be carefully primed and painted to protect it from external factors.
If you follow a plan created in advance and take a responsible approach to each stage of construction, you will be able to build a garden room that will last 10 years or more. Also, the use of special heaters and a well-thought-out heating system will allow you to enjoy the garden room even in winter.
If you’re looking to give your kitchen a more unique and distinct look, you might want to go for wooden cabinets. Some people prefer to have wood cabinets in their kitchens because of the natural look, different color variations, and grain patterns that are available while others might choose to have a more predictable look with engineered materials like laminate. When you pick wood cabinets, you’re going to want to choose the best wood for kitchen cabinets and this all depends on your style and budget preferences. Here are some to consider:
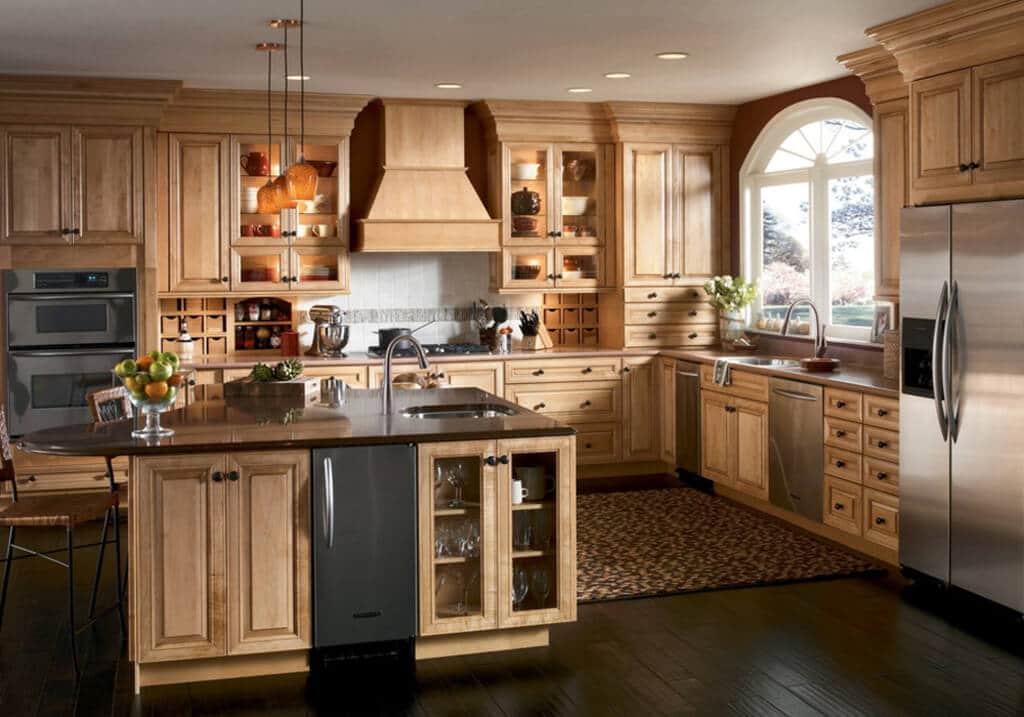
1. Maple Wood
Maple is considered to be hardwood and the color of it can range from an almost true white to a cream-colored look. It’s a type of wood for kitchen cabinetsthat also has a smooth and fine grain. Since it is readily available and pretty easy to work with, it’s a popular choice when it comes to kitchen cabinets.
With maple wood, you can go for a modern style, contemporary, transitional designs, and traditional depending on all of the specifics of the cabinet design including the style, finish, and more.
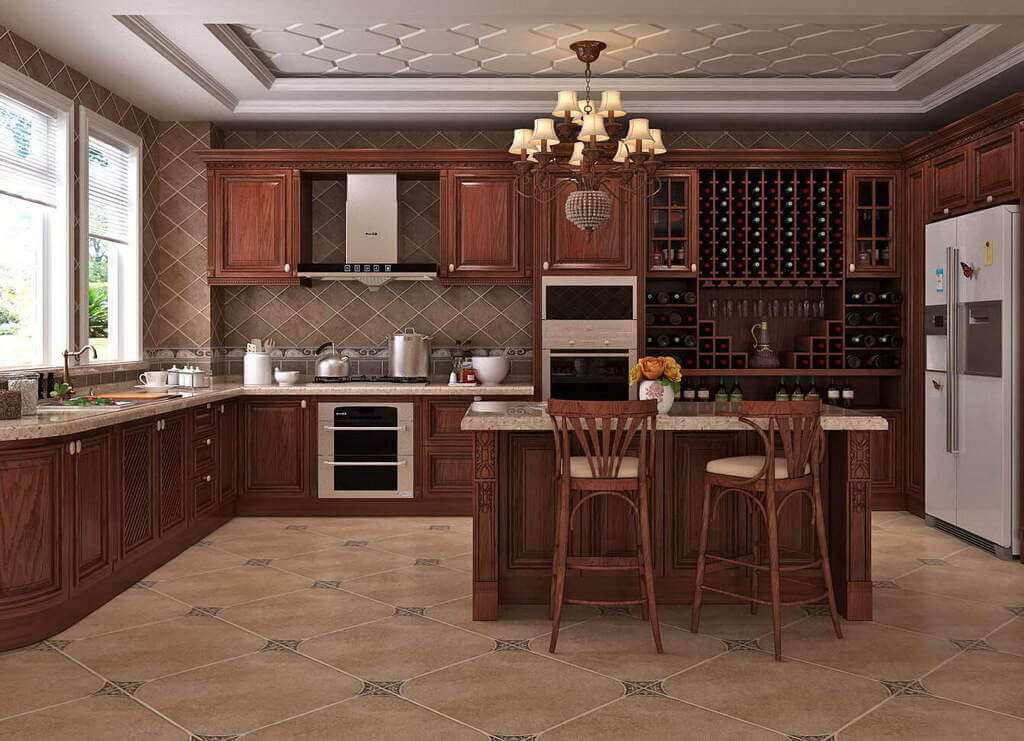
2. Walnut Wood
Another hardwood is walnut and this type has a more significant grain as well as different color variations of cabinets that can range from a creamy white color to dark brown. It’s a premium wood which means that it’s not readily available; however, it is easy to work with.
In terms of style options, this wood type works great with contemporary, transitional, and traditional styles. It can be finished in order to bring out the natural colors of the wood and change the look to be more classic.
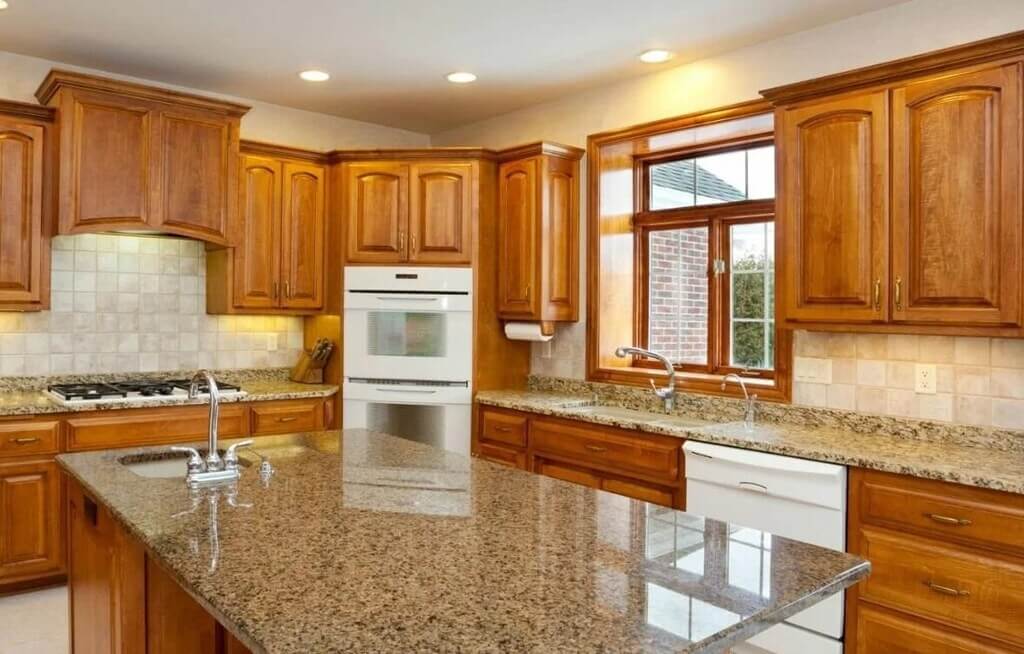
3. Clear Alder Wood
If you’re looking for a relatively soft-wood type, clear alder is right for you. It has a fine and uniform grain and colors that can range from light tan to reddish-brown. It’s similar to Cherry wood, but it’s a lot softer which means that it can be distressed and finished in different ways.
Clear Alder wood is commonly found in the West and is readily available. You can use it for a distressed farmhouse style or even some traditional and transitional styles.
4. Knotty Alder
Similar to Clear Alder, Knotty Alder is a soft-wood that has knots throughout. They are a natural feature and the wood itself typically has nicks and dents from the distressing that has accumulated over time. It’s a popular choice for a more rustic style or worn finish.
It’s readily available and is commonly found in the West. Knotty Alder is one of the best natural wood kitchen cabinets as it’s also easy to further distress with stains, glazes, and/or paints.
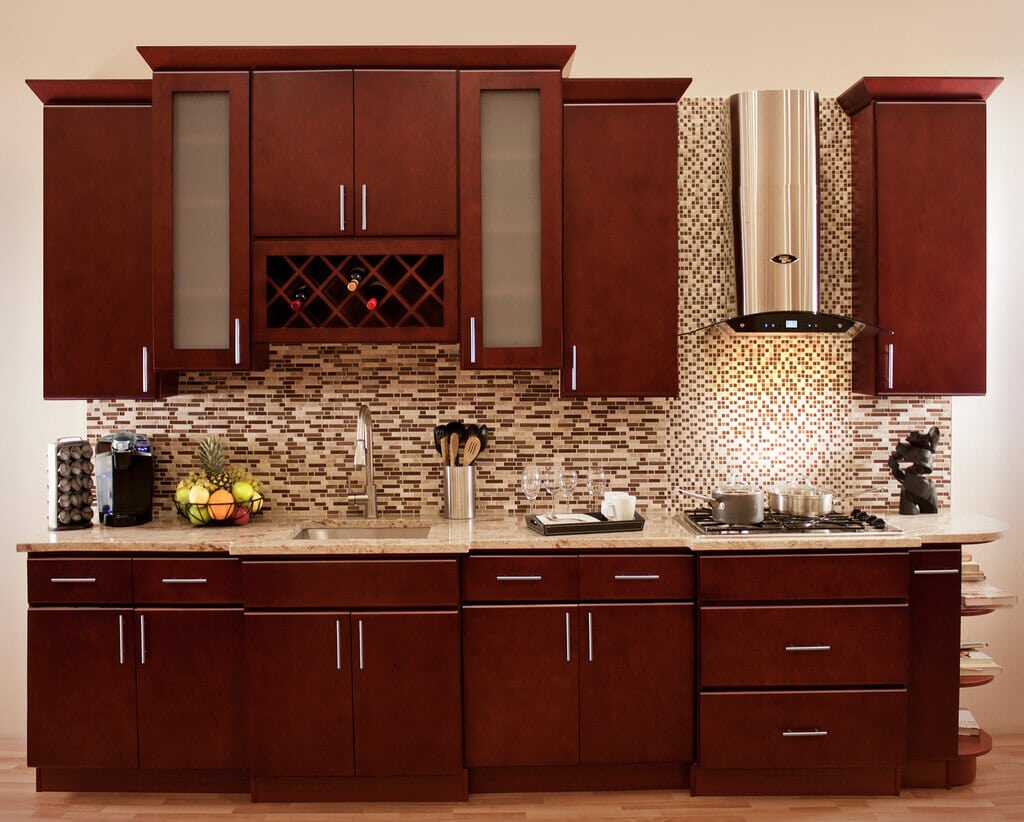
5. Cherry Wood
While Cherry wood is considered to be a hardwood, it’s a lot softer than most that are in that category. With a rich grain and small pin knots and marks, it’s commonly associated with high-end woodworking. This kind of wood offers a timeless and classic look that is commonly found in libraries, traditional offices, kitchens, and more. The finishes that are available for Cherry Wood are reddish and brown stains.
6. Oak Wood
If you want to have very hard-wood kitchen cabinets, you’re going to want to consider choosing Oak Wood. It comes in light to medium brown shades and has a coarse and uneven grain. Oak Wood is one of the different kinds of wood for kitchen cabinets that are associated with more outdated styles; but with a new finish, you can give the wood a more modern look.
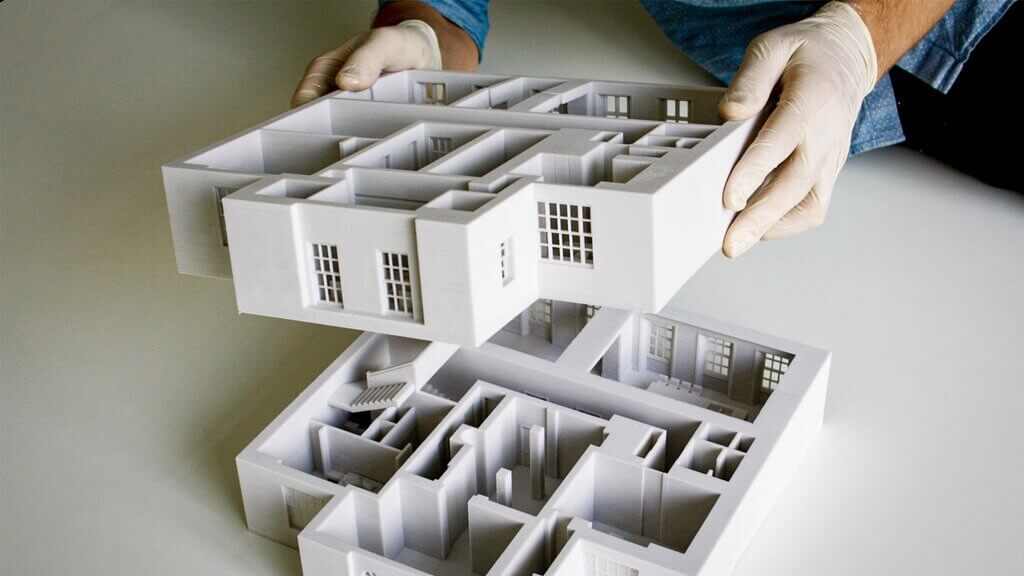
An architectural model is used to illustrate a building’s master plan, and throughout the past few decades, 3D handmade modeling has increased in popularity. Architectural 3D models are a visual representation of your imagination for a building, urban design, or interior design. For a beginner, transforming the image into a model can be challenging. Therefore, to help you achieve your best architectural models, we are providing some tips to get started.
We will discuss everything in this article from the basic tools you require to modern tricks to achieve the best visuals.
What Is Your Architectural Project About?
To make a successful architectural model, the first step is to decide what your project will be about. In the case of 3D architectural models, you need to be selective and particular about what you want to show. There won’t be enough time or money to incorporate every small detail in a handmade model.
Therefore, your model should have just enough elements to communicate. It is a part of preparation where you will make some vital decisions about your project, which will help you cut costs on unnecessary materials and save time.
Material Selection for Your Architectural Model
After deciding on your project type, it is now time to choose materials to represent your model. Even though your handmade architectural model won’t exactly replicate a full-scale building, it needs to express your imagination. In that case, you should choose materials that are easy to work with, will effectively narrate your project, and won’t make you overwork.
Let’s discuss some materials and their uses below:
Cardboard
Cardboard is a very common and versatile material used in architectural model making. It has different densities, colors, and finishes and is the cheapest material to start with. Both conceptual and working models can be done with cardboard. It can also be used as support for other materials.
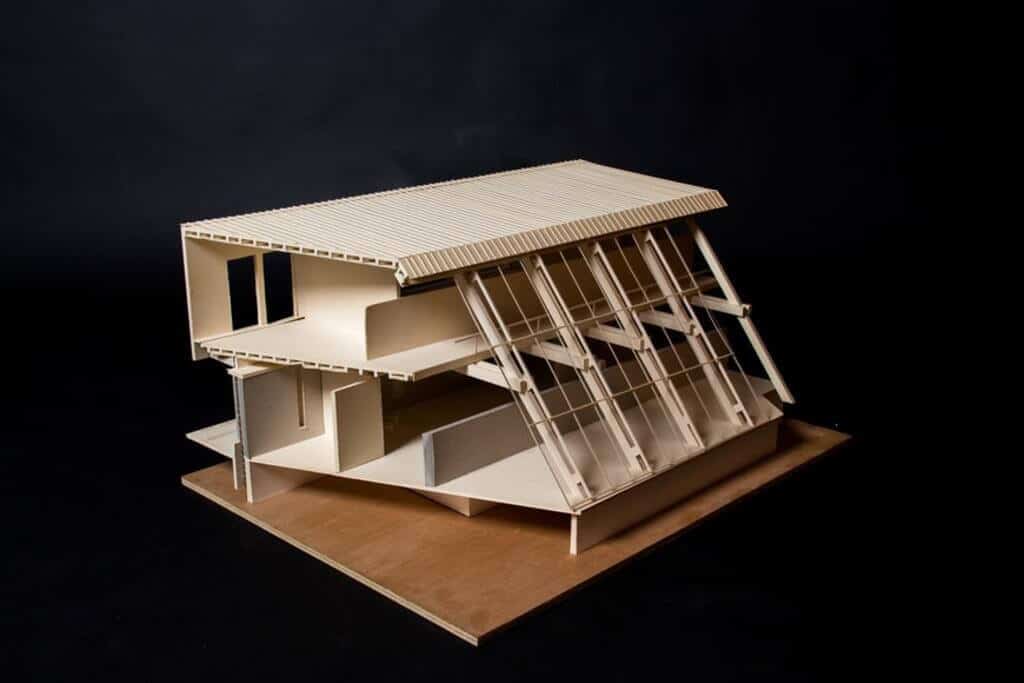
Balsa Wood
Balsa is the most common type of wood used for architectural model making because it is smooth and easy to cut. It is preferred for very accurate model making because of its availability in different weights and attractive finishes.
Basswood
Basswood is a hard type of wood and also has good finishes for architectural model making.
Metal
Metal such as aluminum, brass, copper, or steel can be used to show strong building finishes.
Foamboard
Foam boards are very lightweight and come in several thicknesses and weights for different model structures. They are effortless to cut in shape and are pretty sturdy to hold their structure. Although white foam boards are used to make white context architectural models, they come in other colors.
Transparent Materials
Transparent materials like glass and plastic can be used to form structures like windows and see-through houses. You can use acrylic and perspex to make transparent materials.
Landscape Elements
An architectural model without a landscape is boring. Landscape materials like miniature trees, animals, sand, and cars elevate the model to a high standard. Moreover, it also helps to make the model look more realistic in context.
Scaling the Model
Scaling means choosing the size of your model’s canvas, which is done in ratio. It means the scale of your model will only depend on the type of project you are doing. It will determine the amount of detail and space that can be seen and the time proportion you will spend on your model.
For example, if you are modeling the interior of a room only, then your scale ratio should be around 1:10 because you want to focus more on the interior. On the other hand, if you project an entire urban plan, the scale ratio can be up to 1:12500. Scale can be a game-changer for your model if you use the right proportion. Now, this does not mean that a smaller scale is always faster.
Cutting Tools
Using high-quality cutting tools while modeling a project enables precise and accurate cuts. Although the neatness of cuts is something that can be overlooked, its absence is always noticed. Having a knife only is not enough because different materials have different densities for which they require separate cutting tools. However, whichever cutting tool you choose, make sure the blade is razor-sharp, or else it is going to be more dangerous and time-consuming to use than you might realize.
The tools you can use are:
A high-quality utility knife, X-acto knife, or Olfa knife with a few exchangeable blades
A scalpel
A pair of sharp scissors
Also, have a cutting mat to save your desk from scratches and a cutting ruler to help you cut straight lines.
Assembling Tools
Regular scrapbooking tape is not meant to assemble 3D architectural models. Apart from cutting tools, another vital part of architectural model making is choosing the right assembling tools. Nobody would want their model to collapse with the slightest of touches. Also, no one would want to present their model with drips and strings of glue on it. The list of some important adhesives are:
Superglue- This is also known as acrylic resin glue and provides extremely strong bonding. Superglue is not suitable for fragile materials like paper or cardboard. You can use a glue syringe to ensure precise gluing in the intricate areas of the model.
Wood Glue- As the name suggests, wood glue comes in different types for assembling different types of wood. However, wood glue is not suitable for plastic and metal.
PVA- PVA glue is mainly used in arts and crafts to assemble lighter items like paper, foam, and cards.
Glue Gun- These are tricky to work with as they are very stringy and dry very fast. However, their adhesive is strong.
Clear Synthetic Resin- This is like UHU, which dries clear. It is perfect for assembling clear foam, plastic, or glass.
Finishing Touches
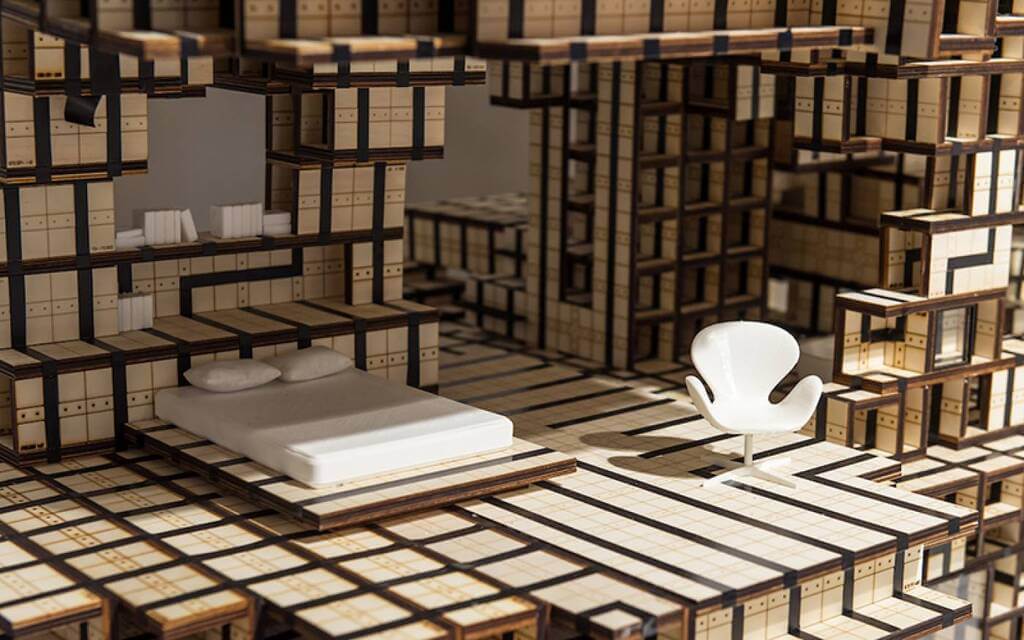
After the outline of your project is complete, you can now add some detailing to complete your model. The detailing preference is completely up to you and your model’s requirements. For example, if your model depicts the interior of a bedroom, you can add miniature furniture, paint the walls, and add wallpaper effects.
On the other hand, if your model is about urban planning, you can add miniature vegetation, vehicles, humans, houses, paint the road, bridges and highways, and much more.
Final Thought
Happy modeling! These were some of the basics that you needed to know for starting your model. You will encounter many issues as you start, too, and you will learn from trial and error.
However, do not let your failures demotivate you from completing your dream architectural project. Remember, even the greatest architectural designs were not perfect in their early 3D architectural model-making phase.
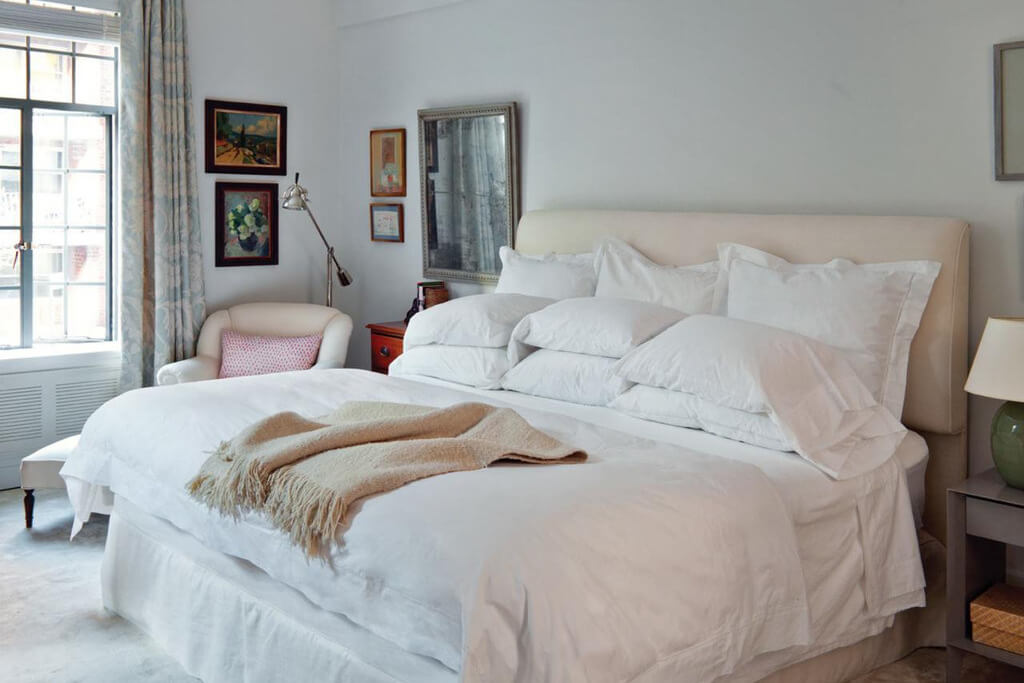
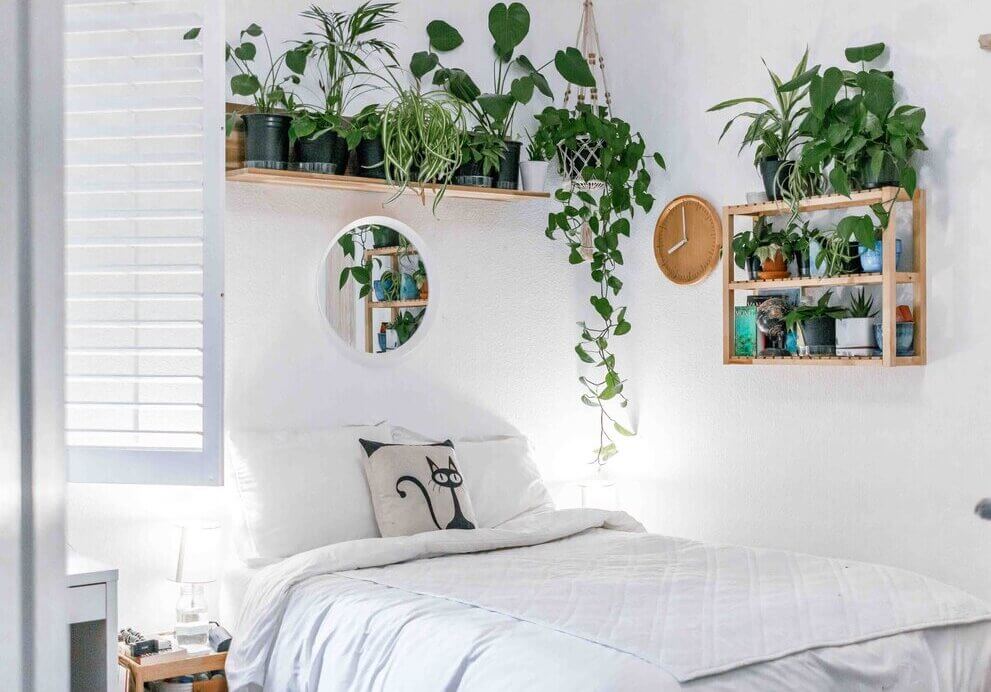
Though many people prefer adding a bed frame to their bedrooms, you can still enjoy a good night’s sleep by choosing a floor bed. Such beds may seem untidy, but styling them well can make the bedroom stand out. You don’t have to sacrifice comfort by overlooking the bedframe. Here are some of the décor tips that you can use to elevate a bedroom without a bed frame.
Add Rugs
Some people like sleeping on the floor due to the extra comfort it comes with. This can also help people with back problems. You can make such a bedroom stand out by adding a rug. This great design element can make the bedroom look good even when it does not have a bed frame.
You can place an elegant-looking rug under the mattress. This can set the tone of the room and create a great ambiance. It also prevents the mattress from being in direct contact with the floor.
Get a Good Mattress
The kind of mattress you choose can determine if you enjoy sleeping without a bed frame. Go for a quality mattress that you can use without the need for a bed frame. Consider the materials used in making the mattress and also compare the prices of different models before making the purchase. Paying attention to Shifman customer ratings can help you find out whether a certain mattress is worth purchasing.
Pick the Right Bedding
When you don’t plan on investing in a bed frame for your room, you should ensure that you get the right bedding. This can pull the bedroom together and create an attractive space for relaxing. Consider linen bedding since it is soothing and it can help dress up the bed.
You can also style the bed with various textures. Consider adding a few pillows to the bed to make it cozy. You can also add a luxurious comforter to the bedroom. Pick colors that blend with other elements in the bedroom. You can even match different patterns from a similar color palette.
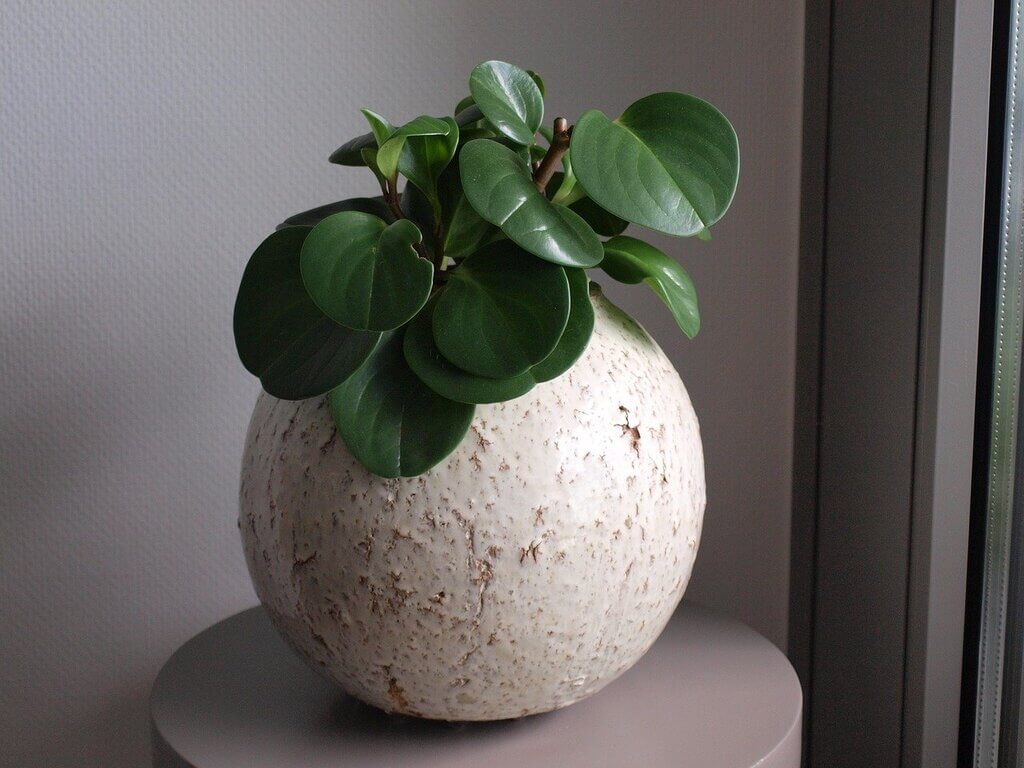
Add Plants
You should also consider adding plants in a bedroom with no bed frame. This is a versatile element that helps in decorating the room and purifying the air. If you have a favorite plant, consider adding it to the bedroom. This can make the room feel alive and fresh.
Feel free to display plants in different ways in such a bedroom. For instance, you can choose to place the plants on a shelf or hang some of them in planters. As you look for the right indoor plants for your bedroom, you can also get some decorative pots to place them. Choose pots with different textures, shapes, and colors which go well with your bedroom’s aesthetic.
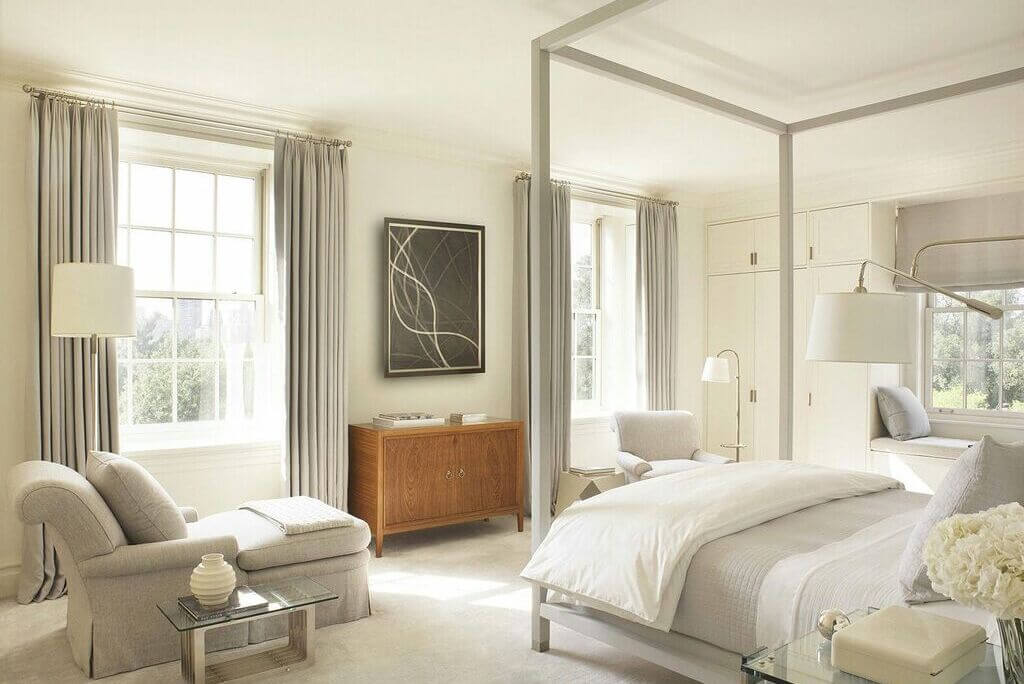
Invest in Some Art
A bedroom without a bed frame does not have to feel empty and boring. You can make it appear classy by hanging some art. Wall art does a great job of adding vibrancy and color to a bedroom. You can also use wall art to express your style and make the bedroom feel personal.
Take your time to find great art that you can hang in your bedroom. Select the prints you like most as you consider other elements in the bedroom. You can also choose wall art in different frames. For instance, oak frames and gold frames make bedrooms with no bed frames look fantastic.
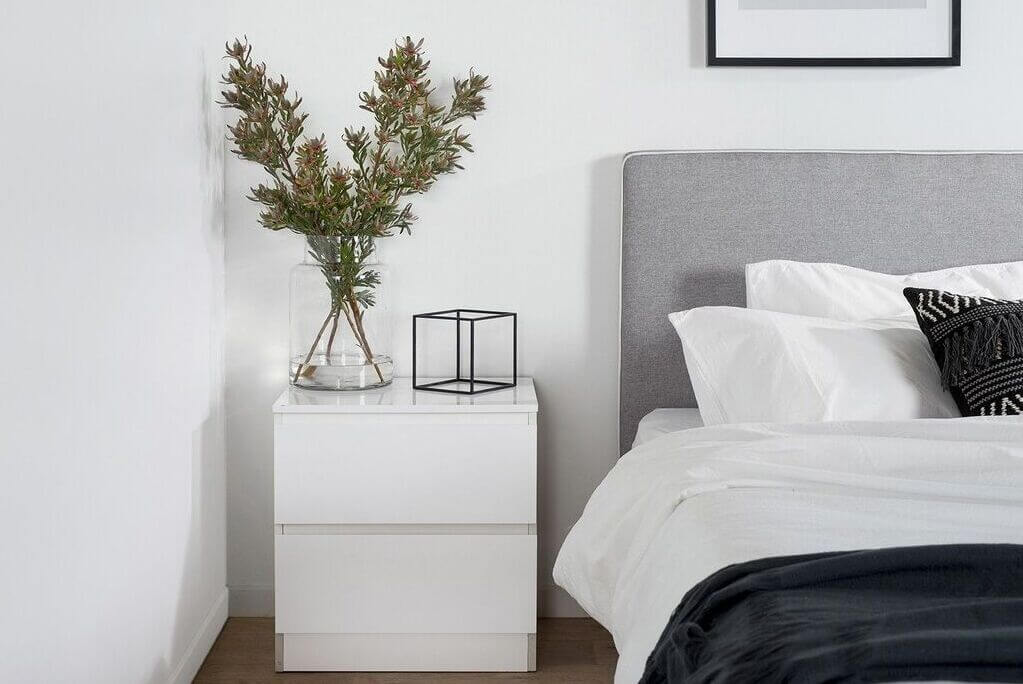
Get a Bedside Table
Just because you are foregoing a bed frame does not mean that you don’t need a bedside table. You can still have a floor bed and a bedside table next to it. This can help you place the essentials that you use at night, such as glass, a watch, or a phone. You make the bedroom more stylish by choosing a good-looking bedside table. You can, for instance, go for a classic table or a coffee table that will not occupy too much space in the bedroom.
Decorate with Vintage Objects
Complete the bedroom by including some vintage objects. This can help decorate the room and make it unique. Most vintage pieces add character to a bedroom that does not have a bed frame.
Whenever there are plumbing problems in your home, it can be frustrating, especially since plumbing usage is essential; after all, people need to wash dishes and use the bathroom. Plus, when you have plumbing problems in your home, you may not know if it will be a quick fix or if a significant revamp of your plumbing system needs to happen.
So, what are the most common plumbing problems that can occur in a home?
If you see any of these problems in your home, be sure to call a professional to assist you.
1. Your Faucets Are Dripping
The reasons for your faucet dripping can be simple or more complex. Some simple issues can be a loose O-ring, a worn-out washer, or an improperly installed washer. If you have any of these problems with your faucet, you may be able to fix it yourself.
But, other issues like a damaged cartridge, water pressure that is too high or too low, or a deteriorated valve seat may mean bigger repairs need to be done to your plumbing. If you have one of these more significant problems, it may be wise to call a professional.
2. Your Pipes Are Leaking
Leaking pipes in homes is more common than you would think. And, it is an absolute nuisance because you have to worry about water getting into your cabinets or on the floor. When most people have a leaky pipe, they put something underneath it to catch the water, but this does not solve the ultimate problem.
You may have leaky pipes due to stubborn clogs, cracked seals or pipes, pipe corrosion, incorrect pipe laying, and joint pipe damage. In other words, if you have a leaky pipe, you have a big problem!
3. Your Toilets Are Running
A widespread plumbing problem that most homes have is a running toilet. A running toilet can waste around 24,000 gallons of water a month, depending on the trickle rate of the leakage. So, it is essential to get this fixed to save water and your water bill, too!
Some causes of your toilet running can be due to worn-out flapper seals or flush valves, corroded toilet handles, refill tube problems, and not having the right-sized flapper chains. Most of these problems can be fixed by buying the part and installing it. Be sure to purchase the right part for your toilet and install it correctly.
4. Your Drains Are Slow or Clogged
Slow or clogged drains are another common plumbing problem for homeowners or renters. The reason your pipes are draining slowly or are clogged is usually due to hair and other things constantly going down the drain. When too much of anything gets in your pipes, it can cause clogging, which makes the water drain slowly.
The way to prevent this is to do a drain cleaning about every three months. If you have a clogged drain in your kitchen or bathroom, it is usually isolated to that part of the home, but if it is in multiple places, that can indicate sewer line problems. If that is the case, do not hesitate to call a professional plumber.
5. Problems with Your Water Heater
Nearly everyone has a water heater in their home, and it is common for water heater problemsto come up occasionally. Your water heater may be having problems due to heater element failure, corrosion or sediment build-up, loose or broken electrical connections. Other reasons are you have the wrong-sized water heater for your home, or it was not installed correctly. Unless you know what you are doing, it is best to bring in a professional for this one.
Conclusion
No matter what type of plumbing problems are in your home, they are never fun to deal with. Some issues can be dealt with on your own, and others need to be left for the professionals. If you have any plumbing problems, you should take care of them as soon as possible to prevent more significant problems from occurring.
There was a time when interior design was considered an expression of good taste in decorating your space. But it is much more than decor. The world of interior designs has changed drastically over the years. From the growing importance of sustainable designs to minimalism, interior designs continue to evolve. In fact, interior design trends are a central idea around which all the elements of a project are designed. So, if you are looking to freshen up the look of your space, below are the latest interior design trends that will shape the next decade.
Nature Indoors
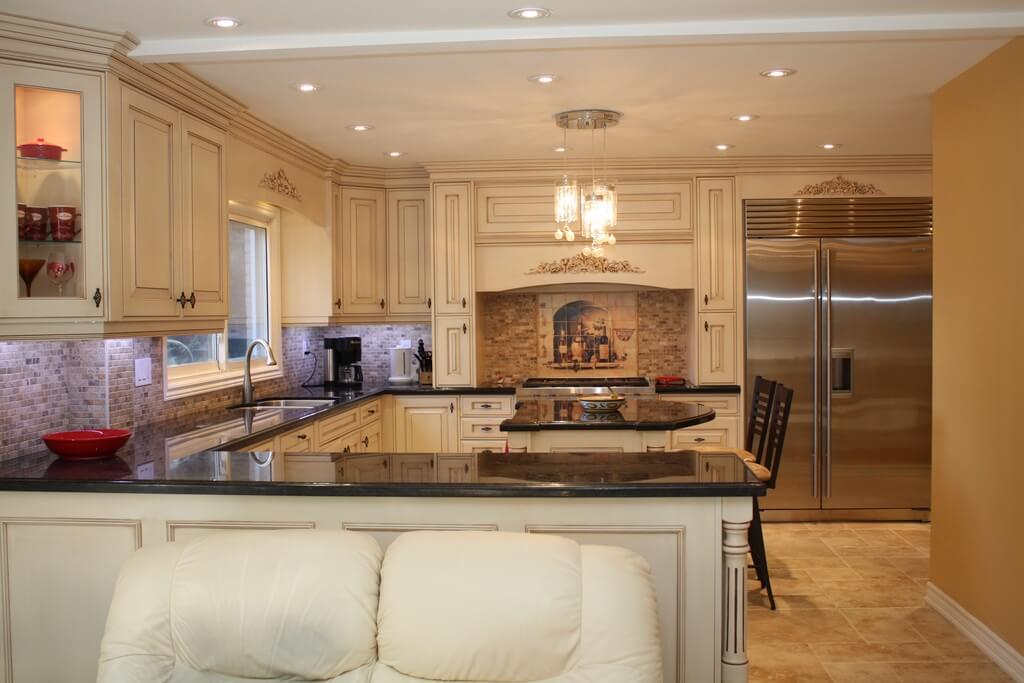
As more and more people are realizing the importance of nature, current interior design trends are taking an eco-friendly approach. The latest of the ‘nature comes indoors’ trends include the use of natural wood in flooring, countertops, cabinet design, or accent decor. Also, stones, like marble, pebbles, etc., are also incorporated in this interior design trend. Designers, as well as consumers, are embracing an eco-friendly approach for sustainable aesthetic appeal. Besides, creating a garden of indoor plants, or bringing nature indoors is another hot trend in 2023 and beyond.
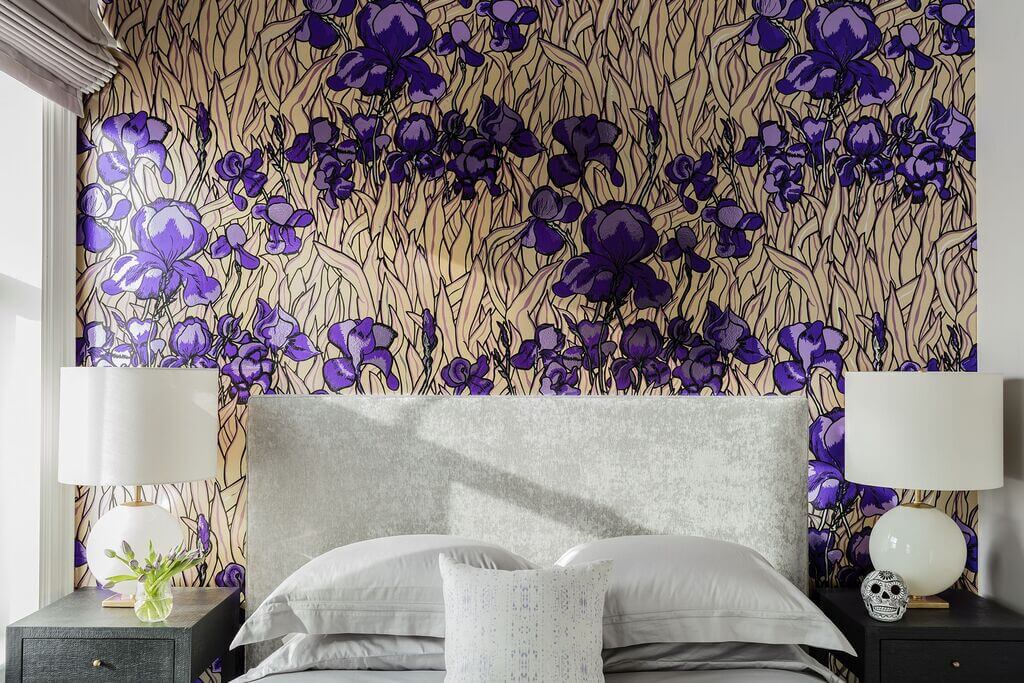
Statement Wallpaper
This interior design trend has made a big comeback this year with contemporary, bold wall coverings for creating feature walls. This emerging trend not only adds to the aesthetic appeal of the home but can also become a significant feature in your home. Graphic and textured wallpapers are also popular among interior designers and consumers who are looking to create eye-catching patterns within their homes. You can find a wide range of high-quality wall coverings and wallpapers online to choose from.
Rounded Furniture
Last year, furniture with clean, straight lines ruled the interior design industry. However, rounded furniture is making a comeback. You can expect to see furniture with round silhouettes and shapely legs and beyond too. If you are into this interior design pattern, pick chairs with curved backs and or consoles with rounded legs. Couches with rounded arms or round tables seem to become a rage. Buy a circular rug that will complement your rounded furniture.
Multifunctional Spaces
Undoubtedly, multifunctional spaces are a big emerging interior design trend you will see this year. The pandemic has brought a great change in the global lifestyle requirements. For example, finding the right corner in your home for a home office, classroom, or integrating chairs, or tables, etc., has now become a necessity. You can a suitable corner of your house as a play area using cabinets or cubbies for hiding toys when they aren’t used. Or, set aside some space at the kitchen counter and use it as a home office. Get the most out of your space by incorporating furniture with a smaller footprint.
Versatile Home Decor
COVID19 had diverse effects on the incomes of people, depending on their jobs. Many are struggling to make both ends meet. No matter how one’s bank account looks like currently, they probably think more carefully before spending money. Thus, the next interior design trend focuses more on versatile, affordable furniture for home decor that doesn’t sacrifice quality. Nowadays, social media is full of posts of prominent versatile furniture trends, like collapsible chairs or tables, modular dining tables with adjustable designs/heights, tables that can be used as shelves or countertops, etc. You can pick the one that offers both comfort and appeal at an affordable price.
Feature Lighting
The right amount of lighting can play a vital role in illuminating your space and highlighting the most important features. Big, bold ceiling lights are in trend and quite a popular way to style your home. Pick a good lighting design that combines both functionality and elegance to your space. Also, make sure to pick a form of lighting that complements the interior styling. You can go for floor lamps or other lighting fixtures that will make your home look attractive. LED lighting around kitchen units or shelving units also improves the look of a space and creates a sense of festivity.
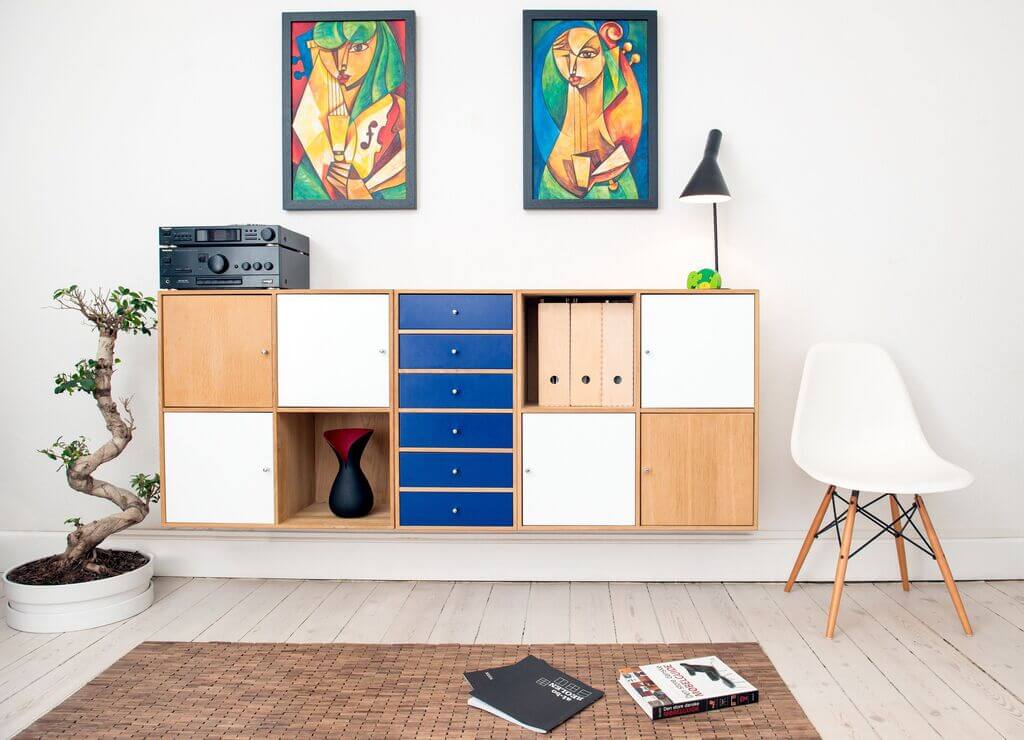
Bold Accessories
Vases, ornaments, lamps, and all forms of artwork make a big difference and bring life to the space. Go for contemporary statement accessories to revamp your home; you can also double up on accessories to create symmetry. Or, create a feature gallery in the wall space to tell a story. The best thing about this interior design trend is, you can choose any artwork that suits your style. From bold abstract pieces to fine lines, you can find any accessory that adds charm to your home. Will it make your space look too busy? Show off the artwork in grayscale. You can simply pick artificial flowers to add finishing touches to transform the look of your home.
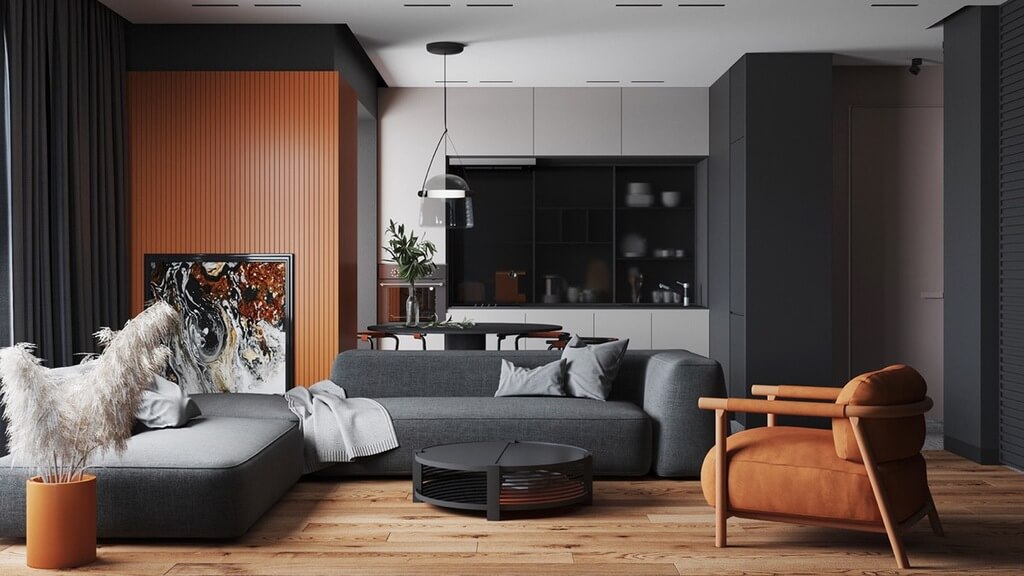
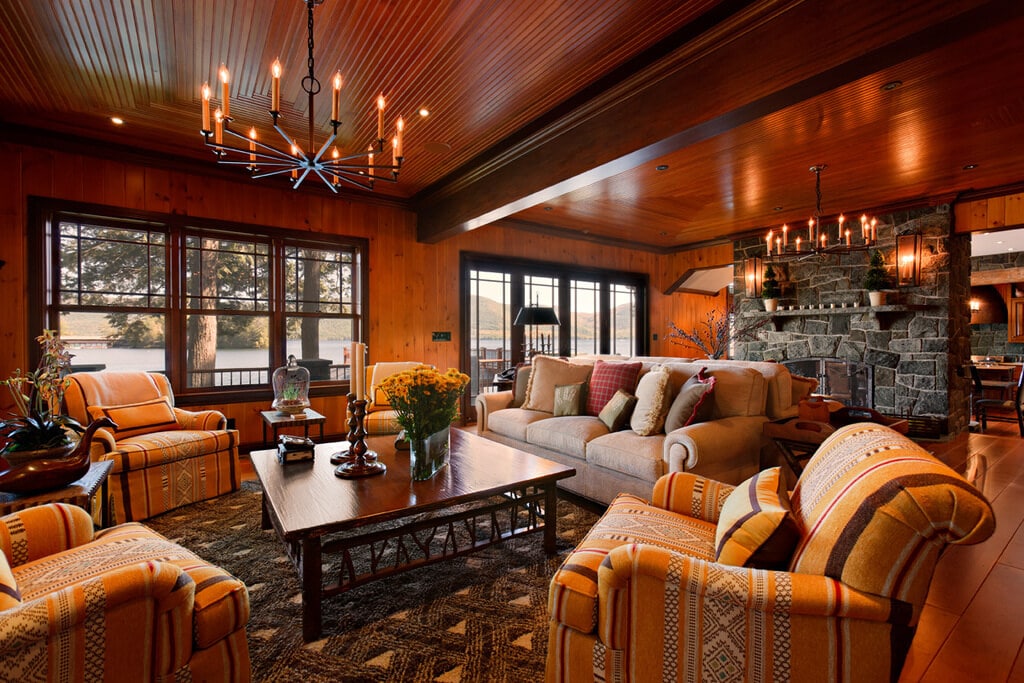
Warm Colors
Warm colors are another popular trend that introduces elegance and drama to a space instantly. Stick to a theme or color palette throughout your home that highlights other features and adds style. Many people have shifted from all-white painted walls to rich colors that elevate their home’s look, create comfort and coziness, and fill their rooms with mood. You can choose dark neutrals, subtle greens, or other warm shades to uplift your home. The best thing is, these shades complement mainstream paint colors.
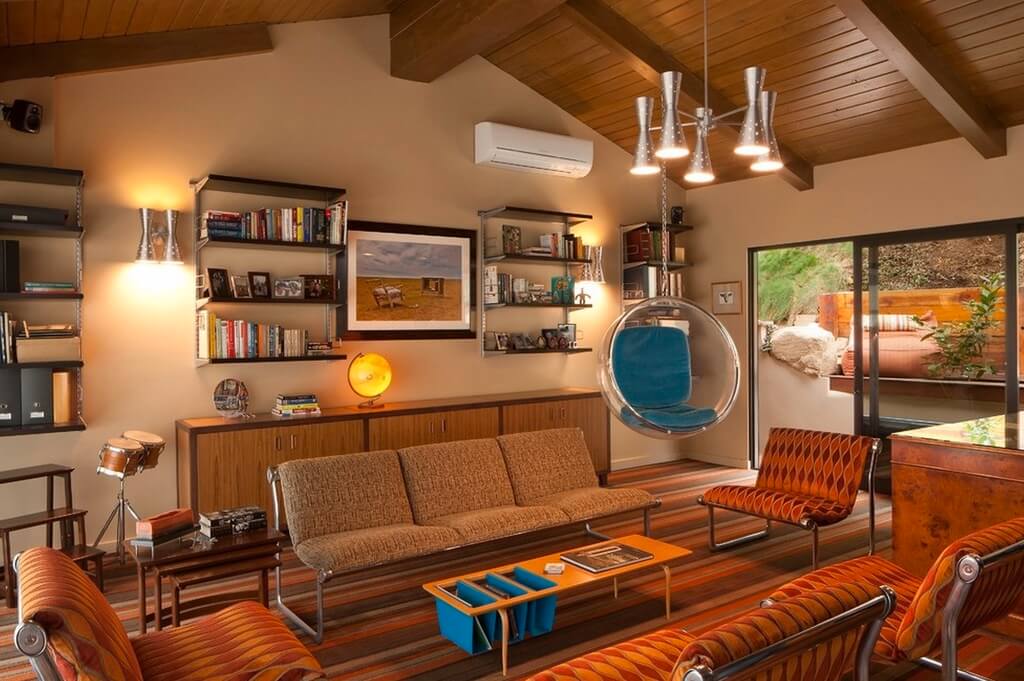
Retro 80s Elements
No other interior design trend is like the racy 80s. Be it architectural breaks, like arches, or disco lights, decor elements from the 80s are making a comeback. You don’t have to pick many but just one glitz item for your home to add more to its charm. For example, metallic lights with wallpaper or wallpapers for creating faux arches.
These are some of the latest interior design trends that you will see this year and beyond. Pick any of the trends based on your needs and style, design your home the way you like. Which interior design do you like the most? Share with us in the comment section!