Home Blog Page 146

Creating a Bar at Home: 7 Essential Appliances You Must Have!

0
Creating a Bar At Home

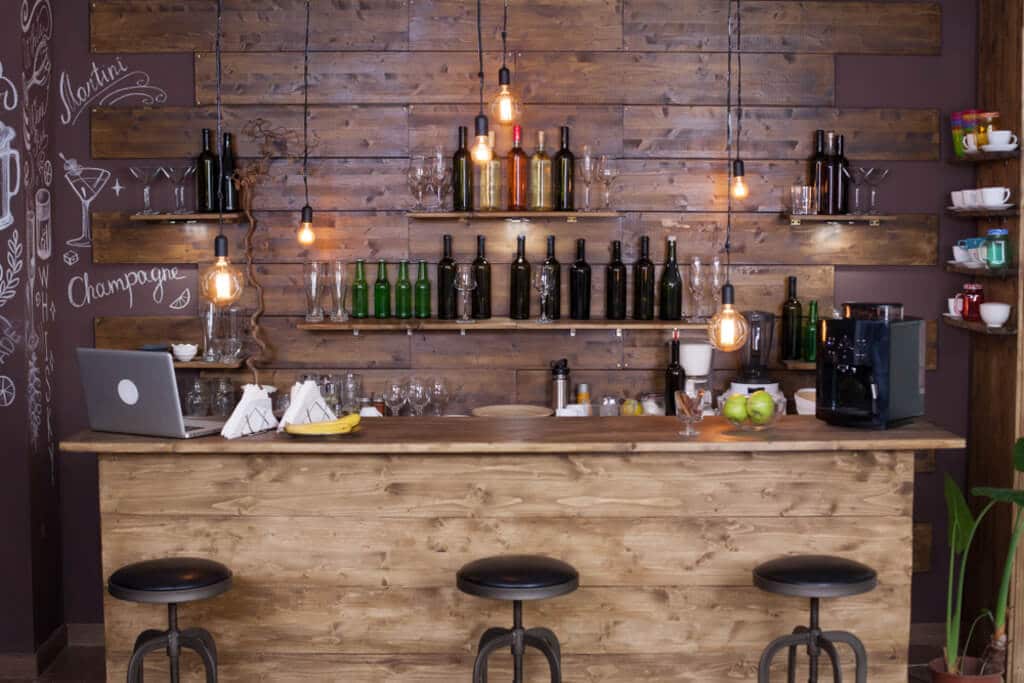
Nowadays people like to host festive parties at their homes more than hosting them outside the home. So when it comes to hosting parties at home, then you must ensure that all the guests are served perfectly with drinks. If you like to host parties and want to build your own bar at home, you should explore and work on what kind of appliances you should definitely have for a perfect, modern, and updated home bar. 

For designing your home bar, you should nicely plan out the layout of appliances and then create all that fits your budget and personality. 

Some people think that home bars are just about fancy cabinets and arranging different brands of alcohol in a presentable stand. But creating a bar is more than just setting the drink.

Creating a Bar at Home

7 Essential and Great Appliances Idea for the Bar!

1. Wine Cooler

Wine Cooler

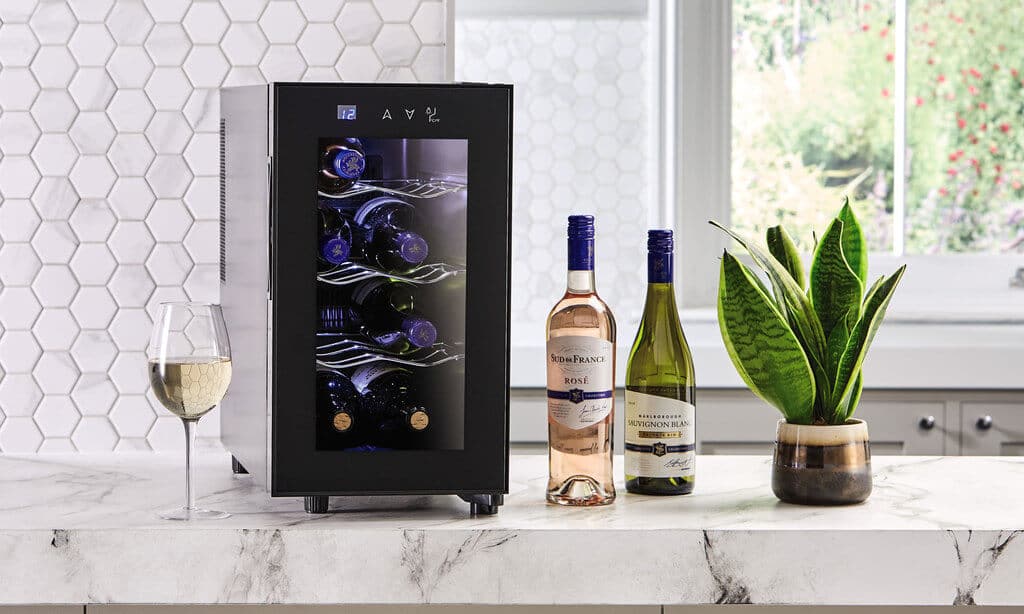
The very first thing and the most essential thing you should definitely have in your tropical home bar is a wine cooler. The wine coolers are available in different sizes and shapes which can be easily accommodated in your home according to the availability of the space. 

If designing a minibar, you are suggested to install a mini cooler which can fit the few bottles of your choice. If thinking about a wine cooler, it is a wine fridge that makes sure that your wine is stored at the right temperature.

2. Beverage Refrigerator

Beverage Refrigerator

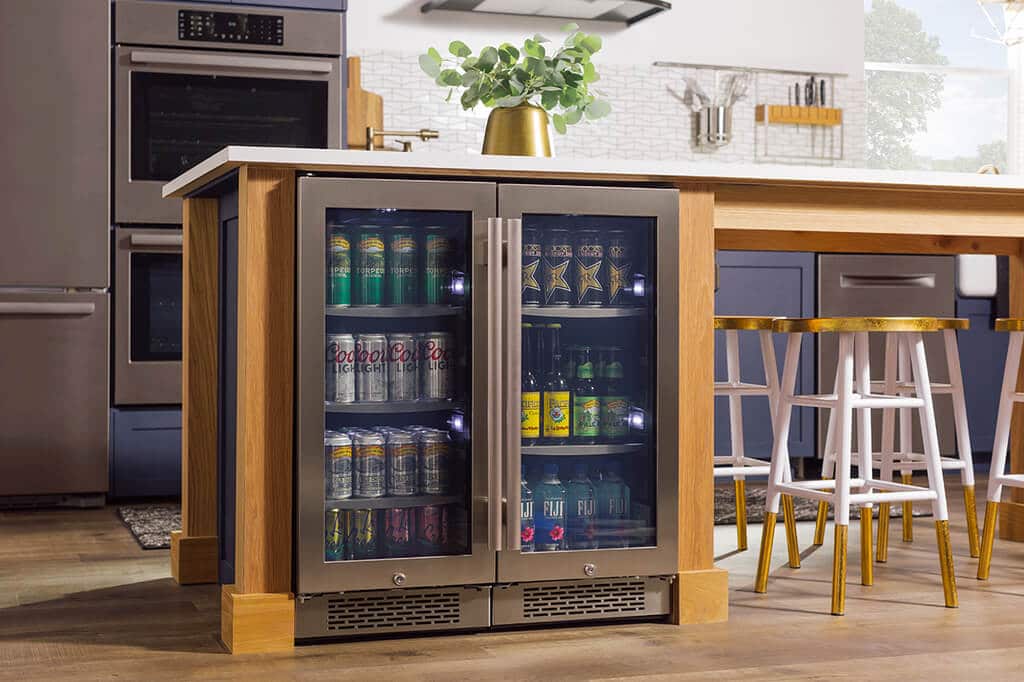
When you acknowledge guests, you need to make sure that you serve them beverages if they do not prefer wine. So it is beneficial to have a beverage refrigerator to store them at a cool temperature. It is advisable to install a beverage fridge and try to establish a glass pane for the door of the refrigerator so that all that you have arranged inside can be easily visible. 

For easy access, install a fridge that has a dual cooling system. This helps you to set different temperatures for a separate section of the refrigerator.

3. Ice-maker

Ice-maker

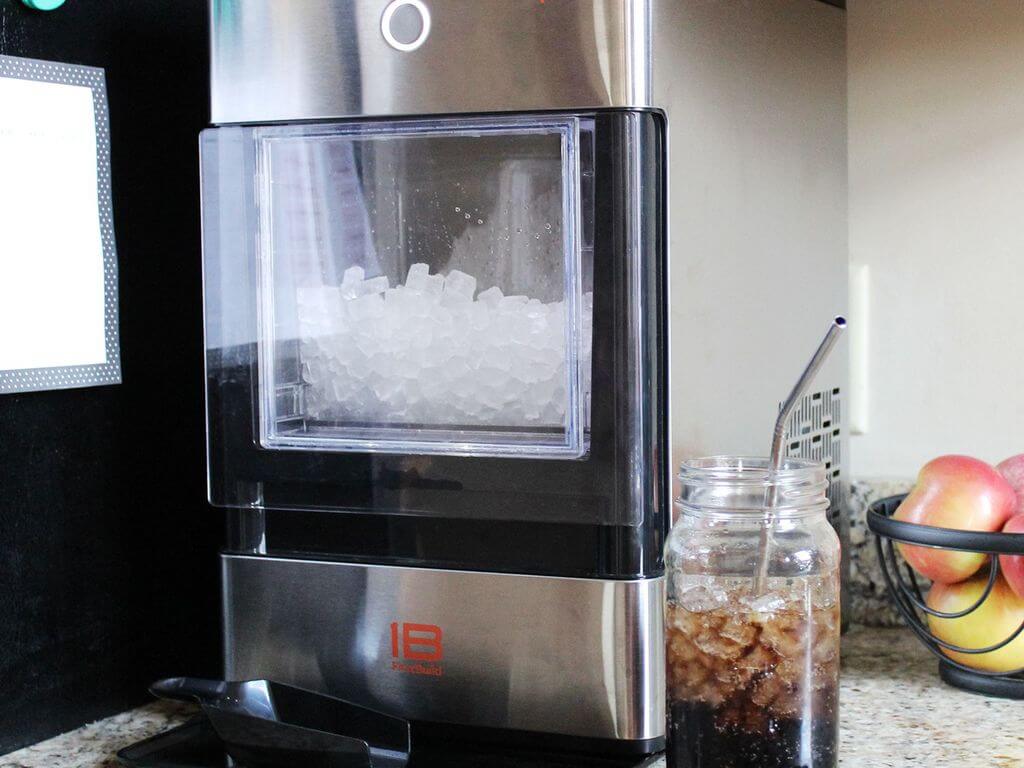
The ice maker is the second important thing after a wine cooler. You never know when you are out of stock of ice cubes. And there is no fun without ice when you have it comes to wine or beer. If you enjoy yourself making cocktails and mocktails, you should definitely install a mini ice maker in your mini home bar. According to your budget, you can either choose a portable icemaker or a freestanding ice maker.  

This is the best thing you can invest in. Not just for a home bar, this can also be helpful on your day to day basis. You need not run down to the grocery shop to get the heavy loading bags of ice cubes.

4. Kegerator

Kegerator

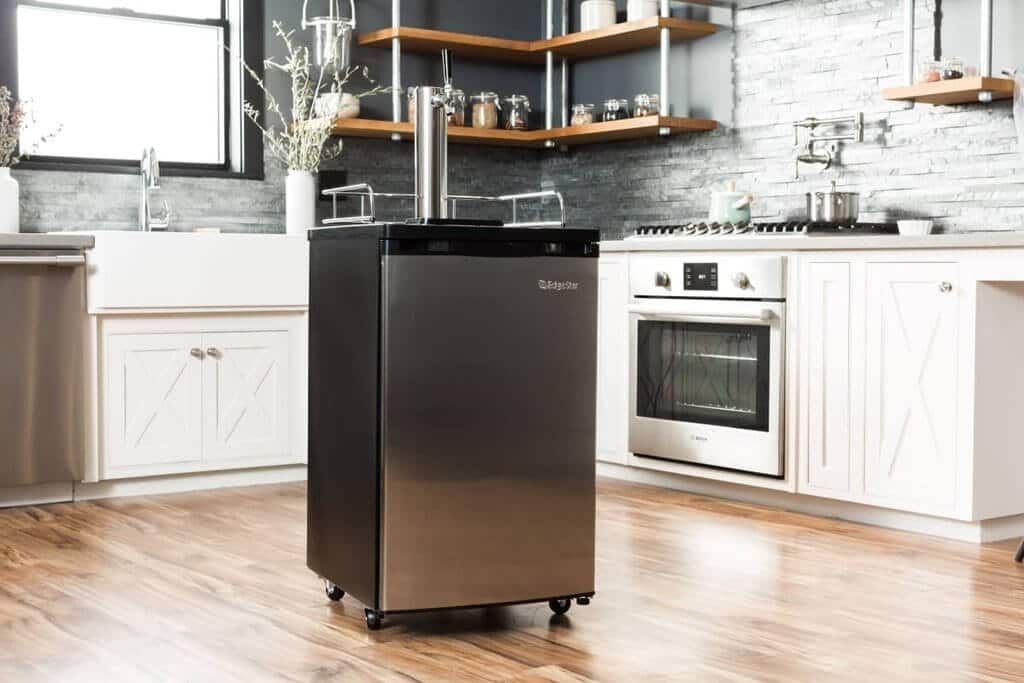
Kegerators are an independent mini fridge that can be converted into a regular fridge if you are not using it as a bar refrigerator. They have a canister of CO2 which is inbuilt with a tap on tap in it. As the kegerator has CO2 provision, which makes sure that your wines and beers are stored at the correct temperature and serves you the original taste and feel.

5. Brandy Warmer

Brandy Warmer

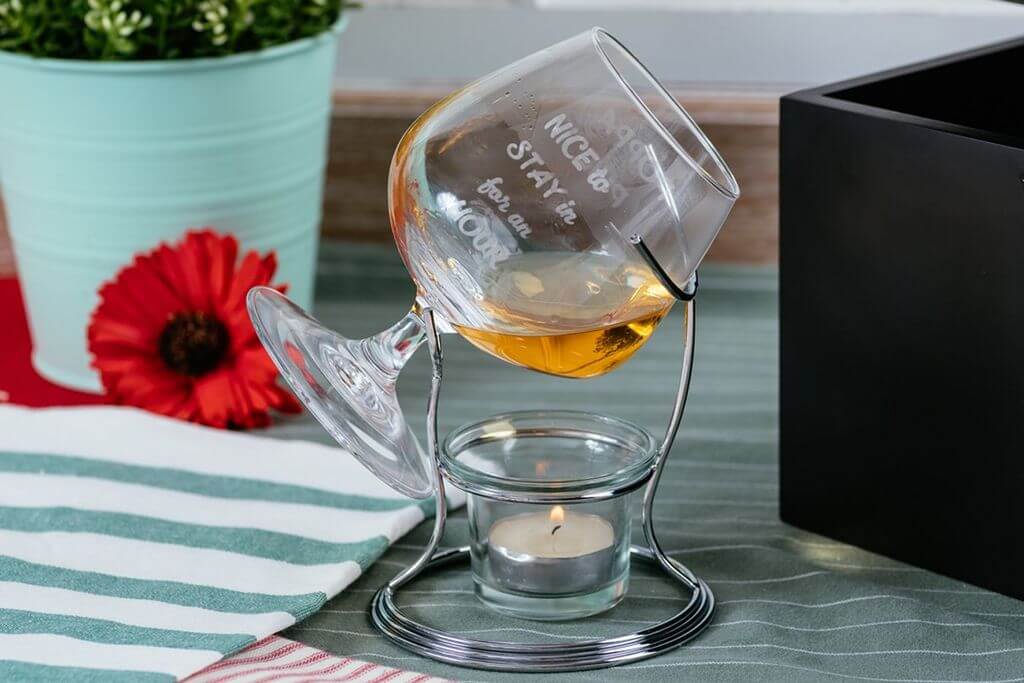
If you don’t know what Brandy is actually, then let me tell you it is a Dutch word that means burnt wine. So this appliance is very beneficial, it keeps your wine warm by heating it within, which helps boost the aroma and savor of the liquor or wine. 

Brandy warmer has a metallic stand that consists of a tea candle rest that comforts your drinks. This not just helps warm your liquor, but also allows you to feel like having the feel of a royal bar.

6. Jigger

Jigger

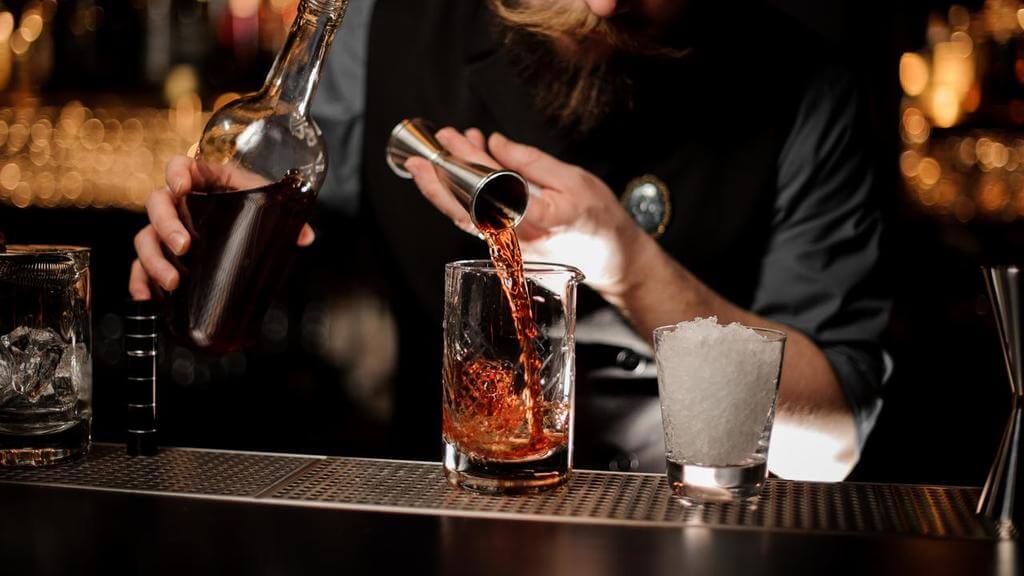
Jigger was formally adopted from a small man who used to dance on the streets of Scotland. And in the language of bar accessories, the jigger is an appliance that happens to be a cocktail set, which helps you measure the right and accurate measure of drink before you pour it in the shaker. 

This is available in different sizes which can help you measure the exact quantity. This is very useful when you are in a hurry and want to have a satisfying sip of the drink. 

7. Mixology Set

Mixology Set

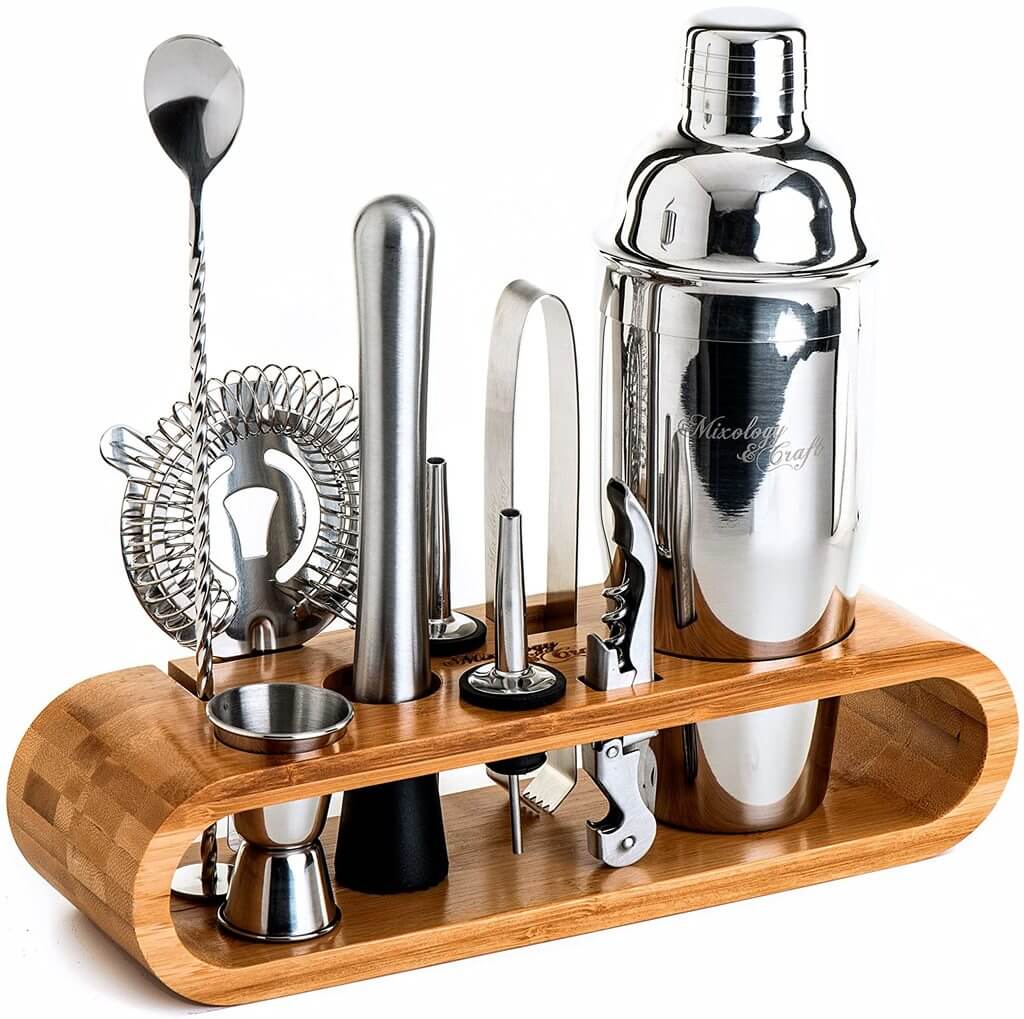
If you are a pro master in mixing and a great mixologist, you should definitely try having a complete set of cocktails that can help you make craft cocktails and mixing of drinks. You can even try creating different styles of cocktails if you buy your very own Mixology set.

Usually, the mixology set consist of 

  • Bottle opener
  • Bar Cart
  • Cocktail shaker
  • Cutting Board
  • Julep strainer
  • Cocktail glasses
  • Muddler spoon and stiller

Conclusion

With this here, we are presenting you with all the necessary and essential bar appliances that you must have when you are planning to create your own home bar at home. This would not just impress guest at home, but also make your serving and work easy.

Also Read: 

DIY Toddler Bed Ideas: 11 Beautiful Handmade Bed Designs for Kids Bedroom!

0
diy toddler beds

A baby slowly growing into a toddler.. isn’t this transition wonderful? It is a significant step in the development and growth of a child. And as parents, this is a big deal for you to see your kids grow, right!. This transition brings a lot of changes in the child and as well as in his surroundings. The nursery room now becomes a toddler bedroom, and the things that as a baby they liked are no longer in need of them. To give you some inspiration, we have collected some cool and creative DIY toddler bed ideas that are also super easy to build.

You have to change according to your growing kid, and the first step in this is to decorate their bedroom. Now the interior design should reflect the personality of your kid. For example, unusual and creative bed designs will encourage imagination and fantasy in your children. Also, with the exciting furniture, they will no longer have a problem with their sleep because this will become their favorite spot! 

These fabulous pieces of furniture come with high price tags, but not everyone has a big budget to spend on them, right? Don’t worry; we’re not telling you to buy these. Instead, you can DIY them. All you need is some of your time and a few required tools, and you can make a perfect DIY bed for your toddler. If you don’t know anything, you can always ask your local carpenter to make one for you. It will also cost less! 

From superhero bed to canopy and treehouse bed, here you’ll find a perfect bed for your kids. All of them are so fun and fabulous, so select the one that fits your skill and budget!

11 Easy But Creative DIY Toddler Bed Ideas

Believe me; there will be nothing better than a DIY toddler bed for a growing toddler. This is a great way to show your love for your kid. This comfortable and stylish bed that you design for them with love and care will be the best gift! Take a look at the below list and get inspired and ready to build a bed for your baby. 

1. DIY Toddler Teepee Bed 

DIY Toddler Teepee Bed 

Your toddler will surely love this bed design. This cute Teepee Bed with Trundle is perfect for the growing kids. It will stimulate them to create new stories, imagination. To make this bed like a tent or a camping site, decorate the entire room accordingly with the right accessories. 

2. DIY House Bed

DIY House Bed

This type of bed is quite trendy these days. The reason is that it can be used for both baby girls and boys. It is also quite easy to make. All you have to do is to create a hut-like structure with some wooden planks on the top of the existing bed. But make sure that you have tightly secured the wooden planks. 

3. White Bed with Rails

White Bed with Rails

If you already have an extra bed, you can also turn it into a toddler bed. How? Look at the above pic; look how beautiful this bed is. Add some bed rails to the bedside so that your kid can sleep safely and to avoid unwanted accidents.  

If the bed’s height is too high, you can add a set of small stairs or a stool so that your kid will not face any difficulty reaching the top. 

4. Sturdy Built-In Bunk Beds

Sturdy Built-In Bunk Beds

Another great option for your growing kids is these spacious built-in bunk beds. For a twist, instead of regular stairs, use a rope ladder. With this bed, it will be a fun time for your children to sleep.

5. DIY Kids Platform Bed

 DIY Kids Platform Bed

Does your kid often fall down from bed while sleeping? If yes, we will not advise you to build a bed at a high level; this can harm them. Try building a platform bed like this one! This is both comfortable, secure, and also pretty easy to make. All you need is some basic supplies and tools to make this cute bed for your toddler. 

6. DIY Loft Bed

DIY Loft Bed

This bed is one of my favorite types of bed on this list. This loft bed has a sliding barn door, which is quite unique in itself. It is just not a bed; it is an entire house. 

Also, it has two levels: on top put a comfy mattress, and this will become a sleeping place. Put some extra chairs at the ground level to make extra seating and playing space. Your kid will surely enjoy this beautiful white cute, comfortable loft bed. 

7. Convert Crib to Kid’s Bed

Convert Crib to Kid’s Bed

For some kids, it is not easy to give up their crib. As a parent, you should always support and help them in this transitional period. How? Repurpose their old crib and transform it into a toddler bed. 

Don’t worry; it is not that difficult. All you need is to do a few structural changes, and for that, you’ll require some extra pieces of wood and some basic tools. Build a new frame because now it will be a little larger than the old crib one. Join all the pieces securely, and your bed is ready! 

8. DIY SuperHero Bed

DIY SuperHero Bed

Every child has an idol superhero in their mind that they blindly admire. We all had these kinds of superhero fan moments in our lives, right? So why not you take inspiration and design a bed matching your kid’s fantasies. This will be a perfect gift for your growing toddler, and we’re pretty sure they’ll love it! 

9. Unique L-Shaped Beds 

Unique L-Shaped Beds 

This bed concept is highly inspired by the college dorms. Just like the dorm beds here also the beds are high at a level. These types of L-shaped beds are perfect for your growing twins. 

More kids mean more stuff, and more stuff means they’ll need more space. So, these beds are perfect as they have plenty of storage space under it. The sturdy wooden steps will give them easy access to these comfy beds. 

10. DIY Modern Kids Bed

DIY Modern Kids Bed

Look at this gorgeous bed! You know the best about your kid’s choices; if they like the modern bed, go for it! It has a rich blue frame with eye-catching yellow hairpin legs, making this combination both elegant and playful.  

This bed frame is so good-looking, but it is definitely not the one that is easy to make. Customized things always have a more personal touch than items that are sold in the market at fancy rates. You will have to put a little bit extra effort into building it completely but believe me, it will be worth all your hard work!  

11. DIY Treehouse Bed

DIY Treehouse Bed

Do your kids love treehouses? If yes, what could be better than this for you to take inspiration and design a treehouse inspired bed for them. To complete the look, put a comfy mattress on the ground. The space on the top will be a great place for your toddler to play. 

To build this, you’ve to place wooden logs carefully and tightly secure them with bolts or screws. Yes, it may take some time and hard work, but the end results will be amazing.

Built a Creative & Comfy Bed

So which bed design you liked the most? Try to build a bed that is comfy and secure and also creates a storyline for your kids. Keep things creative but simple! This will really help them to get a happy, relaxed sleep. 

All these DIY toddler beds are easy to build and look really creative and beautiful. If you don’t know any carpentry skills, you can always take help from a professional or local carpenter to do the job for you. As a parent, it’s our responsibility to provide our kids with a better environment where they feel safe. I hope all these creative and budget-friendly bed ideas will help you to make a perfect sleeping bed for your children. 

Discover More: 

Ways to Reduce Your Medical Office Build Out Costs

0
Medical Office Build Out Costs

Attending a medical office, whether for a consultation or examination, can make a patient nervous. This is only natural, as we value our health greatly and when things do go wrong there is a sense of uncertainty. Yet, take a look at your average medical office or surgery: it is usually dull, lifeless, and sterile, and not a welcoming place.

This is why a lot of new medical offices are built with the patient in mind in terms of practicality and atmosphere. A welcoming office, one where the patient and the staff feel comfortable, is one that will be satisfactory to visitors.

However, new builds – and remodeling of existing medical offices – can be costly, and it may be tempting to cut corners and economize. This results in a dull and uninspiring result. So how can you save money on medical office build costs while providing your clients with a pleasant, practical, and friendly place to be? You could talk to experts in medical builds such as Diversified Construction who are dedicated to designing and building medical offices that are as we described. What can they offer?

Diversified Construction has the experience and expertise in medical buildings – everything from offices to dental practices, surgeries, and more – that allows them to understand what is required in terms of aesthetics and practicality, and they have helped many clients with both remodeling and new builds of medical practices. They embrace innovation and look to the future when it comes to design and materials, and they keep costs down by using the latest most effective methods.

Future-Proof Design and Construction 

Future-Proof Design and Construction 

There are many views as to how future medical buildings will look both inside and out, and Diversified Construction designs its medical facilities so that future developments can be incorporated. In such a building it is as important to understand the technology involved as much as it is to incorporate the necessary reception area, waiting rooms, patient examination rooms, doctor’s office, surgery areas, and more.

With each medical office build being unique to that site it is unsurprising that many clients of Diversified Construction come to them with a clean sheet of paper, and work with them for perfect results. How do they keep costs down? Let’s have a look:

  • Specialist medical office or surgery design means that all areas are attended to at the design stage, and the build is completed as planned with no delays and careful strategy.
  • By using the latest materials, equipment, and techniques costs are reduced thanks to efficient build processes that cut down on the time taken to build.
  • Experience in this specialist field means that costs can be reduced by removing superfluous aspects of the design; only what is necessary will be included.

By guaranteeing excellent efficiency in working practices, and by working with the client to understand exactly what is needed, a build-out or remodel of a medical practice can be less of a chore than you may believe, and also less costly as a result.

Pleasing and Relaxing

Pleasing and Relaxing

Rather than staff and patients finding a medical office a staid and uninspiring building, the Diversified Construction design will prove popular with all. One factor that is often overlooked with such buildings is the exterior space.

Green spaces around a clinic, office, or surgery serve to help the patient relax, and as such are a vital addition to a new-build or, where possible, to a remodeled medical office. Being able to enter via pleasant and welcoming entrance areas is a major benefit for the patient, who will be more relaxed and less nervous as a result.

In summary, cutting corners is not the right way to keep building costs down in a medical office build-out. It will simply present a building that is much like many others, in being staid, drab, and not at all patient-friendly.

Talk to Diversified Construction, your local leaders in the design and construction of medical facilities fit for the future, and you’ll get a great idea of just how they can help you create a space that is perfect for your patients, practical and comfortable for your team, and surprisingly affordable.

Continue reading:

10 Tips for Operating a Mini Excavator

0
Operating a Mini Excavator

A mini excavator is a popular piece of equipment on the construction site thanks to its versatility and relative ease of use. This clever piece of machinery can be used for small demolition work, digging holes, and snow removal to name but a few. So, what is the best way to operate a mini-excavator and how do you get started? Read on to find out more. 

Before Getting Started

It goes without saying that before using any piece of heavy machinery that full training needs to be undertaken from a trained professional who is qualified to provide this certification. This training is essential for all workers that are going to be operating the mini-excavator and this training needs to be regularly renewed to ensure safety and good practice. The following guidelines are our top tips and should not be used in isolation without proper qualification. 

A large Excavator sitting on top of a pile of dirt

10 Tips for Operating a Mini Excavator

1. Plan Ahead

When you’ve received your training certificate it can be tempting to jump straight in at the deep end as you’re itching to use the excavator and get started. However, it is a good idea to thoroughly plan the work before you begin any project. This can ensure that mistakes are avoided, fuel is saved as you plan the most efficient course of action, and all workers are aware of the tasks at hand. 

2. Choose Your Attachments Carefully

Mini excavators can come with a range of attachments that have different purposes. Make sure you educate yourself on what attachment to use for each scenario and have the right attachment in place for your planned project to ensure a successful outcome. 

3. Check Your Machine

It is important to check your machine before use, this includes visual checks to ensure everything looks as it should such as the tracks,  and the machine body, making sure there are no final drive leaks and also ensure oil, lubricant, and coolant are all at the correct level. 

4. Test it Out

When you have checked your machine and have the correct attachments in place, it is always a good idea to test the balance of the excavator on a surface that is level before diving into your project to avoid accidents and mistakes. 

A man sitting in a Mini Excavator on a construction site

5. Make Sure Your Working Spot Is Level

Wherever you need to use your mini excavator, you need to ensure the tracks are on firm ground and a level surface. Take some time to scope out the area where you plan to dig before getting started so you can plan how to approach it in the safest possible way. Without careful planning and consideration, you run the risk of the mini excavator tipping over if you don’t consider the ground situation first. 

6. Brief Your Team 

When using an excavator everyone on site must be fully briefed first to ensure efficient work and safe working space. The surrounding area around the mini excavator needs to be clear of people and obstacles, and the excavator must never be operated close to where individuals could come into contact with it. Drawn out plans and a timetable can be helpful with this so that everyone knows where they need to be and when and what exactly needs to be achieved in the timeframe. 

7. Take Regular Breaks

Operating heavy machinery is tiring and tiredness can lead to mistakes and safety breaches. It is, therefore, very important that whoever is operating the mini excavator takes regular breaks to avoid such a scenario. This will help maintain the health and wellbeing of your workforce, maintain a safe working environment, and ensure that fatigue doesn’t set in.

8. Stay in Tune with Your Surroundings

Careful planning has been reinforced in this article as an essential task before starting any excavation work. However, this does not mean that you switch off the blinkers when conducting the work itself. Whenever a mini excavator is being used the operator must be constantly considering their surroundings and any potential hazards that need to be observed during operation. Make sure mirrors are regularly checked and that you are always in tune with what is going on around you. 

9. Make the Most of the Auto-Idle Function 

Many mini excavators will come with an auto-idle function which the machine activates whenever it has not been used within a certain amount of time. This is an excellent function to both save on fuel and reduce excessive use of the machine when it is not needed. Make sure all operators are aware of this auto function and know-how to enable it. 

10. Perform Regular Maintenance 

Keep your mini excavator in tip-top shape by reinforcing a regular maintenance routine that all your employees are also in tune with. This requires greasing the machine after each use, checking oil levels regularly, cleaning the machine, regularly checking the air filters, and ensuring all of the motor equipment is working efficiently. The final drive motor on your mini excavator will last for many years but will need replacing at some point, find out more about the marvel that is the mini excavator final drive motor here. 

With these 10 tips for operating your mini excavator, you’re sure to have a smooth drive!

Conclusion

Mastered the mini-excavator? Don’t let success lull you – safety thrives on constant vigilance. Remember, every dig starts with planning, awareness, and respect for both machine and terrain. So, operate mindfully, maintain meticulously, and keep the safety of your co-pilot. Happy excavating!

Learn more:-

Why Invest in Retractable Screens?

0
Retractable Screen

As a homeowner, you will want to make the most use out of every part of it. Using the patio in your home can prove to be quite difficult with the existence of insects and weather changes. That would be a shame for homeowners who enjoy lounging at their own houses and taking in the view. One simple way to solve many issues would be to install retractable screens in your doorways. 

There are many benefits you can achieve by investing in some high-quality screens. By reading this article, you will discover the many perks of installing retractable screens in your own home. Once you are aware of how useful they can be, you will not want to pass up on the chance to have them.

Retractable Screens

Why Invest in Retractable Screens

Privacy

Retractable screen doors will allow you to have privacy in any area you choose to install them in. They will act as a sort of barrier that blocks out the view of that area from other people. This will be excellent for swimming areas if you want to keep onlookers away from your pool. If you value your privacy, you will definitely want to invest in a high-quality screen door. 

It will benefit you and the other members of your house to have the privacy you need to enjoy certain areas of your home and you do not even have to worry about the potential hassle of having to remove them during certain types of days. The self-storing feature of retractable screens will prove to make a difference. They will make everything much more convenient for you by making the storage and removal of them hassle-free.

Protection from Insects and Weather

One of the most important benefits of retractable screens is quite essential. They will protect your home from insects and weather conditions. They work to prevent insects and other pests from invading your home from the outside. 

By doing so, you can relax outside without having to worry about constantly looking out for insects. The nice breeze will be welcome into your home while the screen allows your home to stay nice and ventilated.

Retractable screens will also protect the designated areas of your home from rain and UV rays. Some areas of your home and certain types of furniture can be affected by the weather. The retractable screen will make sure that they will stay safe from damage, rain, or shine. This will allow you to relax even when the weather tries to affect your surroundings.

Extends the Life of Your Patio

You will definitely want to make the most out of your patio and the swimming areas of your home. They should last as long as possible in order to stay in top condition despite conditions that would cause them to wear down. Retractable screens will help extend the life of your patio by a long-shot. They will work to protect your patio from being harmed by insects and the weather. As a result, it will take much longer for the patio areas to wear down from outside factors. 

Furthermore, the value of your home will increase. This will be important if you are ever thinking of selling your home. Retractable screens will allow you to have more time with your patio than before. The screens will help the patios stay functional in different seasons thanks to the protection that they provide.

Retractable Screens Extends the Life of Your Patio

Can Be Custom Fitted

Retractable screens are designed to be custom-fitted to any door frame, no matter the size. This will save you the hassle of worrying about problems regarding size during installation. Retractable doors are considered to be a universal fit for any area of the house. This eliminates the concern about inconvenience when it comes to installation and use. They are perfect for terraces, patios, gazebos, and many more areas of the house.

You can keep the retractable screens up to prevent the invasion of pests. They will also disappear on their own when they are not being used. Having this level of convenience while still maintaining your privacy will prove to be beneficial. No matter what room you want to install retractable doors in, your mind will be at ease knowing that it will fit.

Helps You Save Energy

Retractable screens are built to protect your home from the weather. Helping your home be more energy-efficient will help you save money and keep your furniture safe from damage. UV rays become a bigger problem during the hotter months of the year. You will want to be prepared to let your retractable door keep your house cool. 

They are able to prevent a good amount of sunlight from entering your home. This means that you will not have to blast the air conditioner as hard to keep your house cool during the summer.

They also help keep your house ventilated during the winter, which prevents you from having to turn the heater up higher. No matter what season it is, retractable doors will help you save money on your energy bills. Your home will stay comfortable and you will not have to worry about overheating or freezing.

Keeps Air Free of Pollen and Dust

Many people suffer from pollen and dust allergies. It can be difficult to go to certain areas outside of your home if you are affected by it. Retractable doors are designed to protect the inside of your home from dust and pollen, keeping the air free and your lungs safe. They are pretty easy to clean as well. Cleaning it will help ensure that the mesh stays in peak condition to ventilate the area. 

Having a retractable door will prevent you from being surrounded by allergens and keep your living space allergen-free. The amount of protection you will receive thanks to retractable screens will have you satisfied with its high quality.

Conclusion

Investing in a retractable screen has been proven to be more convenient for you in many different ways. Go Retractable is a reliable brand if you’re looking for retractable screens. The installation will be easy and it will fit perfectly into any door space. The easy installation process and the amount of energy you will save will prove to be entirely beneficial.

Explore More

What You Need to Know About Windows for a Kids Room?

0
Windows for a Kids Room

The first thing parents think about when looking at kids – is how to make the surroundings safe for them.  Needless to say, that everything at home should be planned and placed in accordance.  It is good when we can move all curiosity arousing things on top, but what can we do with windows?  We can’t change their position, but we can make them safe.  The window unit should be secure for kids to be and play around.  

There are few things to be foreseen when talking about kids and glazing constructions:

  • windows should have the ability to be locked in either position – closed or opened;
  • the premise should be protected from dangerous to our eyes UV rays;
  • the rest area is to be not directly under the window.
A man in overalls is opening a glass door

Windows must be secure for kids.  Any type, American double-hung or regular swinging double pane window, can be additionally equipped with various locking devices that will prevent children from opening them.  Parents should consider this before the installation process or even after since most of them are additional devices possible to be applied on existing constructions.

So, let’s take a look at some child locks for swinging mechanisms:

  • “Socket” lock: “closed” plate is installed on the place where the handle should be.  This additional cover can be easily removed by hand, and only the handle can open the casement.  The system is not really convenient, since you always should remember where the handle is and even a two-year-old child can do the same unlocking manipulation himself after the process is well observed;
  • The next option is a handle with a button.  It is installed as easily as a regular one. To perform the manipulation, it is necessary to hold down the button located on the front part – only then the handle will begin to move. The point is that the child will quickly understand the logic.  The other thing is that the button can become an entertaining device.
  • Handle with the key is the coming option.  As you now understand, the handle turns only while the key is inside.  This means that the key will be needed for every manipulation – which is not convenient.  Adults will have to secure that key from little kids at the place, where they can’t reach it.  
  • Another option to secure the window is to buy a child lock. It is installed at the bottom of the frame, consists of two parts, which are securely fastened together if the key is put into operation.  This option allows us to open the window for normal ventilation or completely close it.  In this case, you do not need a key, it is only needed to open the window.  The suggestion is not to open the window for ventilation with an inserted key underneath not to scratch your sill.
  • One more option is such called “cable-lock”.  It can be installed on the top of the window, connecting operable sash and frame and allow the window to open as wide as the length of the cable is.  Once installed and locked you do not need the key all the time to do the manipulations, it is only needed to remove the cable once not needed.
A boy and a girl looking out a window

As we see, it is not a big deal to equip the window with a child lock.  The thing we should care about is that it should be convenient and useful.  Call Apex Window Werks technicians to receive worthy advice and useful device to make your windows safe for children

Child lock for American double-hung windows seems to be more natural.  These are special locks in the construction that allow either to block the movable sash or leave it open on the width the parents consider safe for the child to play around.  The construction is good-looking, very easy to wash, safe for children, and has high energy-saving possibilities.

Another important protection that parents should think about is to secure the kids from harmful UV rays.  You should ask the company-manufacturer or your window glass repair company to apply the special coating on the inside of the glass.  The procedure is not difficult but very important for the health of your family and even for the durability of your interior furniture.

All the glazing units are now claimed to be very tight, not permitting any wind blows inside.  However, we used to think about the security of our children on a level extent higher than normal and try not to place the bed exactly under the window.  This will not only secure the kids from the sun, wind, or other influence but will also exclude direct access from the bed to the window.  Our children deserve to be taken care of, so let’s give them our full attention and unconditional love.

To summarize, all available on the market devices can make the windows safe for the kids’ room and Apex Window Werks, a trustworthy company in the window repair and replacement market, will be happy to assist you to organize any glass repair service and make the glazing units safe for your family.  Apex team pays much attention to safety measures to ensure comfortable and healthy living for our younger generation.

In case you missed it!

DIY Cork Board Ideas: 13 Different Creative Ideas That Can Bring the Vibe to Space

0
DIY Cork Board Ideas

Corkboards are bulletin boards made of a heat-insulating material made of compressed granulated Cork.  Corkboards are the most adapted feature of DIY in workspaces and personal space and rooms. This hand-made or self-made traditional cork board can be made by framing a piece of Cork hanged on the wall.

 There are tons of different ways where we can create a self-customized or a DIY corkboard. Usually, people get these bulletin boards made for their offices to stick or pin the important notices, tasks, or reminders.

But now-day, people also use these cork board ideas for their bedrooms and personal spaces to recreate the vibe of the room with memories and artifacts. DIY cork boards can be entertaining to be made and useful as well. 

Why Should We Use Cork Board Ideas?

In today’s world, we are so busy that, at times, we forget what we have scheduled for the rest of the day. So in such a hectic world of competition, we are so lost that we have no ideas of what is on the list next for us. Do you remember when did you last sat down and went through the albums of your memories? Or when was the last time you made a new musical note?

Or when did you last made a cartoon sketch? No right! So this cork board is also known as “The Cork Board wall” or “The Memory Wall.” Cork Boards can help recreate and store the memories and all those things that are not just lines and curves created with ink, but they are the emotions you have designed with your heart.

How to Make Cork Boards? and Corkboard Walls?

We have the answer to your question. You must know how to apply the corkboard correctly. So before we guide you with the steps for using the cork boards, you are supposed to have some raw materials to create the corkboard or the corkboard wall:

  • A cork roll or a cork sheet.
  • Utility knife, plastic spatula to apply and spread the adhesive
  • Strong and long-lasting Adhesive
  • Plywood Sheet
  • Paper towels or sheets to clean and damp the adhesive.

Now let’s start with the necessary steps of creating a traditional and straightforward Corkboard/Wall:

  • First of all, decide the size of your board or wall and mark them with pencils neatly in a precise manner.
  • Get the cork sheets, rolls, or the tiles.
  • Mount the plywood board according to the markings on the wall.
  • Apply the adhesive according to the thickness of the cork sheet to have a firm grip.
  • Apply and roll over the cork sheet. 
  • Press and spread over the sheet to remove the air gaps beneath the sheet.
  • Trim and shape it according to the design you need, if necessary.
  • Load it up with your Tasks, memories, notes, quotes, reminders, or inspirations!

Different Ideas to Create Your Cork Boards and Wall!

Now it’s time we explore some different and creative DIY ideas for your corkboard walls:

Spreading Out Some Paint

Spreading Out Some Paint diy cork board

If you are a creative person and have a good hold on the brushes, you might try creating and adding some colors to make the board and the corkboard wall more attractive and bright.

You don’t need to be a great artist. All you need is the fun within you should be seen in the paint. Just bring the joy out and create your attractive corkboard.

Stylish Cutouts

Stylish Cutouts diy cork board

Let’s get a little more creative with some shapes and designs for your board plate. If you feel like applying the entire cork roll sheet or the board to the frame, you can cut them down to different shapes and then roll them over to the adhesive.

Fabrication to the Frame

Fabrication to the Frame diy cork board

Watching just a bare brown wall or board can be tedious. For creating a spark to the dullness, you drape a beautiful and mesmerizing fabric cut to the board. The fabric added to the board can bring liveliness to the bland vibe of the board.

This corkboard frame can be best for fashion stylists and designers; they can add the fabric cut-outs on the corkboard according to the projects they have been working on.  

This idea can turn out to be beneficial plus attractive at the same time.

Use Colorful Board Pins and Sticky Notes

Use Colorful Board Pins and Sticky Notes diy cork board

The best part is the pins and the sticky notes; they can be used for both office and residential purposes. To create catchy eye boards, you can use maximum colorful pins and sticky notes to maintain the board’s vibrant touch.

Pocket Storage Cork Boards

Pocket Storage Cork Boards

Smartness includes secrecy. And here, cork boards and walls can have fabric pockets that can maintain the privacy of your notes, reminders, and memories or secrets. Have you ever thought about how it would be to add a secret space to your corkboard? Think over! This idea can be the best solution.

Jewelry Hangings Cork

Jewelry Hangings Cork

To organize jewelry and accessories is the most challenging job for a lady. I hope all the ladies would agree to this. So here you have an exciting idea.

Make your jewelry organizer. Have cutouts according to the different types of jewelry and sort them out. You can add designs and doodling with white color to give it ethnic or an artistic touch.

Wine Cork DIY Idea

Wine Cork DIY Idea

Wine corks are available easily in the market. You can collect wine corks, frame them together in any shape you want, and hang it on the wall. This can be the best cork board and the most beautiful idea one can use.

Kids Art Corkboard Wall

Kids Art Corkboard Wall

When we talk about kid’s art, what are the everyday things they like to store as their memories are their drawings? They want to draw on many things where they quickly and openly express their feelings and emotions. 

 So creating a corkboard wall is the best option. Sticking their art and crafts on the wall, locking them as memories are happy moments for kids. 

Round Cork Boards for Wall Organizers

Round Cork Boards for Wall Organizers

Have you seen an organizer on walls to store or note down important things? What if we create wall organizers with the help of cork boards? Make box storage out of cork boards to keep in light kinds of stuff, and we can use the exterior part of the box as noting down notes and reminders.

Inspiration Word with Corkboard

Inspiration Word with Corkboard

Cut out an inspirational word that can motivate and boost you daily, roll it over the cork sheet and trim it with the letters. And frame them on the wall and note down the dreams and goals with your inspirations.

 How does this sound to you?

Fairy Lights to the Cork Board Wall

Fairy Lights to the Cork Board Wall cork board

If you are a girl and like to decorate your memories, this can be the best idea. What you need is a fairy light. Add it to the memory cork board wall and light up your memories and keep them shining for a long run. 

Though this idea sounds to be expected, the spark this can get is worth using repeatedly.

Fix Together for a Corkboard Wall Art

Fix Together for a Corkboard Wall Art

Do you find wall arts and wallpapers to be tedious now? Want to try something new? Get some cork boards together, cut them down into chained designs or a honeycomb.

Color it, spray it, glitter it and place it on a bare wall with a solid color, and here you are, with a beautiful and focusing wall. This wall art can be created quickly and will stand out the best artifacts you can own in your entire house. 

According to the survey, a wall art full of love and fun works out to be the best piece of the houses.

Re-cycle the Corkboard

diy Re-cycle the Corkboard

If done as a bulletin board or a memory wall, now use it as something useful. Like you can use it as a tea coaster, plant coaster, pen –stand, a DIY watch, and many more exciting ideas. These cork boards are beneficial in many ways and can be recreated in any form.

Summary

So with this, we conclude this blog, and I hope you must have collected different creative ideas for your cork boards. Corkboards and walls are the best way to note and store your memories. And not just for reporting down of things and plans. Corkboards can be helpful to create many organizers and storing materials.

Corkboards are easy to be self-made. You need to get the raw materials and be firm about what do you want to create. If a beginner, it is advisable to seek a professional’s help to avoid any harm. 

So how did you find this helpful? Please do let us know!

Discover more:

Build Modern Homes With Inclusion Of Architectural Design Of Revit Families

0
Revit Families

The recent technological adaptations are scaling high. With the growing times, people are open to follow the updated guidelines of building real estate projects. For the successful development of building projects, the key factor required the most is to adopt technological procedures. 

Expertise builders will welcome the combinations of management and architectural capabilities. The revit families are being pronounced more to structure real asset projects. Next, the contractor’s owners don’t want to compromise on the accuracy of the task. So, the idea is an ultimate solution that unfolds the incredible future increasing the accuracy of the project models. 

Introduce Software In Project Plan

A construction process attains completion with the adaptation of Revit. Next, BIM is one of the software applications that helps in improving construction efficiency. Channelizing the real estate project in advanced form is great to do. So, every landscape architect, structural engineer delves into productive building information modeling software. Whenever it comes to construction projects, the good management system comprises solutions of full-scale BIM modeling. Also, it will not leave space for the integration of plumbing and electrical. 

The Revit families constitute the group of components used in building the model. Next, architects exhibit their intelligence in creating specific drawings for each stage of the project. Thereby, it helps individuals to build models such as windows, walls, doors, and stairs. 

A floor plan of a house with furniture

Save Costs And Thrust On The Modernity

With the evolving times, the construction styles have changed. For building stunning projects, developers remain in search of adding different products. Along with the same, it is required to bring cost-friendly projects. The introduction of technology in construction opens up a new phase to the same.

The remodeled architectural form is a practical way to save costs and add more value to design the project. So, every planner needs to assist homeowners accordingly. So it will help them to unlearn the measures to feature the best.

Promote Green Projects

For increasing the value of the project, nothing goes beyond the consideration of green. Investors don’t have to spend much on proprietary materials. With the inclusion of green architecture, it is possible to design the natural layout of a home. Next, the effective planning of the mechanical system is possible with the BIM. It will be great to achieve high levels of green certification. 

Durability is an essential factor to consider for the constructed buildings. Next, before the construction begins, investors can conduct the stress test of a building. It is the application of 3D environments and Revit drafts to make the optimum gains. 

The custom-made Revit drafts and architectural models work the most. Every owner desires to have the highest quality designs of stairs, windows, and doors. So those who are foreseeing to build standard projects should not neglect the stated method.

A drawing of a house with a lot of details

Blend The Technical Applications

Modern architecture is the arena that underlines the facets of promoting new construction plans. While using the Revit architecture, it is better to take a grasp of the matter of how the functionality of blueprints works with a 3D environment. 

The expertise team can work well to continue with tasks of BIM modeling and document drafting. Users give prompt feedback that there lies the possibility of creating automatic integration. So, it is beneficial to do the same because it leads to the possibility of reducing human errors. 

Track Budgets

The BIM is a secured tool to revamp the structural designs of a home. So, users want to devise the mechanism of the BIM. It can eventually help in the spheres of cost tracking and the projection part. Builders are lying a step ahead in building innovative construction projects.

Gaining profitable outcomes for the project is high. The efficient tools for ERP and drafting communication are promising ways to reduce costs. So, it is simple to track managing supplies to contractor communication. 

Realistic Management

The practical applications entirely rest on the advancements. The Revit architectural model is such that it implies more than the usage of resources. It reflects the recently updated techniques. Next, individuals should feel free to implement virtual recreation capabilities and 3D.

Undoubtedly, it helps people to give colors to the project where they can prove it valuable for maintenance planning and sales. Not only the Revit model rests within the building features, but the management system also creates leaps and bounds. They project the overall functionality of the same. The management teams can reach the interested parties to demonstrate the complete functional look of the building. 

Conclusion

It is advisable not to limit within the boundaries of construction formalities. Build durable assets with progressive technical measures. Architects are on a competitive edge to shape new projects. Therefore, the Revit architectural plan proves to be the dominant force. 

Learn more:

Why You Should Get Professional Scratched Glass Repair Services

0
Scratched Glass Repair Services

Repairing a building’s glass window is inevitable. We encourage you to choose a professional for this, as all DIY projects go awry if you have no prior training or have no expertise on the matter. No amount of toothpaste and microfiber cloth can remedy a scratched glass surface that stood several years against the elements. In fact, it can turn your warranty void if you aren’t careful.

No matter what needs repairing, DIY-ing, it is never a good idea. Plumbing, electric wiring, and even solar panel cleaning are just some of those things you’d instinctively want to handle by yourself. Not only will this feat endanger you but also do more damage than repair. You should also take note about installing new ones, as unless you have prior knowledge and experience, you’d probably botch it.

Scratched &  Broken Glass Repair Services

1. Save A Lot Of Time

Face it. You don’t have time to assess the glass, decide if you want to fix it, install a new one, go about fixing/installing a new one, and do aftercare. At best, you’ll decide to do it another day and altogether forget it ever needed repair. Just like other non-priority tasks, it’ll get buried in daily chores and responsibilities, and the more you put it off, the more stressed you become.

With a professional, you’ll be handing over this obligation in well-trained hands that have possibly done this a thousand times. Companies such as Glass Renu have seasoned technicians that use only the most updated tools to make sure your glass will look just like the first day you purchased it. They also offer free services for those that got their glass violated with graffiti and other damage save breaking damage.

2. Ensure Your Safety And Security

Unlike a non-professional in this field such as you, technicians are well-armed for any glass scratch problems. They know their way around getting to the defective glass pane and have the necessary equipment to make sure they don’t fall. When it comes to installment (if you ever decide to replace it), they know the safest and most efficient manner to go about it. 

Remember this before you go DIY-ing your scratched glass panels: A professional costs less than a broken window pane or a broken bone.

3. Maximizing Your Building’s Safety

Besides doing what’s in their job descriptions, these professionals can assess your building and see any possible flaw in your glass panes. This means they can see and determine an area that can be compromised and can give useful advice. 

This advice can help prevent any unwanted events such as a robbery. According to a statistical report (see reference: https://safeatlast.co/blog/burglary-statistics/#gref), 23% of burglars happen through a window. They can break windows they deem too weak and fragile to withstand forceful entry. If that glass window happened to have scratches and other flaws, your house might be easily compromised. 

Maximizing Your Building’s Safety

4. The Proper Tools

Windows range in type, shape, size, and thickness. They can be framed or not, but professionals can handle them no matter the variation, thanks to the tools they have in their arsenal. As a homeowner with little to no experience, we can safely assume you don’t have any essential tools to ensure that windows stay intact during the repair. Thus, there is no guarantee for a 100% successful repair if you used basic tools and can actually create more liabilities.

5. Licensed and Insured

In finding a company capable of repairing your scratched glass. Determine if they’re licensed and if their professionals are certified as well. Each state in the US has differing requirements, which you need to research before checking for any local glass scratch repair services. You should also check for any reviews about their company, both posted on their website or from other blog posts and reviews.

If you fail to make sure these requirements are met, you can find yourself with a job poorly done with no insurance given. Insurance is only applicable to reputable and legitimate companies due to the confidence in their services. Otherwise, you’ll be subjected to larger and unwanted fees, twice-fold when you finally hire legitimate professionals.

To ensure your safety in this regard, take note of their customer service. Good customer service can mean the company is also good at delivering their services. Inquire about their insurance policies, availability, and proof of licensure. As reputable companies, they won’t think twice about giving you the evidence, and the opposite can be said with scam companies.

Conclusion

Don’t gamble with scratched glass. Skip the DIY stress, safety risks, and potential liability. Invest in professional repair – for a crystal-clear future free from wobbly panes and break-in blues. It’s a window of opportunity for worry-free peace of mind.

To get more information:-

Plumbing Plans and Architects: Important Considerations

0
Plumbing Plans and Architects

When someone thinks about architects, they usually envision grand, aesthetic buildings. What people often do not understand is that it’s not just about how the building ends up looking, but also a lot about how to sound the core, foundational plans are. Out of the many layers of planning that go into a building’s architecture, plumbing plans will be in focus today, as we are about to discuss a few important considerations to facilitate plumbing.

Reduce the Number of Walls with Pipelines

Often known as wet walls, in every building or household, there are a few walls that contain the plumbing lines. These would be the:

  • Sewer lines
  • Vent stacks
  • Main water supply and distribution lines

Now, the little trick here is to share wet walls, whenever possible. By placing rooms that require active pipelines side-by-side, it is possible to use the walls that they share between them as common wet walls. Reducing the total number of wet walls has the following advantages:

  • Reduces the cost of plumbing installations and the associated labor costs
  • Simplifies the plumbing plans, making repairs in the future a lot easier
  • Damp walls can be kept to a minimum in case of a water leak
  • Detecting the origin of a leak becomes so much easier when there aren’t too many wet walls

Unfortunately for homeowners, they usually buy into homes that already have a set plumbing system inside. If the architect was not particularly mindful of the shared wet wall strategy, fixing even a small leak can become a nightmare for even experienced DIY enthusiasts. In such cases, leave the job of leak detection and repair to expert professionals. If you are in South Carolina, these Rock Hill plumbers can help.

A bunch of tools are laying on top of a blueprint

Cleverly Place the Main Shut Off Valve

There could be many reasons why people in the contracting business decide to place the main shut off valve as far away from easy reach as possible, but we can’t find any good ones! When we mention cleverly placing the main shut off valves, do not assume that it needs to be placed in a cleverly hidden crawl space. Instead, place it in a location that’s easy to reach for everyone who might need to reach it in case of an emergency. A burst pipe and the consequent water damages are going to be so much worse, if the future homeowners cannot even find the main valve, or reach it in time.

For instance, let’s say that your main shut off valve is somewhere in the yard, but underground, in a room that can only be accessed with a key. If you are away from home when a pipe burst and someone wants to shut off the water supply to reduce how much damage is caused, it will be very difficult to do. 

Incorporate the Wastewater Irrigation System

There are no advantages to be had in wasting water, so it only makes sense that the plumbing design naturally incorporates a wastewater irrigation system. It’s basically a design that diverts the dirty water from laundries, baths, and kitchens (not the sewer line!), right into the garden/lawn area.

However, this means that future homeowners should be warned about turning off the wastewater irrigation system if they are planning to use hard chemicals for cleaning. Do not forget to give them an option to do that, whenever they may need to.

Hire Architects That Understand Plumbing

A water faucet attached to a brick wall

When you look for an architect to design your home or some renovations, you will surely come across some that will tell you it is not their job to layout plumbing pipes. They usually say that the plumber can easily work with the plans he/she creates in order to do his job. If this is a situation you meet, just fire the architect and look for another one. 

A person that does not understand plumbing plans and cannot incorporate important considerations into architectural plans should never be called an architect. For instance, since we mentioned the wet walls, the architect might end up creating a design that would force a plumber to create numerous wet walls, which is not at all ideal. 

Final Thoughts

Plumbing and architecture do not seem to go hand in hand at first glance. But as you clearly noticed, there are some very important considerations that exist. It is very important to make sure that both the architect and the plumber work together in order to create something that is effective in terms of layout and usability.

In case you missed it!