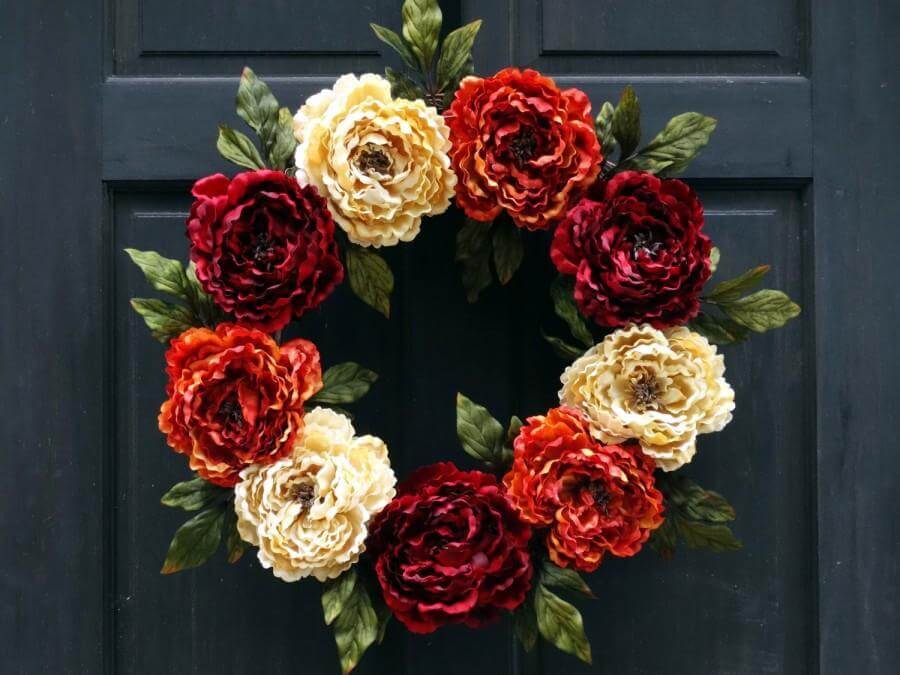
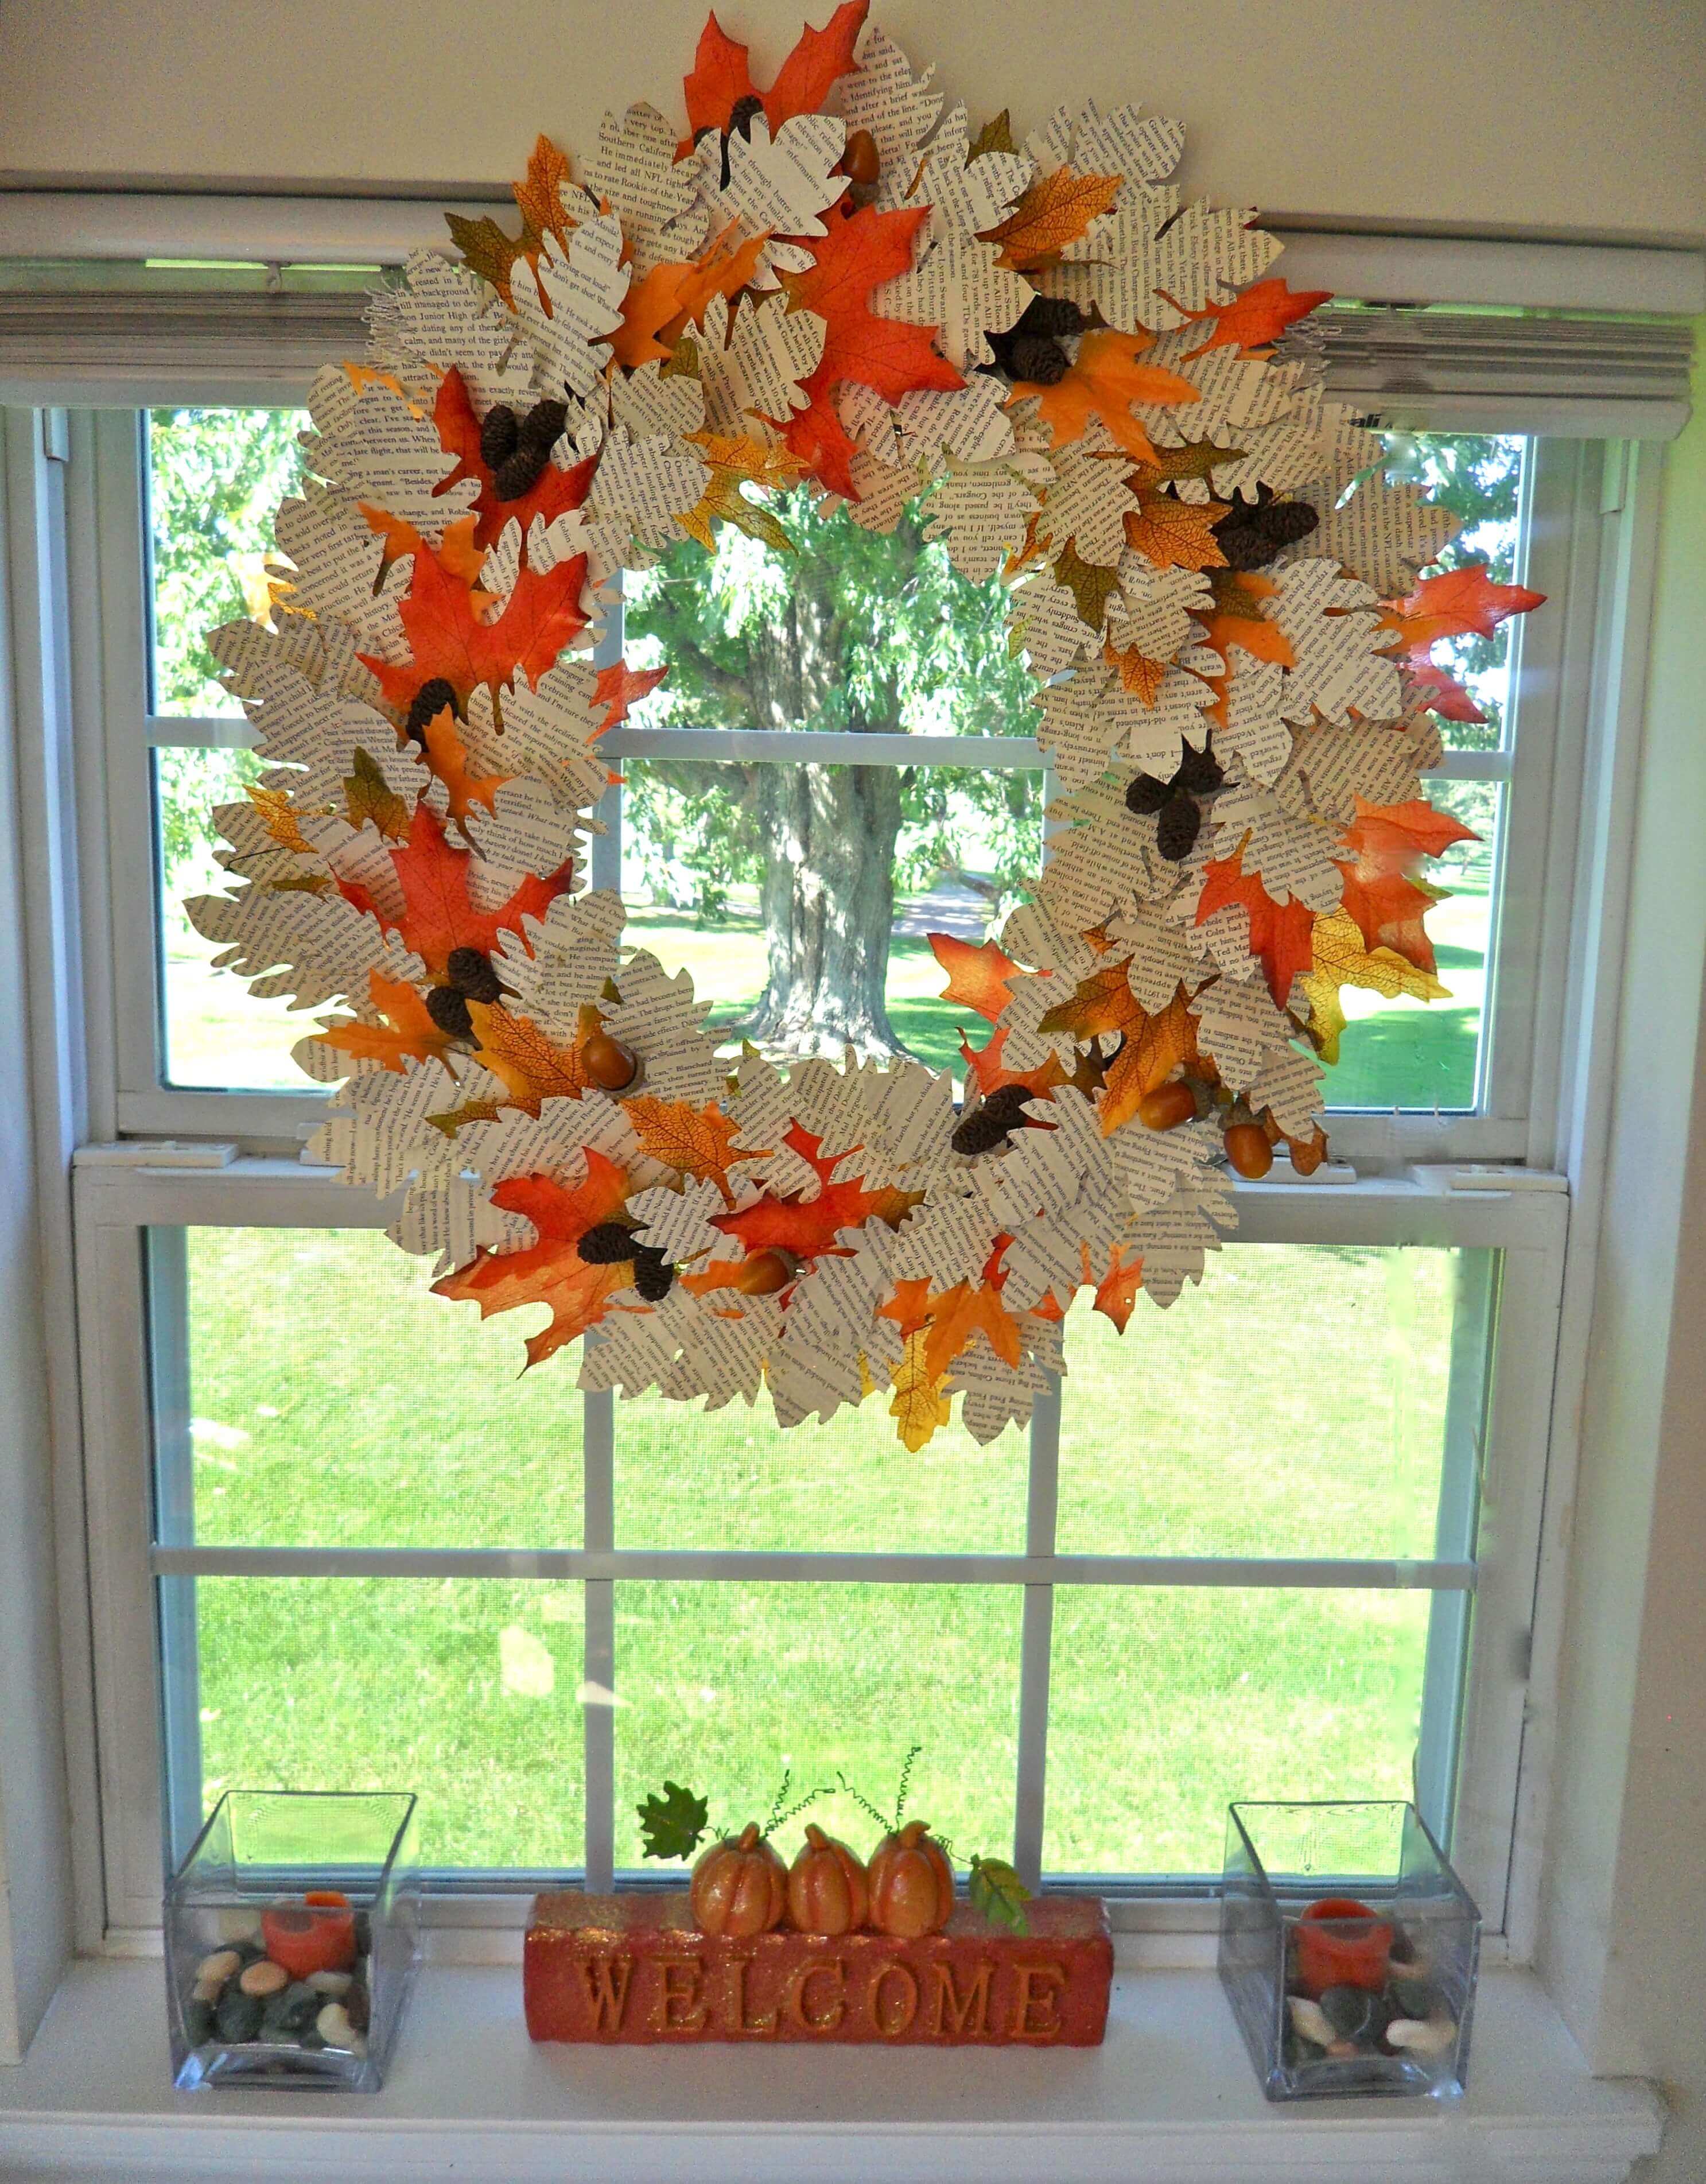
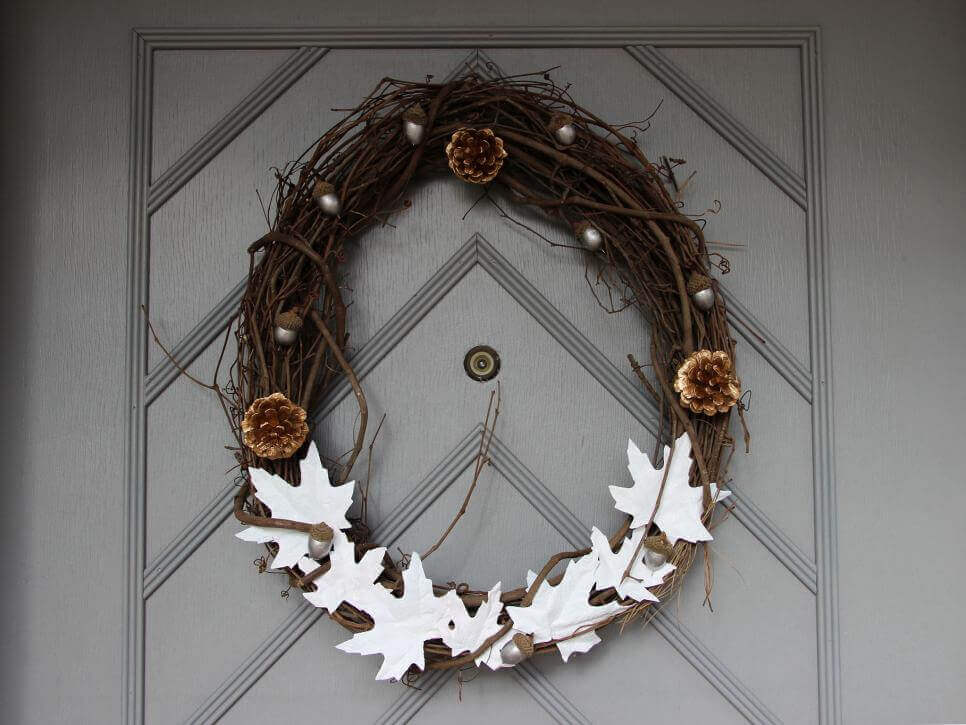
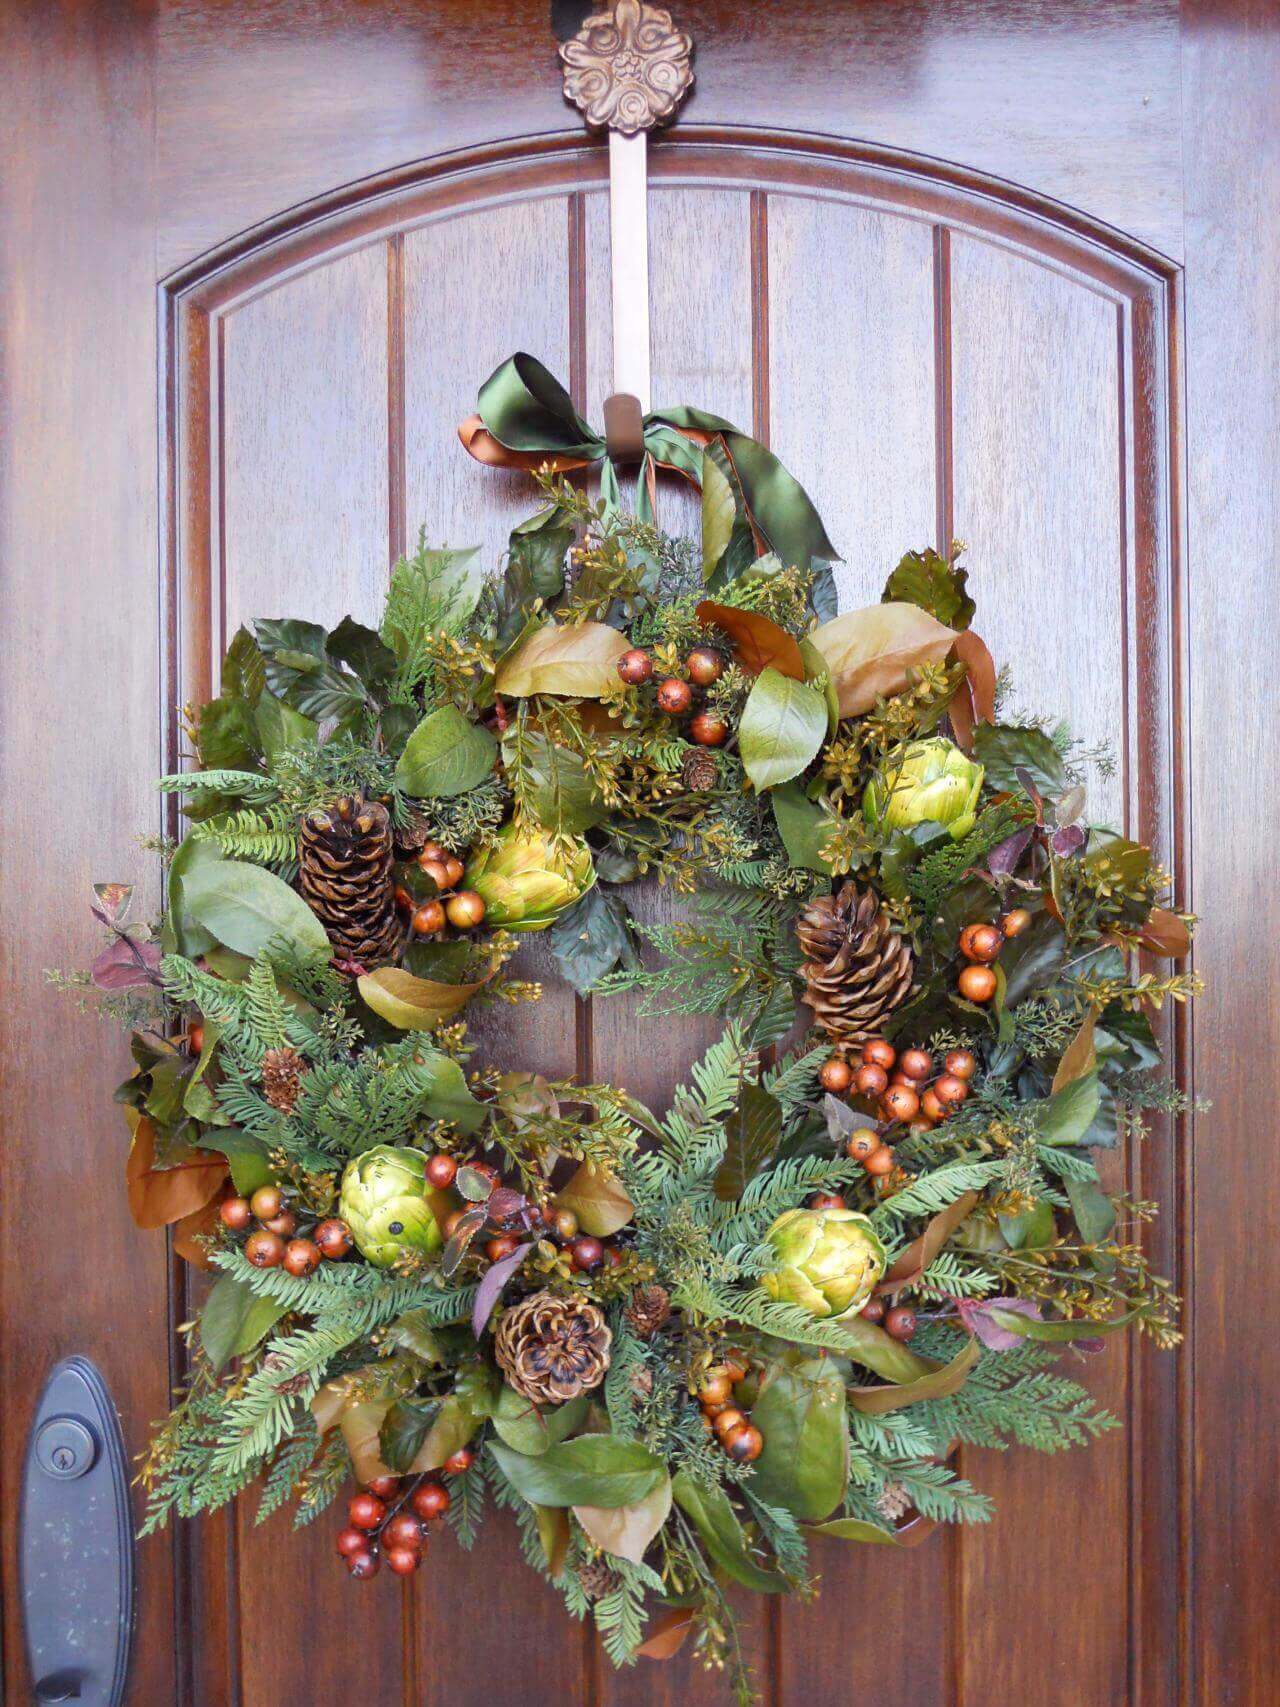
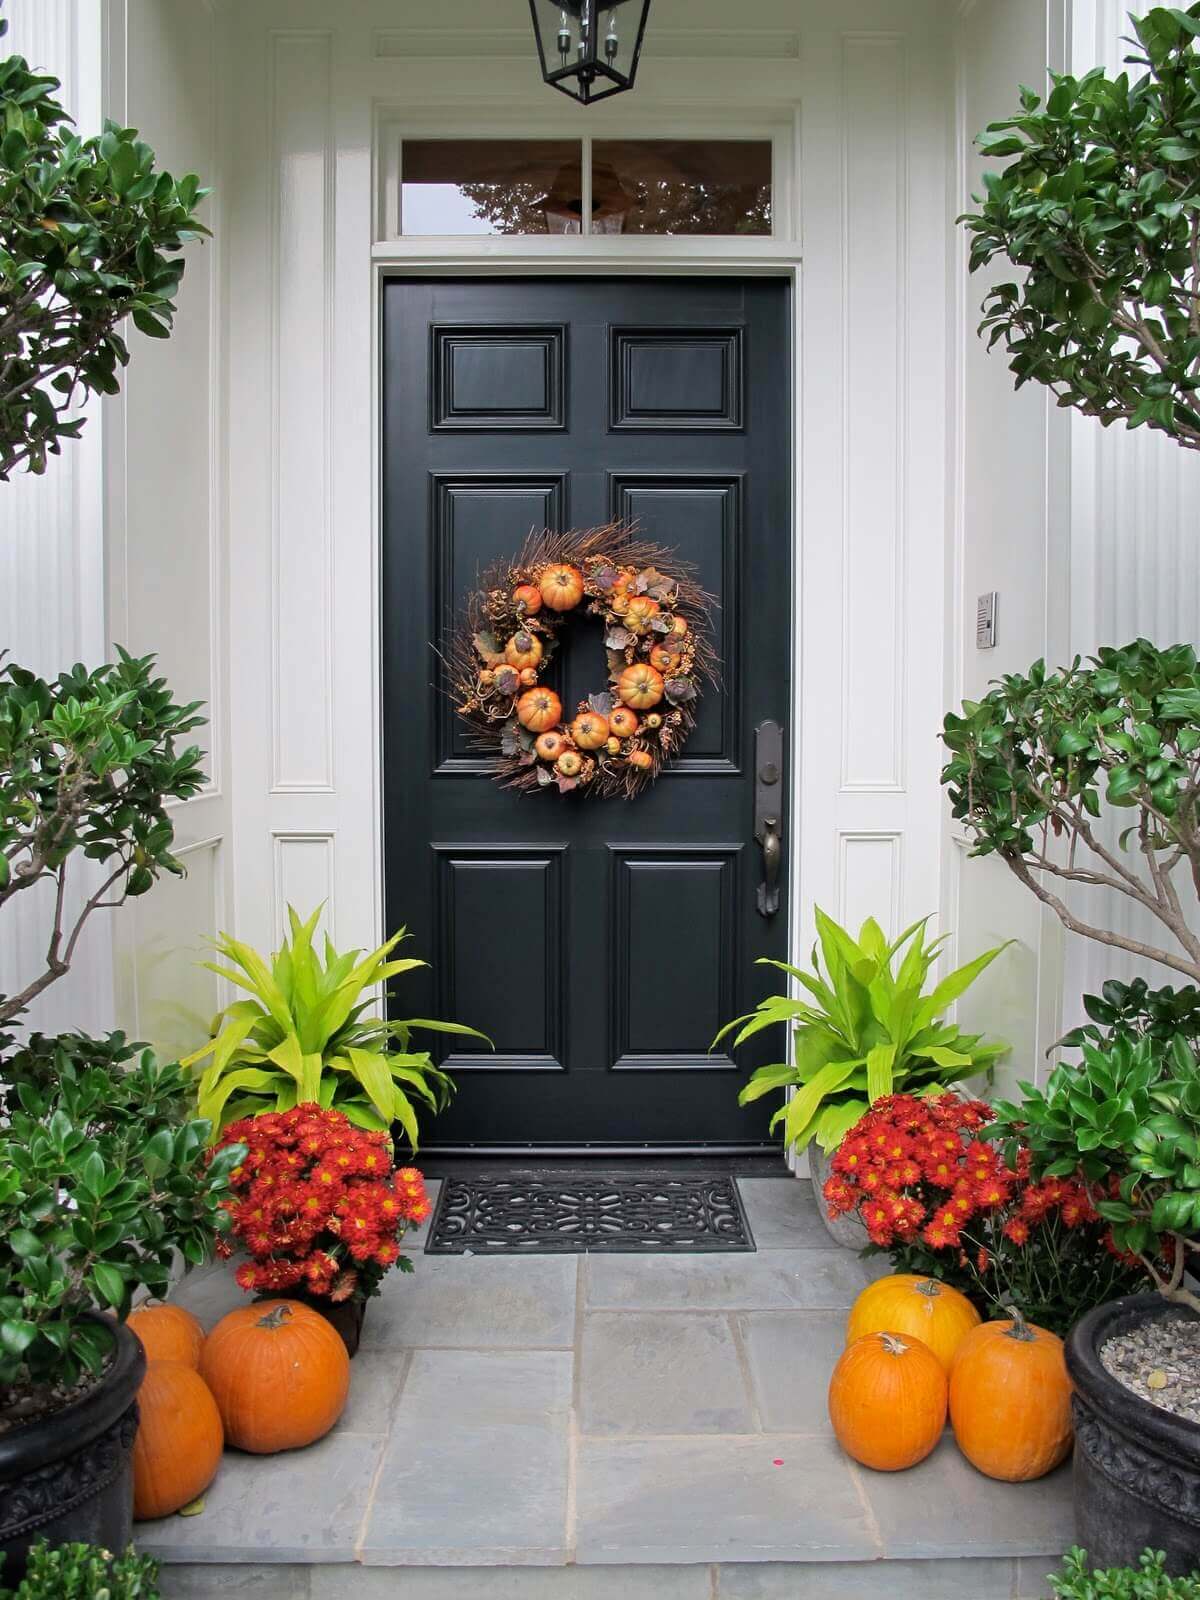
It is never too late the decorating thanksgiving for your home. Thanksgiving wreaths are the best way to give a short message to your loved got inviting them again to your place. You can even buy from many of the stores. But if you aren’t ready to spend on it, it is better to decorate it on your own. These wreaths can be hung on the main door of your home or at a place that can be easily visible to your guest.
Conclusion
Here, you will find The best thanksgiving wreath ideas that will give your house a better thanksgiving decor. These are the best Thanksgiving wreaths DIY that you can simply make at your home and can even decorate on your front door with different wreath ideas.
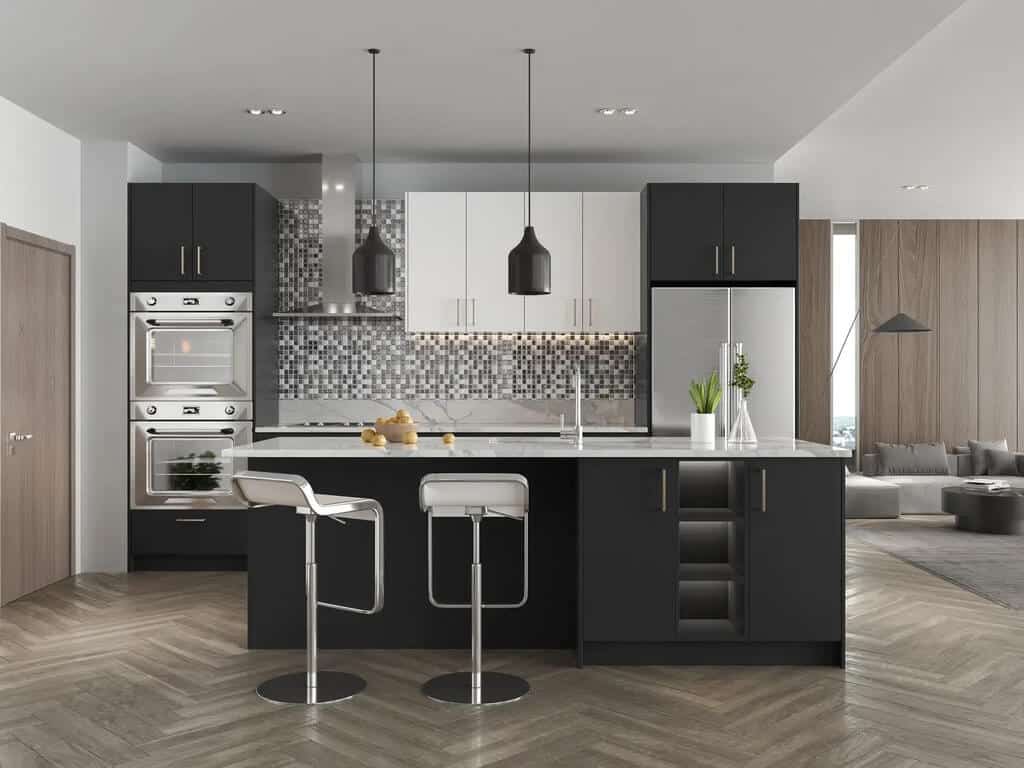
In this article, we’ll show you how to update your kitchen in a modern way without completely gutting it – by using resale items as a starting point! If you’re thinking of selling your home in the near future, it’s important to take into account the kitchen cabinets and appliances that are currently in the space.
While buyers might not be overly impressed with outdated or damaged cabinetry, they’ll certainly appreciate updated features like granite countertops and stainless steel appliances.
What to Consider When Buying Modern Kitchen Cabinets
When shopping for a new kitchen cabinet, there are a few key things to keep in mind. The first is the budget. While you may be tempted to go all-out on the newest and most expensive model, remember that a new kitchen cabinet will only last a few years before it needs to be replaced.
It’s better to buy something that will last several years and be able to be repurposed or updated down the line.
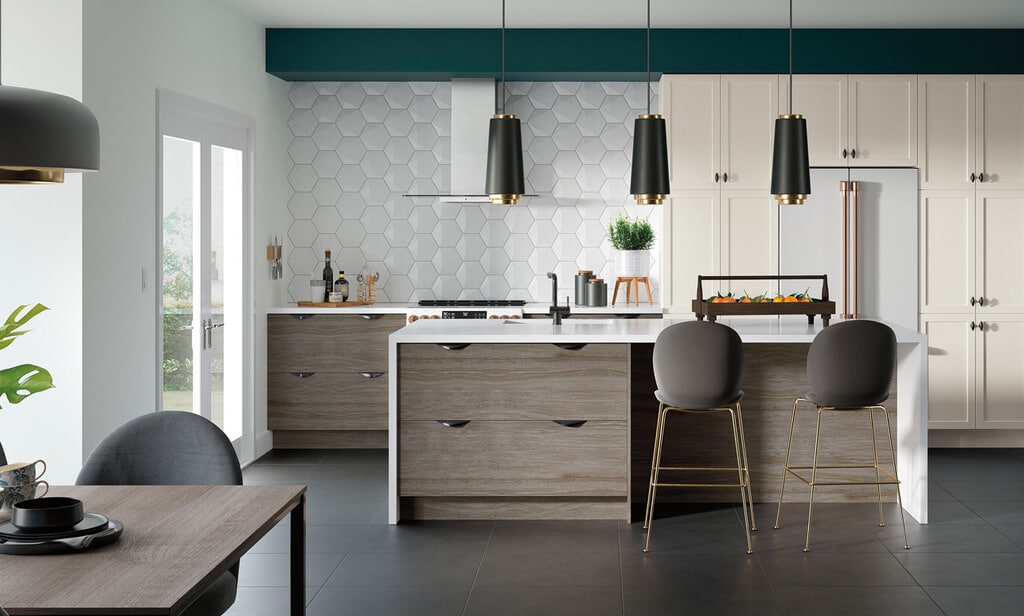
Another key consideration is the style of your kitchen. Are you looking for cabinets that are modern and sleek, or do you prefer more traditional styling? If you’re not sure, take a look at some of the different styles of modern kitchen cabinets online or in stores and see which one appeals to you the most.
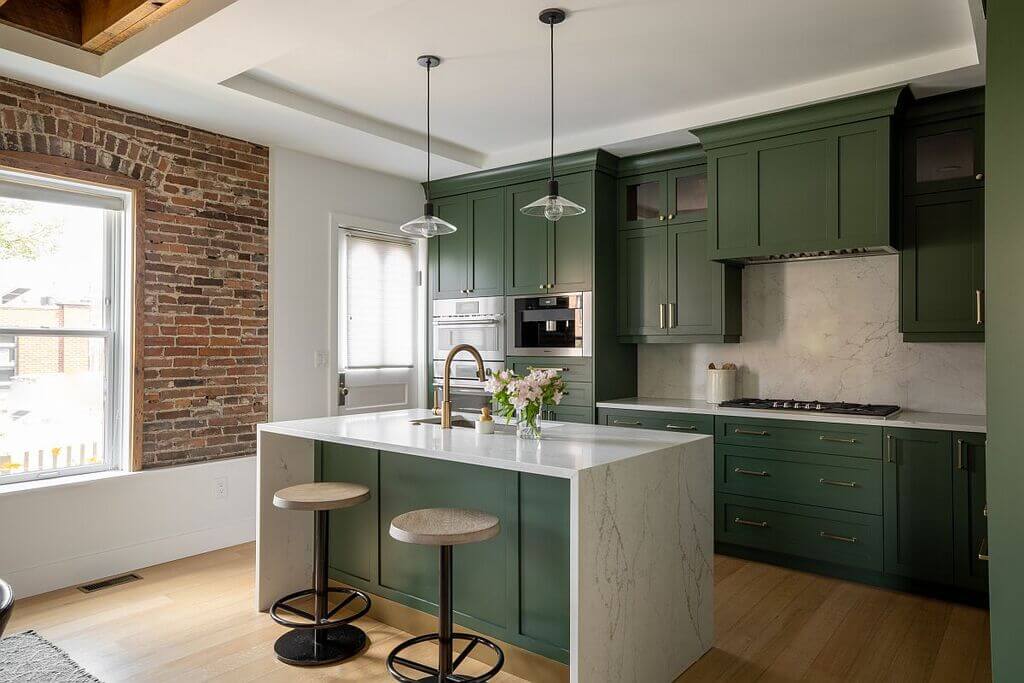
Finally, consider how much storage space you need. Some kitchens have less storage than others, so it’s important to choose a cabinet that has enough space for your needs. Many cabinets come with shelves and compartments, so it’s worth taking the time to explore all of the different options available before making your purchase.
What to Look for in a Modern Kitchen Cabinet
When shopping for a new kitchen cabinet, there are a few things to keep in mind. Firstly, think about what style you would like your kitchen to have.
Do you want a modern look with sleek lines and an open layout? Or do you prefer more traditional features such as higher ceilings and cabinetry that are hidden behind walls? Once you decide on the style, take into account the materials that are available.
A lot of modern cabinets are made from wood or metal, but they can also be made from plastic or other synthetic materials.
Once you have decided on the style and material of your kitchen cabinet, it’s time to start thinking about what features you want. Do you want drawers or doors on all of the cabinet doors? Or do you only want one door on the front that opens to the kitchen? And do you want hidden drawer slides or French doors that open up to the outdoors?
Once you have figured out all of your wants, it’s time to start looking at different cabinet models. Do some research online or in magazines to see what different companies have to offer. There are a lot of great modern kitchen cabinets out there that aren’t too expensive, so don’t be afraid to shop around!
How to Resale a Modern Kitchen Cabinet
If you’re looking to resell your modern kitchen cabinet, there are a few things to keep in mind.
First, make sure the cabinet is in good condition. It’s important to focus on the cosmetic aspects of the cabinet, rather than its underlying structural issues.
Second, be sure to list the cabinet accurately and completely. Include all of the features and specs of the unit, as well as any special features that make it unique.
Finally, be prepared to offer a fair price for the modern cabinets. They won’t sell at a discount if they’re in poor condition or if they don’t have all of the features specified in the listing.
When you’re ready to move on from your old kitchen cabinet, there are a few things to keep in mind when it comes to reselling.
First and foremost, make sure the cabinet is in good condition. It’ll be much harder to sell if it’s damaged or has scratches.
Next, consider what features are most important to you. Do you need a dishwasher? A pantry? Lots of storage space? These are all factors you’ll want to take into account when choosing your cabinets.
Finally, be prepared to do a little bit of legwork. It can be tough to find someone who wants to buy a used kitchen cabinet, so it’ll be helpful to research what’s out there and prepare a pitch accordingly.
Conclusion
Kitchen cabinets are a key part of any home’s design, providing storage and organization for all your cooking tools and supplies. But with prices on new kitchen cabinets continuing to climb, many homeowners are looking for ways to save money by reusing or upgrading their existing cabinets.
If you have valuable hardware and woodworking skills, there are several remodeling projects you can undertake on your own to update your kitchen without spending a fortune.
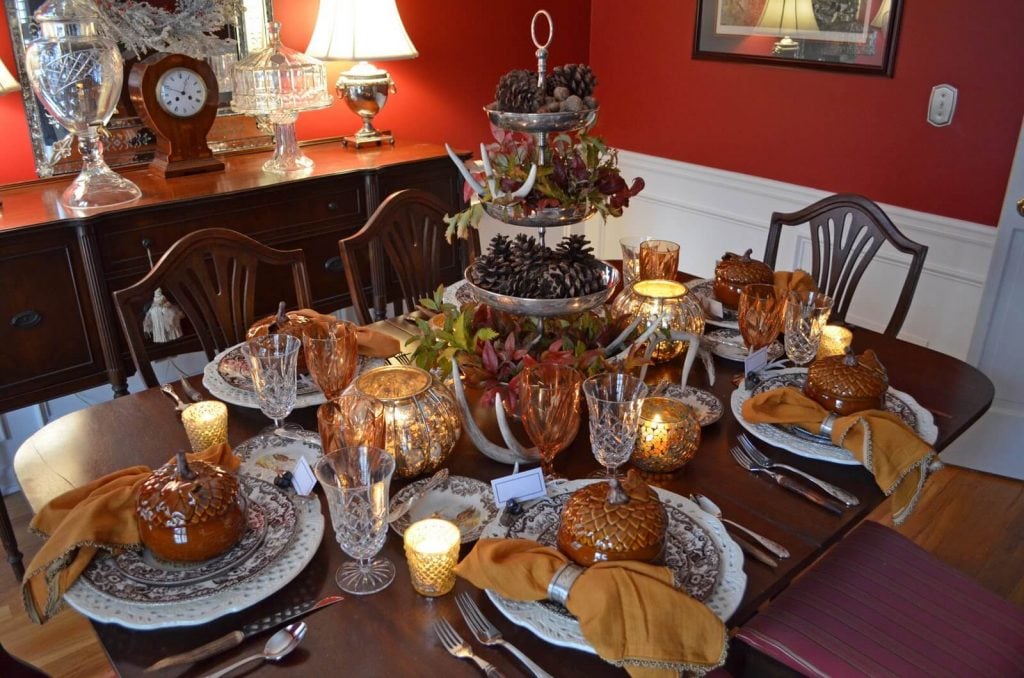
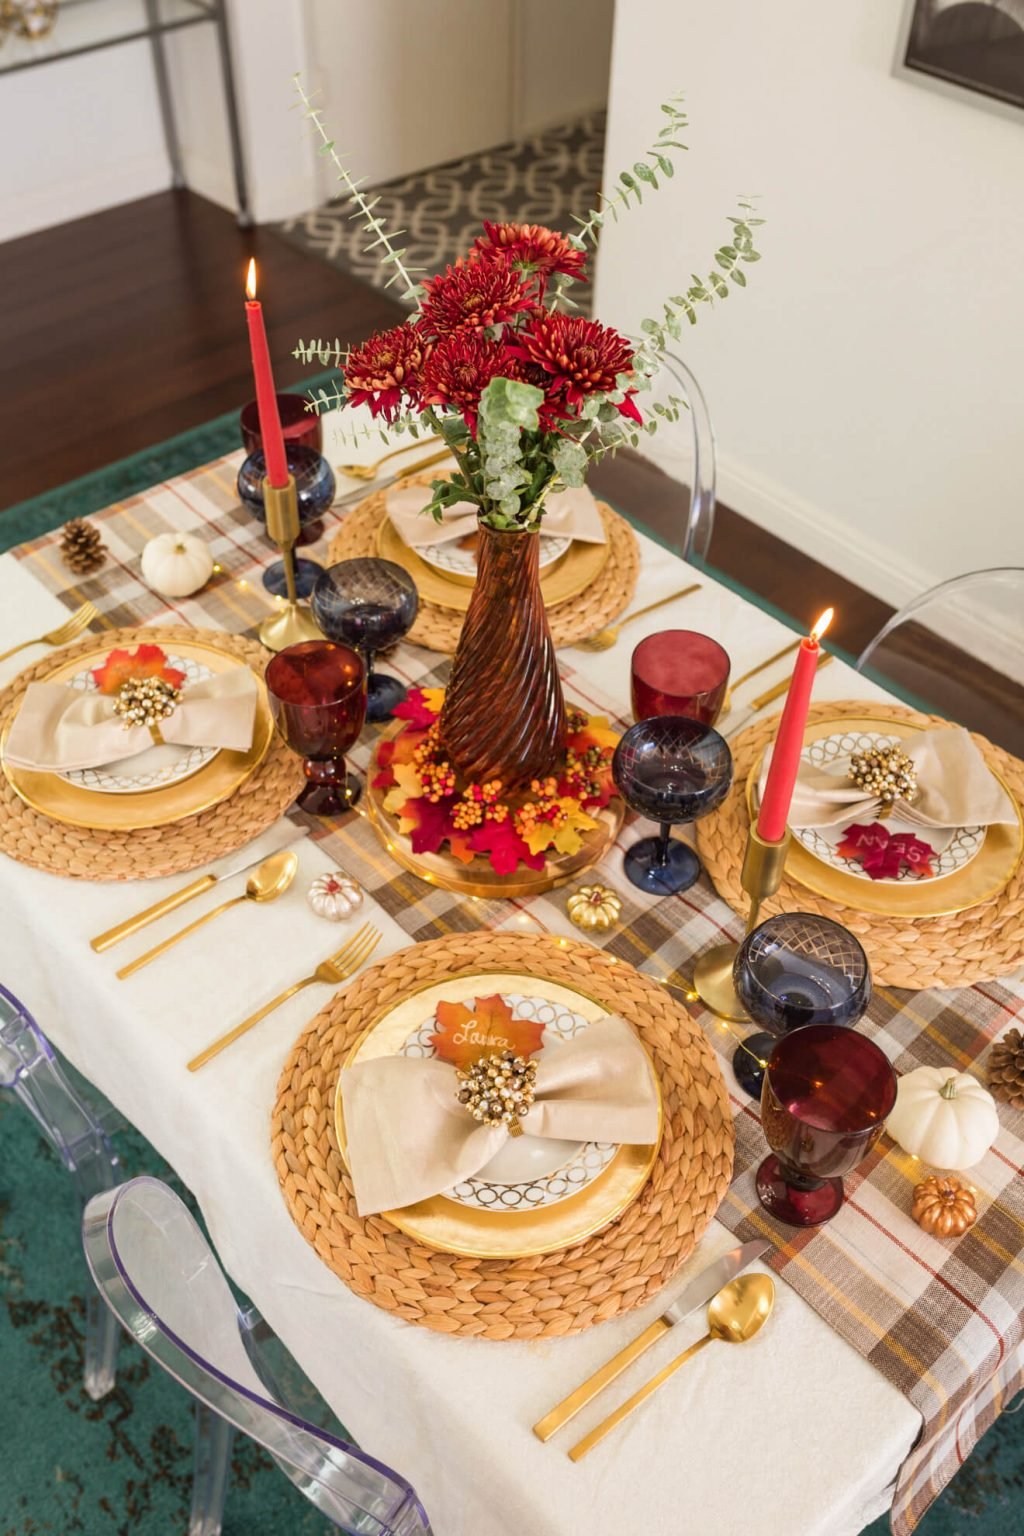
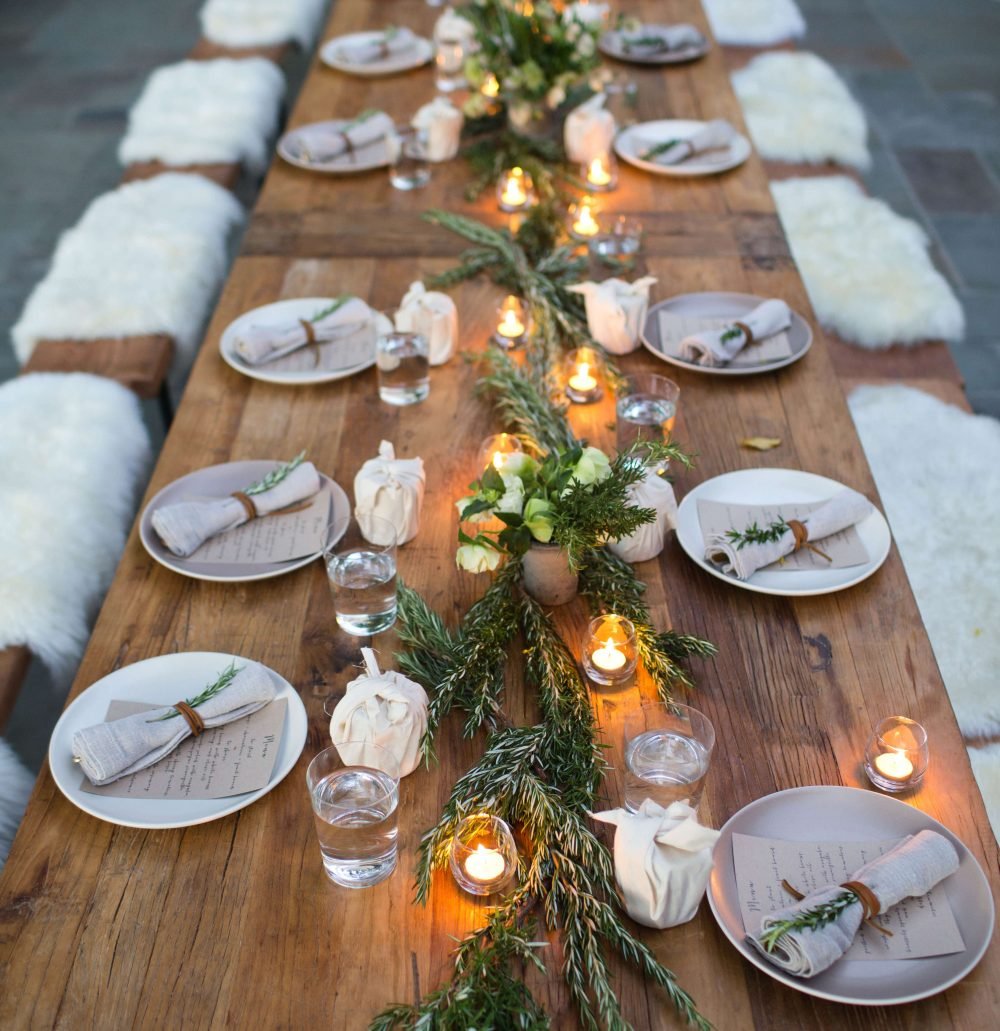
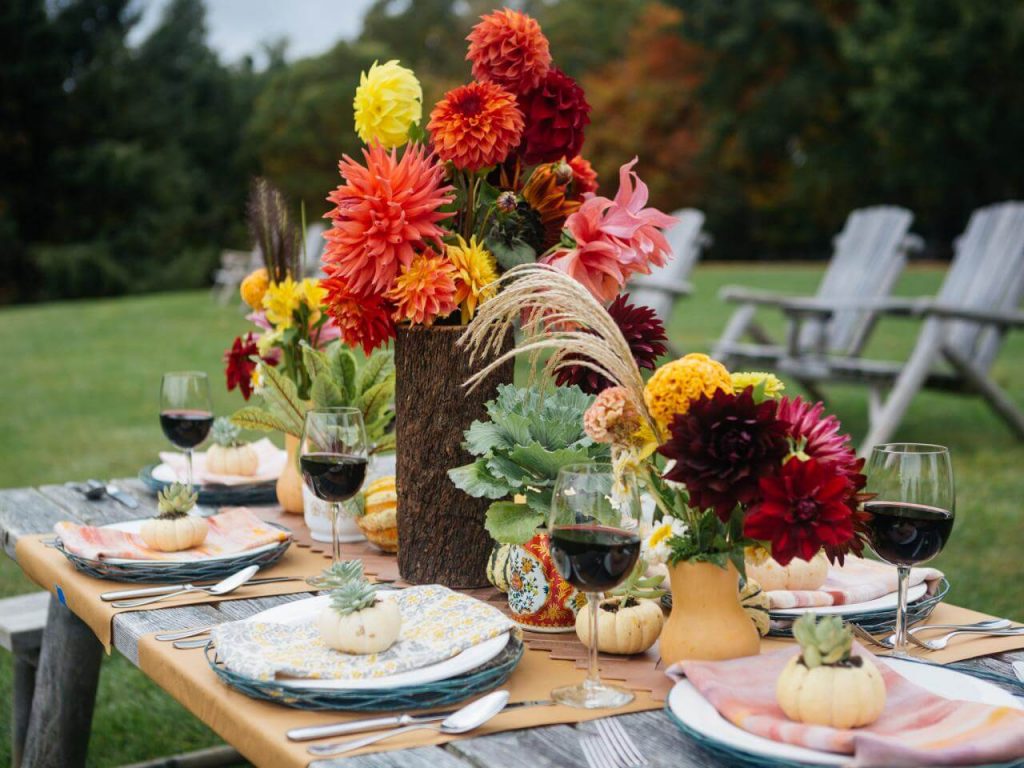
Thanksgiving is just right around the corner. Thanksgiving means sharing your meals with family and friends you love. Since dinner is the main focus of this festival, so, except for your turkey, the dining table should also look beautiful and impressive. So, if you are not started with the decorations, let’s begin together. Here we are providing Thanksgiving dinner table decorations, that’ll surely help you out.
How you want your dining table looks– Plain and boring or full of creative and exciting things? You know that delicious food that serves in a creative and innovative way makes thanksgiving more special and memorable for you. You don’t need to buy whole new things and make a burden on your pocket. What you really need is creative thinking and little planning.
On Thanksgiving, our families and friends came together and celebrated with a fancy dinner. And before we start eating we all pray and thanks for all the things in our life. “There is always, always something to be thankful for” right..? So this year make your thanksgiving more special, by adding some decorations to the dinner table.
Here are fifteen thanksgiving dinner table decorations:
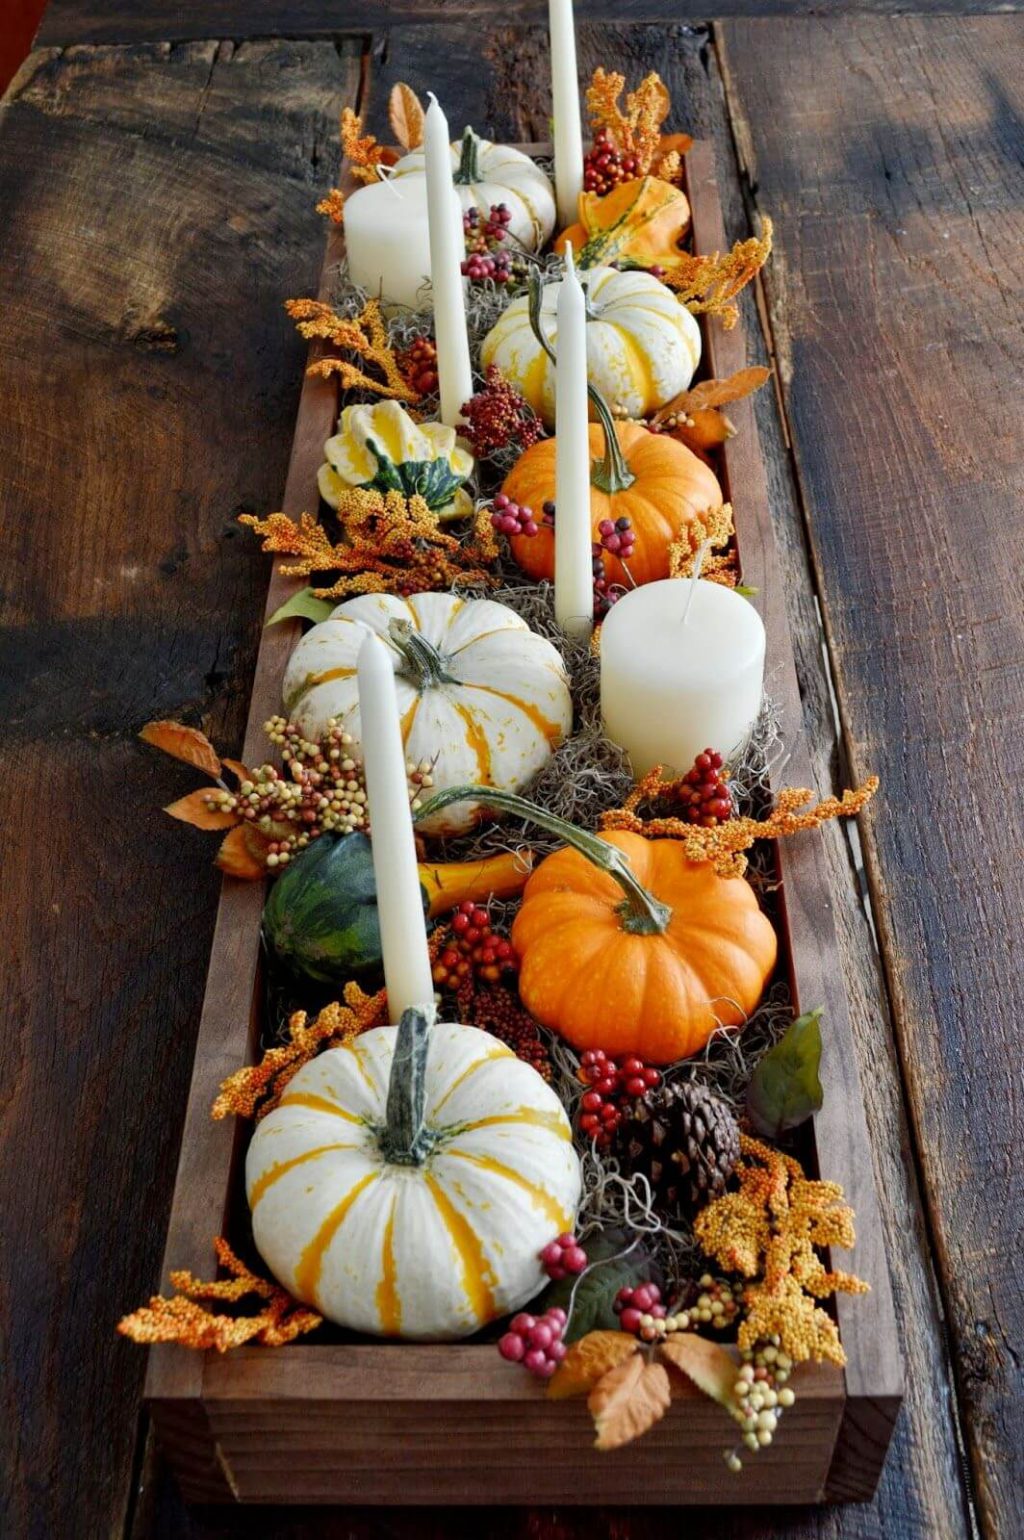
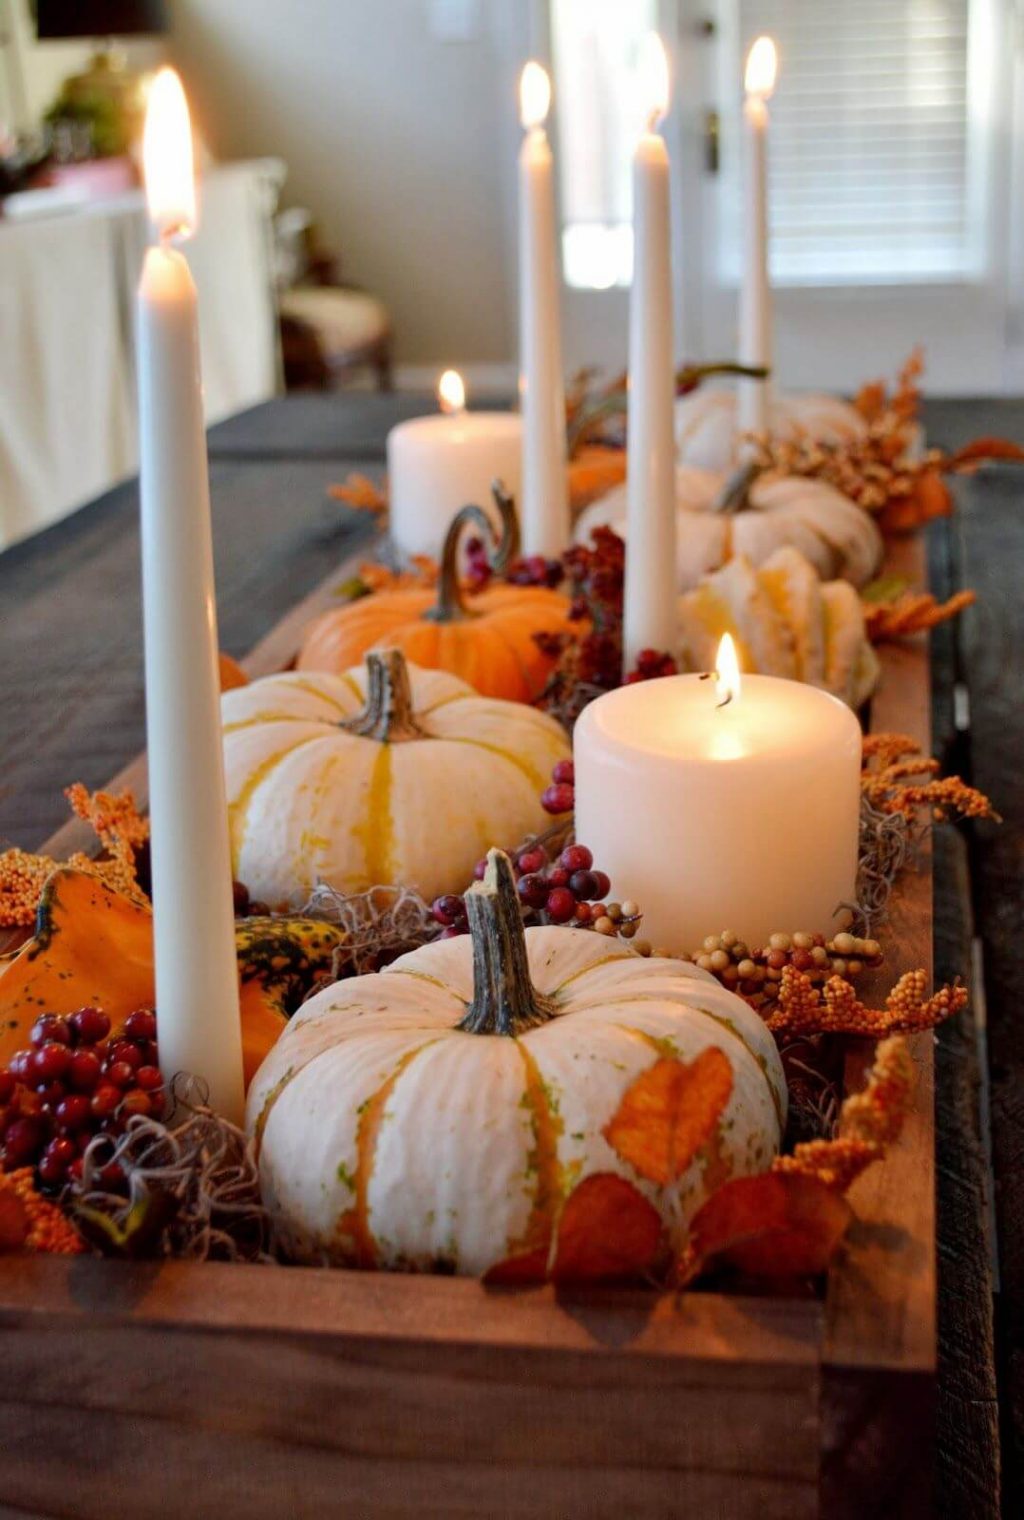
1. Centerpiece
A centerpiece on a table not only creates a focus but also adds a wow factor to the whole area. You can go for any centerpiece or specially designed for thanksgiving. It could be anything from Confetti-Stuffed Turkey Centerpiece, mason jars, and gold pumpkins to wheat and flower bouquets.
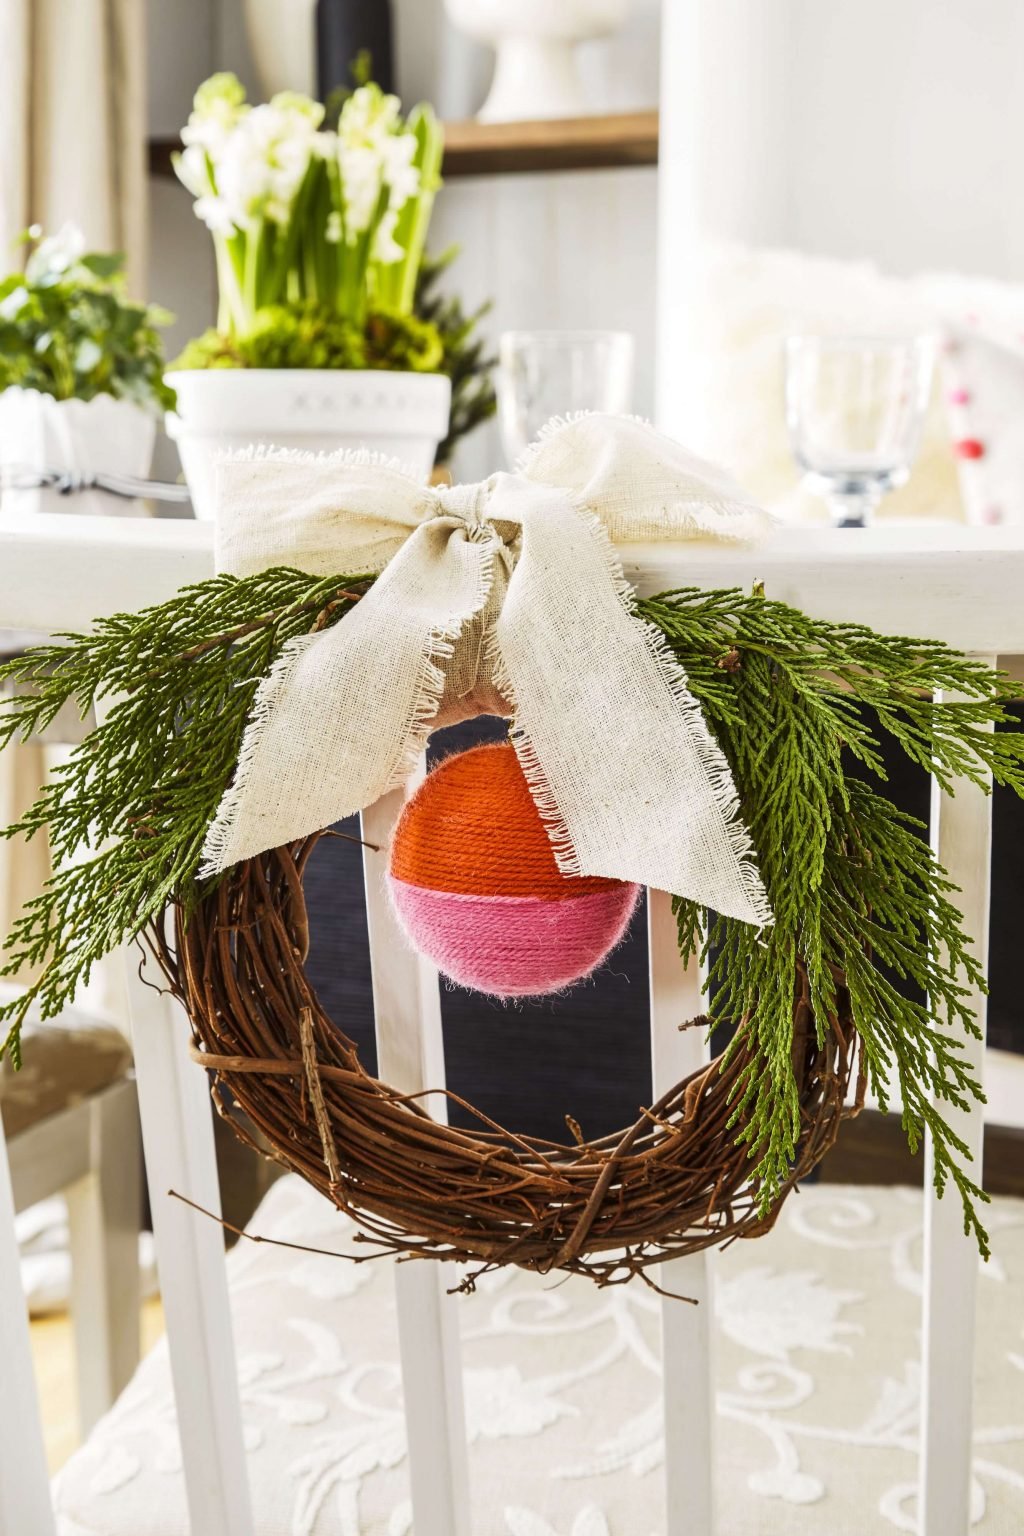
2. Wreaths
Yes, wreaths… they are not only for door decorations but also you can adorn your dining space. Make cute little wreaths and tie them on the back of the chair. It looks gorgeous and unique.
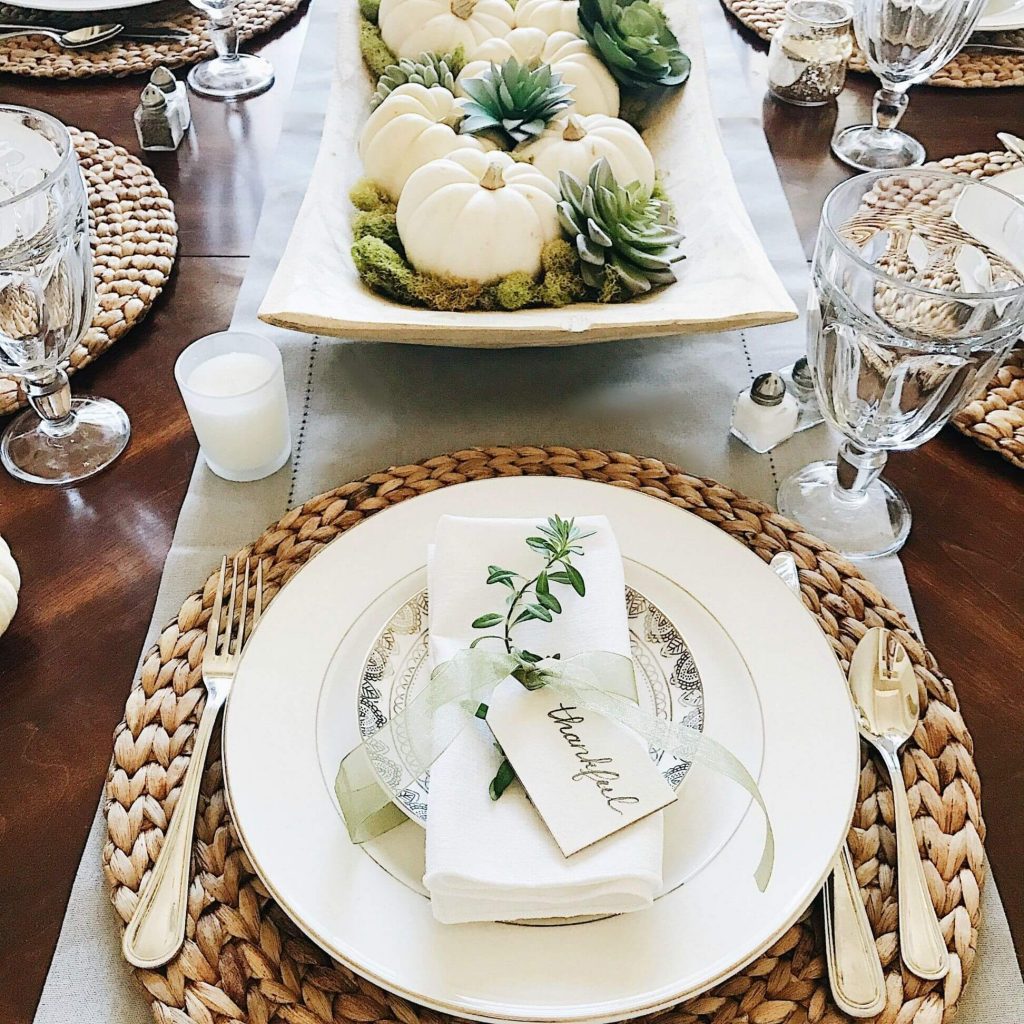
3. Greetings
What is better than cards to show your gratitude towards your family and friends. Write your feelings on these little but adorable place cards and put them on the table. You can also write welcome notes on these.
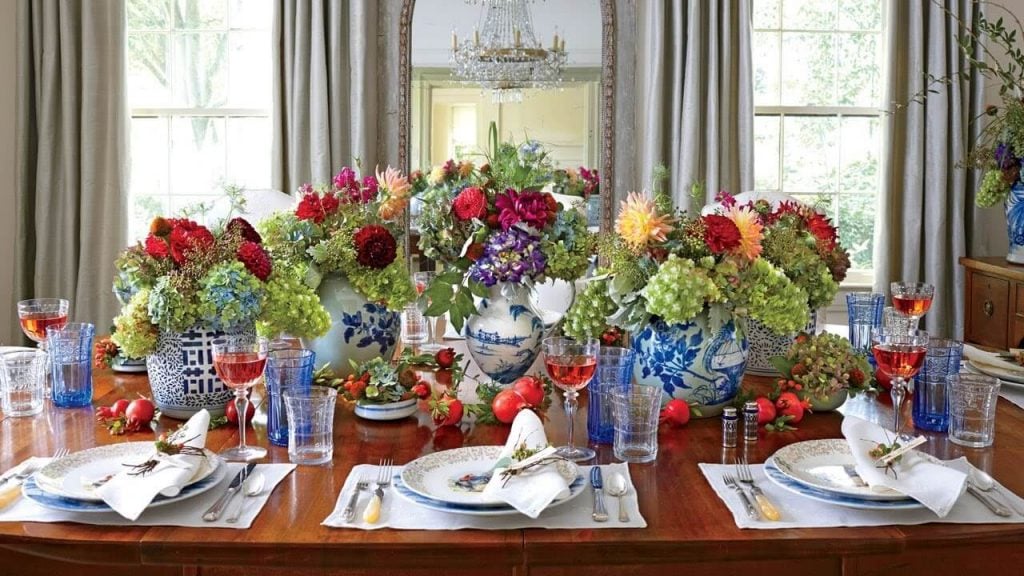
4. Tablecloth
Change the dull and boring tablecloth into a contrasting festive one. By this, you’ll immediately saw a change in your dining area. Colors bring joy and happiness to any place. So, feel the holiday season with vibrant colors like red, blue and orange.
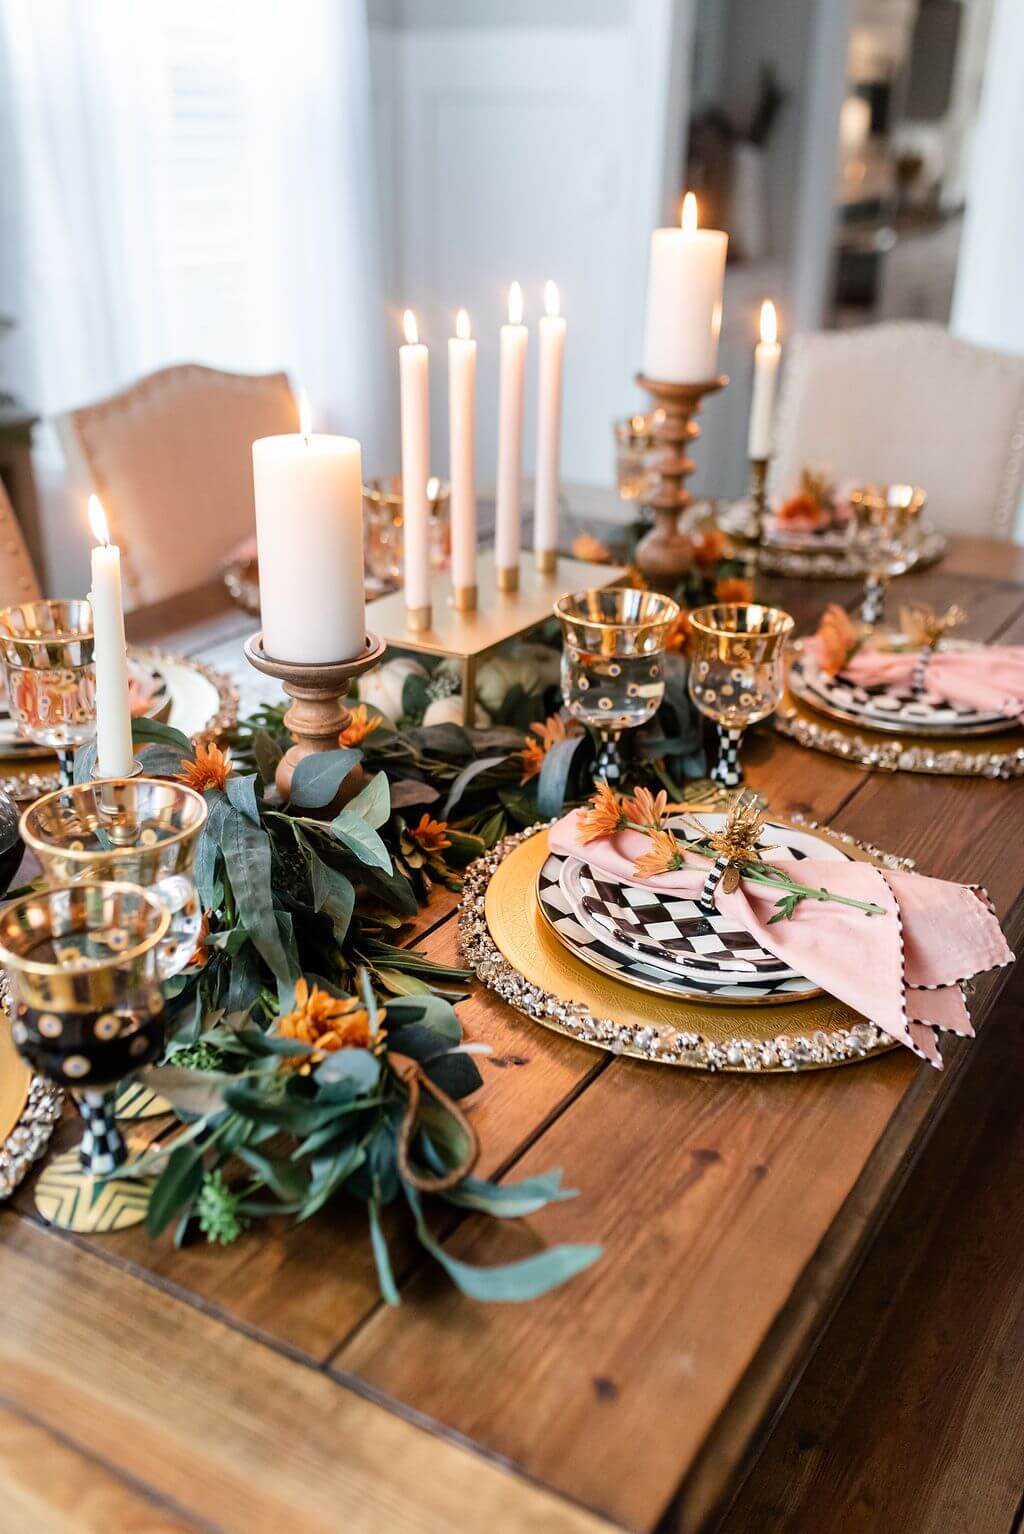
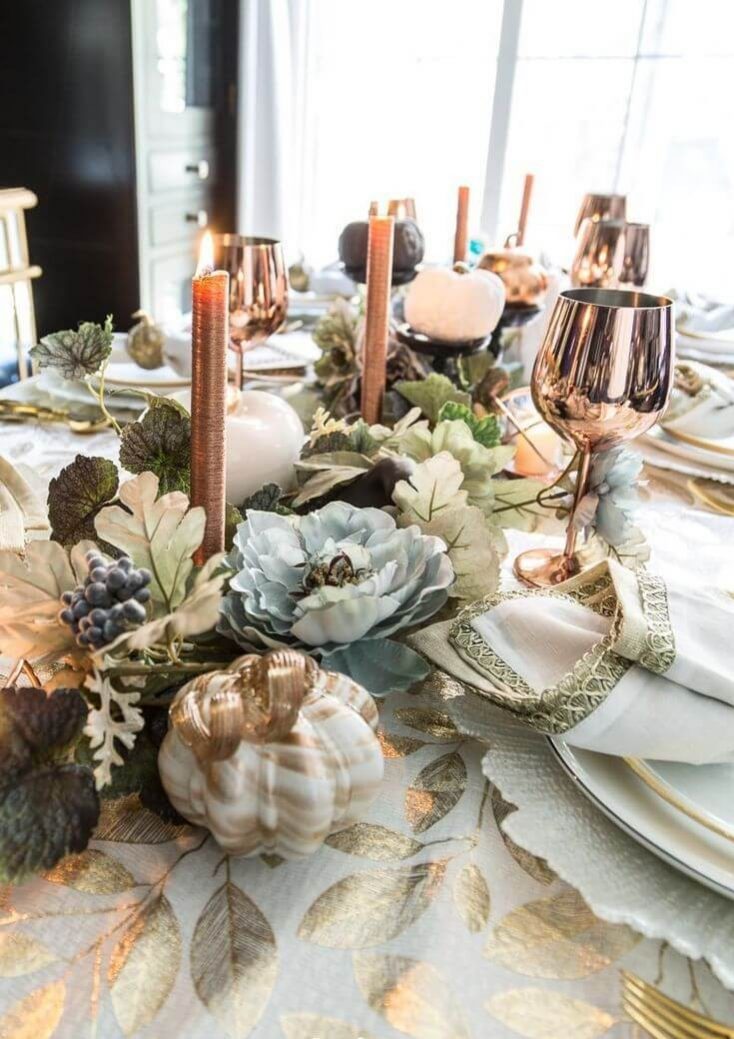
5. Candleholders
To really give your dining table a fall treatment, add funky candleholders. From votive copper holders to edible apple holders. Anything could be used as a candleholder, but make sure that they are going with the rest of the pieces.
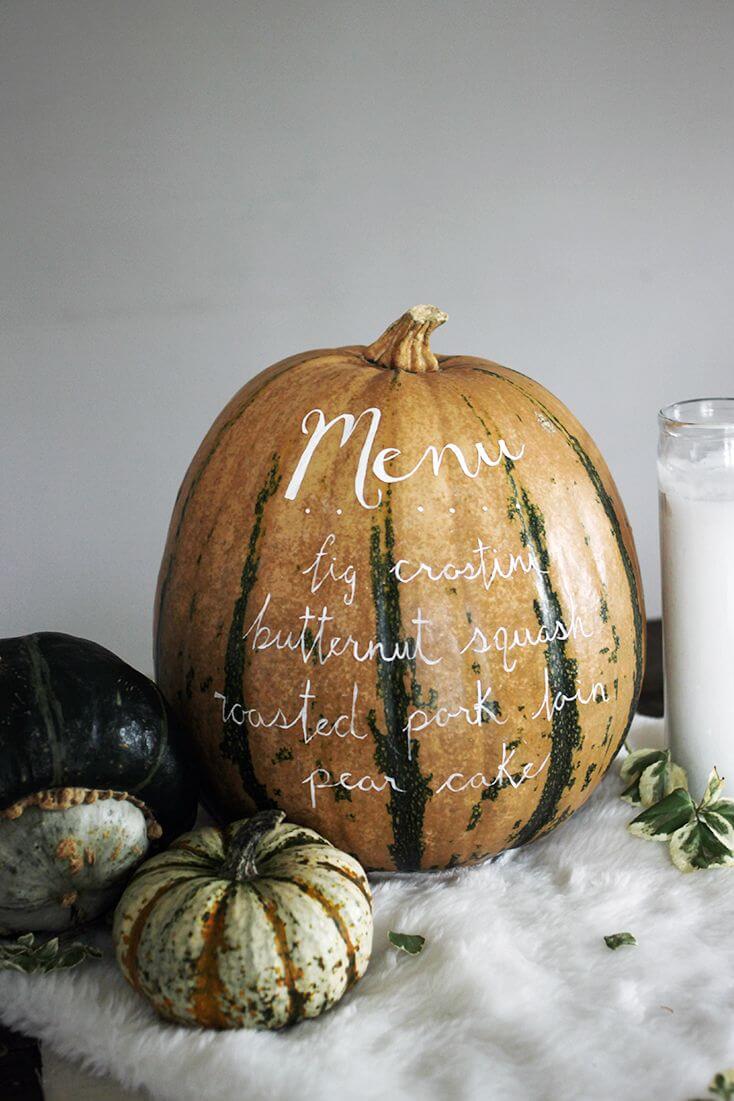
6. Pumpkin Menu
What do you think about placing a Pumpkin menu on the table? A Pumpkin looks great on the table and is also an innovative idea to represent your recipes. Not only kids but also adults find this funny and creative. Just take an ordinary big pumpkin, write all the dishes’ names on it, and place it at one corner of the table.
7. Plaids
Plaids are evergreen and almost work with every decor. So try out layering different printed plaids in napkins, placemats, and tablecloths. They bring extra texture and character to space. This thanksgiving provides an extreme dose of plaid by matching your outfit with the table decorations.
8. Candles
To make your dining area more warm and cozy, place some scented candles and sticks. They will be the perfect decor for your table. You can also wrap simple plain candles in beautiful candle wraps. This festive season style your dining place by fragrance.
9. Gratitude Signs
This thanksgiving shows your gratitude to your family and friends by signs and boards. Place a chalkboard near the table and write beautiful gratitude quotes such as “ Be thankful for the blessings of the little things, even when you don’t get what you expect.”
10. Personalized Tea Towels
Personalized tea towels..!! Sounds fun and artistic right..? You can custom-make the napkins and towels to add a personal touch to the dining space. So include some printed towels in thanksgiving dinner decorations.
11. Table Setting
You can also change the setting of the dining. Choose the area (either outdoor or indoor) according to the family numbers and their choices. Outdoor settings are best for large family gatherings. Decorate the outdoor space with string lights and festive decor pieces.
12. Flowers
Flowers are the simplest way to bring beauty from outside to inside. Buy some flowers (real or artificial) from the supermarket and embellish your dining room. Two-toned flower arrangements will tie up the whole fall decoration.
13. Coasters
Coasters are another way to bring fall vibes to the dining table. Change the ordinary ones from the fall-themed ones. You can easily find cute and spooky ones in a dollar store.
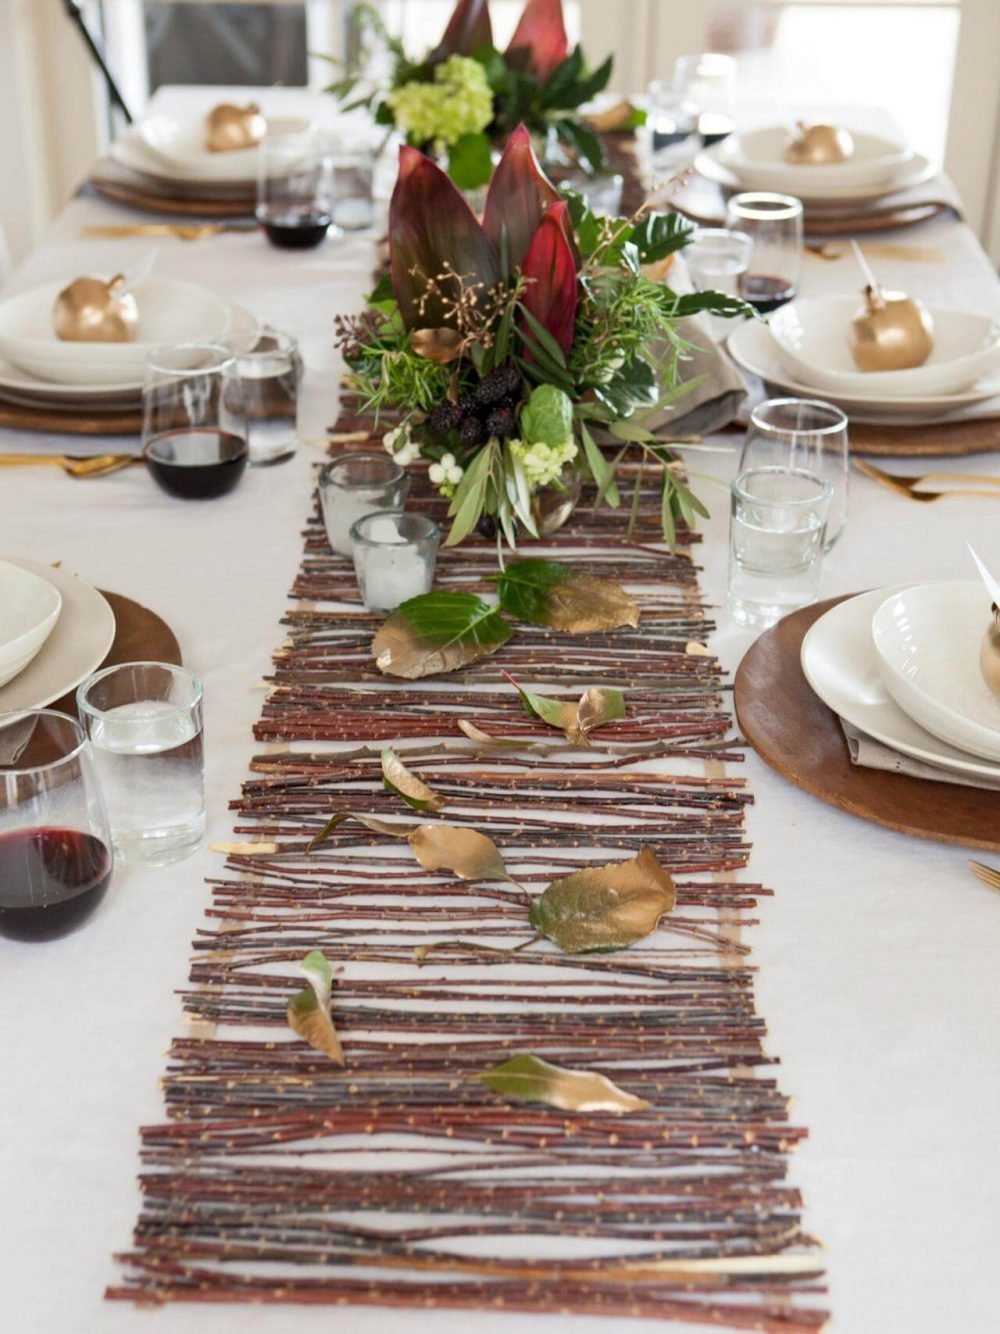
14. Table Runners
When you change your table cloth, change the runners also. Cut the pieces from the velvet fabric or felt and place it on the table. You’ve got the runner and protection from the hot plates. A centerpiece on it will add more beauty to the whole look.
15. Themes
Conclusion
For some people, Thanksgiving is turkey day. They enjoy eating turkey with their loved ones. With these ideas, impress your guests with your extraordinary decoration skills. And last, don’t forget to thank and appreciate everyone who came to your party. After all, Thanksgiving is all about being thankful for all the things you have..!!
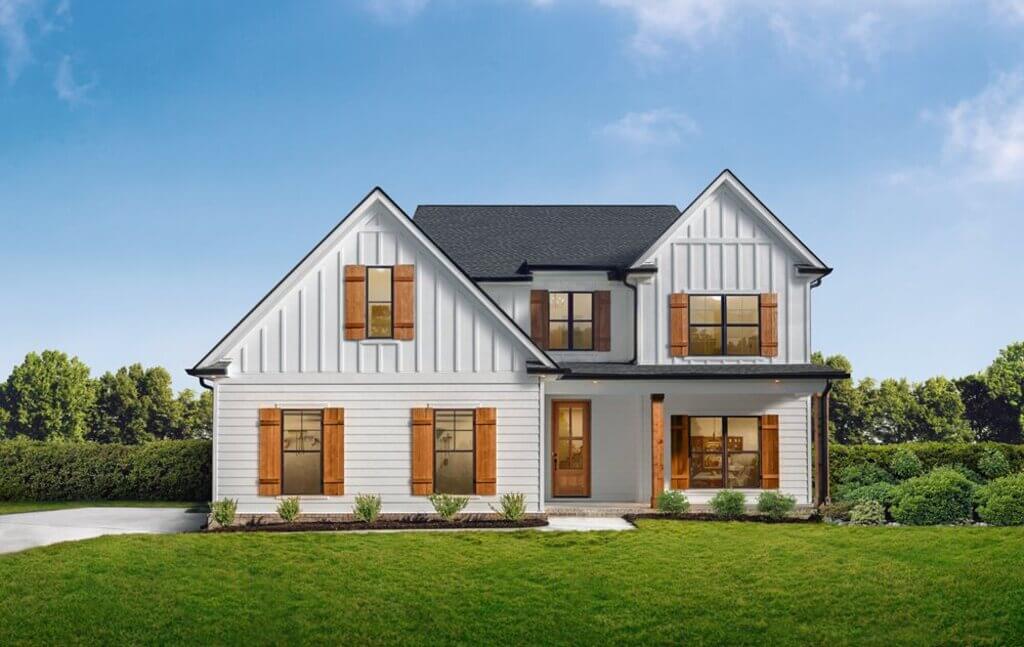
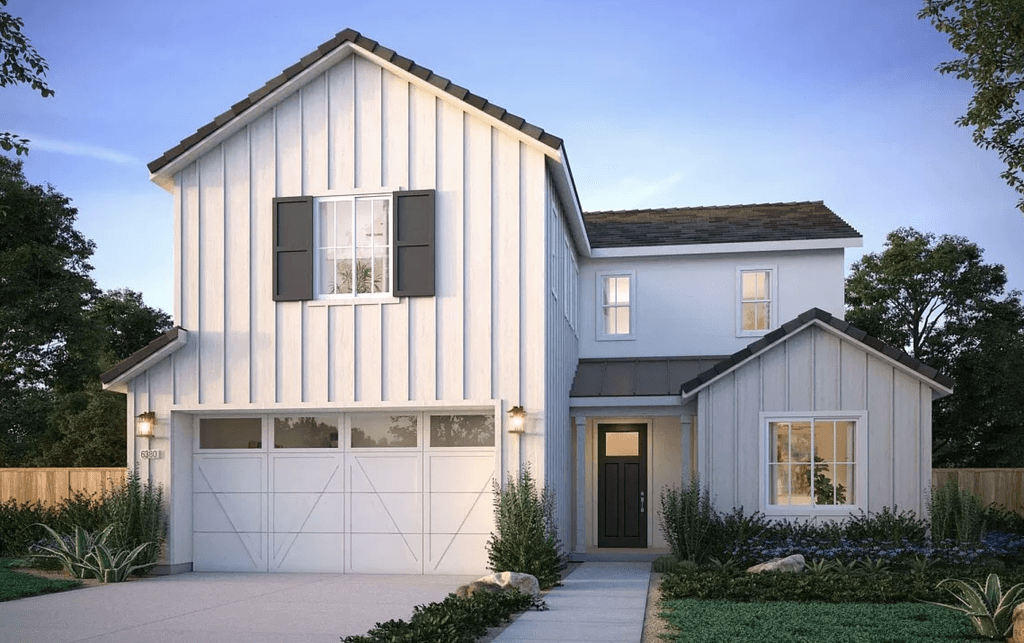
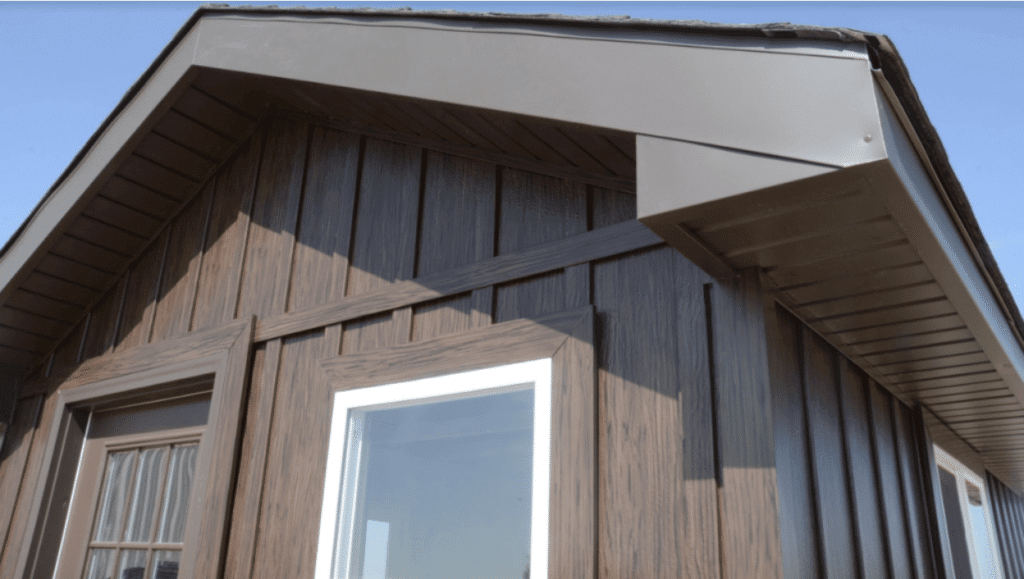
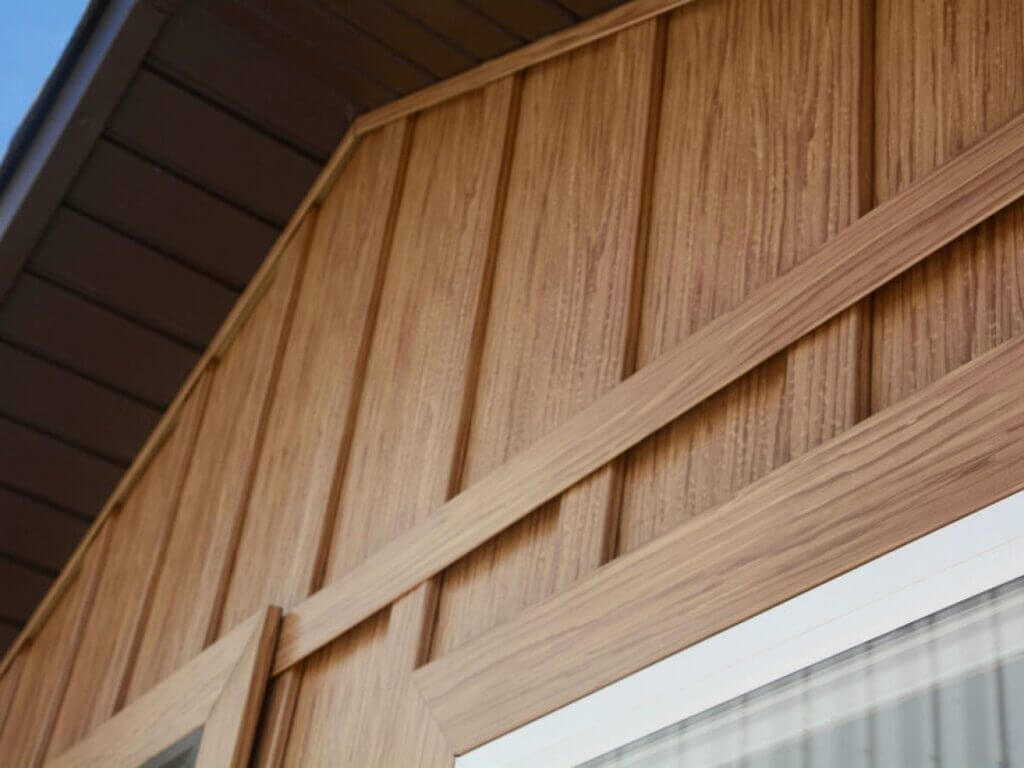
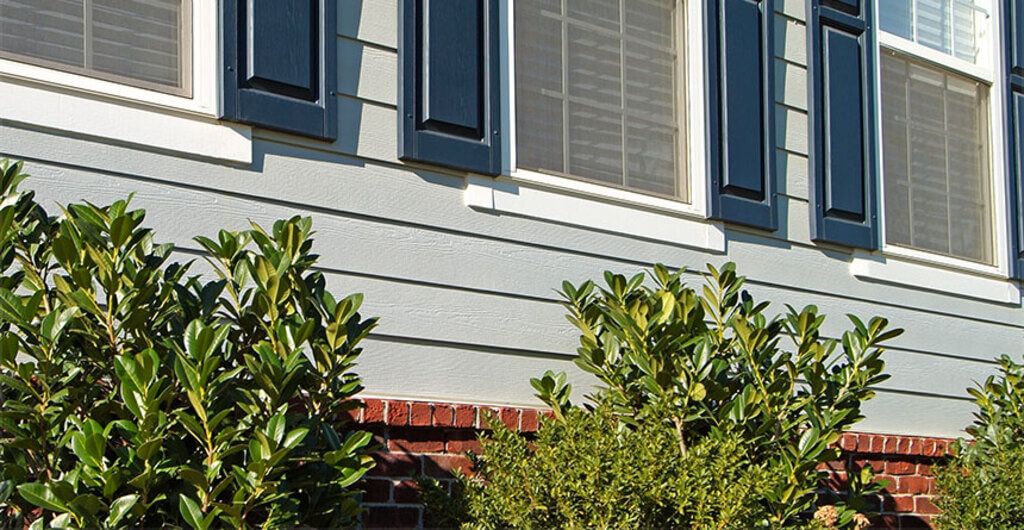
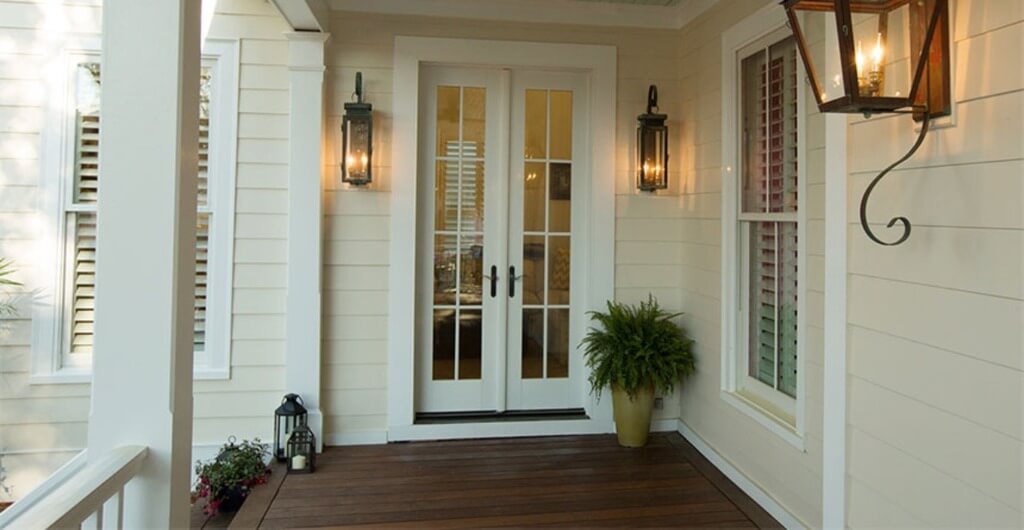
One of the key design and functional features existing in most of the home designs is the board and batten siding. From old residence designs to modern homes, batten board siding has remained one of the top picks for homeowners and designers.
The traditional board and batten siding have been upgraded with the innovation of newer materials and technology. The current designs promise durability and clean aesthetics to keep up with the modern look. Let’s look into what exactly a board and batten siding is and what all possibilities these bring to a home’s design and functionality.
The History of Board and Batten Siding
Board and batten siding have been famous picks for home designs for a long time. Earlier, homes were built with long vertical panels that covered the foundation to the top of the house without having to add a horizontal panel for connectivity.
However, later on, the building techniques changed and horizontal members were introduced. Board and batten siding, in this case, became an easy and efficient method to conceal the overlapping and offer a seamless surface. Another advantage of the board & batten was their ability to capture the air within the house.
The sealed edges left minimal chances to form an escape route for air which took the structures towards an energy-efficient approach. The strategic building approach that proved to be sustainable and aesthetic is now considered one of the designer elements in the house. Farmhouse board and batten siding are timeless designs that have remained in trend from earlier times till today.
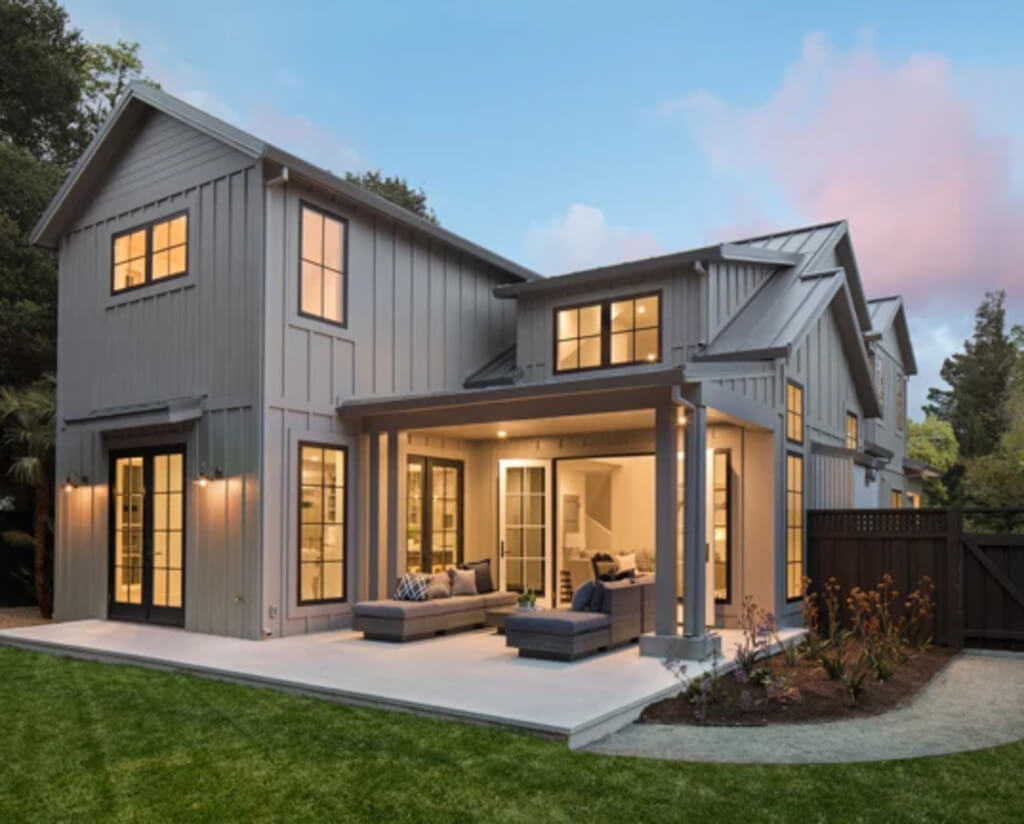
A Modern Context with Board and Batten Siding
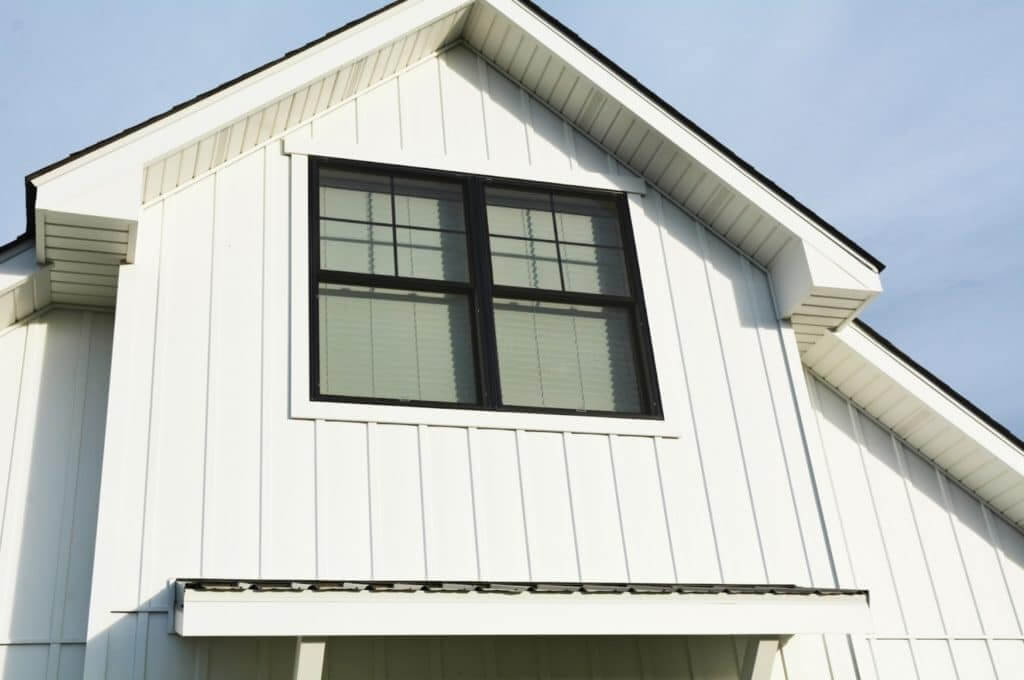
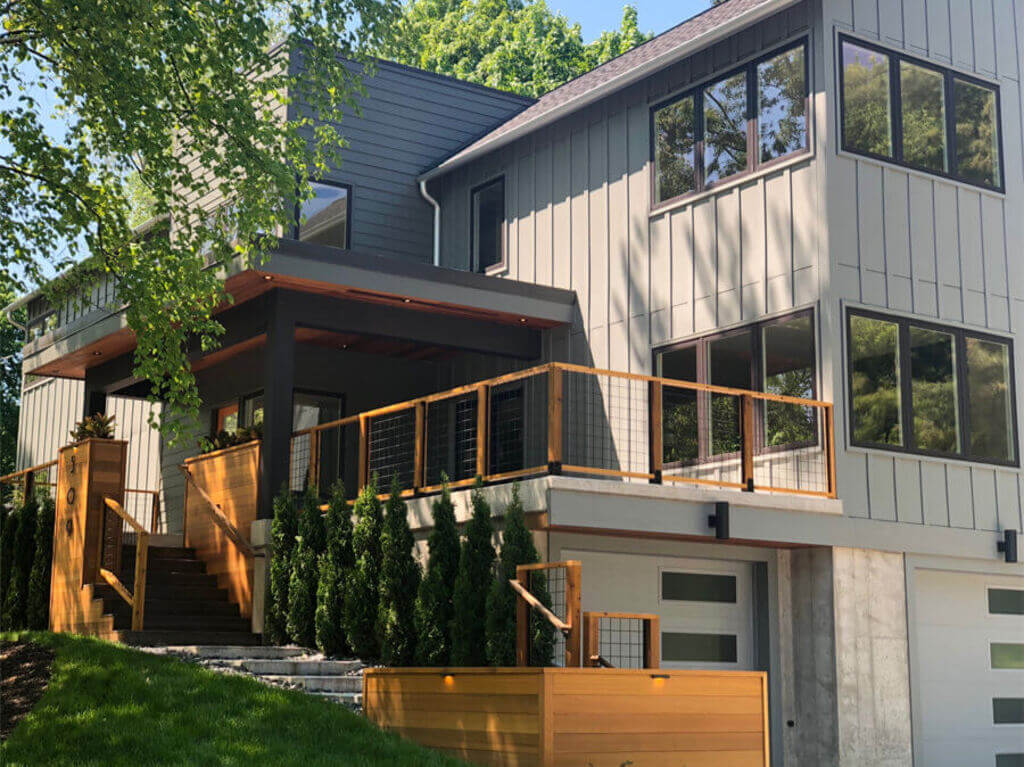
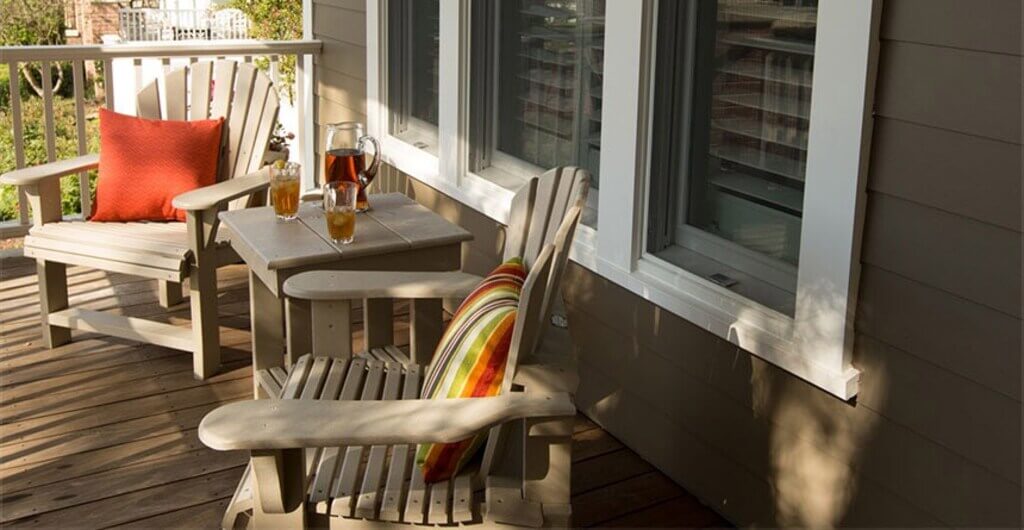
Contrasting to the vertical building panels, board and batten siding is added as a horizontal element. While the traditional design had narrow wooden strips concealing the seams, modern designs are all about varying textures accentuating the aesthetics.
Modern designs nestle the design of the board and batten siding not only in the exterior but interior panels as well. These offer an unparalleled stylish look to the entire house and bring a unique personality to the space. These can impart the finishing touch to the face of the building and balance the entire visual appeal.
There are multiple ways of using board and batten siding to give the design a distinct design language. From vertical vinyl siding being balanced with horizontal ones to plain wooden sidings, there are endless possibilities when it comes to amping up the design. Let’s learn about the materials available in the board and batten siding and the essence they add to the design.
Board & Batten Material Options
There are multiple options in terms of the materials when it comes to board and batten siding. Each material comes with its own set of pros and cons and can offer a unique look to the house. Let’s understand the material better to help you narrow down the most suitable choice.
Material
Pros and Cons
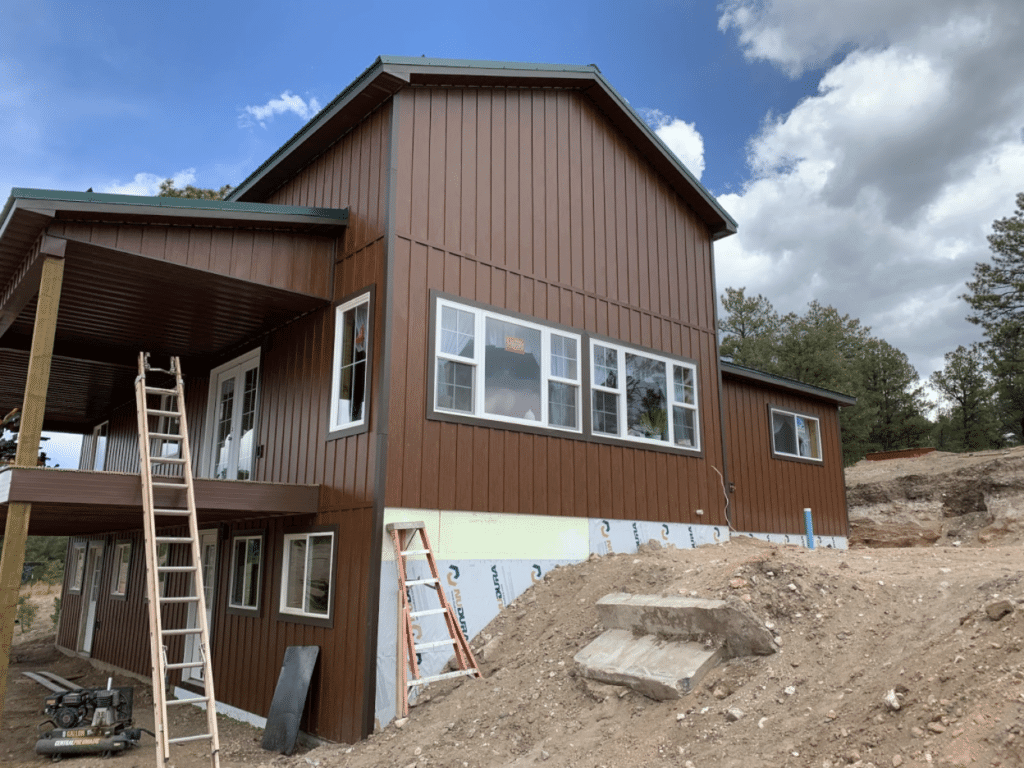
Wood Board and Batten Siding
Add traditional appeal to the design. Prone with moisture damage. Can sag based on the temperature difference. High maintenance.
Fiber Cement Board and Batten Siding
An advanced material than wood. Adds to the strength of the siding. A greater hold on the rest of the design elements. Demands repainting in order to maintain a fresh look. Installation is best performed by professionals rather than taking it as a DIY project.
Steel Board & Batten
One of the best board and batten siding options. Promises excellent performance. Demands minimal maintenance and upkeep. Quick and easy to install. Greater fire safety than wooden board and batten siding. Water-resistant material. Keeps consistency in its color.
Board and Batten Vinyl Siding
A cheap option for board and batten siding. Enhances the aesthetics of the home exteriors. Durable material offering longevity.
James Hardie Board and Batten
The Hardie board and batten work on the panel configuration to get the desired look. These are one of the most effective board and batten siding options the results are promising and the material demands minimal upkeep.
While the real wood board and batten aren’t a smart choice for the siding, James Hardie Board and Batten let you get the desired look with their engineered product. These can stand up against extreme exterior conditions and adds wooden appeal to the design.
The Hardie board and batten let you choose amongst a plethora of options varying from different colors to textures. You can select the desired option that goes well with your design sensibilities and reflect your personality through the design. Bring the classic designer touch to the house and make it stand out in the rest of the neighborhood.
Install Board and Batten Siding the Right Way
With board and batten siding finding its place in both interiors and exteriors, let’s look into the installation procedure that needs to be followed.
Exteriors
Although the installation might vary based on the design, here’s the basic process that needs to be followed while installing board and batten siding.
Undergo the process of furring that demands the installation of horizontal strips serving as a structural frame. This framework forms the skeleton on the top of which board and batten siding will be installed.
The next step is you measure the size required for the siding and precisely cut it. Make sure to measure from the soffit’s underside to 1/4th inch below the foundation’s top level.
There’s a possibility of expansion and contraction of the board and batten siding due to the weather conditions. In this case, to prevent the case of warping within the boards, ensure to leave a gap.
Once all the vertical boards have been set in place, it’s time to add top trim with the help of battens. Place it horizontally and ensure that it’s tightly pressed against the soffit.
Now it’s time to add battens. These have to be placed tightly against the trim board and the bottom needs to be flushed in line with the wide vertical boards.
Once everything is in place, you can go for a water-resistant sealant on the top of the battens. And based on your personal preference, the entire setup can also be painted in the desired tones.
Interiors
Let’s look into the installation process of batten board siding trim in the interiors.
Before starting the process, trace the layout on paper and analyze the spacing required within the battens for a neater look.
Once the layout has been finalized on the sketch, you need to pick a chalk and start marking it on the wall. This will let you look into how the result will come out and tweaks can be made prior to getting into the hefty work.
It’s time to get rid of the thin baseboards and replace them with a new and sturdier base. Opt for boards with a thickness that matches the batten size.
Check the alignment with a level and the next step is the installation of top trim. Add it to the base with fresh nails and precisely cut the battens based on the measurements.
Your battens will be installed with construction adhesive as gypsum might not hold nails in place. Once the glue has been applied on the back of the batten, you can start adding nails at an angle in order to keep it in place.
Conceal the nail holes and paint the boards in your preferred colors. This will give a fresh and finished visual appeal to the entire space.
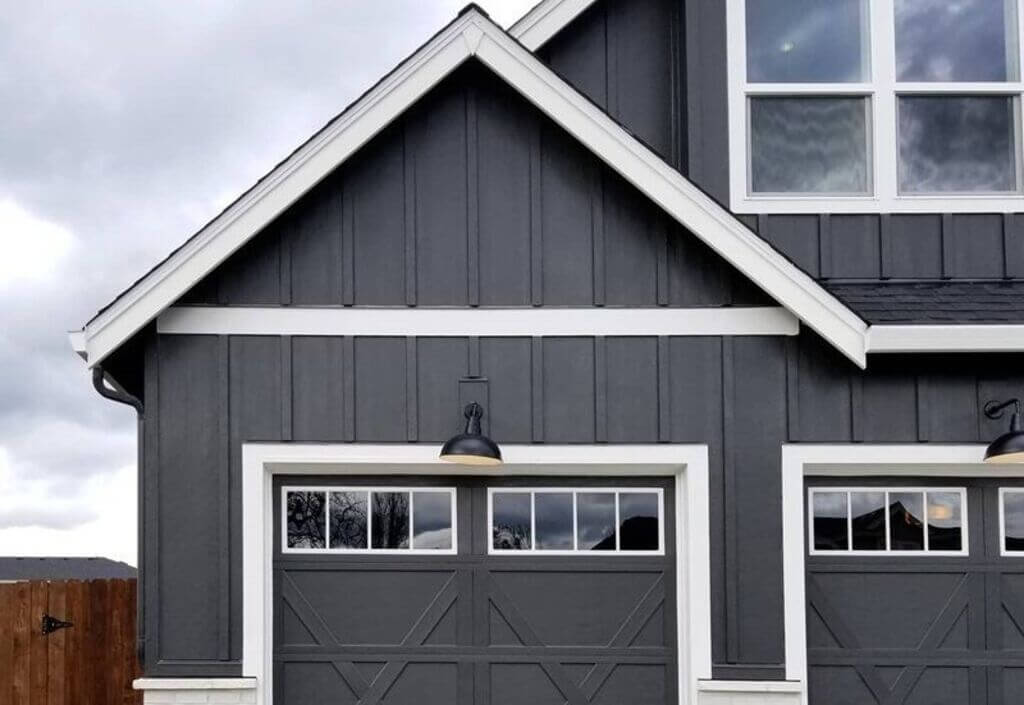
How do Decide the Color of the Board and Batten Exterior?
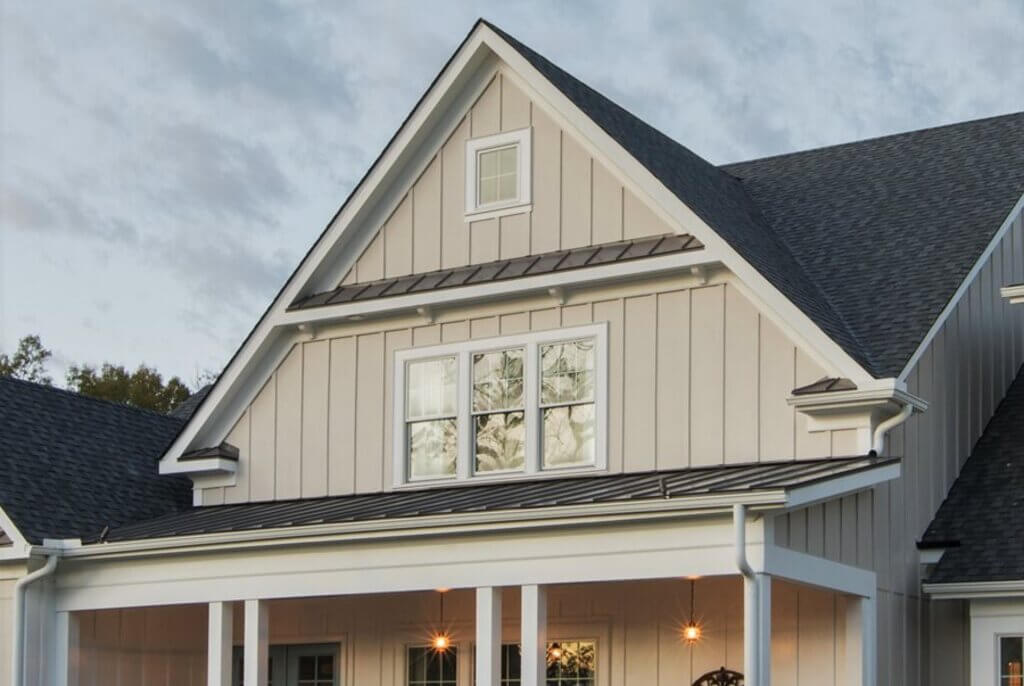
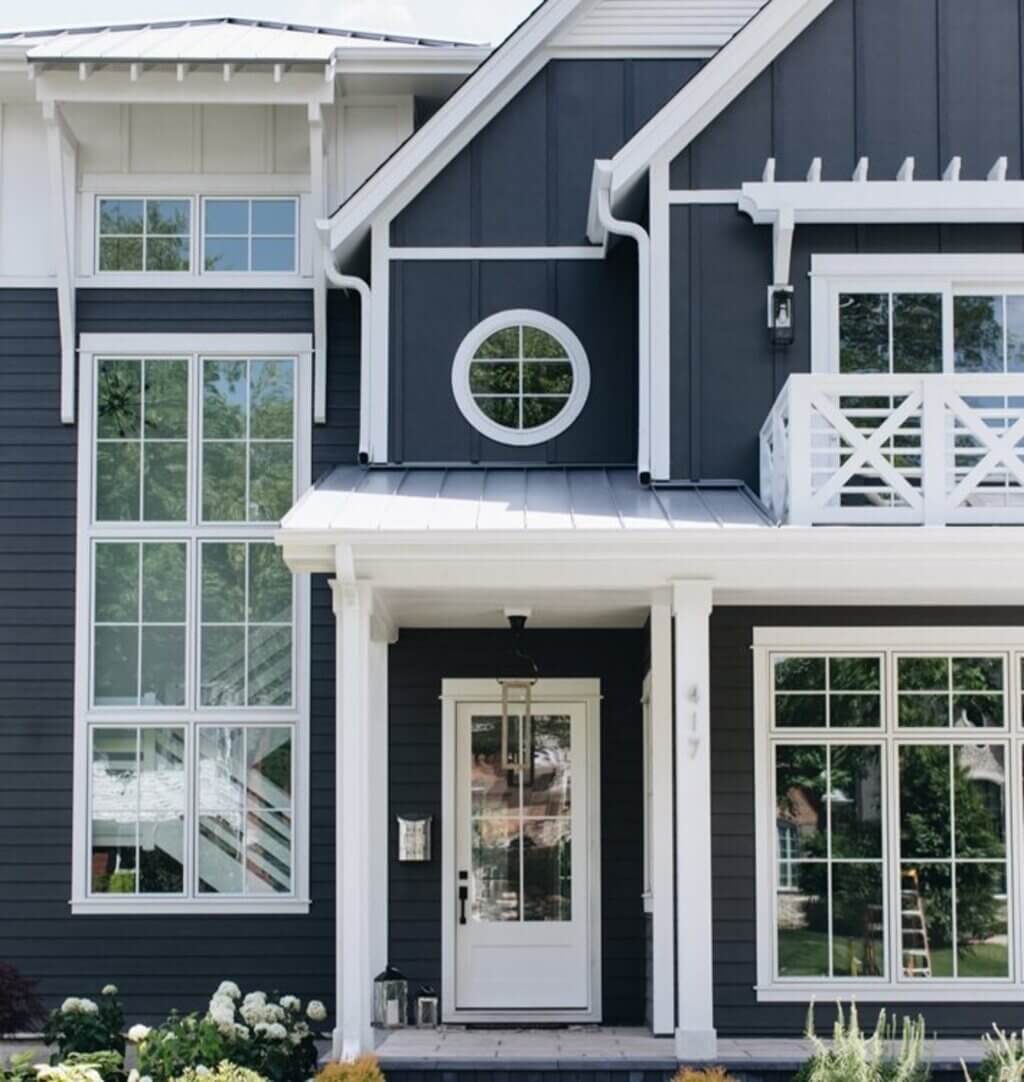
Whether to go for white board and batten siding or dark? Picking a color for the board and batten exterior can prove to be a challenge. There are a lot of considerations when it comes to selecting the color as the chosen option has to match the rest of the design language of the house.
One key noteworthy point in the case of board and batten siding is that it needs to be repainted with time. This is a key consideration when opting for wooden siding. Apart from the steel siding, rest most of the materials demand paint to conceal the wear and tear on the surface.
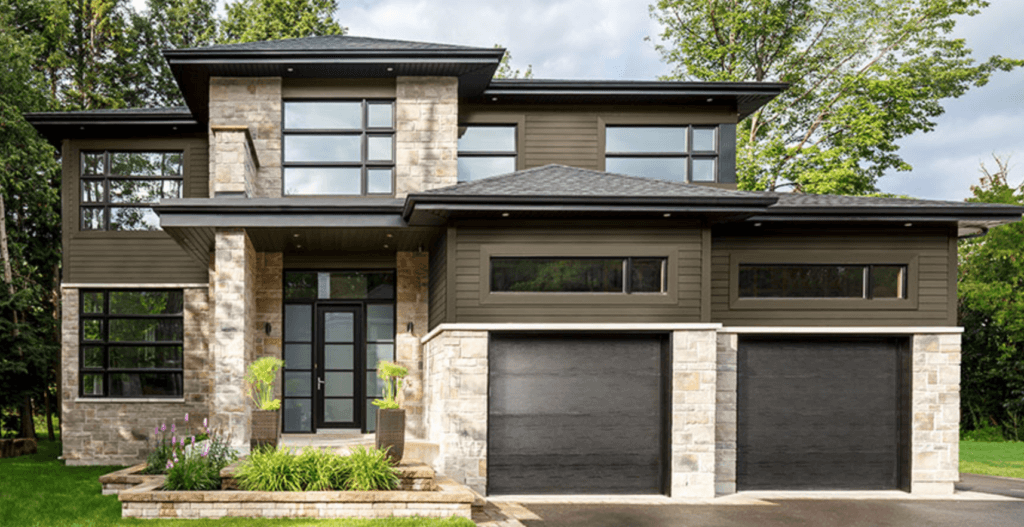
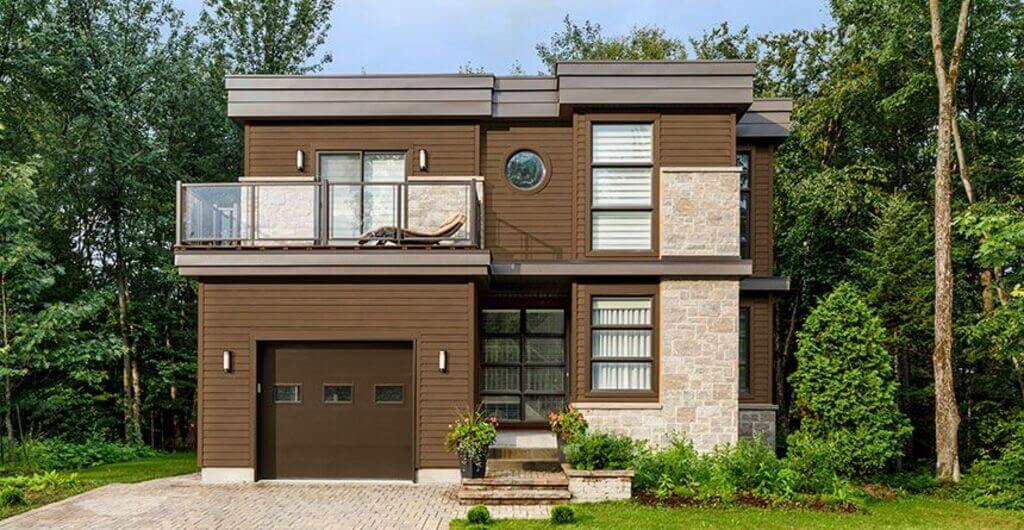
The chosen color of the board and batten has to match the trim on the facade. One of the best options is to go for natural wooden tones in order to keep the design inclined toward modern aesthetics. Your design can also add contrast with a blend of light siding and dark trim or vice versa.
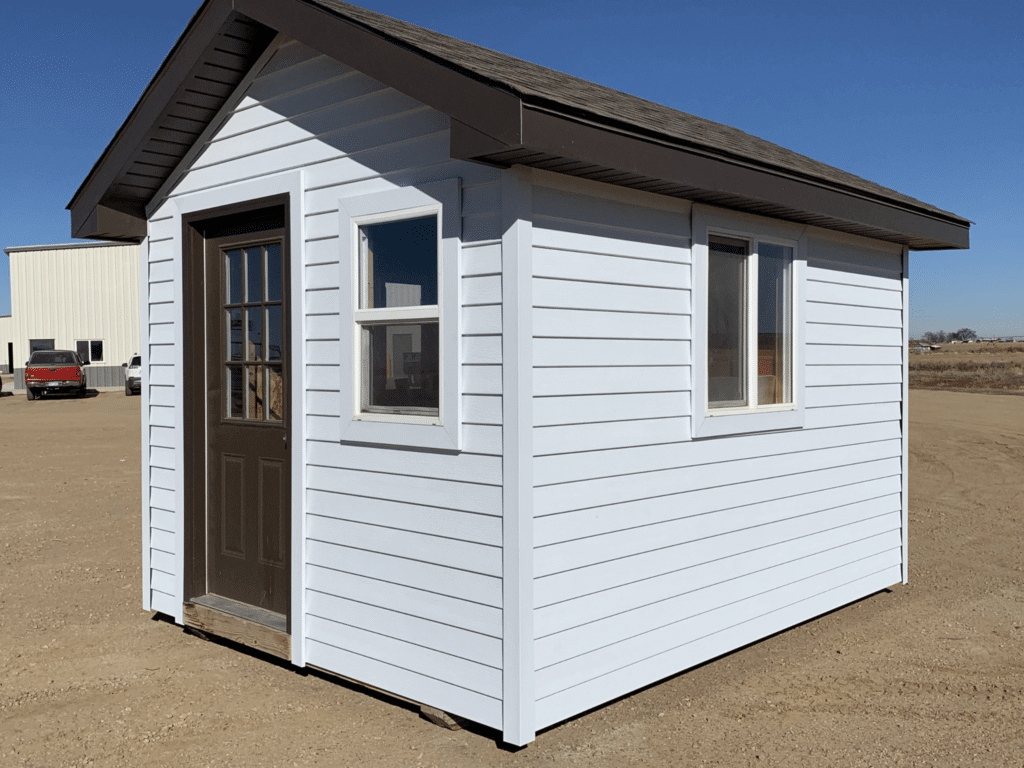
Comparative Analysis of Lap and Board and Batten Siding
One of the main questions while designing your dream house is whether to opt for lap siding or go ahead with board & batten. Let’s analyze a few factors that will help you decide better.
Cost
The prices of siding, in either case, depends upon the material you’re choosing. While wooden and vinyl board and batten siding can prove to be a cheaper option, innovative materials like steel and fiber cement can prove to be a little expensive. Although the prices may be a little higher, these offer better strength and aesthetic appeal to the house. A general range for board and batten siding is within $1 to $9 per square foot.
When it comes to lap siding, there are multiple options in the materials. The wooden siding is the cheapest choice, however, durability isn’t promised in this case. In the case of lap siding, the labor cost also varies as per the chosen design and material.
Maintenance
Board and batten siding demand repainting when it comes to wooden or vinyl materials as these can fade away with exposure to the sun. In a few cases, maintenance levels can be more based on the climatic conditions and the material that you’ve chosen.
The upkeep of lap siding might demand painting in order to offer a fresher appeal. Whereas, new-age materials like steel are totally maintenance-free.
Installation
The installation of board and batten siding is a bit challenging with the traditional methods, however, the new-age approach makes it easier. The entire process can be eased out with easy-to-handle materials and modern techniques.
Compared to the board and batten siding, lap siding is easier to install. But again, this is totally dependent on the material you’ve chosen.
Summing it Up
Lap Siding
Board and Batten Siding
Expenses
$1-$10
$1-$9 per square foot.
Ease of Installation
Easy to install.
A hefty procedure with traditional techniques but innovative methods offer ease of installation.
Maintenance Factor
Based on materials, might require to be repainted.
Demands maintenance to keep up the fresh appeal.
Board and Batten Siding– A Longer Companion
Board and batten siding will remain intact if installed and maintained well. All you need to consider while selecting the batten board siding is the well-suited material and the installation process.
With several options in its style and textures, pick the one that blends well with the design and aids in amping up the curb appeal of your house.
Floors tend to be covered up a lot in most homes. Rugs, foot traffic, stains, and the signs of a life well lived to tend to make floors dull and not very nice to look at, but if you decide that you want to enhance your living room flooring, you can do a lot without spending a fortune as well!
Here are some of the best ways to put the pep back into the floor you step on! Plus, since you won’t be spending a lot of money, most of these steps have very little effort involved too!
1. Do a Deep Clean!
For starters, it’s probably been a while since you did anything to clean your floors beyond a simple vacuum, sweep, and mop. In order to fully refresh your floor, you need to do a deep clean. Take a look at all the floors in your home and then get started on doing a deep clean.
First, sweep and vacuum like you normally would, but then you can use things like warm water, baking soda, and other floor cleaners to really get deep into the floor and remove those stains that are hard to see.
Now, your kitchen floor is going to be different from your living room floor, which is going to be different from your bathroom floors, so make sure to research how to deep clean them all effectively.
Finally, make sure to clean your floors with natural cleaners or with cleaners that aren’t filled with harsh chemicals, because going the natural route will be easier on your health and on your floors.
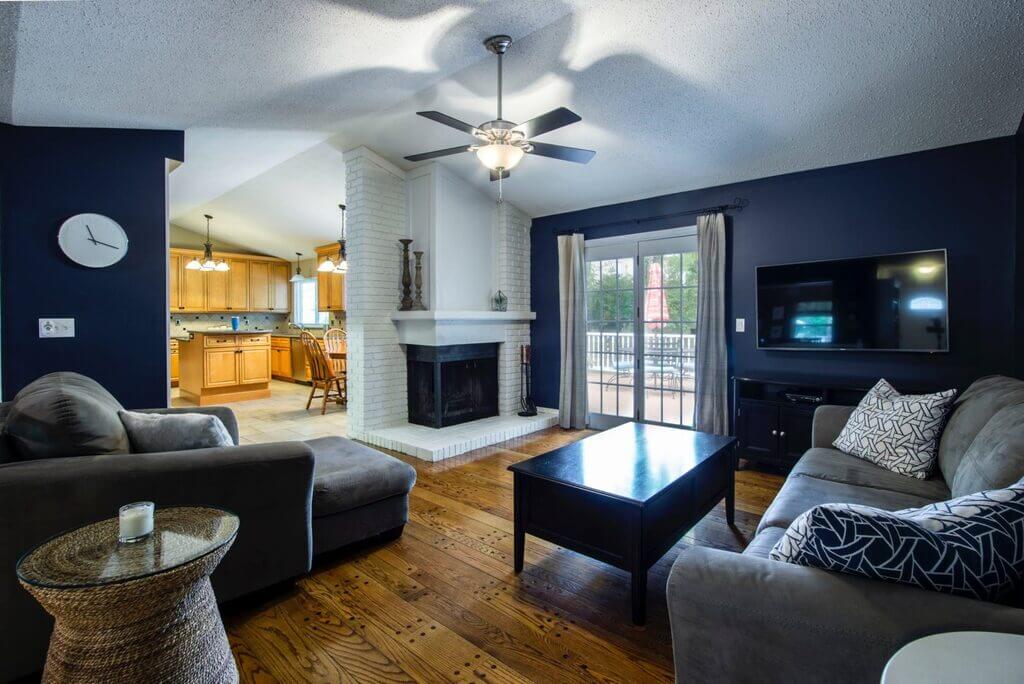
2. Use Rugs
The right rug might seem like it just covers up your living room floor, but instead, it can actually enhance it. Get a rug that can match the colors of your living room furniture or decorations, and make sure to place all of these items effectively.
You can find rugs and carpets in various colors and patterns for any type of room, and they can provide a nice change in both color and texture for your needs.
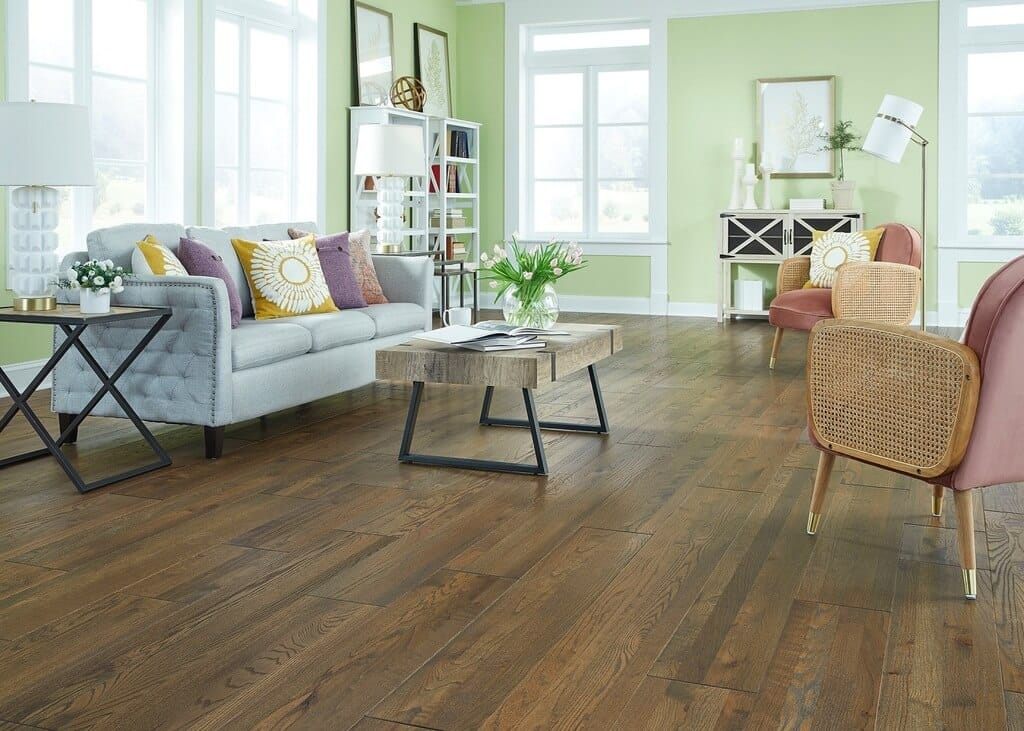
3. Use a Laminated Coating on Your Floor
Laminated wooden flooring can be very helpful when you want to enhance your natural wooden floor, and it is made by stacking several layers of synthetic materials and then coating all of that with a top layer of laminate finish. It is a lightweight flooring that is very easy to maintain and the flooring can be customized very easily.
The only downside of using laminated flooring is that if you have a lot of moisture in your home it tends to disintegrate. Even if you have the driest home and floor imaginable, the top layer may still wear off after a period of time, so you will need to repair the flooring at times.
Buying Flooring Online
However, if you don’t see any way to enhance your own flooring and want to instead replace your old flooring with something even better, then you can simply buy up new flooring instead and see what that looks like. You can go online to various flooring websites, including Empire Today, and see all the options for the floorings they have.
Empire Today flooring options run the gauntlet from wood to tile, to vinyl flooring and you can work with their team to see what type of flooring will work the best in your living room. They offer a lot of interesting flooring at an amazing price, and they can get your old floor out and your new floor in no time at all.
There are also lots of other flooring websites that let you buy flooring online, so don’t hesitate to look around and see what flooring options are the best for you and your needs.
Remember That Flooring Is Important for Your Living Room
Finally, don’t be afraid to pay some attention to your floors. For most people floors are simply something to build upon in a living room with furniture and artwork and other items, but it’s still a wonderful canvas and should be taken care of.
Even a simple cleaning of the floor now and again or a new rug can make your entire living room shine, and that can make you feel really good too!
You might as well take care of your floors because they will continue to help you out! Especially if you can care for your flooring without placing a hole in your wallet either.
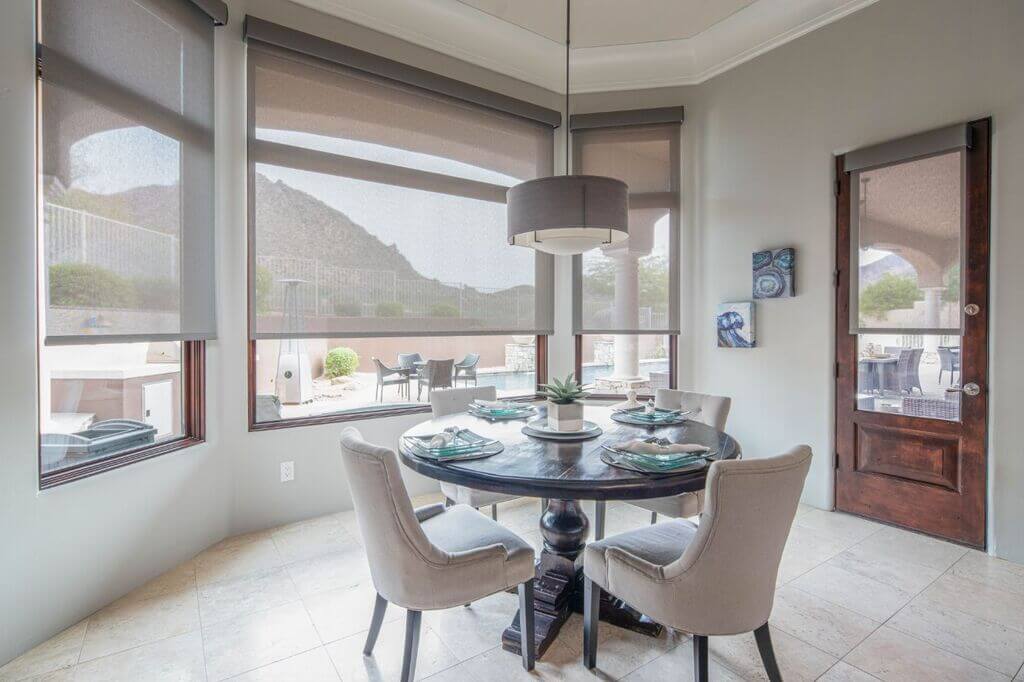
Are you looking for ways to improve the lighting in your home? If so, you may be considering new window treatments. Here’re tips on how to choose the right window blinds for optimal lighting.
Window blinds are a great option for controlling light, and they come in a variety of styles to suit any space and décor.
But with so many options available, how do you choose the right window blinds for optimal lighting?
In this blog post, we’ll give you some tips for choosing the right window blinds for your home. We’ll also share some of our favorite options for creating optimal lighting in any space.
Key Points
Optimal lighting is important for many reasons
Window blinds can help you achieve optimal lighting
There are a few things to consider when choosing blinds for optimal lighting
If you’re not sure where to start, we’ve got some great suggestions for you!
Why Optimal Lighting Is Important
Window blinds are an essential part of any home or office space.
Not only do they help to regulate the amount of light that enters a room, but they also play an important role in reducing glare and protecting furniture from sun damage.
Productivity and Comfort
Optimal lighting is important for both productivity and comfort. Too much light can cause eye strain and headaches, while too little light can make it difficult to see what you’re working on.
Perfectly Balanced Environment
Window blinds allow you to adjust the light level in a room to create the perfect balance for your needs.
Reducing Energy Costs
In addition, blinds can also help to reduce energy costs by keeping out unwanted heat in the summer and trapping heat in the winter.
As a result, investing in high-quality blinds is a wise decision for any home or business owner.
How Window Blinds Can Affect Lighting
Window blinds are a popular choice for office and home window treatments. They come in a variety of materials, colors, and styles to suit any décor, and they can be adjusted to control the amount of light entering a room.
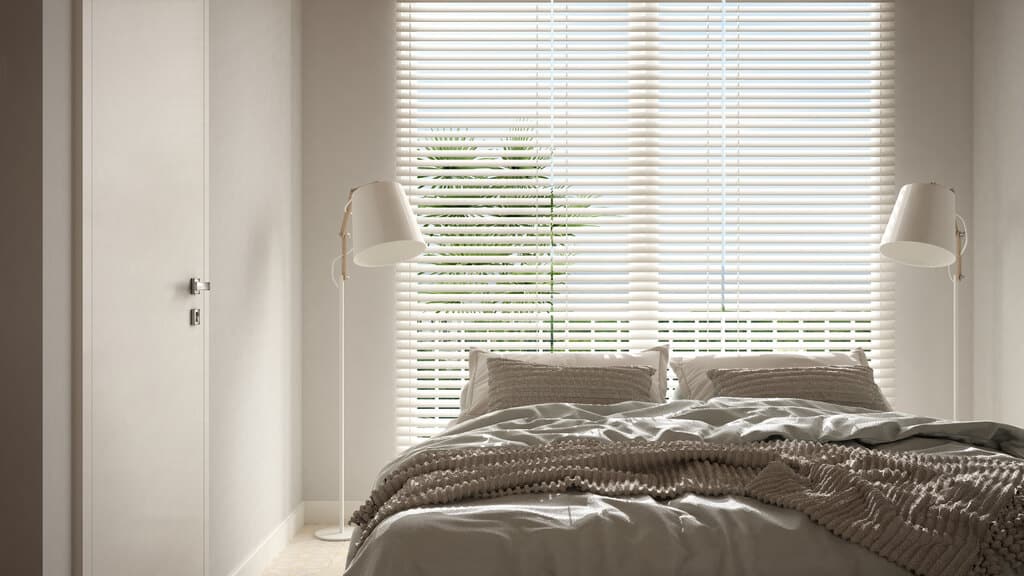
Allowing or Blocking Out Light
When closed, blinds can block out all light, making them ideal for bedrooms and media rooms. When opened, they can allow natural light to enter the room, helping to brighten up a space.
Controlling the Direction of Light
Blinds can also be tilted to control the direction of the light, making it possible to reduce glare on a computer screen or television.
Insulating a Room
In addition, blinds can help to insulate a room by trapping air between the window and the blinds. As a result, blinds can have a significant impact on lighting levels in a space.
Tips for Choosing the Right Window Blinds for Optimal Lighting
Choosing the right window blinds for your home can be a daunting task. With so many different styles, materials, and sizes to choose from, it’s difficult to know where to start.
However, by following a few simple tips, you can easily find the perfect blinds for your needs.
Brightness Level
One of the most important factors to consider is the amount of light you want in the room. If you prefer a brighter space, then lighter-colored blinds or those made of sheer fabrics are a good option.
On the other hand, if you want to block out more light, then darker colors or thicker materials will be better. Another thing to keep in mind is the size of the window.
Size of Window
Smaller windows will look best with smaller blinds, while larger windows can handle larger ones.
Blind’s Blending Behavior
Finally, think about the style of the room. If you want the blinds to blend in, then choose neutral colors and simple styles.
Lighter or Bolder Hues
But if you want them to be a more eye-catching feature, go for bolder hues and prints.
By keeping these factors in mind, you’re sure to find the perfect blinds for your home.
How to Get Started with Choosing the Right Window Blinds for Your Home
Window blinds are a great way to add privacy and style to your home. However, with so many different types and styles available, it can be hard to know where to start.
Here are a few tips to help you choose the right blinds for your home:
Intended Function of Windows
First, consider the function that you want your window blinds to serve. Are you looking for privacy? Light control? Or simply a decorative element? Once you know what you need, you can narrow down your choices.
Take Your Window’s Measurements
Next, take measurements of your windows so you know what size blinds you need. Be sure to measure both the width and the height of the window, as well as the depth of the window sill.
This will ensure that your blinds fit properly and look proportionate.
Style of Your Home
Finally, think about the style of your home. Are you going for a modern look, or do you prefer something more traditional?
There are discounted blinds at Affordable Blinds in a variety of styles, so take some time to browse until you find something that matches your taste.
With these tips in mind, choosing the right window blinds for your home will be a breeze!
Conclusive Remarks
Window blinds can have a significant impact on lighting levels in a space.
When choosing window blinds, it is important to consider the amount of light you want in the room, the size of the window, and the style of the room.
By following these tips, you can easily find the perfect blinds for your home’s optimal lighting requirements.
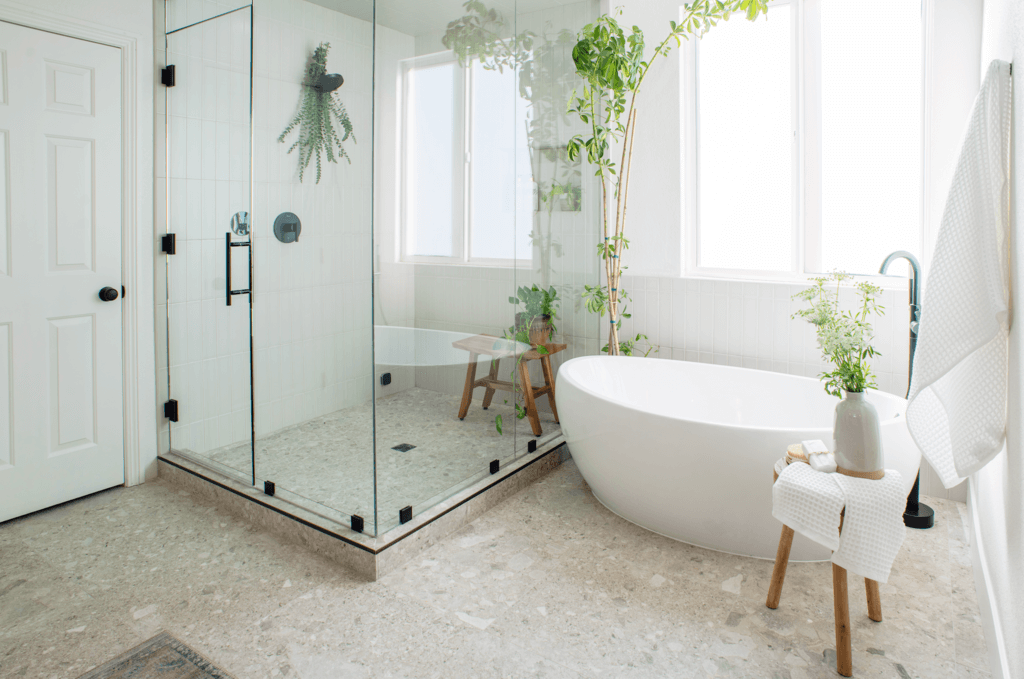
As you enter the shower, you are thinking about the day ahead- already late for the office, and already behind on work. Today is not going to be a good day! But as the water falls, you feel relaxed and carefree. You look down on the shower floor and embrace the experience.
Taking a shower is a magical experience. It makes you forget the stress and the worries of life, even if only for a moment. Obviously, you need the right shower for a good shower experience. And no shower is complete without a great shower floor- the shower pan and the shower base included.
But wait, are these two different things? The shower pan and the shower base?
Shower Pan and Shower Base: What’s the Difference?
Both the Shower Pan and the Base are essentially part of the Shower floor and both aid in channeling the water toward the drain. But they aren’t the same thing. The shower pan is the surface that you step on when you enter the shower, while the Shower base is what is hidden beneath it.
The Shower Base
Beneath the elegant acrylic/composite “floor” of the shower lies the Shower Base. Treated with cement or mortar, it helps drain the water and protect the surrounding. It is usually connected to the subfloor using a liner or sealant.
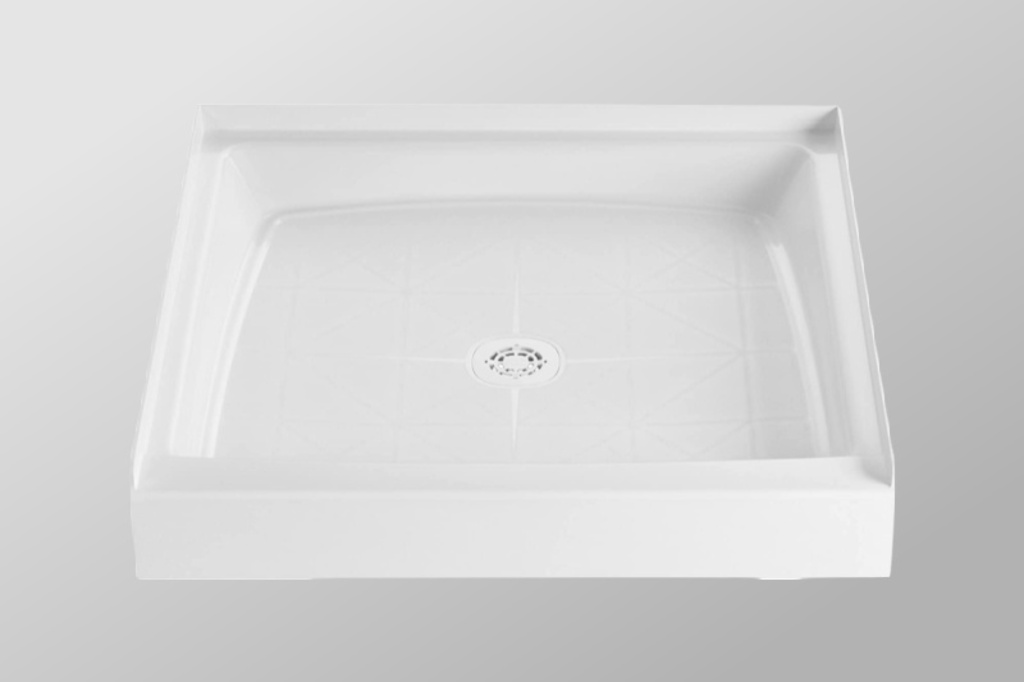
The Shower Pan
The shower pan is the floor you stare at while in the shower, thinking about your day, or taking crucial life decisions. It is usually one piece made of acrylic or composite material. The aim is to look elegant while ensuring that the water flows down the drain. You can also make best bathroom shower.
What are Shower Pans Made Of?
Shower Pans usually come in these variants:
Acrylic- Large sheets of acrylic are heated and then stretched to form shower pans. They are often used in conjunction with reinforcements. They are a durable option but turn out to be costly in case they do need repairs.
Custom tile- This one is known for its looks but at a higher cost. It is also a task to maintain a custom-tiled shower pan, as the grout between the tiles is a little difficult to clean.
Fiberglass- A cheaper option in both installation and maintenance. Fiberglass shower pans are a mix of polyester resin and woven glass fibers. But they are also more susceptible to damage or stains.
Composite- These pans are made from a combination of materials and are very durable. The quality and looks are often customizable and varied at the least. They are usually the expensive ones but cut down on maintenance and repair costs.
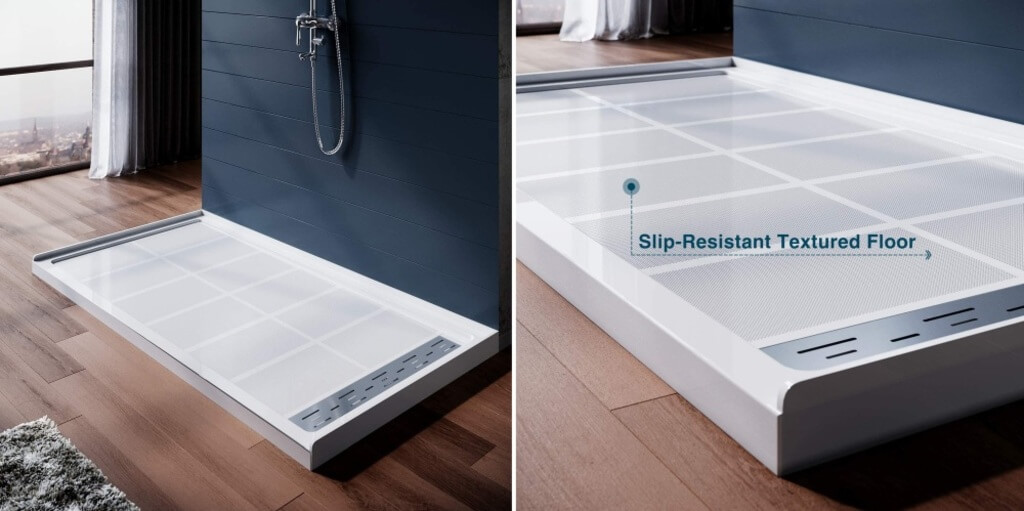
Top 7 Bathroom Shower Pans
1. DreamLine Neo Angle Shower Pan
Made of fiberglass-reinforced acrylic, this shower pan is one of the most popular choices for corner showers. It’s anti-slip and extremely durable. It accommodates drains that are up to 2-inches wide (but not included in the pan). It is also one of the most compact designs- perfect for small or mid-sized washrooms.
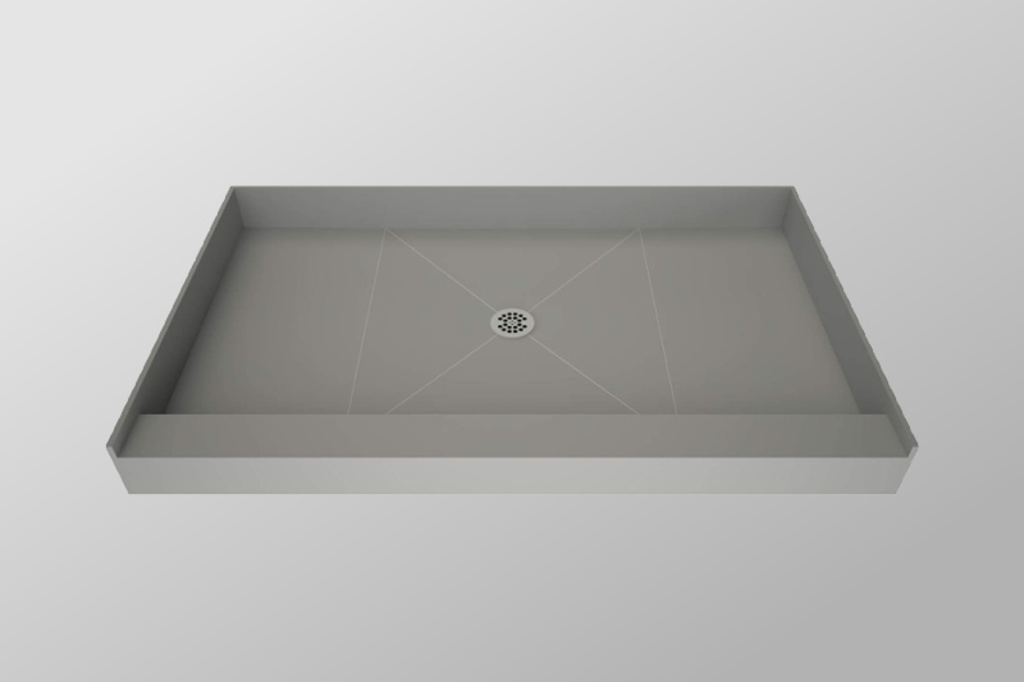
2. ELEGANT Shower Base
This is a premium-look shower base by ELEGANT STORE, made of sheet molding compound. This shower base even has an integrated tile flange to merge with your current flooring. It comes with three different drain locations and is durable, heat, and water-resistant. There is only one catch- this base only comes in white.
3. Tile Redi Base Shower Pan
The perfect option for a walk-in shower, the Tile Redi Shower Pan comes without a frontal threshold. It is also easily accessible by a wheelchair. It goes well with natural stone or concrete floor, and the surface itself is tile friendly. Its base is so durable that it comes with a 3-year warranty!
4. PROFLO Shower Pan
This pocket-friendly shower pan is available molded into one piece in all the standard sizes. Made of a high-quality composite, it is non-porous and resistant to stains and shocks. Meaning? Suitable for all cold or hot showers you want! It doesn’t let you slip and is perfect for walk-in showers.
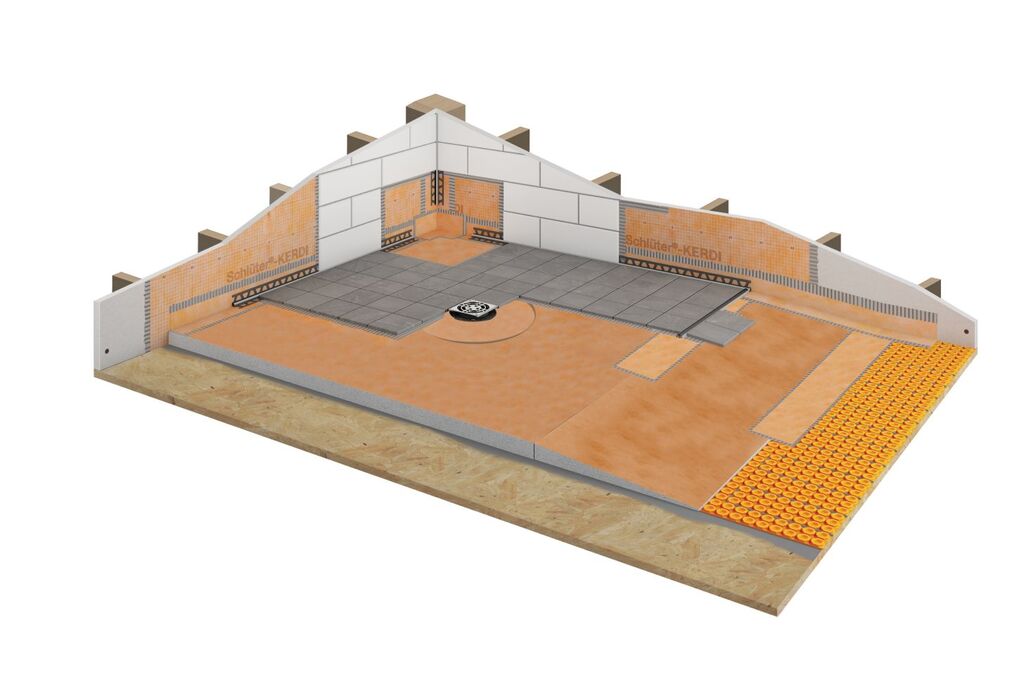
5. Schluter Shower Pan
The Schluter shower systems are the go-to for tiled shower lovers. Even tiled shower floors need proper water-proofing systems. Otherwise, it is tough to manage moisture content and prevent the growth of mold. The Schulter Kerdi shower kit comes with the waterproofing components necessary for a good shower floor.
6. Westbrass Shower Pan
A solid acrylic base reinforced with fiberglass and resin, this shower pan comes in six standard sizes and four different finishes. The pan is easy has a central drain and is easy to clean and maintain. Even the drains are available in either plastic or brass.
7. WOODBRIDGE Tileable Shower Base
This shower base model by WOODBRIDGE comes in standard sizes and even includes an installation kit for a smooth process. It is a highly suitable option for many shower shapes. It features a center drain with a two-inch PVC drain in a stainless-steel drain plate with a nickel finish.
How to Install a Shower Pan, By Yourself
Once you have picked out the best shower pan to suit your needs, there is only so much that goes into installing it:
Step 1: Measure the space; to check if you have the required space to fit in a shower pan (i.e. around 3’). Second, to help you choose the one that fits.
Step 2: Prepare the subfloor to embrace the incoming shower base.
Step 3: Install and check the drain. Make sure things are locked into their place, especially if you don’t want any leaks!
Step 4: There are different ways of securing the pan, including adhesive or mortar.
Step 5: Now that you have a floor, you need to put a drain screen over the drain pipe with a gasket in the midst.
Step 6: Check for leaks. If you find one, back to step one. If you find none, congratulations!
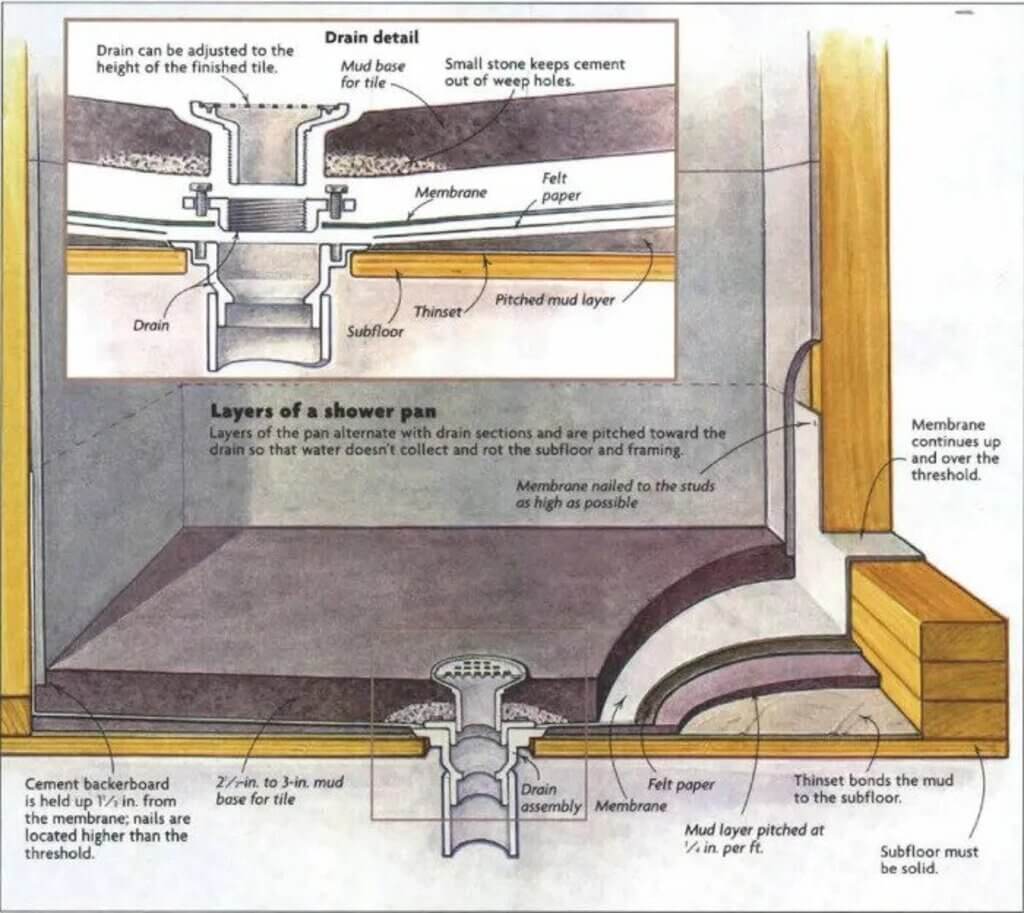
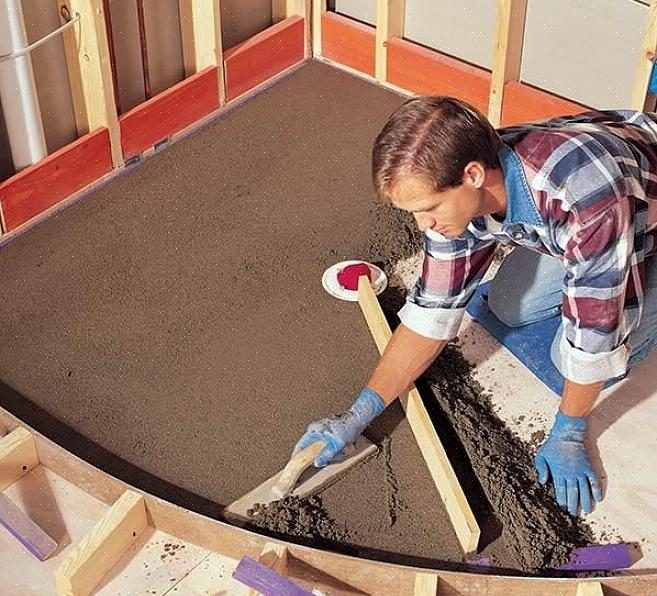
How to Build a Shower Pan
If you are good with DIY and have the tools necessary for the project, you can even build a shower pan in-house! Here’s how:
Step 1: Measure the space, and the dimensions of the floor and then draw it on the floor.
Step 2: Locate the studs on the shower walls, and pour in the first layer of mortar.
Step 3: Place the shower pan liner and fold it along the walls and fix it in place.
Step 4: Make a hole where the drain is located and fix the top cover in place.
Step 5: Attach the Backer board and add the Metal Lath.
Step 6: Form the curb and cover it in mortar.
Step 7: Adjust the drain dole to check for leaks.
And we are done!
Long Story Short
Shower pans are important, yet often ignored. The right shower pan is a perfect blend of elegance and efficiency. It should be durable, low-maintenance, and easy to repair. The standard-sized pans are often the most affordable.
If you think the process of installation of a shower pan is a labor-intensive one, it isn’t. Once you have chosen the perfect pan for your bathroom, just follow the steps for installation, check for any leaks, and you are all set!
FAQs
What’s the Difference Between a Shower Base and a Shower Pan?
The shower base comes first- it’s the part of the shower floor that is hidden under the shower pan. The base is usually made of cement or mortar, while the pan is made of acrylic, fiberglass, or composite.
Is It Better to Use a Shower Pan or Tile?
Installing a tiled floor is a long process and requires a certain amount of skill and precision. Any mistake can lead to extensive water damage. Installing a shower pan, on the other hand, is much easier than installing a tiled floor.
How Much Does It Cost for a Shower Pan?
The cost for a new shower pan ranges from 200$ to 1200$, with additional cost for installation, which costs similar to the shower pan.
What Is Best to Put Under the Shower Pan?
Mortar is recommended as the best material to be used under shower pans. It contains latex and polymer additives that increase the bonding strength to surfaces. Using mortar decreases the risk of the pan slipping or cracking due to an uneven surface.
What Are the Standard Shower Pan Sizes?
Shower pans come in a variety of sizes to fit the space for a shower in your bathroom. They usually range from 32 x 32 inches to 60 x42 inches. The neo-angle ones range from 36 to 60 inches in diameter.
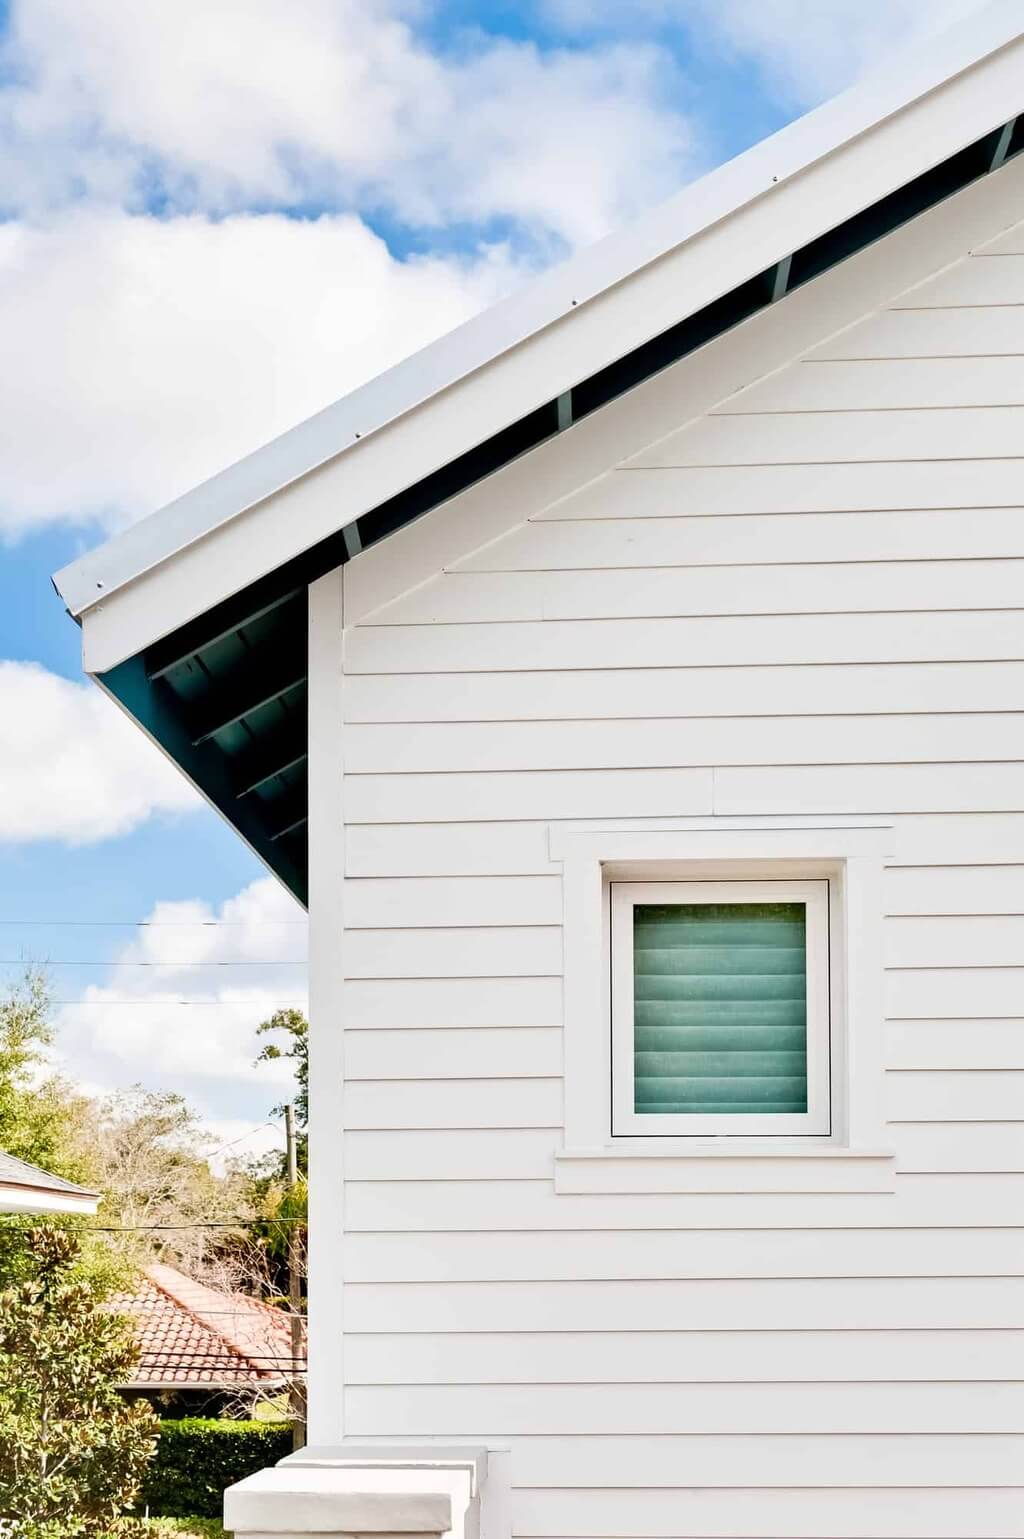
Are you an old soul seeking timeless beauty in your wood-paneled home? However, in this day and age, maintaining a wooden exterior might be difficult. People are preferring stronger materials such as cement and steel. However, Hardie plank siding may give the ideal balance of durability and attractiveness. It is the most popular siding brand in North America, safeguarding and embellishing homes from all over the world. In comparison to plaster or concrete block siding, Hardie Plank has a more natural appearance and may imitate the look of wood siding.
You must be wondering how it is possible to achieve sturdiness with wood grain texture! The James Hardie Corporation manufactures Hardie Plank, a siding material consisting of cementitious elements and cellulose. They come in many designs, including trim boards, shingles, panels, and lap siding.
Additionally, they are produced with a variety of grain patterns, including stucco, seamless, and hardwood texture. If you intend to update your exteriors, continue reading to learn more about this durable siding solution.
What Materials Are Used in Hardie Plank Installation?
The essential components of James Hardie lap siding are cellulose fiber, Portland cement, and sand. If you tear a piece of Hardie Plank, you’ll find a rigid core interwoven with wood fibers inside. Its hardwood component, however, does not add to its distinct natural wood effect. It is generally the consequence of embossed texture. Hardie Board Siding was created with energy efficiency in mind. The composition is not fireproof but is also regarded as fire-resistant.
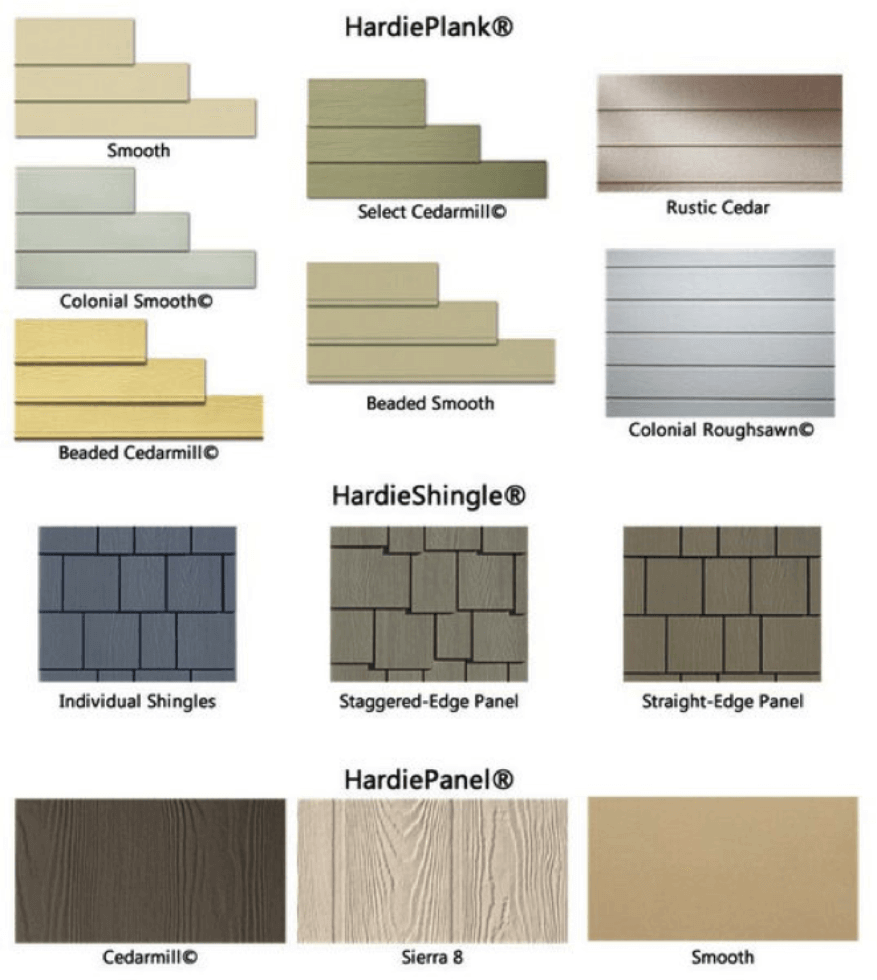
5 Styles of James Hardie Lap Siding
Four different HardiePlank lap siding designs are available for homeowners to select from so they may customize their homes appearance:
1. Traditional Lap
The horizontal siding of this style is the most popular Hardie panel style. Here, the bottom of each board is slightly overhanging the board below it as it is horizontally put out in traditional lap siding.
2. Beaded Hardie Plank Siding
Beaded siding is made out of horizontal planks connected by a little pellet strip. While beaded smooth provide your house a sleek, modern appearance, the beaded cedar mill style gives it a rustic vibe.
3. Custom Colonial James Hardie Lap Siding
In this lap sinding style, bigger horizontal boards are divided by slim, inverted siding segments. Colonial Roughsawn and Colonial SmoothR, which are both available in smooth and wood-like finishes, replicate the conventional, vintage appearance.
4. Shingle Edge Hardie Plank Siding
Your home will have a traditional but rustic appearance with this design. This shingle type is composed of little shingle boards cut at varying lengths but the same height to provide a crisp accent to each horizontal line.
5. Scallop Shingles Hardie Plank Siding
Scallop shingle design provides your property with a historical and seaside look. This aesthetic is created by using little shingle planks with semi-edges to create a fish-scale effect.
Why Should you Install Hardie Board Siding?
1. Hardie Plank Siding Cost
HardiePlank and other major types of fiber-cement siding are often more costly than vinyl siding. Generally speaking, these cost around three times as much as vinyl siding. The cost of your Fiber cement siding varies substantially depending on the environment, the number of workers, and the market demand for the materials.
2. Maintenance
It may be necessary to do routine maintenance on painted HardiePlank boards to maintain color consistency. You have to repair any areas where the paint has been washed or scraped by falling objects, most likely during stormy weather.
3. Prolonged Installation Time
Hardie Board siding’s hefty weight makes it more difficult to manage than other siding products. This makes installation more complex. To guarantee the warranty remains valid, installation should only be performed by James Hardie-qualified specialists.
5. Higher Resale Value
You should be sure to recoup your initial investment if you choose HardiePlank for your home’s exterior. This is due to the high cost of HardiPlank siding and the increased value it gives your property. It is questionable whether you will be able to recoup your initial investment with other forms of siding, notably vinyl siding. According to experts, installing fiber-cement siding is an upmarket siding job that will repay the bulk of your initial investment when you sell the property.
6. Fire Resistance
HardiePlank contributes no combustibles to a fire. Vinyl siding, on the other hand, vinyl siding is made from petroleum and contributes greatly to fires. Wood is quite flammable. As a result, it is classified as fire-resistant but not fireproof. While fiber cement does not burn, it is not as fireproof as cement-asbestos shingles.
7. Impressive Warranty Schemes
James Hardie fiber cement siding is so dependable that it comes with a 30-year, non-prorated transferable guarantee. ColorPlus Hardie siding also comes with a 15-year transferrable, non-prorated guarantee. When a manufacturer is ready to back up its products like James Hardie, it provides homeowners peace of mind.
Top 3 Factors to Consider While Installing Hardie Plank Siding Installation
1. Hardie Plank Siding Cost
HardiePlank and other major types of fiber-cement siding are often more costly than vinyl siding. Generally speaking, these cost around three times as much as vinyl siding. The cost of your Fiber cement siding varies substantially depending on the environment, the number of workers, and the market demand for the materials.
2. Maintenance
It may be necessary to do routine maintenance on painted HardiePlank boards to maintain color consistency. You have to repair any areas where the paint has been washed or scraped by falling objects, most likely during stormy weather.
3. Prolonged Installation Time
Hardie Board siding’s hefty weight makes it more difficult to manage than other siding products. This makes installation more complex. To guarantee the warranty remains valid, installation should only be performed by James Hardie-qualified specialists.
Why is Hardie Plank Siding Expensive?
As previously said, this siding material is rather pricey. Fortunately, the high upfront cost is recouped in the long term due to the longevity of fiber cement and its high resale value. Let us examine the variables that contribute to the high cost of these durable panels.
HardiePlank has a limited supply compared to the material’s strong demand, driving increasing its price.
Fiber cement siding installation is more time-consuming than vinyl siding installation.
Many siding companies install vinyl siding, but there are fewer who do fiber-cement siding.
Given that this substance is much heavier than vinyl, shipping charges are greater.
Fiber-cement siding is typically painted after installation to provide the desired look and texture.
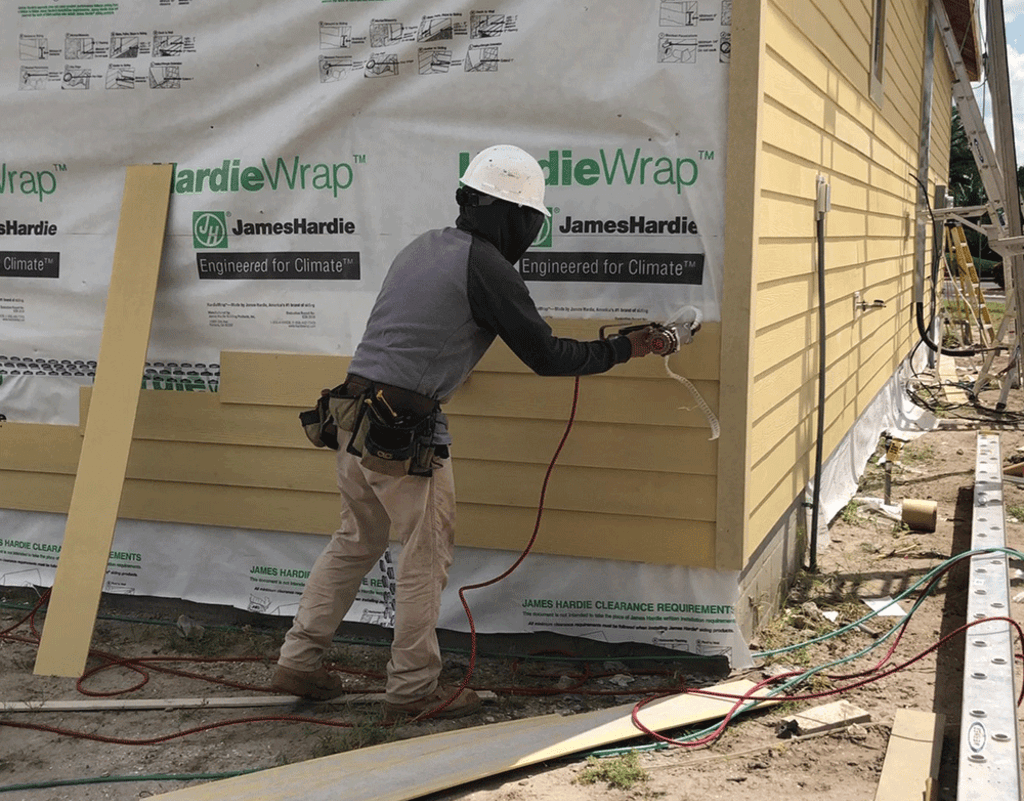
How to Install Hardie Plank Siding
It is advised that you use James Hardie Brand pros to install the slide. Even if you are installing it yourself, keep your safety in mind and follow the instructions.
1. Prepare the Wall
To begin, cover the walls with foam, chipboard, or oriented strand board. The sheathing should then be covered with a felt sheet or household wrapping. Then, using chalk lines, indicate the placements of the studs.
2. Cutting the Sidings
Next, you have to cut the Hardie planks into your desired size. The most common way to cut siding is with a circular saw. It does, however, generate the greatest dust. Other options include fiber cement shears, sawing, and scoring.
3. Nailing
You may either blind nail or face nail the siding. It is possible to hand-nail fiberboard cement siding, but you must predrill holes close to any edges. This is because it is so much tougher and more brittle than wood. You may save a lot of time by utilizing a pneumatic coil siding nail gun.
4. Trim Installation
Trim materials include vinyl, wood, and fiber cement. You’ll also need to make space for caulking. Allow space for up to two stacked Hardie boards. Begin by attaching the trim to the inner and outside corners of the wall.
5. Siding Installation
After you’ve finished the trim boards, use a story pole to lay down the siding courses. The house’s fiber cement cladding needs to be at least 6″ above grade. You must also provide a space between horizontal surfaces such as steps, decks, or neighboring roofs.
Hardie Plank Siding: An Engineering Masterpiece
After going through all the advantages of Hardie Plank Siding you probably admit that it is worth the hype! This Siding produces an outstanding home envelope with pest and fire-resistant properties. It features deep embossing, which gives it the appearance of real wood cladding. Also, it is paintable, unlike certain fiber cement siding choices. To summarize, Hardie Plank solves the majority of your external cladding problems while maintaining an elegant aesthetic.
FAQs
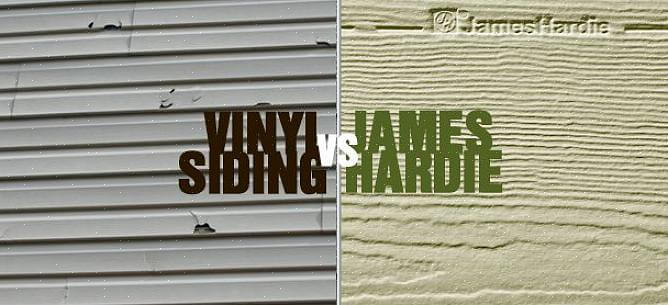
1. Which Is Superior, Vinyl Siding or Hardie Siding?
Hardie Plank Siding is a better cladding option. Fiber cement siding is more durable and up to 5 times thicker than vinyl siding. It effortlessly withstands the weather, defying damage from rain, snow, strong winds, and hail. Furthermore, provides years of protection with minimal maintenance.
2. Do You Nail or Screw Hardie Board?
James Hardie recommends and advises installing Hardie Plank lap siding using the blind nailing technique, which conceals fasteners beneath the course above.
3. How Long Does Hardie Plank Last?
Hardie plank siding is more expensive than vinyl siding, but it also lasts longer. As you evaluate this part of your selection, keep in mind that you will be able to enjoy this exceptional siding for up to 50 years.
4. Is the Hardie Board Prone to Breaking?
Fiber cement does not decay and does not bend or warp. As a result, it is brittle and stiff. Also, It is resistant to mold, mildew, and fading, although it, like all things, can become soiled with time.
5. Is Hardie Board Prone to Moisture Retention?
Hardie plank is impenetrable to factors such as rain, strong winds, and humidity because of its unique combination of concrete and other composite components. The fact that cement does not absorb moisture means that this siding never rots, swells, or warps.
Construction can sometimes be tricky, which is why a lot goes into planning before you even begin to see any progress. If you plan to construct a building, you should remember that planning is crucial for your project’s success. Having prior experience in construction will not necessarily give you an advantage, but noting these five things before planning a construction project should increase your chances.
Here are the five major things you must know when you are doing construction planning.
Finalize and Understand the Contract
An important thing to do is read the contract and finalize it once you thoroughly understand its contents. It can be challenging to start and manage a project you don’t know about terms, conditions, penalties, and risks.
Understanding the contract is important if you want to successfully manage the project and be ready for possible problems that may arise during the process. Do not hesitate to ask questions about the plan and the contract, as it can help you understand the end goal.
Ensure Financial Management
One thing that everyone can quickly agree on is that construction projects are not cheap. Projects often experience problems and delays due to the lack of funds or mishandling. So, after understanding and reading through the contract, it is time to go over the project’s finances and plans for monitoring the budget. You can understand the financial situation by asking questions like:
Are the funds fully available?
Is the overall budget realistic and within the capacity of the company or the client?
Are there allowances in case of contingencies?
When you ask these questions before the project starts, it will make it easier to see how the process will happen. Understanding the overall financial health of the project is essential if you do not want to lose more money or cause delays in the project. You should search for a reliable construction materials provider that offers competitive prices, then keep track of the construction expenses from wages, materials, tools, equipment, and permits.
Keeping tabs on the expenses, from the piece of tile to the number of general-purpose access door surface-mounted products the building will need, will help you control the flow of the overall finances in the project. Technology can be a big help on projects like these as it makes tracking all the project costs easier.
Establish Communications
The next thing you would want to do is establish theConstruction project’s communication flow. It will include the project owners, contractors, workers, managerial staff, and vendors. Having a communication flow is one of the keys to a successful project. Here are some essential things to take note of when establishing communication flow:
The ways of communication. Will it be through writing, text messaging, group chats, call, or something else?
How will the reporting be done, and how often does it happen?
Schedules of meetings and who will be present on this day and that.
How to effectively inform team members and staff of changes, new developments, or alterations in the project.
Conclusion
Without a proper form or flow of communication, you may find yourself with an unsuccessful project. Communication is vital, even in significant construction projects. You should always welcome questions and inquiries from project team members to ensure that everyone understands and is on the same page.
From the hair color to the tones in the soil, every natural element has a tint of brown. It could be the color of your favorite food item or perhaps interior decor, brown has a comforting essence in its tone. Now the real challenge is what colors make brown?
The brown color is mainly perceived as the epitome of class and beauty. It is one of the popular picks when it comes to home decor. However, finding the perfect match isn’t as easy as it sounds. Let’s learn a bit more about the meaning of brown in design and what mix of colors make brown and help you find a new favorite.
Brown: The Trendsetter
When it comes to interior design trends, grey has ruled the list for a long time. Taking over the place of the trendiest tones is brown. Designers and homeowners seek a bit of warmth in their spaces and brown effortlessly do the job.
The versatility of this color in order to facilitate several design languages makes it one of the most popular choices. From taking the decor towards an earthy look to jazzing it up with a little sense of luxury, this is the best choice. The only consideration is what colors do you mix to make brown.
Will light brown look better or the dark shade? That call is specific to your design taste and the ambiance you’re trying to create for your happy abode. While the lighter tones conjure up a sense of calmness and serenity in the decor, dark tints inject a little drama into the room. In either case, the color promises to set the scene and impart a unique character to the room.
What Colors Make Brown?
From subtle taupe to moody dark mahogany, there are endless choices in the accents of brown when it comes to picking one color. And what two colors make brown of your desired intensity varies from tone to tone. Before we get into the mixing of shades for light and dark brown, let’s check out what primary colors make brown?
The Magic of Primary Colors
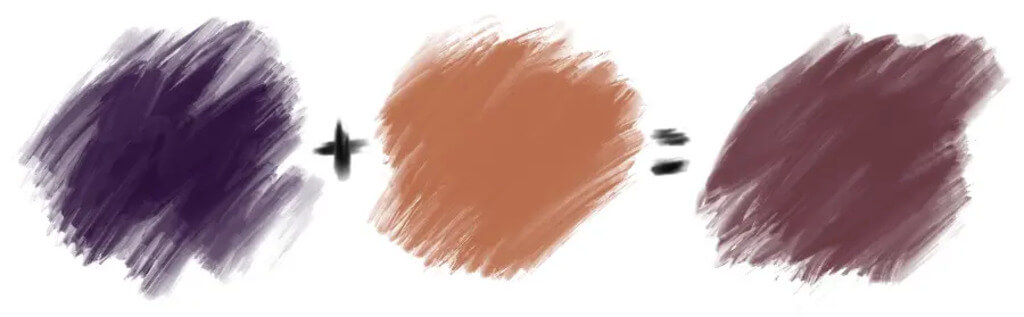
Brown is a composition of three primary colors– blue, red, and yellow. The answer to what colors make brown paint is these three shades in which their ratio varies based on the tone you’re trying to achieve.
Apart from the mix of primary colors, secondary shades can also be blended to get the desired color. For example, a mix of blue and orange will result in brown. The same is the case when yellow and purple are mixed up. However, the look of brown made by the distinctive mixing will also be different.
The mix of orange of blue will have a little greenish undertone to its brown, whereas, the purple and yellow mix will reflect a bit of the yellow tints.
Now that we’re aware of the primary colors, let’s see what 2 colors make brown.
Secondary+Complementary Colors
Yellow
Purple
Green
Red
Blue
Orange
What Colors Make Light Brown?
Lighter tones like taupe and tan have made it to the current design trends. These can be added to the mood board to compose a tranquil design theme for the home. The light brown shades aren’t only classy but also add a sense of timelessness when added to the decor.
Now, what colors make brown resemble these hues? In order to get the lighter brown shades, the basic primary colors are mixed well and white is added to the mix. Based on how light you want the color to be, the ratio of white to be added increases.
On top of it, you can add the desired primary shade to take the color toward your desired undertone. For example, in the case of taupe, the light brown mix will need additional red to add the pink undertone. And if the desired choice is tan, replace adding extra red with yellow. Knowing what colors make brown with the desired look is extremely important to get dreamy decor.
What Colors Make Dark Brown?
Adding dark brown to the mood board can exude a sense of elegance in the design. Dark brown goes well in not only home interiors but office spaces as well. It offers the flexibility to either keep the design traditional or use it as an accent color for contemporary decor.
Let’s see what colors make brown that bring a sophisticated edge to its addition. It’s very simple! Now that you know what colors make brown paint, you just need to add a bit of black to the basic mix. The intensity of the tone is entirely dependent on the amount of black you’re using. And just like the shades of light brown, red, blue, and yellow can be varied in order to get the desired dark brown tone.
Top 4 Common Browns
Let’s learn what color makes brown tones that are popularly used in the designs.
Espresso
We know what colors make brown. But now the challenge is how to achieve a particular tone with the mix. Espresso shade goes towards the darker brown tones and this can be achieved by adding color to the palette that is darker than the primary colors used.
While you’re mixing the shades, make sure to keep the ratios of blue and red higher than yellow. And in order to further intensify the tone, you can either add black to the mix or purple. While purple will keep the brightness sublime, black will make it darker.
Pro-tip: If you’re aiming to make the color lighter than what you’ve achieved, always go for the addition of either yellow or grey rather than adding white. White will lighten it more than desired.
Tan
Tan is a light brown shade with an attractive look. In order to get this color, the brow mix has to be added with something light. The easiest answer to what colors make brown with a tan look is to add yellow to the classic mix. The desired tone can also be attained by adding white.
Beige
Don’t we all love beige whether it’s home decor or clothing? It is one of the go-to shades for most people. Let’s find out what colors make brown that is so loved by all.
As it’s extremely light, you need to add white to the palette. In order to achieve the perfect beige shade, you’ll have to add brown to the white mix. Keep the proportions of brown to white low as even if it goes a little darker, you might end up losing the authentic look.
Since the beige color has a little pinkish visual appeal, add a tiny amount of red to the mix.
Pro-tip: The color can either be lightened further with white or yellow or made darker with blue or brown addition.
Chestnut
Chestnut is one of the pretties tones of brown with a lighter appeal. The answer to what colors make brown with this exact shade is a mix of yellow and red. To the brown color that you’ve made by mixing primary tones, keep adding yellow and red step by step.
The color must have a bit of a reddish tone and the intensity of the shade needs to be kept somewhere in the middle of light and dark.
The Role of Brown in Home Decor
Let’s see how can we bring brown accents to different spaces of the room and what essence these conjure up.
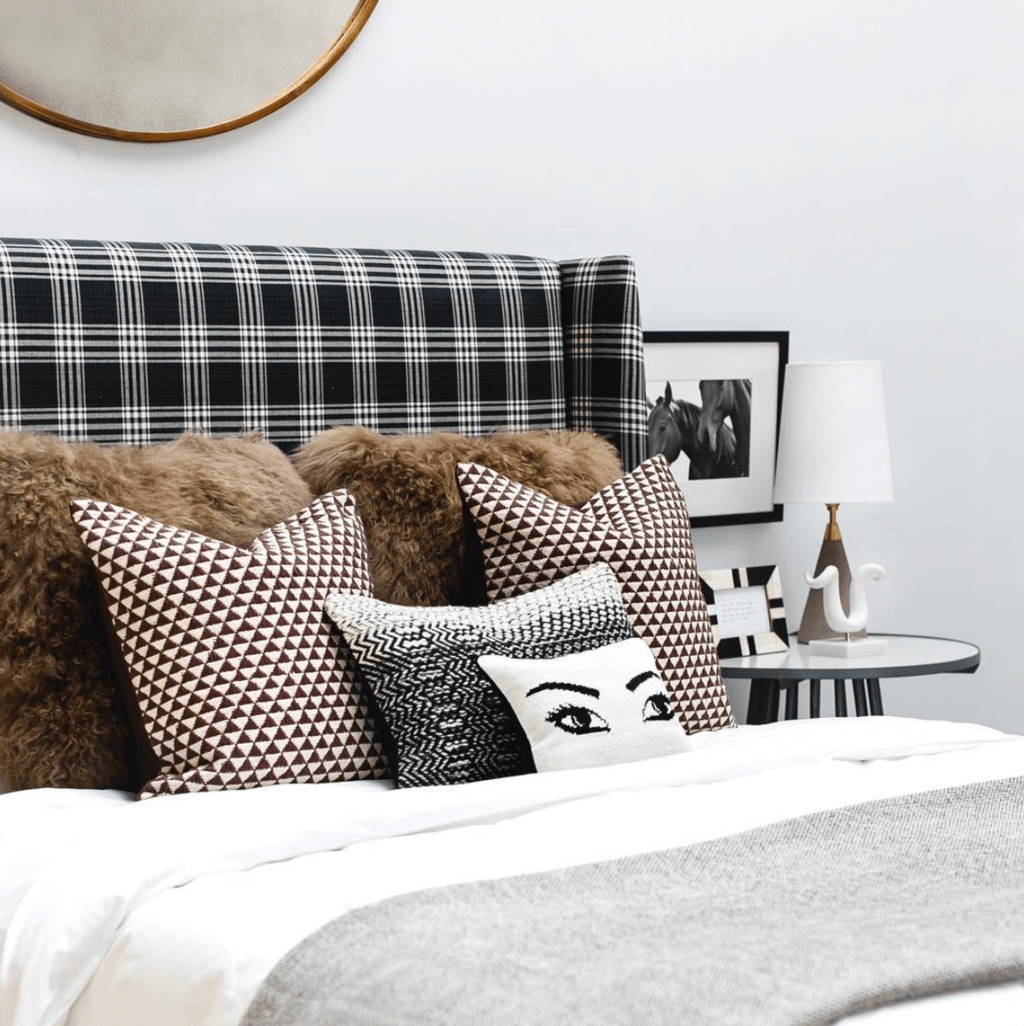
1. A Cozy Bedroom
Isn’t our bedrooms the ultimate snoozing zones of the house? And we want our personal sanctuaries to be as comfortable as possible. Snuggle into the world of warmth by adding brown upholstery to your bedroom. Go for accent cushions or add a nice brown rug to the room for a soothing decor.
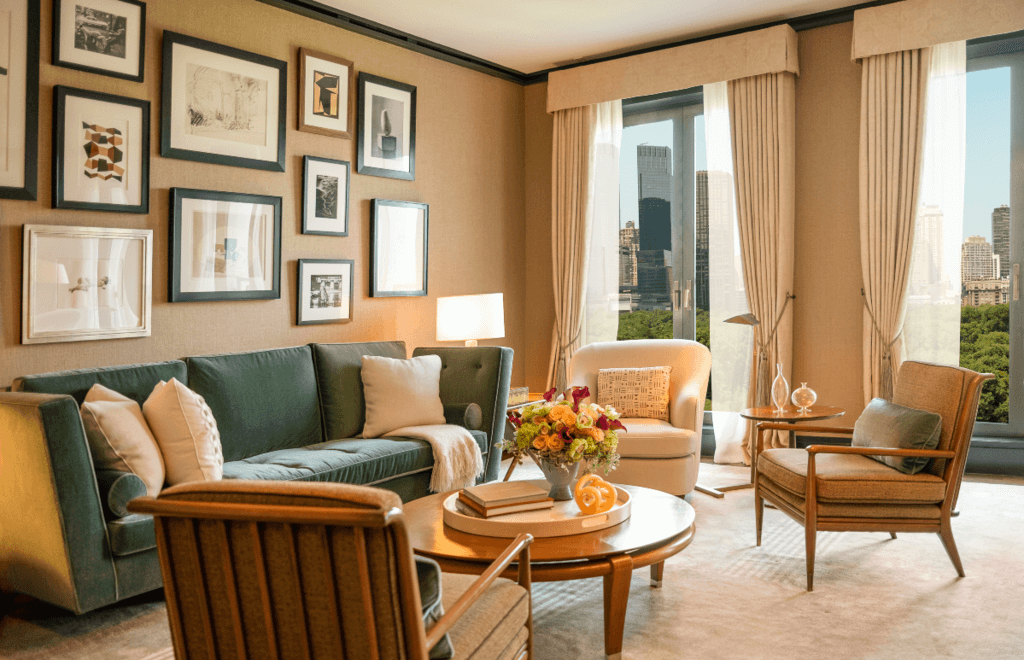
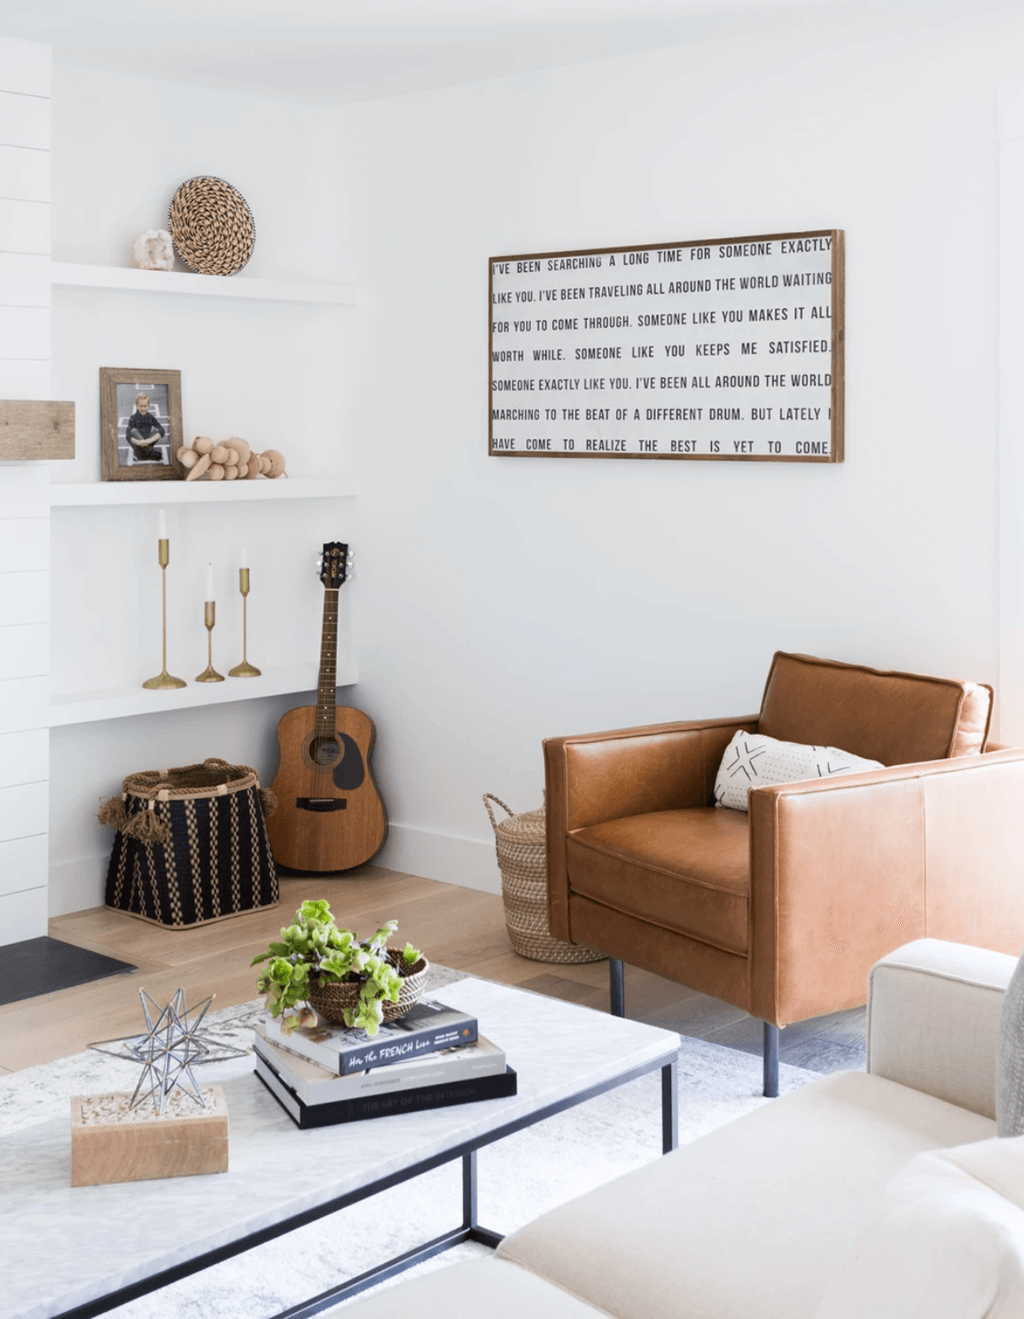
2. Perfectly Balanced Living Room
When you’re working with brown tones, it’s important to create a visual balance in the decor. Pair up the decor with crispy white walls that serve as a subtle backdrop for the brown accent items. Your living room design can revolve around these two colors. Add enticing elements like a leathered sofa or heavy texture in brown to make it the ultimate attention-seeker of the room.
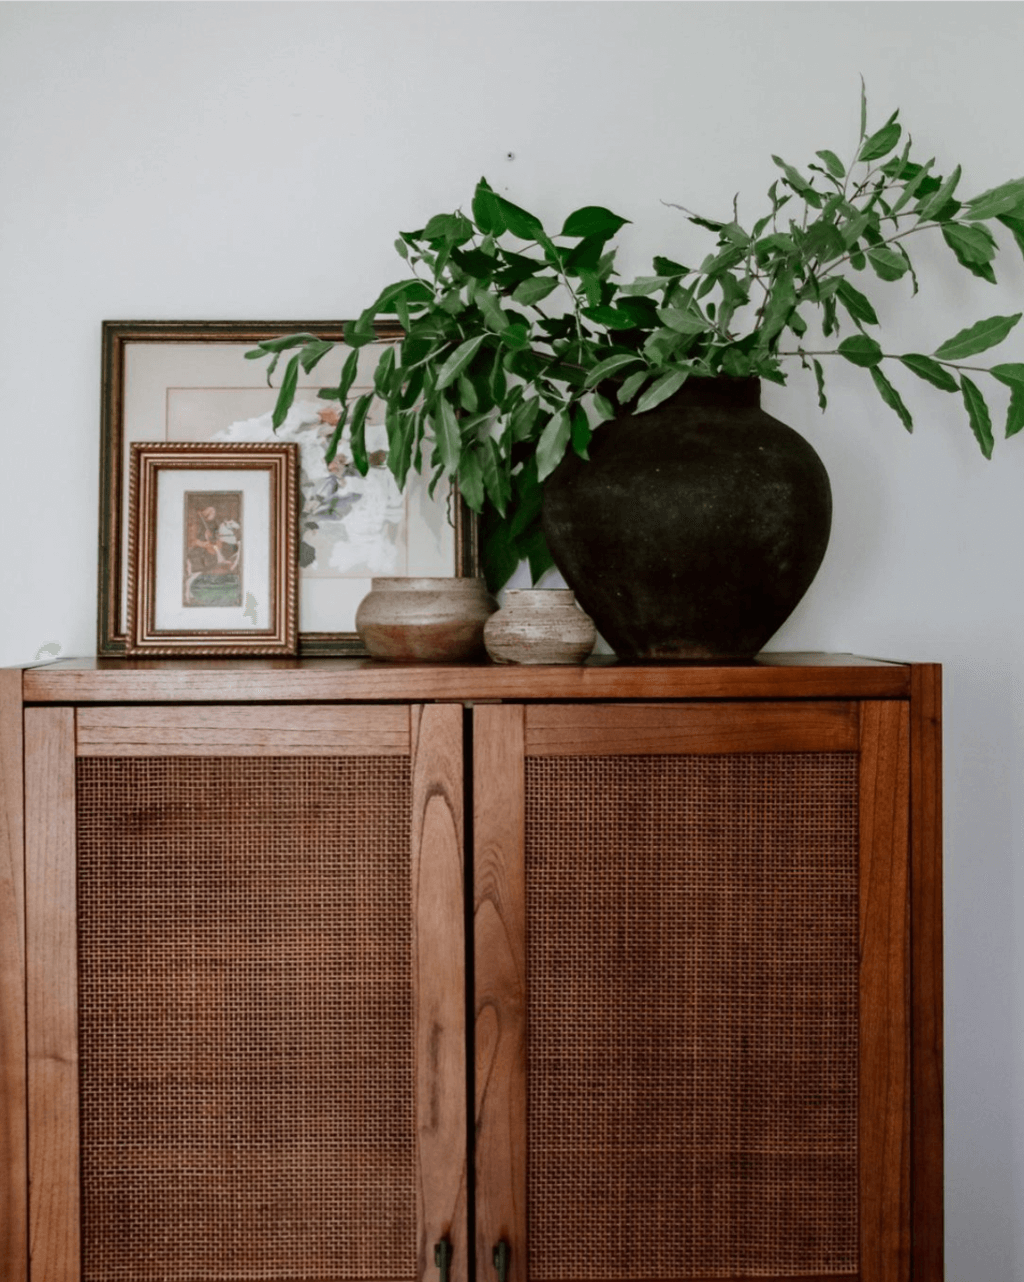
3. Rustic Appeal with Wood
One of the best investments inhome decor is wooden furniture. Adding these items won’t only amp up the aesthetics but impart a rustic look to the design. You can either opt for vintage design language or keep it a bit modern with rich shades of brown. Either case, the design is sure to reflect your fine styling taste.
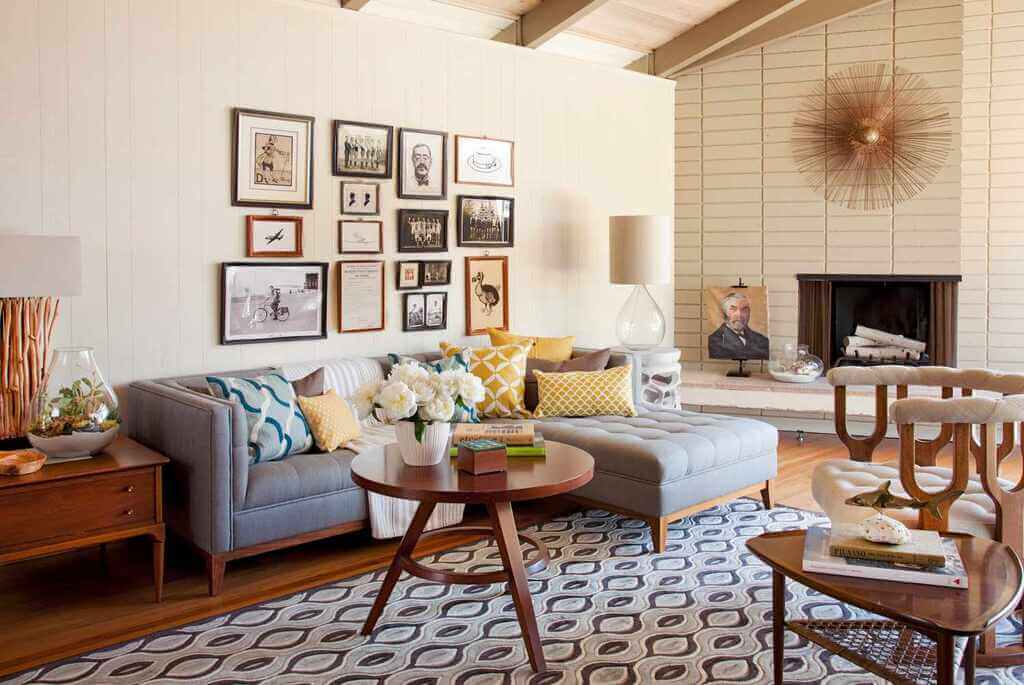
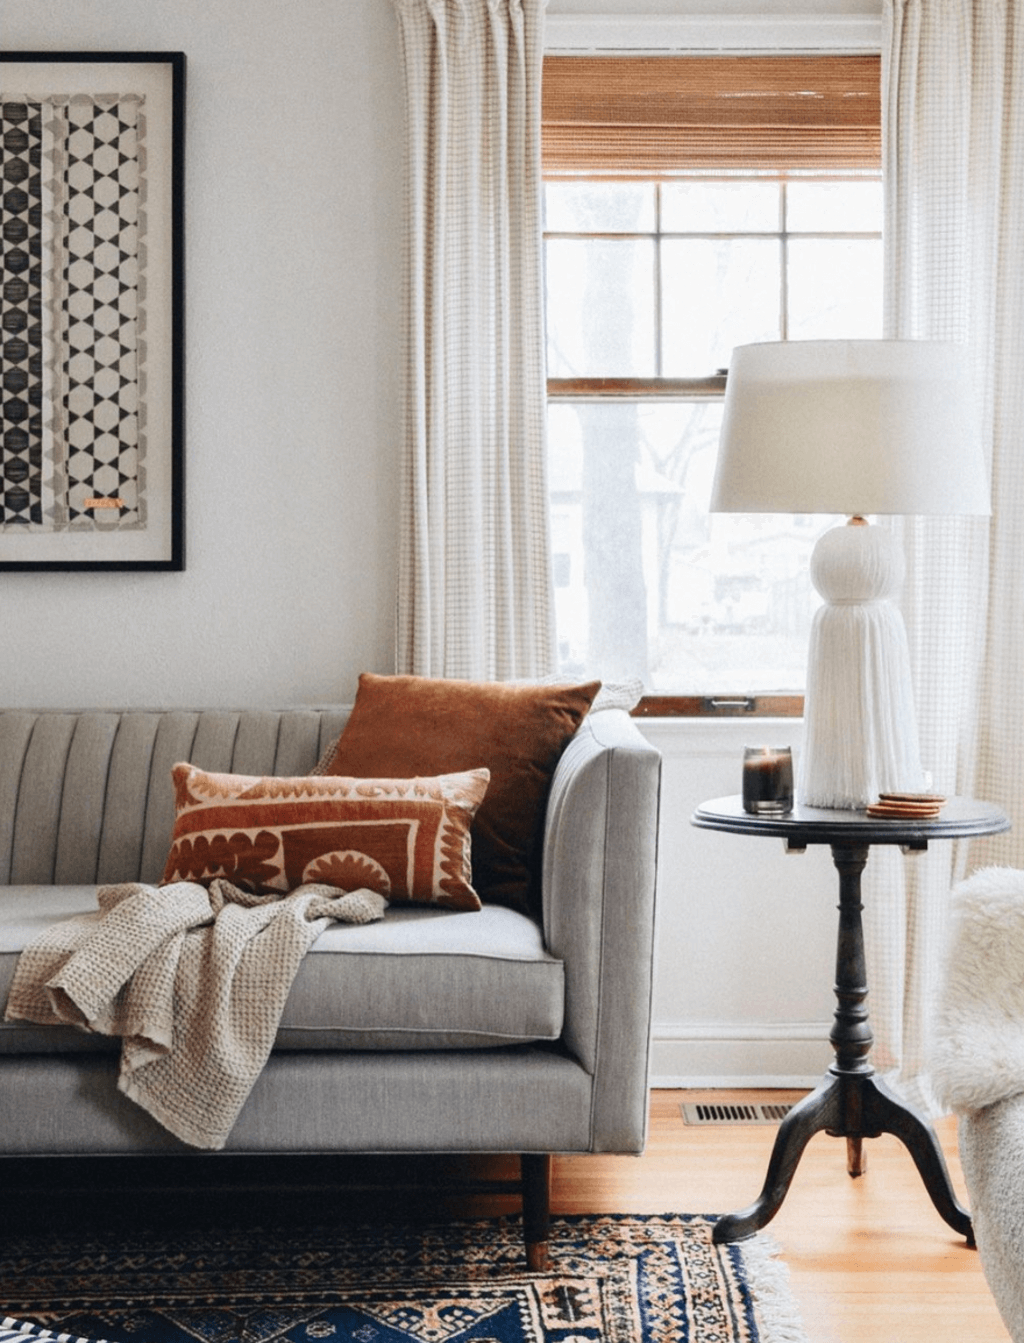
4. An Earthy Home
There’s nothing as comfortable as an earthy touch to the entire home decor. Boast the natural accents of brown with furnishings and brown design elements. Pick from the varying browns and make a perfect blend that offers a comfortable nestling ambiance.
5. Simplicity in Decor
Your home will exude sophistication with the simplicity of the tones. Whether it’s your living room or formal space decor, don’t shy away from bringing brown tones to the space. From the furniture to wall paints, the more, the merrier is the rule with browns.
The Bespoke Brown
Brown color is all about simplicity and sophistication. This tone has been ruling not only the vintage decor trends but modern designs as well. A little addition of brown to the space brings an unparalleled designer flair.
The knowledge of what colors make brown is extremely important as it doesn’t only prove fruitful for home decor ideas but fashion and art as well. The natural look of the color and warmth in its tones makes it one of the most desired picks. Color is always surrounding you whether you’re inside or outside. Carefully craft the decor with the right tones of brown and offer the decor a fresh and timeless look.
FAQs
What 2 Colors Make Brown?
The rule to check what 2 colors make brown is to pick a secondary color and pair it up with its complementary primary shade. Mixing yellow with purple, red and green, and blue with orange will result in brown.
What Primary Colors Make Brown?
The three primary colors used to make brown shades are blue, red, and yellow. The ratio of colors can be varied in order to get the desired results.
Is Brown a Trendy Interior Design Tone?
Brown color has a timeless appeal to it which can never make it go out of style. The earthy look of browns keeps them trendy.
Which Colors Pair Up Well with Brown?
Brown is a versatile color that works best with both light and dark shades. It can be matched with turquoise or dark blue for a bold decor look or can be kept sublime with white and beige.
What Is the Meaning Behind the Color Brown?
Brown is the color of warmth and security. It can instantly make you feel comfortable and also hint at safety while keeping you calm.