When it’s cold you want hot radiators and when you turn on the hot tap you want hot water. This is all thanks to your boiler. The government has introduced proposals to stop the installation of all natural gas boilers by 2035, as part of a plan to reduce the reliance on fossil fuels. But what are the alternatives and what are the current boiler types?
Typical home gas boilers can be categorized into three main types: combi boilers, conventional boilers, and system boilers.
Modern (although the tech has been around for more than 100 years) heat pumps extract heat from the air outside and pump it into your home. Heat pumps use electricity, removing natural gas from the equation. It’s using this tech that government plans are proposing to meet its carbon neutral goals.
Boiler Types
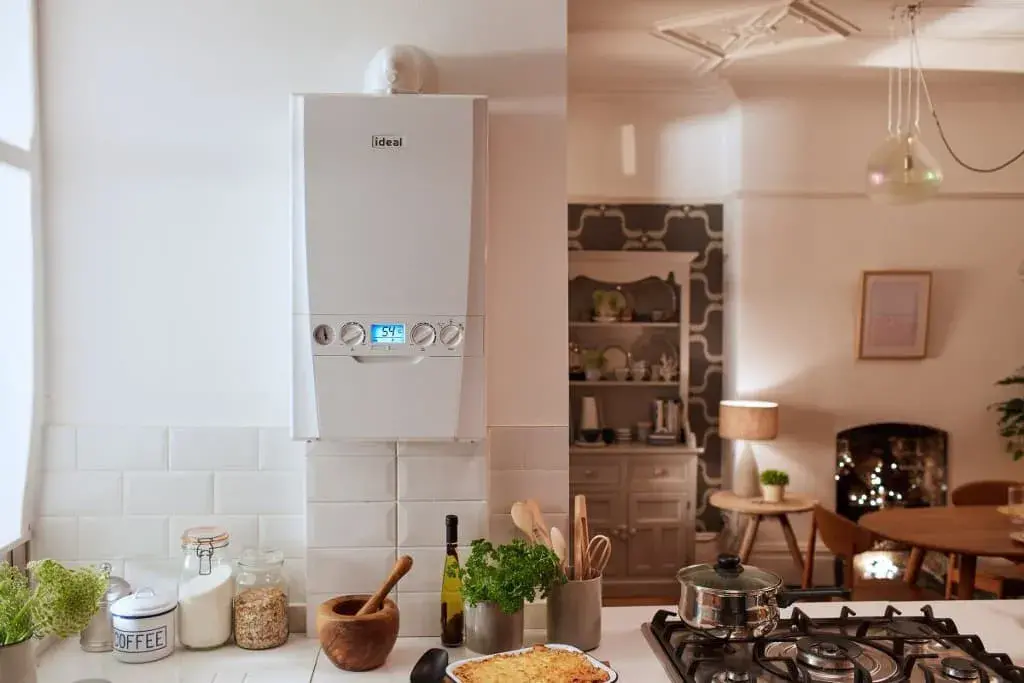
A combi boiler, also known as a combination boiler, is a compact and efficient unit that provides both heat and hot water. It’s ideal for homes with limited space, as it does not require a separate hot water cylinder or cold water storage tank. Instead, it takes water directly from the mains supply and heats it on demand. Combi boilers are also easy to install and maintain, making them a popular choice for many homeowners.
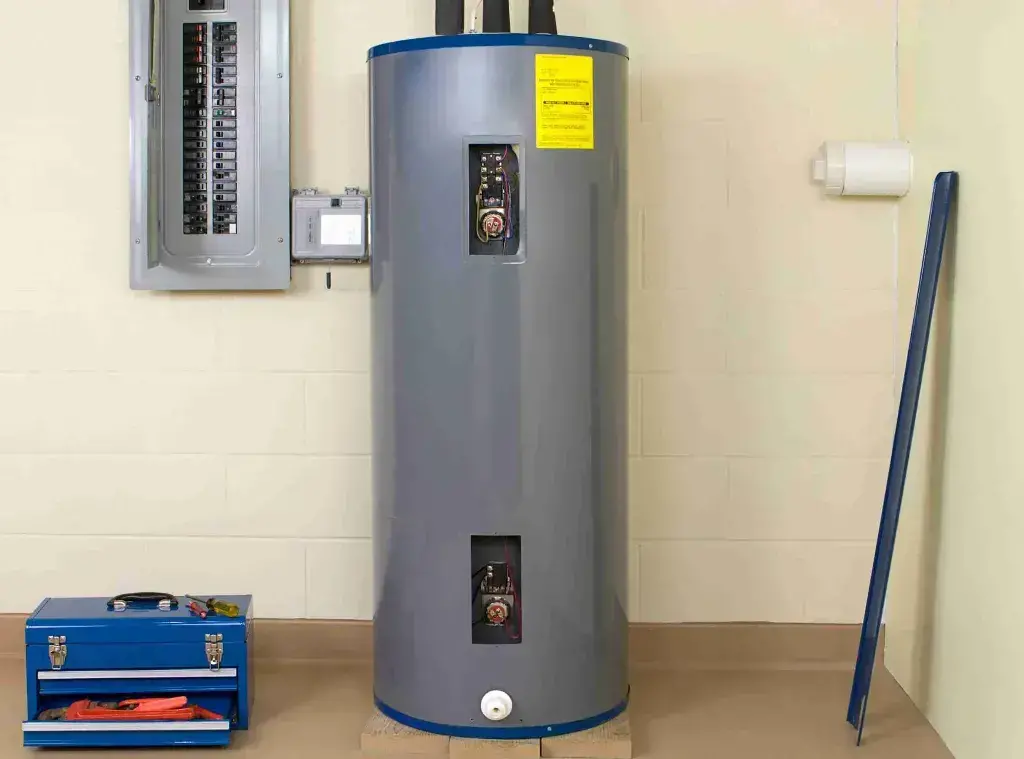
A conventional boiler is a separate heating unit that provides heat to radiators and hot water to a storage tank. Typically found in older homes, it’s best suited for those with multiple bathrooms or large families. Conventional boilers are also ideal for homes with high hot water demand. They tend to be more expensive than combi boilers, due to their separate components and installation costs.
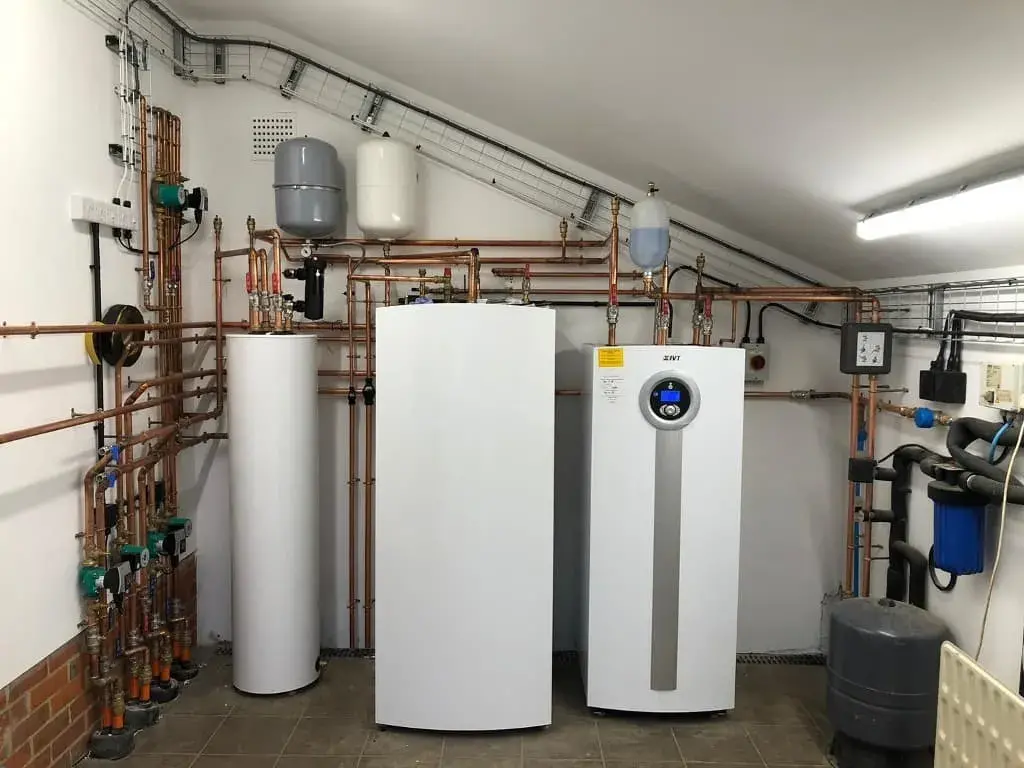
A system boiler, also known as a sealed system boiler, is similar to a conventional boiler, but with some important differences. A system boiler also provides heat to radiators and hot water to a storage tank, but it doesn’t require a separate cold water storage tank. Instead, it takes water directly from the mains supply, similar to a combi boiler. This means that a system boiler takes up less space than a conventional boiler, making it a good option for homes with limited space.
Heat Pumps
One of the main advantages of heat pumps is that they are highly efficient. They can extract up to four times more heat from the air or ground than the energy they consume, making them a much more efficient alternative to gas boilers. Additionally, heat pumps emit no carbon dioxide, making them a great option for those looking to reduce their carbon footprint.
There are different types of heat pumps:
Air source heat pumps: which extract heat from the air outside,
Ground source heat pumps: which extract heat from the ground,
Water source heat pumps: which extract heat from a nearby water source such as a lake or river.
What’s more, a heat pump can last 20 years (a gas boiler lasts around 10 years) and requires less maintenance.
Buying a Boiler for Your Home
Size and space: Consider the size and space available for the boiler. Combi boilers are compact and require less space than conventional or system boilers.
Hot water demand: Consider the hot water demand of your home or flat. If you have a large family or multiple bathrooms, a conventional or system boiler may be a better option.
Efficiency: Consider the efficiency rating of the boiler. Look for boilers with high efficiency ratings, as they will use less fuel and produce fewer emissions.
Fuel type: Consider the type of fuel that the boiler uses. Boilers can be powered by gas, oil, or electricity. Gas boilers are the most common and probably the most cost-effective option. Oil boilers are also a good option, but they tend to be more expensive than gas boilers. Electric boilers are the least common, but they are considered to be the most environmentally friendly option.
Reputation and warranty: Consider the reputation of the boiler manufacturer, as well as the warranty offered on the boiler. Look for boilers from reputable manufacturers that offer long-term warranties.
Installation and maintenance: Consider the cost and complexity of installing and maintaining the boiler. Combi boilers are generally easier to install and maintain than conventional or system boilers.
Ultimately, the type of boiler you choose will depend on your specific needs and preferences. Consider the size and space available, the hot water demand, the efficiency rating, the fuel type, the reputation and warranty of the manufacturer, and the cost and complexity of installation and maintenance.
It is also advisable to consult a heating engineer or plumber who can help you to select the right boiler for your home or flat and install it properly.
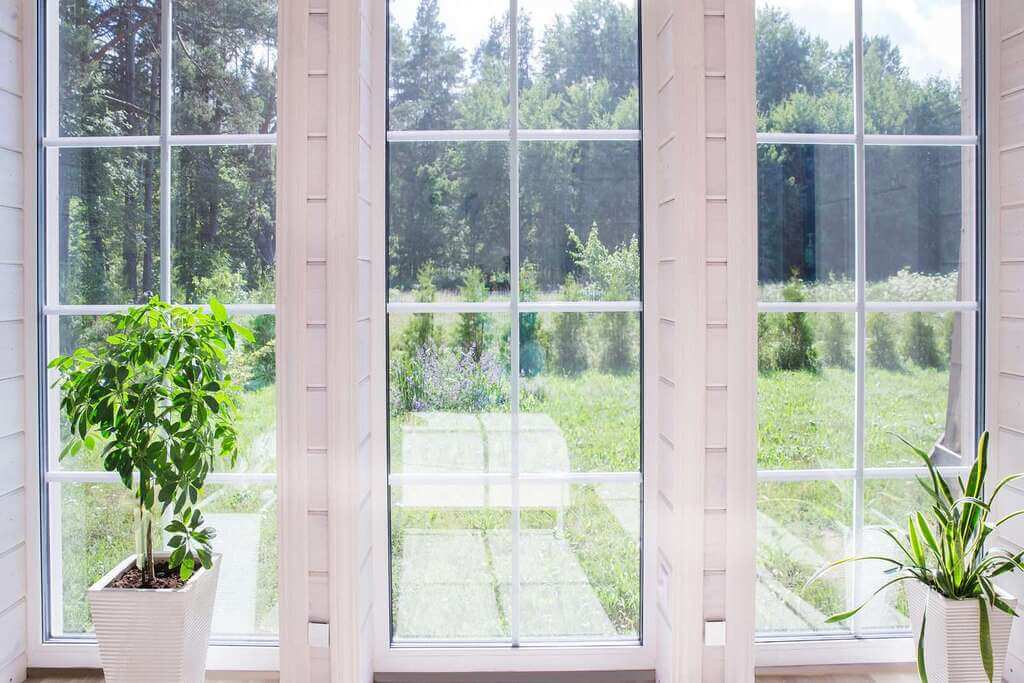
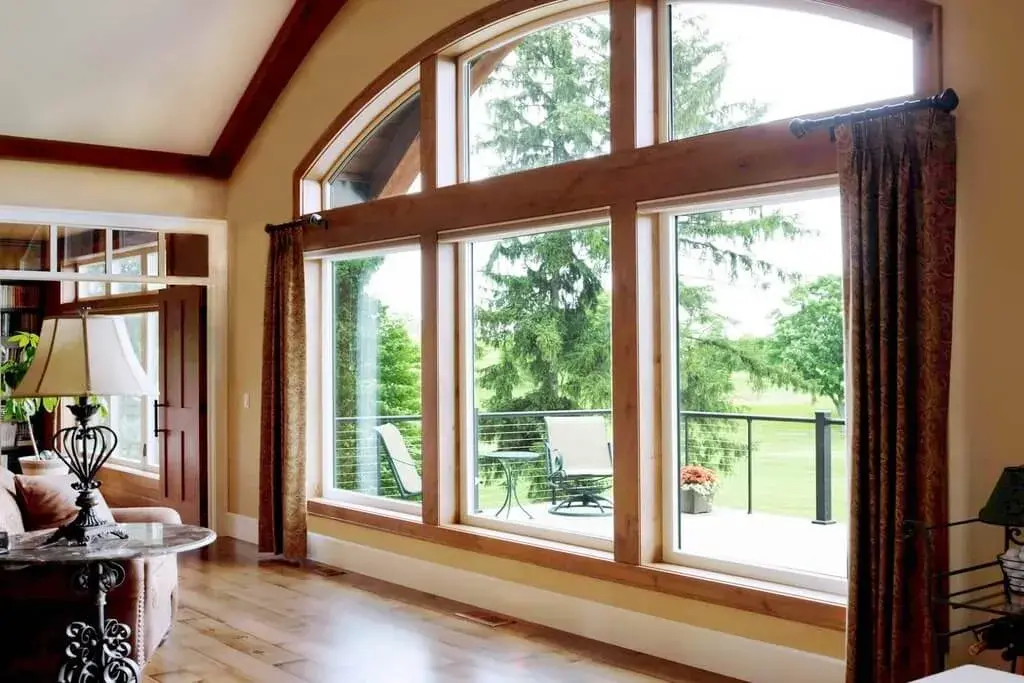
Although traditional glass windows provide excellent insulation, a range of alternative materials is becoming increasingly popular for window construction. These materials offer their own unique characteristics such as reduced maintenance and better overall flexibility, making them an attractive choice for energy-efficient or specialized applications.
Whether you need superior sound reduction, superior thermal insulation, or just durability, there’s an alternative window material that can meet your needs, and choosing the right glass for your home windows is about more than the upfront cost. It also is about long-term savings. We are looking at the different options and what they have to offer.
Types of Window Glass
Float Glass
Float glass is a large flat glass panel that is floated on the molten tin to create a smooth thin glass panel. Float glass is basic glass before it gets cut or treated in any way.
It is created by floating molten glass on a bed of liquid tin, which produces high optical quality glass which is far superior to sheet glass produced from the rolling process. Float glass offers extreme clarity and uniform thickness that is consistent throughout the entire sheet, making it some of the finest quality glass available.
Safety Laminated Glass
Safety laminated glass is two glass panes with a layer of polyvinyl butyral sandwiched between them using pressure fusion and high heat. When safety laminated glass gets broken, the glass pieces remain in place.
Safety laminated glass gets used in homes for windows, doors, shelving, and bathroom doors.
Obscured Glass
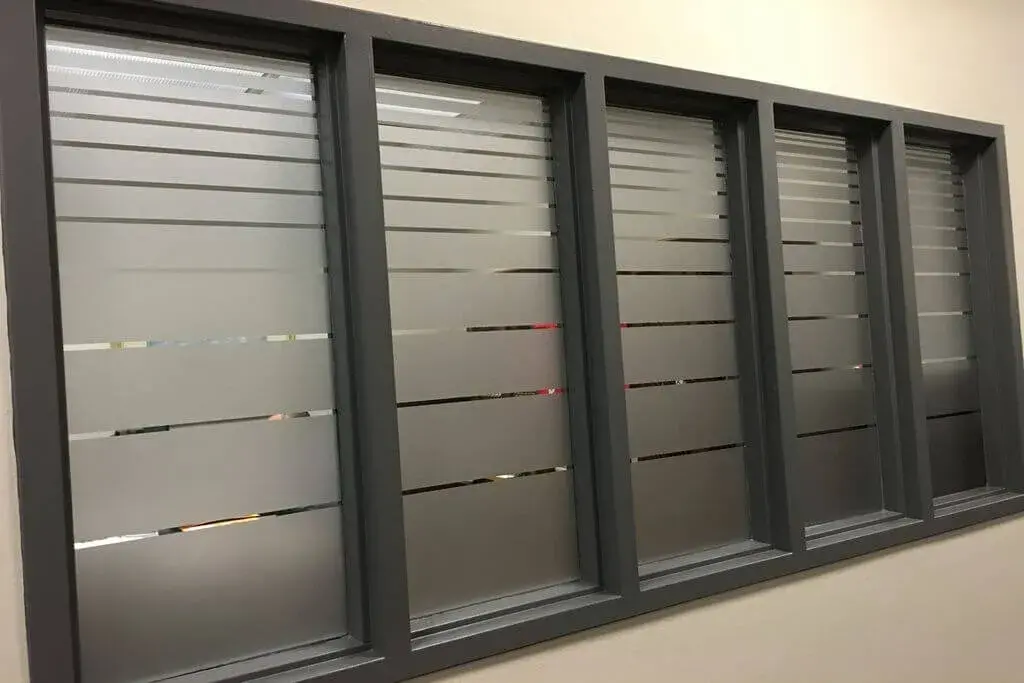
The obscured glass allows light to pass through but is not completely transparent, for example, frosted glass.
Obscured glass is common in bathrooms where homeowners want natural light in the room and privacy.
Annealed Glass
Annealed glass is float glass that is cooled over a period to strengthen the glass.
Annealed glass is popular for basement window panes.
Tinted Glass
Tinted glass is glass that has a coloring substance added to it. Some tinted glass also incorporates a UV protective coating.
Tempered glass is glass that has been heated and rapidly cooled. Tempered glass is around four times as strong as basic glass.
Tempered glass is often used in bathrooms and for large glass doors.
Insulated Glass
Insulated glass usually has two or three glass panes with argon gas sandwiched between them. Tempered security or laminated glass often makes up insulated glass panels. Argon gas between the glass panes does not conduct heat well, and keeps the window insulated.
Insulated glass is used most often in home window construction.
Mirrored Glass
Mirrored glass is a glass pane with a polished metal coating covered by a protective sealant on one side.
Mirrored glass is used rarely for home windows, but it is common when building larger structures like office buildings.
Low-E Glass
Low-E stands for low emissivity. Low-emissivity glass has a special coating that reflects thermal radiation but allows sunlight to pass through. Low-E glass panes reflect heat away from the house in the summer and reflect indoor heat back inside in winter.
Low-E glass is another type of glass that is used frequently for home windows.
Wired Glass
Wired glass has a wire frame built into the glass pane as a fire safety feature. If there is a fire and the glass shatters, the wire grid holds the broken glass in place.
Wired glass windows are built in schools or areas where safety or the possibility of fire is a concern.
Heat Soak Tempered Glass
Heat-soak tempered glass gets strengthened by a specialty heating process that takes place over time.
Heat-soak tempered glass is more expensive and not commonly used in basic home windows, but it is common in skylights.
Heat Strengthened Glass
Heat-strengthened glass is annealed glass reheated and rapidly cooled. The reheating and rapid cooling process makes this window glass twice as strong as annealed glass. Heat-strengthened glass is similar to tempered glass but cooled over a long period.
Heat-strengthened glass panes are more durable than basic glass but can still shatter, so it is not commonly used for exterior home windows unless it is laminated.
Conclusion
When deciding on the right material for your window construction project there are several factors you need to consider such as budget, desired aesthetics, insulation needs, maintenance requirements, etc. Popular alternative materials each come with their own pros and cons depending on your individual needs. Be sure to do your research before making any decisions so that you make the best choice for your home!
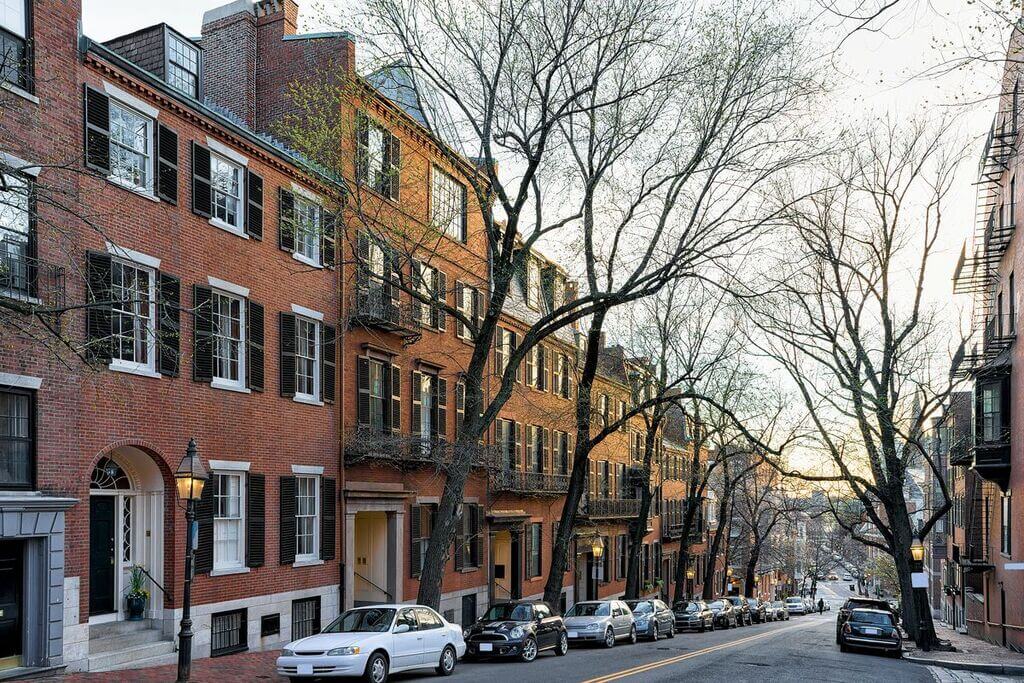
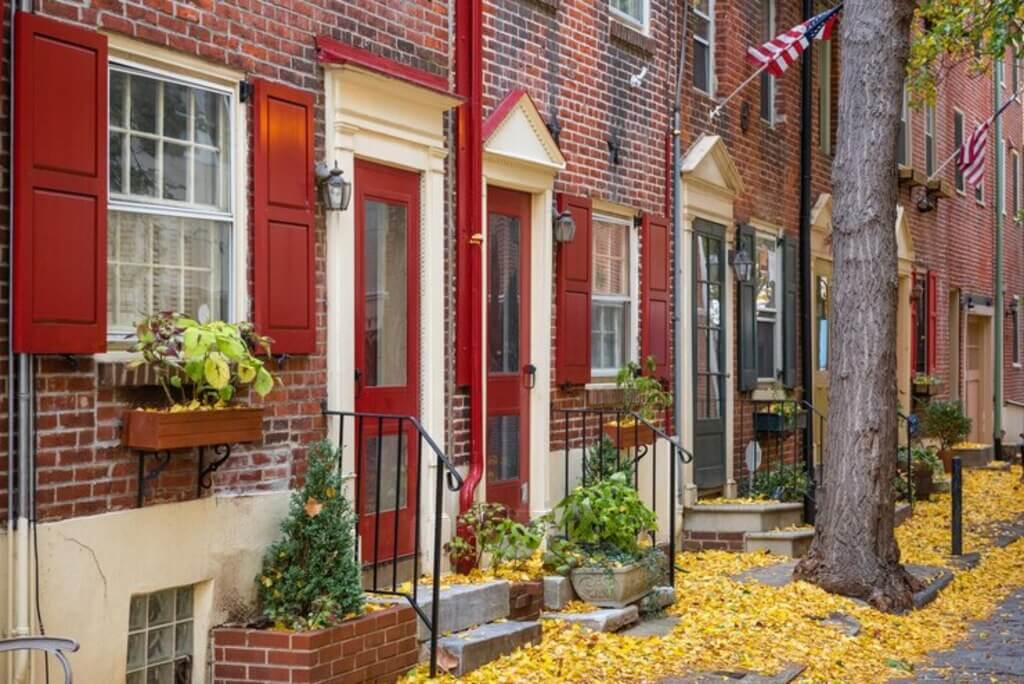
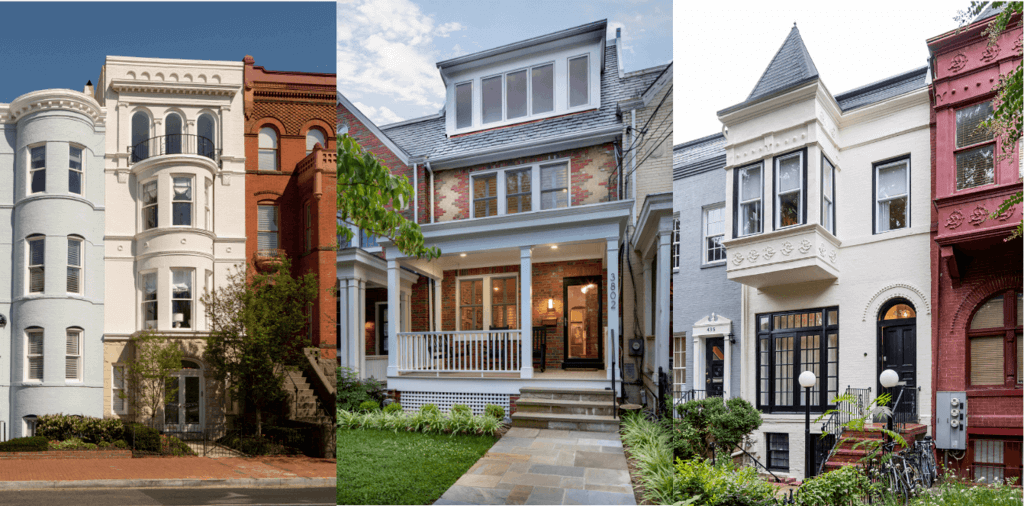
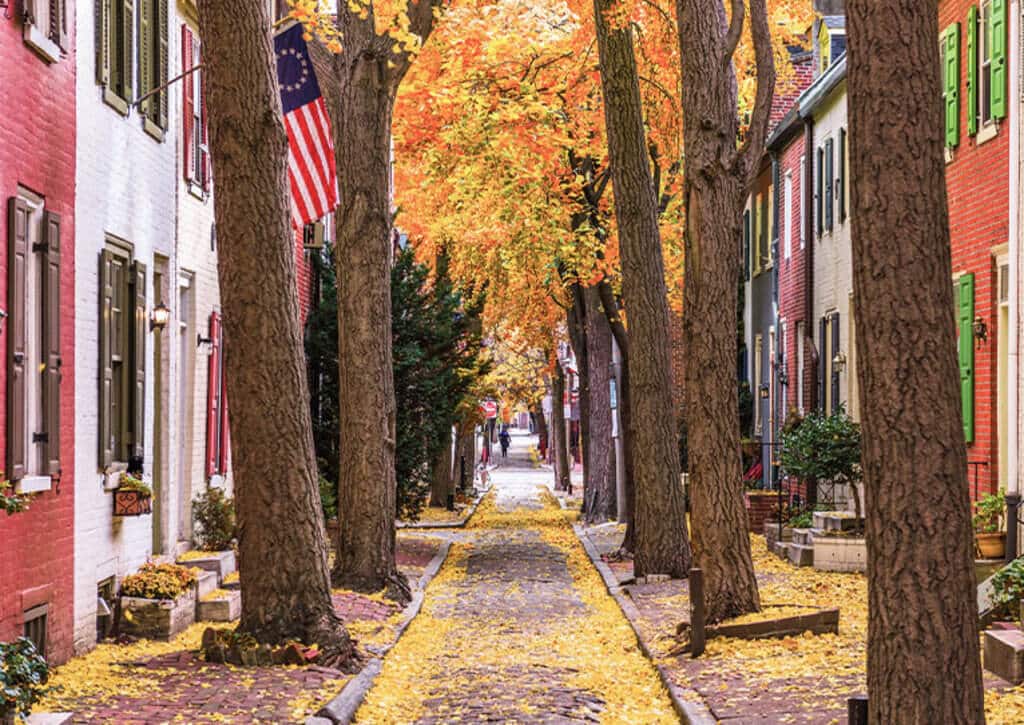
Rowhouse is a type of residential building that is characterized by a series of connected houses sharing a sidewall. It is significant to note that rowhouses can be found in a variety of contexts, including urban, suburban, and even rural settings. However, they are commonly thought of as being a feature of urban life.
In the 19th century, rowhouses were first built as dwellings for working-class families in the United States. Today, rowhouses are found in a variety of styles and are available at a range of prices. A rowhouse is generally much narrower than other types of residential buildings. Due to their narrow depths, rowhouses can be constructed on relatively small lots.
A Sense of Community Takeaway: Reasons Why Rowhouses Remain a Popular Housing Choice
Despite their popularity, there still needs to be more clarity about what is a rowhouse and how they differ from other housing types. Read on to learn everything you need to know about rowhouses, including their history, architecture, and benefits!
What Is a Rowhouse?
Rowhouses often have a unique charm, as they are typically older homes with more character than newer, cookie-cutter homes. They often have interesting architecture and may be located in historic districts. They are also known as shotgun houses because they were built with two or more stories and were shaped like a shotgun.
A row house is a type of residential structure in which row houses line both sides of a street and are connected by an open space in the center. The word “row” in this context does not refer to an arrangement of people or things but instead refers to the arrangement of buildings that form one side of the street.
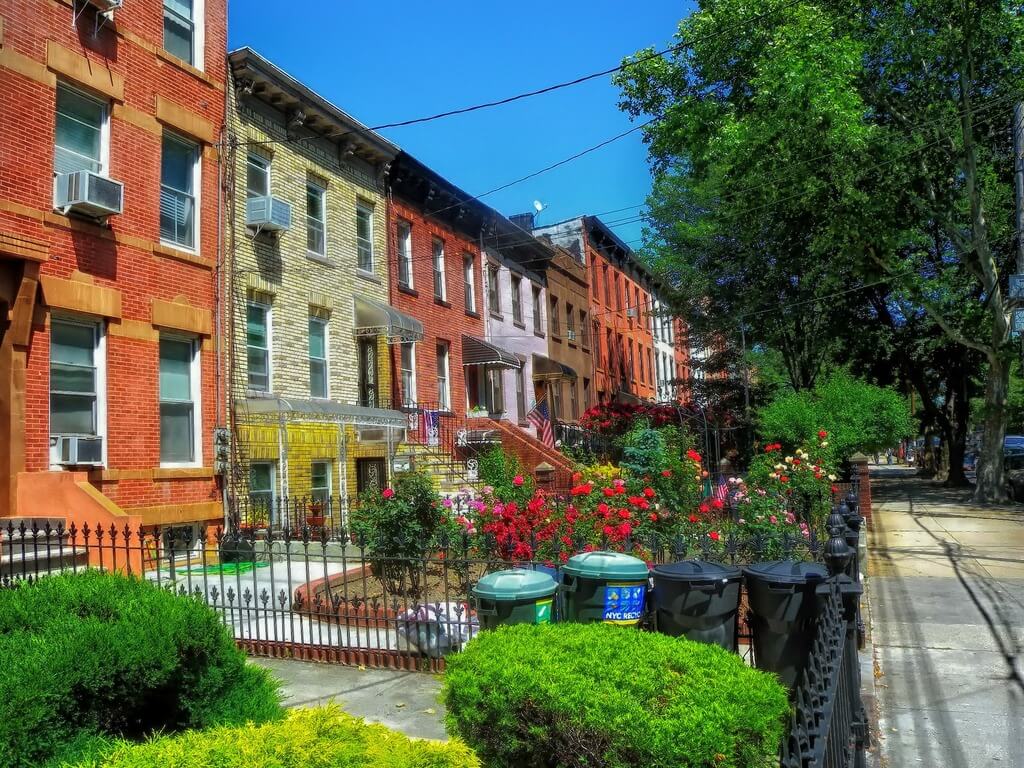
A rowhouse is a multi-family dwelling usually consisting of three or more units. The name comes from the fact that these structures look like houses, but they are tall buildings with multiple floors. You can use rooftops for additional living space; sometimes, decks are attached to the buildings for outdoor living. If you’re looking for a more unique and affordable option for living in an urban area, a rowhouse may be the perfect option for you.
History of a Rowhouse: From Ancient Times to Today
The history of rowhouses is a fascinating story with roots in the 19th century and a long and evolving life. A rowhouse is a building with three to five stories, usually one story above the other. The term comes from the Dutch word huis rood, which means red house. In the 17th century, wealthy people built these homes to show off their wealth and status, but they are also known as mansions because of their size. So they built these huge houses that took up nearly an entire city block!
Architect William Thornton built the first rowhouses in Washington, DC, in 1812. They were small, one-story homes with only one room on each floor. These houses were called “rowhouses” because they were arranged in rows along streets, like houses in a lane or a row of trees. These homes were bays where you could stand at the front door and look out over your neighbors’ rooftops.
Eventually, they spread across Britain and America, but they never became popular in Europe until after World War I, when England suffered an economic depression. Architects like George Gilbert Scott designed row houses for this new clientele with beautiful views of the city below them.
4 Types of Rowhouses
There are many different types of rowhouses, from the traditional townhouse to the more modern row home. A rowhouse is a type of housing where a group of houses is connected in a row.
Rowhouses are usually found in urban areas and are a popular type of housing for many people. Each type has its unique features and benefits, so it’s important to choose the right one for your needs.
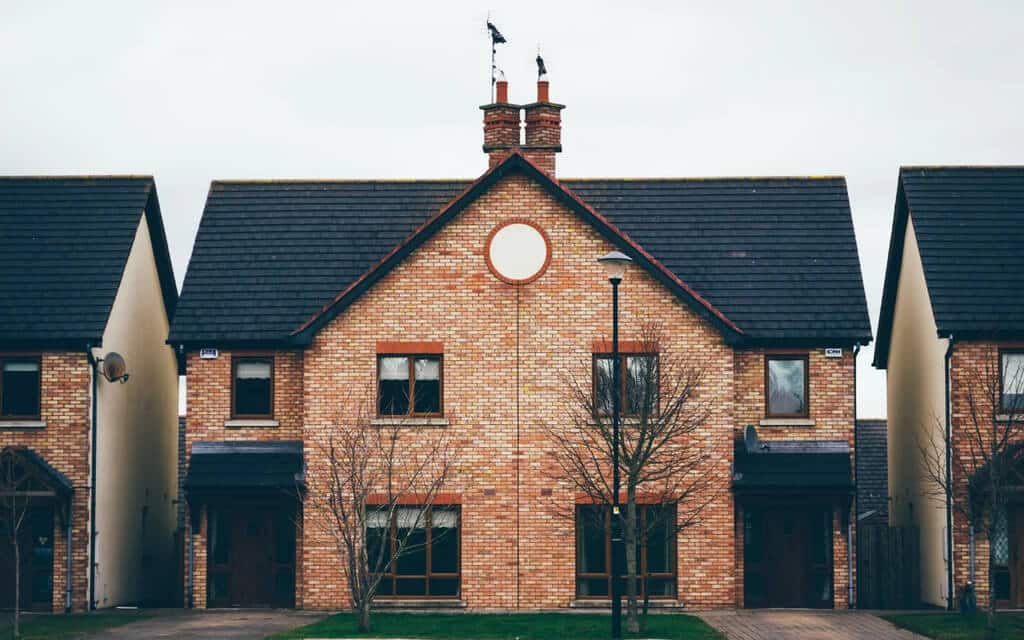
1. Townhouses: Private Types of Rowhouses
The most common type of rowhouse is a townhouse. Townhouses are generally rectangular, with private front entrances on each level. These homes are typically three or four stories tall and are built close together, with common walls between each unit. Rows of windows line each floor, and a second-floor overhang may be above the first-floor porch. Townhouses are a popular choice for urban living, as they offer a lot of square footage in a small footprint. They also tend to be more affordable than other types of homes.
2. Tenements: Inexpensive Types of Rowhouses
Tenements are the most inexpensive type of rowhouse and are typically found in urban areas with high crime rates and poverty levels.
3. Row Homes: Erratic Types of Rowhouses
In some towns, you’ll find row homes with rear yards — similar to townhouses but with narrow, irregular facades instead of regular ones. But they usually have two stories. These are usually found in older neighborhoods where lots are smaller than in newer areas or where developers don’t want to build large buildings that would block out light from neighboring properties.
4. Brownstones: Luxurious Types of Rowhouses
Brownstones are the most luxurious type of rowhouse and are typically found in affluent neighborhoods.
Key Characteristics of Rowhouses
Rowhouses have a distinct look and feel that sets them apart from other types of homes. They are typically built on small lots, which means they don’t take up much space. However, they can be very expensive to buy or build because they usually require more architectural features than other home designs.
A rowhouse is a type of urban residential building consisting of two or more connected houses, generally on a single lot, sharing a wall between their front yards and their rear yards.
In general, the characteristics of a rowhouse include the following:
Two or more attached units (houses) sharing a common wall, which may be either on the same lot at the same address or spread across two or more lots at different addresses.
A wall separates the front and back yards of the houses. The backyards are reserved for the rear house(s) and may extend further, but not as far as the adjacent lot.
A set of entrances at the front of the houses, either for vehicular access or pedestrian access. In some cases, there are multiple entrances. In a neighborhood with multiple rows, there may be no single entrance, but each house has its own entrance.
10 Interesting Facts About Rowhouses
1. Rowhouses Are Cooler Than Normal Houses
Because a rowhouse is built around a courtyard (or at least one shared by all the neighbors), they tend to be cooler than normal homes because they don’t trap heat inside like a typical house. Also, they tend to have bigger windows that let in more natural light and make them feel brighter.
2. Rowhouses Are More Laid Back
Because they’re not attached and don’t have any yards or garages, a rowhouse is usually less busy than other houses — which makes them easier to live in and gives you more space to enjoy your life outside work or school. You can also put up curtains if you want privacy (but remember that those won’t block out those pesky street noises).
3. Rowhouses Are More Convenient Than Multi-Family Buildings
A rowhouse is easier to maintain and more accessible. Since most rowhouses have no basements, it is much easier to climb up and down stairs. That’s great because nothing is worse than climbing up and down a hill all day.
4. Rowhouses Are Not Multi-Family Mix
A rowhouse is not multi-family mixed with houses — they are all houses. That means they are less likely to have a lot of commotion from many people coming and going at all hours.
5. Building in the Upper Middle Eastern Context
A rowhouse is a part of the Middle Eastern landscape. They are a type of building that is more common in Middle Eastern cultures.
6. Rowhouses Are Incredibly Compact
Rowhouses are extremely dense. They are small spaces that are packed together closely. That means you get a lot of value for your money, but you also have to consider how to stay safe regarding storage and safety.
You’re still more likely to encounter neighbors and other people in a rowhouse than in a typical house. But if your neighborhood is safe, your chances of encountering your neighbors are slim. That’s cool because you can be alone, at peace, and close to people.
7. Rowhouses Have a Great Climate
A rowhouse tends to be more climate-controlled than normal houses, meaning they are much more comfortable. There is more ventilation because you don’t have to worry about heating and cooling as much. In turn, you can create a space that is conducive to your needs.
8. Rowhouses Have Much Larger Walls
Rowhouses tend to have much bigger walled areas, meaning they are much larger than normal houses.
A rowhouse has this great little courtyard or space that is shared by all of the buildings. Most houses don’t have the size of a courtyard that a rowhouse does. In short, a rowhouse has much larger living and entertaining spaces.
9. Rowhouses Are Incredible for Storage
A rowhouse is a wonderful storage place. That’s because the walls are tall, and there are usually many vertical spaces. So when you need to store something, you can fit it anywhere.
10. Rowhouses Are Great for the Health of the Individual
A rowhouse has much better air quality than typical houses. They are much more ventilated and air-conditioned. This means they are more conducive to a healthy environment for the occupants. You can also create a personal space isolated from the hustle and bustle of the outside world, giving you more freedom.
Are You Ready to Buy a Rowhouse for Yourself?
To summarize the article, you should be aware of what is a rowhouse. Rowhouses are condominiums built in a row, with each one having its own door and a common wall, thus the name. With their unique charm and comfortable layout, rowhouses make for the perfect place to call home.
Buying a rowhouse is a wise option for people who want to move into a pleasant neighborhood but don’t want to spend a lot of money. There are many worthwhile benefits to buying and living in a rowhouse. We hope this blog provided you with a comprehensive guide to everything you need to know about these properties.
FAQs
1. What Is a Rowhouse?
A rowhouse is a type of residential building that is typically characterized by a series of attached homes, each with its own entrance, that share common walls.
2. Why Should You Consider Living in a Rowhouse Instead of a Condo?
There are several benefits to living in a rowhouse, such as having a smaller carbon footprint than living in a detached house, being closer to neighbors for a sense of community, and saving money on heating and cooling costs since rowhouses are generally more energy-efficient.
3. What Makes Rowhouses Different from Regular Homes?
They are different from regular homes because: A rowhouse is an attached home that shares a wall with the home next to it. Rowhouses are usually narrower and have less outdoor space. They are cheaper. Although they are a bit smaller than bigger homes, they are still as comfortable, and they tend to be a bit cheaper. This is because they are easier to build, and that makes them a good option for first-time homeowners. There is something special about them since they are a row of houses built closely together. The feel of a house in a row is completely different: the sound, the sight, and the smell are different.
4. How Are Rowhouses and Townhouses Different?
A rowhouse is a dwelling that is attached to other dwellings on either side, while a townhouse is a dwelling that is attached to other dwellings on only one side.
5. How Are Rowhouses Different from Apartments?
A rowhouse is typically attached side-by-side, while apartments are usually built in a taller, more centralized structure. Additionally, rowhouses have more outdoor space, such as a backyard or patio, while apartments have a balcony.
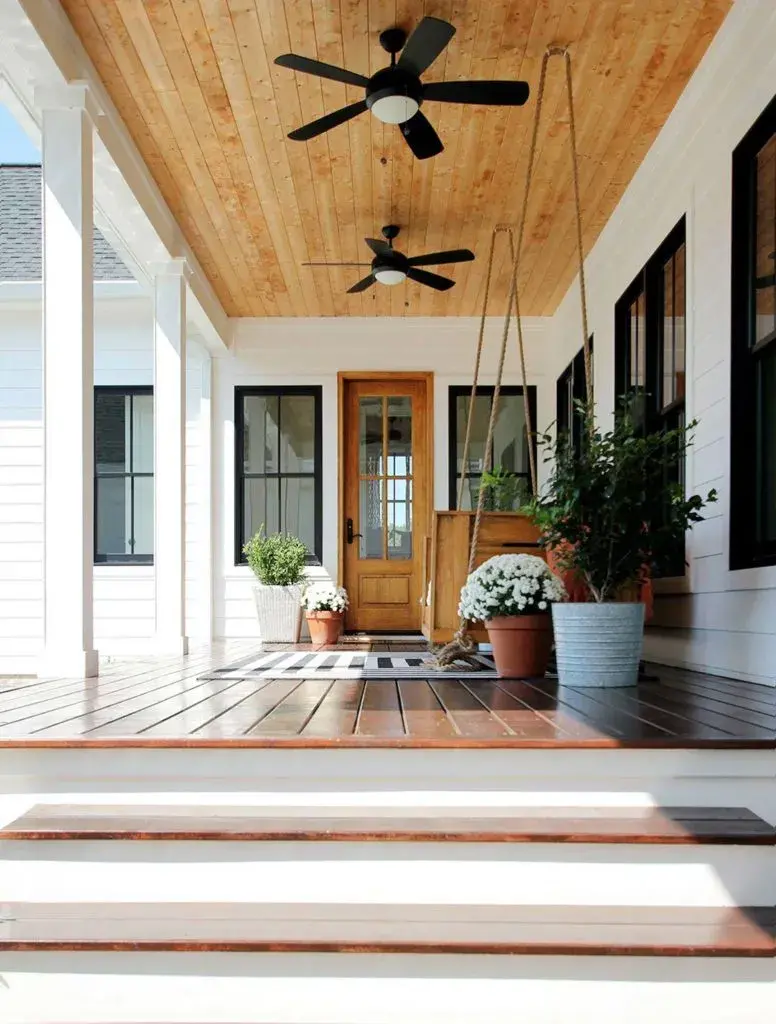
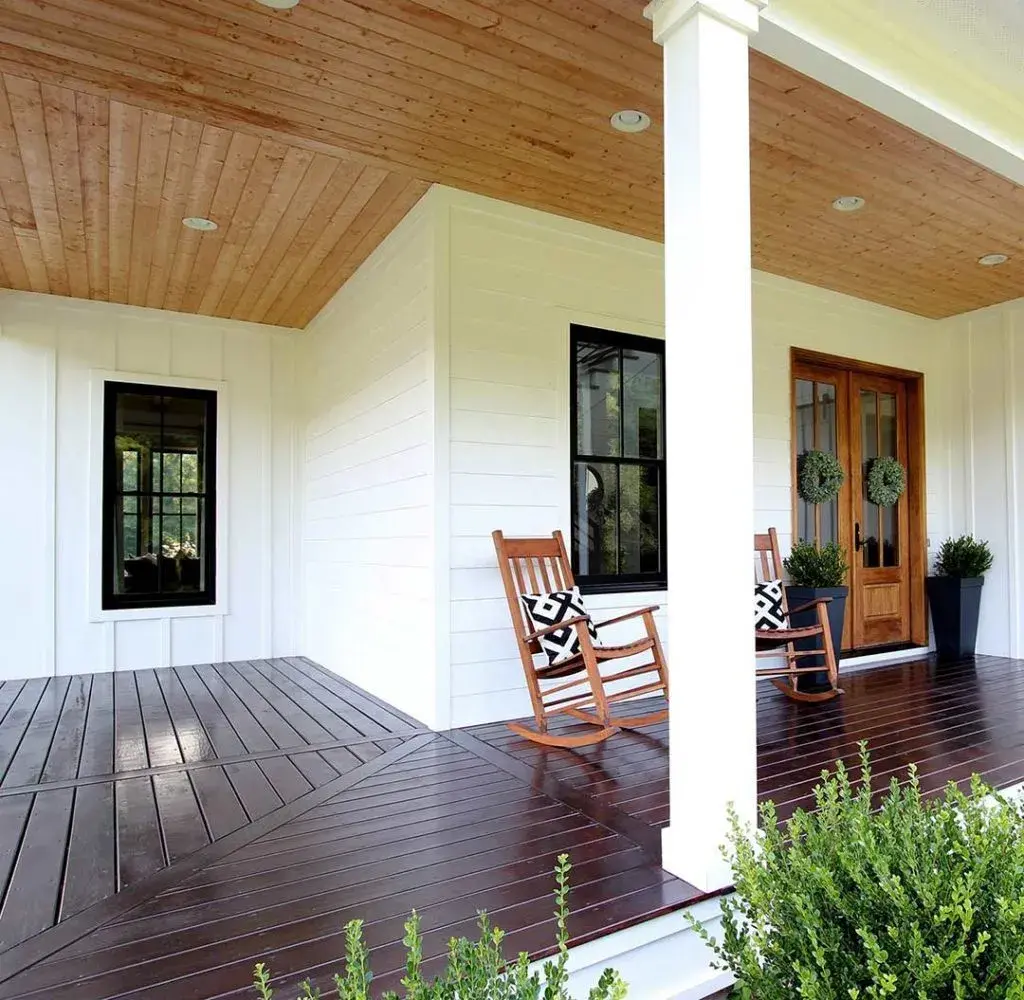
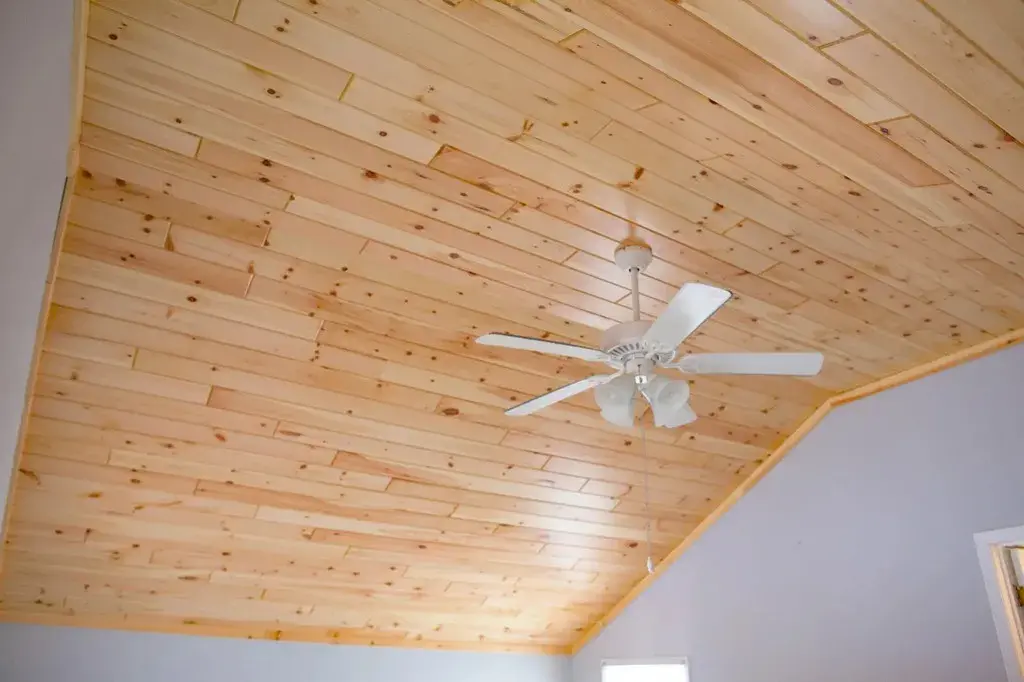
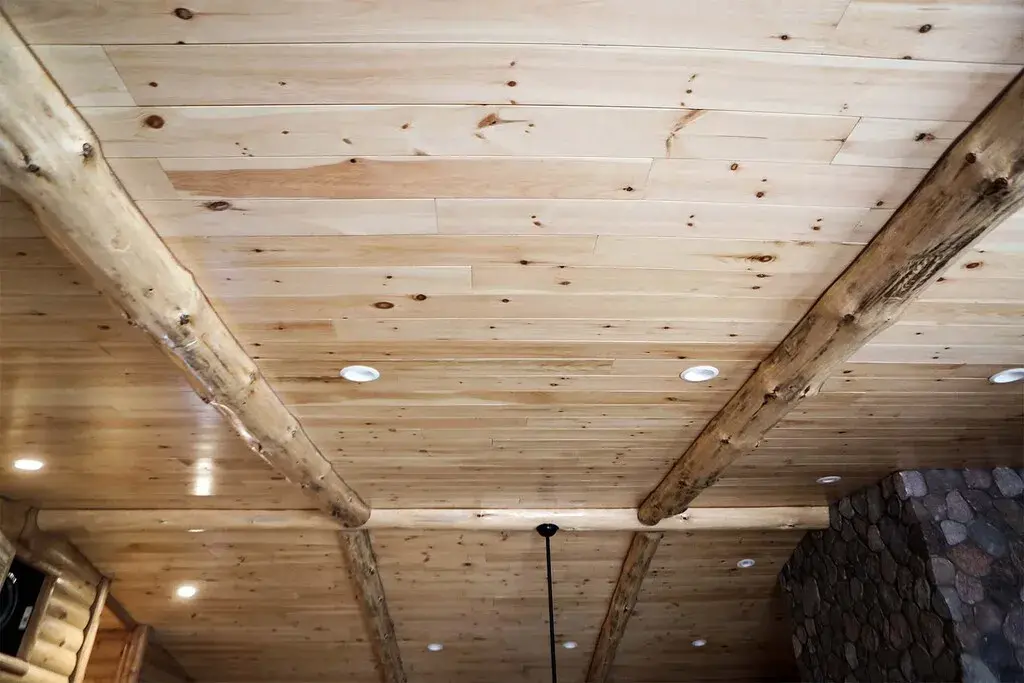
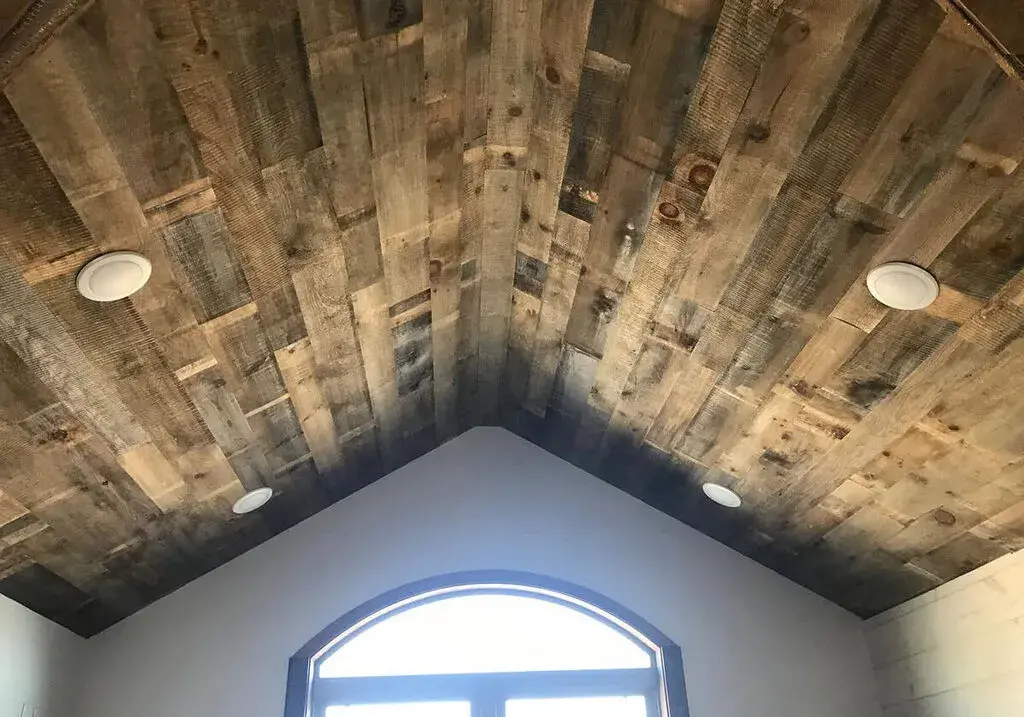
Choose a tongue-and-groove ceiling if you want a warm and authentic look for your home. The natural wood elements used in this ceiling provide a perfect visual appeal. May it be your home or lumberyard, the tongue and groove ceiling can fit everywhere.
The panels used in this ceiling are highly flexible and modular. Using a tongue-and-groove ceiling is trendy these days because it can perfectly conceal the unsightly elements of your ceiling. The following paragraphs will help you understand everything about tongue-and-groove ceilings.
Let’s Learn The Basics: What is a Tongue and Groove Ceiling?
A tongue-and-groove ceiling plank is a milled wood board. This ceiling, on its longer side, has a tongue and groove on the other side. It is made by slipping one piece onto another, like a locking puzzle. The most popular dimensions are 4 – 16” in length and 4 – 6” in width.
You can easily prepare a DIY tongue-and-groove ceiling by nailing or gluing. They are made to fit side by side across the ceiling. Its installation and maintenance are easier than those of a drywall ceiling. The more perfectly it is installed, the more aesthetic the results will be.
What is a Drywall Ceiling and How They are Installed?
Drywall ceilings, popularly known as plasterboards, are most common in homes and offices. They deliver great visual appeal at a reasonable cost. Its material makes it fire-resistant as well. It even prevents sagging over time. They are a good choice for soundproof rooms.
Unlike the tongue-and-groove ceiling, the drywall ceiling can only be done under professional guidance. For a basic installation, the boards are to be screwed to the construction planks on the ceiling. Make sure you have the correct dimension for drywall boards to fit into your ceiling; otherwise, your work will be doubled!
How Can You Distinguish Between Tongue and Groove and Drywall Ceiling? – 5 Points To Help You Out!
TONGUE AND GROOVE CEILING
DRYWALL CEILING
01
The tongue-and-groove ceilings are easy to install.
The drywall ceilings are comparatively difficult to install.
02
Painting the tongue-and-groove ceiling is tricky.
Painting a drywall ceiling is easier.
03
You will get a better visual appeal from a tongue-and-groove ceiling than from a drywall ceiling, due to the warm and authentic look of the wood.
Tongue and groove have better visual appeal than a drywall ceiling.
04
Maintenance of tongue-and-groove ceilings is comparatively difficult.
Maintenance of a drywall ceiling is easy.
05
A tongue and groove ceiling cannot have a flat and smooth surface.
Drywall gives a flat and smooth finish to the ceiling.
3 Types of Tongue and Groove Ceilings to Use
The three major types of tongue and groove ceilings used are –
Pine tongue and groove ceiling.
Cedar tongue and groove ceiling.
Spruce tongue and groove ceiling.
Depending on the wood used, the paint cost would be different for tongue-and-groove ceilings. The pine tongue-and-groove ceiling remains the most costly of all. And if you use cedar tongue-and-groove ceilings, you will get one of the best finishes for your ceiling. The spruce tongue and groove ceiling will provide you with one of the most flexible designs.
Stay Safe: The Safety Considerations for Tongue and Groove Ceiling
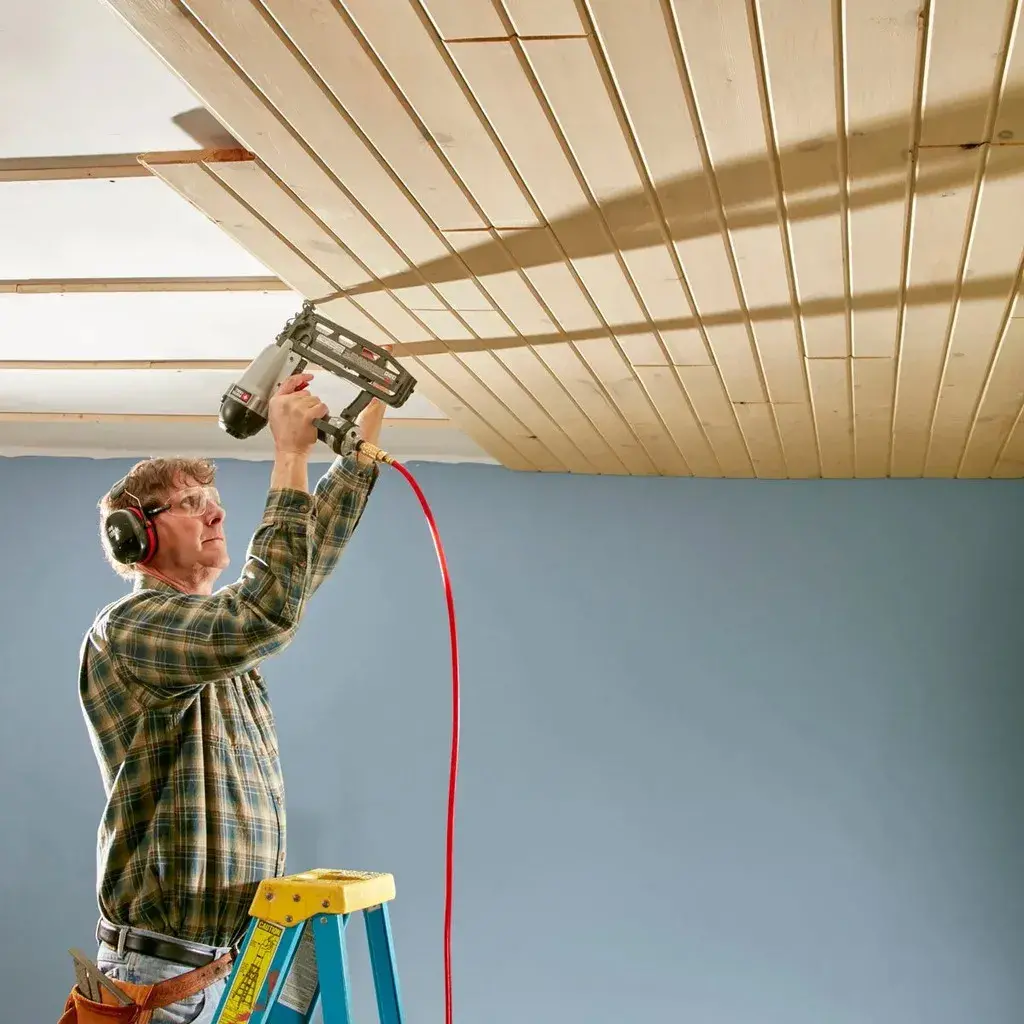
It can be dangerous to nail up lengthy and clumsy tongue-and-groove wood boards while standing on a ladder. The boards might knock you off balance as they are challenging to control.
So, it is better to use scaffolding while installing the tongue-and-groove ceiling. The tongue-and-groove ceiling planks can be installed by a single person, but having two people makes the job safer. If you have a plank that is 8′ or longer in length, have one person hold the plank while the other nails the ceiling in place.
What You’ll Need To Make a Tongue and Groove Ceiling?
The following materials will be required to install a tongue and groove ceiling –
Tongue and groove wood boards.
1×2 furring strips.
Primer and paint.
The tools and equipment you would need to install a tongue and groove ceiling are –
Electric nailer or hammer.
Electric miter saw or hand-saw.
Scaffolding or ladder.
Painting toolbox.
Rubber truncheon.
The Pros and Cons Of Tongue and Groove Ceiling: You Should Not Miss!
Pros of Tongue and Groove Ceiling
1. Lightweight
The tongue-and-groove ceiling wood boards are lightweight and thus easy to lift. So you can keep them lifted until they are installed.
2. Look
The tongue-and-groove ceiling gives a natural wood look to your room. They can conceal the painting and other texture imperfections in the ceiling.
3. Value Addition
This tongue-and-groove ceiling increases the value of your property if properly installed and finished.
Cons of Tongue and Groove Ceiling
1. Painting is Difficult
Overhead painting of tongue-and-groove ceilings is difficult and tedious.
2. High Maintenance
The tongue-and-groove ceiling requires high maintenance for the upkeep of its woods.
3. Longer Installation Time
To install a large number of boards in a tongue-and-groove ceiling, more time is required.
Money Matters: Cost of Tongue and Groove Ceiling
One of the most affordable ceiling choices is a tongue-and-groove ceiling. Various factors determine the cost of its installation. The type of material you choose will be the major determining factor in your cost. On average the tongue and groove ceiling cost $2 – $3.5 per sq. ft.
Ceiling Cost
The larger the ceiling, the more expensive the tongue and groove installation will be, as more wood boards will be required.
Material Cost
Depending on whether you choose pine, spruce, cedar, or redwood, the cost will vary. The knotty pines are comparatively cheaper at $2.6 per sq. ft., while clear pine is the most expensive.
Labor Cost
If you choose to install the tongue and groove ceiling yourself, then no or little cost will be involved. While if you decide to hire a professional, the price will obviously be higher.
Other Costs
The cost of paints, stains, or any other ceiling decor will also influence the final cost of the tongue-and-groove ceiling.
The 6 Steps: How to Install Tongue and Groove Ceiling?
1. Arrange the Materials First
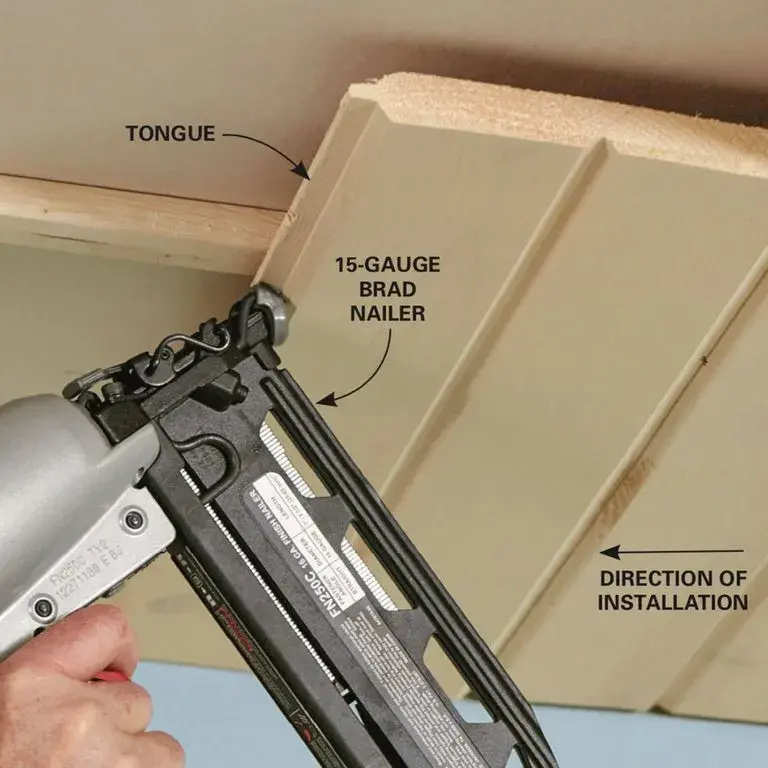
To start with the installation of your tongue-and-groove ceiling, you are first required to arrange the materials. Get the wooden boards, scaffolding, measuring guide, battens, nails, hammer or nail gun, 15-gauge brad nailer, and drill.
Make sure that the planks are clean, and if required, re-cut their ends. If you get pre-finished boards, they will have grooves at the ends. And if you don’t have pre-finished boards, then get a 45-degree bevel, appearing as a V groove, on each end of the plank.
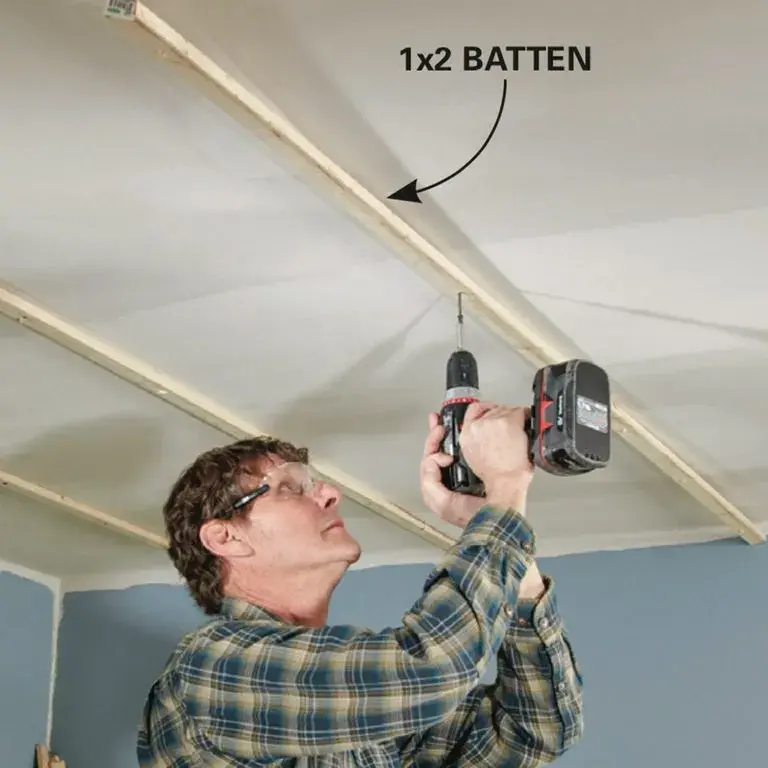
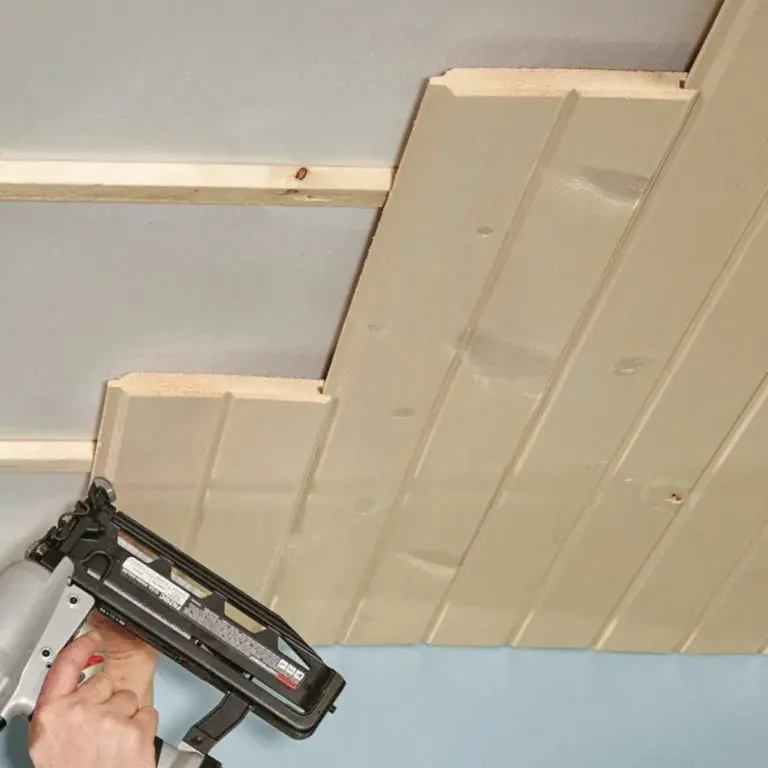
2. Install Battens in The Ceiling
The next step is to install the battens in the ceiling. It is recommended to install 1×2” battens and join them to the framing using 2-½” screws. These battens will act as the framework for your tongue-and-groove ceiling.
3. Staining of The Tongue and Groove Ceiling
If you don’t want to strain your neck by painting upside down, then choose stained tongue-and-groove ceiling boards. You can explore the market for the available option of a stained board.
4. Cut The Boards for The Tongue and Groove Ceiling
Use the technique of V-grooving while preparing the next board to give it a professional appeal. This V-grooving is done at a 45-degree bevel, called a chamfer, that will conceal any imperfections in the butt joints.
5. Nail the Boards Into The Ceiling and Beat The Joints
The next step is to nail the tongue into the battens that are running in the direction of installation. While nailing the planks, make sure they are facing the wall and the tongue is facing out. For nails, 2” brads are a good choice.
6. Finish It Off
To wrap up the installation of your tongue and groove ceiling, you can add electrical work, paintings, and other decorations to your ceiling. If you want to paint your tongue-and-groove ceiling, then fill the nail holes present there. A visible crack between the ceiling board and the molding should also be caulked.
In case you don’t want to paint the tongue and groove ceiling to make it look natural, then use polyurethane or linseed oil. While linseed oil is environmentally friendly and easier to apply, polyurethane is more resistant and durable. Considering that ceilings don’t get wear and tear, using linseed oil is preferable.
When Should You Consider Calling A Professional To Install Tongue and Groove Ceiling?
If you have difficulty installing the tongue-and-groove ceiling yourself, you can always consult a professional. A carpenter or any general contractor can help you out with working overhead for a longer period of time. You can even get a finish with higher accuracy if you consult a professional. They can handle tricky portions like bowed ceilings, joints, etc. better than you and give a better final result.
Let’s Install a Tongue and Groove Ceiling!
To conclude, it can be said that the tongue-and-groove ceiling provides you with several advantages compared to other types of ceilings. It’s an easy job to have a tongue-and-groove ceiling installed in your home; all you need is a little guidance. Being safe and quick increases its value. So, what are you waiting for? Go get a tongue-and-groove ceiling for your home!
FAQs
1. What Is the Price You Have to Pay for the Tongue and Groove Ceiling?
To professionally install a tongue-and-groove pine ceiling, you would require around $4 to $8 per sq. ft., depending on the cost of material and labor. It can even range from $3 to $4 per sq. ft. if you wish to install the tongue-and-groove ceiling as a DIY project.
2. In Which Direction Should the Tongue and Groove Ceiling Run?
The direction in which your tongue-and-groove ceiling should run depends on the dimension of your ceiling. If you wish to make your tongue-and-groove ceiling run in a longer direction, it will have fewer cuts, but keeping each row straight will be difficult. And, if you wish to make your tongue-and-groove ceiling run in the shorter direction, there will be more cuts but fewer butt joints.
3. Which Type of Ceiling Is Called a Tongue-In-Groove?
In the tongue-in-groove ceiling, the natural long wood planks are arranged side by side across the ceiling. Unlike drywall ceilings, the installation of tongue-and-groove ceilings is relatively easy and can produce more beautiful results.
4. Which Ceiling Option Is the Cheapest?
The tongue-and-groove ceiling can be your choice if you are searching for an affordable option that is easy to maintain and install. They have elaborate designs and are aesthetically pleasing.
5. How to Install the Tongue and Groove Ceiling?
Follow the following steps to easily install the tongue and groove ceiling Decide your place for installation. Make sure you place your boards perfectly. Nail the tongues. Keep space for ceiling objects like fans, lights, etc. Use crown molding to cover the edges. Caulk and seal, if any gaps are present. And then paint.
Choose The Finish Option For The Tongue and Groove Ceiling
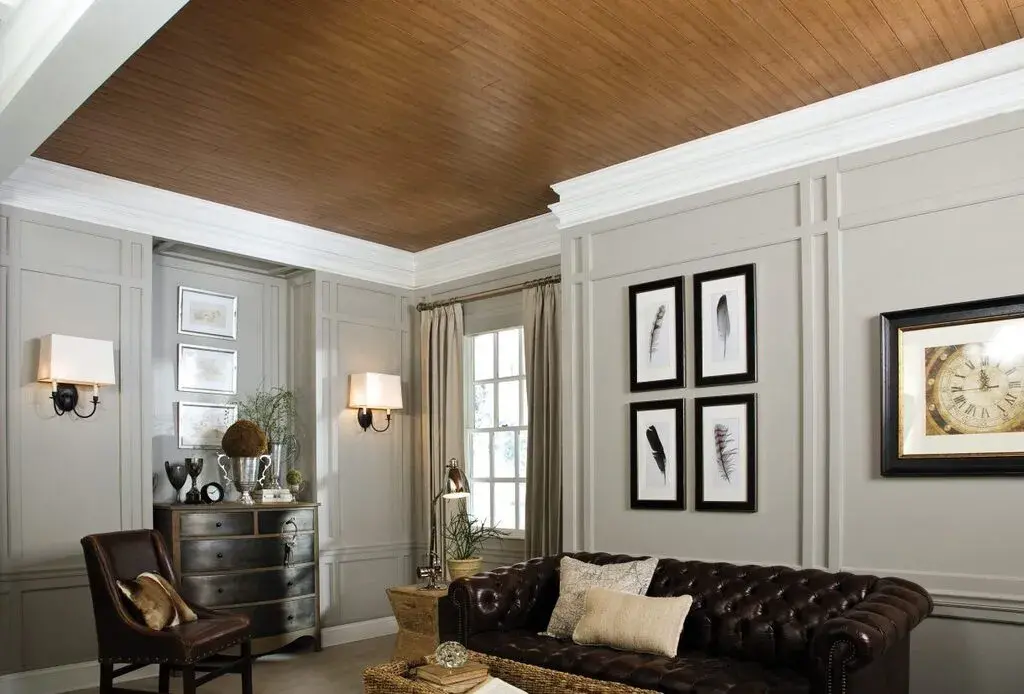
The type of finish you choose will determine the look of your tongue-and-groove ceiling. Stained, neutral, or painted, each will have a dramatic appeal. It is up to you, how you want to feel, and how you want your room to look.
A stained ceiling with darker flooring will create contrast in your room, while a light shade will brighten up the space. Whether you want an elegant and classy vibe or a natural and rustic appearance, it’s up to your choice. So, choose the shade and color that will define your space.
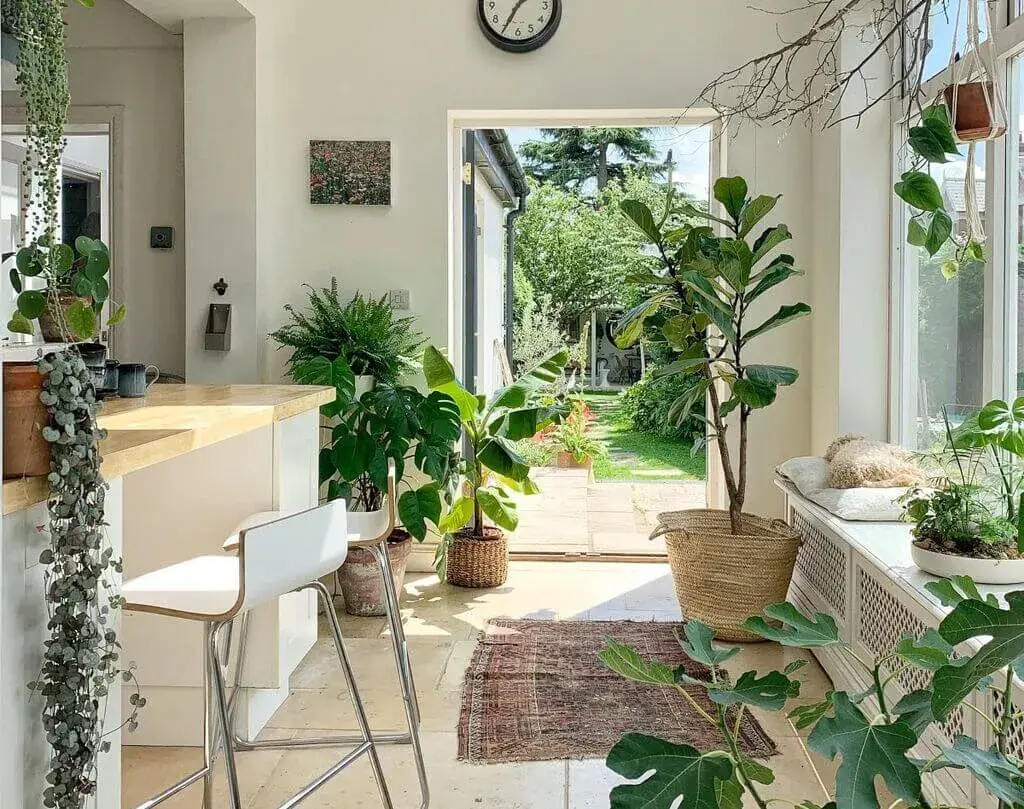
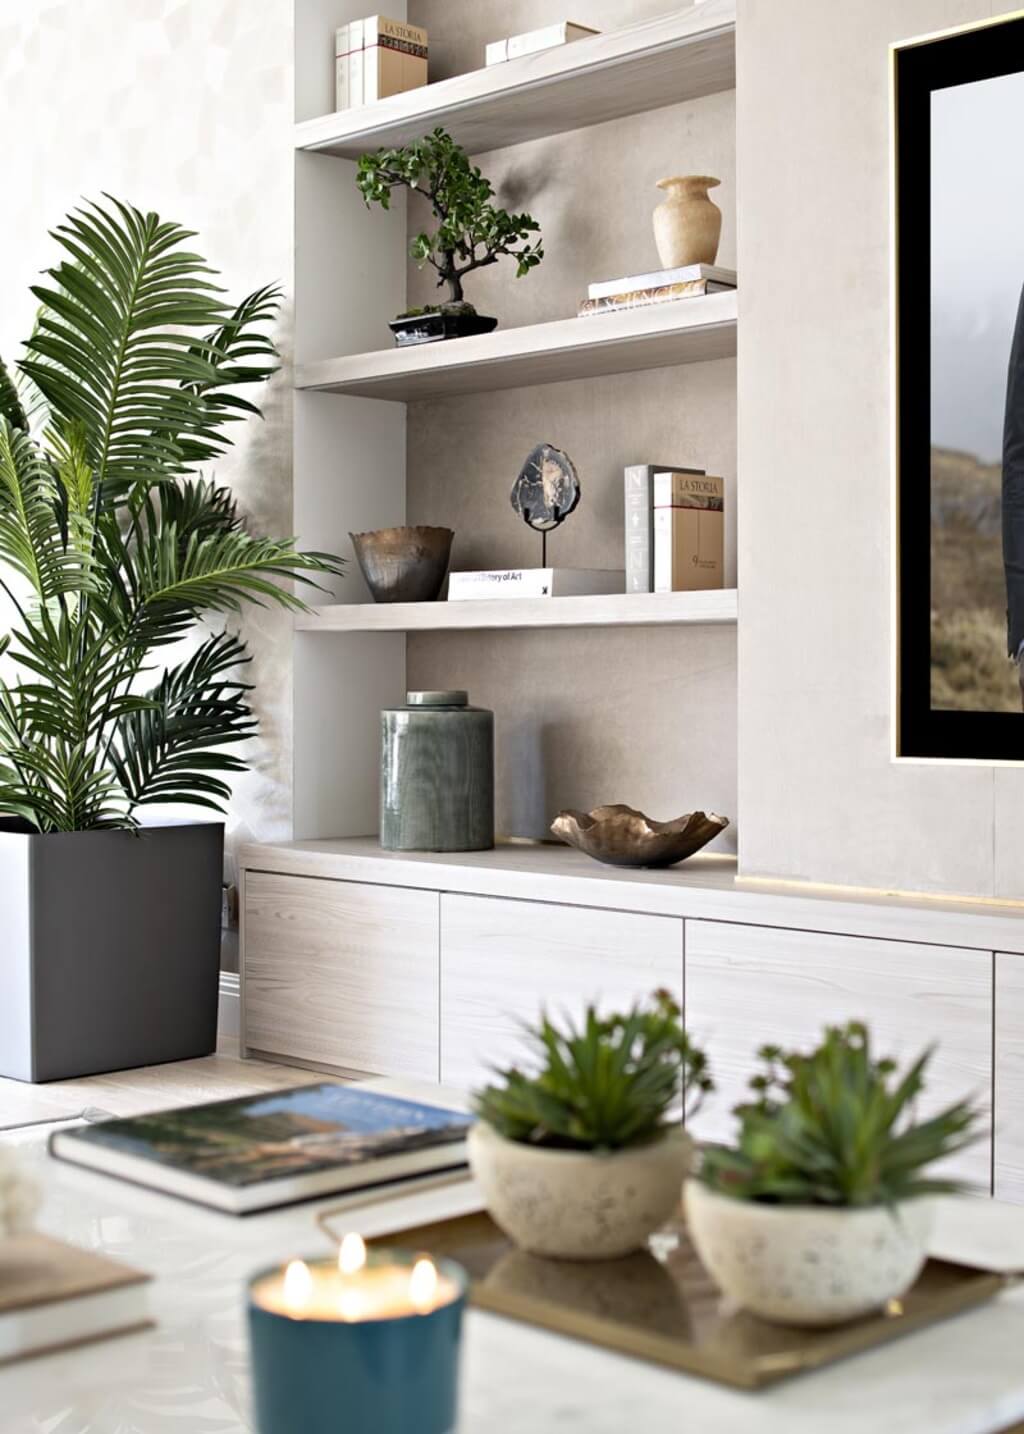
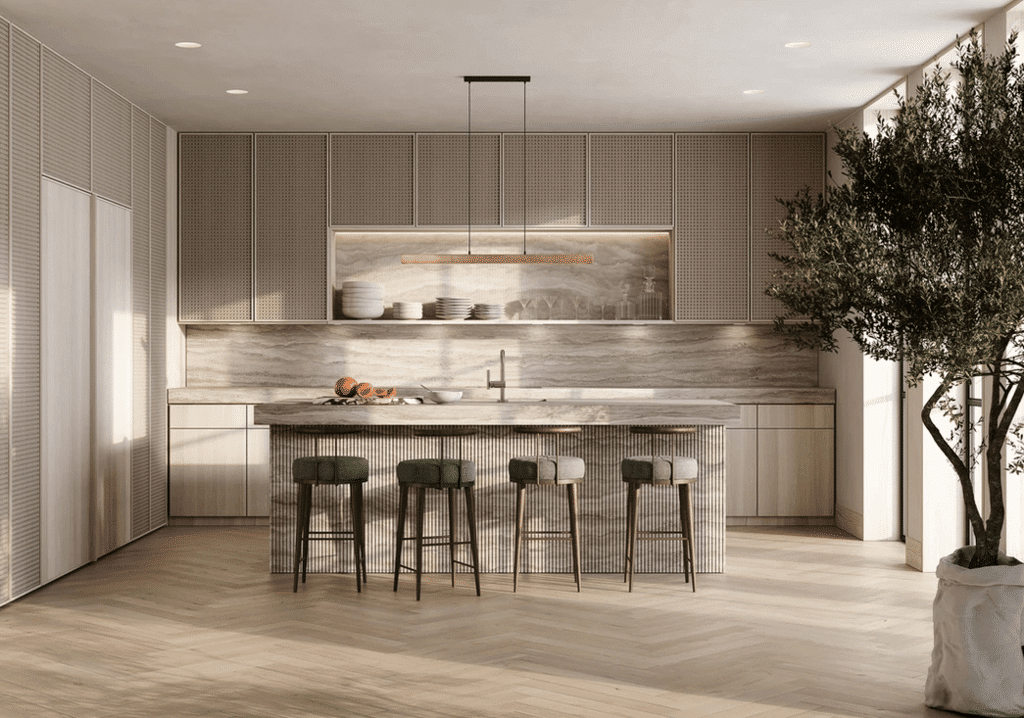
Biophilic design is one of the architectural trends in 2023 incorporating elements of nature into built structures to enhance well-being and connection to the natural environment. From planting trees to using authentic materials in building and designing houses and edifices, bringing in nature offers several benefits to occupants and the environment. Find out here amazing ideas for nature-inspired home interiors.
Indoor Plants and Herb Gardens
Houseplants are common indoor fixtures. They not only make the atmosphere look bright, but also serve as air purifiers. In addition to blooms and plants, you can make your indoor setting more nature driven by putting trees. Nowadays, indoor trees are the new trend with homeowners investing in potted saplings and bushes. If you’re still in the design phase of your new home, you can plant a tree out of the floor of your home.
Keep in mind that it needs proper drainage, correct indoor soil mix, and adequate care. It’s also important to choose a tree that is compatible with the amount of natural light your home gets because certain varieties of plants thrive with less sunlight, but others do not.
Consider an indoor herb garden to spice up and give flavor to foods. Moreover, herbs add a natural fragrance to your indoor environment. Natural scents not only smell good, but they also elicit positive emotions which are proven to lower stress and improve mental well-being. Subsequently, herbal plants serve as a starting point for sustainable edible gardening. It’s also possible to plant a salad or other low-maintenance vegetables that you can propagate indoors.
Natural Materials and Decor
Foliage and vegetation in the interior of your house are not the only things that can bring nature into your home. It is also a good idea to use natural materials as much as possible when building because they are eco-friendly and offer benefits. For example, stones are durable, low maintenance, and ecological. They do not release harmful chemicals into the interior of your house.
Furthermore, natural stones look gorgeous, you will not need paint and finish to enhance their appearance. Adobe brick is another environmentally friendly building material. It is useful in insulating your home and offers noise protection. Other examples of building materials that are great for your interiors include wood, cork, bamboo, and straw.
Decorating your interior with ecological materials also helps in connecting with nature. Popular materials include glass, metal, stone, leather, jute, and bricks used partly or entirely as interior decor. To illustrate, you might want to fill a wall using dried flowers, grass, or leaves. Wicker baskets and furniture can also give the inside of your house a natural and homey look as wooden bowls and picture frames.
Natural Light
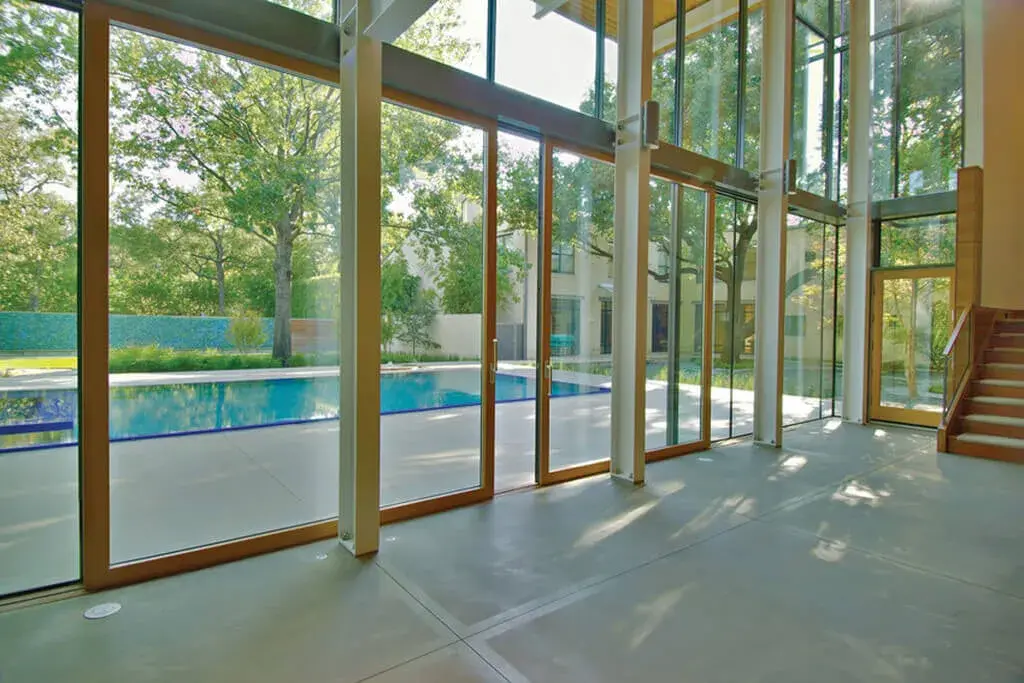
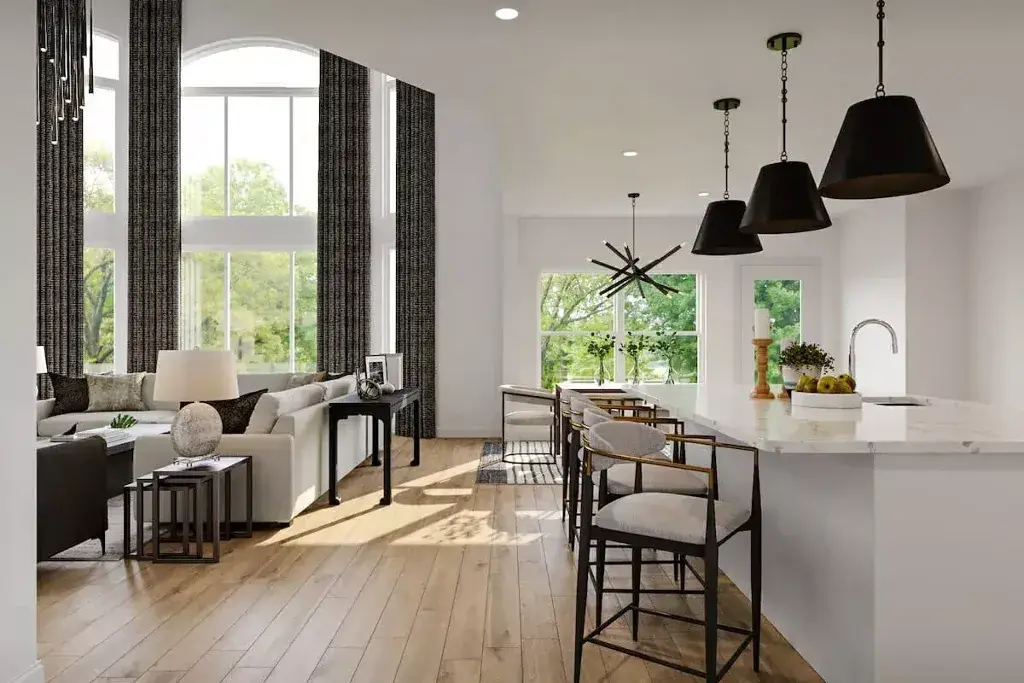
Natural light plays a crucial role in connecting with nature. Exposure to it helps the body to produce vitamin D, promotes better sleep, and improves well-being. Moreover, natural lighting creates a positive mood and enhances the energy of the living space. When choosing or designing a home, natural light and orientation should be a priority with the longest side of your residence catching the morning and afternoon sunlight. Orientate the layout of your living space so that bedrooms and common rooms (living and dining) catch the most light.
Windows and doors are equally important in ensuring that your inner space gets a lot of natural light. Large windows, glass doors, and skylights must be included throughout the design of your interior. Bi-fold doors can create a flow of light between rooms. Where natural light is missing or low, think of putting mirrors in strategic places to make a room brighter. Mirrors have reflective properties that can instantly make a living space larger and livelier.
Good Ventilation
Proper ventilation is an important aspect as well of the interior design of your abode. Specifically, natural ventilation is viewed as an attractive solution for reducing energy use and cost in addition to improvement of indoor air quality. In designing the building, it is useful to view it as a circuit composed of supply and exhaust. As such, design recommendations include separate supply and exhaust openings in rooms and ridge vents on the roof to let air flow freely out of the house.
For adequate internal airflow, interior doors must be designed to be open to enhance whole-building ventilation. Windows should also be added to the basement to complete the ventilation system. If building attics, it is vital that the space is ventilated to reduce the transfer of heat to cooler rooms below.
Another way to improve air quality is to build vented skylights that offer an opening for stale air to escape. While improving indoor air can be as simple as opening doors and windows to maintain good air quality and boost circulation, it’s also recommended to install additional mechanical systems to enhance airflow such as venting systems to remove pollution indoors from the kitchen and bathrooms.
The heating, ventilation, and air conditioning (HVAC) system also facilitates adequate ventilation and comfortable temperatures. Unfortunately, designers acknowledge that it is difficult to create structures that rely on both mechanical cooling and natural ventilation. If banking on natural ventilation, large windows and door openings are appropriate while an artificially conditioned home is best served by sealed windows and a compact plan.
Final Words
It is possible to include nature in the design of a home’s interior. From plants and natural materials to light and ventilation, a house design that incorporates these elements will gain from the benefits nature offers.
As the years pass, they often come to be defined by trends that took hold during them. Even though the passage from December to January is arbitrary from a design and development perspective, it is inarguable that years are useful to track the growing prevalence of certain trends – particularly within architecture and building design.
This year promises to be a vibrant year with regard to architectural trends, too. A number of global events and technological leaps have set the stage for some strong trends to emerge in project and practical design alike. What can you expect to see in architecture in the coming years, both in terms of new projects and new customer demands? In this article, we’ll delve right into this topic to find out.
The Importance of Sustainability
Sustainability has been a growing buzzword in the construction and design industry for some time now, but in recent years has become a much more important facet of design and architecture. Anthropogenic impacts on global weather systems have been made abundantly clear, and this year saw many of us in the UK get the first hands-on experience of man-made climate change. When discussing sustainability in the construction industry, one must focus on building materials and recycling as much as possible.
Environmentally friendly materials, also referred to as green construction materials, are those that have been produced, installed, and maintained in a way that has little impact on the environment.
They must be made from resources found in the area where the building activity will take place, or they must be strong, reusable, or recyclable. They must also contain recyclable components in their composition.
Additionally, these components must be natural (soil, cork, wood, bamboo, straw, sawdust, etc.) and unaffected by extremes of temperature or humidity.
But how will sustainability surface in terms of building design? Commissioning clients, contractors, and construction firms alike will together move away from reliance on wasteful or pollutive materials, whether single-use plastics or concrete products with high carbon costs. Instead, durable, quality timber sheet materials will be used for structural design as well as aesthetic purposes, melding sustainability as practice with natural and biophilic design principles.
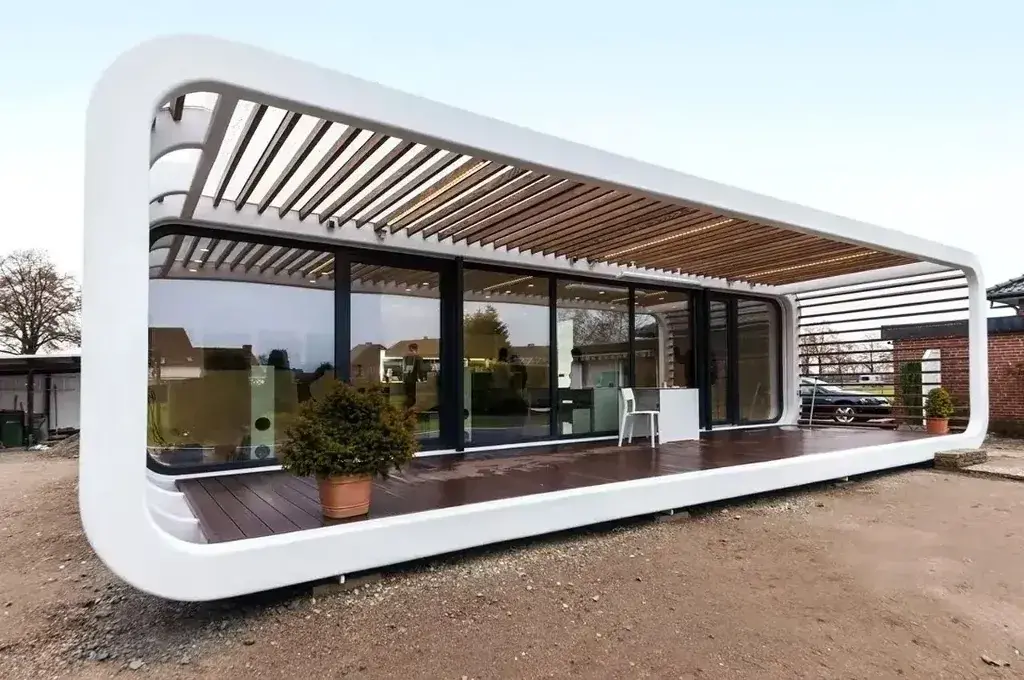
The Rise of 3D Printed Homes
Hand-in-hand with an increased focus on sustainability comes to an increased focus on technological possibility, with 3D printing emerging as the next ‘big thing’ for affordable and equitable building design, and even mass-manufacture capabilities. 3D printing technologies have been commercially available for some time, but the technology continues to be advanced in sectors like construction – resulting in the creation of printers that use cutting-edge concretes to ‘print’ permanent structures with ease.
3D printing allows for the creation of complex, even previously-impossible shapes, and topologies, advancing architectural design and democratizing it for smaller companies and clients. Not only this, but the repeatability of printing allows the mass manufacture of frames, modular substructures, or entire properties. This could have the potential to permanently alter the Architect’s Design of new-build domestic properties. In the meantime, Current year will see more audacious design folding complex shapes and modular structures.
Portable Home & Structures
In talking about modular structures and mass manufacture, we inadvertently discussed another key shift in construction capability and technology: portability. This has already been recognized via the explosion of interest in van, narrowboat, and otherwise tiny living, but is starting to get reflected in construction start-ups and practice as a viable solution to the growing number of homeless people and the housing crisis.
The concept has notably gained much more publicity and attention ever since the Tesla and Space X CEO, Elon Musk, announced in 2021 that he was selling his properties to live in his very own Boxabl portable home. The prefabricated Casita, which in Spanish means “cottage” or “little house,” can be purchased for as little as $49,500 or rented for as little as $250 per month, which could be another indication that Elon Musk really does reside in a Boxabl since he previously stated his home is worth about $50,000. Knowing this, it’s hard to believe that the world’s richest person would live so far below their means but certainly creates good sustainability publicly.
Conclusion
Prefabricated domiciles are nothing new, and businesses across the world have been pioneering flat-pack, modular-build, and even on-demand custom unit design that enables the delivery of finished homes to different locations. But new manufacturing possibilities – and new insights on sustainable construction – give modular living all the more potential to explode and beyond.
Saving energy is something many homeowners think about when they design or renovate their homes. Energy prices continue to increase, and the same can be said of our awareness of environmental damage.
For those who are renovating or just making simple adjustments to their homes, there are some simple smart home design ideas to consider. These can help reduce their home’s energy consumption and its environmental impact.
Tips for Smart Home Design
When people renovate a room or make simple adjustments, there are many things to consider. Smart Home design can be a daunting process, but when the right steps are taken, it can also be rewarding.
Budget
Your budget is one of the most important factors to take into account when planning your home. It is also a good idea to do some research on the labor and material costs associated with the project. Having a realistic budget and researching the expected costs of labor and materials will help to ensure that people are able to successfully complete their smart home design project without overspending.
Practical Use
When considering house renovations, practicality is another crucial consideration. It is recommended to anyone looking to design or renovate their hometo consider how they may make the most of the area by taking its usefulness into account. Included in the factors to consider are the rooms’ sizes and functions. It also involves looking through appliances and considering which features are needed and which are not.
Design
Everyone looking to design or remodel their home should take the time to think about the kind of style and feel they want. To make a reasonable budget, they also need to take into account the expenses of various materials, designs, and features. They should think about how they want to use the space and determine the kind of area that best suits their preferences, whether they like a contemporary, minimalist atmosphere or a more traditional, rustic appearance.
Why Save Energy?
Saving energy helps reduce the number of greenhouse gases produced from burning fossil fuels, which are a primary cause of global warming. Furthermore, energy-saving measures can help households lower their utility bills. Energy-saving measures such as installing energy-efficient lighting and appliances, reducing water usage, and improving insulation can have a big impact on a home’s overall energy consumption. A little more about these and other energy-saving measures are below.
LED Lights
Many spaces may benefit from the contemporary, elegant feel that LED lights provide. They may be found in a number of colors, enabling you to personalize your room and provide a distinctive environment. LED lights provide durable, energy-efficient illumination in addition to making a place seem contemporary and welcoming. They are consequently better for the environment they can also reduce energy bills. Not to mention that they can make a room look stunning and unique.
Solar Panels
Solar panels are becoming more and more popular. n the UK, rooftop solar panels are available for usage. However, since more sunlight can be utilized to produce power towards the south, they are most effective there. Homes with solar batteries will be able to utilize significantly more solar energy, but the initial cost will almost double.
Large roofs that are not hit by shade and are in good condition are ideal for the installation of solar panels. Additionally, it is best when the roofs are south-facing and diagonal. Although the initial expenditure is substantial, it may eventually pay off. Solar panels may be suitable for the right home.
Energy-Saving Home Appliances
Energy-efficient home appliances are another way that can be used to reduce energy consumption. These appliances, such as refrigerators and washing machines, function with less energy than conventional ones. Energy-efficient household equipment is available that may help save money and the environment.
Even though they initially cost more, buying energy-efficient equipment for homes can eventually become more financially advantageous. Models’ features and benefits should be carefully considered when selecting energy-efficient products for a home.
Insulation
Insulation is one of the best ways to reduce energy costs and minimize the impact on the environment. Properly insulating homes helps to keep them warmer in the winter and cooler in the summer, meaning that it can reduce energy consumption. In addition to reducing energy costs, insulating your home also helps reduce emissions from your heating and cooling systems. It can also help reduce the noise from outside, keeping your home peaceful and comfortable. Installing insulation can be a wise investment, both for wallets and for the environment.
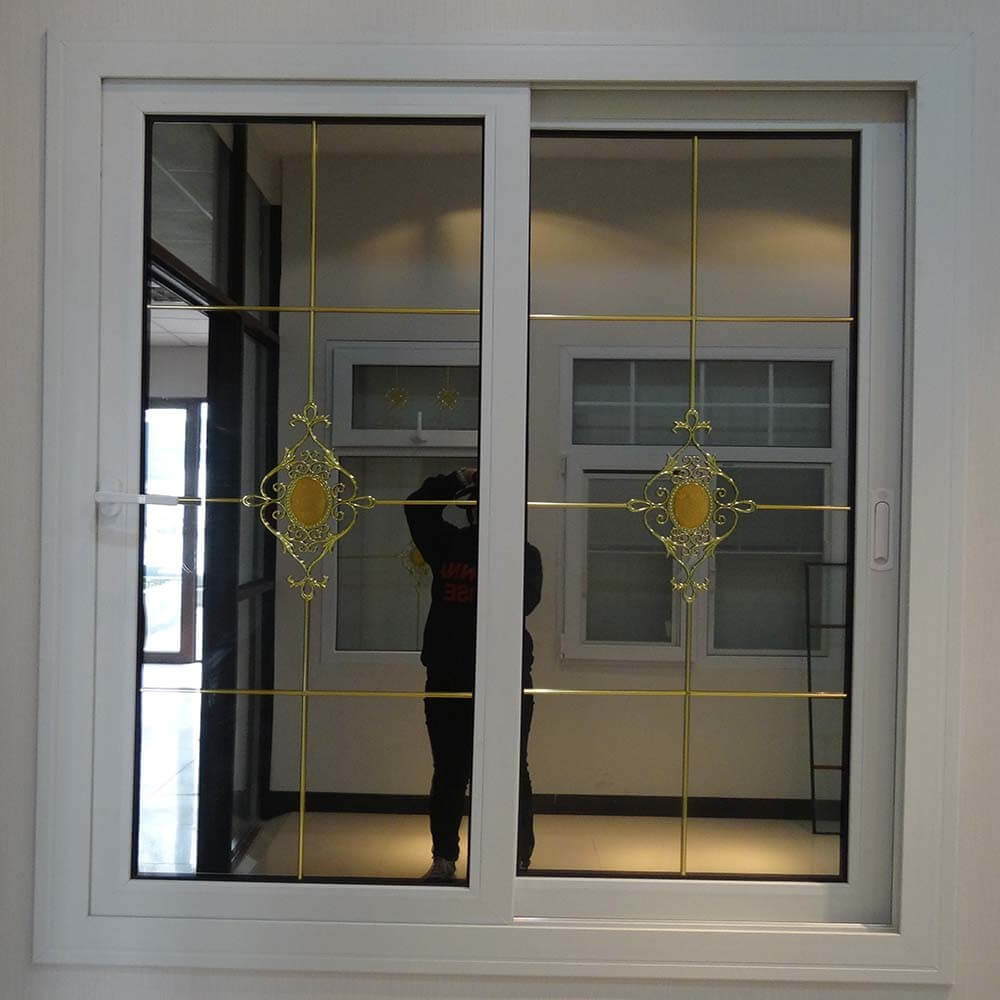
Double Glazing Windows
Aside from their various benefits such as reduced condensation, increased safety, and noise blocking, double-glazing windows can also act as great insulation tools for your home. Because they are built with two layers of glass that are separated by a pocket of air, double-glazing windows trap warm air inside, which will help to keep your home’s interior temperature consistent. They do come at a higher cost, however. What are the best double-glazing windows? How much do they cost, and who are hey right for? For those who might want to find out more about double-glazing windows, here is alist of the best double-glazing windows.
Everyday Steps That Can Reduce Energy Consumption
A great way to reduce your energy consumption and power bills is to adopt energy-saving behaviors. Simple habits like unplugging devices when, not in use, turning off lights when leaving a room, and taking shorter showers may help you consume less energy. Bathing uses more energy than taking a shower. People should be cautious while using the dishwasher and washing machine. Utilizing cold water instead of hot when washing or whenever else possible can also help save energy. Every appliance should be handled carefully.
Conclusion
Before renovating or designing a home, a variety of things should be thought about, including budget, design, and practicality. Additionally, considering energy-efficient options such as double-glazing windows and energy-efficient household appliances can help reduce the cost of energy bills in the long run
Smart Home designcan be a daunting process, but when the right steps are taken, it can also be rewarding. Saving energy is something many homeowners think about when they design or renovate their homes. Energy-saving measures such as installing energy-efficient lighting and appliances can have a big impact on a home’s overall energy consumption. LED lights provide durable, energy-efficient illumination in addition to making a place seem contemporary and welcoming.
With these ideas in mind and external research, saving energy at home should be a little easier.
Okay, firstly what are the two essential things that complete the house design? Doors and Windows.
They are an essential part of the house. While doors save us from thieves, burglars, unnecessary and unwant people, windows provide us with fresh air and sunlight. Windows allows us to have a peek at the outsiders’ or neighbors’ lifestyles. You can observe the surroundings within your comfort zone.
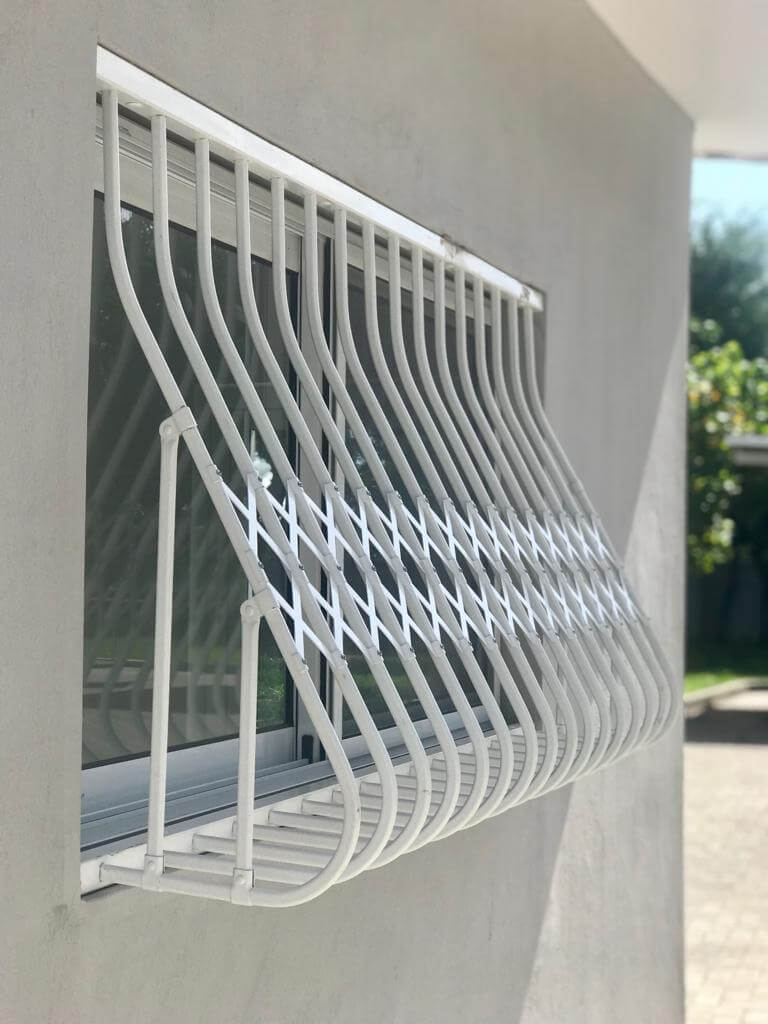
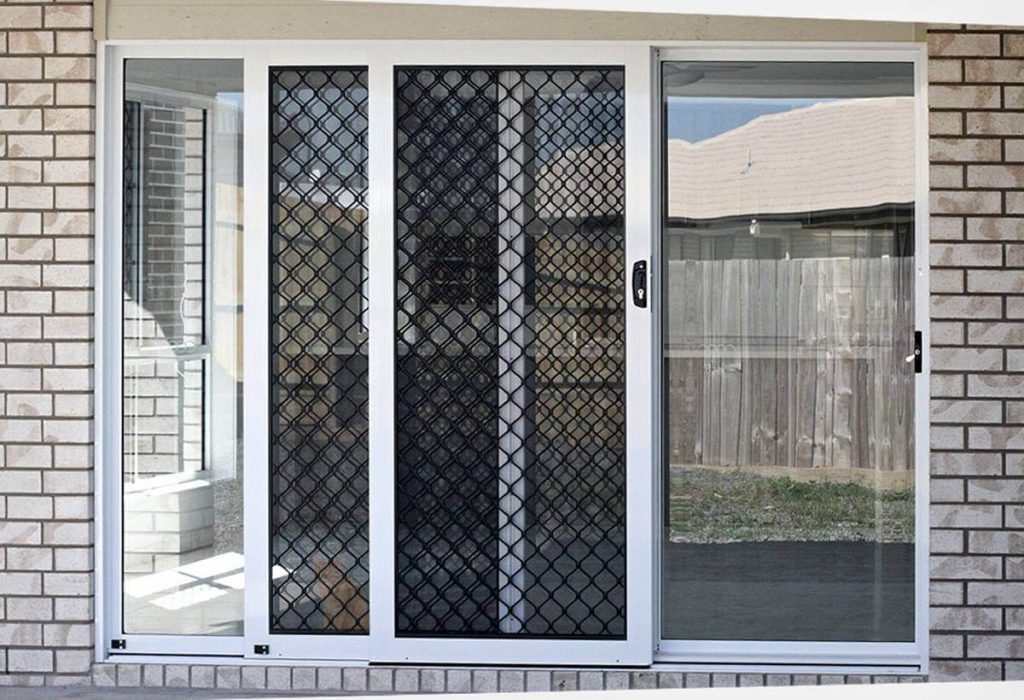
But windows can also be the space from where the intruders can enter your house. To make it full proof, designers came up with the ideas of the bars as bars are the perfect solution to both of the situations. Windows with bars can allow you to observe the world and also will forbid intruders to enter your space. Let’s see simple window grill design.
You know only bars are so outdated even it isn’t the safest option as well. With the increase in technology and the invention of new tools, merely bars are not safe. Bars are most natural to break, so the best option is to get window grill design new (complex arrangement).
Modern window grill design is made considering all the factors, safety, attractive design, and enough space to let air and sunlight pass. Do you know you can even add an interior window too? An internal window can add a dramatic effect to your residence and also looks attractive.
What is the importance of a grill designed window? Firstly, it increases the safety guard, and secondly, it adds a charm to the outlook of your apartment. They don’t just add beauty but also a sophisticate look, to both the interior as well as exterior.
Here we have mention some products and their description (in brief) to help you with the selection of the right window for your dream house.
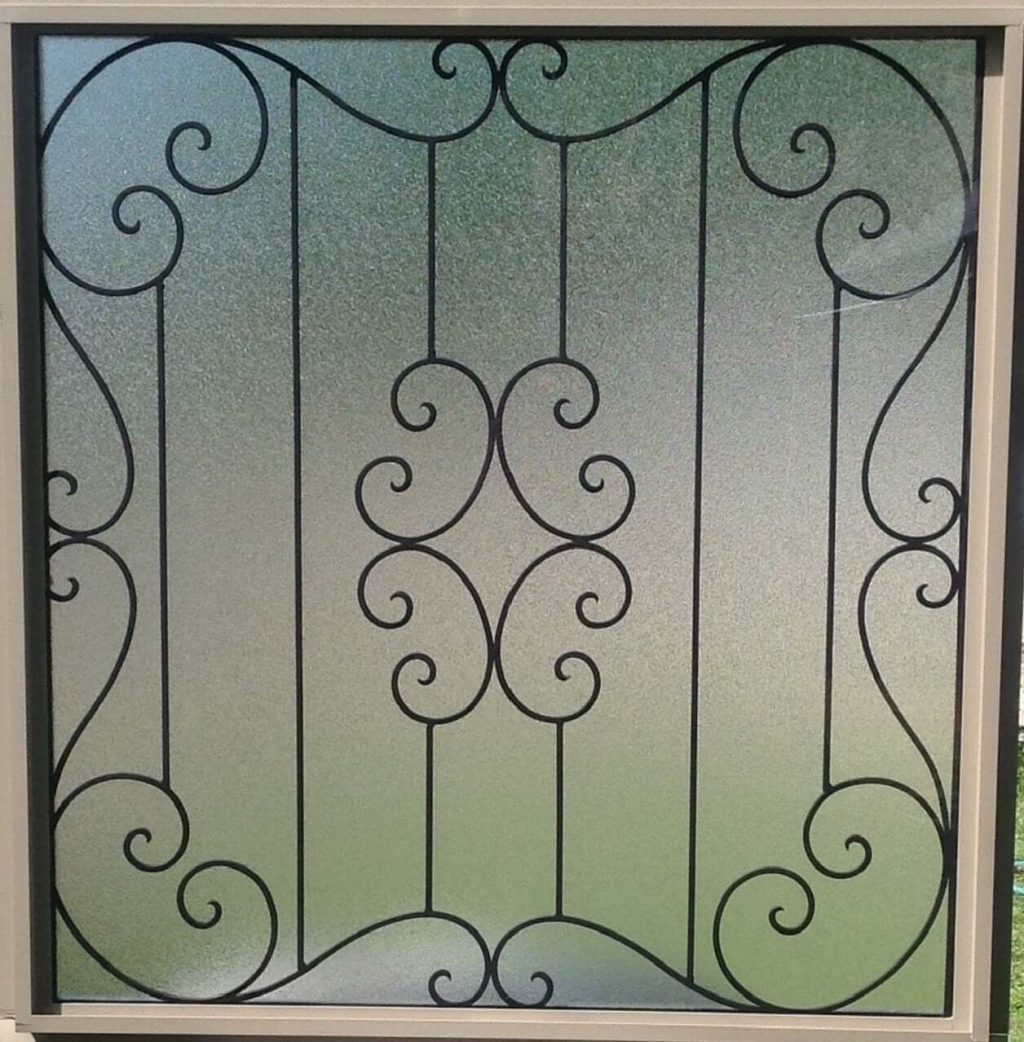
1. White Design Patterns Window Grill
The above design is simple yet elegant and can give an aesthetic outlook to your house. This pattern is highly demand and love by the clients who have purchase this design. This simple window grill design is sent after the proper quality check.
The features of this white window grill are dimensional accuracy, simple installation, and smooth finish. Plus this is termite resistant and moisture resistant. It also emphasizes heavy durability and low maintenance. The size of this grill is customizable, and if we talk about thickness, the exterior is 18mm, and the interior can vary from 6-18mm.
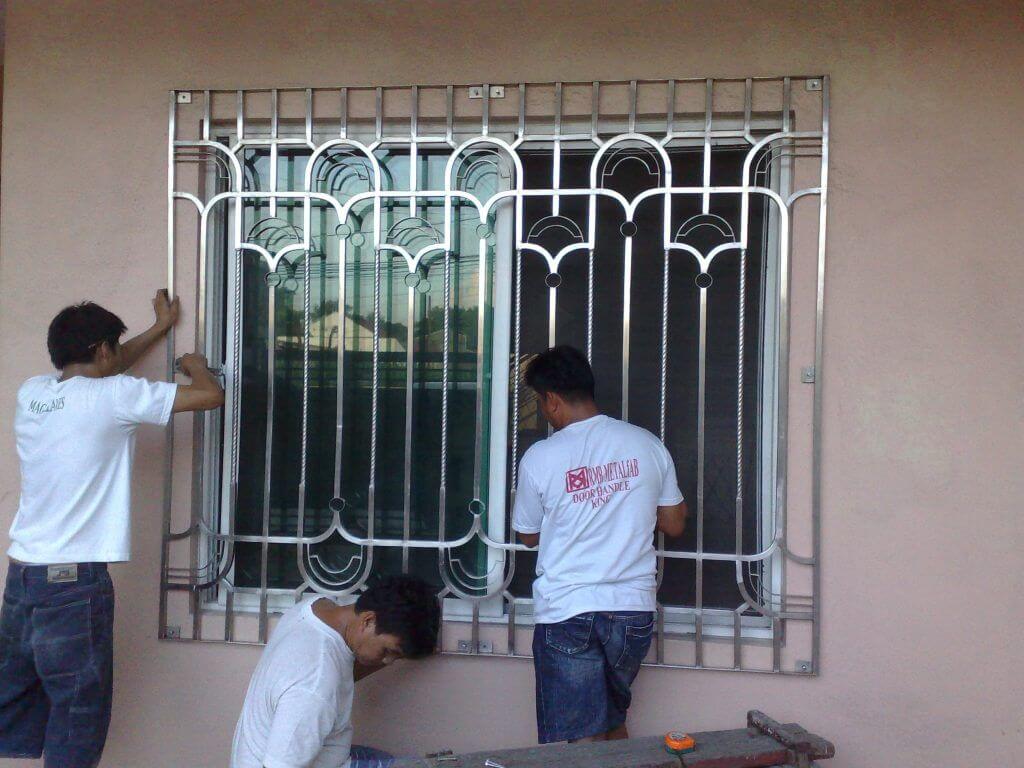
2. Iron Window Grills
Window grill design new, and this can be add along with the standard windows. That will strengthen the outlook of your house. The plus point of bay windows is that they are super safe, how? You will get the double protection window.
The main feature of this window is its strength. This window is made up of iron. We don’t need to tell you about the durability of iron. The size and design of this grill are customizable according to your choice. Your residence got a large window, and want to implement this grill, tell them they will make your wish come true.
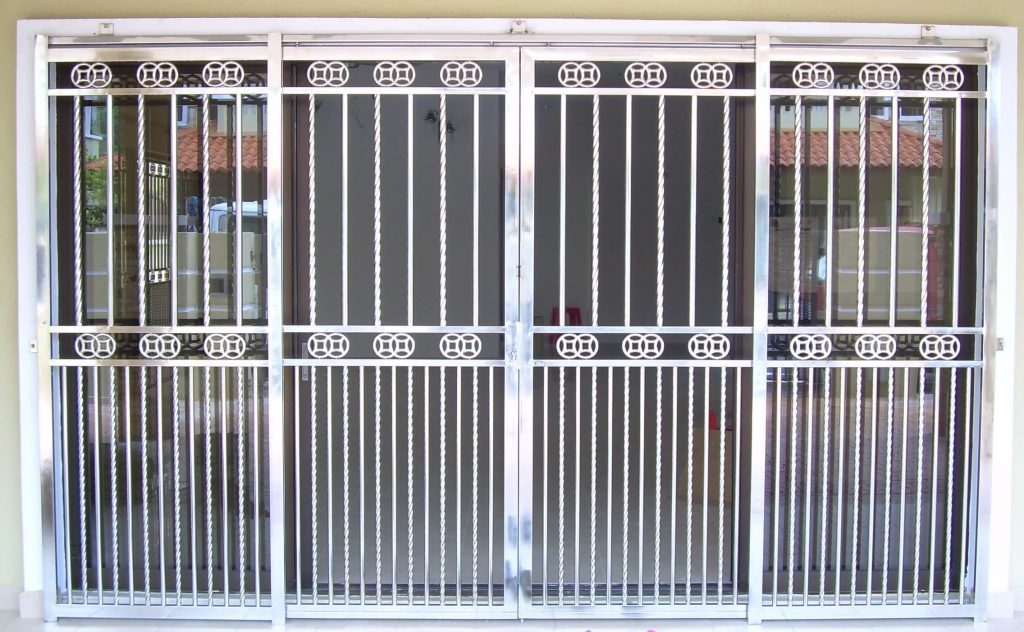
3. Metal Window Grills
Metal window grills are always a yes-yes for the implementation. These metal grills can be use in two ways, either fix it in the interior area of the window or the exterior space. Both will give the home a classic look. You can set this type of window accompanying with the mirror to accentuate its look.
The features of this metal window grill are its long-lasting finish, corrosion-resistant, and high durability. The materials use in the manufacturing of this grill are stainless steel and mild steel. The size is customizable.
4. Stainless Steel Window Grill Design
You can get whichever shape or design you want in the window grill. But the most basic form of the window grill is rectangular. Not just basic but also most prefer. It is the safest option, as well.
This stainless steel window grill is manufacture in such a way that it is fire and heat resistance. The height of the grill can vary from 3-4ft. This grill has a polish surface finish and is corrosion-free. The plus point is you can use this design in a commercial outlet too.
5. Mild Steel Grill
This is the most commonly seen and safest option in this simple modern window grill design. This type of window is known as a wall-mount design. As they are stuck or you can say it is fixed to the wall. Plus this is non-openable as well. What else do you need for the super security?
This grill features mild steel and is properly welded. The design can be done as per the requirement of the customer. Moreover, it is also corrosion resistant. If you don’t want it to be mild steel, there are other options available too, like iron or steel. Even the selectivity of color is also flexible.
6. Grill Patterns
If you are not into an organize grill, then you can prefer this type of grill too. The application of this grill is also flexible (interior or exterior). Plus the intricate pattern of this grill is more attractive and will give your home a perfect view point.
This complex grill pattern is manufacture with the use of different types of materials like plastic, natural fibers, and additives. This is termite resistant and moist resistant. It also emphasizes heavy durability and elegant look. The size and design of this grill are customizable, and if we talk about thickness, the exterior is 18mm, and the interior can vary from 6-18mm.
7. Welded Mesh Black Aluminium Grill Windows
Till now you saw windows of steel or iron, but this one is of aluminum. This pattern is mostly seen in fencing, and you know why fencing is done, right? For protection and safety. The purpose of a mesh grill is the same here.
This welded mesh grill is corrosion-resistant. The surface finishing is of paint-coat that too with the black color. The size is customize according to the demand of the client. If you have small children in the house, then this is the perfect one for you. Buy best aluminum grill from here.
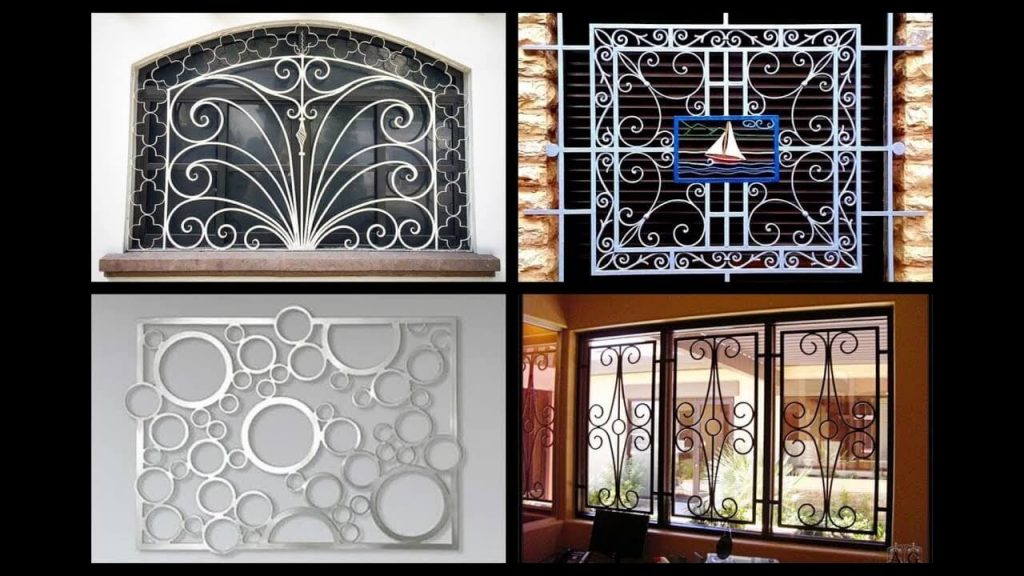
8. Designer Window Grill
Most trending windows are ones with the designer grills. Do you know? You can get any design conver into a grill. All you have to do is provide them with the design you want, or even you can explain to them the type of grill you are looking for. And you are ready to roll it into your space.
The company providing this simple modern window grill design is working with the motive of coping up with every requirement of the customer. This white color designer grill is made using Mild steel. As for size, you can get a smaller version as well as a larger version of it.
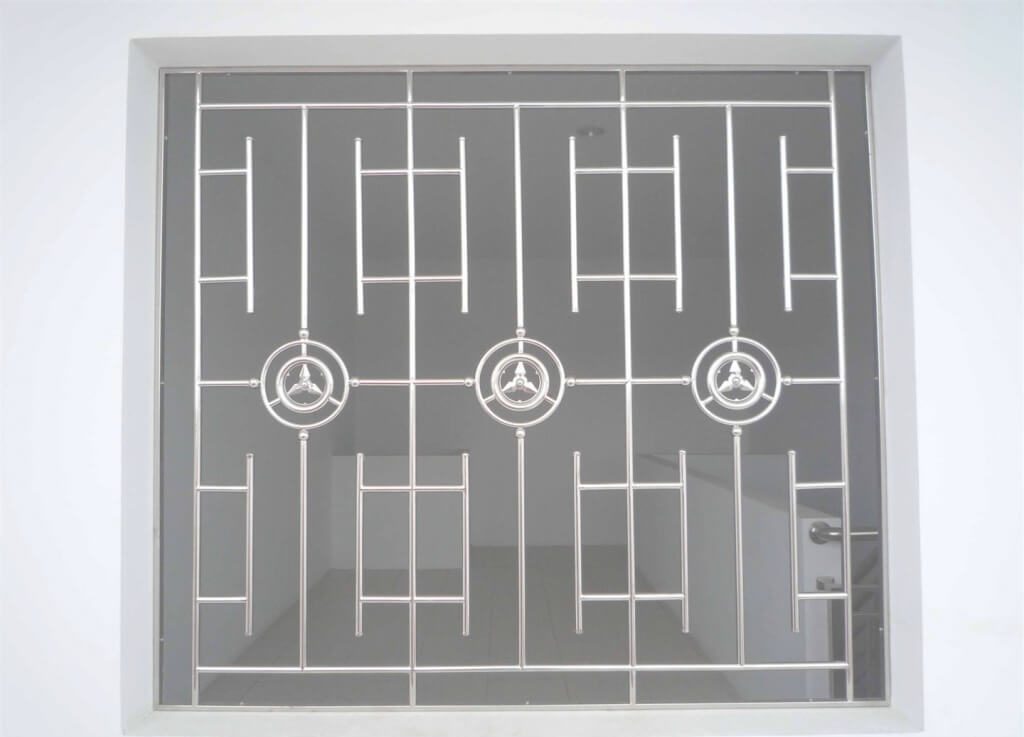
9. Mild Steel Modern Window Grill
The above window design is too formal but balance. The three horizontal bars at the even distance is making it look more pretty. This is a modern design that can be used at the entrance as well. If you want to give a connected feel to your house, then go for the same grill for the door as well as windows.
This grill is made up of mild steel. In windows, it will be of fix structure, i.e., non-openable. The polished surface of the grill gives an accent look. The thickness is 7mm, ideal for the window and safe too.
10. Dramatic Metal Window Grill
Doesn’t this window look like coming straight out of some movie scene? We have seen many movies with these dramatic windows in the background. Lit up your house with the movie feels by fixing this dramatic grill to your window.
The plus point of the metal grill is that it is easy to maintain, and its durability is also high.
It is corrosion-resistant too. They are cheap in pricing too. The pricing will depend on market valuation.
11. Window Grill Design for House
This is the modern window grill design we have mention on this list. This type of grill is mostly found in hotels, resorts, shopping malls, and even in residential buildings. If you have a beautiful garden, then trust us, nothing will look more enticing than this window grill.
The attractive point of this grill is that it has excellent finishing. And durability is also that its highest point. Overall this product has a perfect look that will go well with the dream house design. As this design can be use in both residential as well as commercial buildings, you can buy it for any of the purposes.
12. PVC Casement Window Grill Design
The window casements look classy. Get this PVC casement window grill and make your entrance more welcoming and attractive. This product is make on the standards of industry and quality check materials. It is highly admire by the clients because of its high durability and good quality.
It features a superior finish and rug look that makes it look more attractive and appealing. This grill is ideal for apartments. And as it is make up of PVC, it has many benefits like toughness, lightweight, and abrasion resistance. What else you need to have a perfect casement?
Above were the modern window grill design that you should go for or tell your architecture to fix when you are renovating the window. We hope you will get a perfect window for your dream place.
FAQs
What Type of Window Grill Design Is Best for Your Home?
There are various window grill designs that you can choose from: Mild steel Aluminium Stainless steel Concrete jails Wood
What Objective Does Window Grill Design Serve?
Window security grill designs are best to prevent trespassers from infiltrating your house. They even work as child safety features. For example, you can protect your children from falling through the window.
What Is the Best Place to Keep Window Grills in Your Home?
As per the window designers, the grills must be placed approximately ten centimeters far from the sliding windows. If there is a hinged opening system, you need to allow sufficient space for window panes to open by having roughly five centimeters extra space.
Which Color Is Most Preferred for Window Grills?
Brown color is most preferred for window grills.
Which Type of Iron Is the Best for Window Grills?
Cast iron is the best choice for window grills.
Is There a Way to Keep the Window Grill from Rusting?
Baking soda is the best anti-rust formula to keep window grills from rusting. Mix it with water to curate a thick blend. Apply it in equal numbers, and keep it open for a few hours. Then wash it with water and dry the grill completely.
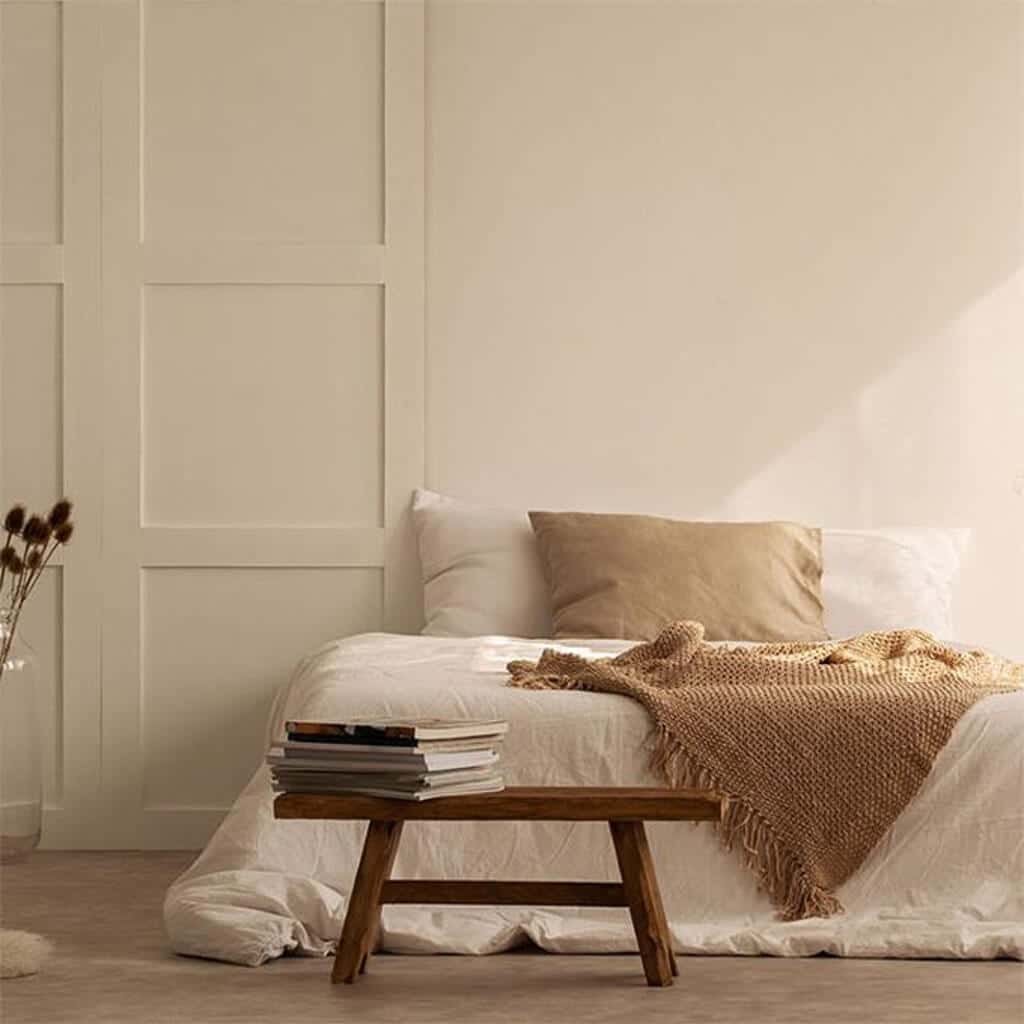
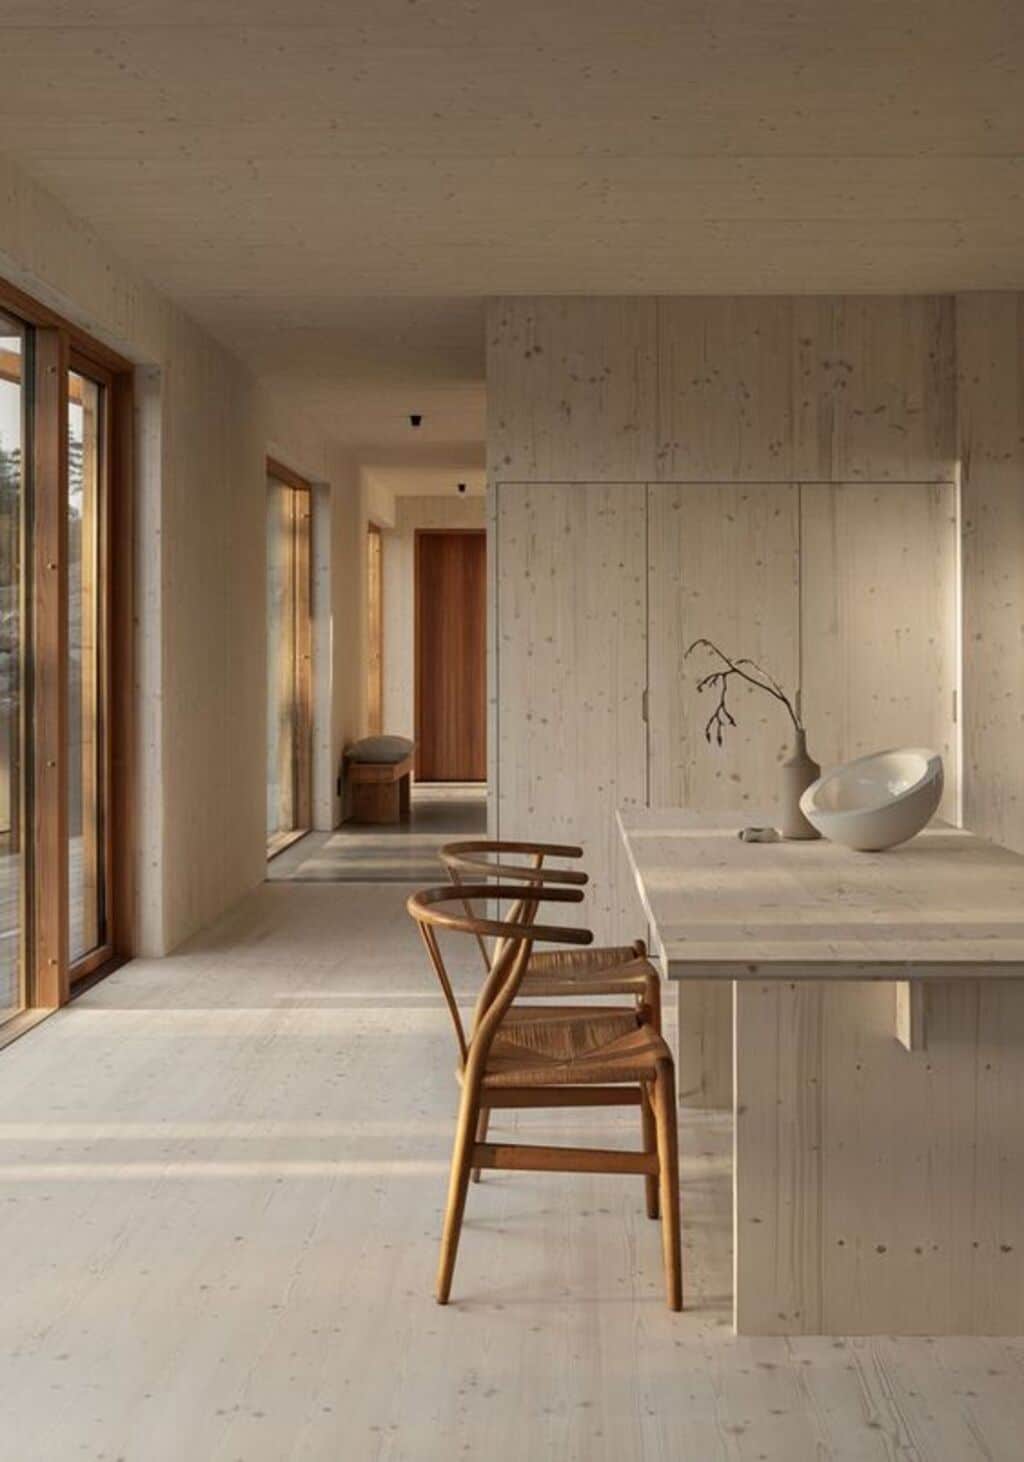
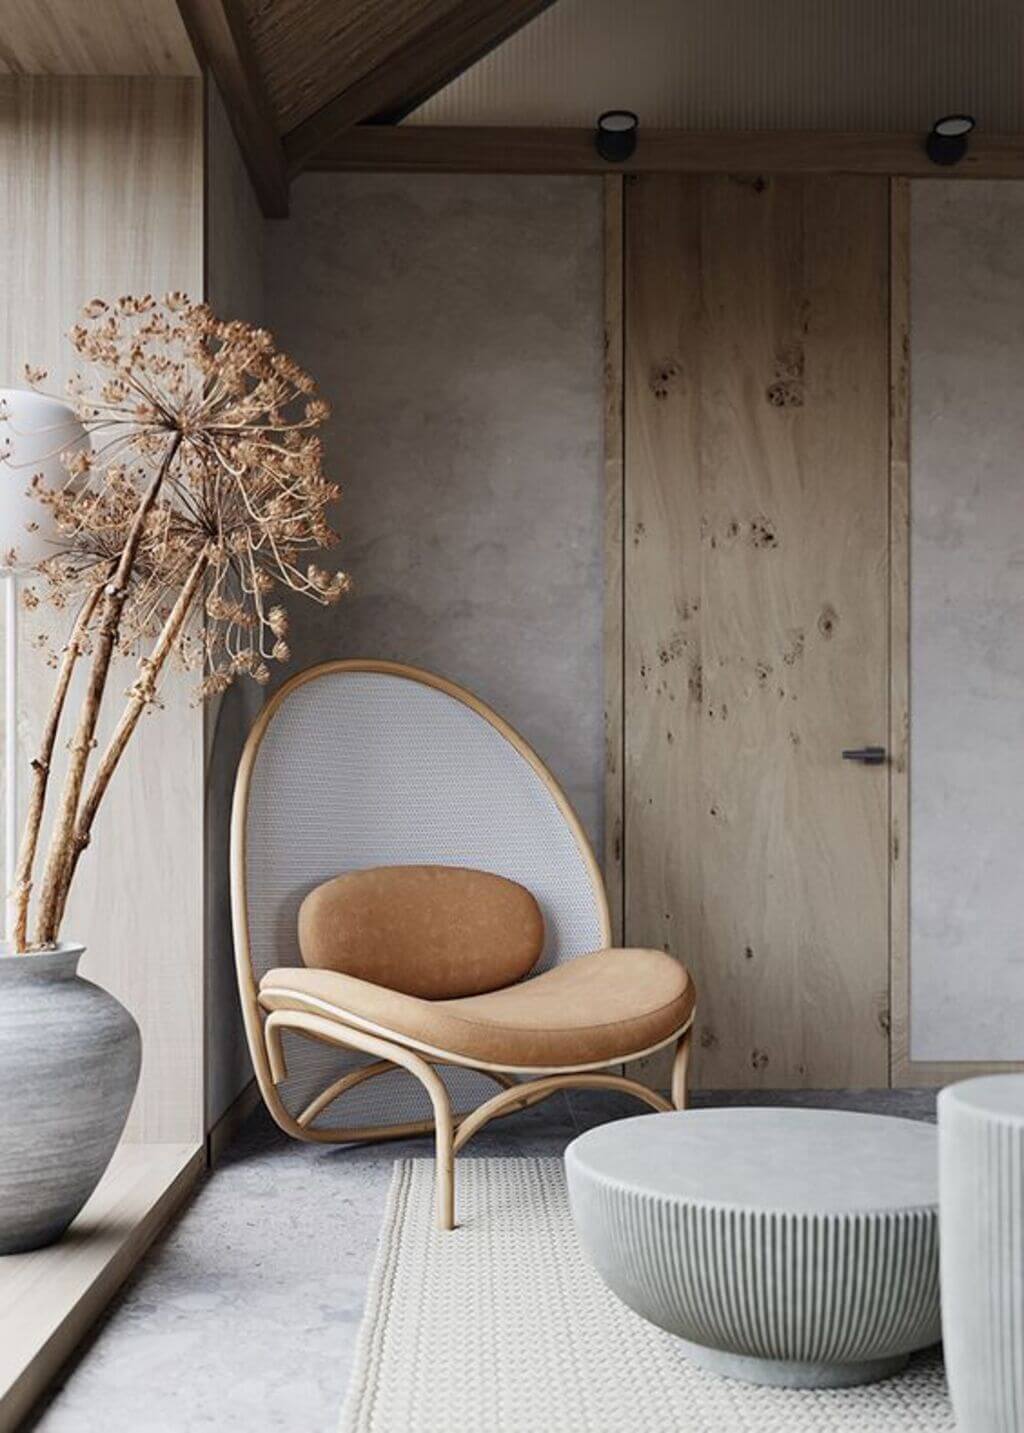
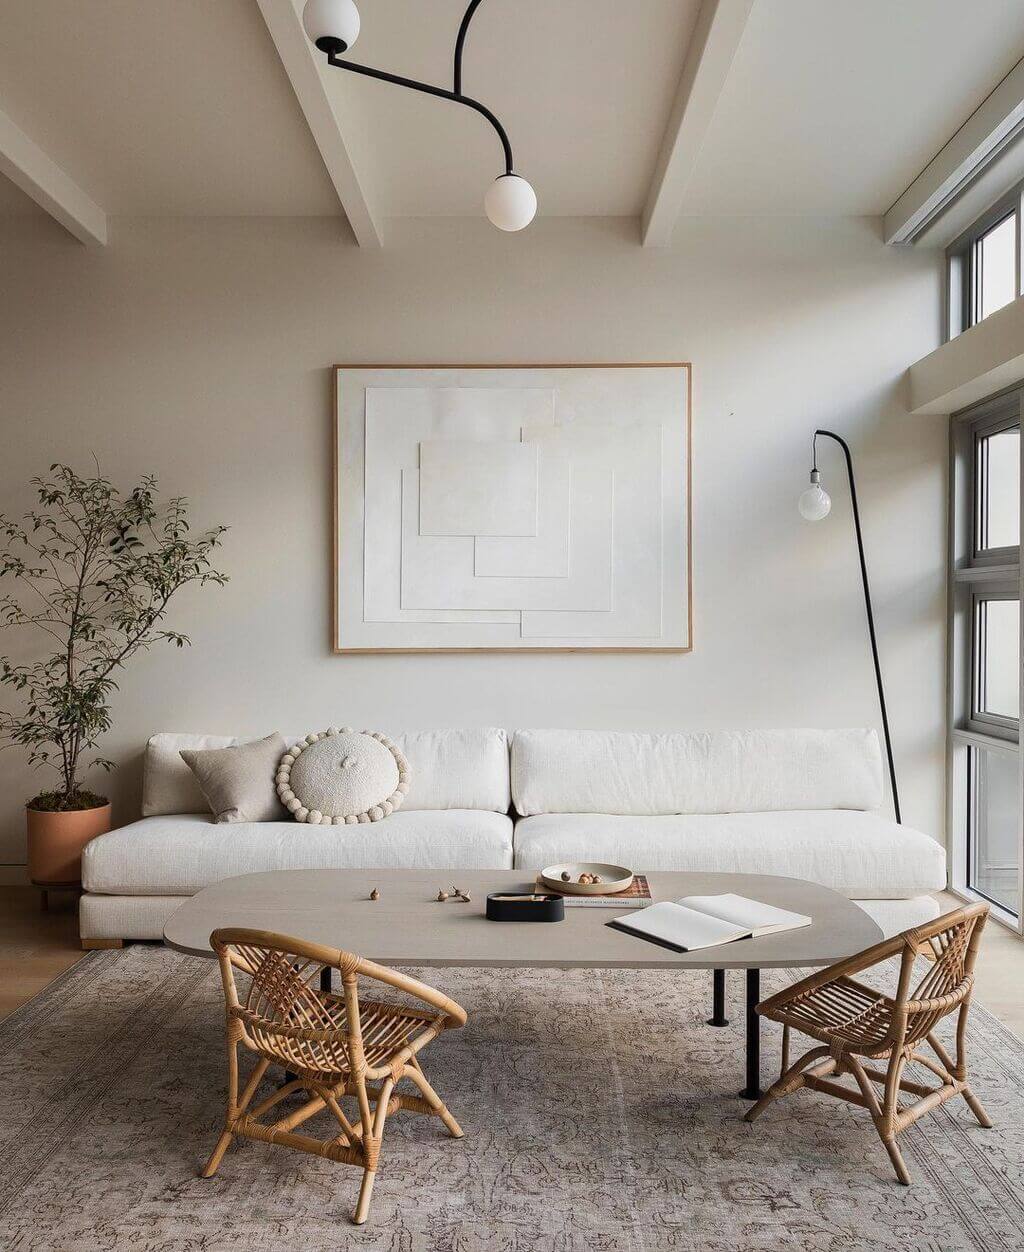
A trend that has become a bit of a buzzword and sensational recently is Japandi Style! You may already have heard from people or read about this popular interior design in our previous blogs about interior design trend predictions for 2022.
It has been quite rare to see Japandi style for more than a year (Japandi interior design 2021). This is because at this time, one decor style can’t stay longer than six months, whereas Japamdi style has been on trend this entire year, and it will be one of the top interior design trends of 2022. Pretty surprising, right?
So, why are people crazy about Japandi Style interiors and decors?
People love this fusion of Japanese minimalism and Scandinavian aesthetics as it offers minimalist yet warm vibes to the place.
Japandi is the fusion of two major interior styles: Japanese minimalism and Scandinavian. This design is about creating a simplistic, classic, and timeless look with a neutral palette and natural Japandi materials.
Another surprising thing about the Japandi style is that the Japanese and Scandinavian styles evolved at different times and are almost 5,000 miles apart, yet people love this fusion because they love the combination of natural light and natural materials.
So if you’re also fascinated by this design and looking for something minimalistic, in a neutral palette, Japandi will be the ideal style for you.
Today in this blog, we’re going to tell you everything about Japandi interior design. From what it is to key elements and how to incorporate them into your home, we’ve covered everything. Keep reading till the end because we’ve also gathered up some of the latest and trendy Japandi interior style ideas for you to get some inspiration.
Let’s start with what the Japandi style is and its key elements.
What is Japandi Style?
“Japandi is the union of modern Japanese and Scandi (Scandinavian) interior design style.”
This hybrid trend combines the modern flair of Scandinavian design with the timeless elegance of Japanese aesthetics, which creates a unique style having the best of both interior designs. This combo of Scandinavian functionality and Japanese rustic minimalism naturally creates a feeling of art, nature, and simplicity.
Japanese elements are known for their warmth and minimalism, and on the other hand, Scandinavian elements have a simple and functional design with interesting contrasts. Japandi Style or Scandi-Japanese style is more focused on warmth, natural elements, clean lines, bright spaces, and muted color palettes. This style is about taking the key features of both types of designs and balancing them together to create a cohesive look.
The Key Elements of Japandi Interior Style
Japandi interior design is aesthetically pleasing, but it is also centered around functionality and an overall minimalist approach. Japandi style consists of clean lines and sharp looks, but it also promotes “Wabi-Sabi.”
Have you heard about this thing before? It is a Japanese concept in which we find beauty in imperfection, rustic elegance, and craftsmanship. These elements are used to create a serene appearance, and they can also be combined with the Scandinavian style.
Let’s see the essentials and key elements of the Japandi interior design 2022:
Clean lines, simple, minimalist designs, and shapes
Emphasis on sustainability & eco-friendly aesthetics
Japandi is heavily focused on simplicity, minimalistic designs that are aesthetically pleasing yet highly functional. If you’re going for this style, use the same elements and try to create a peaceful and warm environment with a minimalist layout.
Japandi design isn’t sparse—it’s intentional!
Minimal colors and materials don’t mean you have limited choice. There are numerous color options, and paint choices are available which well complement Japandi furniture and accessories. Also, brighter colors are infused with calming, tranquil, and peaceful palettes.
Now let’s know Jpandi colors and Japandi materials in detail and learn how you can infuse them in your existing or new home interiors.
Japandi Color Palettes
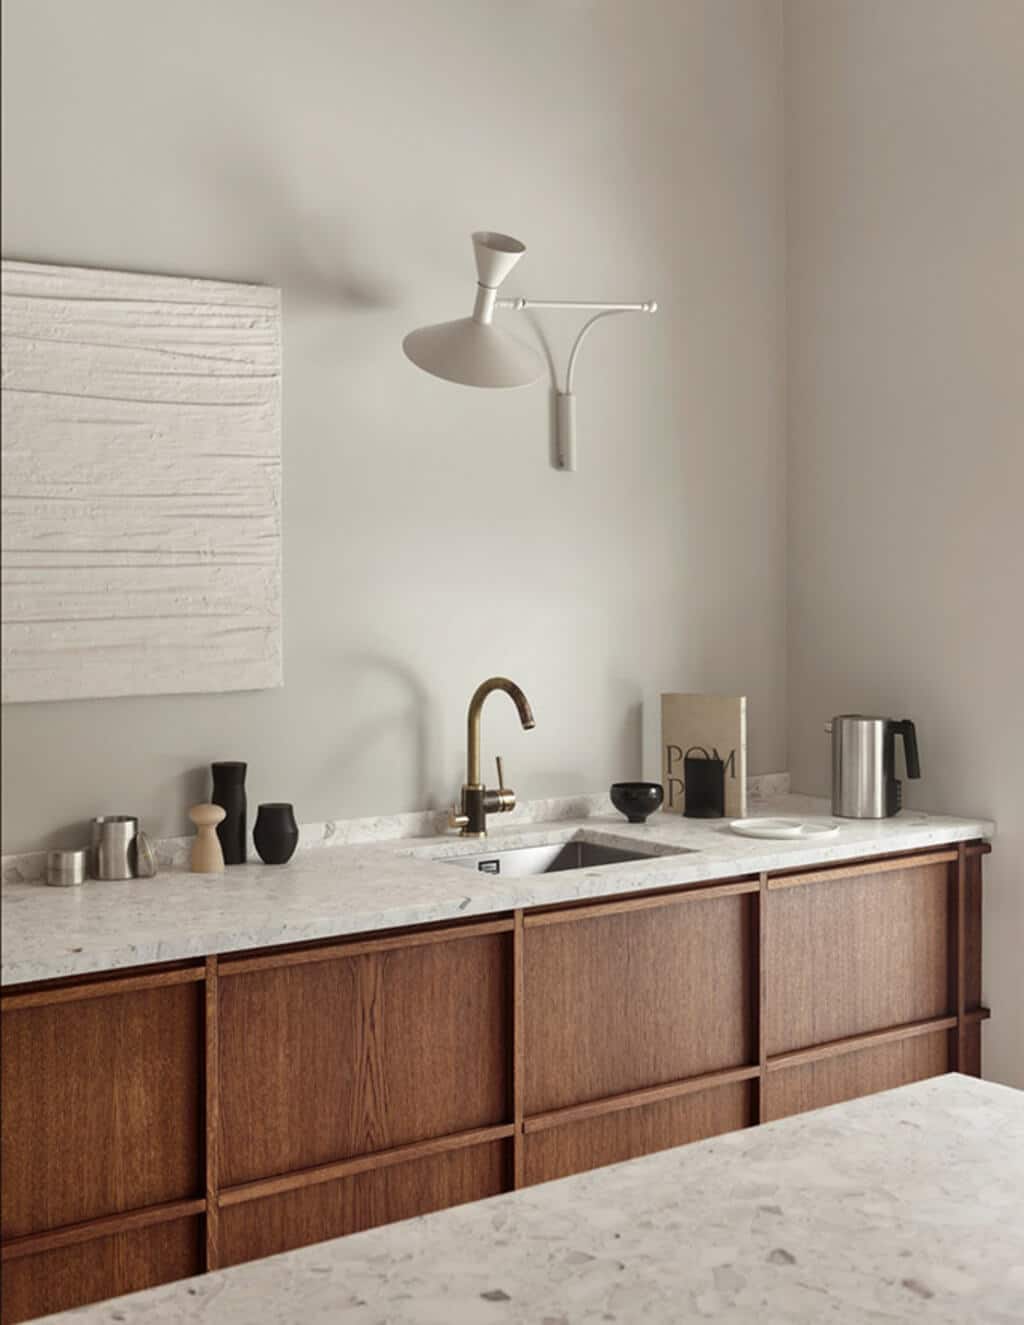
For a perfect Jpandi style room, first, you’ve to select a base for the color palette. You can go with Neutrals! So, instead of all white, go with warmer neutrals like warm white, cream, brown, and beige. They all work great as base colors.
To make the balance between the Japanese and Scandinavian styles, add pops of color throughout your space. You can use shades of blush pink, muted blues and greens, and gray and black for a hint of drama. You can also combine colors like pearl grey, sky blue, a hint of black, pale pink, and natural wood in dark and light shades.
Here are the top 5 colors of the Japandi style:
Soft Neutrals: Warm White or Cream, Ivory, Soft Greys, Blues, and Beiges.
Earth Tones: Muted Shades of Clay, Terracotta, and Taupe.
Warm Wood Grain: Cedar and Red Pine (darker woods) & Oak and Teak (light woods).
Muted Green: Organic Shades of Green, Soft Sage, and Green-grey.
Dark Contrast: Granite, Indigo, and Black.
NOTE:
Make sure that neutrals are in larger amounts and dark contrasting colors are in smaller amounts.
Japandi Materials
Japandi interior design styling includes natural fibers and furniture made from natural materials. You can even use handmade pottery and Japandi decor items. This style perfectly balances natural materials with clean lines, solid muted colors with a strong focus on sustainability and eco-friendly aesthetics. That’s the reason simple natural materials are picked for high quality and open places to get a modern feel.
To style a room with Japandi design, keep these key Japandi materials in mind:
For Furniture:-
Rattan
Wicker
Cane
Wood (walnut, acorn, teak)
Bamboo
Upholstered (linen, cotton, or flax blends)
For Textiles:-
Organic Linen
Organic brushed cotton
Organic cotton muslin
Velvet
For Decor:-
Terra cotta
Clay
Glass
Concrete
Wood
Plants
How to Incorporate Japandi Style Into Your Home
After reading up to here, now you know deeply about Japandi Colors, materials, and key elements. However, still many of you are wondering how to incorporate these elements into your home? Will Japandi Style look good in your interiors?
The answer is yes! This style looks not only great but also quite practical as it works with almost all types of architecture.
These two different designs (Japanese and Scandinavian) complement each other on so many levels. Scandinavian will bring simplicity and coziness through the clean lines of architecture and uncluttered decor, while the Japanese style creates a calming, elegant ambiance with its minimalism.
So let’s see how you can add Japandi Style to various parts of your house, including the bedroom, living space, kitchen, and even bathrooms.
Here are some tips and ideas for you:
Japandi Living Room
When it comes to Japandi style living rooms, there are plenty of modern Japandi design options to choose from. From minimalistic designs to bright and bold decors, you can experiment with the decors and colors. All you need is to be creative!
If your living space is a bit on the larger side, you can go a bit heavier on the darker colors. Suppose your walls have lighter Scandinavian tones, pick the furniture pieces in slightly darker wood or darker fabrics. You can also try the opposite by using darker tones on the wall and lighter Japandi Style furniture and decor. Add a large art piece on the wall or decor piece to create a focal point for the living room. Finally, bring authentic Japandi colors through accessories and textiles.
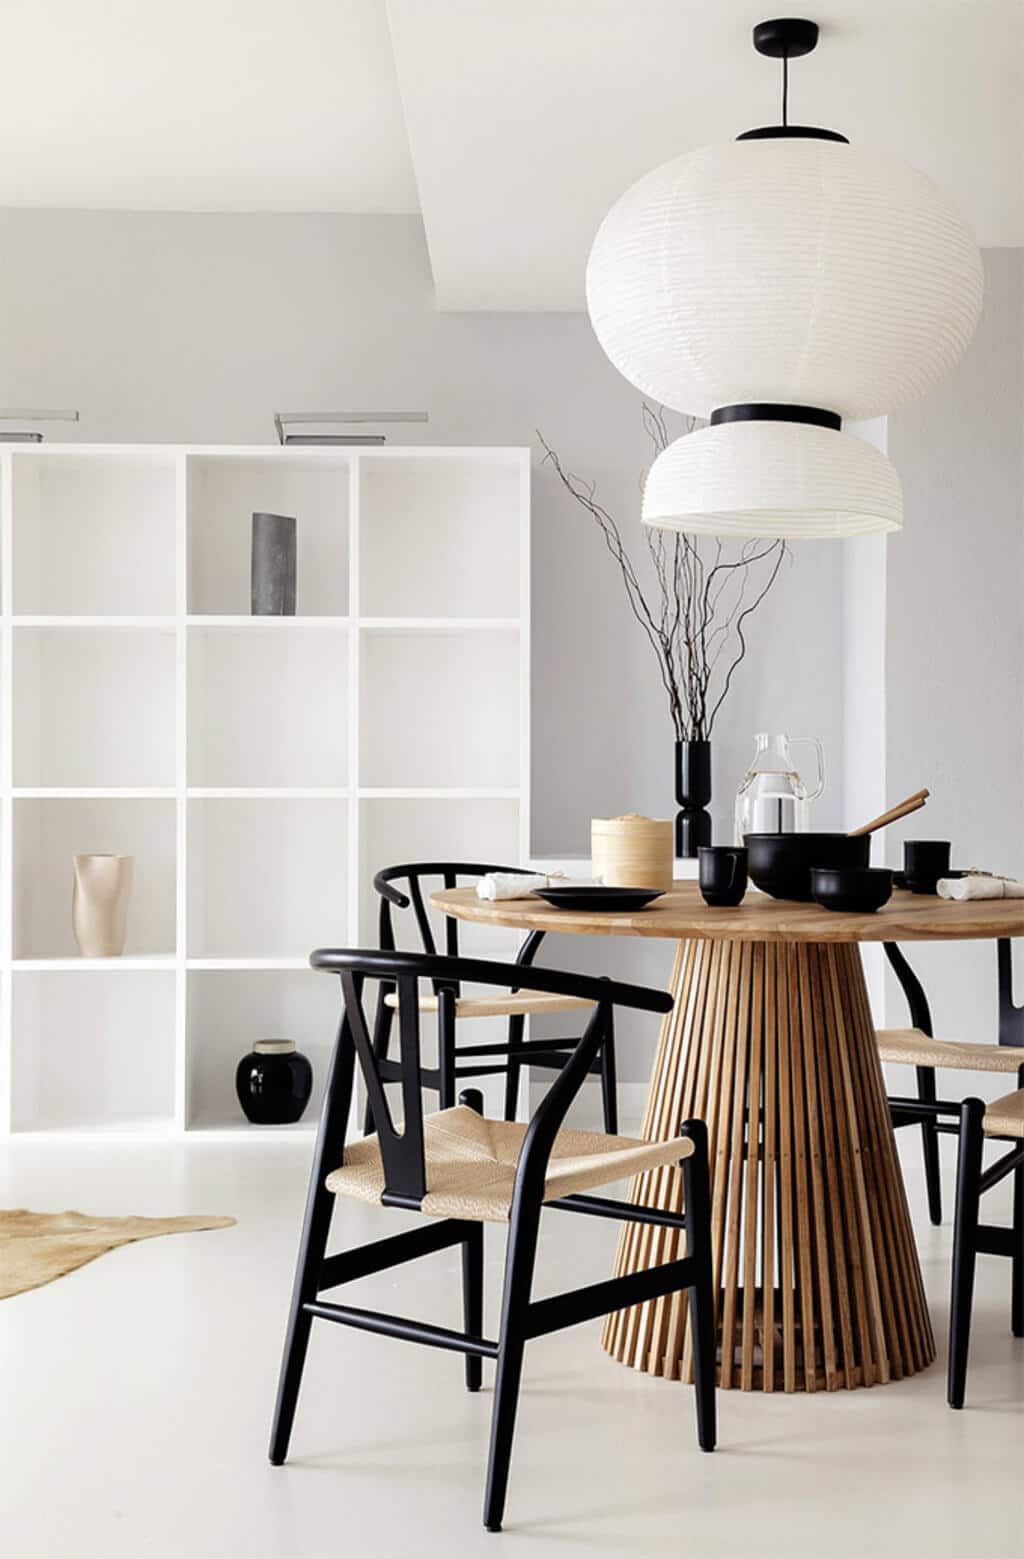
Japandi Kitchen & Dining Room
Kitchen: The center or, more precisely, the heart of the home! This space magnetically attracts people and invites them to have tasty meals together. So to add a bit more energy to this place, all you need is to use various Japandi interior design elements into the dining spaceand kitchen area carefully. This will not only encourage lively conversation but also get people excited about spending time in the space.
Play with darker colors on the walls and balance it out with some contrasting cabinets and furniture. Or, keep your kitchen walls lighter and use dark slate tiles and darker cabinets. This combo will also create a beautifully contrasting yet balanced look. Instead of light tones of wood, go with dark and give a final touch through accessories.
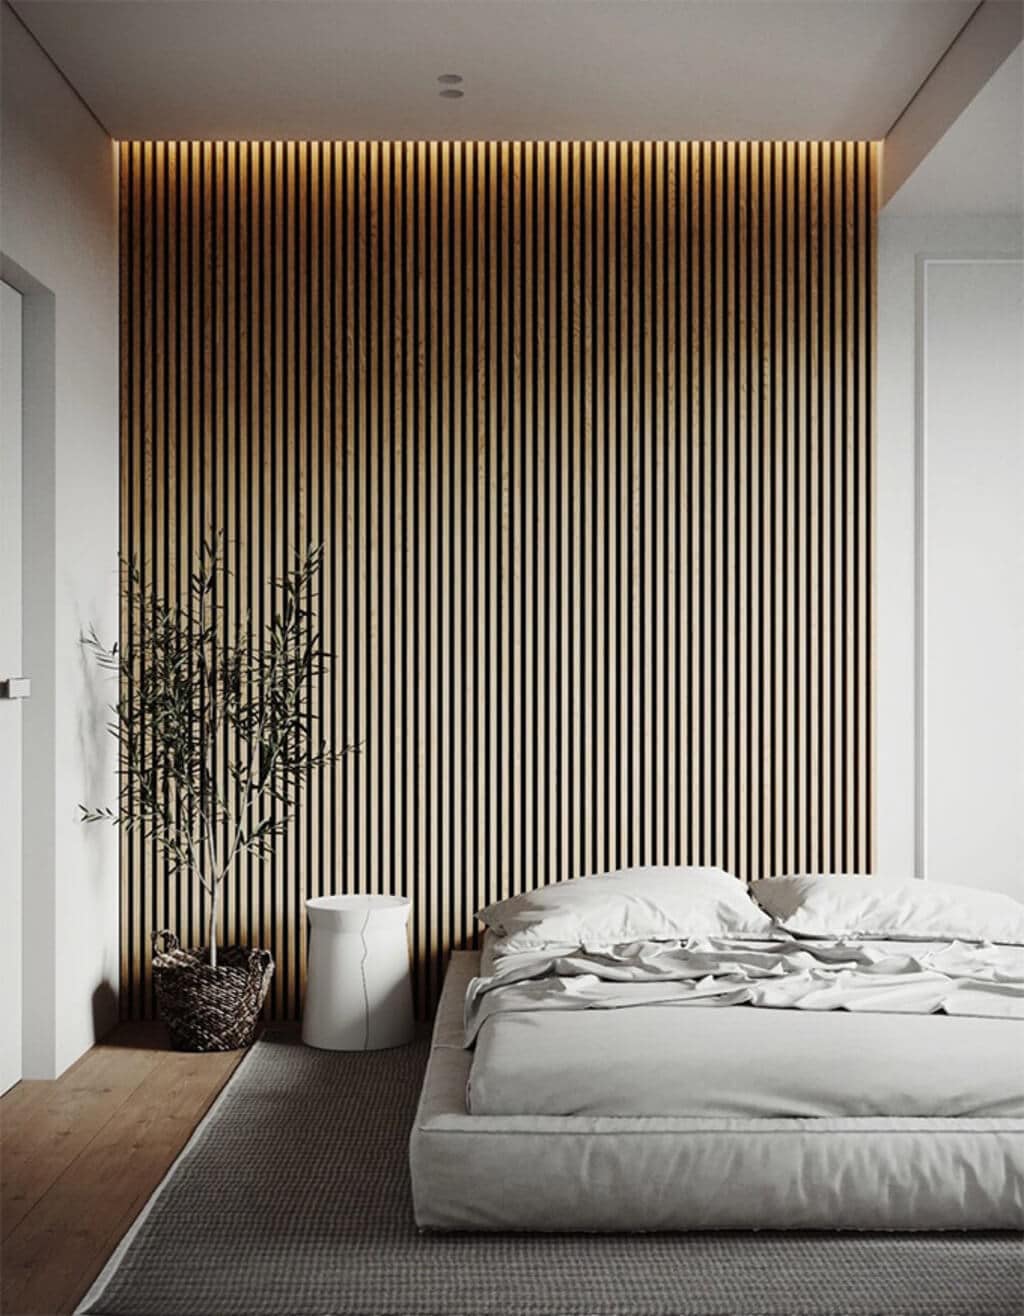
Japandi Bedroom
No matter which part of the globe you live in, your bedroom is the only place where you can relax after a long day. It should always feel like a sanctuary; that’s why Japandi style is perfect for bedrooms! The simple, elegant, and uncluttered style will create a relaxing and soothing atmosphere.
To achieve a Japandi Style bedroom, try to include elements of wabi-sabi through natural fabrics such as washed cotton and wool. You can add accent pieces by including fabrics with rough edges for an interesting and unexpected twist. The only thing you need to remember is to keep the overall theme of your Japandi bedroom design simple and not too busy. For that, go for a warm white, soft muted pink, or gentle beige shades.
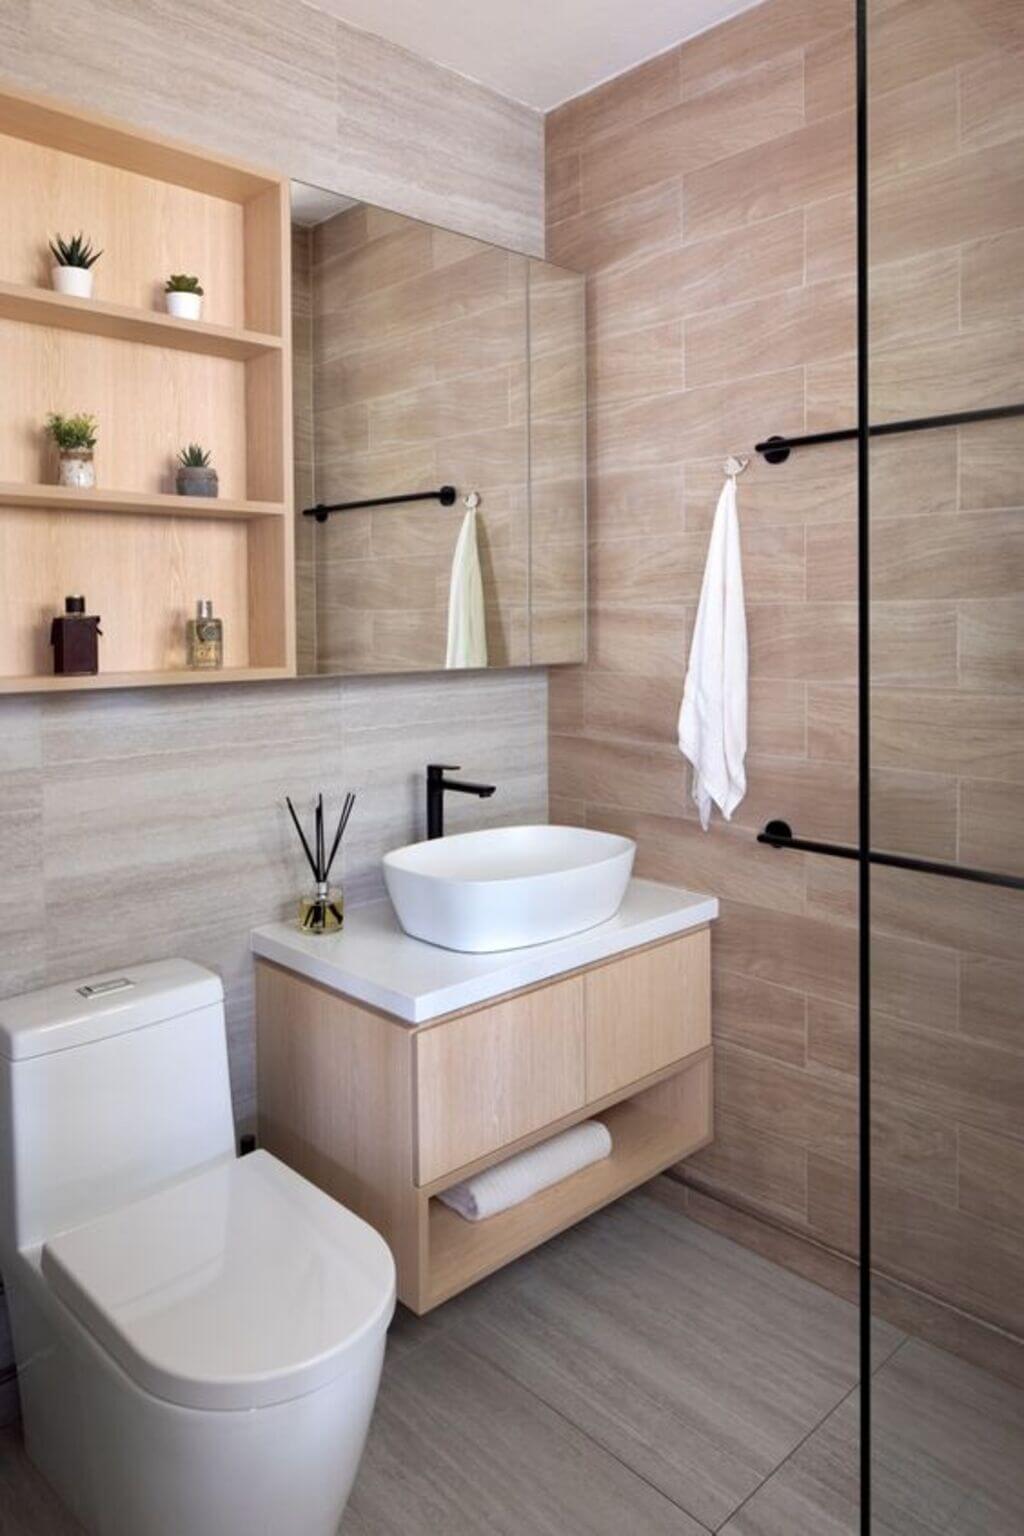
Japandi Bathroom
Yes, you can have gorgeous and relaxing Japandi Style bathrooms! Either go with classic white or lighter walls or have a modern japandi style with darker walls. The modern twist from gray or charcoal walls will give your space a sophisticated feel.
For a final touch, use lighter wood, stone, and crisp white elements. Or go vice versa with light walls and darker wood or tile floors, darker wood cabinets, or darker countertops. Both ways, it will balance and complete the look.
11+ Latest & Modern Japandi Style Ideas For Your Home
One thing you’ll immediately notice whenever you enter a Japandi home is the ambiance. There will be a calm, serene atmosphere in which you’ll be totally submerged. The modern look is created by clean lines, neutral colors, soft lighting.
So how to bring a true authentic Japandi style into your home? How can you recreate that feeling?
If you want to create the same environment and overall look, here are some great Japandi Style home interior designs and ideas for you.
Create Serene Japandi Interiors
Japandi Style is all about natural textures, beautiful details with some of the most delicate shades of colors. From functional furniture pieces to modern decors, there are so many great things about this interior design. With simple things and timeless accessories and following the key elements rules, you can easily recreate this easy-to-live Japanese Scandi fusion.
Remember, there are no limits to your creativity! From solids to small patterns and prints, you can experiment with the Japandi Style without being “too much.”
So, folks, these are all the unmistakable Japandi Styles. I hope this blog will help you to upgrade your house interiors in the serene and tranquil Japandi interiors. If you find this guide helpful and informative, share it with your family and friends and help them create warm and cozy modern Japandi Style interiors.
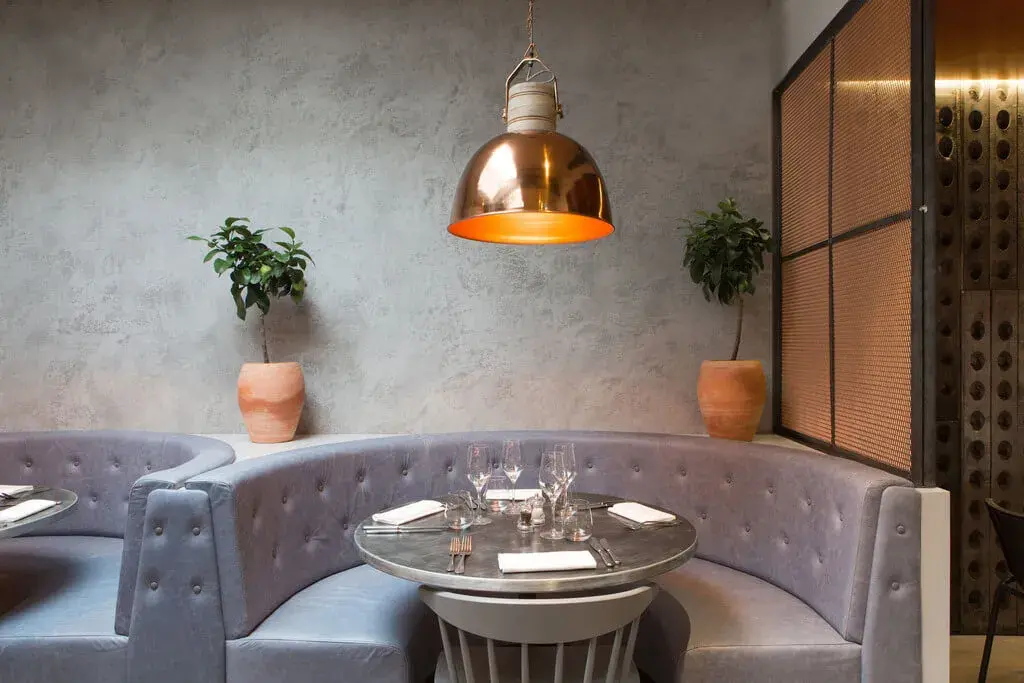
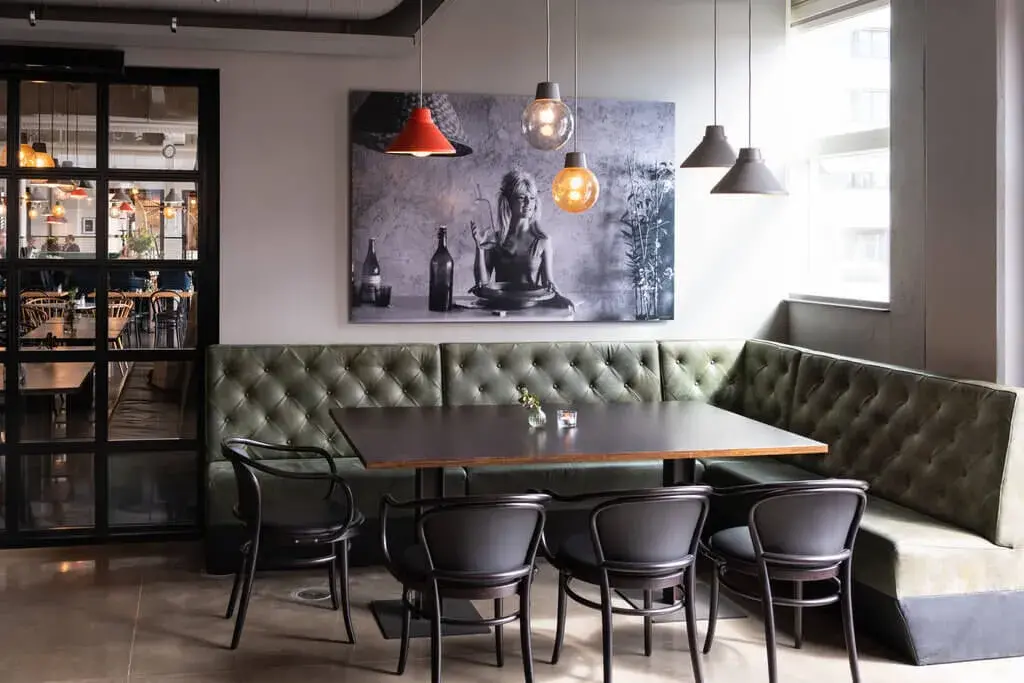
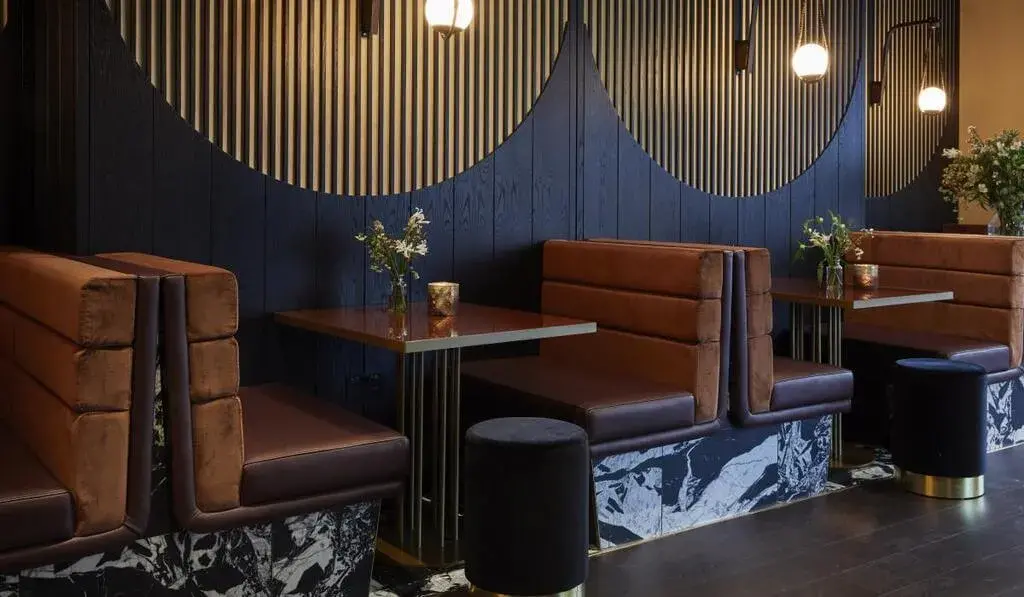
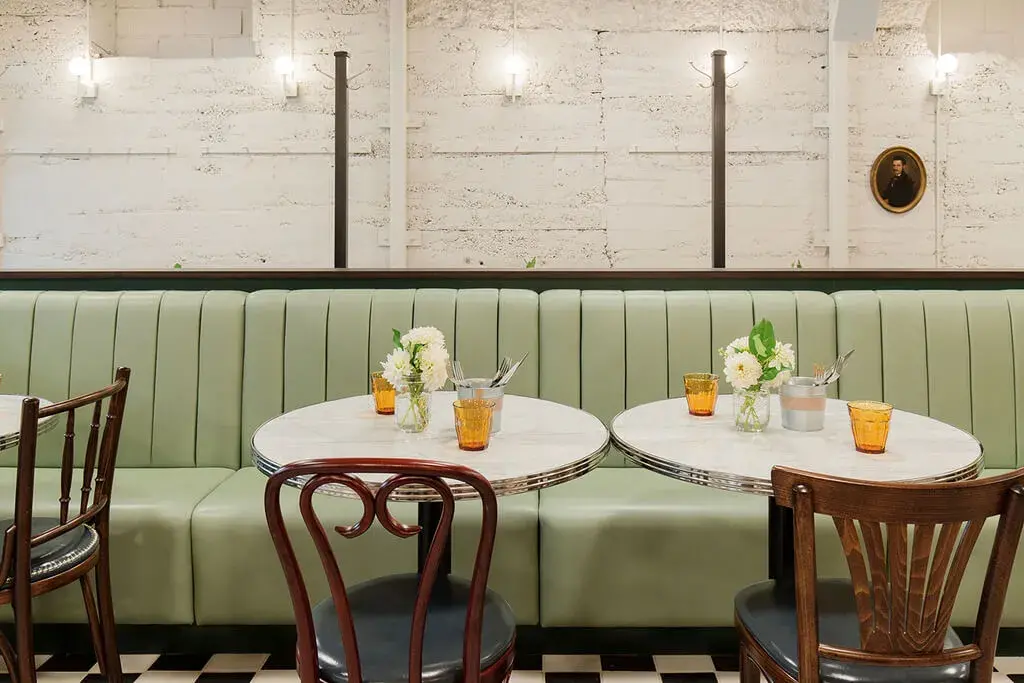
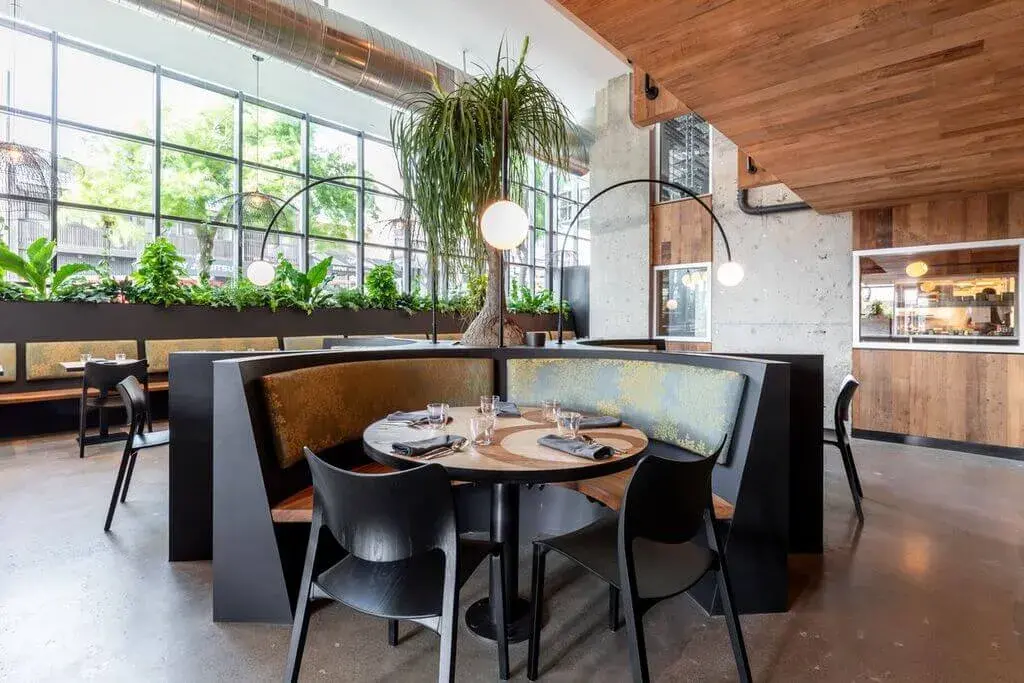
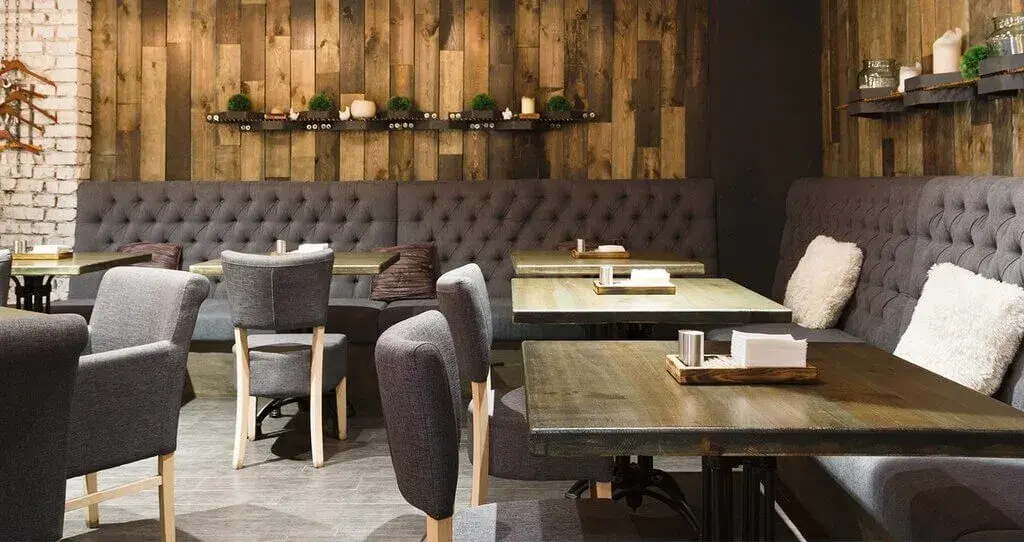
If you own a restaurant, the addition of restaurant booths can make the restaurant attractive. This article will teach you about the things one must consider while buying a restaurant booth.
Restaurant booths are popular configurations for any type of restaurant setup. Whether you own a family or casual restaurant, the restaurant booths can make your aesthetics very appealing.
If you want to renovate your current restaurant or open a new restaurant, the padded seats can make the seating arrangement comfortable for visitors. Due to the importance of the restaurant booth, one needs to be careful in the selection of upholstered restaurant booths.
What Is Booth Seating?
Before we move to the considerations, it is also important to know what Booth seating is, so we will also understand what it exactly is.
Booths are made of 1 or more banquettes to make a comfortable and intimate seating arrangement. A booth with a face-to-face, horseshoe, or U-configuration is created by several banquette seats and is kept back-to-back to arrange more seating in the restaurant.
The intimate setup of the booths encourages privacy and is thus perfect for a small group of people who want to enjoy their personal time and not in a loud environment.
Important Things to Consider While Choosing the Restaurant Booths
1. Quality
Quality should be your top-most priority while selecting restaurant booths. The quality must not be compromised, even if you get a low price. The booths are there for customers, and if the quality of the booth is not good, it will directly affect customer experience and your business.
Many dealers will offer you the booths at a low price, but their quality will not be at all up-to-mark. Thus, it is important to go for quality rather than just looking at the price of the booth. The best you can do is to look for the perfect combination of cost and quality.
2. Restaurant Size
If you are buying restaurant booths, you need to ensure that it does not affect the walking space in the restaurant. So, if the restaurant is small, you must prefer buying the mural booths as it will eliminate the chances of collusion of people working there. Thus, do consider the size of the restaurant when you go to buy the restaurant booths.
3. Material of the Restaurant Booth
You can select the material of the restaurant booth as per the atmosphere you want to create in your restaurant. You can choose from the below-mentioned materials:
Wooden: Wood is a traditional and old material that gives things a rustic, modern appearance. However, one needs to be careful with the wood for spillage.
Upholstered restaurant booths: The soft upholstered restaurant booths will be a comfortable dining experience for the guests. Solid foam is more affordable, although spring foam makes entering and exiting the booth simple.
Laminate restaurant booths:The laminated restaurant booths are easy to clean and are best in terms of comfort and elegance. The natural appearance and neutral tone of the laminate restaurant booths can complement any restaurant’s interior design.
4. The Theme of the Restaurant
You should keep the restaurant’s theme in mind when buying the restaurant booth. One must not choose the restaurant booth just based on its color; you should buy one that goes well with the restaurant’s theme.
When you buy the booth as per the theme of your restaurant, then it will elevate the entire look of your restaurant. So, apart from comfort, you will also get an amazing look due to the restaurant booths.
5. Shape
The shape of the restaurant booth is another consideration while buying the restaurant booth. These booths come in a variety of designs, dimensions, and styles. If you select the semicircle-shaped booth, it may fit more people in the limited area. People can easily enter and exit the place as a result.
FAQs
1. How Tall Are The Restaurant Booths?
The height of the booths in restaurants is typically 48 inches. It is also available in lengths between 36 and 52 inches.
2. What Are the Common Shapes of the Restaurant Booths?
The most popular type of booth is a double one because they take up more room in a restaurant’s Design
3. What Colors Are Available in the Restaurant Booths?
One can get the restaurant booths in any color. There is a wide range of collections available.
Final Thoughts
At last, we would say that the restaurant booths can be a good seating option for the customers. However, one needs to choose the right booth for your restaurant; the points we have mentioned will help you choose the right one.