Home Blog Page 75

Top 20 Kitchen Cabinet Hardware Ideas You Can Easily Recreate

0
Kitchen Cabinet Hardware Idea

You can restyle your kitchen easily and affordably by changing up your kitchen hardware without getting too involved in major changes. This is the type of detail that can completely transform your place, giving it a distinctive appearance. Kitchen hardware comes in many different types for cabinets and drawers. Choosing the right hardware requires consideration of both its appearance and functionality.

Tips for Kitchen Cabinet Hardware

Tips for Kitchen Cabinet Hardware

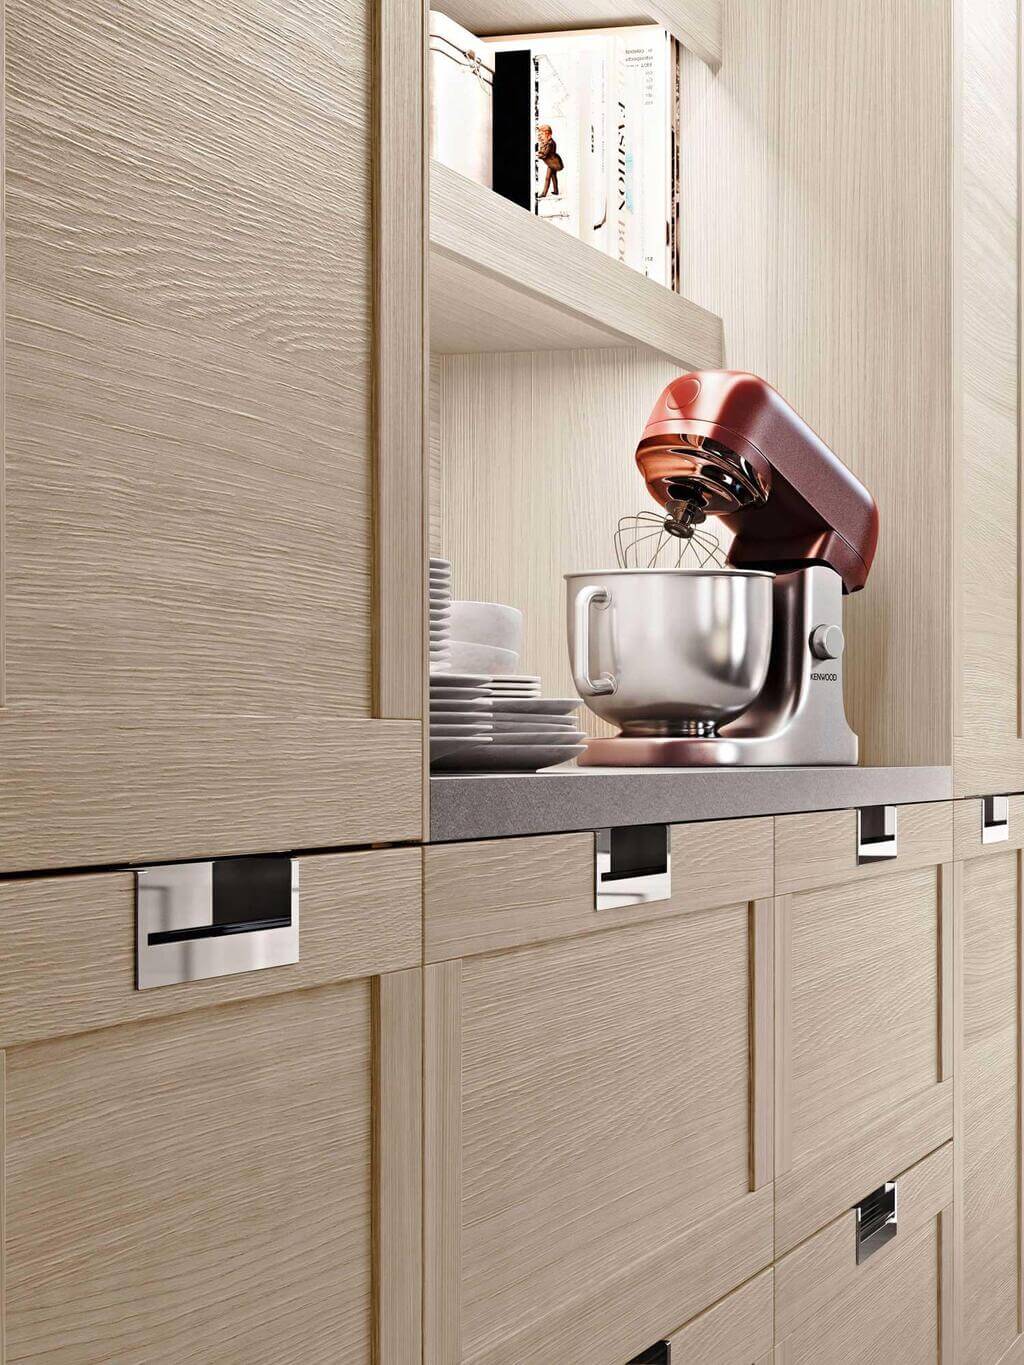
Textured Hardware: The combination of aesthetics and contemporary style can be achieved by adding textured knobs to your kitchen cabinet.

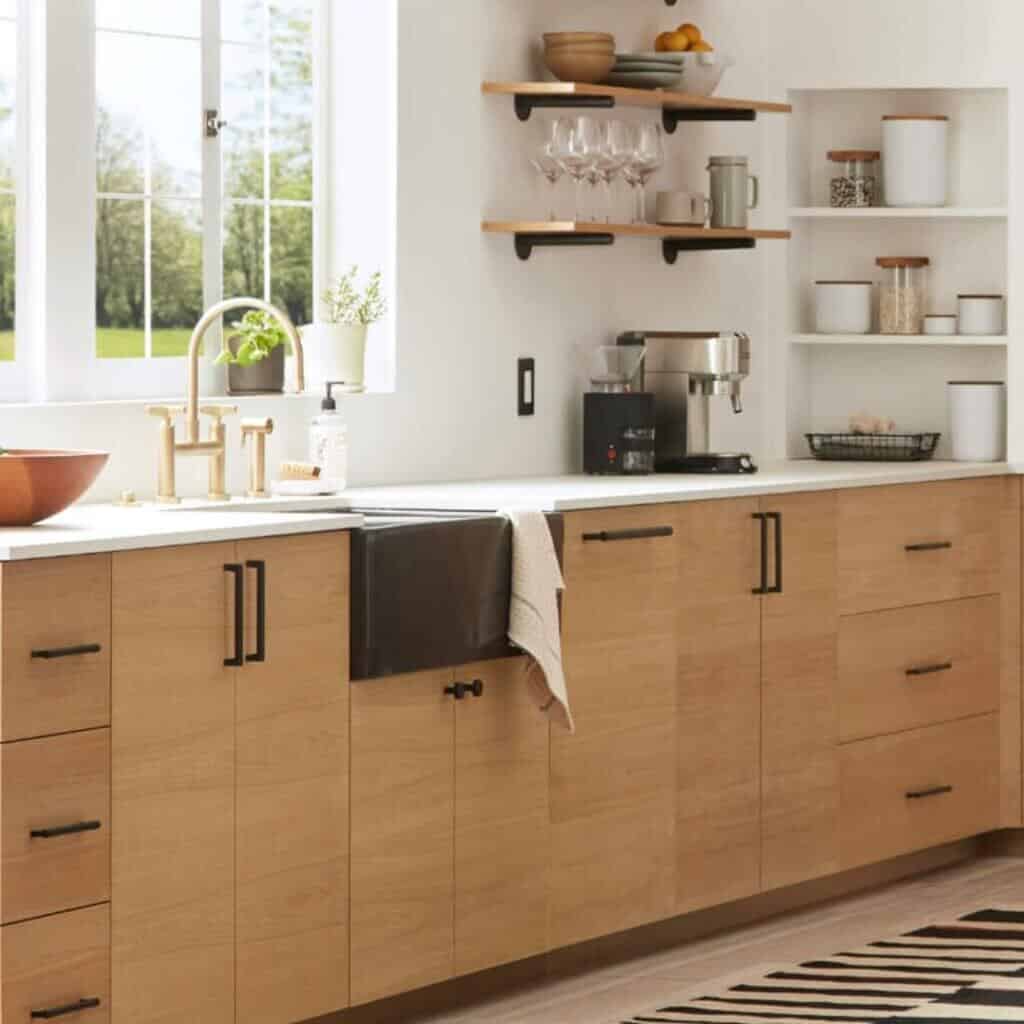
Recessed Pulls: Keeping your kitchen minimalistic with recessed pulls gives it the perfect blend of rustic and modern.

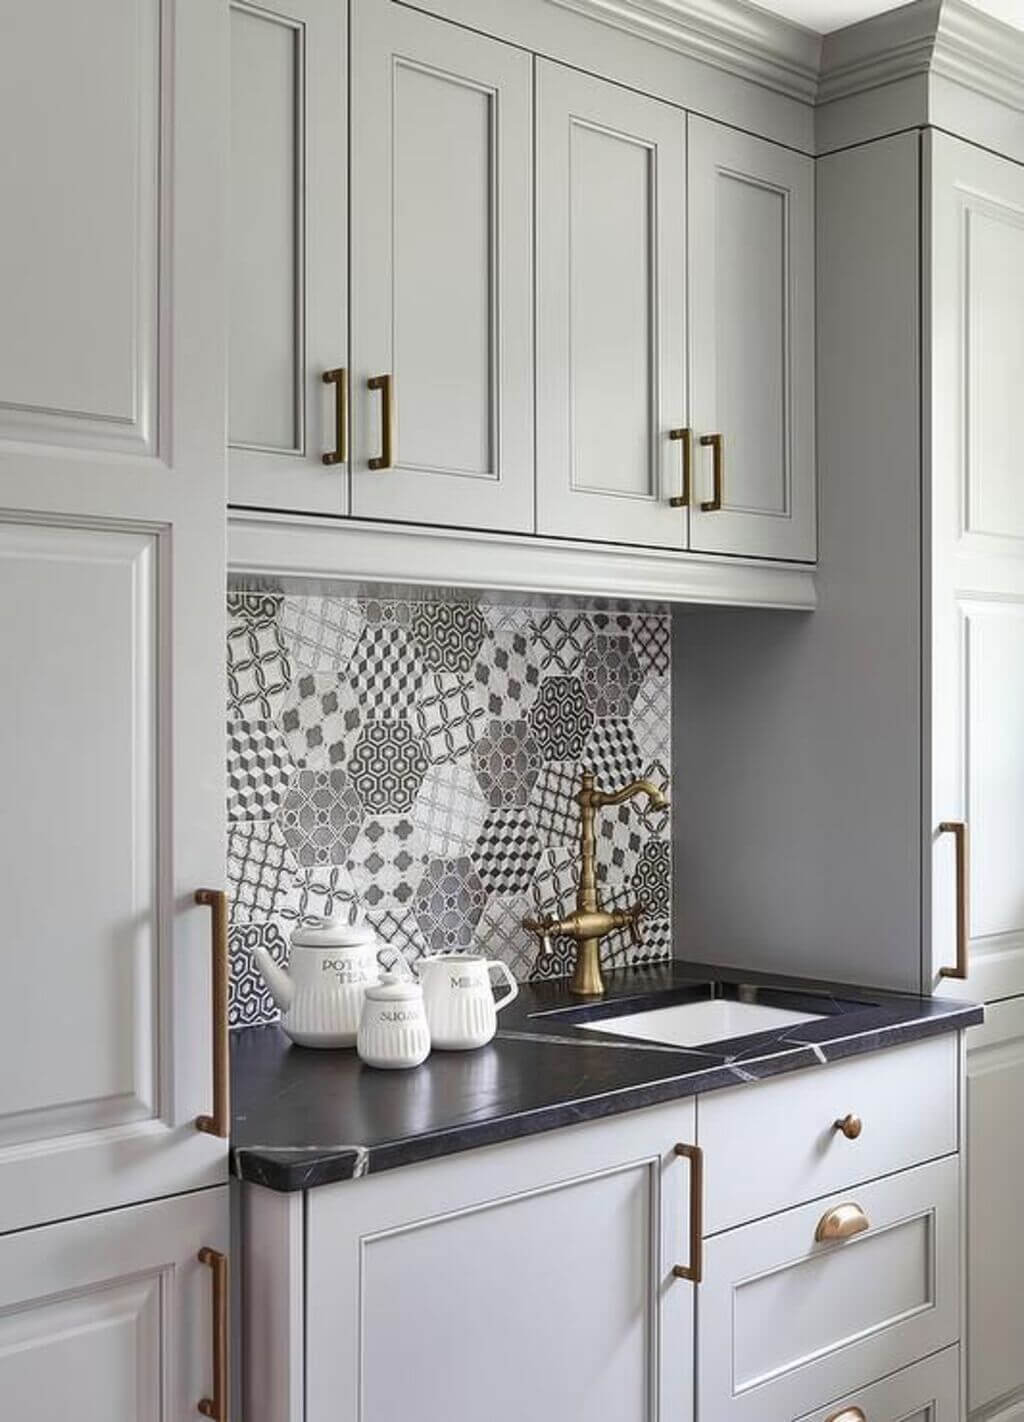
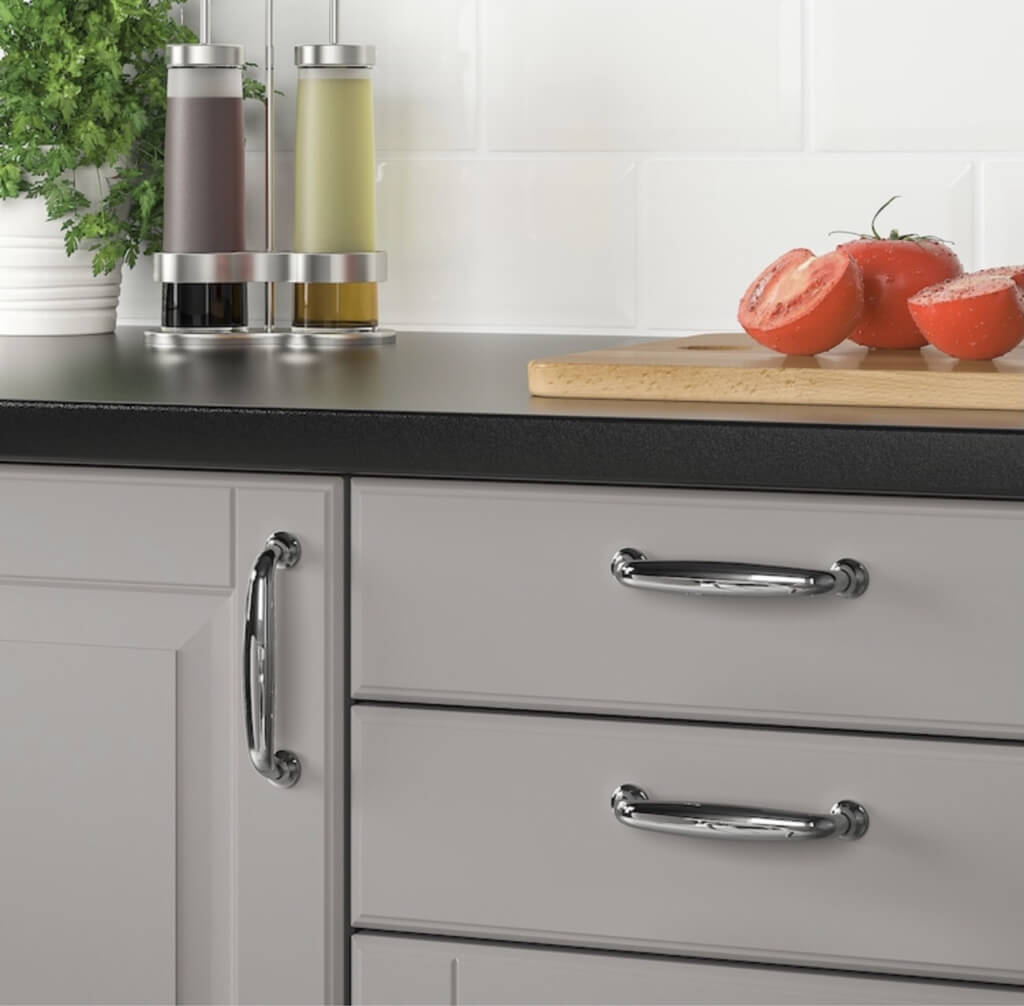
Vintage Bar Pulls: These pulls are ideal for classic kitchens and shaker cabinets as they add a touch of vintage charm.

Minimalist Oversized Pulls: This type of drawer pull is perfect for vertical cabinets or drawers. It is easy to integrate them seamlessly into any kitchen design, whether it is modern or classic.

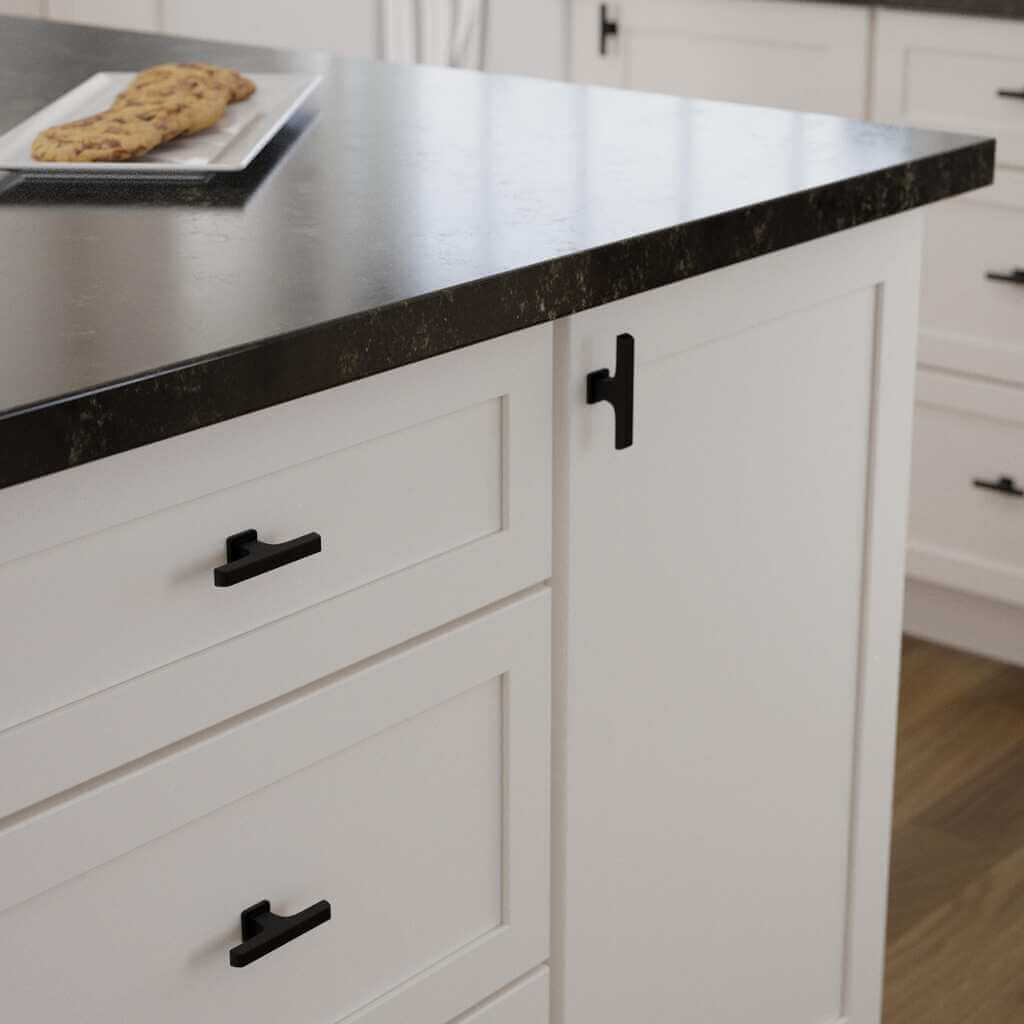
Matte Black Finish: This contemporary finish gives endless versatility to your kitchen hardware.

Here is a collection of 20 hardware ideas that can transform the look of your kitchen cabinet.

1. Curved Brass Pulls

Curved Brass Pulls

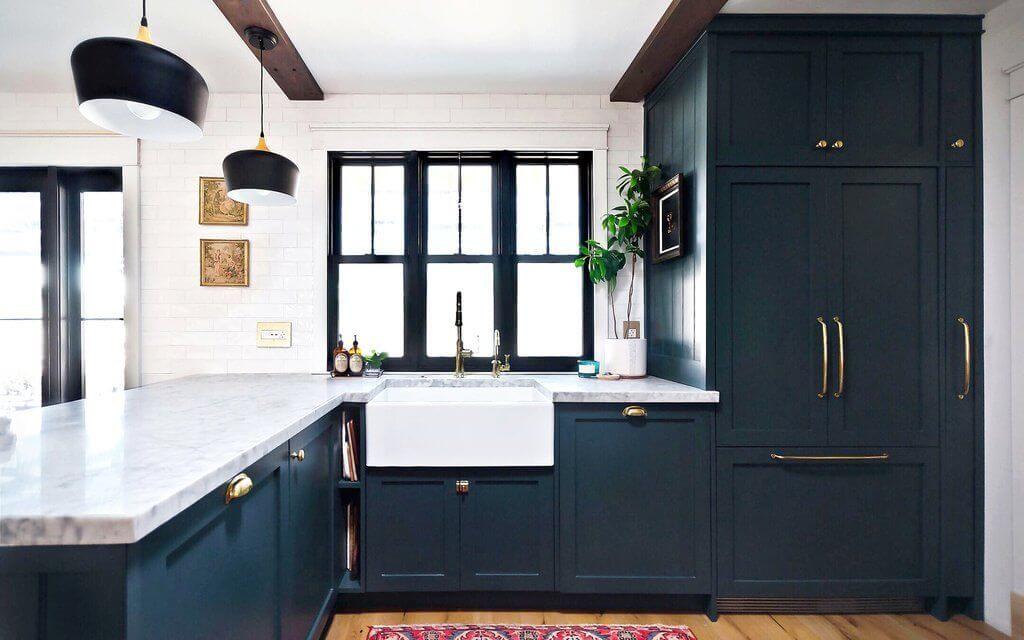
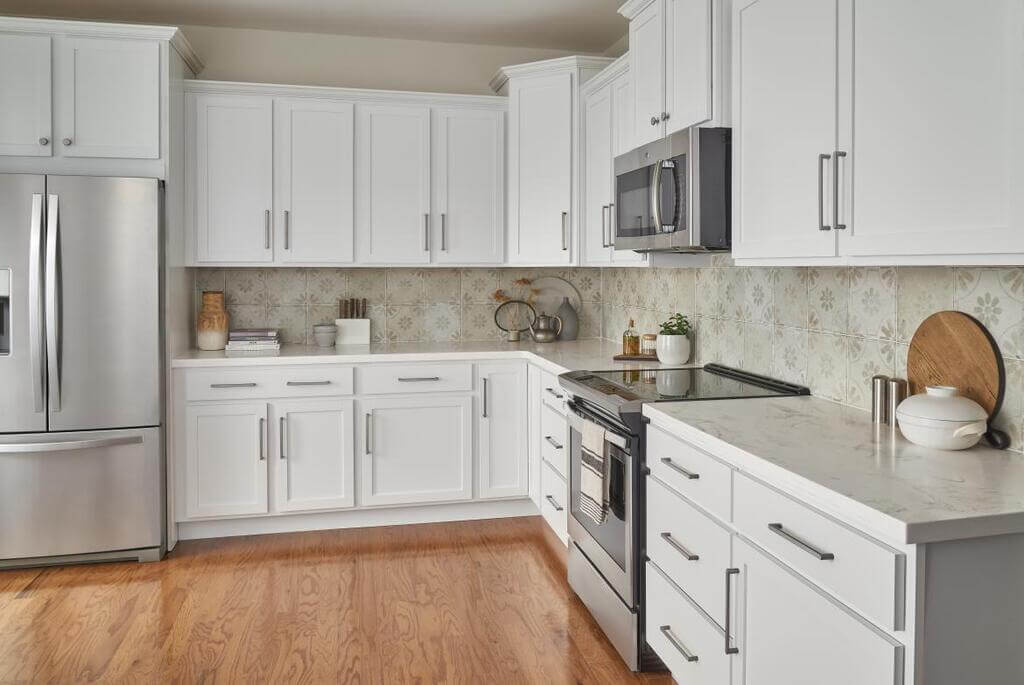
A kitchen cabinet decorated with brass adds a touch of elegance. Brass pulls look best when attached to neutral colours such as white, black, or charcoal. The colour adds just the right amount of warmth to your space.

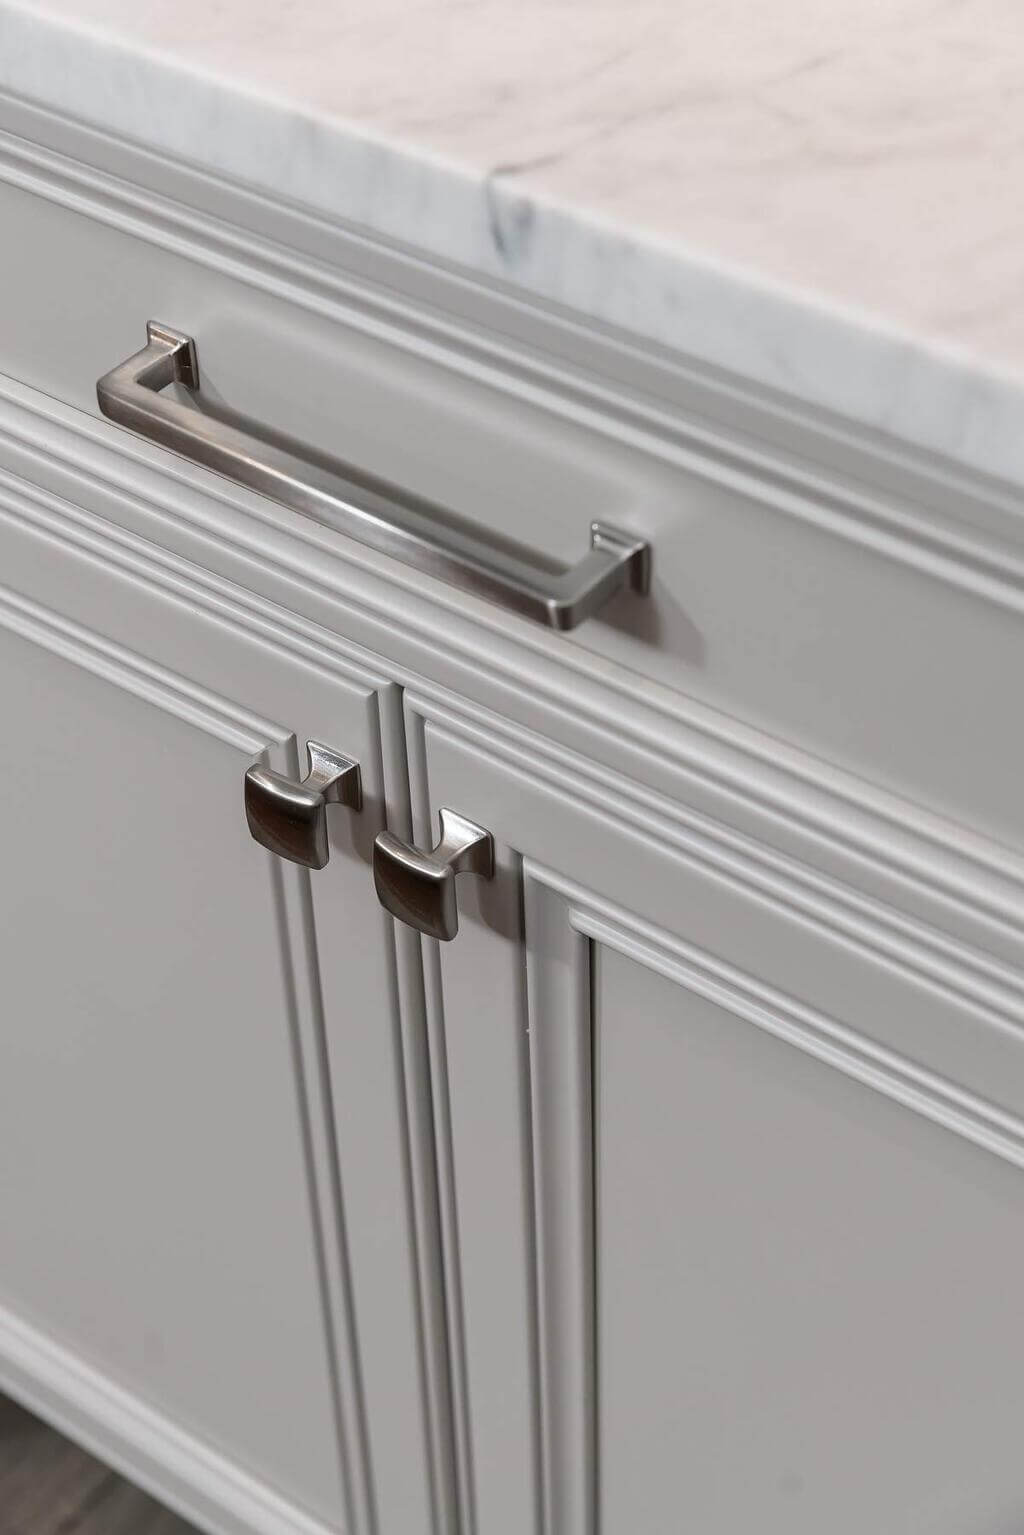
2. Embellished Metal Handles

Embellished Metal Handles

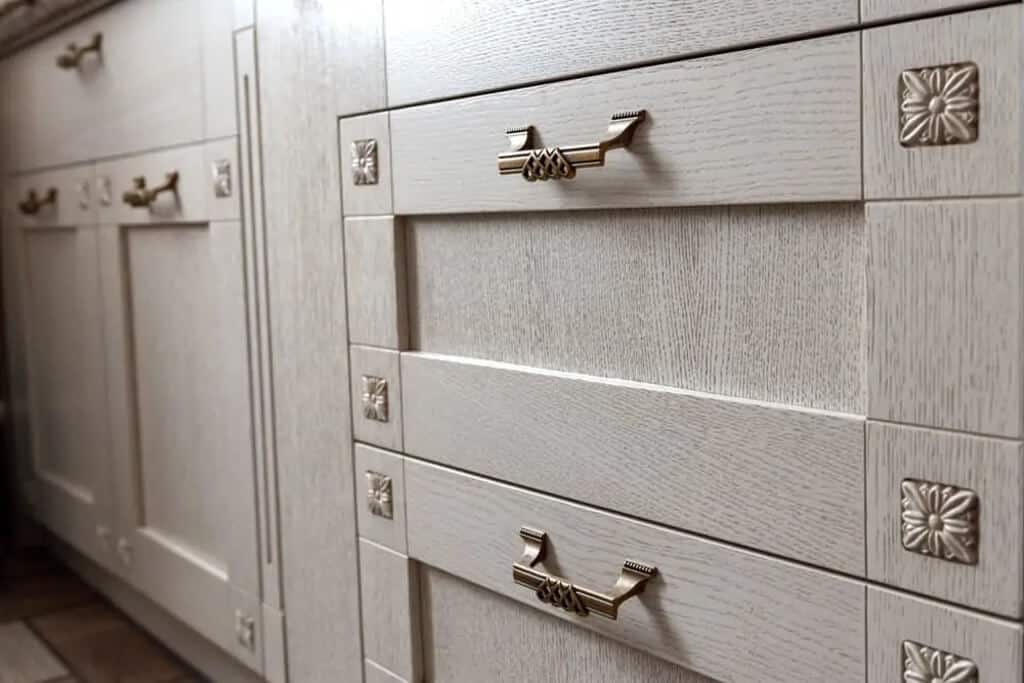
Embellished metal handles are a great option if you want your kitchen hardware to look more elegant. This handle combines the utility of a traditional handle with the luxury of an elegant design for an elegant appearance. Placing them in decorative drawers will add depth to your kitchen’s design. 
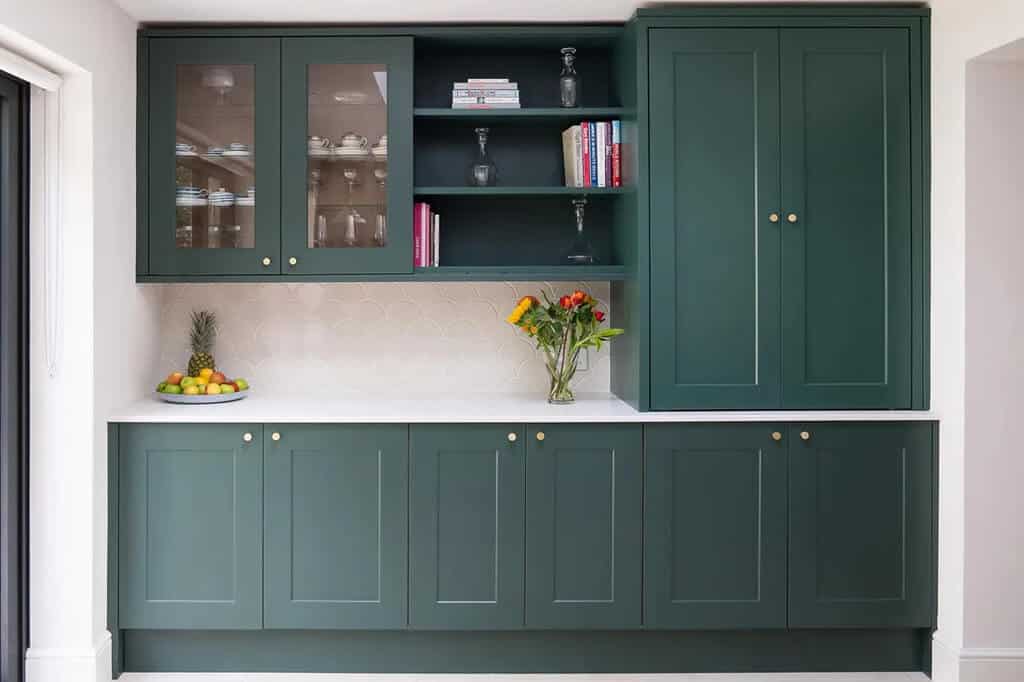
3. Brass Knobs

Brass Knobs

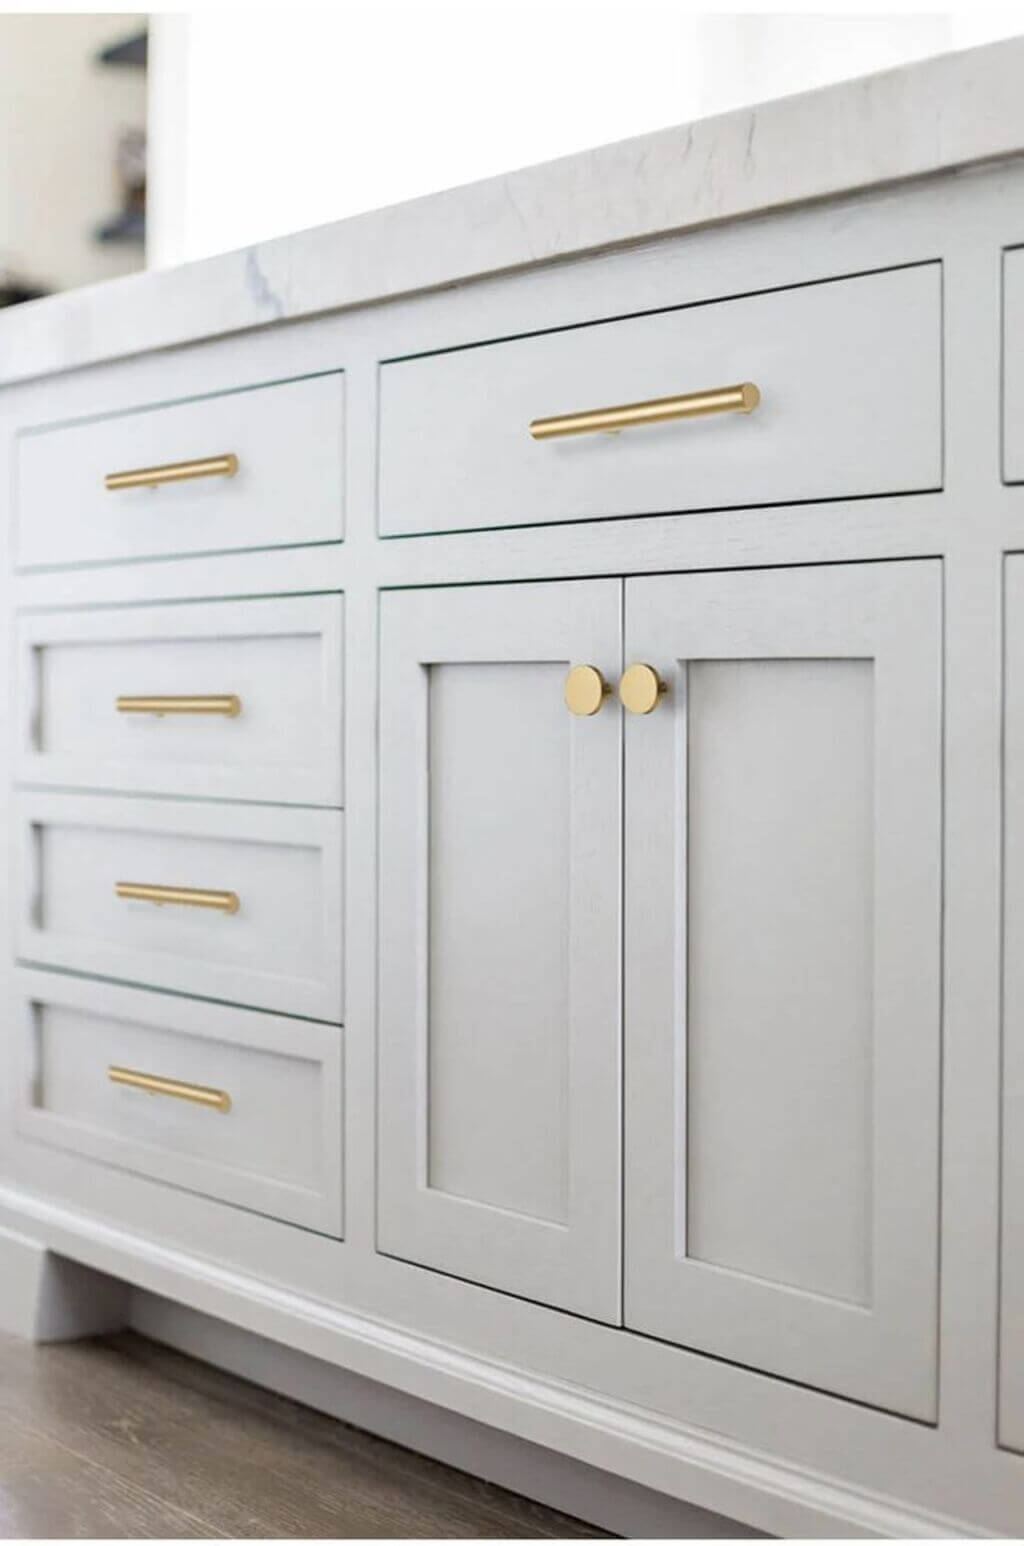
The shiny, rusty-gold metal is a popular choice for budget-friendly kitchen knobs. It is the ideal type of hardware for sleek, contemporary kitchens. Moreover, it is very easy to use and maintain, so it can be used for a long time.

4. Brushed Copper Pulls

Brushed Copper Pulls

The warm, earthy texture of copper can be used to enhance a rustic kitchen space. Embrace the modern design aesthetics with copper hardware for your kitchen cabinet. There is also a good aesthetic match between copper pulls and white furniture.

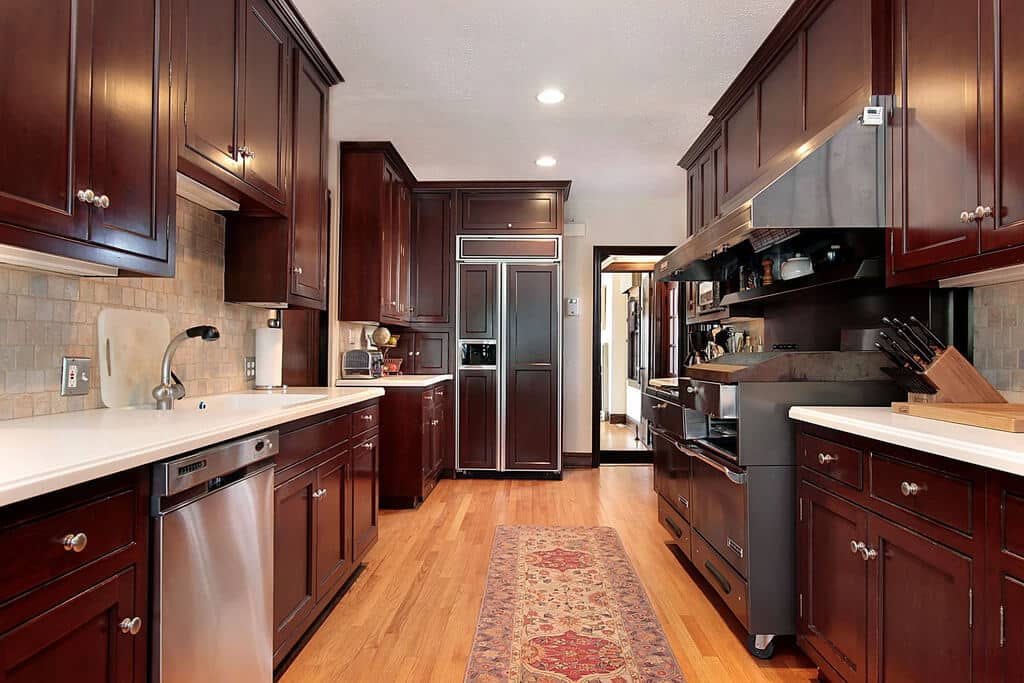
5. Brushed Nickel Knobs

Brushed Nickel Knobs

Kitchen with natural materials like wood and concrete look great with brushed nickel knobs. It is ideal for designing an industrial-style kitchen. With its modern look and durable design, it can be used to modernise any kitchen.

6. Brushed Nickel Handles

Brushed Nickel Handles

Nickel’s durability makes it a highly useful metal. An elegant look can be created with rectangular brushed nickel handles. Modern styles emphasise clean, geometrical lines with shiny surfaces which can be achieved through it.
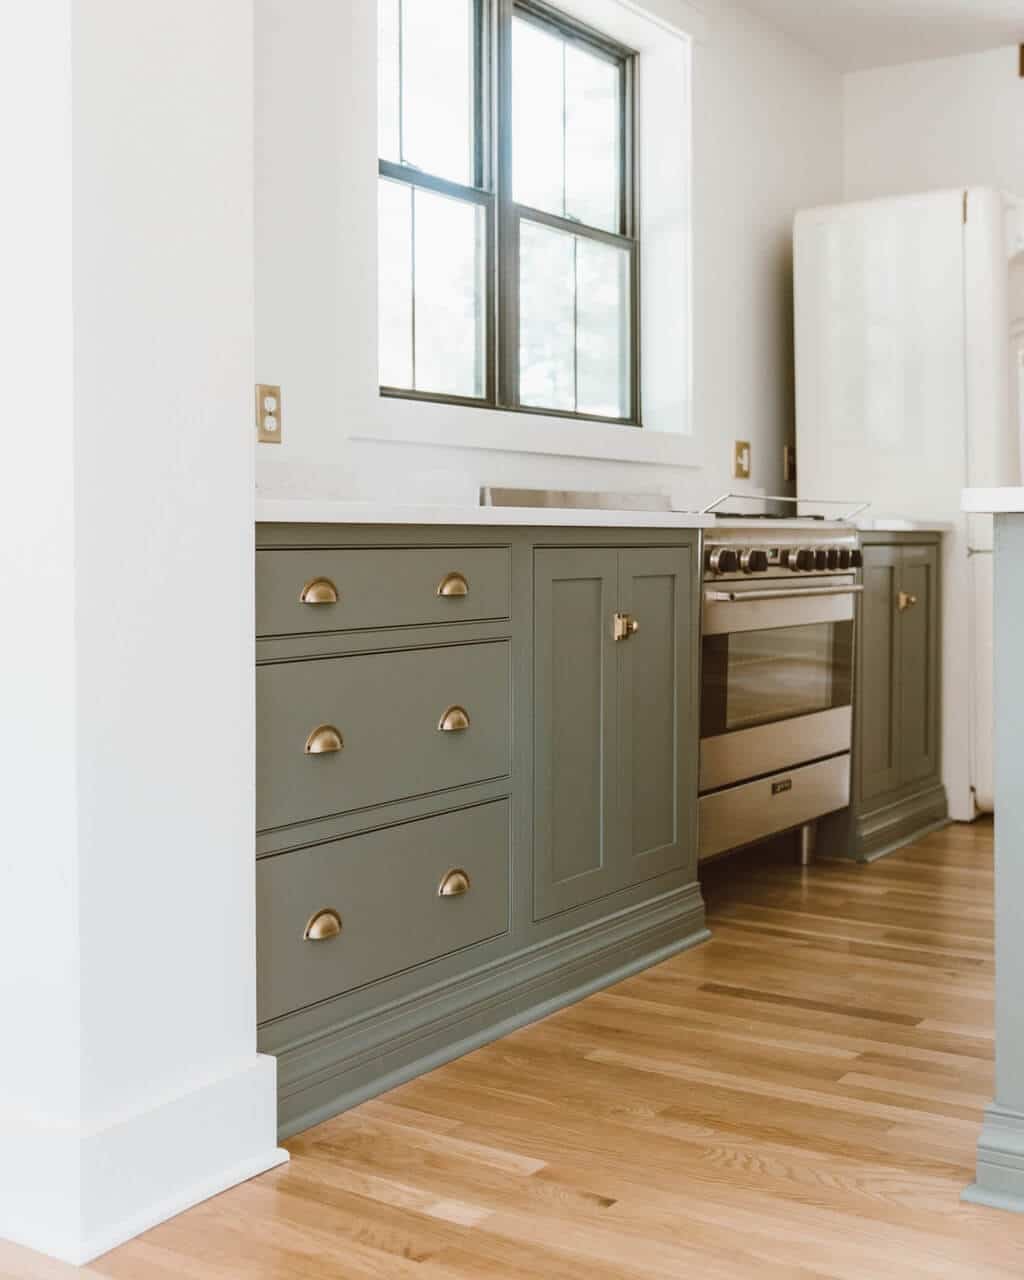
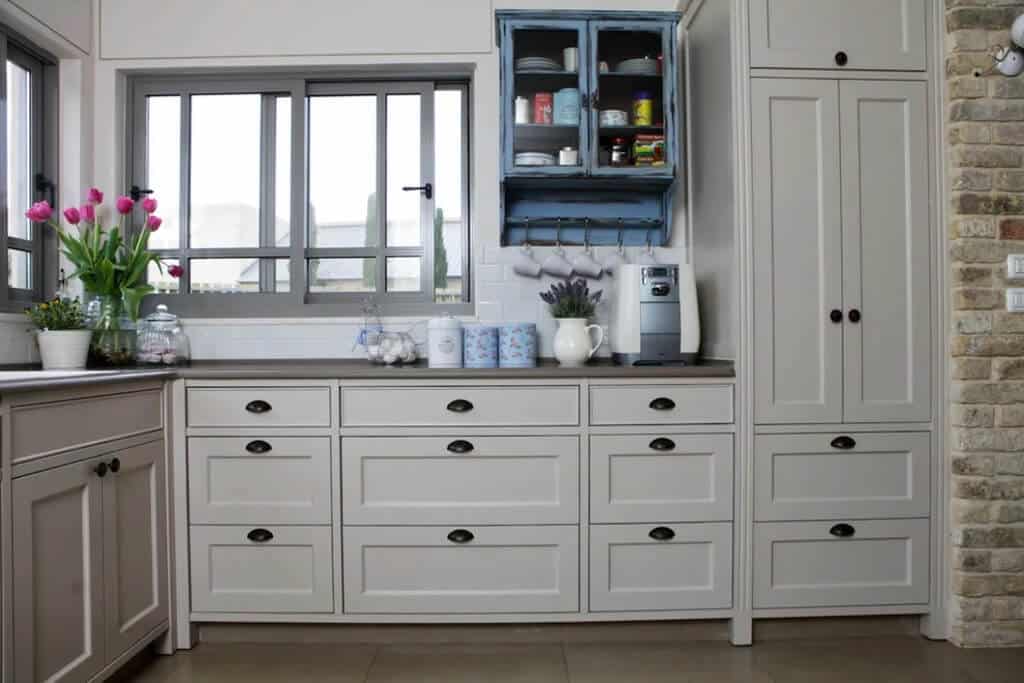
7. Black Bin Pulls

Black Bin Pulls

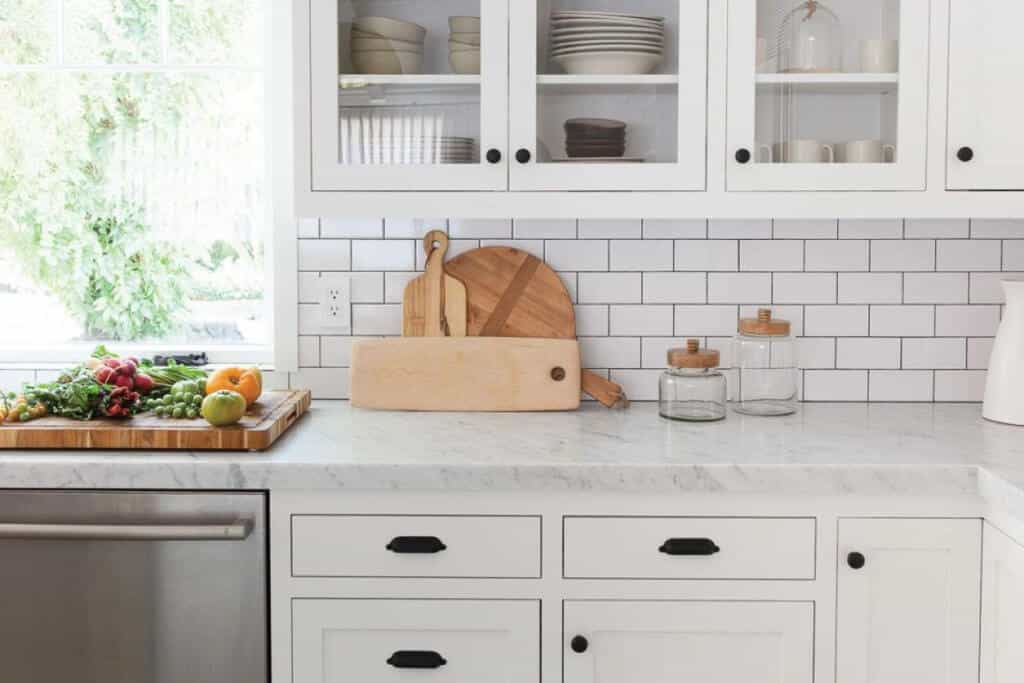
An addition of bin pulls to your drawers makes a lasting impression with their simple, traditional appearance. It is one of the best kitchen hardware ideas that can easily add the vintage appearance you want. With its ergonomic design, it provides an easy grip as well as utility. 
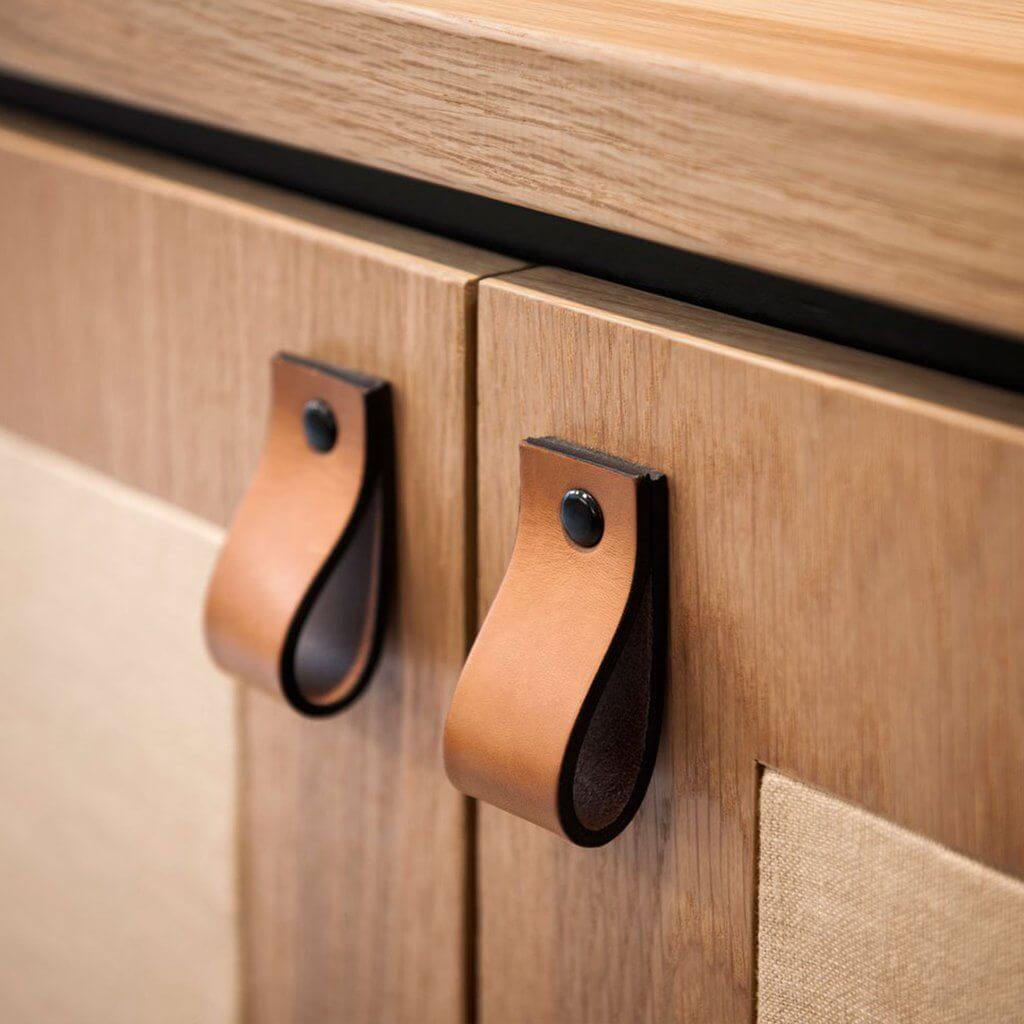
8. Leather Pulls

 Leather Pulls

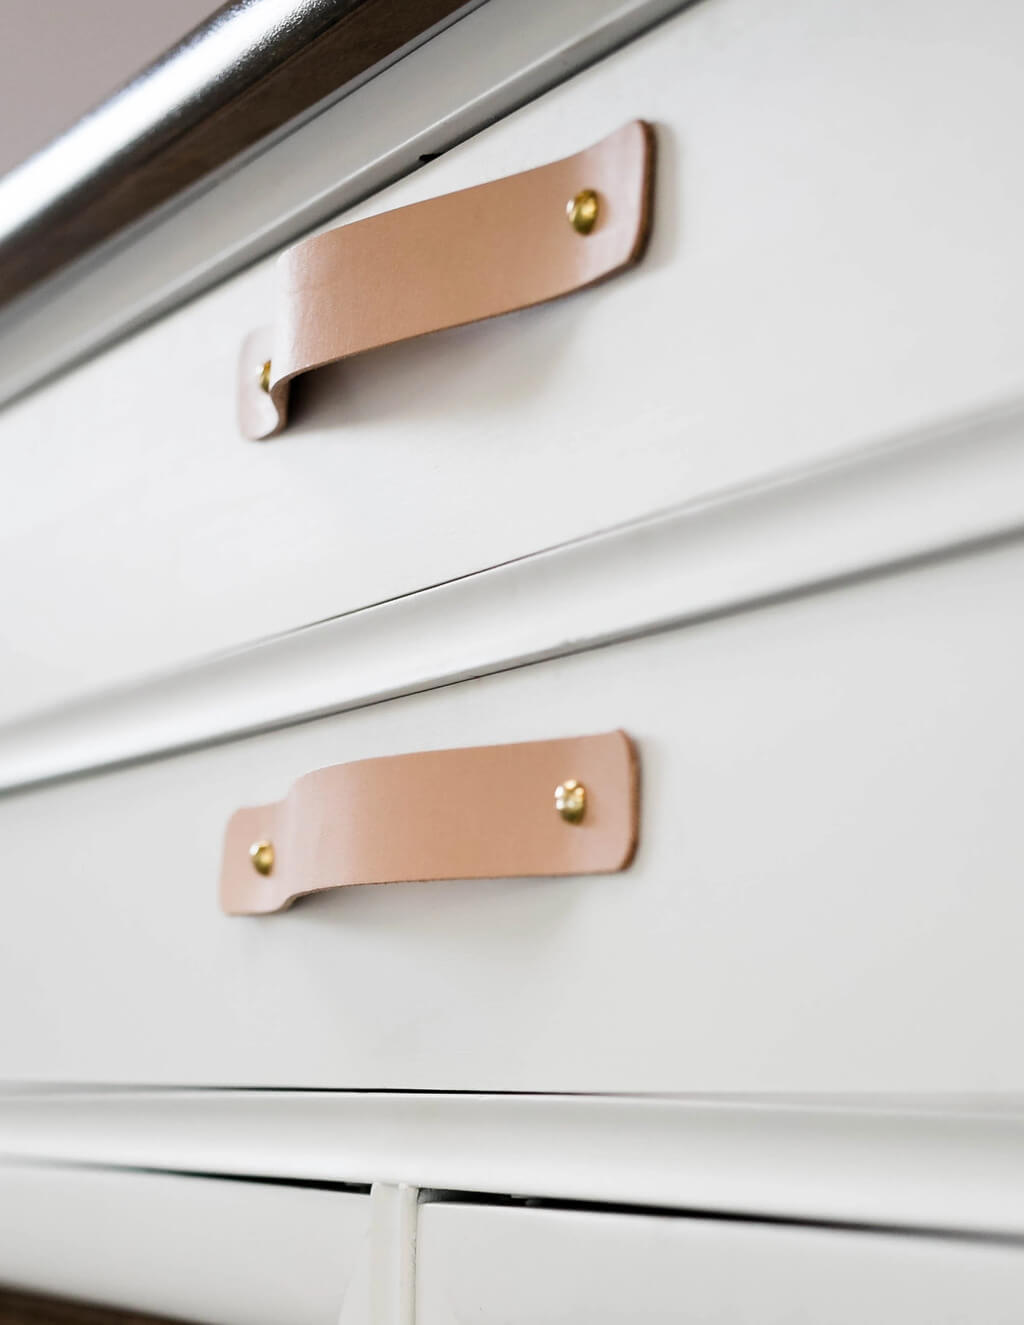
You can design industrial-style kitchen storage with leather pulls. Using repurposed leather will avoid waste and ensure the look you’re aiming for remains consistent with your style. Attach leather pulls to drawers and cabinets made of unpolished wood to bring out their bold and rustic nature. It gives your kitchen a unique look. 
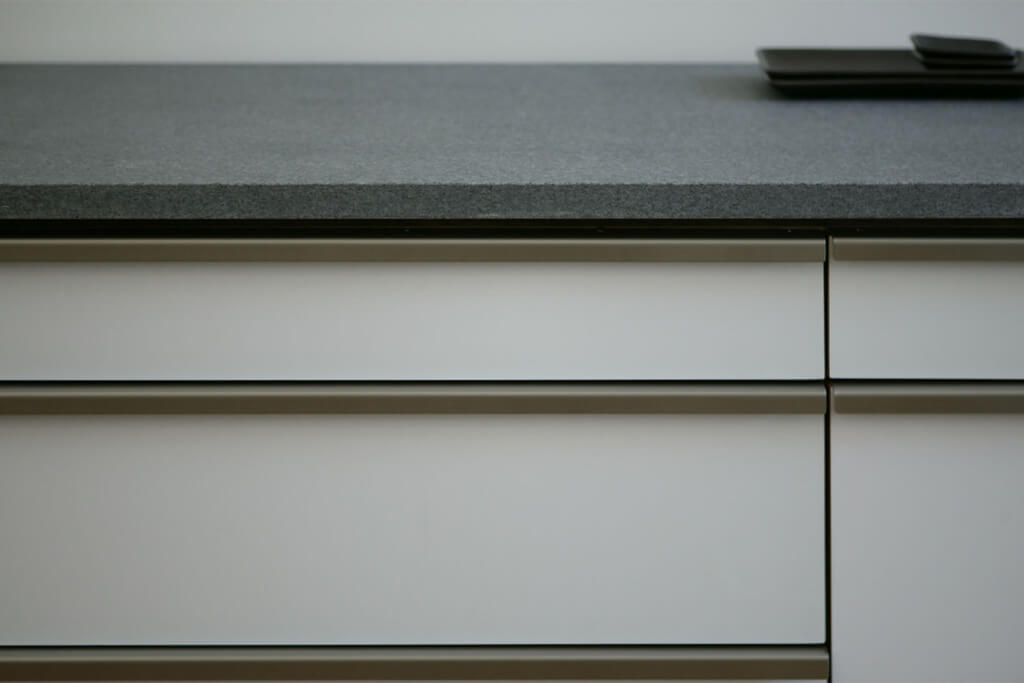
9. Recessed Pulls

 Recessed Pulls

Use recessed drawer pulls to achieve sleek kitchen drawers and avoid drawer handles that come out. You can create a minimalistic kitchen with recessed pulls by blending rustic and modern trends.

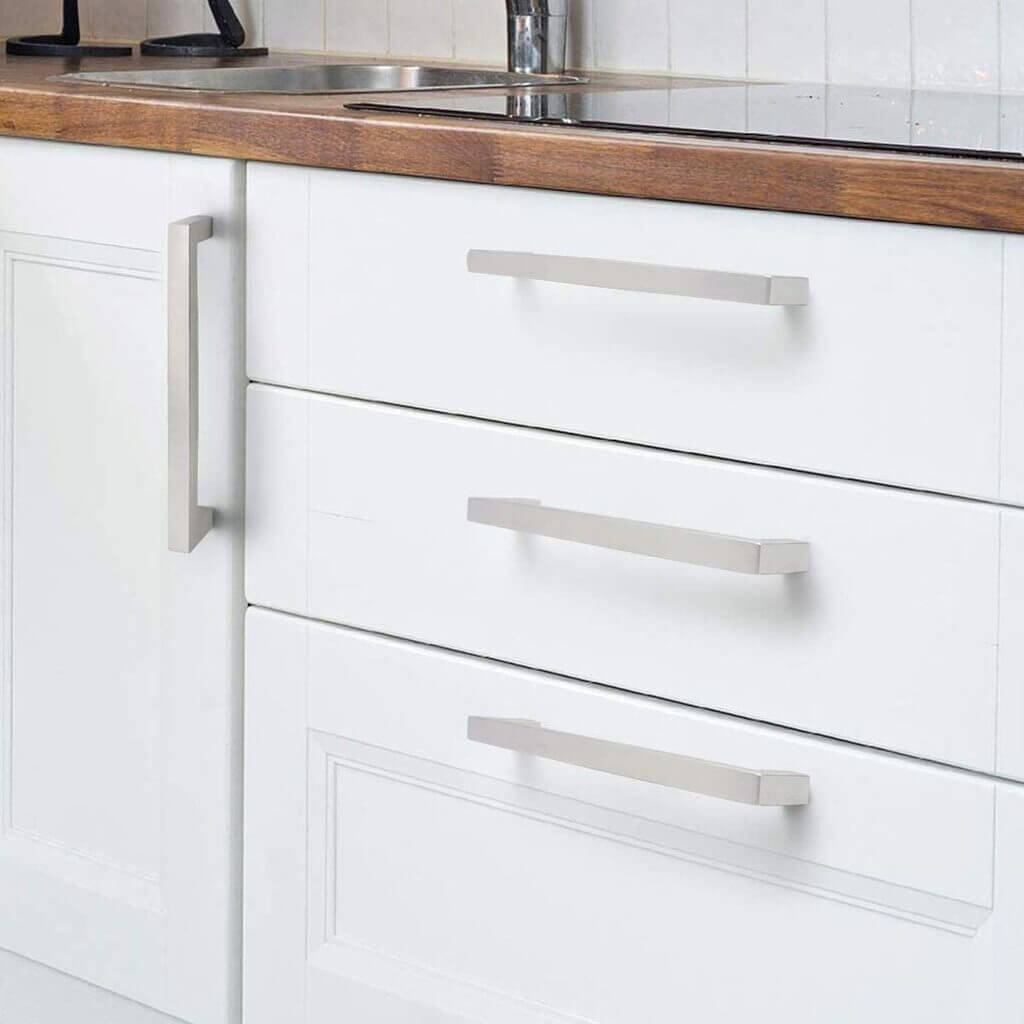
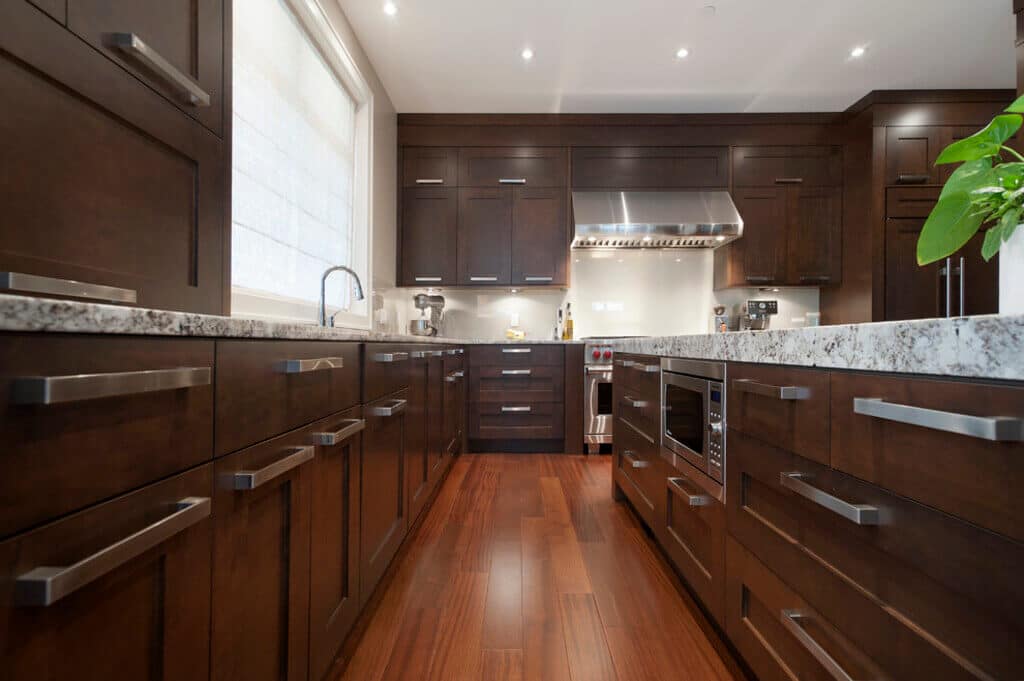
10. Full-Length Silver Pulls

 Full-Length Silver Pulls

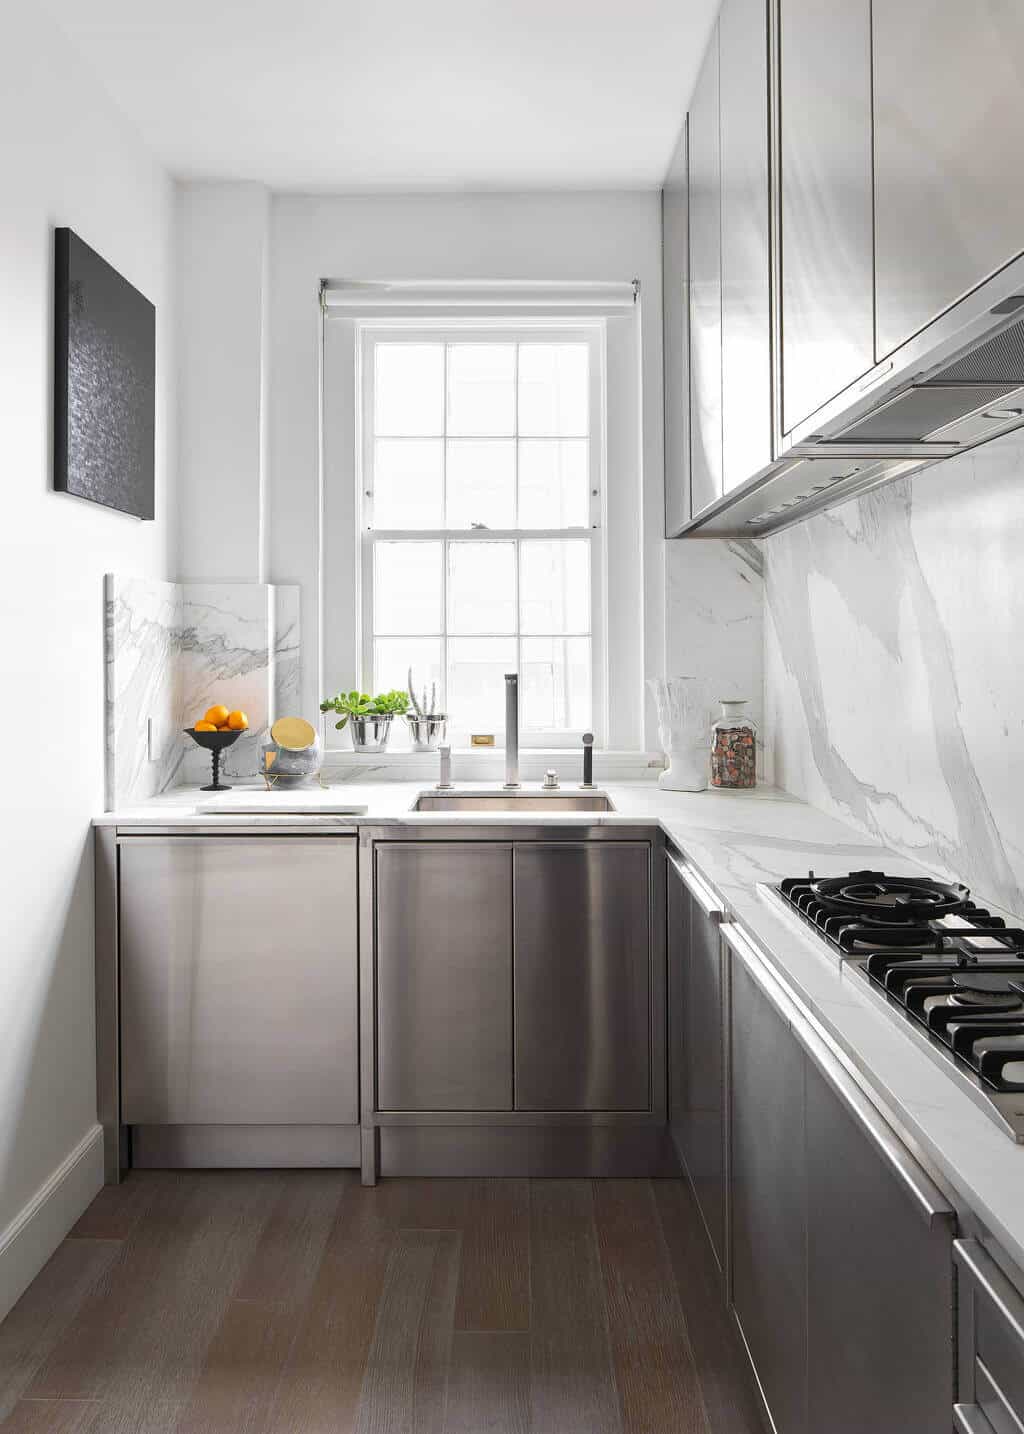
Sleek aesthetics define modernity. It is ideal for long cabinets and drawers to use pulls that are full-length. Put your full-length pulls at the top of the cabinet. The pulls also give your kitchen a dramatic presence, making it appear more spacious. 

11. Chrome Knobs

Chrome Knobs

The modern kitchen looks great with this shiny metal. Despite the variety of shapes available when it comes to chrome knobs, a sleek geometrical design fits a more modern kitchen better than a more opulent design. 

12. Short Tab Hardware

Short Tab Hardware

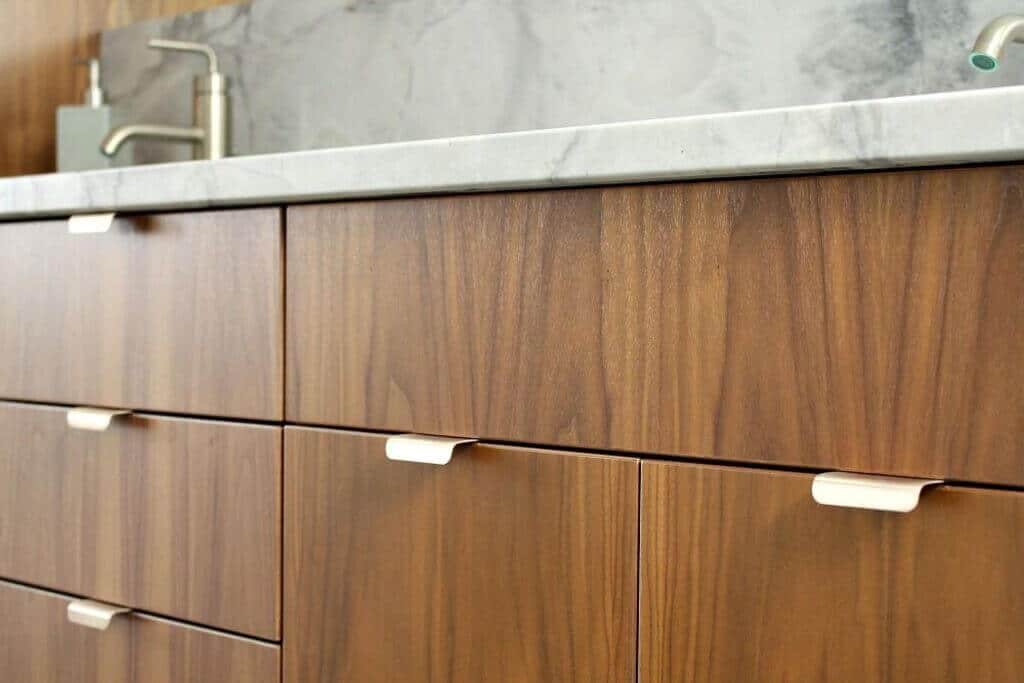
With short tabs, your drawers and cabinets will look clean and contemporary with minimal and subtle hardware. Make sure that drawers are noticeable and can be easily found with silver or black tabs. 

13. Full-Length Tab Hardware

Full-Length Tab Hardware

Full-length tab hardware makes drawer access easier. Extend them to the full length of your kitchen cabinet to maximise its use. You can easily open lower drawers by tucking your foot under the tab.

14. Textured Knobs

 Textured Knobs

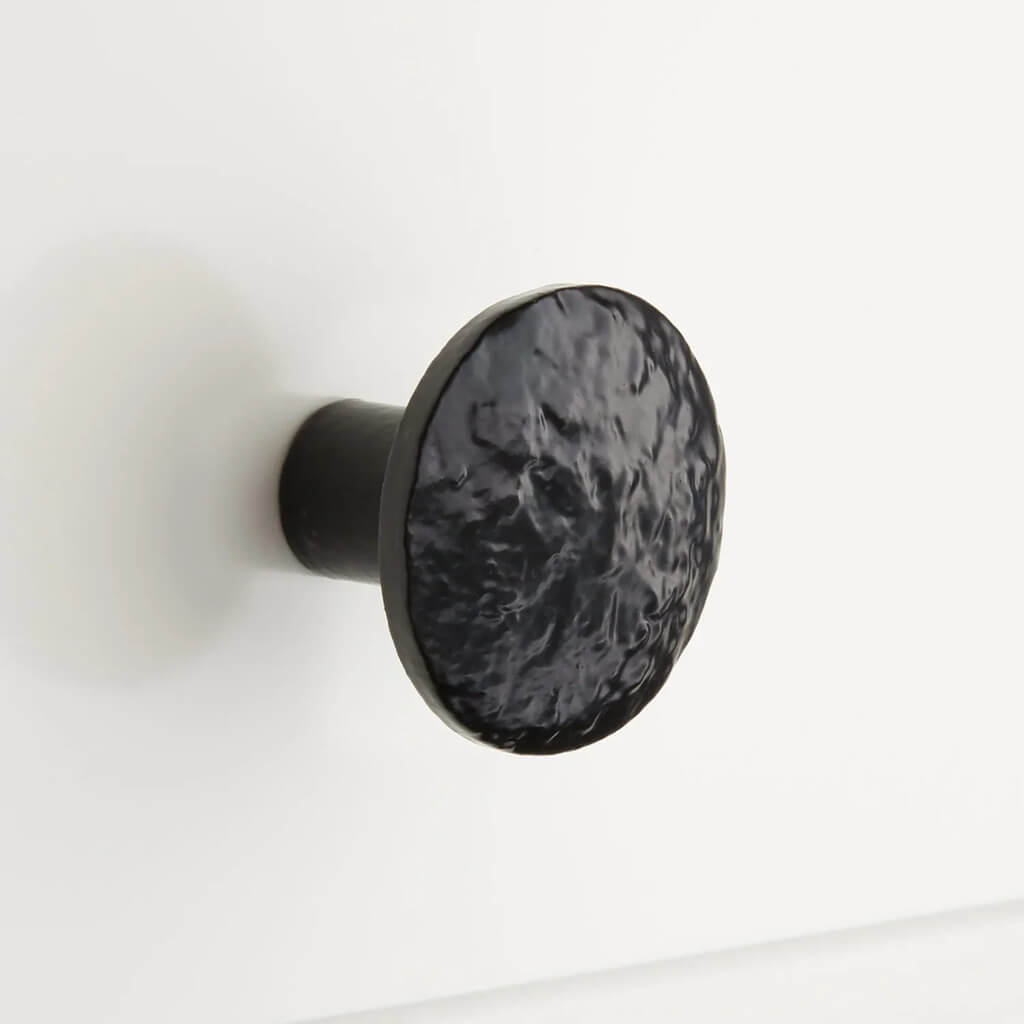
Adding textured knobs to your kitchen hardware can give it the perfect combination of aesthetics, functionality, and contemporary style. Put these subtly ornate pieces in your kitchen for a modern touch. Furthermore, the textured edges make it easier to open heavier drawers and cabinets.

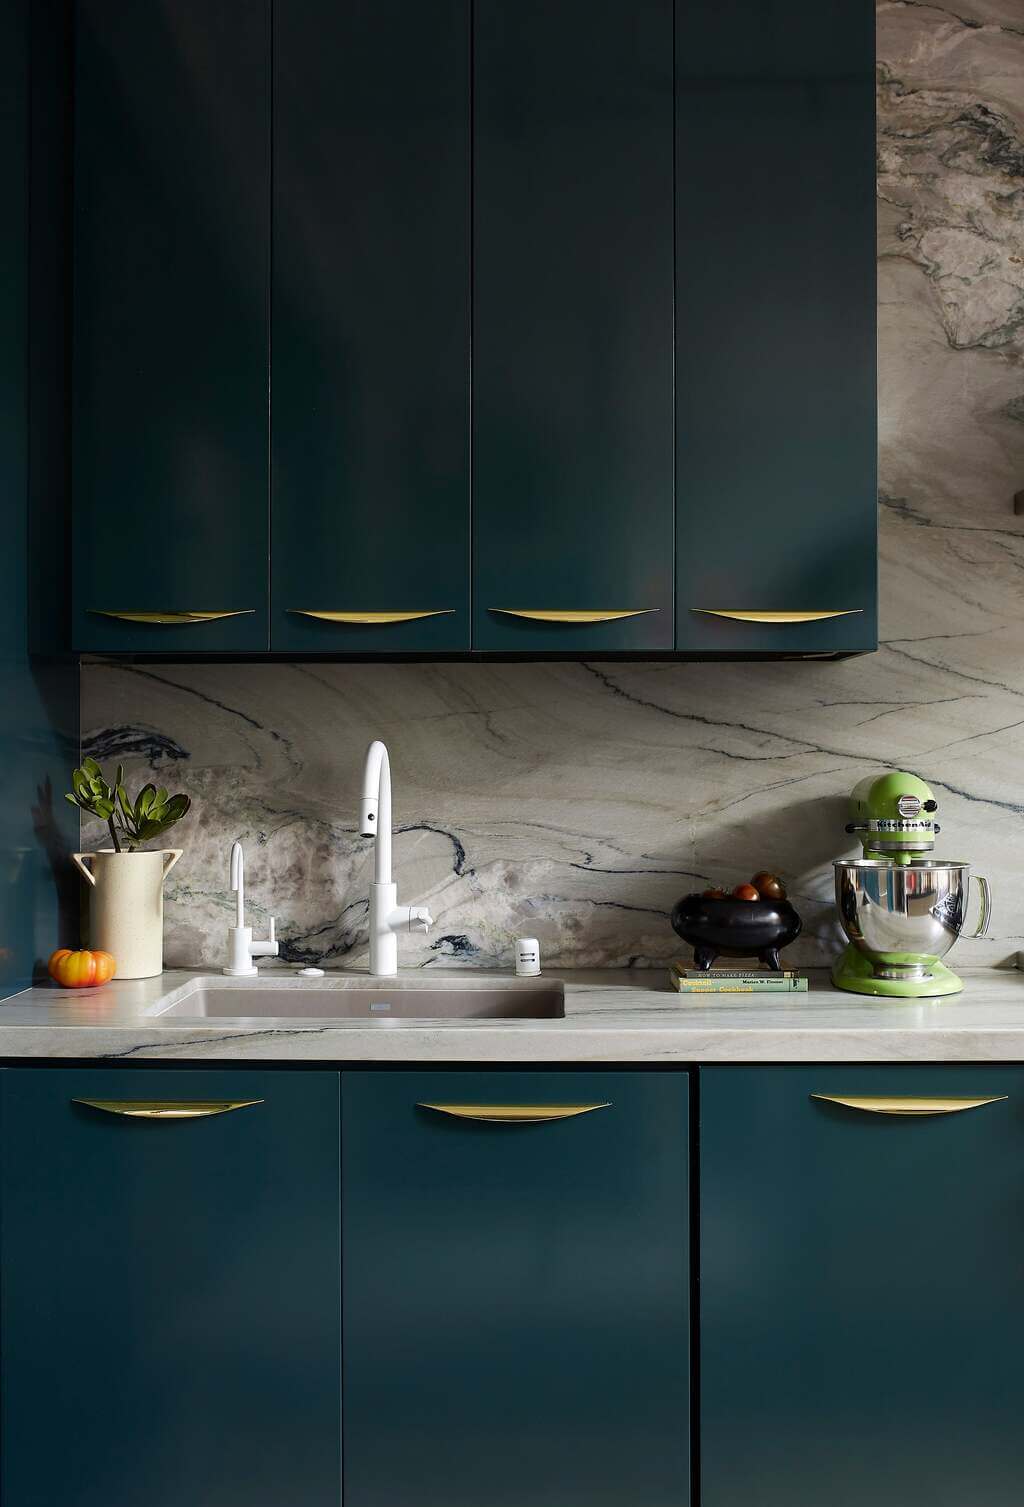
15. Sharp Arch Pulls

 Sharp Arch Pulls

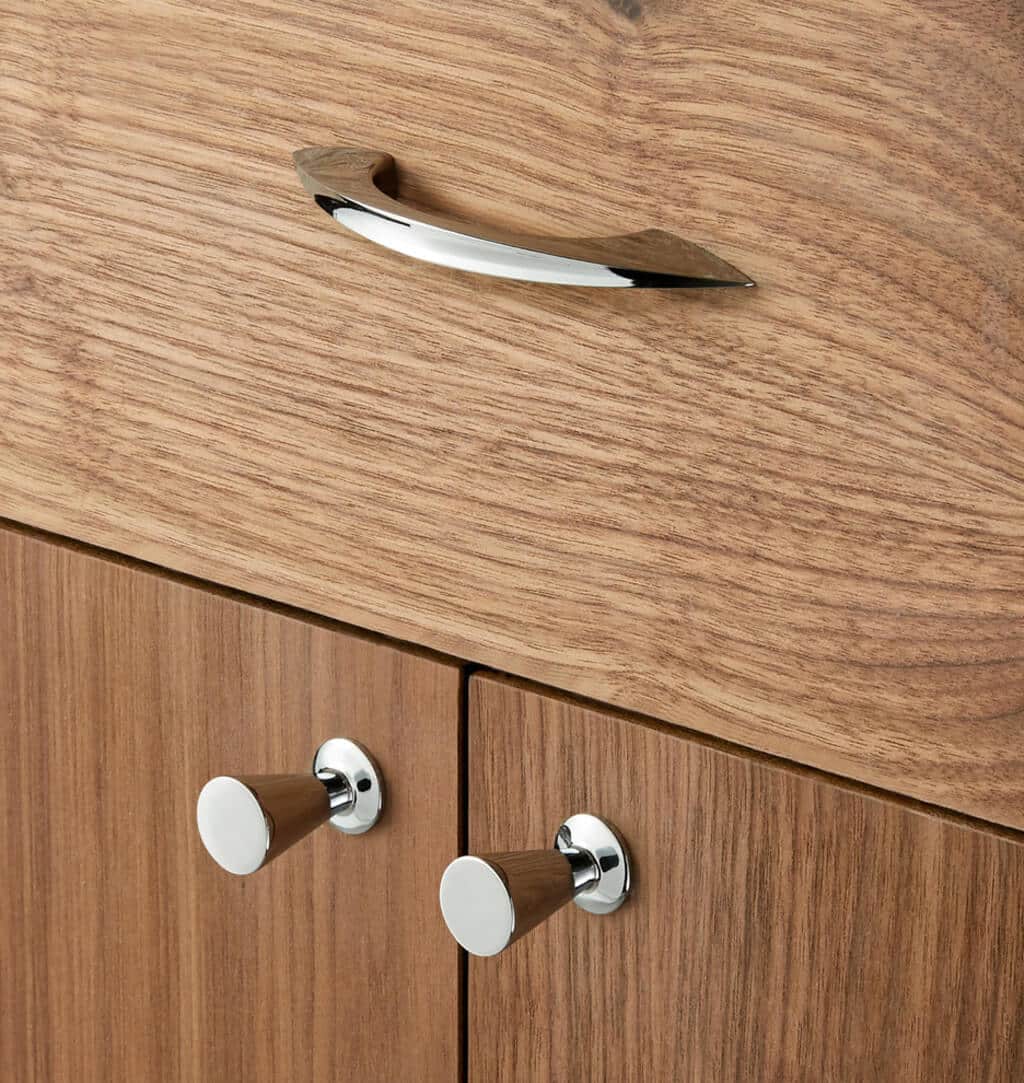
The sharp arch pulls are the perfect way to introduce a touch of subtle abstract design into your kitchen hardware. Its sleek and curved design is both stylish and functional for any contemporary kitchen. 

16. Glass Knobs

Glass Knobs

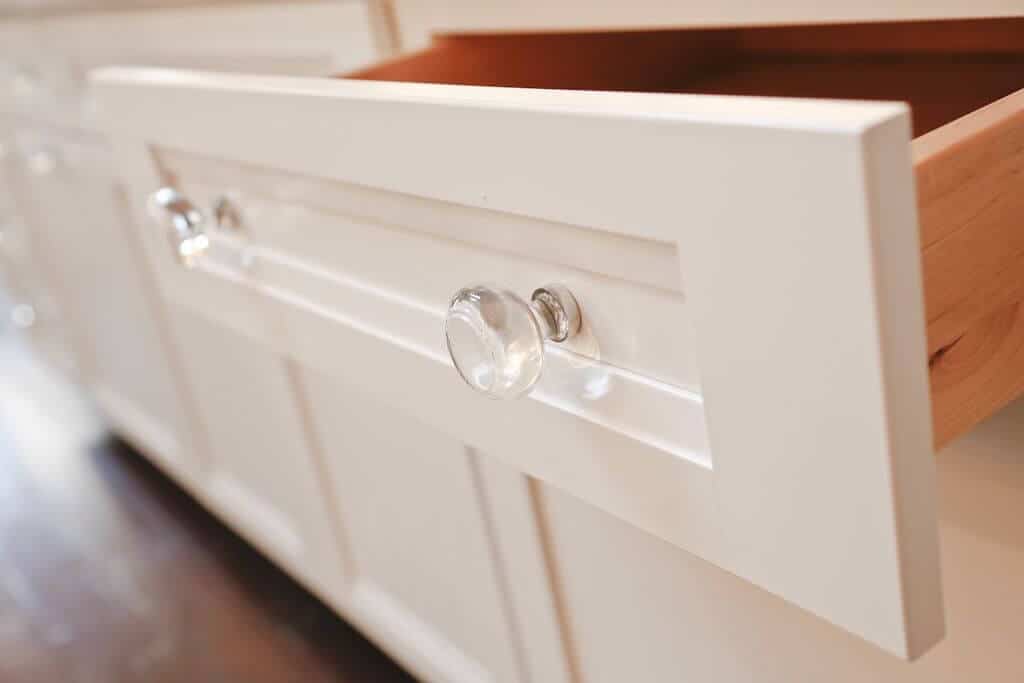
Give your kitchen a little zest with some glass. If your kitchen cabinets are white or light-coloured, adding glass knobs will illuminate and brighten them. You can take advantage of the sun’s rays this way. 

17. Wooden Knobs

Wooden Knobs

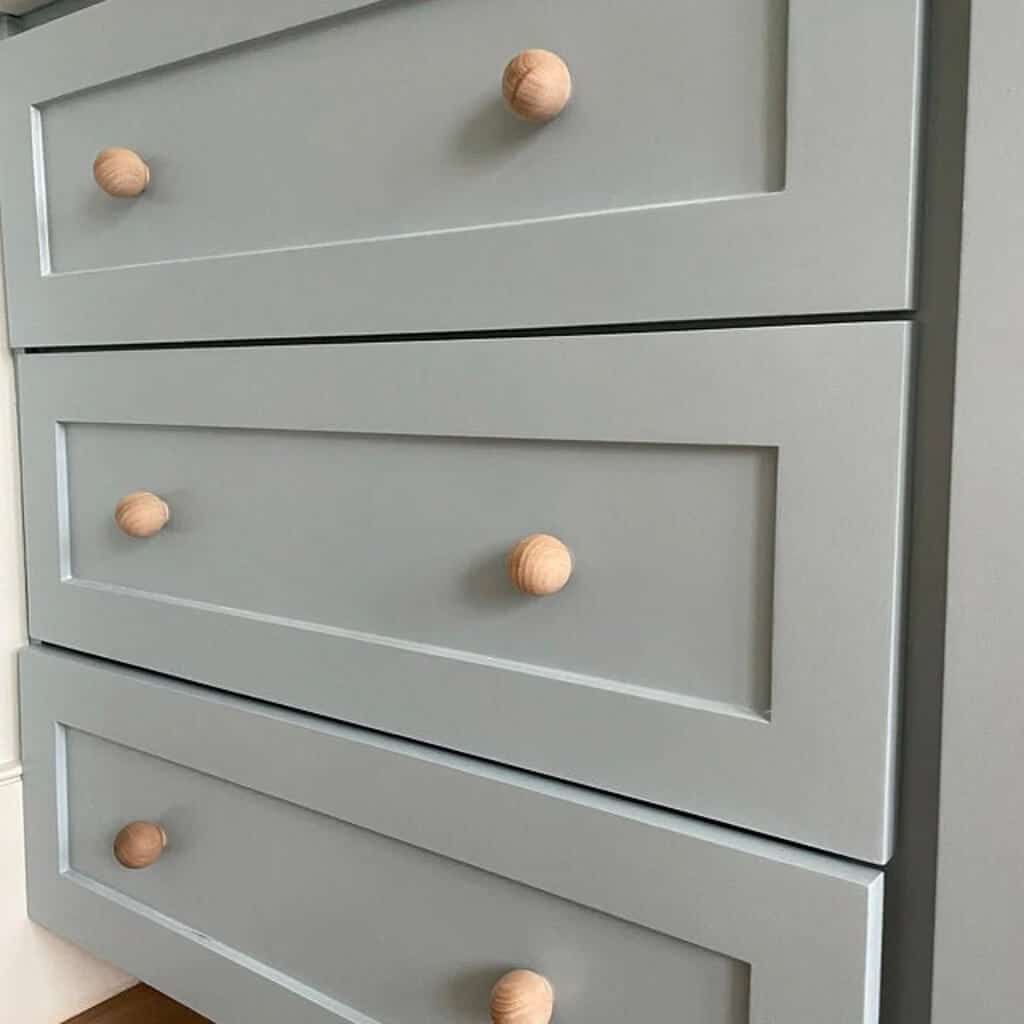
Wooden knobs add a rustic touch to your kitchen cabinet hardwares, making you feel relaxed and at home every time you enter. Pick whatever makes your space feel at ease, whether it’s a colour or type of wood!

18. Leather Tabs

Leather Tabs

In lightweight drawers, leather tabs work best as an alternative to knobs. The best way to place these is in kitchen cabinets with flat fronts (or slabs), which are popular in contemporary kitchens. Choose a colour that compliments the earthy look of the leather tabs.

19. Flower Knobs

Flower Knobs

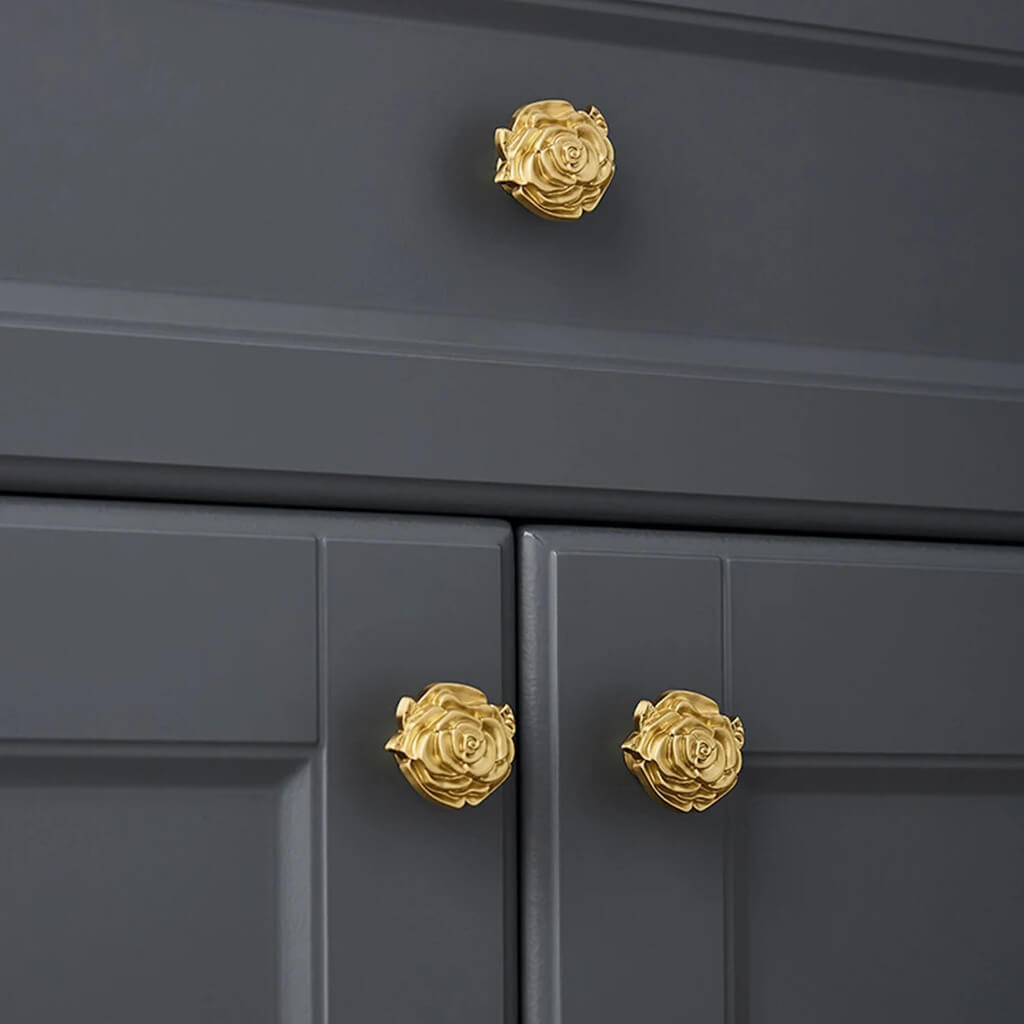
If you have crafty nature, you’ve probably wanted to add some decorative pieces. Your kitchen cabinet will be alive with flower knobs that will enhance its beauty while expressing your personality.

20. Antique-Style Pulls

 Antique-Style Pulls

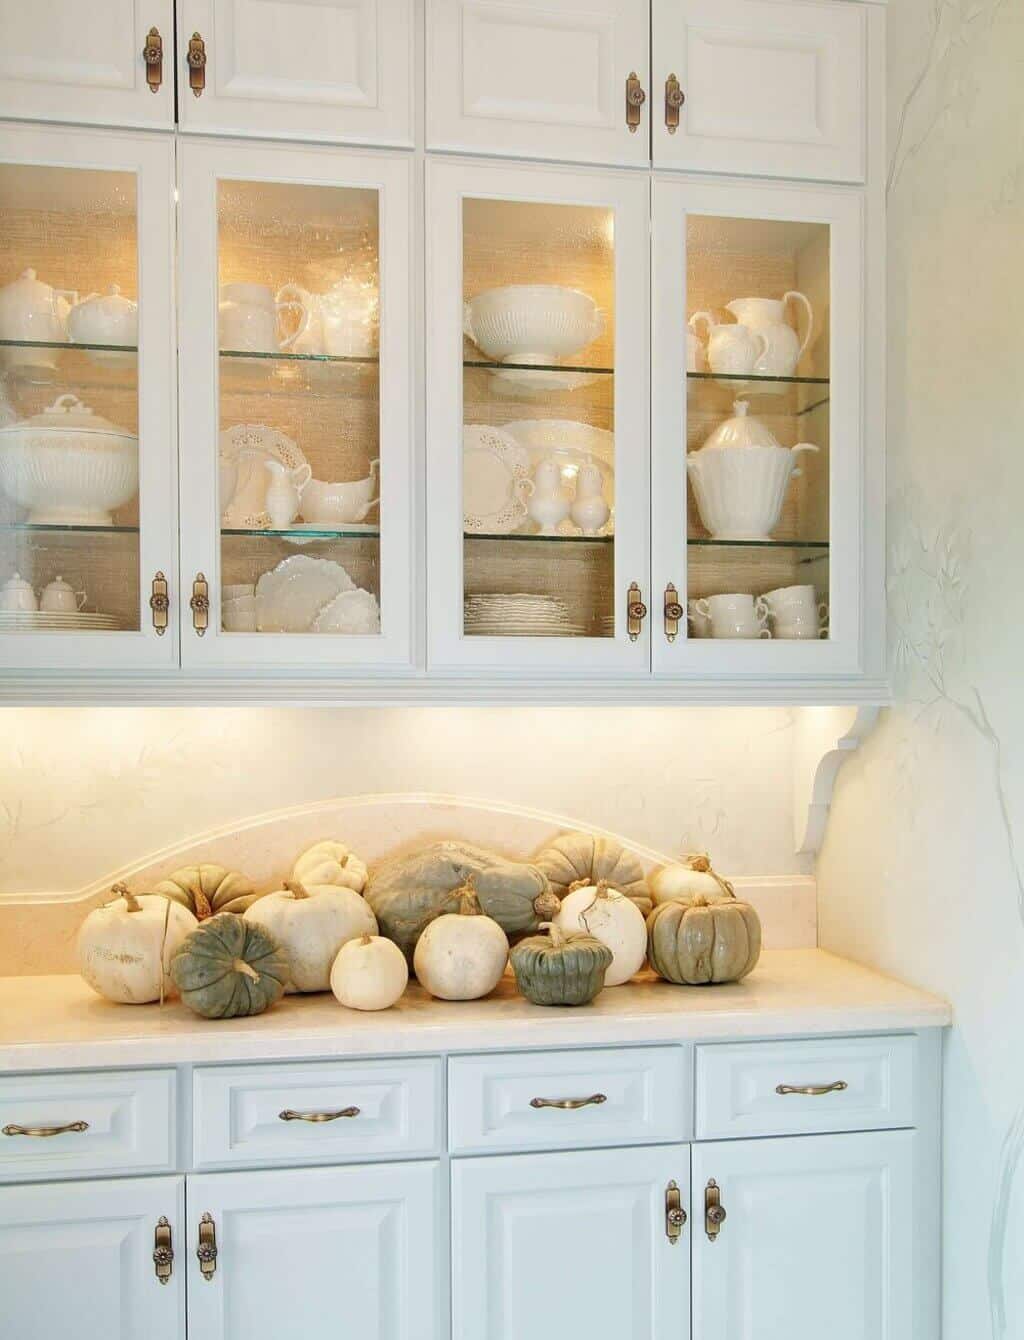
A vintage kitchen requires creativity. Changing drawer knobs for antique flush-mount pulls can make a big difference. Vintage kitchens have this ability to evoke a sense of a bygone era, adding to their atmosphere in a way that makes your space feel like a time capsule.

How Do Knobs and Pulls Compare?

How Do Knobs and Pulls Compare

It is imperative to select the right hardware for your kitchen cabinet when redesigning it. The number of options available can sometimes make it difficult to decide where to begin.

Knobs: Cabinet knobs are popular cabinet hardware. Traditionally, cabinet knobs are round, smaller, and mounted using only one hole. Various materials are used for making knobs, including ceramics, glass, and metals.

Pulls: Pulls, also known as handles, are rods or bars mounted on cabinetry at two points. Featuring pulls, users can open and close cabinets with ease by gripping the hardware with their fingers. 

While the handles are suitable for a wide range of decor styles, they are best suited to modern kitchens.

Whichever knobs or handles you choose for your kitchen space, make sure they complement the overall design. There is a kitchen cabinet hardware idea to complement every kitchen style, regardless of the style of the kitchen.

Get Your Kitchen Redesigned

Get Your Kitchen Redesigned

One of the most exciting aspects of a kitchen remodel is that it gives you the opportunity to design your space with aesthetics as well as functionality. Pulls and knobs come in many combinations and it comes down to your design theme in the end. Decide which style of hardware and cabinets you want to be aligned with when researching kitchen cabinet hardware ideas.

Your kitchen cabinets can be made with these inexpensive fixtures. They’re a great way to express your creativity!

kitchen cabinet hardware ideas
kitchen cabinet handle ideas
ideas of kitchen cabinet handle
kitchen cabinet handles
handle of kitchen cabinet
kitchen cabinet hardware ideas

FAQs

1. Which Kitchen Cabinet Hardware Is Most Popular?

Stainless steel bar pulls are a popular choice for kitchen cabinet hardware. They have a sleek and timeless appearance, fit nearly any interior design style, and are easy to clean. It is also expected that matte black finishes, latches, and mixed hardware (knobs and pulls) will be popular trends in this year.

2. On Kitchen Cabinets, Should I Use Knobs or Pulls?

A decision as to whether to use knobs or pulls for your kitchen cabinets depends upon your personal preferences. As you open a cabinet door, your hand rotates naturally as you turn the knob. Using pulls for drawers is good because your hand doesn’t have to rotate, and you can use more force. Ensure that both options are tried prior to installing.

3. On Cabinets, Can Pulls and Knobs Be Mixed?

Definitely! Pick matching finishes and use the same style of hardware on drawers and cabinets for a uniform look. Pulls for drawers and knobs for doors can be mixed and matched in your kitchen. It creates a beautiful appearance, and it makes opening your cabinets more convenient.

4. Do Kitchen Cabinets Need Hardware?

Installing hardware on your kitchen cabinets will make them easier to open and close, and drawers and doors will stay cleaner. The absence of hardware can be advantageous when designing a minimal space since it makes it appear uncluttered.

5. What Is the Best Way to Match Kitchen Cabinet Hardware with Decor?

Consider your appliances and fixtures before making a decision. It is important to match the cabinet hardware to the faucet, or similar fixture if you intend to use one.

Discover More

How Much Does It Cost to Add a Bathroom in 2025

0
How Much Does It Cost to Add a Bathroom

The bathroom is a basic necessity and modern designs aim at trend-setting patterns that also add value to the entire home. But how much does it cost to add a bathroom?

What’s the point of owning a large villa when you don’t have the comfort of a great bathroom? The cost to add a bathroom is worth it with the privacy that’s offered and the additional retreating zone that’s created in your home. Large, spacious, and an extra bathroom can prove to be the ultimate selling feature of your house.walk-in shower

Let’s look into how much does it cost to build a bathroom?

Bathroom Addition Cost: What Is All to Be Considered?

Bathroom Addition Cost

The range to incorporate a bathroom varies from $5,000 to $50,000. These prices depend upon the theme, amenities, and essence you’re trying to create. A simple bathroom will keep the bill to a minimum, whereas, a luxury bathroom can raise the bill in order to offer spa-like facilities.

The answer to how much it cost to add a bathroom is dependent on several factors:

1. Location of Bathroom

One of the main factors in deciding how much to add a bathroom is the location where you’re planning to install it. Is it away from the existing plumbing lines or will these lines need to be extended till the new location of the bathroom?

2. Size of the Space

The area of the bathroom also plays a major role in predicting the cost to add a bathroom. A smaller area means saving high bills, whereas, a grand bathroom will cost you more.

3. The Scale of the Amenity

Is it going to be another functional room in the home or are you aiming at luxury features within the bathroom? As you keep scaling the luxe factor, the total cost of the bathroom will keep raising to accommodate all those additions.

4. Property’s Age

Are you living in a fresh property or is your house considerably old? The age of the property is vital to determine the need for replacement for the electrical and plumbing lines.

5. Miscellaneous Costs

In order to build bathroom cost, the price always needs to be considered for extras as well. There could be unwanted leakage or unexpected damage that might come up while building the bathroom. Thus, always leave room for these miscellaneous costs while considering the budget of your bathroom.

How Much Does It Cost to Add a Bathroom to an Existing Space?

A bathroom with two sinks and a bathtub

Consider yourself lucky if you already have a space dedicated to a bathroom to be built. Adding a bathroom to existing space will cost about $125 to $250 per square foot which is comparatively cheaper than scooping out space for a new purpose. 

Another smart trick that will lead to savings is building it in an area that has the provision of plumbing lines. For example, you could transform the laundry room into a bathroom as it will be well-equipped with plumbing and draining lines. Or you could consider the option of placing your new bathroom either above or below an existing one. 

How Much Does It Cost to Build a Bathroom Upstairs or Downstairs?

how much does it cost to add a bathroom

While considering the addition of a new bath, taking a call on whether to install it upstairs or downstairs might be tough. While placing the bathroom upstairs can offer much-needed privacy, the downstairs bathroom is more accessible and easy to use. 

Bathrooms on the upper floor can prove to be hefty on your pockets if the plumbing lines don’t run through that floor. Apart from the design cost, you’ll need to spend on taking the supply and drain lines to the upper floor which adds to the overall cost.

In case of budget constraints, building a bathroom downstairs can prove to be beneficial as you save money on the plumbing lines. If the plan is to opt for a powder room for guests, consider building a half bath with a toilet and wash basin. This is a space-saver solution that fulfills the demand and at the same time, keeps your pockets happy. 

A Bathroom in the Garage

how much does it cost to add a bathroom

Adding a bathroom to your house is definitely a smart idea but is placing it in the garage a smart solution? A garage is one of the least expected spaces for a bathroom. Although there’s no harm in placing it in a garage, the only concern is the limited space that will be offered to your vehicles.

Another cost concern while considering the idea of bringing a bathroom to your garage is the heat source. You’ll need to be extra cautious and adopt strategic solutions in order to keep your pipes from freezing during the extreme winters. This factor along with the laying of plumbing lines will lead to added cost.

Bathroom Addition Cost: Half to Full Bath

how much does it cost to build a bathroom

A half bathroom can be transformed into a lavish, full bath with a few tweaks in the design. This conversion from half to full can start at a price of $5000 and can extend to $25000. The cost for this idea is based on the difficulty that comes up during installations and the material palette that’s adopted for the design scheme.

Pro-Tip

In order to save total costs, opt for converting to a three-quarter bathroom design rather than a full one. This design demands basics like a sink, toilet, and shower. The money-saver solution will cut down the cost of adding a bathtub. 

The Bathroom Break-up of Costs

The Tub or New Shower

how much does it cost to build a bathroom

While remodeling or designing a new bathroom, you need to take a call on whether you want to add a bathtub or opt for a shower. The bathtub will be accompanied by the charges of installation and faucet cost whereas the shower will have the bill of installation and additional cost to add a shower curtain or a door. You can even go over the top by opting for the provision of both in your bathroom.

Tiling the Room

how much does it cost to build a bathroom

Are you planning to add tiles as a backsplash or just on the floors? Will these tiles be extended to the ceiling or stopped at a certain level? These are the factors that will lead to your answer about how much it cost to add a bathroom. This bill will further be influenced by the choice of base material and type of tile you’re selecting.

Toilet Installation

Toilet Installation

Whether you’re planning to build a half bath or full bathroom, one of the basics of the design is a toilet. A standard toilet installation ranges between $122 to $229. Opt for smarter solutions by picking unit designs that consume less water and prove to be beneficial for your pockets by saving money on water bills.

Adding the Basin

Adding the Basin

The cost of installing a wash basin depends upon the type of sink you’re picking. It comes with the cost of the unit and installation charges to put plumbing lines and faucets. The typical costs vary between $230 to $450. There are a plethora of options in the sink design to choose from that range from simple vessel sinks to designer pedestal sink designs. Pick the one that fits your budget and complements the design theme. 

Vanity Cost

Vanity Cost

What’s a bathroom without a grand vanity? Seems pointless, right? Vanity is the major eye-catchy and utilitarian feature of a bathroom. The installation of these starts at a price of $45 per hour for labor costs. Additional charges on these can be considered if a sink or plumbing lines need to be added. The total cost of vanity will depend on its design. For a simple drawer design, the charges might be less than the case of a complicated design. 

Flooring Bill

Flooring Bill

There are several items that lead to the overall cost of a design. One such item added to the list is flooring. The cost of flooring depends not only upon the area but the material as well. While natural stone might cost more, tiles can prove to be under budget. On average, bathroom tile flooring costs are within the range of $300 to $600 for a small bathroom.

While looking for options in flooring solutions, make sure that you pick the one that’s waterproof and easy to maintain. You wouldn’t want to invest dollars and end up in a space that needs constant maintenance in order to retain its charm.

5 Money-Saver Tips While Adding a Bathroom

Money-Saver Tips While Adding a Bathroom

Now that we know what all lead to the overall cost of adding a bathroom, let’s look into the ways in which we can save money.

1. Position it Well!

Strategic planning can help you save money while adding a new bathroom. Make sure that the chosen location of the bathroom isn’t too far from the running plumbing and drain lines. Build it closer to the existing pipings in order to save money. 

2. Secondhand Shopping

Rather than investing in new bathroom accessories, look for secondhand items in well-working conditions. You can even consider the option of buying it at discounted prices from local vendors. While there’s no negotiation with the electrical and plumbing installations in the bathroom, you can definitely save on the fixtures.

3. Affordable Flooring

Rather than going overboard with the flooring options, keep it simple and cost-effective. Your flooring solution must be moisture-friendly along with being an aesthetic choice to match the design language of the bathroom.

4. Walk-in Showers

While bathtubs will always cost more, keep the bathroom basic with a simple walk-in shower.

5. Build Within an Existing Facility

When opting for a location to add the bathroom, always consider adding it in space with existing plumbing lines. It could be a pantry or laundry room. This will save bucks on redoing or extending these basic service lines to a new location.

Add Bathroom for Jazzed Up Comfort!

Add Bathroom for Jazzed Up Comfort

Your new bathroom could be the ultimate statement-making design in your entire home. Apart from ease and functionality, it also helps in adding value to the home. The cost of building a fresh bathroom is totally dependent on the approach you’re taking and the scale of grandeur you explore in the design.

A large bathroom with a large tub and two sinks
A bathroom with a shower, toilet, sink and bathtub
A bath room with a tub a toilet and a chandelier
A white bath tub sitting next to a window in a bathroom
A white bath tub sitting next to a white sink
A bathroom with a sink, toilet, and shower
A bathroom with a toilet, sink and shower stall
A bathroom with blue cabinets and a large mirror
A bathroom with a tub and a sink
A bath room with a bath tub a sink and a mirror
A bathroom with a sink, toilet, and shower

FAQs

1. How Much Does It Cost to Add a Half Bathroom in a House?

Adding a half bath in an existing space of the house can cost you between $5000 to $15000.

2. How Much Does It Cost to Add a Bathroom?

The cost of constructing a brand new bathroom in space will be around $22000 on average. 

3. Is Adding a Bathroom Downstairs More Beneficial?

If you have to choose between installing a bathroom upstairs and downstairs, adding it on the lower floor will save you some money as you don’t have to extend the plumbing lines in this case. 

4. How Much Does a Wall-Mounted Sink Installation Cost?

The installation of a wall-mounted sink in a bathroom starts from $42 and can go on till $1560.

5. Which Factors Decide the Cost to Add a Bathroom?

The total cost to add a bathroom to your house is mainly dependent on the size and scale of the amenities. 

6. How Much Does Natural Stone Cost for Bathroom Flooring?

For a small bathroom with an area of about 40 sq.ft., the cost of adding natural stone flooring is about $540.

Keep reading:


Step by Step Guide to Putting Together a Prefab Metal Storage Shed

0
Prefab Metal Storage Sheds

Metal storage sheds have become popular thanks to their durability. So, if you have been needing a storage shed for convenient storage or want a man cave, consider putting together a prefab metal storage shed. With a lot of free time in your hands, you are looking for an activity to keep you busy.

Putting up your metal storage shed is an excellent idea to spend your weekend on and clear your home of clutter.

In addition, it can be a great family project to undertake. Here are the steps required to put up your metal storage shed.

1. Gather Supplies

Gather Supplies

The first important step before undertaking any projecting is gathering all the supplies.

This includes tools like measuring tape, power drill, nail gun, levers, the kit with all its materials, and protective gear like goggles and thick gloves. 

It’s advisable to lay out all the parts to ensure nothing is missing before installing the shed.

2. Check for Permit Requirements

Check for Permit Requirements

Depending on your location, regulations may require a permit before the erection of the metal storage shed. If your town or homeowner’s association requires a permit, ensure to acquire it before starting the physical work. 

However, most states require permits when installing prefab metal storage sheds over 120 square feet.

The town’s zoning and building inspector provides the necessary information and can instruct you on acquiring a permit.

3. Level the Ground

Level the Ground

It is important that your metal storage shed is installed on a level and square ground that’s easily accessible. Avoid installing it on top of underground utility lines or pipes. You would be forced to move your shed if the lines ever need repair. 

Take necessary measures to level the ground. This could be digging the uphill areas or filling the valley areas so the ground becomes level. You will need wooden stakes, a tamper, a string level, and a garden rake.

Stake off the area and use the string level to determine the high point. The high point is your starting point to build the rest of the ground to that level. Also, remove grass using a shovel, add topsoil and spread it evenly using a rake, use your measuring tape to identify the areas that need more soil, and finally, use a tamper to compact the soil.

4. Check the Room You Have

Check the Room You Have

Once you establish where you want to place your metal storage shed, check the available room to determine the size of your shed and how much capacity of storage it can hold. If you require more workspace, your space may change significantly. 

However, since your metal storage shed is in a specific size, ensure to create a room that’s big enough to fit the shed and allow easy access when you need to do maintenance in the future. 

Remove all low-hanging branches and avoid areas where you will run into landscaping, trees, or shrubs. Also, read through the manufacturer’s instructions to ensure you are fully prepared to install the storage shed.

5. Install the Floor

Install the Floor

Prefab metal storage sheds are not hard to build. Reading the manual helps you to get down to business. Start by installing the floor where applicable and use foundation stakes and blocks to secure the floor to the ground. 

Then place the metal storage shed over the flooring. Place one corner panel in one corner of the floor frame and place the widest part of each panel on the sides of the building.

Place all panels, fasten them at the top and bottom using screws, and fasten the middle of every panel to the wall. Then install the roof and door afterward. Installing the metal storage shed is a simple job you can do alone on the weekend. 

However, family or friends can help you work faster. With prefab metal storage sheds, you do not need to hire a professional or wait for weeks to have your storage shed ready. The time it takes to assemble the storage shed will depend on its size and the weather you choose to install it. 

Therefore, installing the shed on a clear and calm day is best. Also, have one person readily available to help.

Conclusion

Establishing a metal storage shed is not hard. This means you can construct and assemble it even without prior carpentry skills. All the materials required to erect the shed are already provided to help you install a strong metal storage shed. 

Putting up a metal storage shed saves time and is a cost-effective option for storing your items. In addition, knowing that the shed will serve your needs for many years makes putting the effort worthwhile.

Discover More

Why Get BIPV Technology for Your Home or Office?

0
BIPV Technology

With technology moving so fast new and smarter ways of living to keep coming up, a very interesting technology of photovoltaics has been introduced which is the BIPV. 

Now you may ask what is this?

What is BIPV Technology? 

BIPV (Building Integrated Photovoltaics). Wondering, what is this super heavy term that they just used? 

Well, the meaning is actually much simpler. These BIPVs are parts or components that are used at the time of construction of buildings and other things that provide solar power to the building. Isn’t this amazing? 

Advantages of BIPV 

Advantages of BIPV 

Undoubtedly this technology is a very good technique to take the game up a notch. Designs don’t need to be complicated they just need to be resourceful and smart. BIPV facades are the latest addition to solar energy technology.

With the help of these facades, you can convert sunlight into electricity and use it for your home or office needs.

There are many benefits of installing a BIPV facade on your home or business:

1) You save money on your energy bills

2) Solar modules for building integration open up the possibility of making additional parts of your building usable for power generation. This way you can increase your share of self-generated energy. 

3) You reduce your carbon footprint by using solar energy instead of polluting sources;

4) BIPV facades are aesthetically pleasing, so your property will look more appealing to potential buyers or tenants.

5) They are components that are just installed in the right places and ways to generate solar power. This helps in reducing the cooling loads and helps with energy consumption by utilizing daylight. 

6) This design is exactly what one needs to amp up their building aesthetic. Ditch the old, regular pattern and you can go for something smart and resourceful at the same time. 

7) It helps with reducing the additional costs of installing solar energy-generating equipment. 

Applications of BIPV

Applications of BIPV

BIPVs are installed during the process of construction of the building or during renovations of existing buildings. They are generally installed in places that receive a good amount of broad daylight to absorb and generate energy. Here are a few places where one can install BIPV in their office or building. 

Roofs

transparent solar glass roofs in the overhead area for the roofing of terraces, atriums, etc. Depending on the application you can choose between VSG and insulated glazing with integrated photovoltaics.

Facades

A new way to maximize energy input is to additionally integrate photovoltaics into facades.  Special PV modules approved for use in facades are used for this purpose.

Shading Systems and Balconies

Externally using these BIPVs can also be beneficial and can give a new decor to your home and office from the outside.

Since, these BIPVs not only help in generating electricity from solar energy but also offer other features like thermal insulation, noise defense, safety, and weather protection. 

Disadvantages of BIPV Technology

BIPV Technology

BIPV technology requires a bit more planning, as the modules are individually adapted to the buildings. 

After all, they should be optimally integrated into the appearance and not be perceived as a disturbing factor, like a standard module in the façade would be. 

For this, you get a perfect result. And as with all photovoltaic systems – you need sunlight. Therefore, BIPV facades are not recommended for north facades.

Which Do You Prefer, Bipv Technology or Standard Photovoltaic Panels?

Prefer, Bipv Technology or Standard Photovoltaic Panels

Standard PV modules are reliable in delivering electricity. The crux, however, is that they do not match the general requirements of building construction standards as a building material for use in facades, and their appearance is not satisfactory as well.

BIPV modules, on the other hand, are specifically designed and approved for use in the building envelope. Those glass-glass-modules focus not only on power output but also on appearance. This makes them perfect for use wherever the PV system is visible. 

It is ideal to complement standard photovoltaics and BIPV to get the most out of your building, e.g., a standard system on the roof, a photovoltaic façade with colored BIPV modules, and transparent photovoltaic roofing with insulating glass in the atrium.  

Conclusion 

Above, we have discussed what BIPV technology is, what are the advantages and disadvantages of this, the applications, and what’s a better pick. standard photovoltaics modules and special glass-glass modules for building integration (BIPV). 

BIPV modules are a great modern-day solution for smart and advanced ways to generate electricity, as well as give your home or workspace a new look. 

 Sunovation provides the most updated and advanced solutions for energy generation. The company is one of the leading manufacturers of glass-glass-modules for building integration in architecture and has a lot of impressive references. You can refer to their website to know more about them and their product range.

In case you missed it!

Most Common Mistakes of New House Flippers That Should Be Avoided

0
Mistakes of New House Flipper

If you have a bit of extra capital and are willing to take a financial risk, you might put your money into a run-down house that no one else wants. With a bit of elbow grease, you can transform that ugly property into a true gem — and sell it at a high profit.

House flipping has become exceedingly popular over the past decade, as low-interest rates and high home demand has allowed savvy real estate investors to make fabulous fortunes. 

However, flipping is not as easy as buying any derelict property you find and tearing it down to studs. To ensure you do not take a significant loss, here are some of the common mistakes of new house flippers that should be avoided.

Failing to Estimate Costs Correctly

Failing to Estimate Costs Correctly

Property flipping has a clear financial incentive: If you can flip efficiently, you stand to make tens and even hundreds of thousands of dollars on a single project. Few people get into flipping for the fun of it; most flippers are eager to reap the steep financial rewards.

However, making money on flips requires not just enthusiasm but a savvy investment. Before you buy a property, you need to be able to estimate what that property is worth today, what it could be worth with certain renovations, and what those renovations will cost. 

If you make mistakes in your estimations, you could radically reduce your earnings — or even suffer significant losses.

If you are new to the world of real estate, you might find a more experienced partner to guide you through your first few flips. 

Your partner should have knowledge and skill in assessing the values of properties before and after flipping. They should also have connections to help you keep renovation expenses low. 

Though you will need to split your earnings with your partner, this training period could be essential in giving you confidence and capability in estimating costs.

Ignoring the Time Requirement

Ignoring the Time Requirement for New House Flippers

Flipping is not the fastest way to make money — nor is it an easy side hustle while you focus on an entirely different career. In addition to the weeks it might take to close on a property, you will need to wait months for all of your inspectors and contractors to complete their work. 

During this time, you will need to actively coordinate schedules to ensure renovations occur in the right order with the right permits. Then, after the flip is finally done, you will need to put the property on the market and wait for the right buyer to make an offer.

The exact time required to flip a property depends on the state of the property as well as regulations within your state. Generally, you should not expect to see a return on your investment for at least six months — and all that time, you will be paying fees associated with loans, insurance, taxes, and more. 

You should not get into flipping with the expectation of making a reliable income, at least until you are more established in the industry.

Making Bold Design Choices

Making Bold Design Choices for new house flipper

You might enjoy decorating your own home with bold colors and funky patterns, but you should try to keep your flips simple and neutral. When buyers are deciding whether they want to buy a property, they try to imagine placing their own furniture and décor in its spaces.

It is much more difficult for buyers to picture themselves living in rooms that clash considerably with their current aesthetic, and when you make bold design choices, you are likely to alienate a much larger pool of buyers. The more buyers who turn away, the longer it could take to sell your property and the less you might make in profit.

Fortunately, it is possible to make new and exciting design choices that buyers love. With larger design elements, you should strive for neutrality, but with the details, you can be more creative — especially when those details are easy and inexpensive for buyers to change themselves.

For example, you might install beautiful modern ceiling fans in a property’s living spaces, but you might choose fun and unique handles and knobs for the cabinets around the home. Balancing your design in this way is sure to generate more interest in your properties and increase your profits.

Not everyone can be a successful house flipper, but if you steer clear of the above major mistakes, you stand a better chance of making money from flipping.

Explore More

Aspects to Be Considered for Patio Decoration

0
patio decorations

Every addition, whether it is a piece of decorative furniture or a small plant, brings you immense joy when you place it. With that being said, a patio is a small space outside the house where you spend your time reading, cooking, having a family dinner, quality time, etc. 

As summer comes, everyone wants to feel the warmth and seasonal vibes. As with winter, it comes with a lot of cold and wind. If you’re blessed enough to have a patio, you probably want to utilize it as often as you can.

Importance of Patio Decoration 

It is important to decorate your patio because it gives you a comfortable space of your own that feels like home to you. To make it feel like an extra wonderful spot to relax, it needs some decoration and landscaping work. Whether you have a small patio or a large garden, our simple tips to create the perfect outdoor patio can help you make the most of the warm months and, with the appropriate design ideas, prolong the outdoor season far into the cooler months.

The following are some of the backyard decorating ideas, including anything from colorful tile design ideas to simple eating nooks that help you whenever you want to feel comfortable and relaxed.

Tips to Decorate Your Patio

1. Lights:

Light to Decorate Your Patio

They allow you to use your space both during the day and at night. Lighting is a simple and cost-effective way to make a big impact. You can also install a fireplace for winter that will allow you to be warm and comfortable while getting the benefit of the brisk winter air.

2. Cart Smart:

Cart Smart for patio decoration

An outdoor bar cart helps you keep everything that you need during a BBQ or an outdoor poolside party so that you don’t have to go inside every time. It also makes catering easy for your guests and friends. You can be stress-free as everything is handy and easily accessible.

3. Glassware:

Glassware for patio decoration

It is one of the most beautiful additions to your patio and is also attractive. It is a thin, waterproof material that may be highly attractive while still being strong and fragile. Even better, these glasses can be simply placed, and acrylic is known for its durability.

4. Furniture:

Furniture for patio decoration

It is important for comfortability, and since furniture is important, you have to choose the right one. Ensuring your outdoor furniture will survive for more than one season is important since it may be pricey. Selecting a product that won’t rust is essential if you reside in a location with significant exposure to sea salt and ocean air.

5. Pillow:

Pillow for patio decoration

You will need pillows when purchasing furniture, whether it be a little sofa or a sofa bed, to make it more comfortable for you. Because there is so much light around and the seasons are always changing,outdoor pillows should be carefully chosen. Before purchasing, one should verify the fabric or cotton content of the cushion.

6. Shade:

patio decoration

A shade is necessary to make your environment comfortable and sun-protective. Shades are a must since UV rays may damage your skin, the paint on your furniture, or even its longevity. They come in a range of colors, so you should select them carefully so that they match your furniture perfectly and are durable for the longest period of time.

Additional Tips 

There are a number of simple tips to create the perfect outdoor patio, but one of the most important tips is greenery. Everyone wants greenery around them because it enhances their quality of life and provides them with access to energy, health, and safety. 

It also motivates us in a variety of ways. You may also dedicate a small space to yoga or meditation so that you can live your

Conclusion

In order to enjoy time with your family, friends, and loved ones, it is crucial to have a patio that feels like home and is secure. If you have a pet, it is also crucial to make your patio pet-friendly so that your pet is at ease around others. 

The ideal option is to keep the decorating basic and to a minimum rather than overthinking it, which may be tiresome and require a lot of preparation. The goal is to bring out the best of you and how your patio defines you.

Discover More

There’s No Place Like Home: Cozy Touches for Your House

0
Cosy Touches For Your House

Looking for little ways to transform your home into a paradise you yearn to come back to? If you despise arriving home at the end of a hard day’s work, these cozy touches for your house could change your life for the better.

Home should be sweet. Our houses reflect the things that make us most comfortable. They are a collection of items that you cherish, a treasure trove of the photographs and memories that make up family life. 

They are only a few special places where a person can get supremely comfortable. Your home is your castle – so you should treat it the way any castle deserves to be treated. 

Cosy Touches to Decorate Your Castle

With the exemplary, exquisite decoration of your home in mind, let’s discuss ways you can improve it. When you arrive home from work, you should be desperate to put your feet up in a house you love. 

Let’s see what cosy touches might improve the comfort level of your castle. 

Personalised Sign Posts

Personalised Sign Posts

The first thing you see after getting home is the exterior. So it’s best to make that exterior pleasant. Consider an address sign post to add that touch of individuality to your house. 

You never get a second chance to make a first impression and the same goes when you see a building from the roadside. An address signpost helps direct your mail, keep delivery drivers correct, and makes your home look – well – more homely. 

Garden Upgrades

Cosy Touches for Your House by Garden Upgrades

Normally, it would be wise to invest in your garden a little. A garden wall/fence and gate add to the sense of security you feel when you step out of your vehicle. 

Next, a tidy garden represents an organised space within. 

However, budgets are tight nowadays and you don’t need neatness when you have clever lighting. Sow wildflower seeds into that wild grass, then add fairy lighting or solar lights to light up your garden and give it a magical charm. 

It’s a cheap way to upgrade your home and it will make you smile when you get home late in winter.

A Lick of Paint

A Lick of Paint Cosy Touches for Your House

One of the best things you can do to refresh a property instantly is to change the color. Even repainting a white wall gives the impression of cleanliness. If you feel things are getting a little grubby, a single coat of paint takes half a morning. 

It’s a good investment of your time which will change your mood immediately. Exterior paint on a grubby house will change your mood every time you see it.

Improve Car Parking

Improve Car Parking

If you want to go big, a garage upgrade adds value to your home should you choose to sell. It protects your vehicle and, if you build it on the side of your house, it leaves the potential for a second-storey room addition. 

You could have a new garage this year and next year upgrade an extra double bedroom. Can’t afford a full garage? That’s fine. A driveway or carport both keep your vehicle safe and off the road.

Outdoor Living

Outdoor Living

If you have a beautiful garden, then your home doesn’t stop at the front door. Those who have outdoor living space can get a little more out of their home. If you’re not a gardener, consider a garden room, instead. 

You could have an office out there, a studio or a pool room. You could add a pool or a pond. The top cosy home upgrade we recommend though is a BBQ area or fire pit. Imagine the long, comfortable, hygge-filled nights cuddled up in front of your own roaring fire… bliss.

The Log Burner

The Log Burner

Go one step further and bring that feeling of comfort and warmth indoors with your own log burner. This gorgeous home upgrade allows you to heat your home the old-fashioned way, adding in a touch of the modern. 

The correct installation allows for a safe burner with a flue that extends upstairs. This single home addition costs over £3000 but could shave a fortune off your heating bill over the years.

Continual Upgrades Make a Home into a Castle

Your home really is your castle. You should spend your weekends building the life that you want yourself to live through the week. 

This sound advice is the means to continually improve your space, making your life a little easier for yourself each week. Add new storage, put up shelves, invest in a new piece of kitchen equipment, or change your showerhead

Every upgrade you make in your house adds to your quality of life. So make them freely and make them often. We are only here for a brief time.

Explore More:-

Airbnb Hosts Design Tips That You Might Like to Steal

0
Airbnb hosts design tip

Most of us have heard of Airbnb, and many of us have stayed in one or more Airbnb-listed homes.  Most Airbnb hosts know how to make people leave glowing reviews by going the extra mile in interior design wherever possible. 

Focus on the Bed and Bed Linen

Focus on the Bed and Bed Linen

People who rent their properties on Airbnb know that one of the most critical factors in giving guests a pleasant stay is ensuring they have a comfortable bed to sleep on. 

  • They invest in a bed that’s as large as possible for the space (such as Queen or King size). 
  • They ensure mattresses get too old and to the point where they sag, get lumpy or stained, or otherwise lose their support and quality. 

You can follow suit by updating the mattress on your property. Purchase the best product you can for your budget and ensure you look for options that suit your particular needs as closely as possible. 

For instance, search for a mattress that suits your sleeping style (e.g., side, back, or stomach) and preferred firmness level. Plus, you may want to purchase a natural mattress made with fewer chemicals and more likely to be breathable and keep dust mites, mold, mildew, etc., at bay. 

Pay attention to the bed linen you choose for your bedrooms, too. It’s best to pick out soft-to-the-touch sheets that feel nice on your skin and will wear well over time. It’s wise to have two different quilts or blankets for different times of the year to help you stay comfortable while resting. 

Don’t forget to upgrade your pillows every year or so. 

Consider Durability and Maintenance

Consider Durability and Maintenance

Airbnb hosts typically try to decorate their places with durability and maintenance top of mind. Since so many people stay in properties over time and many won’t necessarily be as careful with furniture and fixtures and fittings, etc., as they may be in their own homes, it’s more common for wear to show more quickly. 

By choosing durable and easy-to-maintain materials, though, Airbnb hosts can reduce overall costs and keep spaces looking good for longer.

You might think about these principles as you choose items for your home. Before committing to materials and furnishings, consider how durable they might be over the long term and how easily you’ll be able to clean and maintain various pieces. 

Choose a Style and Stick with It 

Choose a Style and Stick with It 

Another aspect to consider that you can take from Airbnb hosts is the idea of choosing a single design style and sticking with it throughout a home. Picking a decoration option such as farmhouse, modern, bohemian, beachy, etc., should make it simpler to see how to create a consistent look and feel in every room. 

It makes it quicker to decide whether to buy pieces when you look at them in stores, too, since you simply evaluate whether they will suit the chosen design style; if not, you can move on. This will help you save money by not outlaying cash on items you’d just get home and realize don’t work for the space. 

Use Some Bold Colors and Prints

Use Some Bold Colors and Prints Airbnb hosts design tips

For an Airbnb property to be memorable, it usually needs to have some standout features that attract attention for the right reasons. 

These could involve having an excellent location, a plush pool, or interesting architectural features. Often, though, it comes down to design choices and, more specifically, which colors and prints get selected to bring the space to life.

As you pick out paint, furniture, flooring, and other material hues for your home, look for ways to add at least something bold and interesting to the most important areas of the property. For instance, you might add a feature wall in the bedroom.

Choose some funky tiles for the bathroom or kitchen, pick out some beautiful wallpaper for an office or lounge room, or select look-at-me prints for art, rugs, chairs, ottomans, and more. 

Conclusion

Looking for other ideas to steal from experienced Airbnb hosts? If so, you could consider decorating with greenery or placing furniture in ways to optimize how spaces can be used. Plus, you might add some pleasant fragrance to your home (e.g., via candles or diffusers) and invest in quality textiles for it.

Whether you pick up one idea or many from how Airbnb hosts go about decorating and improving their properties, you should find that following their lead helps you create a space that you love even more and enjoy spending time in. 

Discover More

Spectacular Halloween Table Decoration Ideas You Can Easily DIY

0
halloween table decorations

Throwing a Halloween party this fall season? If yes, then you’re definitely looking for cool and creative table decorations. After all, this is the only time of the year, where we celebrate festivals with our family and friends. So, what’s the key to hosting a successful and entertaining party? Two things: Delicious Food and Outstanding Decorations! Halloween table decorations and centerpieces will make your party an unforgettable evening.

From festive cocktails, scary good treats to terrifying Halloween decorations, don’t forget to decorate your Halloween dining table with delightful meals and some over the top table decors. Make sure that this Halloween, your guests will get surprised by your creatively creepy decorations. 

To help you out, we have gathered seventeen best Halloween table decor that’ll surely elevate your Halloween party. From unconventional color combos and witchy plating to spooky surprises, these traffic-stopping but-on theme 

17 Cute & Creepy Halloween Table Decorations

We know that traditional orange-and-black decorations are always festive, but these days light color palette is the new trend, and as well as looks really appealing. So, check out these spooktacular Halloween centerpieces to help you deck out your dining table for halloween party with halloween costume:

1. Pretty but Deadly

halloween table decoration with Pretty but Deadly

You can spice up your Halloween table decor by placing a prop skeleton on your table as a centerpiece. But to soften up the whole look, don’t forget to put flowers. These lovely bouquets and (poisoned) apples will surely haunt your guests.

2. An Eerie Buffet

halloween table decoration by An Eerie Buffet

The secret of a successful Halloween party is to have a great decoration and great food! Use tiny but detailed decors like this one to impress your guests. Buffet Tables the platter has a scarecrow, who is watching everyone with his evil eyes. 

3. A Bloody Vampire Themed Dinner Party

halloween table decoration with An Eerie Buffet

What do you think about a bloody vampire-themed Halloween table decoration?  Black velvet tablecloth linens, blood-red cloth napkins, red drip candles on top of antique black candleholders, and a mirror on the table to reflect the eerie candles, all these decor items are perfect for achieving a vampire theme.

4. Faux Crawly Cobweb Tablecloth

Faux Crawly Cobweb Tablecloth for halloween table decoration

Instead of using a regular runner or tablecloth, cover your dining table with faux cobwebs. It will give you instant Halloween aesthetics. 

5. Glowy Gold & Dark Flowers

halloween table decoration by Glowy Gold & Dark Flowers

Fill your whole table with colorful or dark flowers to celebrate the Halloween party with your family. Finish the look with some white candlesticks and some touches of gold.

6. Rustic Yet Classy Table Decor

halloween table decoration by Rustic Yet Classy Table Decor

Look at these gorgeous rustic-themed Halloween table decorations. With mismatched chairs, a dramatic floral centerpiece, and candle holders are perfect classy decors. 

7. Glamorous Midnight In The Garden

halloween table decoration with Glamorous Midnight In The Garden

Lush greenery and small detailings can add a great spooky forestlike element to your party. The dark tablescape and jeweled spiders that are both creepy and glamorous decors.

8. A Formal Halloween Party 

halloween table decoration by A Formal Halloween Party 

This decor will be perfect for a more casual Halloween affair. You can still impress your guests without having too creepy or fancy centerpieces.

9. Crazy Broomstick Chandelier

Crazy Broomstick Chandelier decoration

This is probably the most epic and crazy Halloween table decor you have seen in your life! From the fancy broomstick & black cat chandelier to the black fringed tablecloth, gourds, and black candlesticks, this dining room is fully filled with awesome decors. Everything is balanced out with beautiful and romantic pink and contrasting red centerpieces.  

10. Black & White Spirited Halloween Table

Black & White Spirited Halloween Table decoration

Nothing too dramatic, this is a monochromatic classic themed table decor. Here the dinnerware, pumpkins, and candles all are black and white color. 

11. Wickedly Stylish Decor

halloween table decoration with Wickedly Stylish Decor

There is absolutely no rule that you have to include an orange color palette in your Halloween decors. Even an all-black table decor can also look sophisticated. Here dark and mysterious flora, eerie candlelight, and plenty of black table decor are used for the decorations. 

12. Fancy Skull Theme

Fancy Skull Theme decoration

What’s better than a skull to get the pure Halloween vibes? Nothing, right! Here the owner decorates her table with a gauze table runner with a delicate branch centerpiece that holds skull tea lights. The skull theme also includes black candelabras and a mummy skeleton.  

13. Harry Potter Themed Halloween Table Decor

Harry Potter Themed Halloween Table Decor

This table includes all the decor inspired by the famous movie Harry Potter. From DIY lace candle holders, a birdcage to the spell books, it is the decor of true witchcraft.

14. Unexpected Halloween Hues

 Unexpected Halloween Hues decoration

This is another option from the traditional orange and black Halloween decor. You can fill your table with white pumpkins, black flatware, and brown goblets. Play with subtle gray plates, and you can also put flowers in both reds and purples shades to elevate your decor to the next level.

15. Luxe Mercury Glass Pumpkin Centerpiece Display

Luxe Mercury Glass Pumpkin Centerpiece Display

Bring some luxury to the table by placing these cute but luxurious mercury glass pumpkins and black-and-orange decors. 

16. DIY Candlestick Branch Display

halloween table decoration with DIY Candlestick Branch Display

Want to DIY your Halloween table decorations? This will be an easy but really great decor idea. To create this gothic-style centerpiece, just place some gold candlesticks in-between its branches.

17. Keep It Light

halloween table decoration by Keep It Light

We always see and hear about the doom and gloomy Halloween decors, but for creating creepy decorations, it doesn’t have to be in dark colors! Look at this table decors. The whole setup is set in a cornfield with the most unexpected pastel candles and centerpieces. You can also do something like that and surprise your guest with your creative decors. 

Eat, Drink, and Be Scary!

As there is a saying,“ Where there is no imagination, there is no horror,” so use your imaginative and creative powers and create bootiful Halloween table decors. Just make sure that your home is festive and fun ready for the holidays.

Once you’re ready with the ultimate  Halloween tablescape, spruce up your front door with some of these outdoor Halloween decorations. Read our blog on spooky Halloween House decorations.  

Explore More

11+ Cool and Easy DIY Halloween Decoration Ideas for 2025

0
DIY Halloween Decorations Idea

Halloween is the perfect time to get creative and turn your home into something spooky, fun, or a mix of both. Whether you love haunted house vibes or prefer something cute and playful, Halloween house decorations let you show off your style. In 2025, trending ideas include DIY crafts, eerie lighting, and outdoor setups that make a big impact without breaking the bank.

This is your chance to fill your space with carved pumpkins, floating ghosts, creepy silhouettes, and more. Whether you’re decorating for a party, welcoming trick-or-treaters, or just adding some seasonal charm, we’ve got ideas that work for every space indoors and out. Many of these decorations are easy to make, budget-friendly, and fun to do with kids.

In this post, you’ll find 11+ spooky and simple Halloween decoration ideas to try at home. From porch displays to wall art, there’s something for every Halloween lover.

Here is the list of the best DIY scary Halloween Decorations for this year:

1. Scary Skull Centerpiece

Scary Skull Centerpiece

Decorate your dining table and welcome your guests with this easy DIY Halloween table decoration. To make this, all you need is to take a faux skull that has a removable top.

You can also paint it in dark colors such as black, gold or use white both ways it looks impressive. Put some real or artificial flowers in it, place it in the center of your table. That’s it and your easy Halloween table decor is ready!

2. Witch’s Bubbling Cauldron

Witch’s Bubbling Cauldron for Halloween Decorations Ideas
DIY Halloween Decorations Ideas

This is a great and easy way to add some scary and witchy feel to your decorations. To make this easy DIY Halloween decoration, all you need is some dry ice and some fake witchcraft things. All these things are easily available in any grocery store or market.

First, take a cast-iron bucket and put some dry ice in it and lastly, add some water. This creates a magical smoky effect. For other parts, take a grapevine wreath and put the cauldron in it. To make it more dramatic, add paper flames. This is one of the scariest decorations that nobody will dare to touch!

3. Party Pumpkin Topiary

Halloween Pumpkin Topiary

To welcome your visitors, craft this wicked pumpkin topiary. You will need only a few things like painted plastic pumpkins, a barrel-inspired planter, lights, and hay to make this decor. This attractive Halloween outdoor decor will surely catch some attention and make your entryway Halloween-ready.

4. Stylish Spider Web Bar Cart

Stylish Spider Web Bar Cart Halloween Decorations Ideas

Don’t leave your bar cart plain and boring. Spruce it up with some skulls and spiderwebs. Put some candy jars, drinks, and garlands. If you want, you can also put a faux skeleton in the lower area of the cart. This is a perfect decor idea for those who want chic and classy Halloween decors.

5. Easy Halloween Mantel Decor

Easy Halloween Mantel Decor

This year instead of traditional Halloween decor, try this cool and stylish-looking mantle decor. This unique decor has eye-popping pumpkins, colorful balloons, fresh blooms, and fun accessories.

Don’t use the traditional orange decor pumpkins, paint them in fun colors like yellow, pink, and gold. Lastly, hang a Happy Halloween banner, and your mantle is ready for Halloween!

6. Creepy Crystal Balls

Creepy Crystal Balls Decorations Ideas

After seeing this decor, your guest will surely think that their future looks spooky! This crystal ball decor has its own creepy vibes, which can make anyone shiver down to their spine.

These glass balls look fancy, but you’ll be surprised to know that they’re made from clear Christmas ornaments. Another great thing about these types of vintage Halloween decorations is that you can store them and use them for many years.

7. Spooky Spider Web Wall

Spooky Spider Web Wall Ideas
Spooky Spider Web Wall Decorations Ideas

Create a scary scene and add layers of creepiness to your Halloween buffet with this spider web decor. To make these types of Halloween window decorations, you’ll need some sticky spiders, webs, and eerie black painted branches.

First, stretch the fake spider web across your windows or buffet wall. After this, stick the spiders and put the branches around them. Look at the above picture for reference. This is one of the best and scary outdoor Halloween decoration ideas.

8. Cute Batty Staircase Decor

Cute Batty Staircase Decor

Are you looking for Halloween decoration ideas for your stairs? If yes, this idea will work perfectly for you. First, take some weave twigs and wrap them around the banister. After this, scatter or stick some paper bats. Don’t forget to add the pumpkins on the stairs to add the spooky Halloween vibes.

9. DIY Test Tube Invitations

DIY Test Tube Invitations

Are you hosting a Halloween party this year? If yes, this idea will be a great option for you. Not only should your decorations and food be fun, but your way of inviting people should also be spirited and amazing.

Instead of sending usual Halloween party cards, send these DIY test tubes invitations to your guests. This is a unique way to welcome your visitors to your party. This is super easy to make, and you can find all the supplies in the dollar store.

10. Witch’s Broom Chandelier

Witch's Broom Chandelier

Add a fun element and texture to your dining room with this interesting broom chandelier. This is an easy and cheap DIY Halloween decoration that you can make in just a few minutes. To make this, you’ll need a broom, mason jars, black candles, and some twines.

First, hang the broom just above the dining table and fill mason jars with black sand. After this, put battery-operated black candles, and lastly, with the help of twine, attach all of them to one side of the broom. To balance, you can add a faux feline on top of the other side of the broom. This chandelier will create the perfect Halloween ambiance for your dining room.

11. Scattered Ravens & Pumpkins

Scattered Ravens & Pumpkins

Create a scary killer entrance with these easy outdoor Halloween decorations. Scatter some twins and pumpkins all over your front porch or outdoor area. Lastly, put a lot of faux ravens all over the area. These are one of the best DIY Halloween decorations for outside.

Happy Halloween!

So which DIY Halloween decoration idea did you like the most? Create a scary ambiance and welcome the festive season with these unique and spooky ideas. These creative and easy-to-make Halloween ideas will make every part of your house festive ready!

I hope this blog on DIY Halloween decorations gave you some creative home decoration inspiration. So, spruce up your porch, living, and dining area with spooky Halloween wreaths, witch brooms, and oversized spiders that will surely amaze your party guests.

Share this blog with your family and friends and help them to decorate their house and make it ready for the Halloween season with amazing costume.

Discover More